vue3 taro-ui-vue3 封装Tabbar组件
提示:使用 vant-weapp,Taro,vant-weapp,vue3文章目录前言一、创建 Tabbar组件二、页面引入1.目录结构前言提示:请在 app.config.ts 文件内引入:usingComponents: {"van-button": "@vant/dist/button/index","van-icon": "@vant/dist/icon/index","van-tabba
·
前言
提示:根据官网地址进行安装配置创建项目:


提示:taro-vue3 创建完项目后
一、taro-ui-vue3安装/引用
1.安装
在项目跟目录执行 npm install taro-ui-vue3 命令安装
2.引用
在 app.js 引用全局样式
// 引用全局样式
import 'taro-ui-vue3/dist/style/index.scss'
图片如下(示例):

二、配置Tabbar组件
1.创建组件
在 components 目录下创建 Tabbar.vue
图片如下(示例):

Tabbar.vue代码如下(示例):
<template>
  <view class="tabbar">
    <AtTabBar
      fixed
      :tabList="tabList"
      :current="current"
      @click="handleClick"
    />
  </view>
</template>

<script>
import {AtTabBar} from 'taro-ui-vue3'

export default {
  props: {
    tabKey: {
      type: [String, Number],
      default: 0,
    },
  },
  data() {
    return {
      current: 0,
      tabList: [
        {title: '首页', iconType: 'home', pagePath:'/pages/index/index'},
        {title: '博客', iconType: 'bullet-list',pagePath: "/pages/blog/index"},
        {title: '我的', iconType: 'user', pagePath: "/pages/my/index"}
      ],
    }
  },
  methods:{
    handleClick(value){
      let url = this.$data.tabList[value].pagePath
      wx.switchTab({
        url:url,
      })
    }
  },
  components: {
    AtTabBar,
  }
}
</script>
2.配置tabBar
在 app.config.js 配置配置
图片如下(示例):

app.config.js代码如下(示例):
export default defineAppConfig({
  pages: [
    'pages/index/index',
    'pages/my/index',
    'pages/blog/index',
  ],
  window: {
    backgroundTextStyle: 'light',
    navigationBarBackgroundColor: '#fff',
    navigationBarTitleText: 'WeChat',
    navigationBarTextStyle: 'black'
  },
  "tabBar": {
    "custom": true,
    "color": "#a9b7b7",
    "selectedColor": "#11cd6e",
    "borderStyle": "black",
    "list": [
      {
        "pagePath": 'pages/index/index',
        "text": "首页"
      },
      {
        "pagePath": 'pages/blog/index',
        "text": "博客"
      },
      {
        "pagePath": "pages/my/index",
        "text": "我的"
      }
    ]
  }
})
3.使用tabBar
在 pages 目录下创建 blog index my 文件
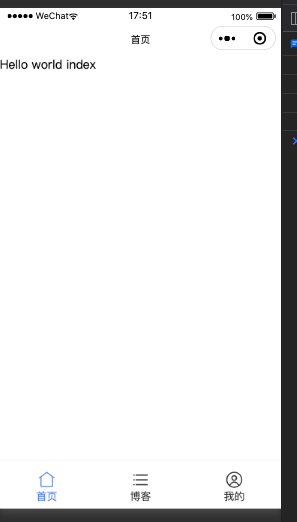
图片如下(示例):

index目录 index.vue 代码如下(示例):
<template>
  <view class="index">
    <text>{{ msg }}</text>
    <Tabbar></Tabbar>
  </view>
</template>

<script>
import {ref} from 'vue'
import './index.scss'
import Tabbar from "../../components/Tabbar"

export default {
  setup() {
    const msg = ref('Hello world index')
    return {
      msg
    }
  },
  components: {
    Tabbar,
  }
}

</script>
blog目录 index.vue 代码如下(示例):
<template>
  <view class="blog">
    <text>{{ msg }}</text>
    <Tabbar ref="tabbar"></Tabbar>
  </view>
</template>

<script>
import {ref} from 'vue'
import './index.scss'
import Tabbar from "../../components/Tabbar"

export default {
  setup() {
    const msg = ref('Hello world blog')
    return {
      msg
    }
  },
  onShow(){
    this.$refs.tabbar.current=1
  },
  components: {
    Tabbar,
  }
}

</script>
my目录 index.vue 代码如下(示例):
<template>
  <view class="my">
    <text>{{ msg }}</text>
    <Tabbar ref="tabbar"></Tabbar>
  </view>
</template>

<script>
import {ref} from 'vue'
import './index.scss'
import Tabbar from "../../components/Tabbar"

export default {
  setup() {
    const msg = ref('Hello world my')
    return {
      msg
    }
  },
  onShow(){
    this.$refs.tabbar.current=2
  },
  components: {
    Tabbar,
  }
}

</script>
我的小程序二维码


前往低代码交流专区
更多推荐

 2
2 0
0- 0


 已为社区贡献2条内容

所有评论(0)