
Java绝地求生—Spring AOP面向切面编程
Java绝地求生—Spring AOP面向切面编程背景动态代理构建被代理对象自动生成代理调用动态代理Spring方法方式一:使用Spring的API接口方式二:使用自定义类方式三:使用注解背景在多个模块的程序中添加某功能,例如log,若直接插入log代码会造成大量重复。且在删除改功能时需要将每一处调用删除。AOP(Aspect Oriented Programming)可通过预编译方式和运行期动态
Java绝地求生—Spring AOP面向切面编程
背景
在多个模块的程序中添加某功能,例如log,若直接插入log代码会造成大量重复。且在删除改功能时需要将每一处调用删除。AOP(Aspect Oriented Programming)可通过预编译方式和运行期动态代理实现在不修改源代码的情况下给程序添加功能。
动态代理
在创建代理对象时,通过构造器塞入一个目标对象(被代理对象),然后在代理对象的方法内部调用目标对象同名方法,并在调用新功能的代码。此时,代理对象 = 增强代码 + 目标对象(原对象)。动态代理通过反射实现。
构建被代理对象
创建以下文件:
- UserService接口
public interface UserService {
    void add();
    void delete();
    void update();
    void query();
}
- 实现类UserServiceImpl(真实角色)
public class UserServiceImpl implements UserService{
    @Override
    public void add() {
        System.out.println("增加用户");
    }

    @Override
    public void delete() {
        System.out.println("删除用户");
    }

    @Override
    public void update() {
        System.out.println("修改用户");
    }

    @Override
    public void query() {
        System.out.println("查询用户");
    }
}
自动生成代理
创建ProxyInvocationHandler类,实现InvocationHandler接口,该类是代理实例所关联的调用处理程序类,可自动生成代理实例(代理角色)。
public class ProxyInvocationHandler implements InvocationHandler {
// 被代理的接口
private Object target;
public void setTarget(Object target) {
this.target = target;
}
// 生成得到代理
public Object getProxy() {
// 参数
// 1.用当前类的类加载器,将生成的代理类加载到JVM中
// 2.被代理类的所有接口信息
// 3.动态代理方法在执行时,会调用当前类的invoke方法
// Proxy类提供创建动态代理类和实例的静态方法
return Proxy.newProxyInstance(this.getClass().getClassLoader(), target.getClass().getInterfaces(), this);
}
// 处理代理实例(代理对象),并返回结果
public Object invoke(Object proxy, Method method, Object[] args) throws Throwable {
// 参数
// 1.代理实例(代理角色)
// 2.代理实例当前调用的方法
// 3.该方法的参数
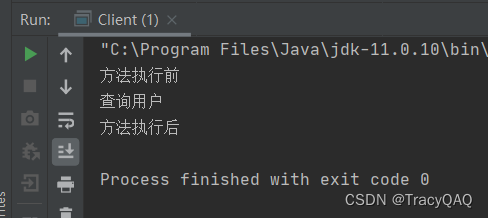
// System.out.println(method.getName()); // 打印调用的方法名
System.out.println("方法执行前");
Object result = method.invoke(target, args);
System.out.println("方法执行后");
return result;
}
}
调用动态代理
创建Client类
public class Client {
    public static void main(String[] args) {
        // 真实角色
        UserService userService=new UserServiceImpl();

        // 调用处理程序对象
        ProxyInvocationHandler proxyInvocationHandler = new ProxyInvocationHandler();

        // 通过调用程序处理角色 来处理要调用的接口对象
        // 设置被代理的接口
        proxyInvocationHandler.setTarget(userService);
        // 生成代理实例(代理角色)
        UserService proxy = (UserService) proxyInvocationHandler.getProxy();
        // 用代理实例调用方法 调用时,实际在执行invoke中的代码
        proxy.query();
    }
}
执行结果
Spring方法
导入aspectjweaver依赖
        <dependency>
            <groupId>org.aspectj</groupId>
            <artifactId>aspectjweaver</artifactId>
            <version>1.9.7</version>
        </dependency>
在service包下复用UserService接口和实现类UserServiceImpl的代码。
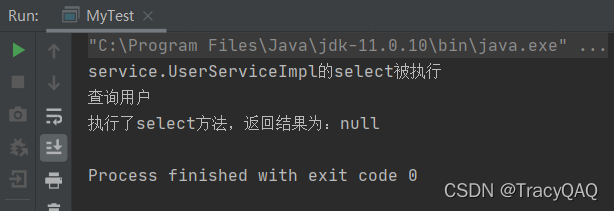
方式一:使用Spring的API接口
在log包下创建文件
1.BeforeLog类,实现MethodBeforeAdvice接口
表示在方法执行前执行log方法
public class BeforeLog implements MethodBeforeAdvice {
    public void before(Method method, Object[] args, Object target) throws Throwable {
	    // 参数
	    // method:要执行的目标对象的方法
	    // args:方法的参数
	    // target:目标对象
        System.out.println(target.getClass().getName() + "的" + method.getName() + "被执行");
    }
}
2.AfterLog类,实现AfterReturningAdvice接口
表示在方法执行后执行log方法
public class AfterLog implements AfterReturningAdvice {
    public void afterReturning(Object returnValue, Method method, Object[] args, Object target) throws Throwable {
    	// 参数
	    // returnValue:方法返回值
	    // method:要执行的目标对象的方法
	    // args:方法的参数
	    // target:目标对象
        System.out.println("执行了" + method.getName() + "方法,返回结果为:" + returnValue);
    }
}
在resources包下编写配置文件applicationContext.xml,将以上类的bean注册到Spring中,并配置AOP。
<?xml version="1.0" encoding="UTF-8"?>
<beans xmlns="http://www.springframework.org/schema/beans"
       xmlns:xsi="http://www.w3.org/2001/XMLSchema-instance"
       xmlns:aop="http://www.springframework.org/schema/aop"
       xsi:schemaLocation="
                    http://www.springframework.org/schema/beans
                    http://www.springframework.org/schema/beans/spring-beans.xsd
                    http://www.springframework.org/schema/aop
                    http://www.springframework.org/schema/aop/spring-aop.xsd">
    <!--注册bean-->
    <bean id="userService" class="service.UserServiceImpl"/>
    <bean id="log" class="log.BeforeLog"/>
    <bean id="afterLog" class="log.AfterLog"/>

    <!--配置aop-->
    <aop:config>
        <!--切入点  execution(要执行的位置 修饰符 返回值 包名.类名/接口名.方法名(参数列表))-->
        <aop:pointcut id="pointcut" expression="execution(* service.UserServiceImpl.*(..))"/>
        <!--执行环绕增强-->
        <aop:advisor advice-ref="log" pointcut-ref="pointcut"/>
        <aop:advisor advice-ref="afterLog" pointcut-ref="pointcut"/>
    </aop:config>
</beans>
编写测试类MyTest
public class MyTest {
    public static void main(String[] args) {
        ApplicationContext context = new ClassPathXmlApplicationContext("applicationContext.xml");
        // 将创建的代理类向上转型为接口
        UserService userService = (UserService) context.getBean("userService");
        // 执行方法
        userService.select();
    }
}
执行结果
方式二:使用自定义类
在diy包下创建DiyPointCut类
public class DiyPoint {
    public void before() {
        System.out.println("============方法执行前============");
    }

    public void after() {
        System.out.println("============方法执行后============");
    }
}
在resources包下编写配置文件applicationContext.xml,将UserServiceImpl和DiyPointCut的bean注册到Spring中,并配置自定义切面。
<?xml version="1.0" encoding="UTF-8"?>
<beans xmlns="http://www.springframework.org/schema/beans"
       xmlns:xsi="http://www.w3.org/2001/XMLSchema-instance"
       xmlns:aop="http://www.springframework.org/schema/aop"
       xsi:schemaLocation="
                    http://www.springframework.org/schema/beans
                    http://www.springframework.org/schema/beans/spring-beans.xsd
                    http://www.springframework.org/schema/aop
                    http://www.springframework.org/schema/aop/spring-aop.xsd">
    <!--注册bean-->
    <bean id="userService" class="service.UserServiceImpl"/>
    <bean id="diy" class="diy.DiyPoint"/>

    <!--配置aop-->
    <aop:config>
        <!--自定义切面 ref为引用的类-->
        <aop:aspect ref="diy">
            <!--切入点-->
            <aop:pointcut id="point" expression="execution(* service.UserServiceImpl.*(..))"/>
            <!--通知-->
            <aop:before method="before" pointcut-ref="point"/>
            <aop:after method="after" pointcut-ref="point"/>
        </aop:aspect>
    </aop:config>
</beans>
复用测试类MyTest

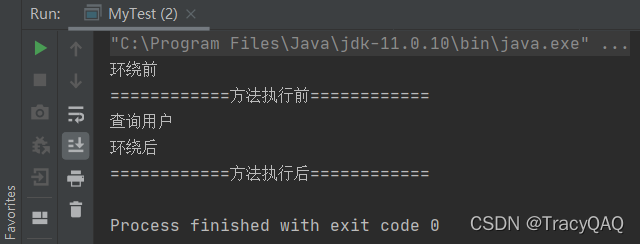
方式三:使用注解
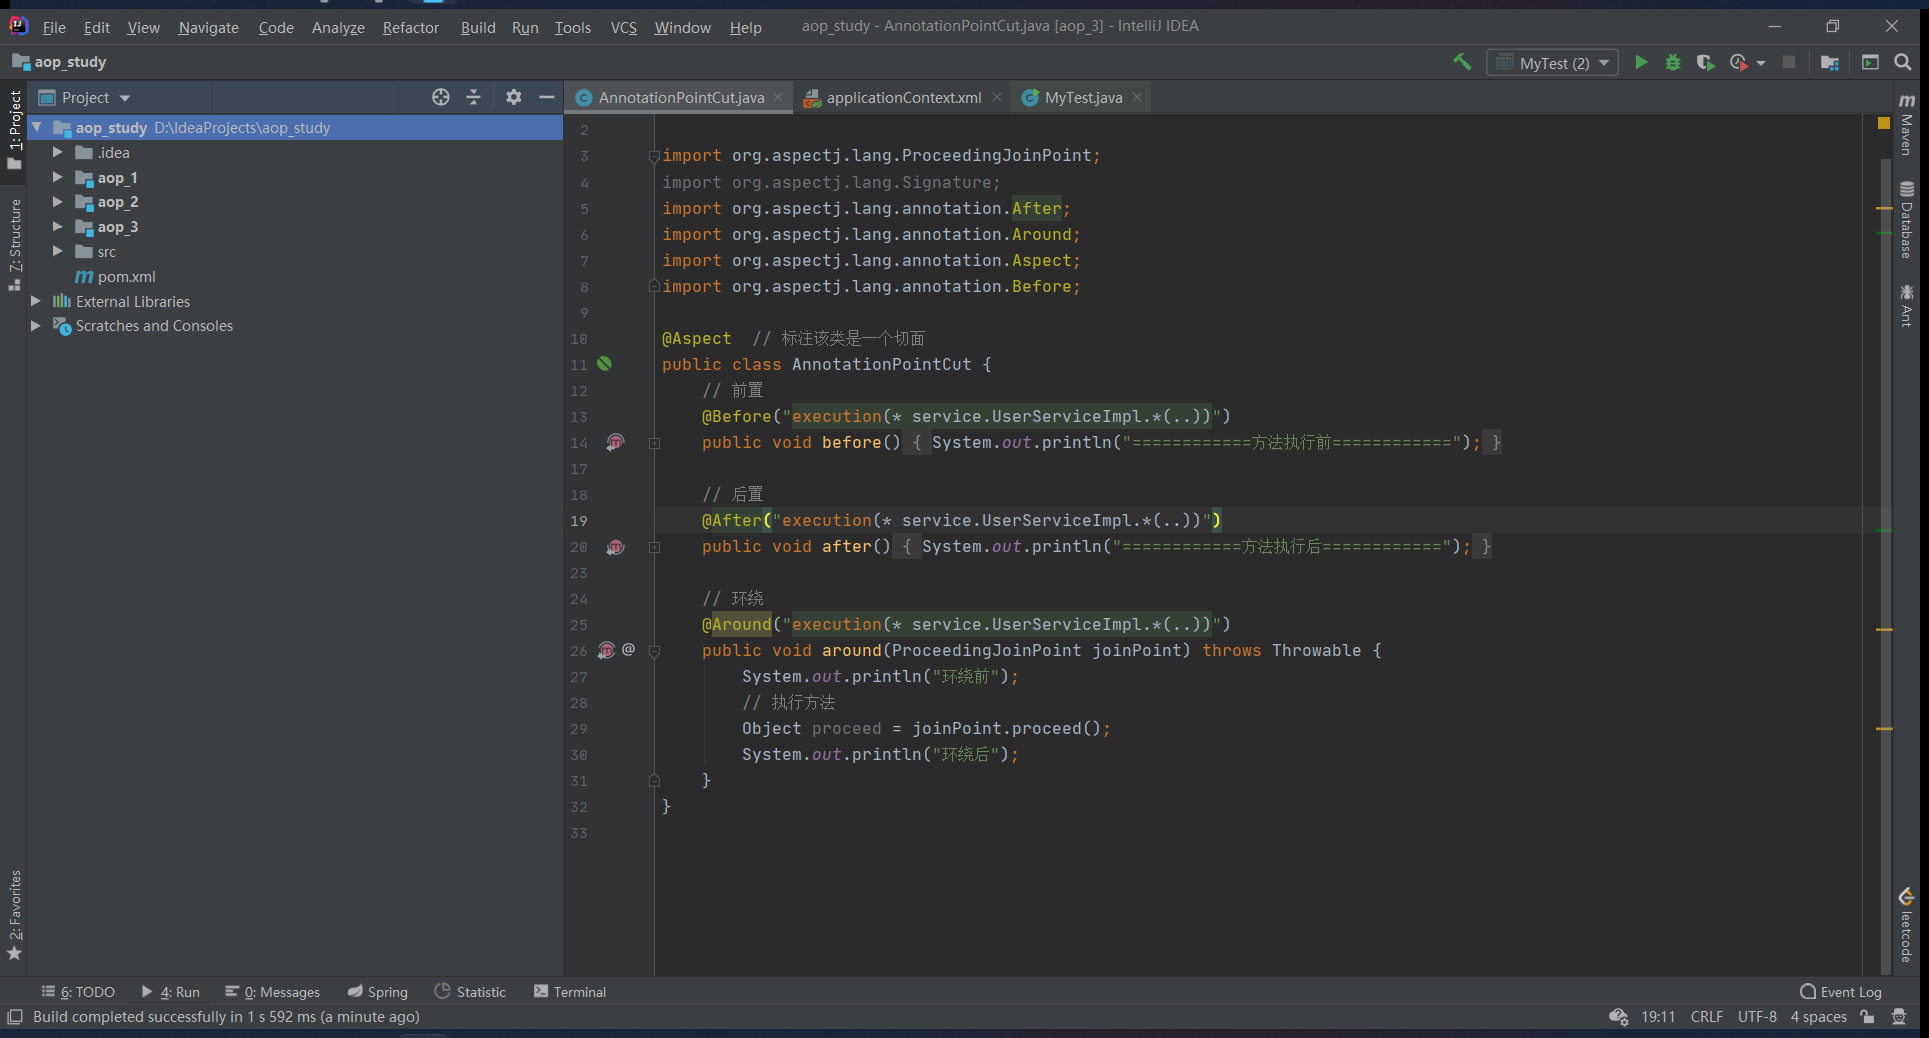
在diy包下创建AnnotationPointCut类
@Aspect  // 标注该类是一个切面
public class AnnotationPointCut {
	// 前置
    @Before("execution(* service.UserServiceImpl.*(..))")
    public void before() {
        System.out.println("============方法执行前============");
    }

	// 后置
    @After("execution(* service.UserServiceImpl.*(..))")
    public void after() {
        System.out.println("============方法执行后============");
    }

	// 环绕
    @Around("execution(* service.UserServiceImpl.*(..))")
    public void around(ProceedingJoinPoint joinPoint) throws Throwable {
        System.out.println("环绕前");
        // 执行方法
        Object proceed = joinPoint.proceed();
        System.out.println("环绕后");
    }
}
在resources包下编写配置文件applicationContext.xml,将UserServiceImpl和AnnotationPointCut的bean注册到Spring中,并开启注解支持。
<?xml version="1.0" encoding="UTF-8"?>
<beans xmlns="http://www.springframework.org/schema/beans"
       xmlns:xsi="http://www.w3.org/2001/XMLSchema-instance"
       xmlns:aop="http://www.springframework.org/schema/aop"
       xsi:schemaLocation="
                    http://www.springframework.org/schema/beans
                    http://www.springframework.org/schema/beans/spring-beans.xsd
                    http://www.springframework.org/schema/aop
                    http://www.springframework.org/schema/aop/spring-aop.xsd">

    <!--注册bean-->
    <bean id="userService" class="service.UserServiceImpl"/>
    <bean id="annotationPointCut" class="diy.AnnotationPointCut"/>

    <!--开启注解支持  JDK(默认proxy-target-class="false") Cglib(proxy-target-class="true")-->
    <aop:aspectj-autoproxy proxy-target-class="false"/>
</beans>
复用测试类MyTest

瓜分20万奖金 获得内推名额 丰厚实物奖励 易参与易上手
更多推荐

 0
0 0
0- 0


 已为社区贡献1条内容

所有评论(0)