7-FreeSwitch-mrcp-plugin-with-freeswitch(亲测可用,自我整理)
mrcp-plugin-with-freeswitch特别感谢Cotin 网站《构建简单的智能客服系统》(一)、(二)、(三)对于构建过程的帮助,您在阅读本教程前,可以先行阅读这本书三篇文章,本教程基于此调整了构建顺序,给出了更多的操作细节,错误处理以及其他构建描述。主要目的使用FreeSWITCH接受用户手机呼叫,通过UniMRCP Server集成讯飞开放平台(xfyun)插件将用户语音进行语
文章目录
- mrcp-plugin-with-freeswitch
- 主要目的 和技术援助方式
- 第一步安装freeswitch
- 第二步 配置编译UniMRCP Server
- 第三步 集成讯飞开放平台SDK
- 第四步 配置与验证
- 测试:拨打5001测试一下:成功
mrcp-plugin-with-freeswitch
特别感谢Cotin 网站《构建简单的智能客服系统》(一)、(二)、(三)对于构建过程的帮助,您在阅读本教程前,可以先行阅读这本书三篇文章,本教程基于此调整了构建顺序,给出了更多的操作细节,错误处理以及其他构建描述。
主要目的 和技术援助方式
使用FreeSWITCH接受用户手机呼叫,通过UniMRCP Server集成讯飞开放平台(xfyun)插件将用户语音进行语音识别(ASR),并根据自定义业务逻辑调用语音合成(TTS),构建简单的端到端语音呼叫中心。

VX同号18956043585
545909047@qq.com
第一步安装freeswitch
1.下载 FreeSWITCH源码:
cd /usr/local/
git clone -b v1.6 https://freeswitch.org/stash/scm/fs/freeswitch.git freeswitch
缺包可在git粘贴复制
2.安装依赖库
yum install -y git gcc-c++ wgetalsa-lib-devel autoconf automake bison broadvoice-devel bzip2 curl-develdb-devel e2fsprogs-devel flite-devel g722_1-devel gdbm-devel gnutls-develilbc-devel ldns-devel libcodec2-devel libcurl libcurl-devel libedit-devellibidn-devel libjpeg-devel libmemcached-devel libogg-devel libssl-devellibsilk-devel libsndfile-devel libtheora-devel libtool libvorbis-devellibxml2-devel lua lua-devel lzo-devel mongo-c-driver-devel ncurses-develnet-snmp-devel openssl-devel opus-develpcre pcre-devel perl perl-libs perl-ExtUtils-Embed libzrtpcpp-devellibtiff-devel libX11-devel expat-devel pkgconfig portaudio-develpostgresql-devel python26-devel python-devel soundtouch-devel speex speex-develsqlite-devel unbound-devel unixODBC-devel libuuid-devel which yasm zlib-devel libdb-develuuid-devel @development-tools
3.编译安装
cd freeswitch/
# 先执行 bootstrap.sh,生成configure文件
./bootstrap.sh
./configure --prefix=/usr/local/freeswitch
make & make install
make cd-sounds-install
make cd-moh-install
4编译运行
cd /usr/local/freeswitch/bin
./freeswitch
5其他问题
笔者在centos7的时候遇到很多问题,感谢下列作者的贡献
git源代码:https://github.com/signalwire/freeswitch
FreeSWITCH 安装配置的 各种坑, 填坑:https://www.cnblogs.com/lzpong/p/6740188.html
freeswitch 中文语音:http://www.bubuko.com/infodetail-2905851.html
freeswitch设置账号密码和端口:https://blog.csdn.net/huiguo_/article/details/118388074
freeswitch开启录音:https://blog.csdn.net/huiguo_/article/details/119423570
freeswitch添加中文语音:https://blog.csdn.net/huiguo_/article/details/119417360
freeswitch添加坐席:https://blog.csdn.net/huiguo_/article/details/118388193
freeswitch 安装和问题解决:https://blog.csdn.net/singleroot/article/details/52298620
第二步 配置编译UniMRCP Server
本次示例的UniMRCP Server在CentOS 7中进行源码编译安装,感谢由Github用户cotinyang提供的已经写好的集成讯飞SDK的UniMRCP Server源码。
1.下载 UniMRCP Server Plugin Demo 源码
链接: https://pan.baidu.com/s/1cUUK4q0LqZ5PhXtMK15i3Q 提取码: z8ic 复制这段内容后打开百度网盘手机App,操作更方便哦
2.编译准备环境
cd MRCP-Plugin-Demo/unimrcp-deps-1.5.0
编译可能出现错误, 注释掉:107 ~ 109, getopt的set,其中存在不识别的option
编译生成apr, apr-util, target path: ./libs
./build-dep-libs.sh
注:1.过程中需要输入两次y,并确认;
3.编译安装unimrcp
cd unimrcp-1.5.0
./bootstrap
如果不能自动检测apr,apr-util,请在configure中增加 option:–with-apr=/path/apr --with-apr-util=/path/apr-util/
apr, apr-util由./build-dep-libs.sh 生成
./configure
make & make install
4.测试运行(这时候可能你会遇到一个问题)这个问题一定要看
cd /usr/local/unimrcp/bin
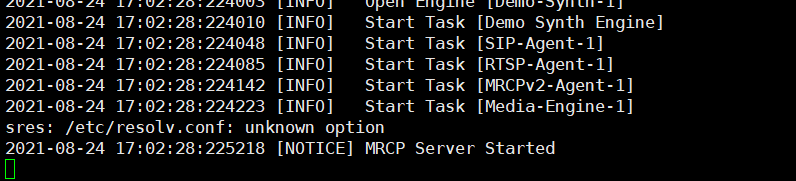
./unimrcpserver -o 3
服务端启动
[root@name /usr/local/unimrcp/bin]# ./unimrcpserver -o 3

.......省略

2021-08-24 17:02:28:224085 [INFO]   Start Task [RTSP-Agent-1]
2021-08-24 17:02:28:224142 [INFO]   Start Task [MRCPv2-Agent-1]
2021-08-24 17:02:28:224223 [INFO]   Start Task [Media-Engine-1]
sres: /etc/resolv.conf: unknown option
2021-08-24 17:02:28:225218 [NOTICE] MRCP Server Started

在开一个黑框,上一个黑框不要动,使用client进行验证
cd /usr/local/unimrcp/bin
./unimrcpclient
>help
usage:

- run [app_name] [profile_name] (run demo application)
       app_name is one of 'synth', 'recog', 'bypass', 'discover'
       profile_name is one of 'uni2', 'uni1', ...

       examples:
           run synth
           run recog
           run synth uni1
           run recog uni1

- loglevel [level] (set loglevel, one of 0,1...7)

- quit, exit
输入help回车,给出了使用方法,输入run recog运行语音识别测试,run synth进行语音合成测试。


第三步 集成讯飞开放平台SDK
1.讯飞开发平台SDK下载
由于从讯飞开放平台下载的SDK包和用户以及用户创建的应用相关联,因此需要将third-party/xfyun中的文件和文件夹全部删除,重新下载解压属于自己的SDK,目录与源代码基本一致。
您需要注册并登录 讯飞开放平台 ,进入控制台页面,并创建应用;
在“我的应用”界面获得你的APPID,并为该应用“添加新服务”,选择需要的“语音听写”和”在线语音合成“服务(本示例需要);
点击右侧“SDK下载”,在跳转页面中确认“选择应用”已经选中了您创建的应用,“选择您需要的AI能力”选中上述两项服务,并点击“SDK下载”等待SDK生成与完成下载。
将下载的zip包,解压并替换MRCP-Plugin-Demo/unimrcp-1.5.0/plugins/third-party/xfyun/下的所有文件及文件夹。
注:创建应用页面中的应用平台选择“Linux”。
2.plugin编写与编译
本步骤将告诉您如何编写unimrcp的插件代码,即现在MRCP-Plugin-Demo/unimrcp-1.5.0/plugins文件夹下xfyun_recog、xfyun_xynth文件夹下的文件及其相关配置是如何得到的,如果您当前还不关注此细节,可以跳过本步骤至第四步。
实际上,上述MRCP-Plugin-Demo代码是在 Unimrcp官网 下载 Unimrcp 1.5.0 和 Unimrcp Deps 1.5.0 并在此基础上添加的plugin代码。
首先编辑configure.ac文件,会在后面的Makefile中使用到的宏定义。XFyun recognizer plugin的添加如下:
dnl XFyun recognizer plugin.
UNI_PLUGIN_ENABLED(xfyunrecog)

AM_CONDITIONAL([XFYUNRECOG_PLUGIN],[test "${enable_xfyunrecog_plugin}" = "yes"])

...

plugins/xfyun-recog/Makefile

...

echo XFyun recognizer plugin....... : $enable_xfyunrecog_plugin

注:其中 ··· 是该文件中的其它默认配置,请找到对应位置填写。
对应地,XFyun synthesizer plugin的添加如下:
dnl XFyun synthesizer plugin.
UNI_PLUGIN_ENABLED(xfyunsynth)

AM_CONDITIONAL([XFYUNSYNTH_PLUGIN],[test "${enable_xfyunsynth_plugin}" = "yes"])

···

plugins/xfyun-synth/Makefile

···

echo XFyun synthesizer plugin...... : $enable_xfyunsynth_plugin
新增源码与目录
在 plugins 目录下,新建 xfyun-recog 目录,并在该目录下新建 src 目录,可以将 demo_recog_engine.c 拷贝到该目录下改名为 xfyun_recog_engine.c,将xfyun_recog_engine.c文件进行修改(已知一个修改的部分:将appid修改成你自己下载sdk的appid,不然会报错:QISRAudioWrite failed! error code:10407),xfyun-synth目录下对应创建并修改。

static apt_bool_t xfyun_login()
{
	int			ret						=	MSP_SUCCESS;
	const char* login_params			=	"appid = XXXXX, work_dir = ."; // 登录参数,appid与msc库绑定,请勿随意改动

	/* 用户登录 */
	ret = MSPLogin(NULL, NULL, login_params); //第一个参数是用户名,第二个参数是密码,均传NULL即可,第三个参数是登录参数
	if (MSP_SUCCESS != ret)
	{
		apt_log(RECOG_LOG_MARK,APT_PRIO_ERROR,"[xfyun] MSPLogin failed , Error code %d.", ret);
		return FALSE; //登录失败,退出登录
	}
	apt_log(RECOG_LOG_MARK,APT_PRIO_INFO,"[xfyun] MSPLogin success");
	return TRUE;
}
在xfyun-recog文件夹下新建Makefile.am文件,内容如下:
AM_CPPFLAGS                = $(UNIMRCP_PLUGIN_INCLUDES)

plugin_LTLIBRARIES         = xfyunrecog.la

xfyunrecog_la_SOURCES       = src/xfyun_recog_engine.c
xfyunrecog_la_LDFLAGS       = $(UNIMRCP_PLUGIN_OPTS) \
                              -L$(top_srcdir)/plugins/third-party/xfyun/libs/x64 \
                              -lmsc -ldl -lpthread -lrt -lstdc++
xfyunrecog_ladir            = $(libdir)
xfyunrecog_la_DATA          = $(top_srcdir)/plugins/third-party/xfyun/libs/x64/libmsc.so


include $(top_srcdir)/build/rules/uniplugin.am

UNIMRCP_PLUGIN_INCLUDES     += -I$(top_srcdir)/plugins/third-party/xfyun/include
对应地,在fyun-synth文件夹下新建Makefile.am文件夹,内容如下:
AM_CPPFLAGS                = $(UNIMRCP_PLUGIN_INCLUDES)

plugin_LTLIBRARIES         = xfyunsynth.la

xfyunsynth_la_SOURCES       = src/xfyun_synth_engine.c
xfyunsynth_la_LDFLAGS       = $(UNIMRCP_PLUGIN_OPTS) \
                              -L$(top_srcdir)/plugins/third-party/xfyun/libs/x64 \
                              -lmsc -ldl -lpthread -lrt
xfyunsynth_ladir            = $(libdir)

include $(top_srcdir)/build/rules/uniplugin.am

UNIMRCP_PLUGIN_INCLUDES     += -I$(top_srcdir)/plugins/third-party/xfyun/include
修改plugins文件夹下Makefile.am文件,xfyun-recog添加内容如下:
if XFYUNRECOG_PLUGIN
SUBDIRS               += xfyun-recog
endif
对应地,xfyun-synth添加内容如下:
if XFYUNRECOG_PLUGIN
SUBDIRS               += xfyun-synth
endif
修改conf/unimrcpserver.xml文件,从默认启用demo engine改为启用我们的两个engine。
xfyun-recog修改如下:
注意:在这个地方下载无论是给还是笔者的百度云盘此位置可能需要修改

<engine id="Demo-Recog-1" name="demorecog" enable="false"/>
<engine id="XFyun-Recog-1" name="xfyunrecog" enable="true"/>
对应地,xfyun-synth修改如下:
<engine id="Demo-Synth-1" name="demorecog" enable="false"/>
<engine id="XFyun-Synth-1" name="xfyunsynth" enable="true"/>
同时,如果您已经准备好将UniMRCP Server和FreeSWITCH对接,您应该在conf/unimrcpserver.xml中配置好server的ip地址,即当前unimrcp安装的子网访问地址。
重新编译安装unimrcp(第二步 3)。
当你启动时出现如下问题时:

Failed to Load DSO: /usr/local/unimrcp/lib/libmsc.so: undefined symbol: _ZTVN10__cxxabiv117__class_type_infoE
方法:-lstdc++
笔者亲测遇到了一个libsofia-sip-ua.so.0 不存在的一个情况
./unimrcpserver: error while loading shared libraries: libsofia-sip-ua.so.0: cannot open shared object file: No such file or directory
方法
在etc/ld.so.conf 内容增加: /usr/local/lib
ldconfig 将ld.so.conf读入cache


注:替换unimrcp的VAD模块
unimrcp vad 模块voice activity dector一直认为比较粗暴,而且unimrcp的社区也很久没有更新了。使用原始unimrcp如果只是用来做Demo演示,通过手动调整参数,还是可以的。但是距离生产环境,还是有很远的一段路。故可以替换成webrtc的vad模块。
参考下面链接,本项目已经替换成webrtc的vad模块,无需再修改。 https://www.cnblogs.com/damizhou/p/11323394.html
第四步 配置与验证
配置
配置FreeSWITCH
我们需要将处理用户语音呼入的FreeSWITCH与向xfyun engine发请求的unimrcp server两者连接起来。
1.配置unimrcp模块并自动加载;
编辑/usr/local/freeswitch-1.6/modules.conf文件,找到要安装的模块,去掉前面的注释符号#cd /usr/local/src/freeswitch
vim modules.conf
#asr_tts/mod_unimrcp
asr_tts/mod_unimrcp
在/usr/local/freeswitch-1.6目录下执行make mod_xxx-install命令,这样就编译相应模块,并把编译后的动态库安装的/usr/local/freeswitch/mod目录下
make mod_unimrcp-install
编辑/usr/local/freeswitch/conf/autoload_configs/modules.conf.xml,去掉注释符号,如果没有发现对应模块,则添加
<load module="mod_unimrcp"/>
2.设置profile文件与conf文件;
在/usr/local/freeswitch/conf/mrcp_profiles目录新建unimrcpserver-mrcp-v2.xml配置文件:
这里的ip如果你是centos等线上服务器:ifconfig查看 :笔者曾一度认为是我连接服务器的ip地址,其实是不对的
<include>
  <!-- UniMRCP Server MRCPv2 -->
  <!-- 后面我们使用该配置文件,均使用 name 作为唯一标识,而不是文件名 -->
  <profile name="unimrcpserver-mrcp2" version="2">
    <!-- MRCP 服务器地址 -->
    <param name="server-ip" value="XXX.XX.XX.XX"/>
    <!-- MRCP SIP 端口号 -->
    <param name="server-port" value="8060"/>
    <param name="resource-location" value=""/>

    <!-- FreeSWITCH IP、端口以及 SIP 传输方式 -->
    <param name="client-ip" value="XXX.XX.XX.XX" />
    <param name="client-port" value="5069"/>
    <param name="sip-transport" value="udp"/>


    <param name="speechsynth" value="speechsynthesizer"/>
    <param name="speechrecog" value="speechrecognizer"/>
    <!--param name="rtp-ext-ip" value="auto"/-->
    <param name="rtp-ip" value="XXX.XX.XX.XX"/>
    <param name="rtp-port-min" value="4000"/>
    <param name="rtp-port-max" value="5000"/>
    <param name="codecs" value="PCMU PCMA L16/96/8000"/>

    <!-- Add any default MRCP params for SPEAK requests here -->
    <synthparams>
    </synthparams>

    <!-- Add any default MRCP params for RECOGNIZE requests here -->
    <recogparams>
      <!--param name="start-input-timers" value="false"/-->
    </recogparams>
  </profile>
</include>
配置/usr/local/freeswitch/conf/autoload_configs/unimrcp.conf.xml文件:
<configuration name="unimrcp.conf" description="UniMRCP Client">
  <settings>
    <!-- UniMRCP profile to use for TTS -->
    <param name="default-tts-profile" value="unimrcpserver-mrcp2"/>
    <!-- UniMRCP profile to use for ASR -->
    <param name="default-asr-profile" value="unimrcpserver-mrcp2"/>
    <!-- UniMRCP logging level to appear in freeswitch.log.  Options are:
         EMERGENCY|ALERT|CRITICAL|ERROR|WARNING|NOTICE|INFO|DEBUG -->
    <param name="log-level" value="DEBUG"/>
    <!-- Enable events for profile creation, open, and close -->
    <param name="enable-profile-events" value="false"/>

    <param name="max-connection-count" value="100"/>
    <param name="offer-new-connection" value="1"/>
    <param name="request-timeout" value="3000"/>
  </settings>

  <profiles>
    <X-PRE-PROCESS cmd="include" data="../mrcp_profiles/*.xml"/>
  </profiles>

</configuration>
注:1.unimrcpserver-mrcp-v2.xml中server-ip为unimrcpserver启动的主机ip;2.client-ip和rtp-ip为FreeSWITCH启动的主机,client-port仕FreeSWITCH作为客户端访问unimrcpserver的端口,手机作为客户端访问的FreeSWITCH端口默认为5060,两者不同;3.unimrcpserver-mrcp-v2.xml中的profile name应和unimrcp.conf.xml中的default-tts-profile与default-ars-profile的value一致(有些文档的分析中称mrcp_profiles中的xml文件名也必须和这两者一致,实际上是非必须的)。
Attenion: unimrcpserver 和 freeswitch 部署在同一个网段很重要,最好部署测试的时候在同一台物理机器上进行
3.配置IVR与脚本。
在/usr/local/freeswitch/conf/dialplan/default.xml里新增如下配置:
<extension name="unimrcp">
    <condition field="destination_number" expression="^5001$">
   	    <action application="answer"/>
        <action application="lua" data="names.lua"/>
    </condition>
</extension>
在/usr/local/freeswitch/scripts目录下新增names.lua脚本:
session:answer()

--freeswitch.consoleLog("INFO", "Called extension is '".. argv[1]"'\n")
welcome = "ivr/ivr-welcome_to_freeswitch.wav"
menu = "ivr/ivr-this_ivr_will_let_you_test_features.wav"
--
grammar = "hello"
no_input_timeout = 80000
recognition_timeout = 80000
confidence_threshold = 0.2
--
session:streamFile(welcome)
--freeswitch.consoleLog("INFO", "Prompt file is \n")

tryagain = 1
 while (tryagain == 1) do
 --
       session:execute("play_and_detect_speech",menu .. "detect:unimrcp {start-input-timers=false,no-input-timeout=" .. no_input_timeout .. ",recognition-timeout=" .. recognition_timeout .. "}" .. grammar)
       xml = session:getVariable('detect_speech_result')
 --
       if (xml == nil) then
               freeswitch.consoleLog("CRIT","Result is 'nil'\n")
               tryagain = 0
       else
               freeswitch.consoleLog("CRIT","Result is '" .. xml .. "'\n")
               tryagain = 0
    end
end
 --
 -- put logic to forward call here
 --
 session:sleep(250)
 session:set_tts_params("unimrcp", "xiaofang");
 session:speak("今天天气不错啊");
 session:hangup()
我们需要在/usr/local/freeswitch/grammar目录新增hello.gram语法文件,可以为空语法文件须满足语音识别语法规范1.0标准(简称 SRGS1.0),该语法文件 ASR 引擎在进行识别时可以使用。
<?xml version="1.0" encoding="utf-8" ?>
<grammar version="1.0" xml:lang="zh-cn" root="Menu" tag-format="semantics/1.0"
      xmlns=http://www.w3.org/2001/06/grammar
    xmlns:sapi="http://schemas.microsoft.com/Speech/2002/06/SRGSExtensions"><!- 这些都是必不可少的-->
  <rule id="city" scope="public">
    <one-of>     <!-- 匹配其中一个短语-->
      <item>北京</item>
      <item>上海</item>
    </one-of>
  </rule>
  <rule id="cross" scope="public">
    <one-of>
      <item>到</item>
      <item>至</item>
      <item>飞往</item>
    </one-of>
  </rule>
  <rule id="Menu" scope="public">
    <item>
      <ruleref uri="#date"/>         <!--指定关联的其他规则的节点-->
      <tag>out.date = reles.latest();</tag>
    </item>
    <item repeat="0-1">从</item>    <!--显示1次或0次-->
    <item>
      <ruleref uri="#city"/>
      <tag>out.city = rulels.latest();</tag>
    </item>
    <item>
      <ruleref uri="#cross"/>
      <tag>out.cross = rulels.latest();</tag>
    </item>
    <item>
      <ruleref uri="#city"/>
      <tag>out.city = rulels.latest();</tag>
    </item>
  </rule>
</grammar>
注:lua脚本中,”play_and_detect_speech” 调用了 ASR 服务,”speak” 调用了 TTS 服务。配置启动中遇到问题。
配置启动中遇到问题:https://www.jianshu.com/p/6aa2140937b2
测试:拨打5001测试一下:成功

其他相关资料
FreeSWITCH主页:https://freeswitch.com/

Unimrcp主页:http://www.unimrcp.org/

Apache APR:https://apr.apache.org/

讯飞SDK包导入方式:https://doc.xfyun.cn/msc_linux/SDK%E5%8C%85%E5%AF%BC%E5%85%A5.html

CSDN联合极客时间,共同打造面向开发者的精品内容学习社区,助力成长!
更多推荐


 1
1 0
0- 0


 已为社区贡献3条内容

所有评论(0)