[深度学习]人脸检测-Tensorflow2.x keras代码实现
人脸检测1. 所需Python环境2. 数据准备3. 代码实现3.1 用OpenCV实现3.2 用深度学习实现目标检测1. 所需Python环境pip install opencv-pythonpip install mtcnnimport cv2import mtcnnprint(mtcnn.__version__)print(cv2.__version__)0.1.04.4.02. 数据准备下
1. 所需Python环境
pip install opencv-python
pip install mtcnn
import cv2
import mtcnn
print(mtcnn.__version__)
print(cv2.__version__)
0.1.0
4.4.0
2. 数据准备
下载下面图片并且保存为test1.jpg放在你的项目目录里

下载下面图片并且保存为test2.jpg放在你的项目目录里
3. 代码实现
3.1 用OpenCV实现
OpenCV提供了许多预训练的模型。 我们就用其中一个。
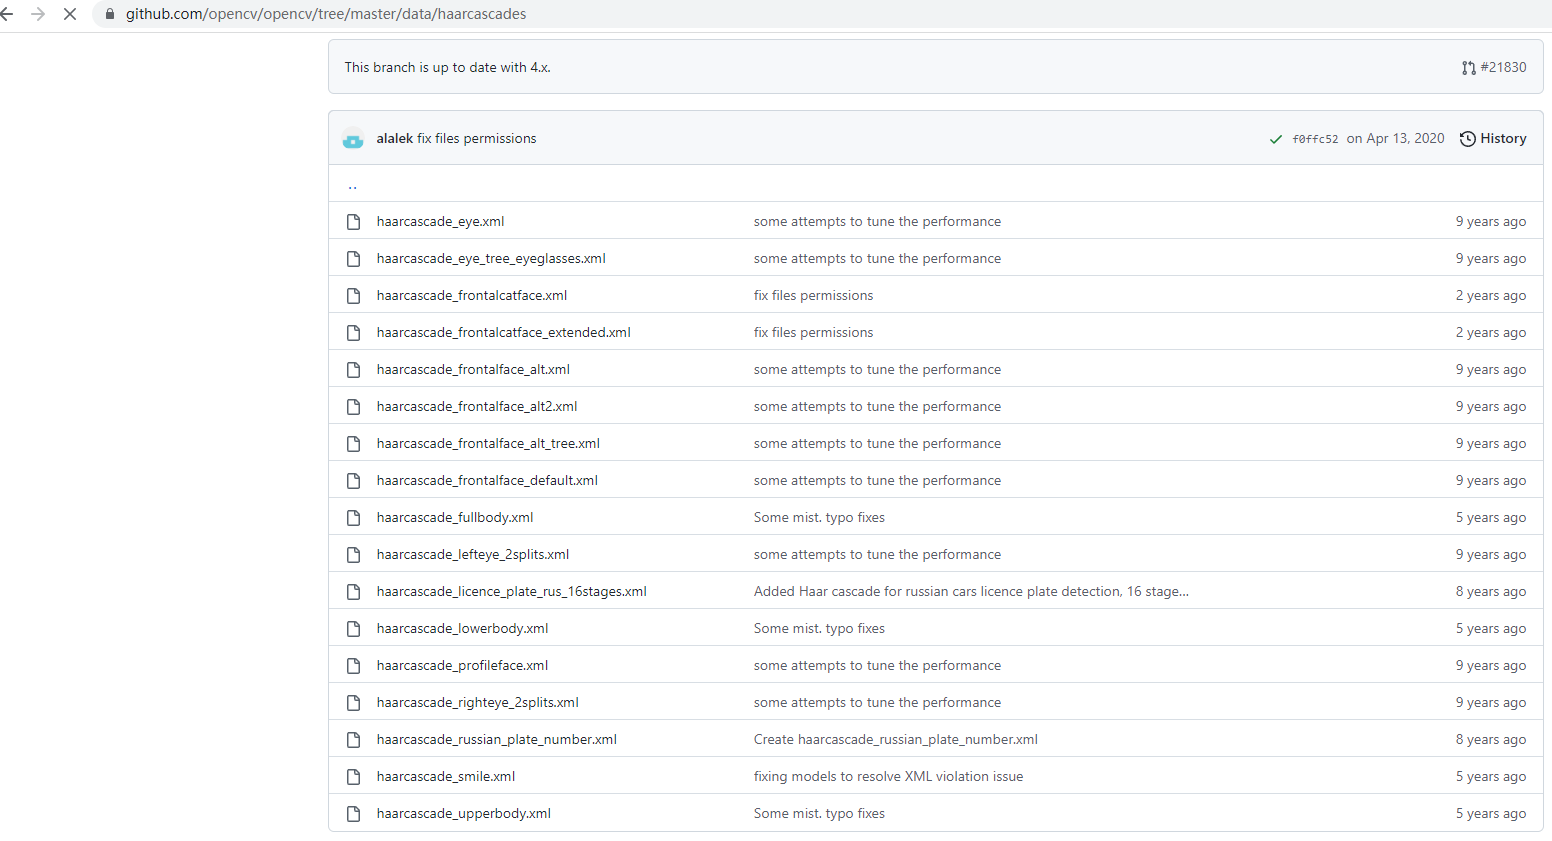
从OpenCV GitHub项目下载用于正面人脸检测的预训练模型,并将其放在文件名“ haarcascade_frontalface_default.xml”的当前工作目录中。
下载haarcascade_frontalface_default.xml
代码讲解
加载OpenCV的模型
# load the pre-trained model
classifier = CascadeClassifier('haarcascade_frontalface_default.xml')
加载图片待识别的图片
# load the photograph
pixels = imread('test1.jpg')
获取人脸的位置信息,人脸的左上角坐标,与宽和高
# perform face detection
bboxes = classifier.detectMultiScale(pixels)
# print bounding box for each detected face
for box in bboxes:
	print(box)
	x, y, width, height = box
[219 33 165 165]
利用左上角的坐标与右下角的左边画一个矩形框。
# extract
x, y, width, height = box
x2, y2 = x + width, y + height
# draw a rectangle over the pixels
rectangle(pixels, (x, y), (x2, y2), (0,0,255), 1)
显示图片,并且保持图片打开,直到你把它关掉。
# show the image
imshow('face detection', pixels)
# keep the window open until we press a key
waitKey(0)
# close the window
destroyAllWindows()
完整代码如下
# plot photo with detected faces using opencv cascade classifier
from cv2 import imread
from cv2 import imshow
from cv2 import waitKey
from cv2 import destroyAllWindows
from cv2 import CascadeClassifier
from cv2 import rectangle
# load the photograph
pixels = imread('test1.jpg')
# load the pre-trained model
classifier = CascadeClassifier('haarcascade_frontalface_default.xml')
# perform face detection
bboxes = classifier.detectMultiScale(pixels)
# print bounding box for each detected face
for box in bboxes:
	# extract
	x, y, width, height = box
	x2, y2 = x + width, y + height
	# draw a rectangle over the pixels
	rectangle(pixels, (x, y), (x2, y2), (0,0,255), 1)
# show the image
imshow('face detection', pixels)
# keep the window open until we press a key
waitKey(0)
# close the window
destroyAllWindows()

修改为下面代码,加载test2.jpg,
pixels = imread('test2.jpg')
大部分都检测到了,但是仔细看发现第二排第一个没有检测到,还有的是双框。

detectMultiScale()函数提供了一些参数来帮助调整分类器的用法。
bboxes = classifier.detectMultiScale(pixels, 1.05, 8)
经过微调,结果如下,其实还是不好,你们可以试一试。

3.2 用深度学习实现目标检测
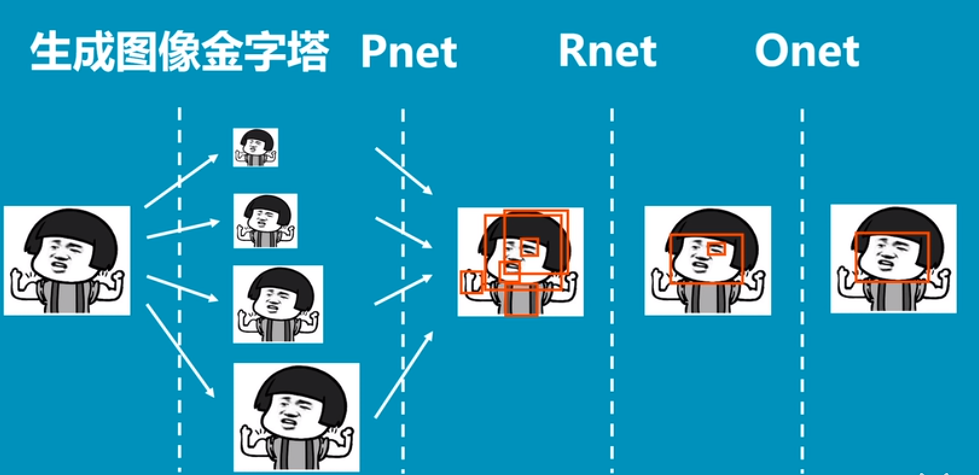
MTCNN,Multi-task convolutional neural network(多任务卷积神经网络),将人脸区域检测与人脸关键点检测放在了一起,它的主题框架类似于cascade。总体可分为P-Net、R-Net、和O-Net三层网络结构。
P-Net 全称为Proposal Network,其基本的构造是一个全卷积网络。对上一步构建完成的图像金字塔,通过一个FCN进行初步特征提取与标定边框,并进行Bounding-Box Regression调整窗口与NMS进行大部分窗口的过滤。
R-Net 全称为Refine Network,其基本的构造是一个卷积神经网络,相对于第一层的P-Net来说,增加了一个全连接层,因此对于输入数据的筛选会更加严格。在图片经过P-Net后,会留下许多预测窗口,我们将所有的预测窗口送入R-Net,这个网络会滤除大量效果比较差的候选框,最后对选定的候选框进行Bounding-Box Regression和NMS进一步优化预测结果。
O-Net 全称为Output Network,基本结构是一个较为复杂的卷积神经网络,相对于R-Net来说多了一个卷积层。O-Net的效果与R-Net的区别在于这一层结构会通过更多的监督来识别面部的区域,而且会对人的面部特征点进行回归,最终输出五个人脸面部特征点。
这边篇详细介绍什么是MTCNN博客,感觉还可以
MTCNN的整个过程如下:
1.首先一张图片进行不同尺度的缩放,生成图像金字塔,目的是为检测不同大小的人脸。
2.然后把这些不同大小的图片传入Pnet. Pnet 会生成一大堆的人脸候选框。这些人脸候选框的坐标都是相对原图的。
3. 把这些人脸候选框剪出来后传入Rnet中。Rnet会对图片内是否真正存在人脸进行判断评分。同时对原有的候选框进行修正。
4. 通过Rnet后,我们会获得相对正确的候选框。再次把人脸的候选框剪出来传入到Onet中。
5. Onet 是MTCNN种最精细的网络,它会再次对候选中是否存在人脸进行判断评分。同时对人脸候选框进行修正。Onet的输出结果就是我们的人脸的位置了。
整个MTCNN的网络图

代码讲解
可以通过调用MTCNN()构造函数来创建网络实例。
默认情况下,该库将使用预先训练的模型,尽管您可以通过“ weights_file”参数指定自己的模型并指定路径或URL,例如:
model = MTCNN(weights_file='filename.npy')
配置并加载模型后,可以通过调用detect_faces()函数将其直接用于检测照片中的人脸。
这将返回一个dict对象列表,每个对象都提供许多用于检测到的每个面孔的详细信息的键,包括:
- “框box”:提供边界框左上角的x,y以及框的宽度和高度。
- ‘置信度confidence’:预测的概率置信度。
- “关键点keypoints”:为“ left_eye”,“ right_eye”,“ nose”,“ mouth_left”和“
mouth_right”带点的字典。
例如,我们可以对第一张照片执行如下面部检测:
# face detection with mtcnn on a photograph
from matplotlib import pyplot
from mtcnn.mtcnn import MTCNN
# load image from file
filename = 'test1.jpg'
pixels = pyplot.imread(filename)
# create the detector, using default weights
detector = MTCNN()
# detect faces in the image
faces = detector.detect_faces(pixels)
for face in faces:
	print(face)
{'box': [242, 17, 122, 175], 'confidence': 0.9999426603317261, 'keypoints':
{'left_eye': (271, 84), 'right_eye': (325, 105), 'nose': (280, 130), 'mouth_left': (260, 146), 'mouth_right': (308, 163)}}
利用左下角坐标与宽和高画一个红框。
# get coordinates
x, y, width, height = result['box']
# create the shape
rect = Rectangle((x, y), width, height, fill=False, color='red')
# face detection with mtcnn on a photograph
from matplotlib import pyplot
from matplotlib.patches import Rectangle
from mtcnn.mtcnn import MTCNN

# draw an image with detected objects
def draw_image_with_boxes(filename, result_list):
	# load the image
	data = pyplot.imread(filename)
	# plot the image
	pyplot.imshow(data)
	# get the context for drawing boxes
	ax = pyplot.gca()
	# plot each box
	for result in result_list:
		# get coordinates
		x, y, width, height = result['box']
		# create the shape
		rect = Rectangle((x, y), width, height, fill=False, color='red')
		# draw the box
		ax.add_patch(rect)
	# show the plot
	pyplot.show()

filename = 'test1.jpg'
# load image from file
pixels = pyplot.imread(filename)
# create the detector, using default weights
detector = MTCNN()
# detect faces in the image
faces = detector.detect_faces(pixels)
# display faces on the original image
draw_image_with_boxes(filename, faces)

换成test2.jpg, 执行结果如下: 可以看出效果不错哦。
filename = 'test2.jpg'

我们可以通过Circle类为眼睛,鼻子和嘴巴画一个圆。 例如
# draw the dots
for key, value in result['keypoints'].items():
	# create and draw dot
	dot = Circle(value, radius=2, color='red')
	ax.add_patch(dot)
运行下面代码
# face detection with mtcnn on a photograph
from matplotlib import pyplot
from matplotlib.patches import Rectangle
from matplotlib.patches import Circle
from mtcnn.mtcnn import MTCNN

# draw an image with detected objects
def draw_image_with_boxes(filename, result_list):
	# load the image
	data = pyplot.imread(filename)
	# plot the image
	pyplot.imshow(data)
	# get the context for drawing boxes
	ax = pyplot.gca()
	# plot each box
	for result in result_list:
		# get coordinates
		x, y, width, height = result['box']
		# create the shape
		rect = Rectangle((x, y), width, height, fill=False, color='red')
		# draw the box
		ax.add_patch(rect)
		# draw the dots
		for key, value in result['keypoints'].items():
			# create and draw dot
			dot = Circle(value, radius=2, color='red')
			ax.add_patch(dot)
	# show the plot
	pyplot.show()

filename = 'test1.jpg'
# load image from file
pixels = pyplot.imread(filename)
# create the detector, using default weights
detector = MTCNN()
# detect faces in the image
faces = detector.detect_faces(pixels)
# display faces on the original image
draw_image_with_boxes(filename, faces)

换成test2.jpg, 执行结果如下: 可以看出效果不错哦。

3.3. 最后在加一个图片
想到之前我的机器学习课上有同学用人脸检测+人脸识别自动生成对应的同学的名字。其实这里只是识别出人脸的位置,剩下就是用facenet识别每个人的人脸了。这个我会在下篇博客讲。
这图片实在网上找的,不知道有没有侵权,如果有,联系一下我,我会改成其它的。


参考资料
https://gitee.com/a593012670/mtcnn-keras
https://medium.com/@iselagradilla94/multi-task-cascaded-convolutional-networks-mtcnn-for-face-detection-and-facial-landmark-alignment-7c21e8007923

CSDN联合极客时间,共同打造面向开发者的精品内容学习社区,助力成长!
更多推荐


 1
1 0
0- 0


 已为社区贡献9条内容

所有评论(0)