
RuoYi(若依)前后端分离版本,windows下部署(nginx)
上一篇用了tomcat部署(https://blog.csdn.net/yueyekkx/article/details/105491363),还是觉得nginx是王道话不多说开始:还是windows下部署:nginxjar包前端:1.1前端一样:运行代码:npm run build:prod生成一个dist文件夹后端:打成jar包maven打包 :按照1,2,3步骤,...
上一篇用了tomcat部署(https://blog.csdn.net/yueyekkx/article/details/105491363),
还是觉得nginx是王道话不多说开始:
还是windows下部署:
nginx jar包
前端:
1.1前端一样:
运行代码:npm run build:prod
生成一个dist文件夹
后端:
打成jar包

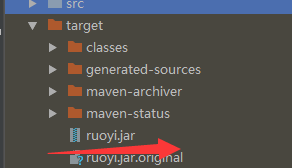
maven打包 :按照1,2,3步骤,输入命令
clean package -Dmaven.test.skip=true

项目目录下会产生target文件夹,内有ruoyi.jar文件。
开始部署:
nginx下载解压版,解压

修改conf下的nginx.conf文件
server {
        listen       80;
        server_name  localhost;
        location / {
                root   F:/RuoYi-Vue/ruoyi-ui/dist/;
   		try_files $uri $uri/ /index.html;
                index  index.html index.htm;
        }
          location /prod-api/{
   		proxy_set_header Host $http_host;
   		proxy_set_header X-Real-IP $remote_addr;
  		 proxy_set_header REMOTE-HOST $remote_addr;
  		 proxy_set_header X-Forwarded-For $proxy_add_x_forwarded_for;
   		proxy_pass http://localhost:8080/;
  	}
  	error_page   500 502 503 504  /50x.html;
        location = /50x.html {
            	root   html;
        	}
       }
其中
listen 80; 端口
server_name localhost; 名称
root F:/RuoYi-Vue/ruoyi-ui/dist/; 是dist文件夹的路径;
proxy_pass http://localhost:8080/; 是后端地址
安装并启动redis;
然后分别启动前后端即可:
后端:java -jar 文件拖进黑窗口

前端启动nginx:
cmd进入nginx目录,start nginx.exe即可

输入网址:http://localhost即可登录

快速构建 Web 应用程序
更多推荐
 3
3 0
0- 0


 已为社区贡献2条内容

所有评论(0)