带有 htmx、Alpine-js 和 Django 的列过滤表
您是否曾经需要创建一个需要在多个列之间进行过滤的表?也许您已经尝试使用带有单个搜索/过滤器输入字段的标准表,但它并没有按照您想要的方式工作。
本文将展示我如何使用多列过滤器构建表格。我要实现的表如下所示:
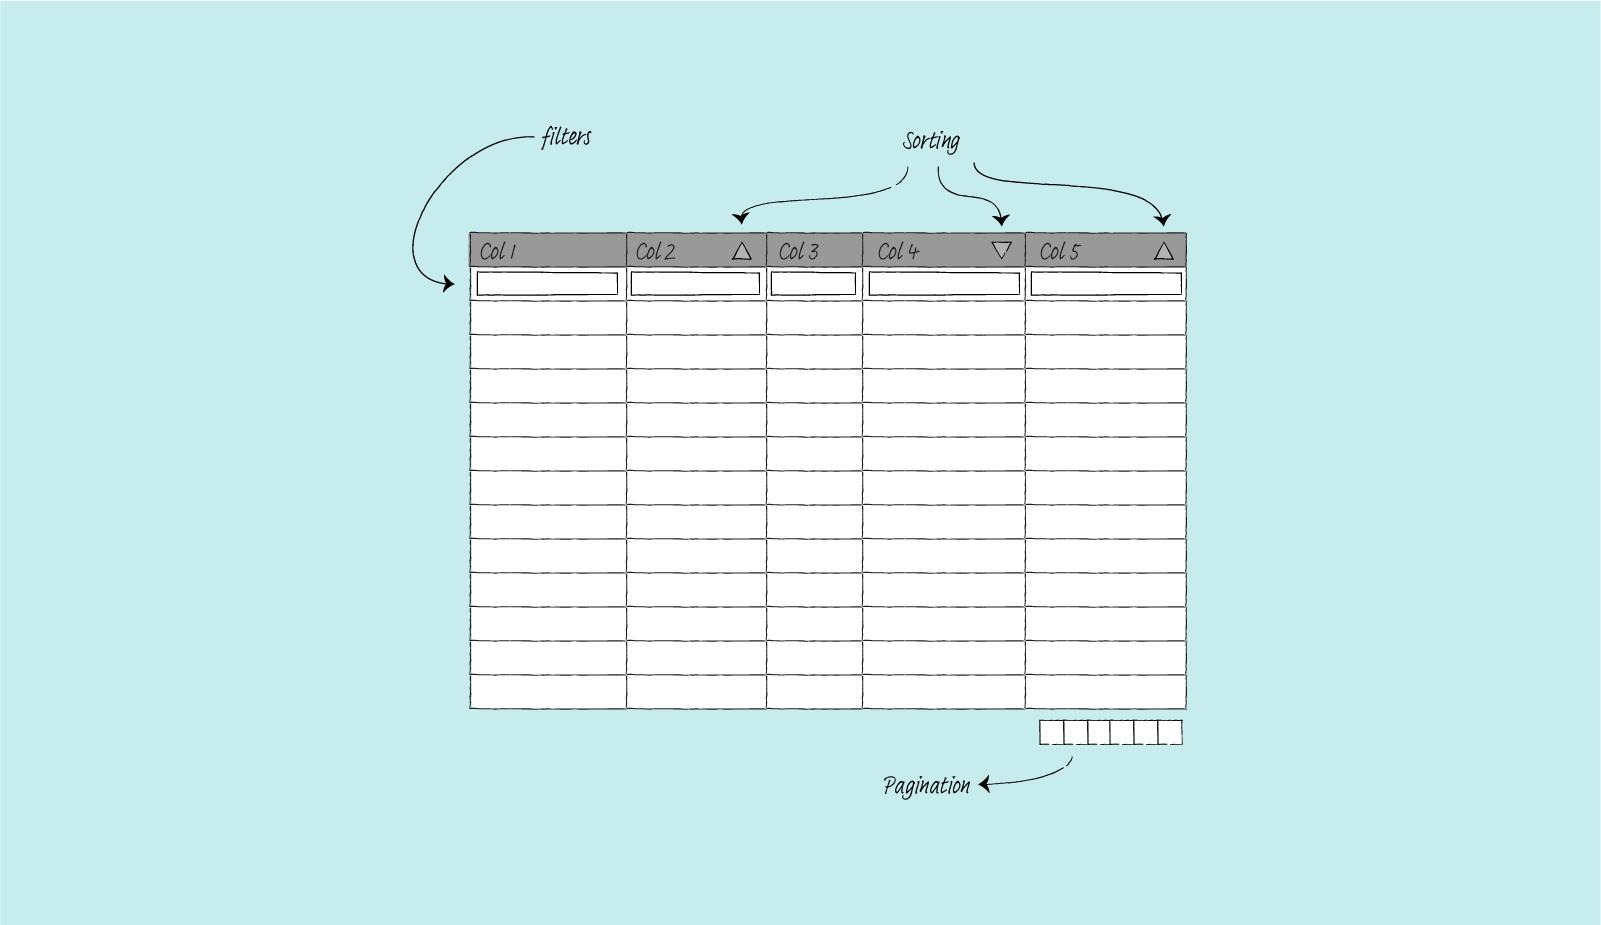
作为旁注,本文建立在上一篇文章的基础上,我使用Django和htmx创建了一个简单的表;我不会重新讨论htmx的工作原理。现在,让我们开始吧。
本项目使用的包
1.htmx。htmx允许使用属性直接在 HTML 中使用 AJAX。它很简单,而且对于这么小的一个包来说,非常强大。
2.django-tables2。这个 Django 应用程序让您可以像定义 Django 模型一样定义表。它可以自动生成基于 Django 模型的表。它支持分页、基于列的表格排序、通过子类化的自定义列功能以及许多其他功能。
3.django 过滤器。我将此包用于过滤功能。它具有类似于 Django 的ModelForm的 API,并且与django-tables2配合得很好。
4.django-htmx。为了使htmx工作,Django 视图需要知道哪个请求是使用htmx发出的,哪个不是。它有一个将htmx属性添加到请求对象的中间件。
5.Alpine-js。这个项目需要更复杂的行为,仅htmx是不够的。具体来说,表格需要使排序、分页和过滤很好地协同工作。这就是Alpine-js的用武之地。这个小的 javascript 包允许我存储数据并根据变量发生的变化触发动作。
型号
我用于这个项目的模型如下:
# products/models.py
from django.db import models

class Product(models.Model):
    class Status(models.IntegerChoices):
        ACTIVE = 1, "Active"
        INACTIVE = 2, "Inactive"
        ARCHIVED = 3, "Archived"

    name = models.CharField(max_length=255)
    category = models.CharField(max_length=255)
    price = models.DecimalField(max_digits=10, decimal_places=2)
    cost = models.DecimalField(max_digits=10, decimal_places=2)
    status = models.PositiveSmallIntegerField(choices=Status.choices)

    def __str__(self):
        return self.name
表
该表易于设置。show_header设置为False,因为我将包含列名称的表头放在单独的模板中。我将在下面的模板部分进一步讨论这个问题。
# products/tables.py
import django_tables2 as tables
from products.models import Product

class ProductHTMxMultiColumnTable(tables.Table):
    class Meta:
        model = Product
        show_header = False
        template_name = "tables/bootstrap_col_filter.html"
过滤器
我使用的过滤器如下:
# products/filters.py
from decimal import Decimal

from django.db.models import Q
from django.forms import TextInput
import django_filters

from products.models import Product


class ProductFilter(django_filters.FilterSet):
    id = django_filters.NumberFilter(label="")
    name = django_filters.CharFilter(label="", lookup_expr="istartswith")
    category = django_filters.CharFilter(label="", lookup_expr="istartswith")
    price = django_filters.NumberFilter(label="", method="filter_decimal")
    cost = django_filters.NumberFilter(label="", method="filter_decimal")
    status = django_filters.ChoiceFilter(label="", choices=Product.Status.choices)

    class Meta:
        model = Product
        fields = ["id", "name", "category", "price", "cost", "status"]

    def filter_decimal(self, queryset, name, value):
        # For price and cost, filter based on
        # the following property:
        # value <= result < floor(value) + 1

        lower_bound = "__".join([name, "gte"])
        upper_bound = "__".join([name, "lt"])

        upper_value = math.floor(value) + Decimal(1)

        return queryset.filter(**{lower_bound: value,
                                  upper_bound: upper_value})
观点
当请求不是htmx发出时,视图将发送一个完整的页面,而当htmx发出请求时,发送部分结果。
# products/views.py
from django.core.paginator import Paginator, EmptyPage

from django_tables2 import SingleTableMixin
from django_filters.views import FilterView

from products.models import Product
from products.tables import ProductHTMxMultiColumnTable
from products.filters import ProductFilter


class CustomPaginator(Paginator):
    def validate_number(self, number):
        try:
            return super().validate_number(number)
        except EmptyPage:
            if int(number) > 1:
                # return the last page
                return self.num_pages
            elif int(number) < 1:
                # return the first page
                return 1
            else:
                raise


class ProductHTMxMultiColumTableView(SingleTableMixin, FilterView):
    table_class = ProductHTMxMultiColumnTable
    queryset = Product.objects.all()
    filterset_class = ProductFilter
    paginate_by = 10
    paginator_class = CustomPaginator

    def get_template_names(self):
        if self.request.htmx:
            template_name = "products/product_table_partial.html"
        else:
            template_name = "products/product_table_col_filter.html"

        return template_name
我还添加了一个CustomPaginator来处理分页中的边缘情况。具体来说,这是为了处理以下情况:
- 用户选择了一个有效的页面 8
2.用户然后使用过滤器
3.由于过滤的结果小于8页长,Django然后引发404。
在这里,当 Django 引发 404 时,我可以选择使用不同的模板。但我不确定它是否可取。模板不会有任何分页信息。我认为这会让用户感到困惑,因为他们不知道空页面是由无效页面和过滤产生的,而不仅仅是过滤。
因此,当用户过滤并且页面无效时,我只是返回过滤结果的最后一页或第一页。
模板
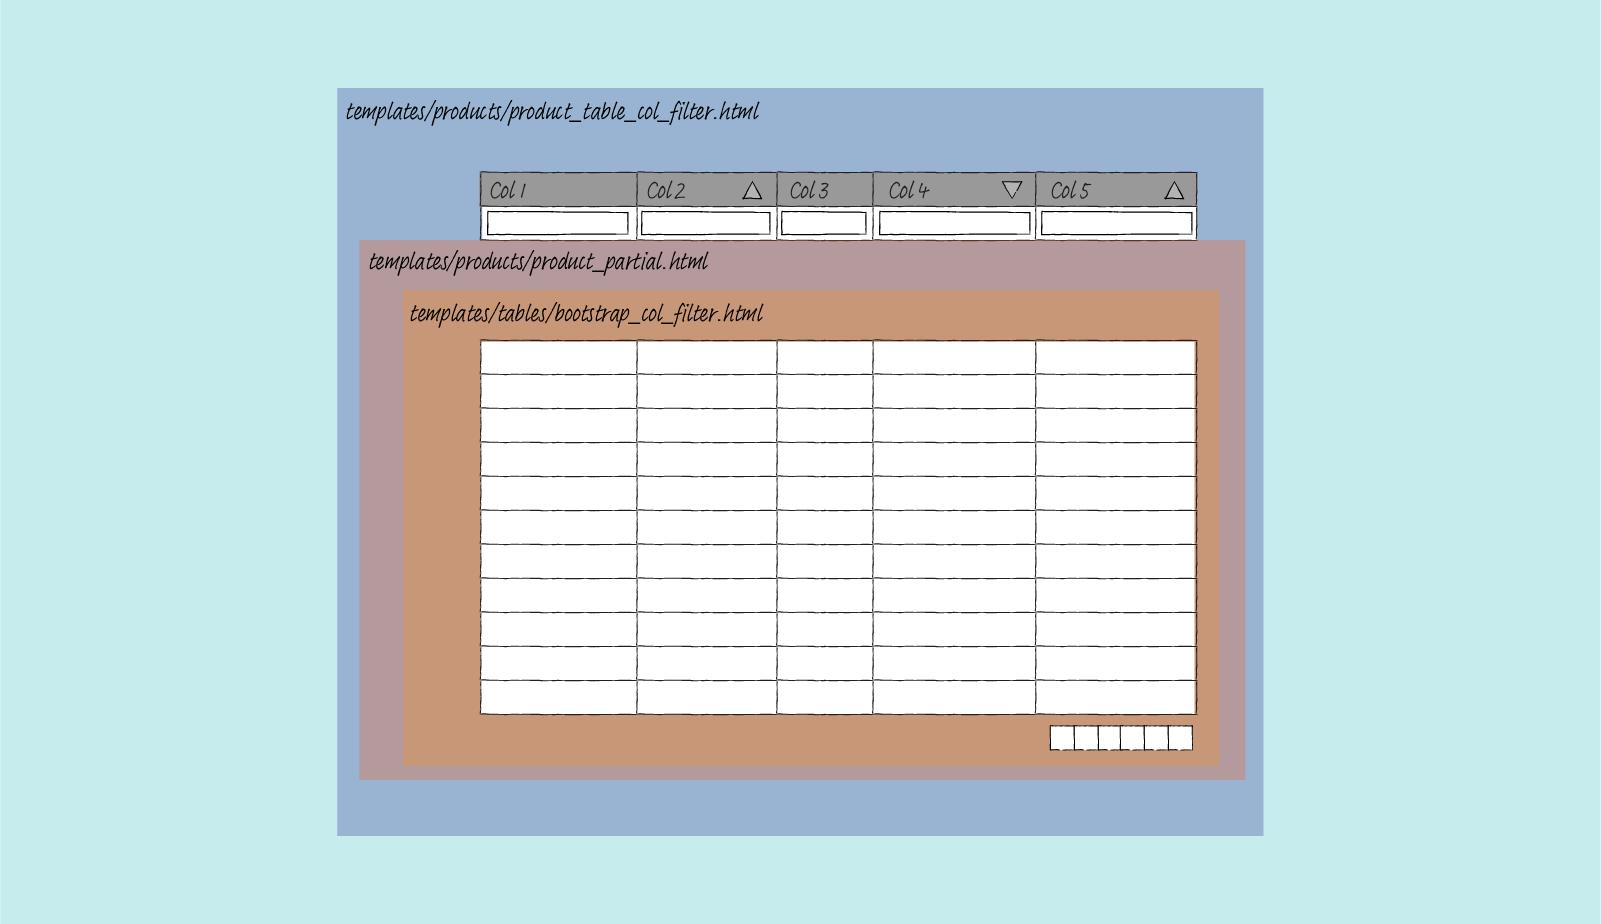
这里有三个模板:
-
渲染整个页面的模板。我在哪里生成带有 HTML 标题和正文以及表格的页面。
-
只呈现表格的模板。当我们执行排序或过滤等操作时,我们只需要渲染部分页面。
3.自定义表格模板覆盖默认值。我需要删除表定义。并添加一些Alpine-js属性以使分页起作用。
渲染整个页面的模板
对于这个项目,我将表头和过滤表单放在这个页面上。这里我定义了两个额外隐藏的input字段。sort和page输入。当用户执行一个动作时,无论是排序、页面跳转还是过滤,我都会将这三条信息全部提交回服务器。
为此,我需要使用Alpine-js。以下是其工作原理的摘要:
1.当用户通过单击列标题对表格进行排序时,我在x-data中定义的sort_by的值通过toggle函数更新。这也改变了sort输入值,因为这是通过使用x-model链接的。要在升序或降序箭头之间切换,我在列标题中使用:class。
2.我用x-init观察sort的输入值有没有变化。当值发生变化时,我会发出一个名为sort-initiated的自定义事件。
3、由于我已经在hx-trigger属性中指定了那个自定义事件,所以当这个自定义事件发生时,htmx会提交整个表单,其中包含过滤器、排序和分页的信息。
{# templates/products/product_table_col_filter #}
{% extends "base.html" %}

{% load render_table from django_tables2 %}
{% load i18n %}
{% load django_tables2 %}
{% load crispy_forms_tags %}

{% block multi_htmx_table %}active{% endblock %}

{% block main %}
<h1>Product table</h1>

<div id="table-container" class="table-container">

    <form class="form-inline"
          hx-get="{% url 'tables:products_htmx_multicol' %}"
          hx-target=".table-body-container"
          hx-trigger="input, select, sort-initiated, pagination-initiated"
          hx-swap="outerHTML"
          hx-indicator=".progress"
          x-data="{ sort_by: '', page_by: 1 }">

        <input type="hidden" name="sort" x-ref="sort_input" x-model="sort_by"
                x-init="$watch('sort_by',
                        () => $refs.sort_input.dispatchEvent(
                                new Event('sort-initiated', { bubbles: true })))">

        <input type="hidden" name="page" x-ref="paginate_input" x-model="page_by"
               x-init="$watch('page_by',
                        () => $refs.paginate_input.dispatchEvent(
                                new Event('pagination-initiated', { bubbles: true })))" >

        <table {% render_attrs table.attrs class="table multi-col-header" %}>
            <thead {{ table.attrs.thead.as_html }}>
                <tr>
                    {% for column in table.columns %}
                    <th {{ column.attrs.th.as_html }}
                        x-data="{ col_name: '{{ column.order_by_alias }}',
                                  toggle(event) {
                                    this.col_name = this.col_name.startsWith('-') ? this.col_name.substring(1) : ('-' + this.col_name);
                                    sort_by = this.col_name;}}"
                        @click="toggle()"
                        :class="sort_by !== '' ? (sort_by === col_name ? (sort_by.startsWith('-') ? 'desc' : 'asc') : '') : ''"
                        style="cursor: pointer;">
                        {{ column.header }}
                    </th>
                    {% endfor %}
                </tr>
                <tr>
                    {% for field in filter.form %}
                    <td>{{ field|as_crispy_field }}</td>
                    {% endfor %}
                </tr>
            </thead>
        </table>

        <div class="progress">
            <div class="indeterminate"></div>
        </div>

        {% render_table table %}
    </form>
</div>
{% endblock %}
模板渲染表
这里我们只渲染表格内容,没有 HTML 标题,没有 HTML 正文。只是内容。
{# templates/products/product_table_partial.html #}
{% load render_table from django_tables2 %}

{% render_table table %}
覆盖默认表的模板
此模板覆盖来自django-tables2的默认表。在这个模板上,我渲染了表格正文和分页信息。分页就像排序一样工作。当用户触发任何分页动作时,x-data中的page_by变量会更新,这会更改page输入的值,因为它是通过x-model链接的。这会创建一个自定义事件pagination-initiated。然后告诉htmx将包含所有排序、分页和过滤信息的完整表单发送回服务器。
{# templates/tables/bootstrap_col_filter.html #}
{% load django_tables2 %}
{% load i18n %}
{% block table-wrapper %}
<div class="table-body-container">
{% block table %}
<table {% render_attrs table.attrs class="table" %}>
{% block table.thead %}{% endblock table.thead %}
{% block table.tbody %}
<tbody id="body-target" {{ table.attrs.tbody.as_html }}>
{% for row in table.paginated_rows %}
{% block table.tbody.row %}
<tr {{ row.attrs.as_html }}>
{% for column, cell in row.items %}
<td {{ column.attrs.td.as_html }}>{% if column.localize == None %}{{ cell }}{% else %}{% if column.localize %}{{ cell|localize }}{% else %}{{ cell|unlocalize }}{% endif %}{% endif %}</td>
{% endfor %}
</tr>
{% endblock table.tbody.row %}
{% empty %}
{% if table.empty_text %}
{% block table.tbody.empty_text %}
<tr><td colspan="{{ table.columns|length }}">{{ table.empty_text }}</td></tr>
{% endblock table.tbody.empty_text %}
{% endif %}
{% endfor %}
</tbody>
{% endblock table.tbody %}
{% block table.tfoot %}
{% if table.has_footer %}
<tfoot {{ table.attrs.tfoot.as_html }}>
<tr>
{% for column in table.columns %}
<td {{ column.attrs.tf.as_html }}>{{ column.footer }}</td>
{% endfor %}
</tr>
</tfoot>
{% endif %}
{% endblock table.tfoot %}
</table>
{% endblock table %}
{% block pagination %}
{% if table.page and table.paginator.num_pages > 1 %}
<nav aria-label="Table navigation">
<ul class="pagination justify-content-end">
{% if table.page.has_previous %}
{% block pagination.previous %}
<li class="previous page-item" role="button">
<div @click="page_by = {{table.page.previous_page_number}}"
class="page-link">
<span aria-hidden="true">«</span>
{% trans 'previous' %}
</div>
</li>
{% endblock pagination.previous %}
{% endif %}
{% if table.page.has_previous or table.page.has_next %}
{% block pagination.range %}
{% for p in table.page|table_page_range:table.paginator %}
<li class="page-item{% if table.page.number == p %} active{% endif %}" role="button">
<div class="page-link" {% if p != '...' %}@click="page_by={{p}}"{% endif %}>
{{ p }}
</div>
</li>
{% endfor %}
{% endblock pagination.range %}
{% endif %}
{% if table.page.has_next %}
{% block pagination.next %}
<li class="next page-item user-select" role="button">
<div @click="page_by = {{table.page.next_page_number}}" class="page-link">
{% trans 'next' %}
<span aria-hidden="true">»</span>
</div>
</li>
{% endblock pagination.next %}
{% endif %}
</ul>
</nav>
{% endif %}
{% endblock pagination %}
</div>
{% endblock table-wrapper %}
结果
这就是它最终的样子。
排序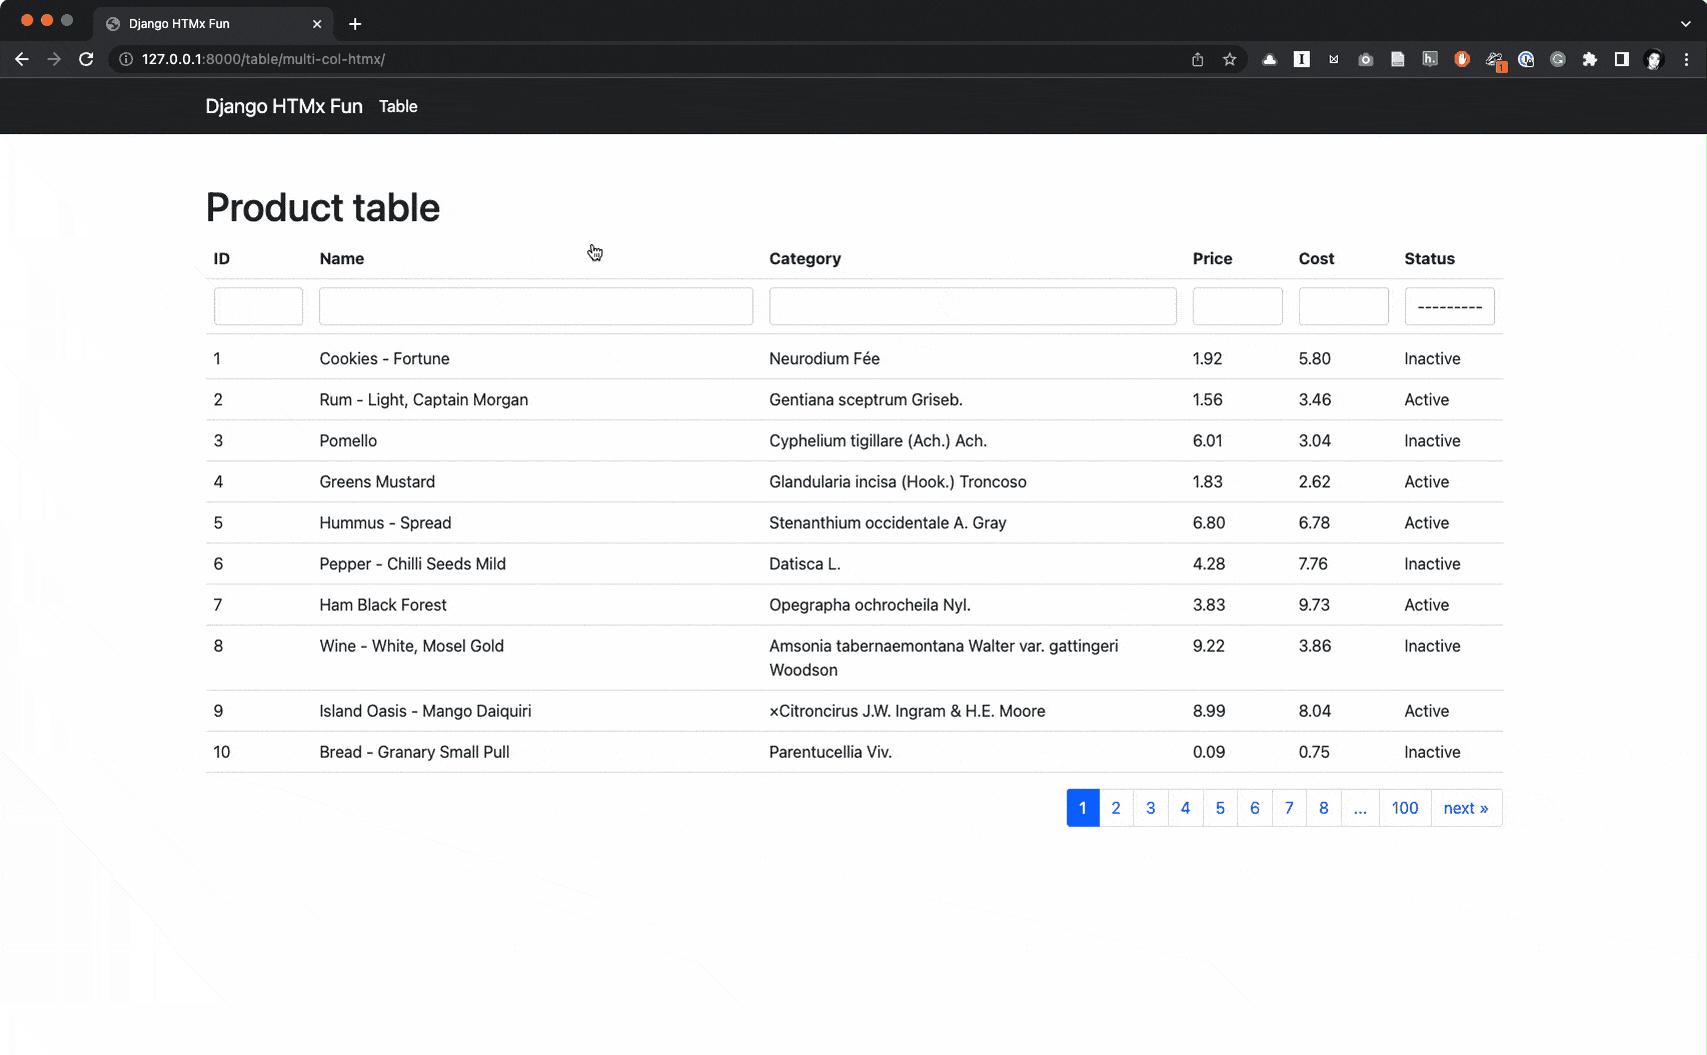
分页
过滤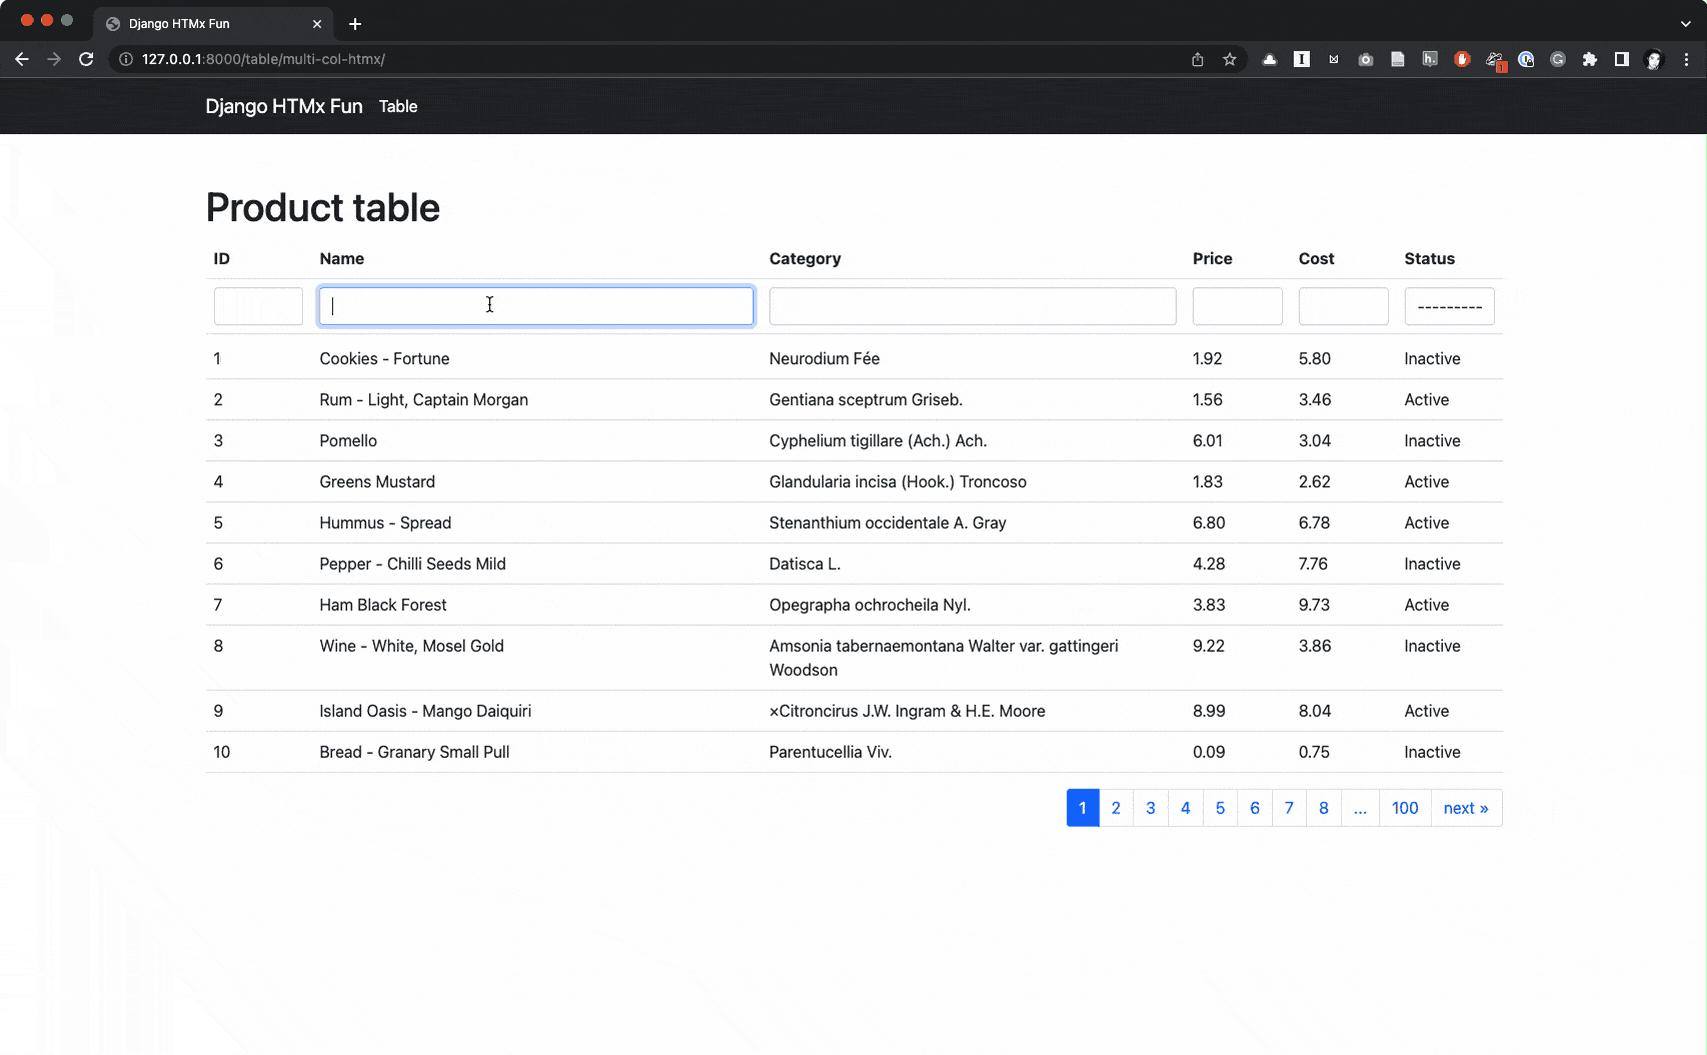
进度条 
所有动作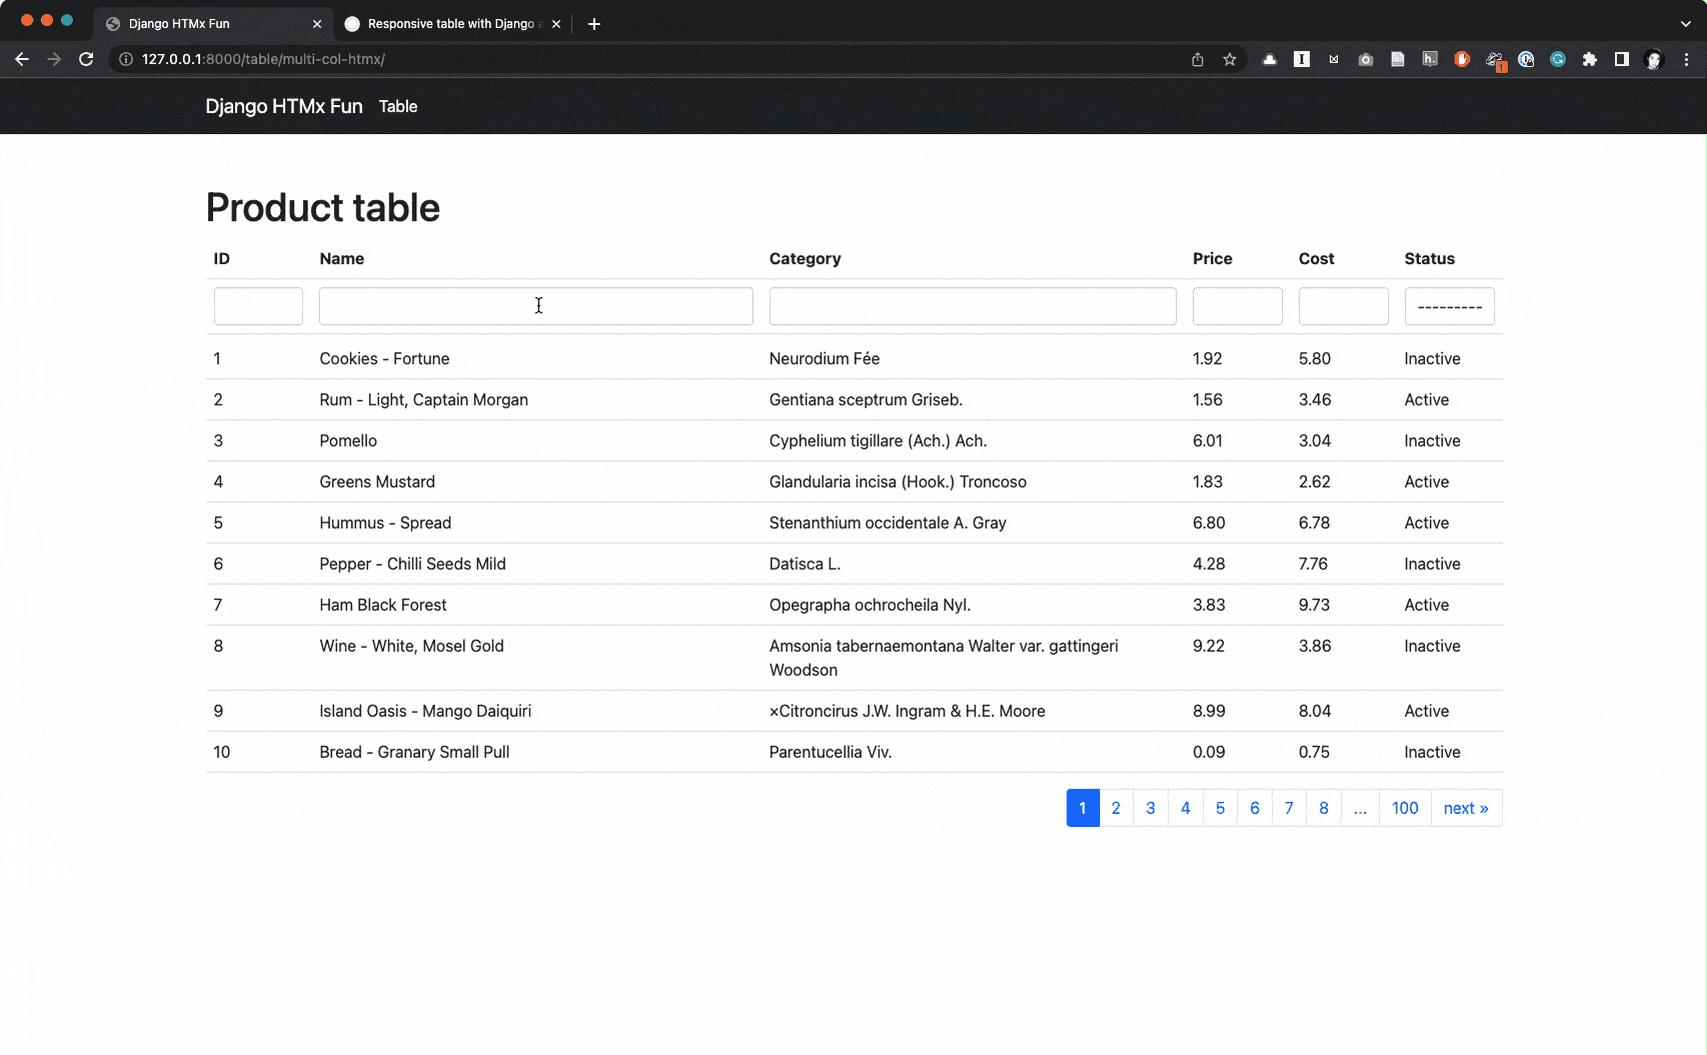
总结
在本文中,我将探索如何使用Django、htmx构建一个稍微复杂的表。对于更复杂的行为,仅htmx是不够的。这是我使用Alpine-js的地方。使用Alpine-js我构建了一个具有多列过滤功能的表。制作起来非常简单。我希望你觉得这篇文章有帮助。
将来,我将探索如何使用复杂过滤器、列选择和已保存过滤器等功能构建更复杂的表。

Python社区为您提供最前沿的新闻资讯和知识内容
更多推荐

 0
0 0
0- 0


 已为社区贡献126445条内容

所有评论(0)