使用 Swagger UI 在 python 中构建一个 Easy Rest API
有很多文章描述了使用python的原因或安装环境的方式。我会向您推荐以下文章,该文章相当完整:auth0.com/blog/developing-restful-apis-with..
在本文中,我们将描述创建一个小的 Python REST api 的方法,以及如何使用flask RestPlus 使用 Swagger 自动创建该 API 的文档。
打造Hello世界
让我们从一个简单的例子开始。这是在 Python 中创建 Rest API 的第一个代码:
import flask
from flask import Flask
app = flask.Flask(__name__)

@app.route("/hello")
def hello_world():
  return "Hello, World!"

if __name__ == '__main__':
    app.run(host="0.0.0.0", port=5000)
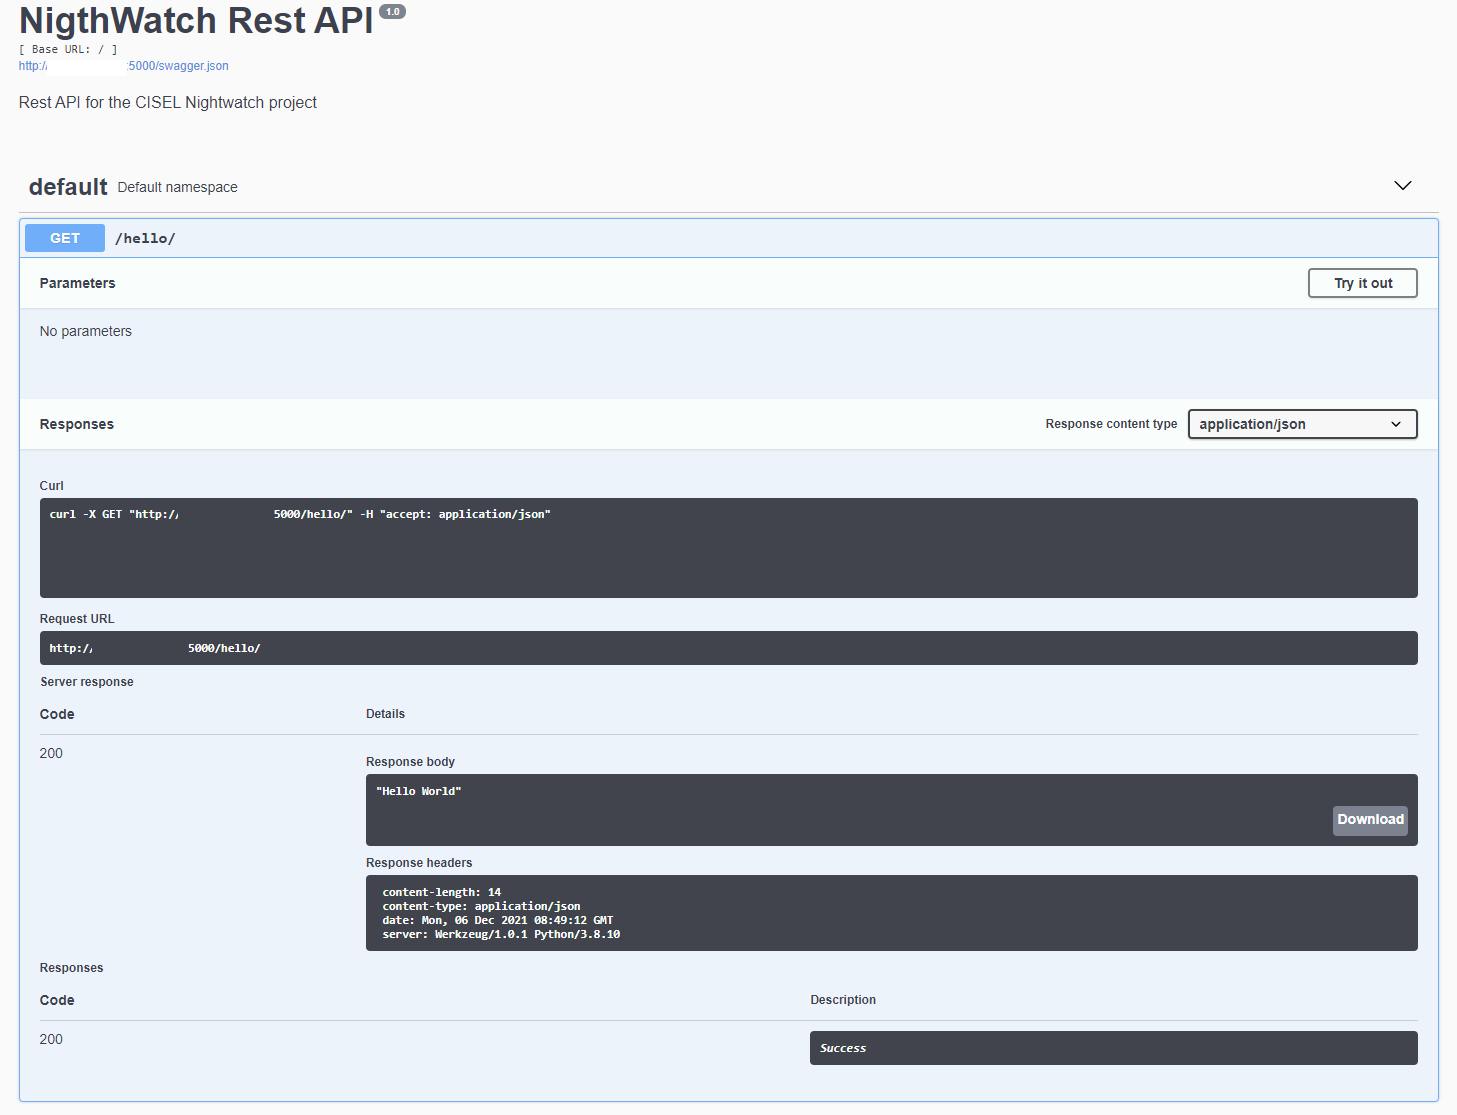
现在,您可以在端口 5000 上访问您的本地地址:localhost:5000/hello,然后看到“Hello world!”信息。
安装使用Flask Restplus
要在您的项目中安装和使用 flask_restplus,您必须导入该库。默认情况下,所有内容都将在默认命名空间中,如果你想在 swagger ui 中创建不同的命名空间,你可以按照这里的小代码中的描述进行操作(本例中为 ns_cisel)。
from flask_restplus import Api, Namespace, Resource, fields
api = Api()
api.init_app(app,title='Cisel Rest API',
          description='Rest API for the CISEL project')
ns_default = api.default_namespace
ns_cisel = api.namespace('cisel-namespace', description='operations in the Cisel Namespace')
如果您遇到库问题或模块错误,请尝试添加此导入:
import werkzeug
werkzeug.cached_property = werkzeug.utils.cached_property
如果本地模块仍然存在问题,则会出现如下错误:发生异常:ImportError cannot import name '_endpoint_from_view_func' from 'flask.helpers' 您可以使用猴子补丁(在此上找到)堆栈溢出)
import flask.scaffold
flask.helpers._endpoint_from_view_func = flask.scaffold._endpoint_from_view_func
import flask_restful
完成后,您将在 urllocalhost:5000上直接找到 Swagger UI
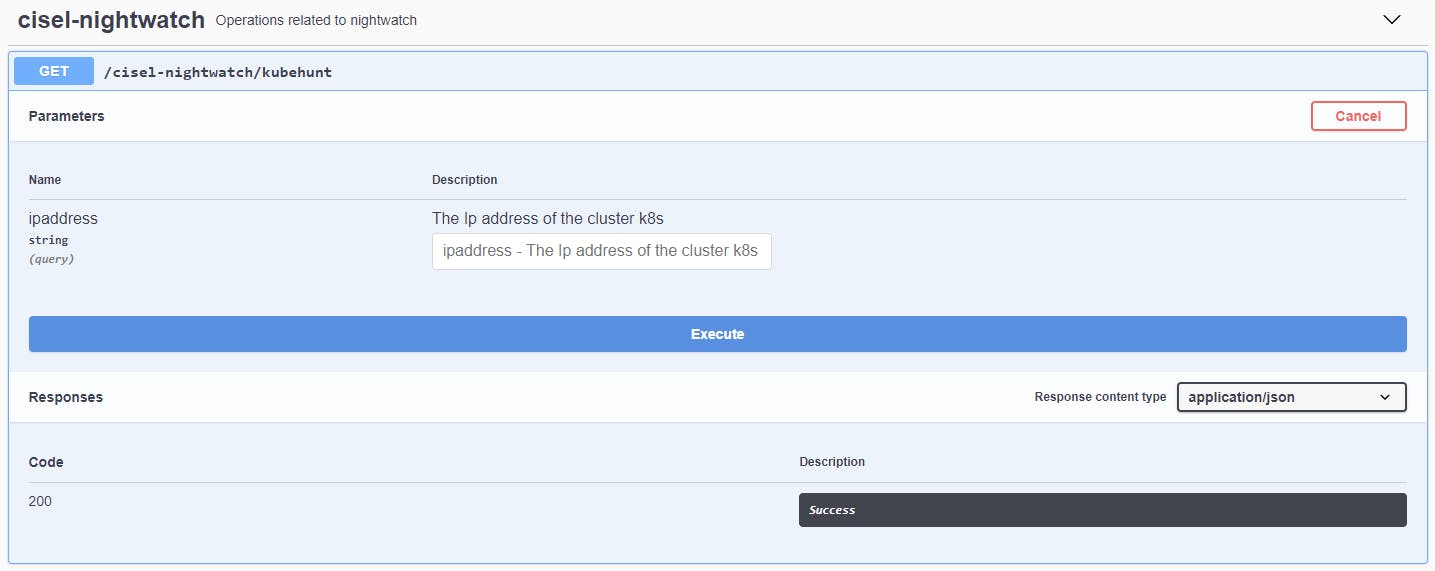
GET 方法的文档
api.doc() 装饰器允许您在文档中包含其他信息。您可以记录一个类或方法。在此示例中,我们将使用 .doc() 装饰器为 Get 方法添加一个参数。
@ns_cisel.route('/kubehunt')
class KubeHunt(Resource):
    @ns_cisel.doc(params={'ipaddress': 'The Ip address of the cluster k8s'})
    def get(self):
        ipaddress = request.args.get('ipaddress')
        output = subprocess.check_output("kube-hunter --remote "+ipaddress+" --enable-cve-hunting --report json", shell=True)
        return output.decode("utf-8")
在这个例子中,参数是 Kubernetes 集群的 ip 地址,我们可以直接在 swagger 文档中看到,甚至可以尝试一下。
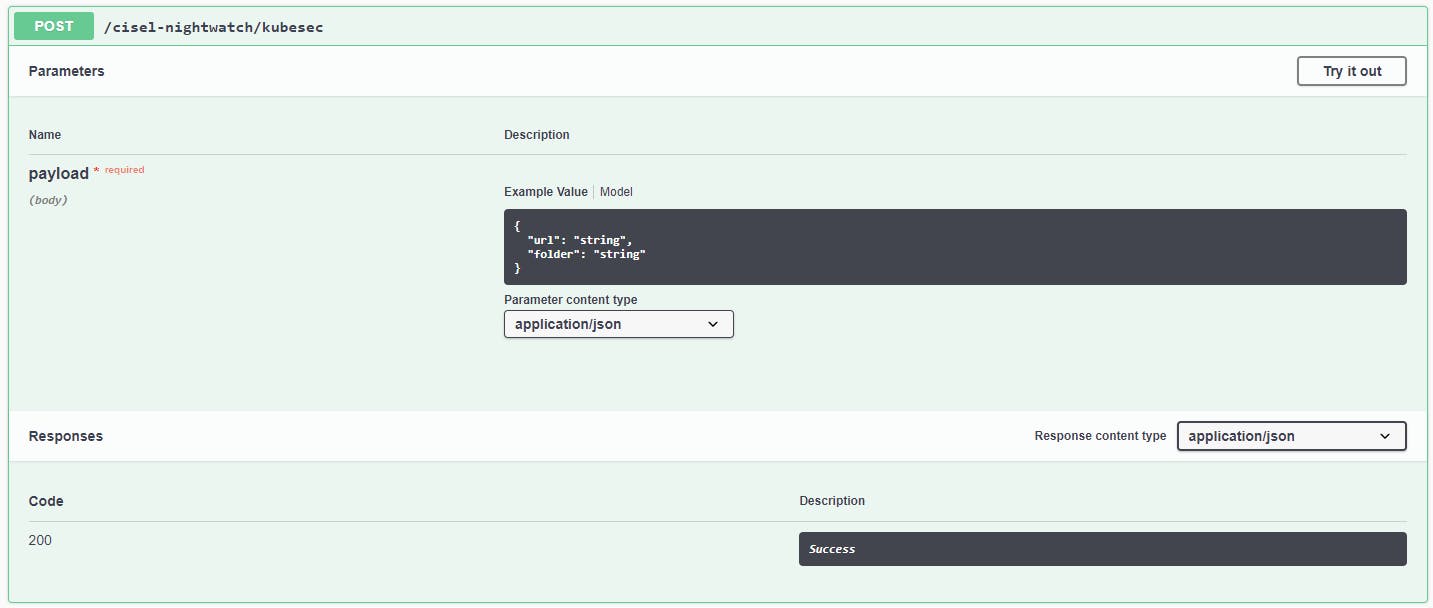
POST 方法的文档
对于此示例,我们将向 Post 方法发送一个 json 正文。它仍在 .doc() 运算符中,您可以使用参数 body 来定义您期望的正文类型。为了呈现一个漂亮的招摇文档,您可以创建一个模型来定义您的 json 主体的不同字段。
kubesecFields = ns_cisel.model('kubesec model', {
    'url': fields.String(description='URL Git repo', required=True),
    'folder': fields.String(description='Folder in the repo', required=True)
})

@ns_cisel.route('/kubesec')
class KubeSec(Resource):
    @ns_cisel.doc(body=kubesecFields)
    def post(self):
        content = request.json
        urlGit = content['url']
        folder = content['folder']
        output = subprocess.check_output('git clone '+urlGit+'; cd '+folder+'; find . -type f -name "*.yaml" -exec kubesec scan {} \;', shell=True)
        return output.decode("utf-8")
在此示例中,工具 kubesec 需要一个 URL 和一个文件夹字符串。我们可以在 swager 文档中看到 post 方法需要在 body 中有一个 json 内容,甚至可以直接尝试。
享受!!
如果您有任何问题,请随时评论这篇文章。
chisel.ch

Python社区为您提供最前沿的新闻资讯和知识内容
更多推荐

 0
0 0
0- 0


 已为社区贡献126440条内容

所有评论(0)