FAST API - 入门
·
简介
本文是关于如何使用FastAPI框架构建 API 的系列文章的开始。
环境
本演练将在 macOS 上构建。但是,您也没有理由不能在 Windows 上跟进。如果可能,我将尝试为两者提供说明。
本文的代码可以在以下GitHub Repo中找到。每个文件夹将包含一个单独的项目,该项目分配给该系列中的指定文章。
工具
-
Python 3
-
macOS
-
VS 代码(编辑器),带有 Microsoft 的 Python 扩展
Python 虚拟环境
导航到您选择的目录以设置新的 FastAPI 项目。在您的新目录中,遵循下一个命令行/终端脚本。
虚拟环境是保持不同项目模块/库彼此分离的 Python 最佳实践。您可以使用
pip freeze命令将所需的库添加到requirements.txt文件中。这允许您稍后重新安装项目所需的库。
Windows 中的设置
# Create Virtual Environment
python3 -m venv venv

# Change VS Code Python Interpreter to the VENV python Version

# Start Virtual Environment
venv\Scripts\activate.bat

# Command Prompt will show running Virtual Environment
macOS 中的## 设置
# Create Virtual Environment
python3 -m venv venv

# Change VS Code Python Interpreter to the VENV python Version

# Start Virtual Environment
source venv/bin/activate

# Command Prompt will show running Virtual Environment
安装包
# Install FAST API with all dependencies for now
pip install "FastAPI[all]"
运行设置命令应类似于以下屏幕截图。激活的虚拟环境显示在终端行venv的开头。

FastAPI Hello World 示例
REF:fastapi.tiangolo.com/tutorial/first-steps
创建一个名为:app.py的新文件
# app.py
from fastapi import FastAPI

app = FastAPI()

@app.get("/")
async def root():
    return { "message": "Hello world" }
运行 FastAPI 服务器
从您的终端或 VS Code 中的集成终端,运行以下命令来启动 API 服务器。
# Start up the server
# First app is the app filename
# Second app is the name of the FastAPI instance in the app.py file
# --reload is a hot reload flag for the FastAPI Server

uvicorn app:app --reload
启动服务器将显示正在运行的 URL 和端口。

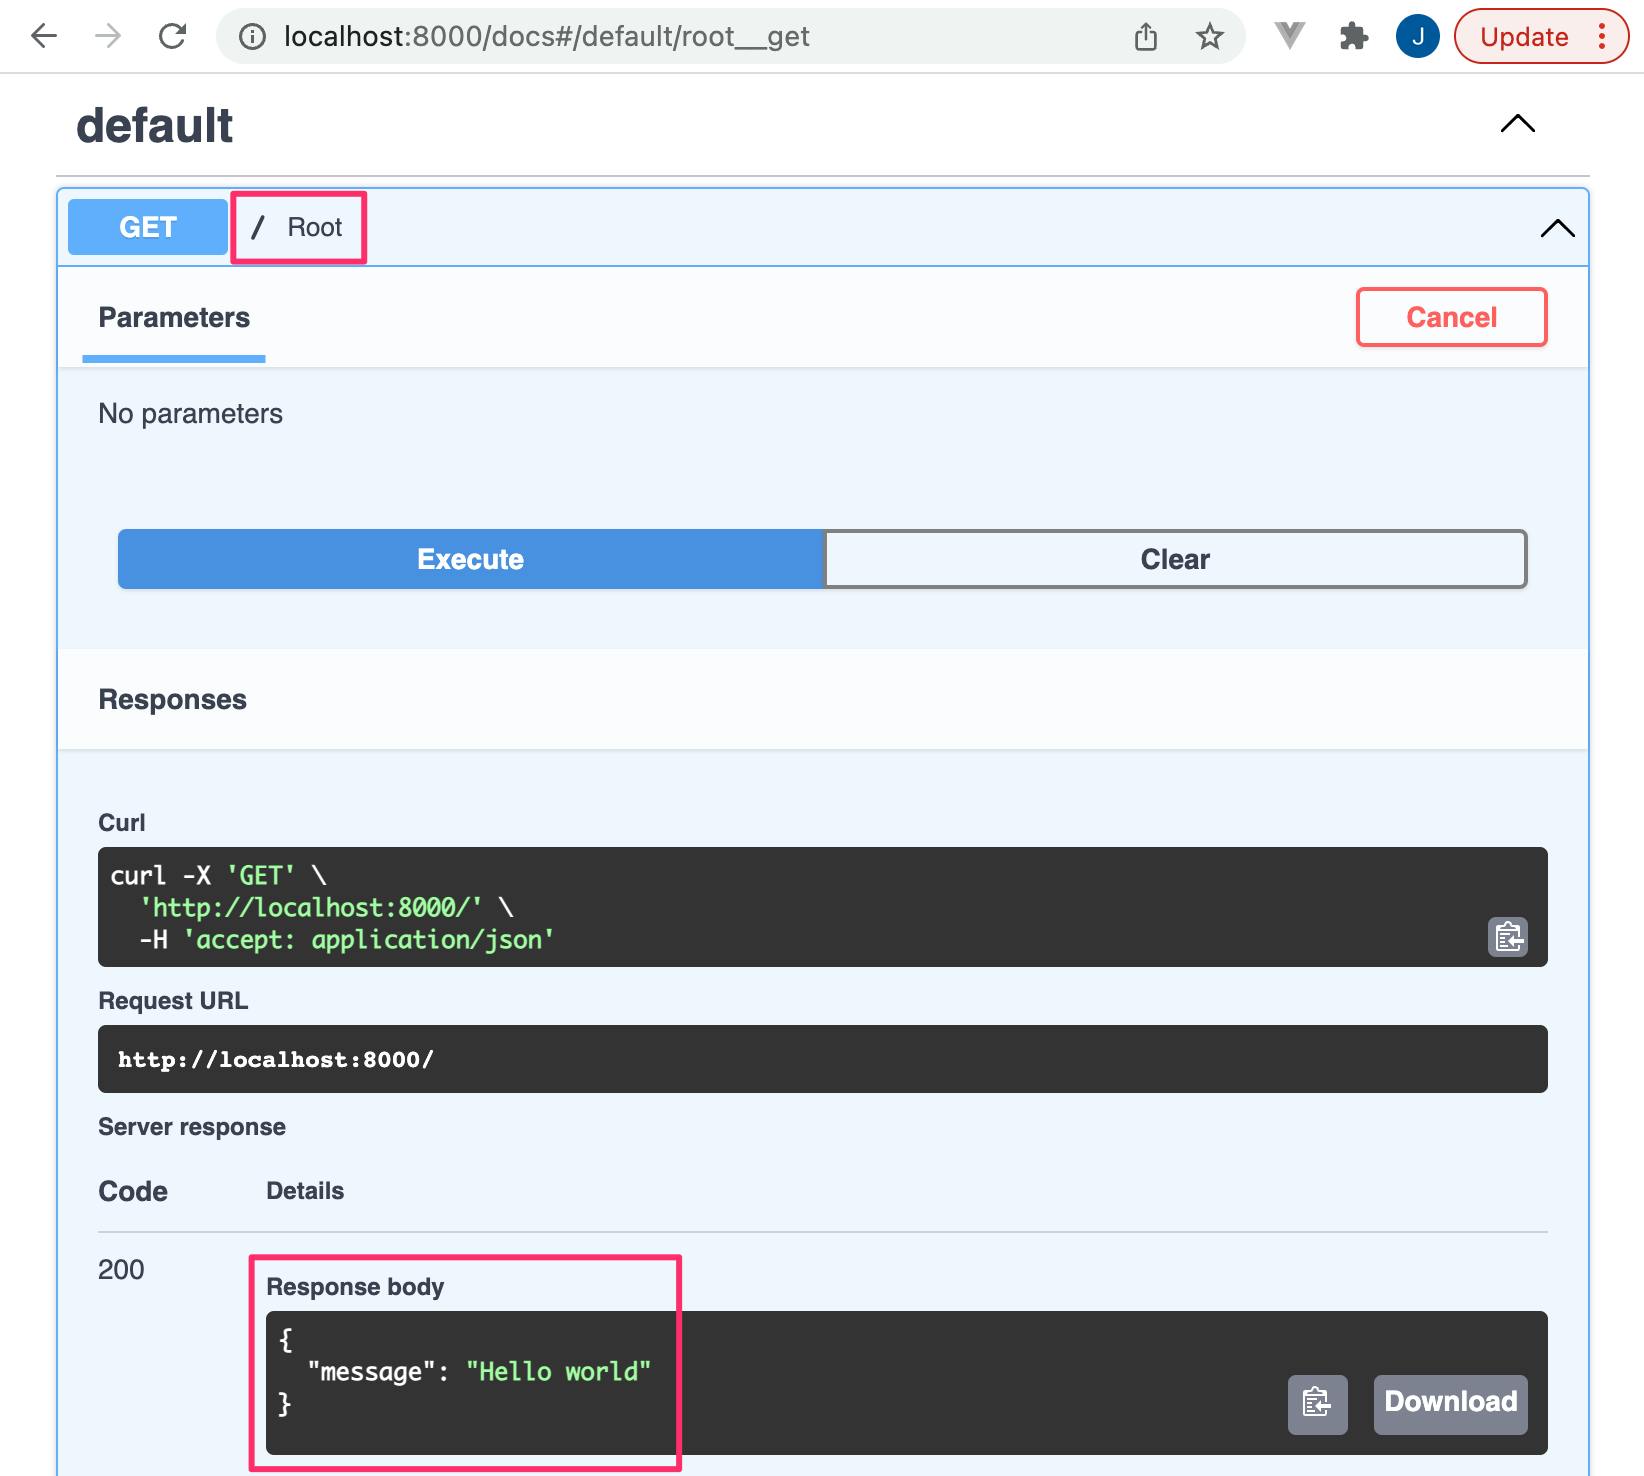
访问http://localhost:8000/docs以查看 FastAPI 服务器的 Swagger 文档。默认情况下,ReDoc 界面也可在以下 URL 获得:http://localhost:8000/redoc。
下面示例中的默认端点/将返回 Hello World 有效负载。
本系列中的文章将介绍有关安全性、数据库连接等的进一步配置。

Python社区为您提供最前沿的新闻资讯和知识内容
更多推荐

 0
0 0
0- 0


 已为社区贡献126442条内容

所有评论(0)