How I Automated Installation of a Kubernetes Cluster with Ansible
Introduction
There are several Kubernetes installation tools provided by various vendors. In this article, we will learn to use Ansible and kubeadm.
Ansible will help automate some of the more repetitive tasks like system update and upgrade, user creation, dependency installation, and network setup in the cluster. It will also make creating additional clusters or recreating existing clusters much simpler and with less human intervention.
Kubeadm is an automation tool that will install and configure Kubernetes components such as the API server, Controller Manager, and Kube DNS
Prerequisites
- One master node or control plane (a node in k8s is a running virtual machine or server) with at least 2GB RAM and 2 vCPUs
- Two worker nodes (workload runners)
- An SSH key pair on your local machine.
- Ansible installed on your local machine.
Step 1 — Create a Working Directory and Ansible Inventory File
Create a directory named ~/my-cluster in the home directory of your local machine and cd into it:
mkdir  ~/my-cluster
cd  ~/my-cluster
Ansible uses an inventory file (basically, a list of servers) to communicate with your servers.
Create a file named ~/my-cluster/hosts using vim or your favorite text editor:
vim ~/my-cluster/hosts
Edit this hosts file with sudo as root.
Put the following into the file ~/my-cluster/hosts
[masters]
master ansible_host=cp_ip ansible_user=root

[workers]
worker1 ansible_host=wp1_ip ansible_user=root
worker2 ansible_host=wp2_ip ansible_user=root

[all:vars]
ansible_python_interpreter=/usr/bin/python3
The first line specifies a group named masters, with a server entry named master, cp_ip as the master nodes’IP and that Ansible should run remote commands as the root user.
Same applies to the group named workers.
The last line of the file tells Ansible to use the remote servers’ Python 3 interpreters for its management operations.
Replace cp_ip, wp1_ip and wp2_ip with the IPs you got from your provider
Save and close the file after you’ve added the text.
Step 2 — create a play that will run on all servers
Note: You should be able to SSH from your local machine into each server as the root user with the SSH key pair generated from your cloud provider. Meaning keys should be present in the appropriate folder
Create a file named ~/my-cluster/clusterInit.yml:
Add the following steps of the play to the file
- To update and upgrade the system, if the last one is more than 86400 seconds ago
- hosts: all
  become: yes
    tasks:

    - name: update and upgrade apt package
      apt:
        upgrade: yes
        update_cache: yes
        cache_valid_time: 86400
- Create a non-root user “student” with a home directory and default shell bash,also append the user to existing groups
    - name: create the 'student' user
      user: name=student append=yes state=present create_home=yes shell=/bin/bash
- Allow the student user have passwordless sudo privileges
    - name: allow 'student' to have passwordless sudo
      lineinfile:
        dest: /etc/sudoers
        line: 'student ALL=(ALL) NOPASSWD: ALL'
        validate: 'visudo -cf %s'
- Set up authorized keys for the student user
    - name: set up authorized keys for the student user
      authorized_key: user=student key="{{item}}"
      with_file:
        - ~/.ssh/id_rsa.pub
- Install Docker - a container runtime. It is the component that runs your containers
    - name: install Docker
      apt:
        name: "docker.io"
        state: present
        update_cache: yes
- Install the APT transport HTTPS
    - name: install APT Transport HTTPS
      apt:
        name: apt-transport-https
        state: present
- Add a new repo for kubernetes
    - name: add Kubernetes' APT repository
      apt_repository:
        repo: deb http://apt.kubernetes.io/  kubernetes-xenial main
        state: present
        filename: 'kubernetes'
- Add a GPG key for the packages.
     - name: add Kubernetes apt-key
       apt_key:
         url: https://packages.cloud.google.com/apt/doc/apt-key.gpg
         state: present
- Install the necessary software. Run the equivalent of apt-get update before the operation.
      - name: install kubeadm
        apt:
          name: kubeadm=1.21.3
          state: present
          update_cache: true


      - name: install kubelet
        apt:
          name: kubelet=1.21.3
          state: present
At this point, we did not install kubectl because we will not be needing it in our worker nodes
Step 3 — create a play that will run on the masters group servers
Add the following steps of the play to the file from step 2
We are performing the operations as root unless stated otherwise in tasks
- Install kubectl.
- hosts: masters
  become: yes
    tasks:

      - name: install kubectl
        apt:
          name: kubectl=1.21.3
          state: present
          force: yes

      - name: hold the software at the recent but stable version
        shell: apt-mark hold kubectl
- Download Calico config file. The CNI plugin
      - name: Download Calico as a network plugin which will allow us to use Network Policies
        get_url:
          url: https://docs.projectcalico.org/manifests/calico.yaml
          dest: /home/student
          owner: "student"
          mode: "0740"
- create a configuration file for the cluster
      - name: Delete previous configuration file if present.
        file:
          path:  $HOME/kubeadm-config.yaml
          state: absent

      - name: Create a configuration file for the cluster.
        file:
          path:  $HOME/kubeadm-config.yaml
          state: touch
          owner: root
          group: root
          mode: '0700'
- Set the configuration for the cluster
      - name: Set the configuration file for the cluster.
        blockinfile:
          path:  $HOME/kubeadm-config.yaml
          marker: ""
          block: |
            apiVersion: kubeadm.k8s.io/v1beta2
            kind: ClusterConfiguration
            kubernetesVersion: 1.21.3
            networking:
              podSubnet: 192.168.0.0/16
- Initialize the cluster
      - name: Initialize the cluster
        shell:
        args:
          cmd: kubeadm init --config=kubeadm-config.yaml --upload-certs
          chdir: $HOME
- create the directory for the kube config file in user home
      - name: create .kube directory
        become: yes
        become_user: student
        file:
          path: $HOME/.kube
          state: directory
          mode: '0700'
- copy admin config generated into user home for use by kubectl
      - name: copy admin.conf to user's kube config
        become: yes
        become_user: root
        become_method: sudo
        copy:
          src: /etc/kubernetes/admin.conf
          dest: /home/student/.kube/config
          remote_src: yes
          owner: student
          mode: '0740'
- install the Pod network from the config file previously downloaded
      - name: install Pod network
        become: yes
        become_user: student
        shell: kubectl apply -f calico.yaml
        args:
          chdir: $HOME
- get the join command and set it for future use in tasks
      - name: get join command
        become: yes
        become_user: student
        shell: kubeadm token create --print-join-command
        register: join_command_raw

      - name: set join command
        become: yes
        become_user: student
        set_fact:
          join_command: "{{ join_command_raw.stdout_lines[0] }}"
Step 4 — add the play for the workers group to file
- grow the cluster by adding worker nodes, Ansible gets the set fact from the host vars
 - hosts: workers
    become: yes
    tasks:

      - name: join cluster
        become_user: root
        become_method: sudo
        shell: "{{ hostvars['master'].join_command }}"
        args:
          chdir: $HOME
Now your playbook should look like this
---
  - hosts: all
    become: yes
    tasks:

      - name: update and upgrade apt package
        apt:
          upgrade: "yes"
          update_cache: "yes"
          cache_valid_time: "86400"

      - name: create the 'student' user
        user: name=student state=present create_home=yes shell=/bin/bash group=admin

      - name: allow 'student' to have passwordless sudo
        lineinfile:
          dest: /etc/sudoers
          line: 'student ALL=(ALL) NOPASSWD: ALL'
          validate: 'visudo -cf %s'

      - name: set up authorized keys for the student user
        authorized_key: user=student key="{{item}}"
        with_file:
          - ~/.ssh/id_rsa.pub

      - name: install Docker
        apt:
          name: "docker.io"
          state: present
          update_cache: yes


      - name: install APT Transport HTTPS
        apt:
          name: apt-transport-https
          state: present

      - name: add Kubernetes apt-key
        apt_key:
          url: https://packages.cloud.google.com/apt/doc/apt-key.gpg
          state: present

      - name: add Kubernetes' APT repository
        apt_repository:
          repo: deb http://apt.kubernetes.io/  kubernetes-xenial main
          state: present
          filename: 'kubernetes'


      - name: install kubelet
        apt:
          name: kubelet=1.21.3
          state: present
          update_cache: true

      - name: install kubeadm
        apt:
          name: kubeadm=1.21.3
          state: present


      - name: hold the software at the recent but stable version
        shell: apt-mark hold kubelet kubeadm


  - hosts: masters
    become: yes
    tasks:

      - name: install kubectl
        apt:
          name: kubectl=1.21.3
          state: present
          force: yes

      - name: hold the software at the recent but stable version
        shell: apt-mark hold kubectl

      - name: Download Calico as a network plugin which will allow us to use Network Policies
        get_url:
          url: https://docs.projectcalico.org/manifests/calico.yaml
          dest: /home/student
          owner: "student"
          mode: "0740"

      - name: Delete previous configuration file if present.
        file:
          path:  $HOME/kubeadm-config.yaml
          state: absent

      - name: Create a configuration file for the cluster.
        file:
          path:  $HOME/kubeadm-config.yaml
          state: touch
          owner: root
          group: root
          mode: '0700'

      - name: Set the configuration file for the cluster.
        blockinfile:
          path:  $HOME/kubeadm-config.yaml
          marker: ""
          block: |
            apiVersion: kubeadm.k8s.io/v1beta2
            kind: ClusterConfiguration
            kubernetesVersion: 1.21.3
            networking:
              podSubnet: 192.168.0.0/16

      - name: Initialize the cluster
        shell:
        args:
          cmd: kubeadm init --config=kubeadm-config.yaml --upload-certs
          chdir: $HOME

      - name: create .kube directory
        become: yes
        become_user: student
        file:
          path: $HOME/.kube
          state: directory
          mode: '0700'

      - name: copy admin.conf to user's kube config
        become: yes
        become_user: root
        become_method: sudo
        copy:
          src: /etc/kubernetes/admin.conf
          dest: /home/student/.kube/config
          remote_src: yes
          owner: student
          mode: "0700"

      - name: install Pod network
        become: yes
        become_user: student
        shell: kubectl apply -f calico.yaml
        args:
          chdir: $HOME


      - name: get join command
        become: yes
        become_user: student
        shell: kubeadm token create --print-join-command
        register: join_command_raw

      - name: set join command
        become: yes
        become_user: student
        set_fact:
          join_command: "{{ join_command_raw.stdout_lines[0] }}"


  - hosts: workers
    become: yes
    tasks:

      - name: join cluster
        become_user: root
        become_method: sudo
        shell: "{{ hostvars['master'].join_command }} "
        args:
          chdir: $HOME
Lab
Now let's run our playbook
I provisioned four (4) servers -3 Ubuntu 18.04 and 1 Centos 7, for this project using Digital Ocean as cloud provider, you can use your favorite.
Wonder why there is a fourth server? I will be using one (Centos 7) as my local machine.
Also I am using Termius SSH client on my mobile device because of its portability
Step 1, 2, 3 and 4 is done, working directory, host file and playbook created
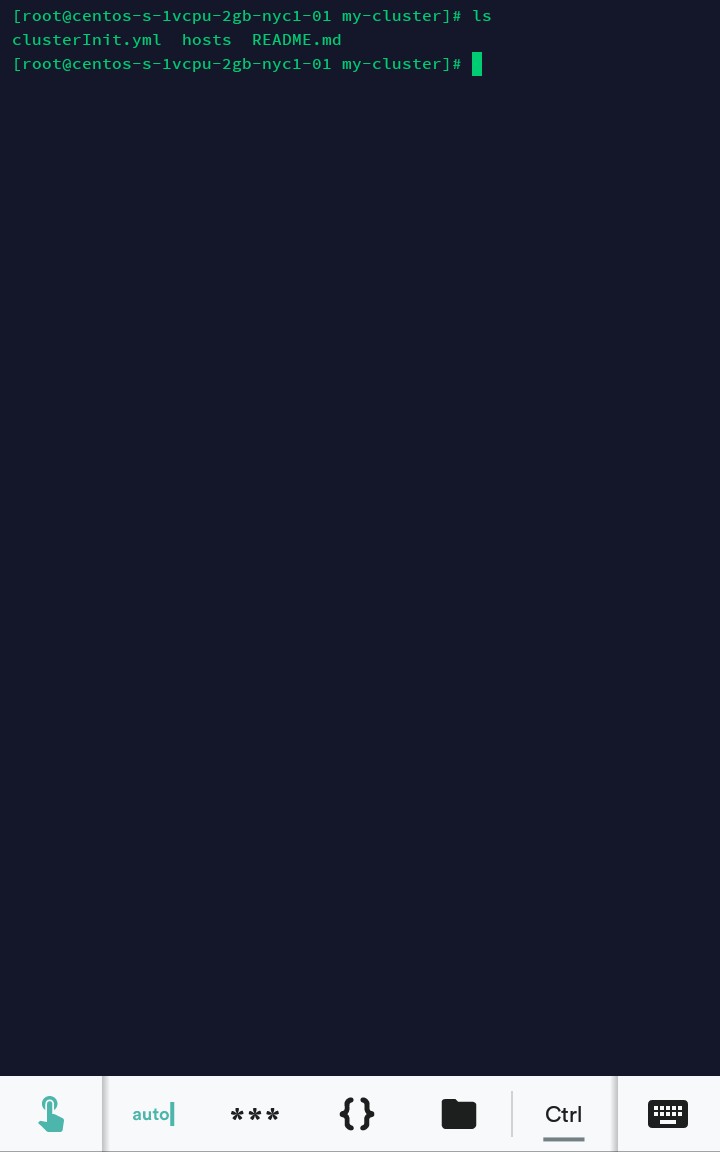
Run your playbook with the following command in your WD
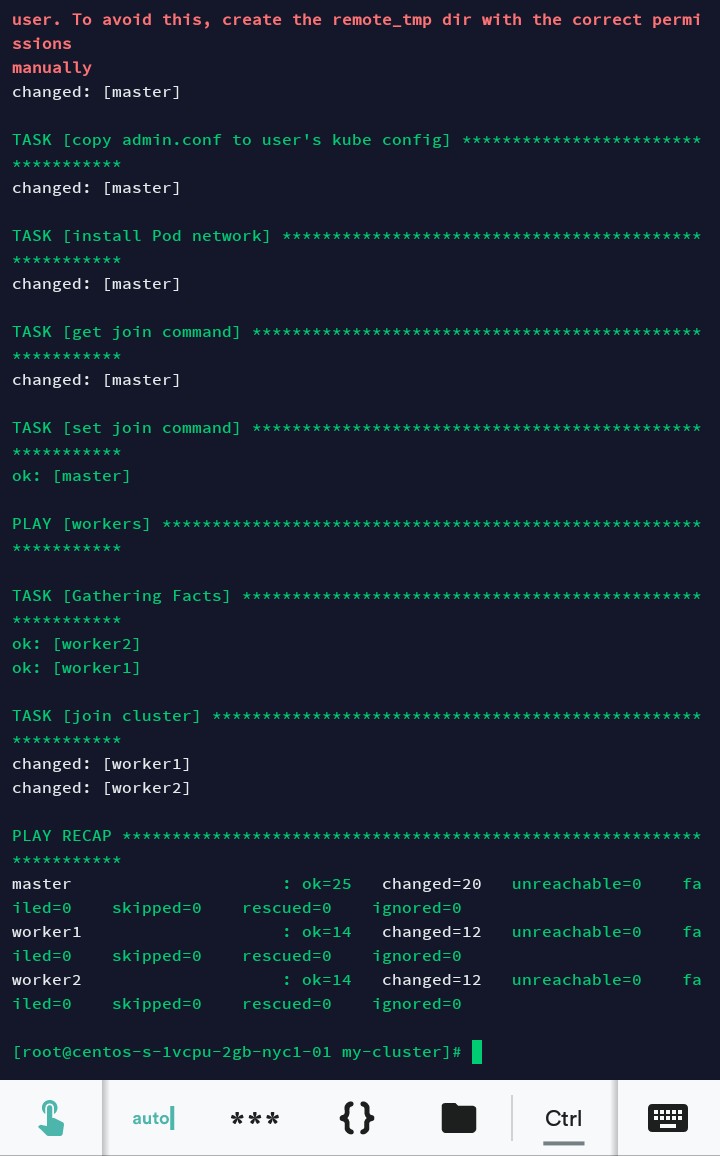
ansible-playbook -i hosts clusterInit.yml --private-key ~/id_rsa
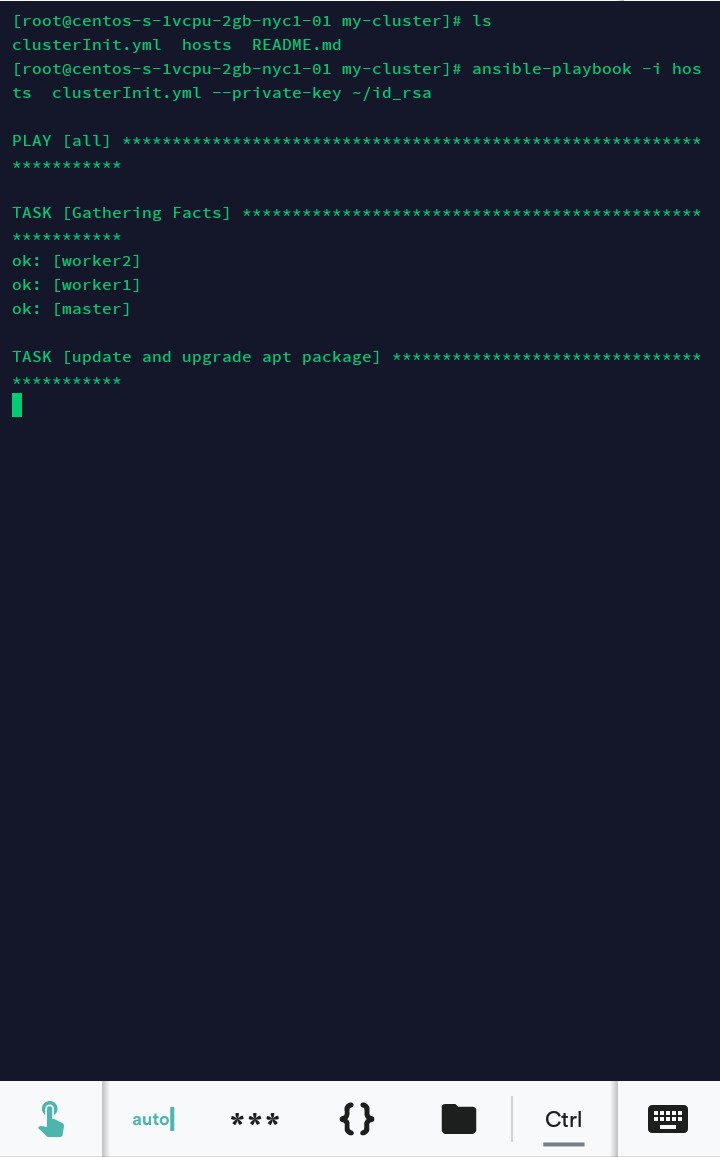
Part of the output ommited for brevity
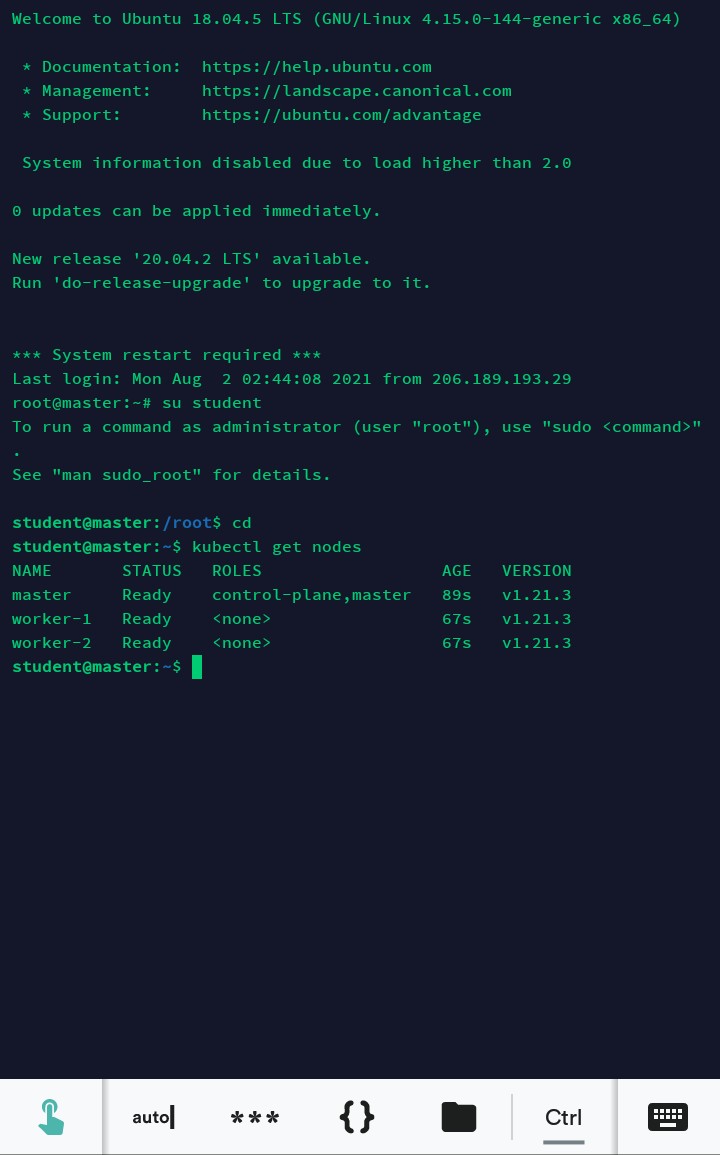
Now go to your master node to get the list of nodes in the cluster by running the command as the student user
kubectl get nodes
Thanks for reading. I hope you enjoyed it as much as I did writing it
Please drop your comments and concerns below
Link to source code here

K8S/Kubernetes社区为您提供最前沿的新闻资讯和知识内容
更多推荐
 0
0 0
0- 0


 已为社区贡献20439条内容

所有评论(0)