Docker环境下配置Es自定义分词器(ik)
采用nginx配合使用自定义分词器,完成搭建,一步到位
分词
一个 tokenizer(分词器)接收一个字符流,将之分割为独立的 tokens(词元,通常是独立 的单词),然后输出 tokens 流。 例如,whitespace tokenizer 遇到空白字符时分割文本。它会将文本 "Quick brown fox!" 分割 为 [Quick, brown, fox!]。 该 tokenizer(分词器)还负责记录各个 term(词条)的顺序或 position 位置(用于 phrase 短 语和 word proximity 词近邻查询),以及 term(词条)所代表的原始 word(单词)的 start(起始)和 end(结束)的 character offsets(字符偏移量)(用于高亮显示搜索的内容)。
Elasticsearch 提供了很多内置的分词器,可以用来构建 custom analyzers(自定义分词器)
1)、安装 ik 分词器
注意:不能用默认 elasticsearch-plugin install xxx.zip 进行自动安装
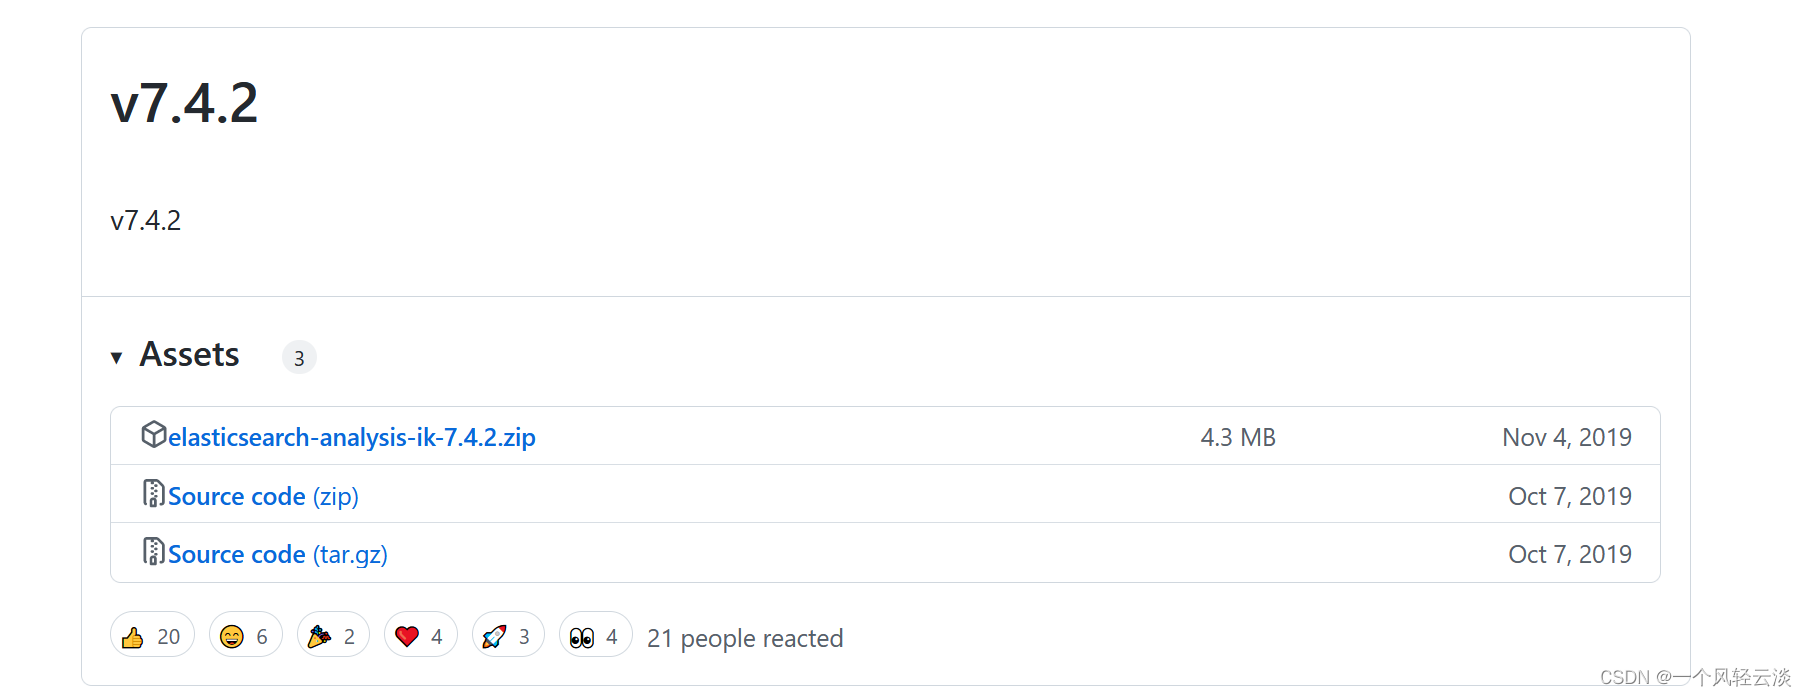
找到github上的开源分词器插件

找到对应的Es对应的版本,一定要找对应的版本,不然会出现一些乱七八糟的错误
下载elasticsearch-analysis-ik-7.4.2.zip
下载完解压以后传到虚拟机对应Docker中对应的Es挂载的插件位置

 将文件命名为ik
检查是不是安装好了,进入Es容器内部
docker exec -it 容器 id /bin/bash即可列出系统的分词器
elasticsearch-plugin list最后记得Es容器
2)、测试分词器
使用默认
POST _analyze
{
  "text": "我是中国人"
}
{
"tokens" : [
{
"token" : "我",
"start_offset" : 0,
"end_offset" : 1,
"type" : "<IDEOGRAPHIC>",
"position" : 0
},
{
"token" : "是",
"start_offset" : 1,
"end_offset" : 2,
"type" : "<IDEOGRAPHIC>",
"position" : 1
},
{
"token" : "中",
"start_offset" : 2,
"end_offset" : 3,
"type" : "<IDEOGRAPHIC>",
"position" : 2
},
{
"token" : "国",
"start_offset" : 3,
"end_offset" : 4,
"type" : "<IDEOGRAPHIC>",
"position" : 3
},
{
"token" : "人",
"start_offset" : 4,
"end_offset" : 5,
"type" : "<IDEOGRAPHIC>",
"position" : 4
}
]
}
使用分词器
POST _analyze
{
  "analyzer": "ik_smart",
  "text": "我是中国人"
}
{
"tokens" : [
{
"token" : "我",
"start_offset" : 0,
"end_offset" : 1,
"type" : "CN_CHAR",
"position" : 0
},
{
"token" : "是",
"start_offset" : 1,
"end_offset" : 2,
"type" : "CN_CHAR",
"position" : 1
},
{
"token" : "中国人",
"start_offset" : 2,
"end_offset" : 5,
"type" : "CN_WORD",
"position" : 2
}
]
}
另外一个分词器ik_max_word
POST _analyze
{
  "analyzer": "ik_max_word",
  "text": "我是中国人"
}
{
"tokens" : [
{
"token" : "我",
"start_offset" : 0,
"end_offset" : 1,
"type" : "CN_CHAR",
"position" : 0
},
{
"token" : "是",
"start_offset" : 1,
"end_offset" : 2,
"type" : "CN_CHAR",
"position" : 1
},
{
"token" : "中国人",
"start_offset" : 2,
"end_offset" : 5,
"type" : "CN_WORD",
"position" : 2
},
{
"token" : "中国",
"start_offset" : 2,
"end_offset" : 4,
"type" : "CN_WORD",
"position" : 3
},
{
"token" : "国人",
"start_offset" : 3,
"end_offset" : 5,
"type" : "CN_WORD",
"position" : 4
}
]
}
结论
能够看出不同的分词器,分词有明显的区别,所以以后定义一个索引不能再使用默 认的 mapping 了,要手工建立 mapping, 因为要选择分词器。
3)、自定义词库
这里采用nginx配合使用自定义分词器
安装 nginx
随便启动一个 nginx 实例,只是为了复制出配置
docker run -p 80:80 --name nginx -d nginx:1.10
将容器内的配置文件拷贝到当前目录:docker container cp nginx:/etc/nginx .
别忘了后面的点
修改文件名称:mv nginx conf 把这个 conf 移动到/mydata/nginx 下
终止原容器:docker stop nginx
执行命令删除原容器:docker rm $ContainerId
创建新的 nginx;执行以下命令
docker run -p 80:80 --name nginx \
-v /mydata/nginx/html:/usr/share/nginx/html \
-v /mydata/nginx/logs:/var/log/nginx \
-v /mydata/nginx/conf:/etc/nginx \
-d nginx:1.10
配置ik分词器配置
在nginx挂载的文件下的html中创建:
mkdir escd esvi fenci.txt
保存退出
修改/usr/share/elasticsearch/plugins/ik/config/中的 IKAnalyzer.cfg.xml
<?xml version="1.0" encoding="UTF-8"?>
<!DOCTYPE properties SYSTEM "http://java.sun.com/dtd/properties.dtd">
<properties>
<comment>IK Analyzer 扩展配置</comment>
<!--用户可以在这里配置自己的扩展字典 -->
<entry key="ext_dict"></entry>
<!--用户可以在这里配置自己的扩展停止词字典-->
<entry key="ext_stopwords"></entry>
<!--用户可以在这里配置远程扩展字典 -->
<entry key="remote_ext_dict">http://192.168.128.130/fenci/myword.txt</entry>
<!--用户可以在这里配置远程扩展停止词字典-->
<!-- <entry key="remote_ext_stopwords">words_location</entry> -->
</properties>
然后重启 es 服务器,重启 nginx。 在 kibana 中测试分词效果
测试
POST _analyze
{
  "analyzer": "ik_max_word",
  "text": "我是乔碧罗殿下"
}
{
"tokens" : [
{
"token" : "我",
"start_offset" : 0,
"end_offset" : 1,
"type" : "CN_CHAR",
"position" : 0
},
{
"token" : "是",
"start_offset" : 1,
"end_offset" : 2,
"type" : "CN_CHAR",
"position" : 1
},
{
"token" : "乔碧罗",
"start_offset" : 2,
"end_offset" : 5,
"type" : "CN_WORD",
"position" : 2
},
{
"token" : "殿下",
"start_offset" : 5,
"end_offset" : 7,
"type" : "CN_WORD",
"position" : 3
}
]
}
更新完成后,es 只会对新增的数据用新词分词。历史数据是不会重新分词的。如果想要历 史数据重新分词。需要执行:
POST my_index/_update_by_query?conflicts=proceed更多推荐
 已为社区贡献2条内容

 https://github.com/medcl/elasticsearch-analysis-ik/releases?after=v6.4.2&page=8


所有评论(0)