Go、Google Functions 和 Gitlab-ci 完美结合
上周我使用 Go 在gcp测试了谷歌功能,之后,我决定添加另一个我喜欢的服务gitlab。我非常喜欢它,所以我决定写这篇文章。
如果您知道如何添加帐户以在 GCP 上进行部署,或者您有帐户,则可以忽略此部分。
创建一个在 Gitlab 使用的帐户。
我将添加很多屏幕截图以使其清楚。
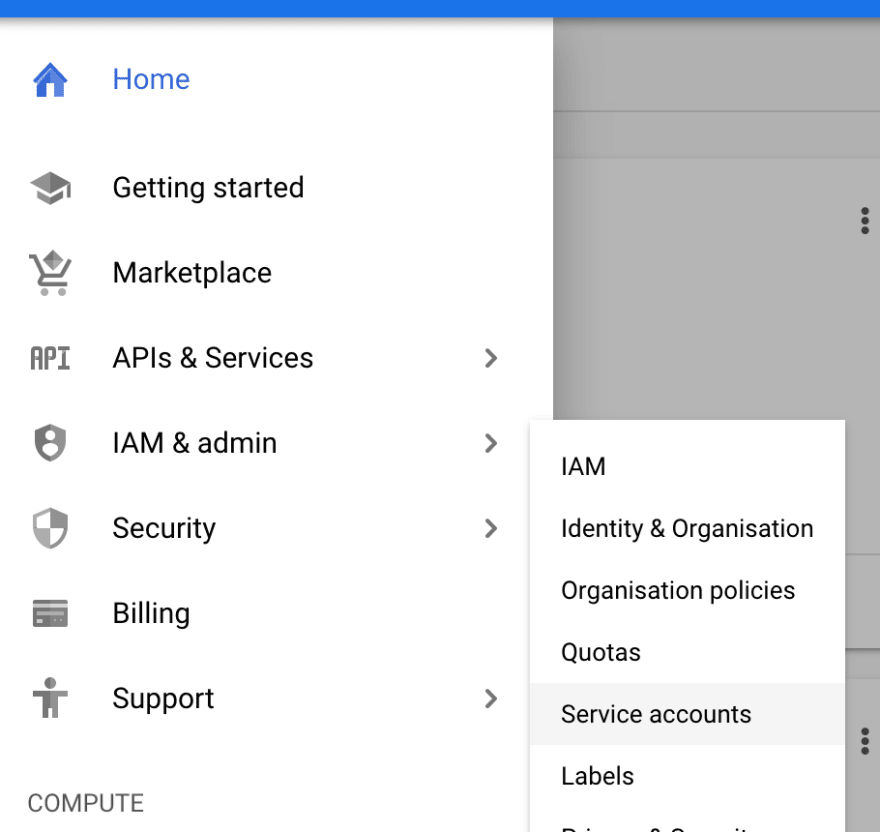
您需要访问 IAM & admin 然后是服务帐户。
[ ](https://res.cloudinary.com/practicaldev/image/fetch/s--yq1RnYxN--/c_limit%2Cf_auto%2Cfl_progressive%2Cq_auto%2Cw_880/https://thepracticaldev.s3。 amazonaws.com/i/li425pbjjwp44ifb9cbi.png)
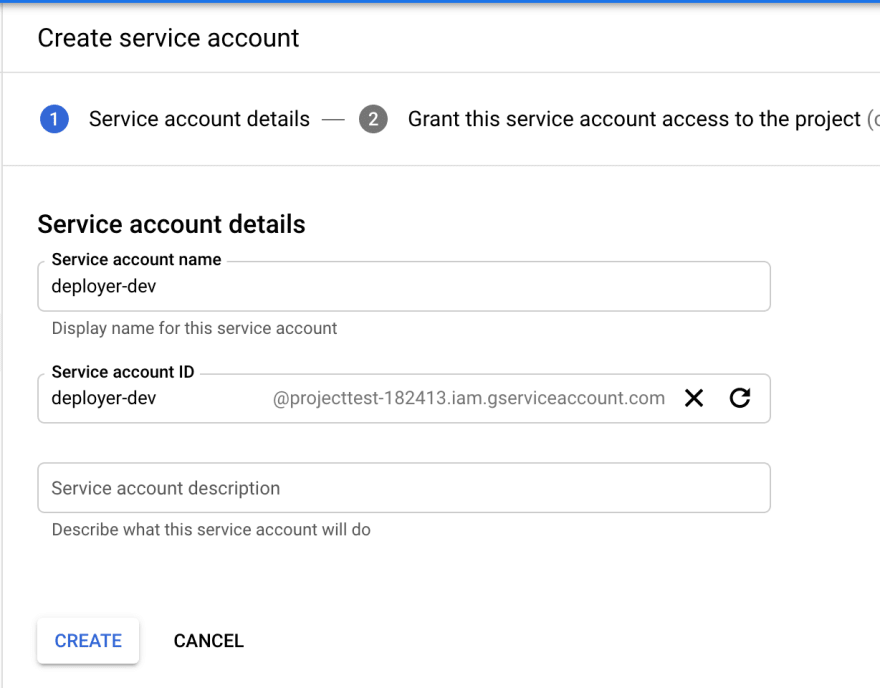
点击按钮“+创建服务帐户”
[ ](https://res.cloudinary.com/practicaldev/image/fetch/s--8xvnTX27--/c_limit%2Cf_auto%2Cfl_progressive%2Cq_auto%2Cw_880/https://thepracticaldev.s3。 amazonaws.com/i/e3avlb1trnb5c5oph89n.png)
输入名称以识别帐户
[ ](https://res.cloudinary.com/practicaldev/image/fetch/s--LM6b6xEO--/c_limit%2Cf_auto%2Cfl_progressive%2Cq_auto%2Cw_880/https://thepracticaldev.s3。 amazonaws.com/i/jesqynonz1celsilrzmx.png)
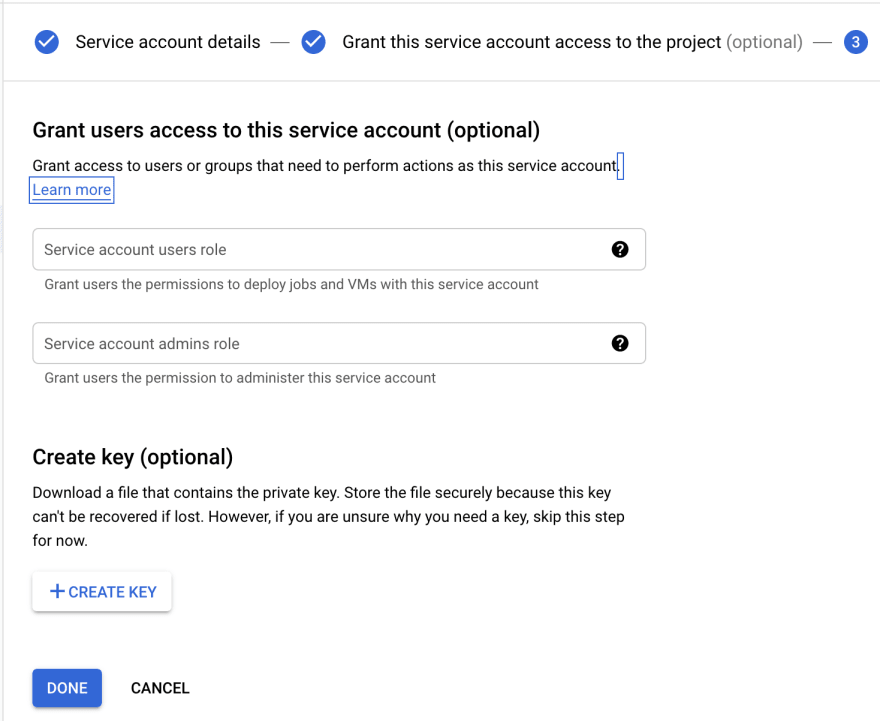
您需要添加 3 个角色
[ ](https://res.cloudinary.com/practicaldev/image/fetch/s--munq8Tw4--/c_limit%2Cf_auto%2Cfl_progressive%2Cq_auto%2Cw_880/https://thepracticaldev.s3。 amazonaws.com/i/zhd3b5sfs5zdr5g4nfib.png)
创建密钥
[ ](https://res.cloudinary.com/practicaldev/image/fetch/s---m8QQPXD--/c_limit%2Cf_auto%2Cfl_progressive%2Cq_auto%2Cw_880/https://thepracticaldev.s3 .amazonaws.com/i/0r5d9rzau63iqpq1q1pp.png)
检查 JSON 是否被选中,然后单击创建按钮
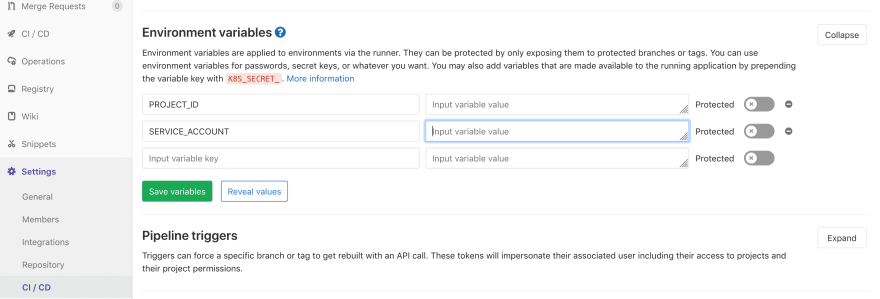
我们在 GCP 上完成了配置,现在我们将在存储库中添加环境变量。 PROJECT_ID 是项目的 ID,SERVICE_ACCOUNT 是您在创建密钥时下载的内容
[ ](https://res.cloudinary.com/practicaldev/image/fetch/s--8Zapsl6G--/c_limit%2Cf_auto%2Cfl_progressive%2Cq_auto%2Cw_880/https://thepracticaldev.s3。 amazonaws.com/i/gds21jd33zpsesieyqpb.png)
好的,现在我们将创建代码来测试我们的部署。我正在使用来自 Google](https://github.com/GoogleCloudPlatform/golang-samples/tree/master/functions/helloworld)的[示例
我们将创建 3 个文件,hello_world.go 就是函数
// Package helloworld provides a set of Cloud Function samples.
package helloworld

import (
    "fmt"
    "net/http"
)

// HelloGet is an HTTP Cloud Function.
func HelloGet(w http.ResponseWriter, r *http.Request) {
    fmt.Fprint(w, "Hello, World!")
}
进入全屏模式 退出全屏模式
hello_world_test.go 就是函数的测试
package helloworld

import (
    "io/ioutil"
    "net/http/httptest"
    "strings"
    "testing"
)

func TestHelloGet(t *testing.T) {
    payload := strings.NewReader("")
    req := httptest.NewRequest("GET", "/", payload)

    rr := httptest.NewRecorder()
    HelloGet(rr, req)

    out, err := ioutil.ReadAll(rr.Result().Body)
    if err != nil {
        t.Fatalf("ReadAll: %v", err)
    }
    want := "Hello, World!"
    if got := string(out); got != want {
        t.Errorf("HelloWorld = %q, want %q", got, want)
    }
}
进入全屏模式 退出全屏模式
和 .gitlab-ci.yml 是运行持续集成的配置
image: google/cloud-sdk:alpine

test_production:
  image: golang:alpine
  stage: test
  only:
  - production
  script:
  - CGO_ENABLED=0 go test ./...

deploy_production:
  stage: deploy
  environment: Production
  only:
  - production
  script:
  - echo $SERVICE_ACCOUNT > /tmp/$CI_PIPELINE_ID.json
  - gcloud auth activate-service-account --key-file /tmp/$CI_PIPELINE_ID.json
  - gcloud --quiet --project $PROJECT_ID functions deploy HelloGet --runtime go111 --trigger-http
  after_script:
  - rm /tmp/$CI_PIPELINE_ID.json
进入全屏模式 退出全屏模式
工作流程是,当我们在生产分支中合并更改时,操作将运行。
就是这样,正如您在下一个屏幕截图中看到的那样,部署已完成,来自 Google 的返回显示创建的 URL
[ ](https://res.cloudinary.com/practicaldev/image/fetch/s--cNKXmUCU--/c_limit%2Cf_auto%2Cfl_progressive%2Cq_auto%2Cw_880/https://thepracticaldev.s3。 amazonaws.com/i/ptb9e4zladmqjhfz7397.png)
就这些了,希望对你有用u003d)。仓库中可以看到代码
更多推荐
 已为社区贡献35528条内容


所有评论(0)