How To Develop a Docker Application on Windows using WSL, Visual Studio Code, and Docker Desktop
Introduction
The advent of the Windows Subsystem for Linux 2 (WSL 2 or WSL for short) has simplified Linux-based development on Windows. The WSL 2 allows for direct integration with Docker Desktop and has plugins for direct development using Visual Studio Code.
In this tutorial you’ll set up a development environment on Windows using Visual Studio Code, the WSL, and Docker Desktop. You’ll build a Python Flask web service in Docker to demonstrate the development functionality of these tools.
Prerequisites
In order to follow along with this guide, you’ll need:
-
Personal Computer with Windows 10 and the WSL 2 installed: You’ll want to ensure that the WSL is installed correctly and that you have Ubuntu 20.04 installed into the WSL. You can follow the tutorial How To Install the Windows Subsystem for Linux 2 on Microsoft Windows 10 to set this up.
-
VSCode Installed: You can download and install VSCode from its official website. You do not need to worry about installing plugins. The required plugins will be discussed in this tutorial.
Step 1 — Installing Docker Desktop and Connecting to the WSL
Docker is a common development tool used by developers to deploy applications. Docker Desktop has the advantage of also being able to run and integrate with your WSL Linux environments.
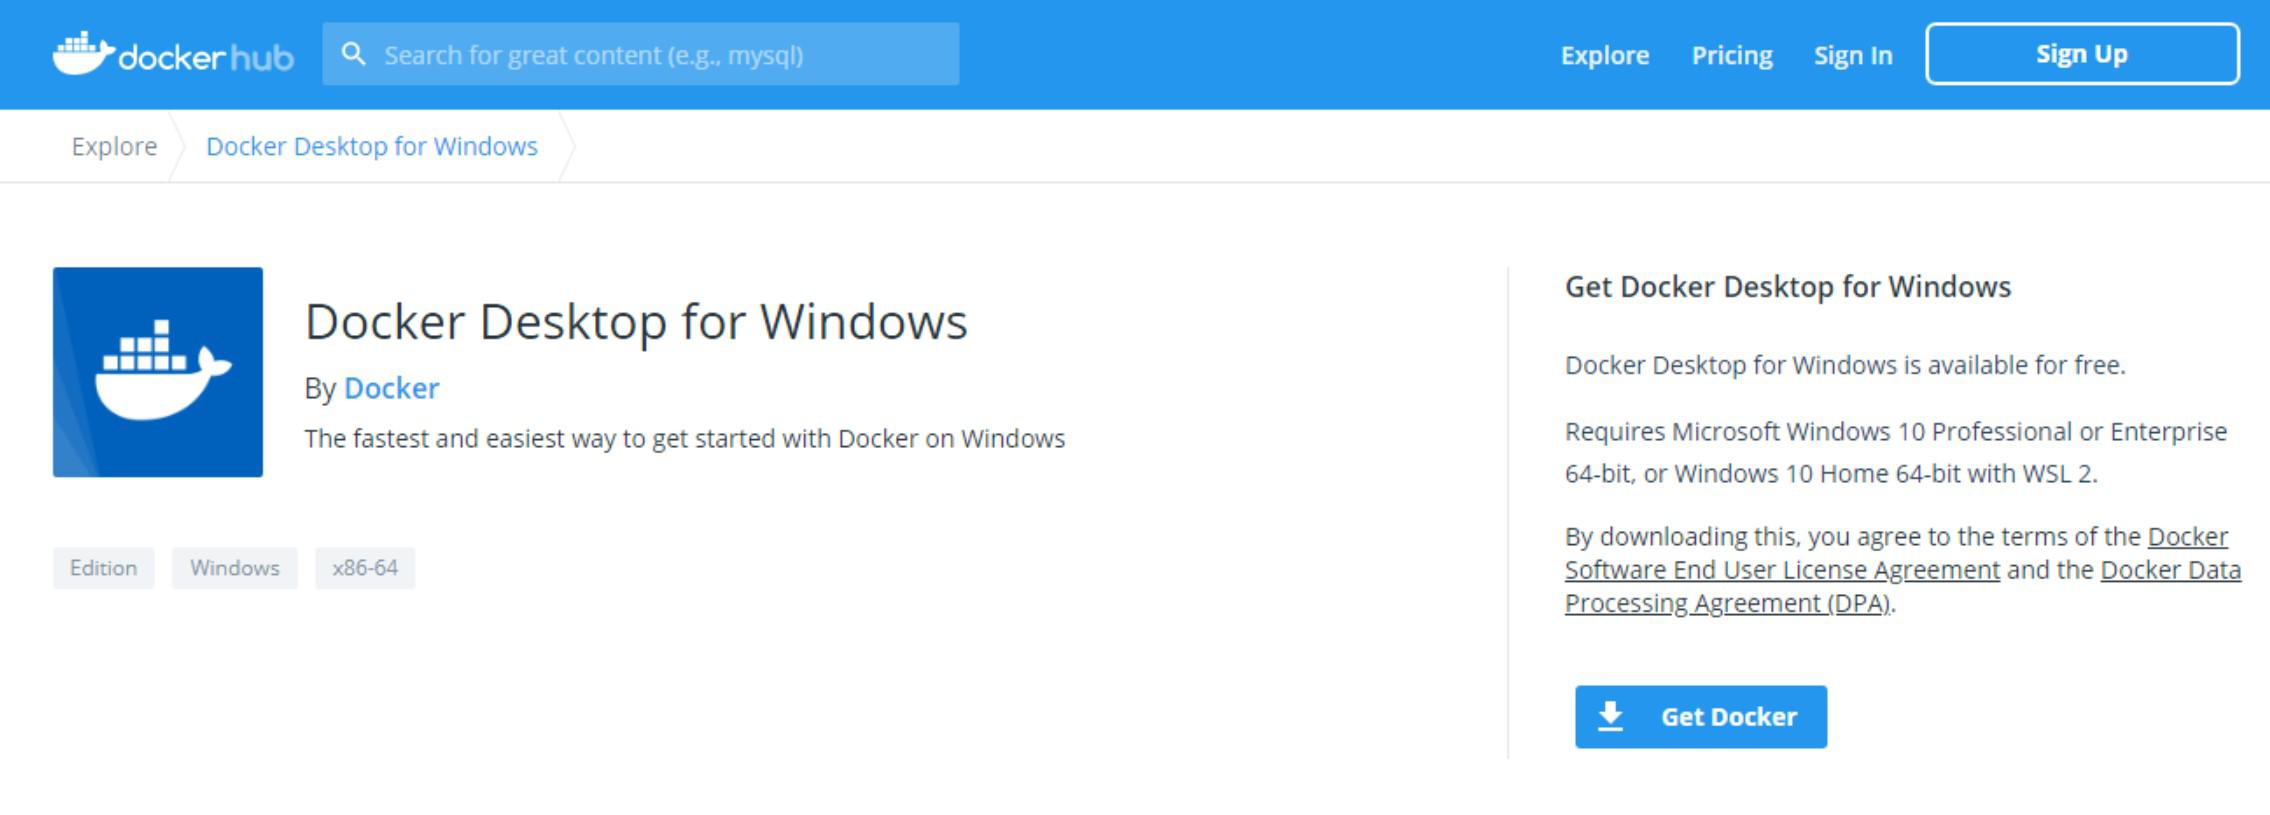
Set up Docker by downloading Docker Desktop from Docker’s website and clicking the Get Docker button to start the download.
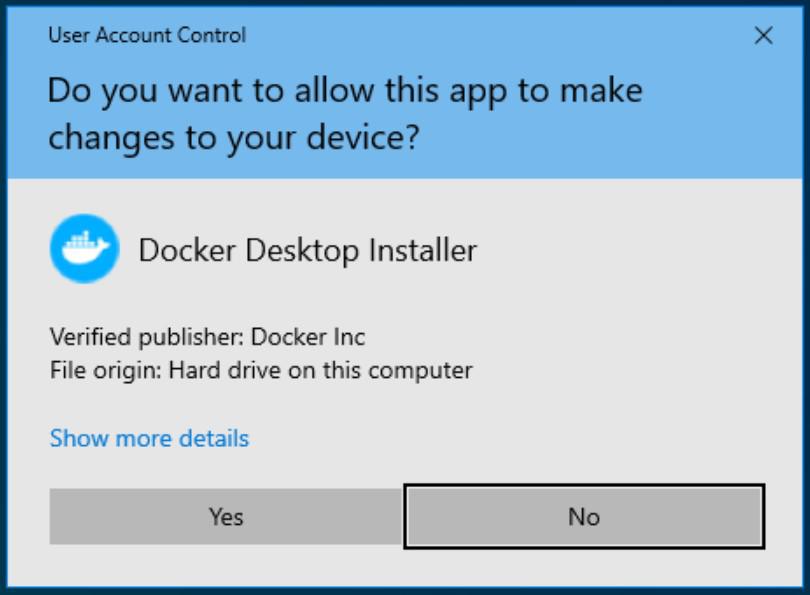
Run the executable once you get it downloaded and allow it to make changes.
During the installation make sure that Install required Windows components for WSL 2 is checked. Whether or not you want a Desktop icon is up to you.

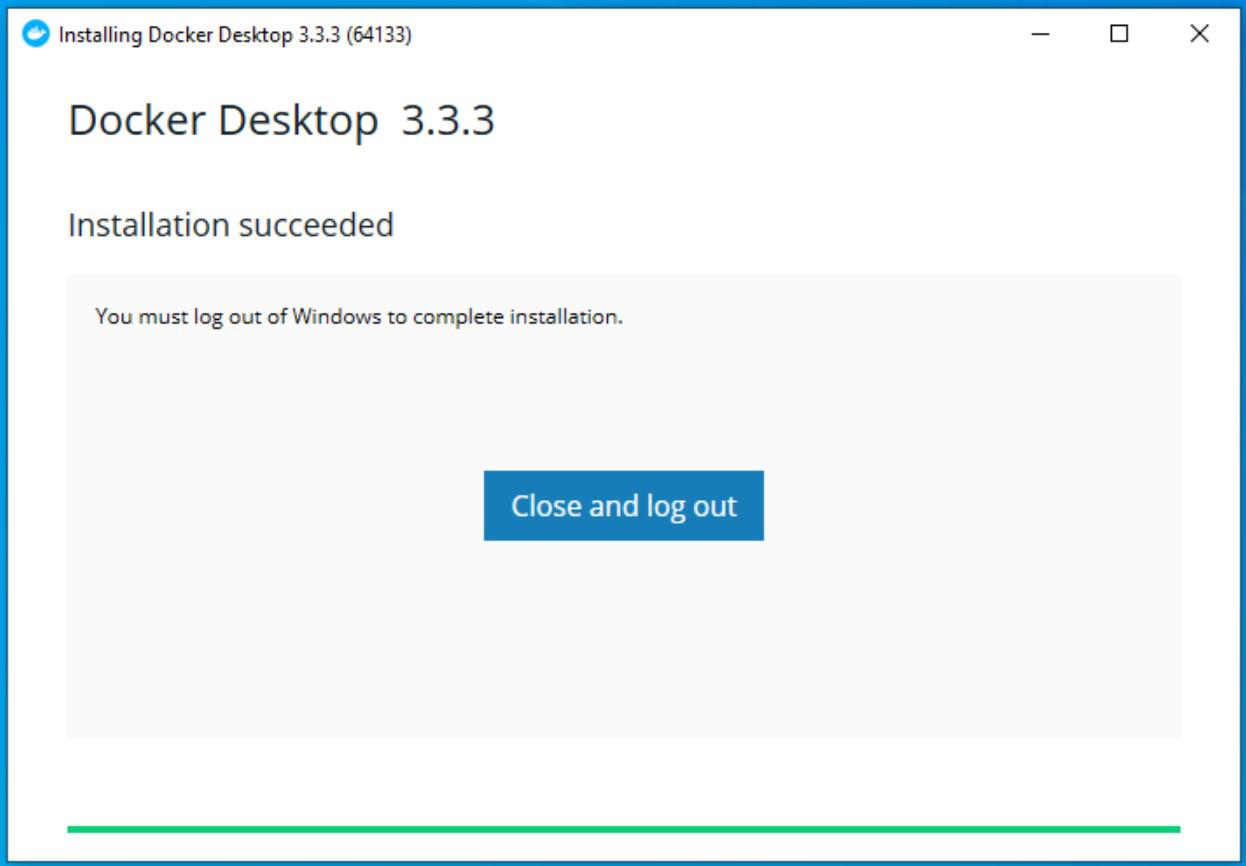
After the installation process is done you’ll be prompted to log out and back in for your changes to take effect. Click on the Close button and then make sure to log out and back in so that the changes take effect.
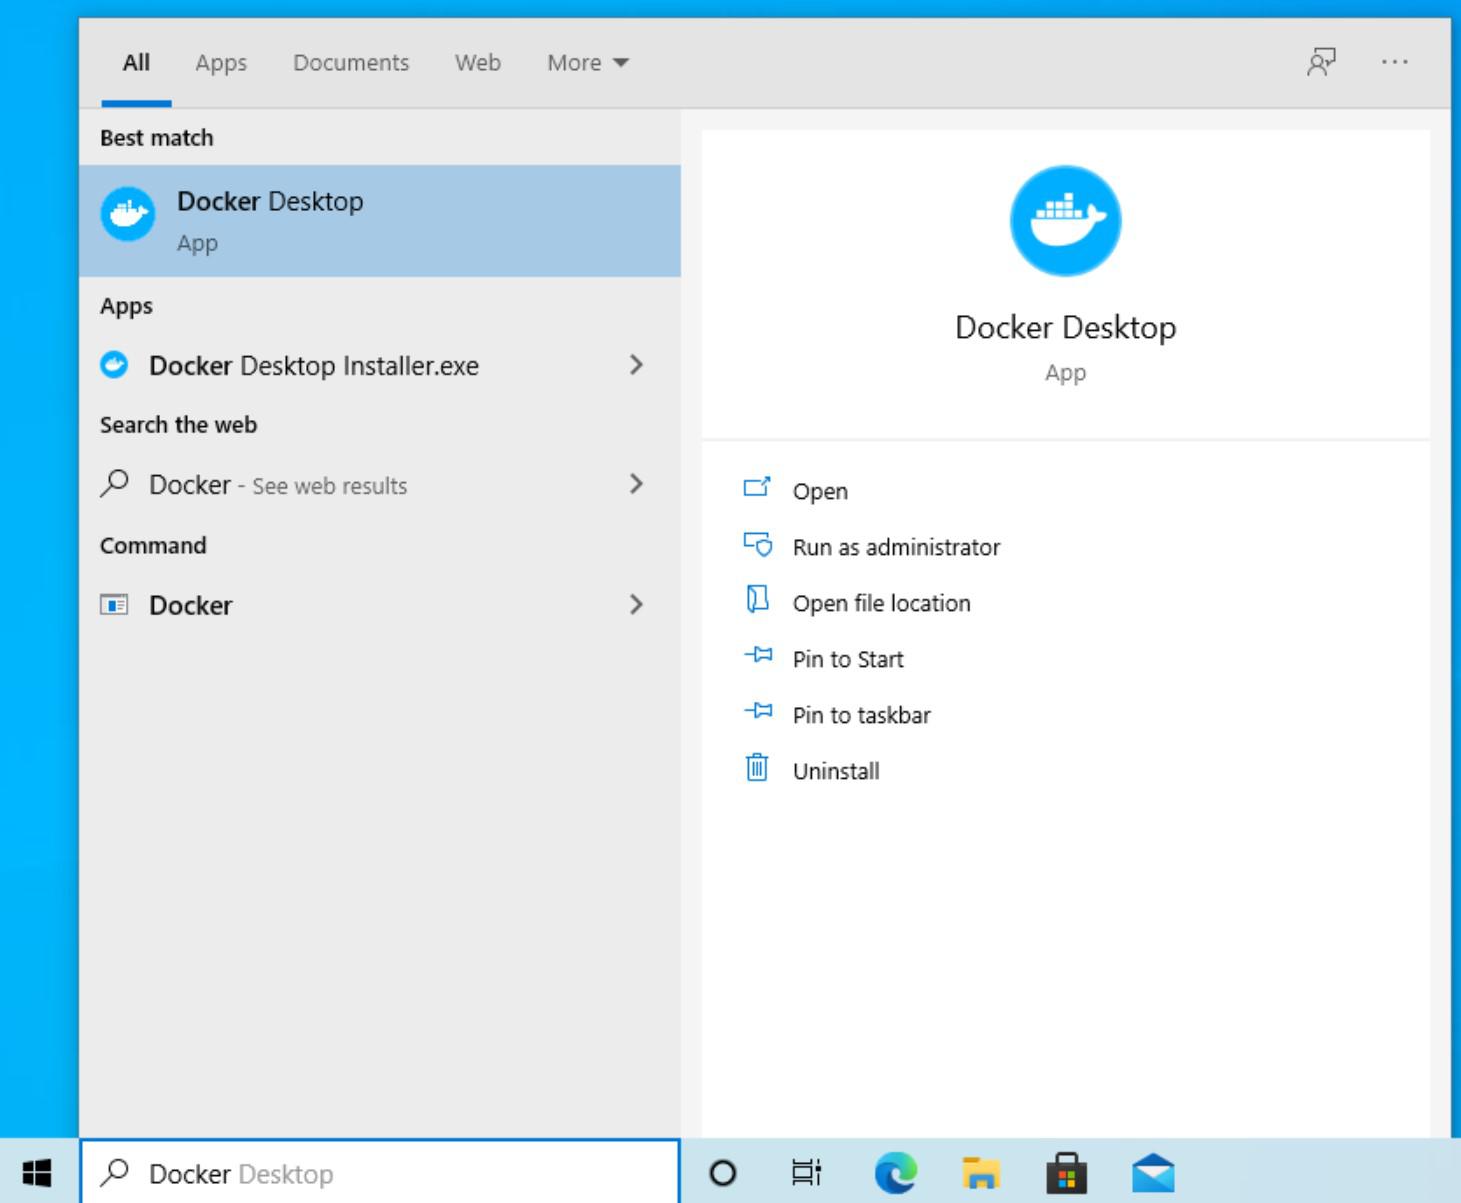
Log back in and launch Docker Desktop from the Start menu.
Warning: When you first launch Docker it will prompt you with a Docker tutorial.
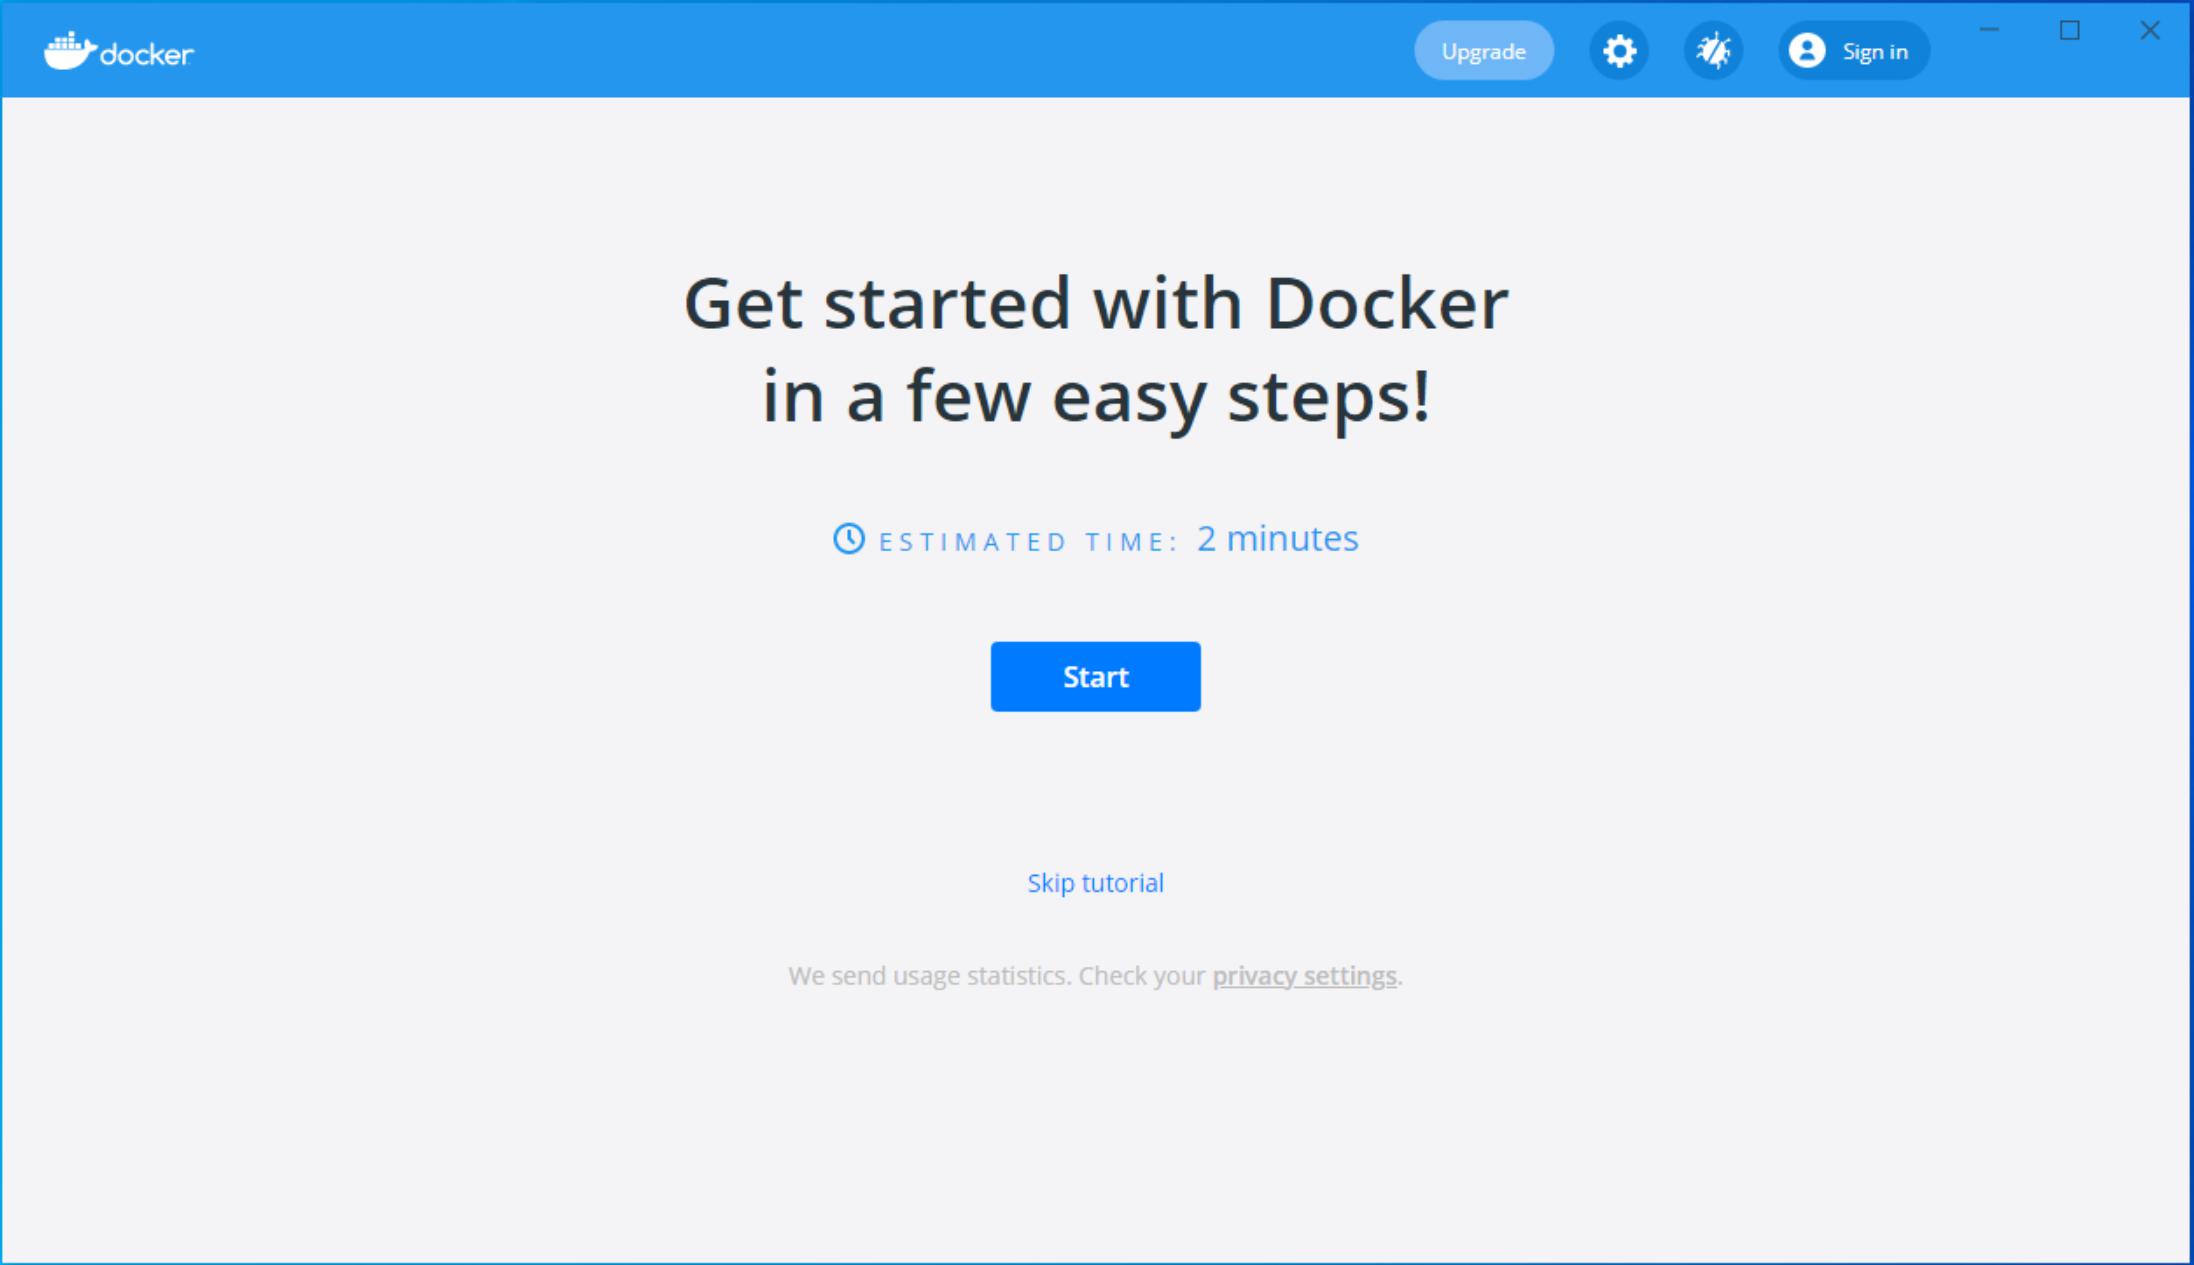
If you are unfamiliar with Docker it may be worth your time to do the Docker tutorial, but it is not required for this current tutorial. Once you have either done the tutorial or skipped it, continue on.
The Docker dashboard will show up. This is where any running containers will appear as well as settings and status of Docker. If you see the logo is green in the bottom left corner that means that Docker is running. If it is yellow then Docker Desktop is still starting; give it a minute or so to finish. If the indicator is red, then Docker is unable to start.
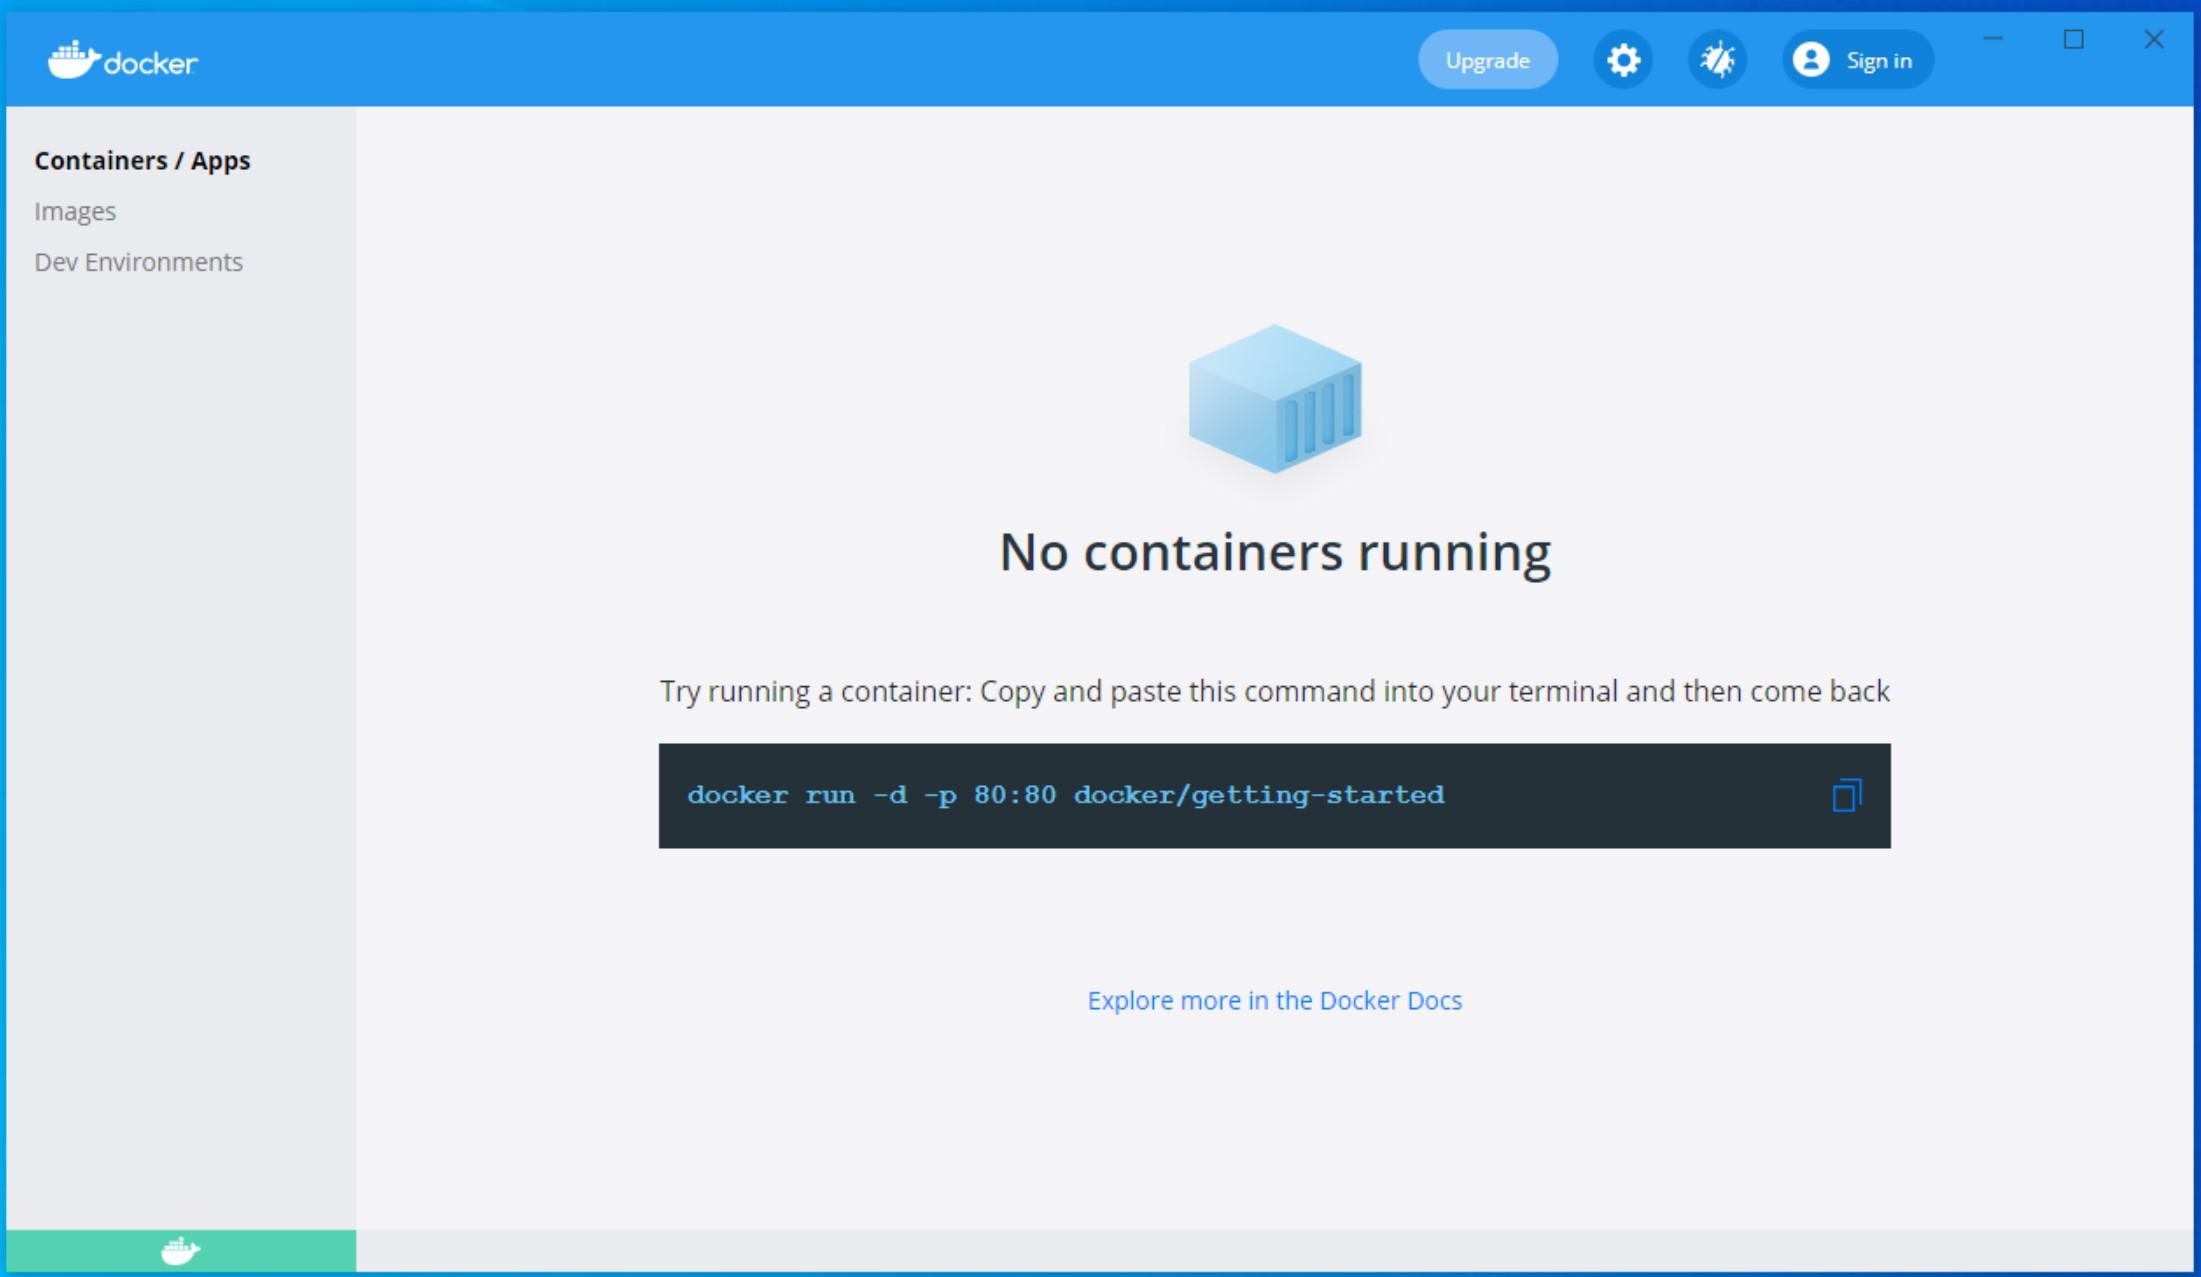
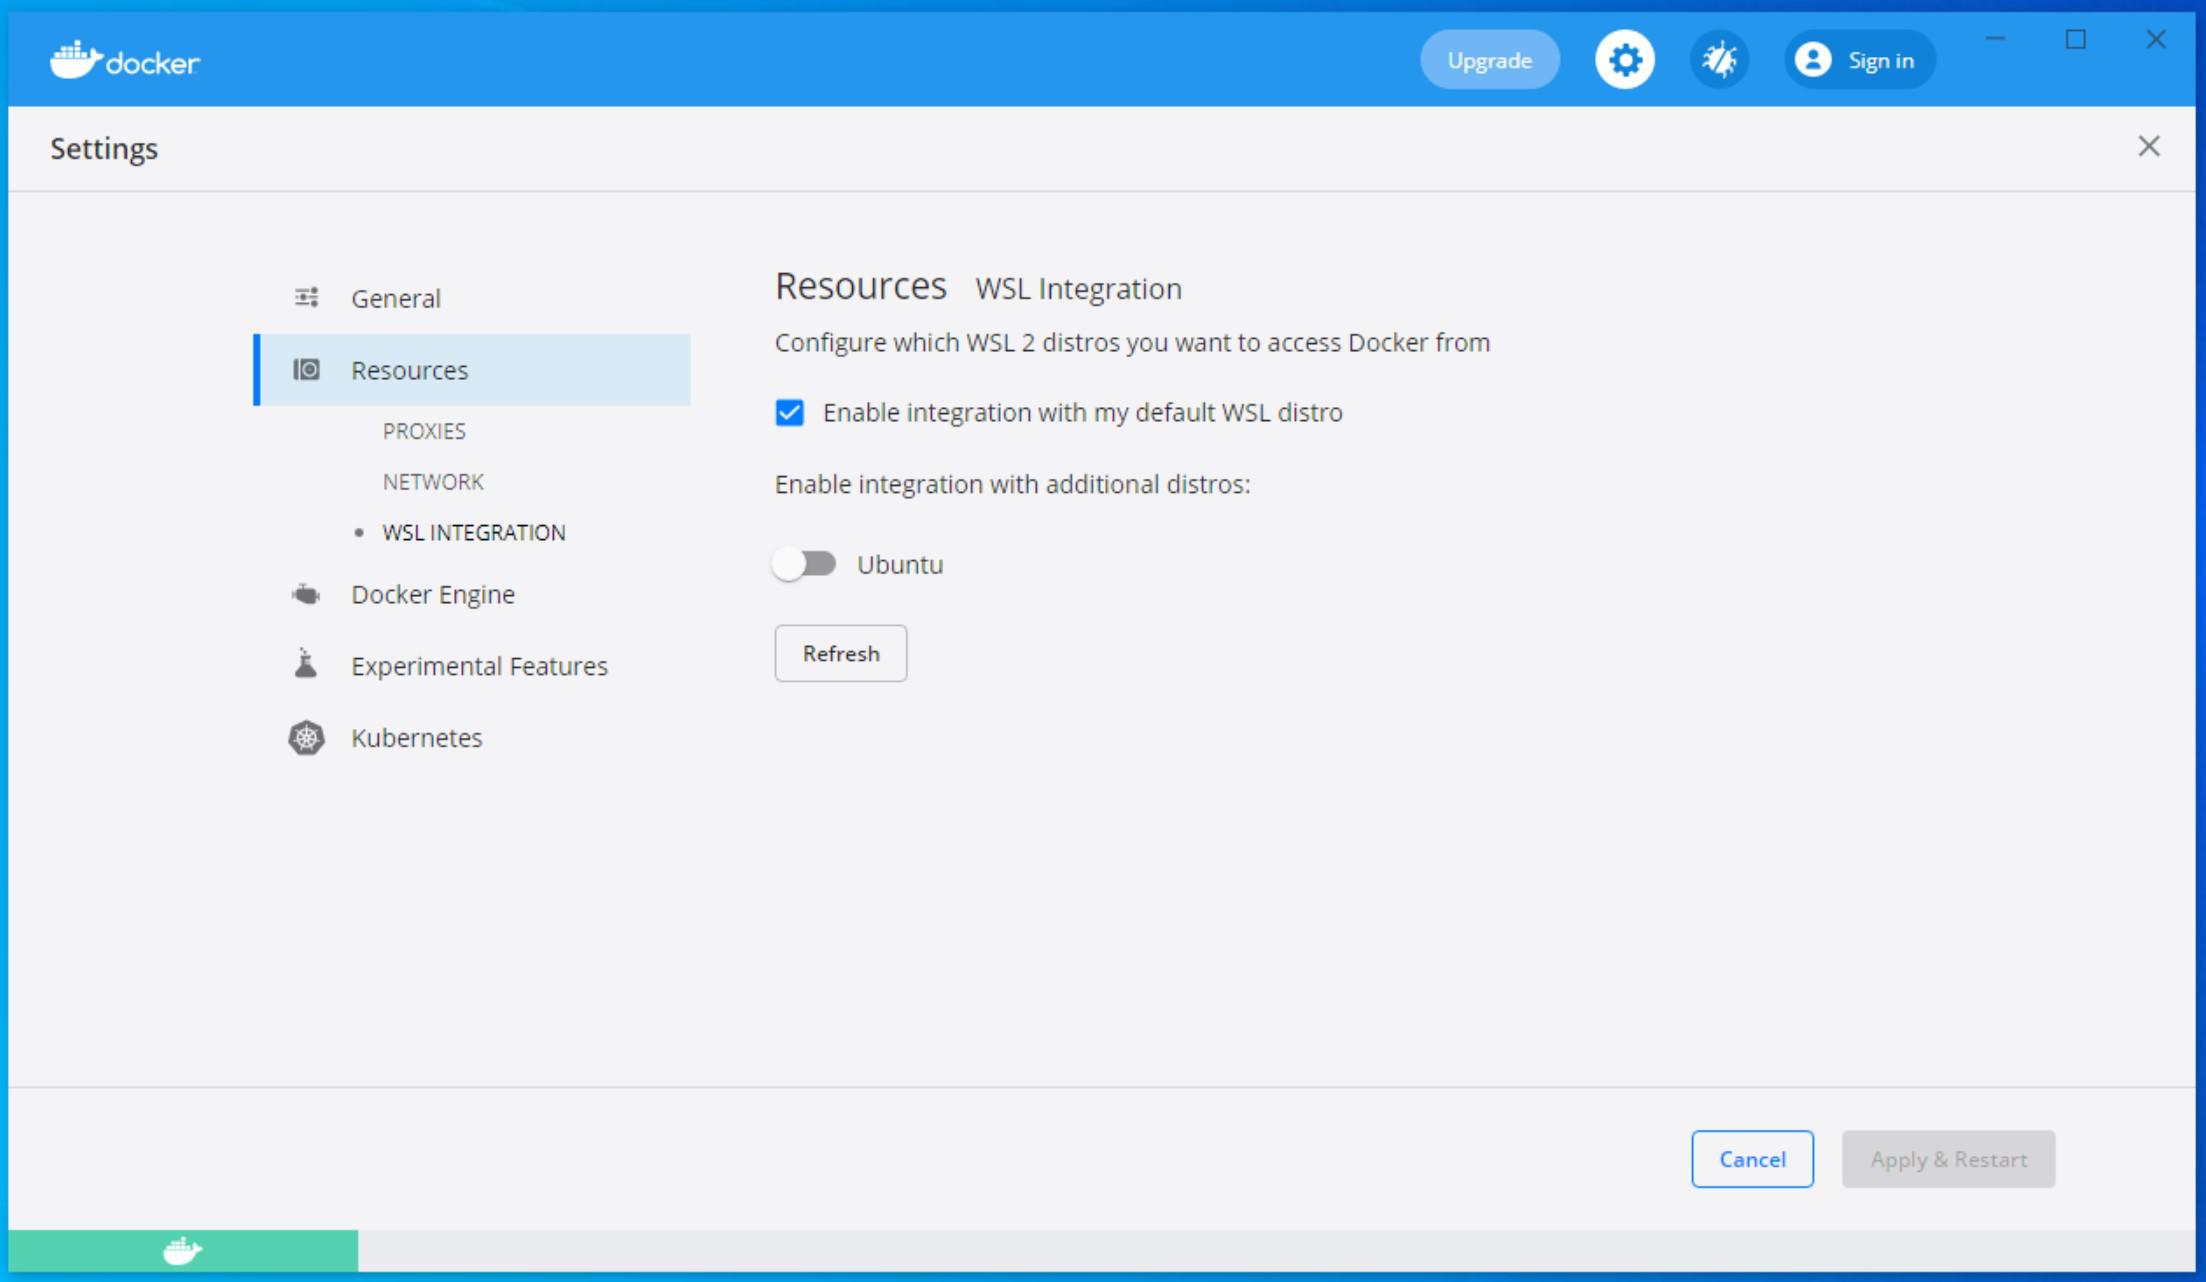
Next you’ll need to expose Docker to the WSL so you can run Docker on your Ubuntu environment. Click on the Gear icon in the top right corner to open Settings. From there you’ll click the Resource tab and then click WSL Integration. You’ll see your Ubuntu environment there, but toggled off, along with any other WSL environments you may have installed.
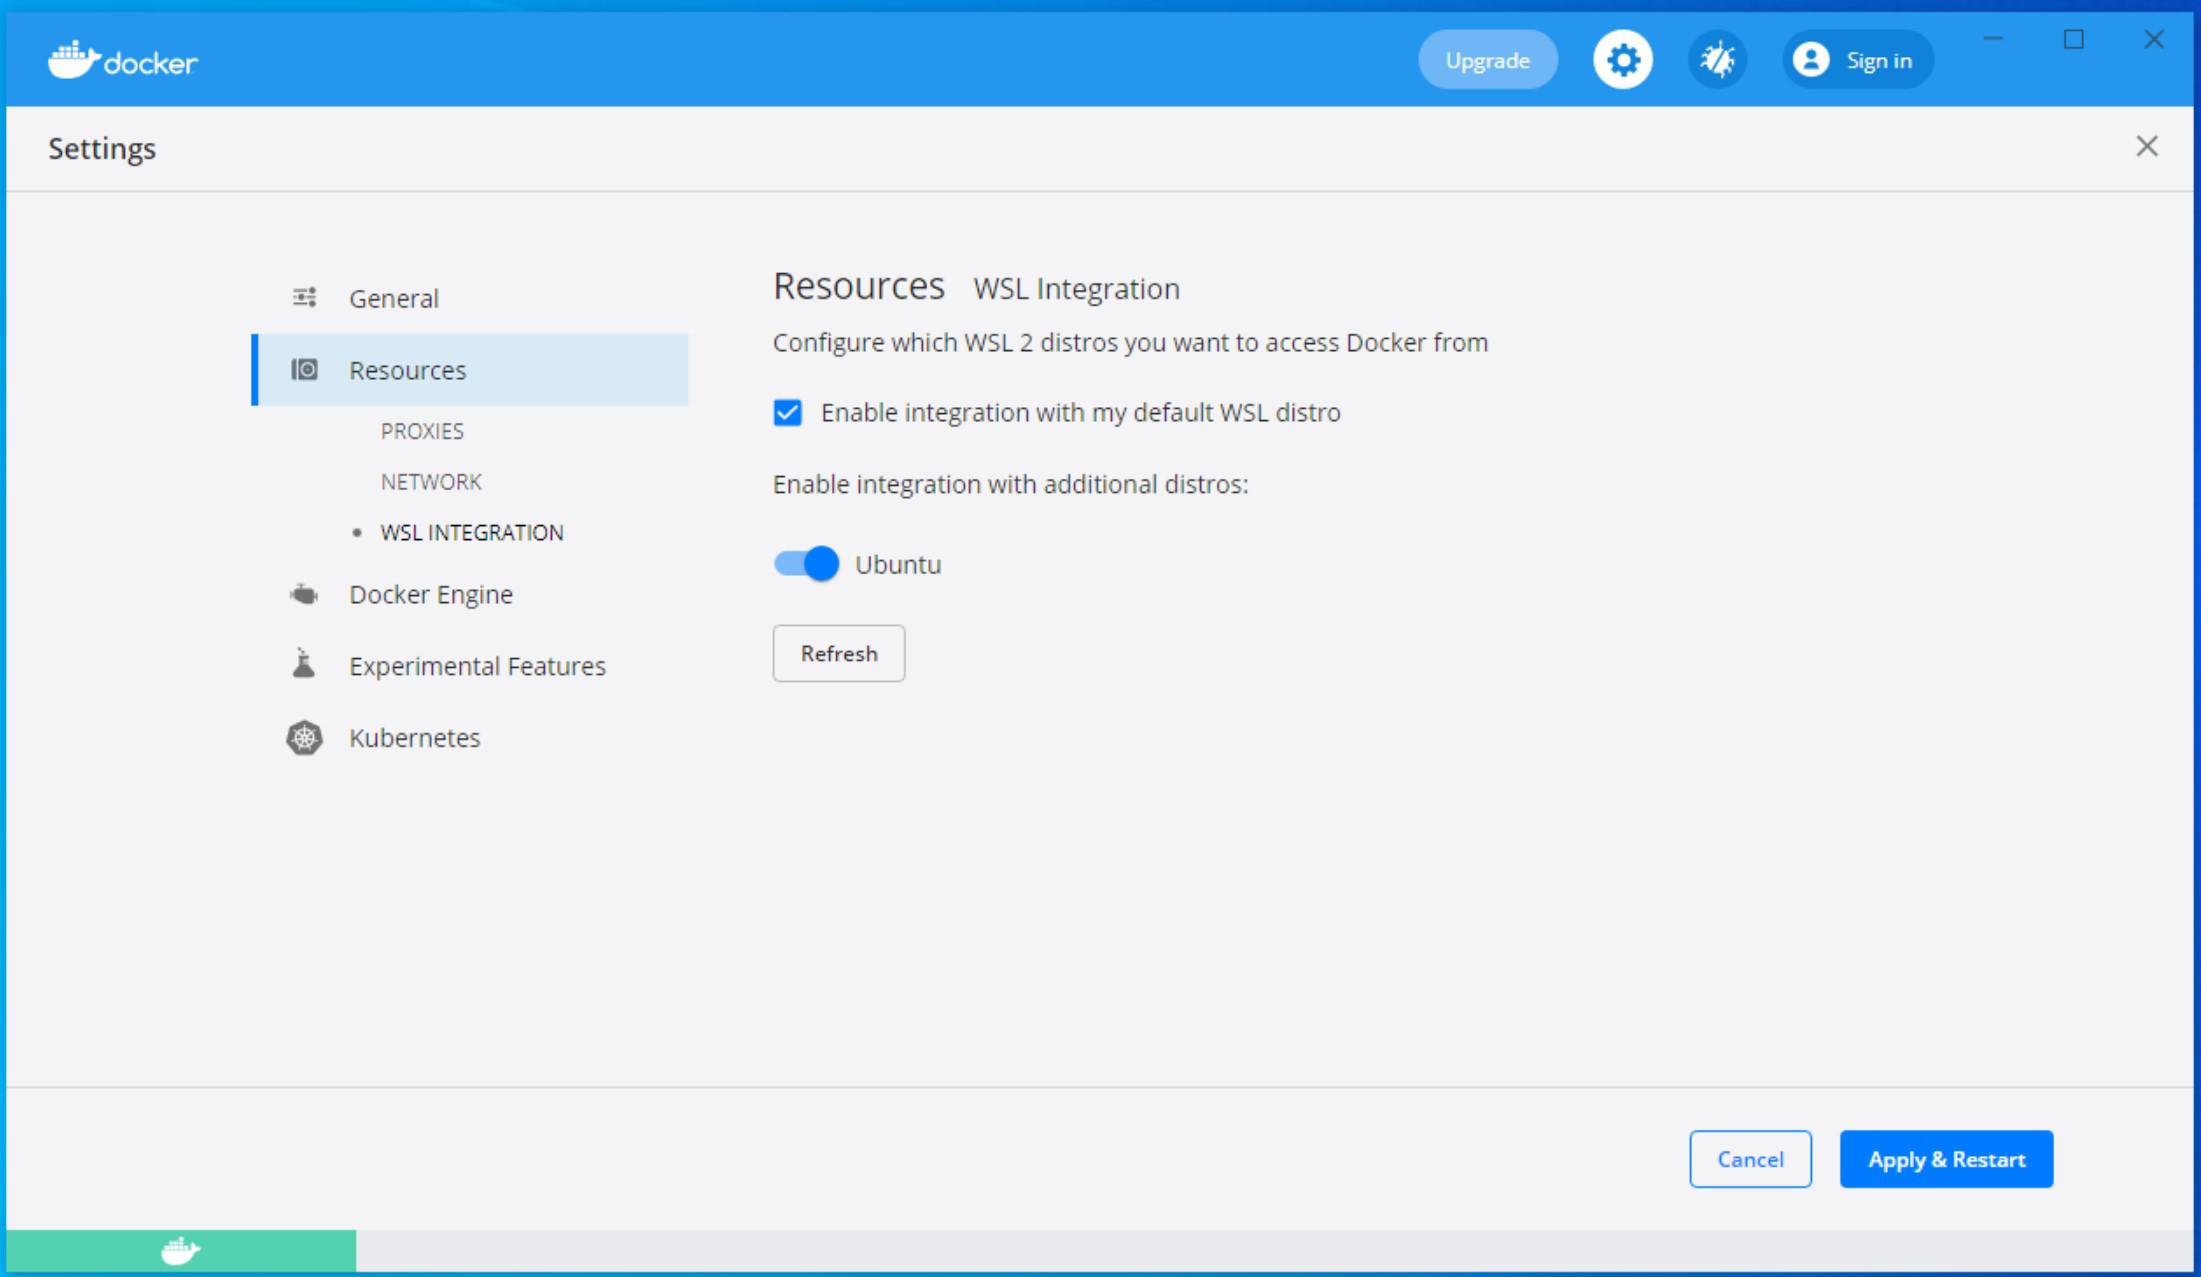
Enable Docker in your Ubuntu environment by clicking on the slider to turn it on, and then click Apply & Restart. Once the restart is done your Ubuntu environment will have access to Docker.
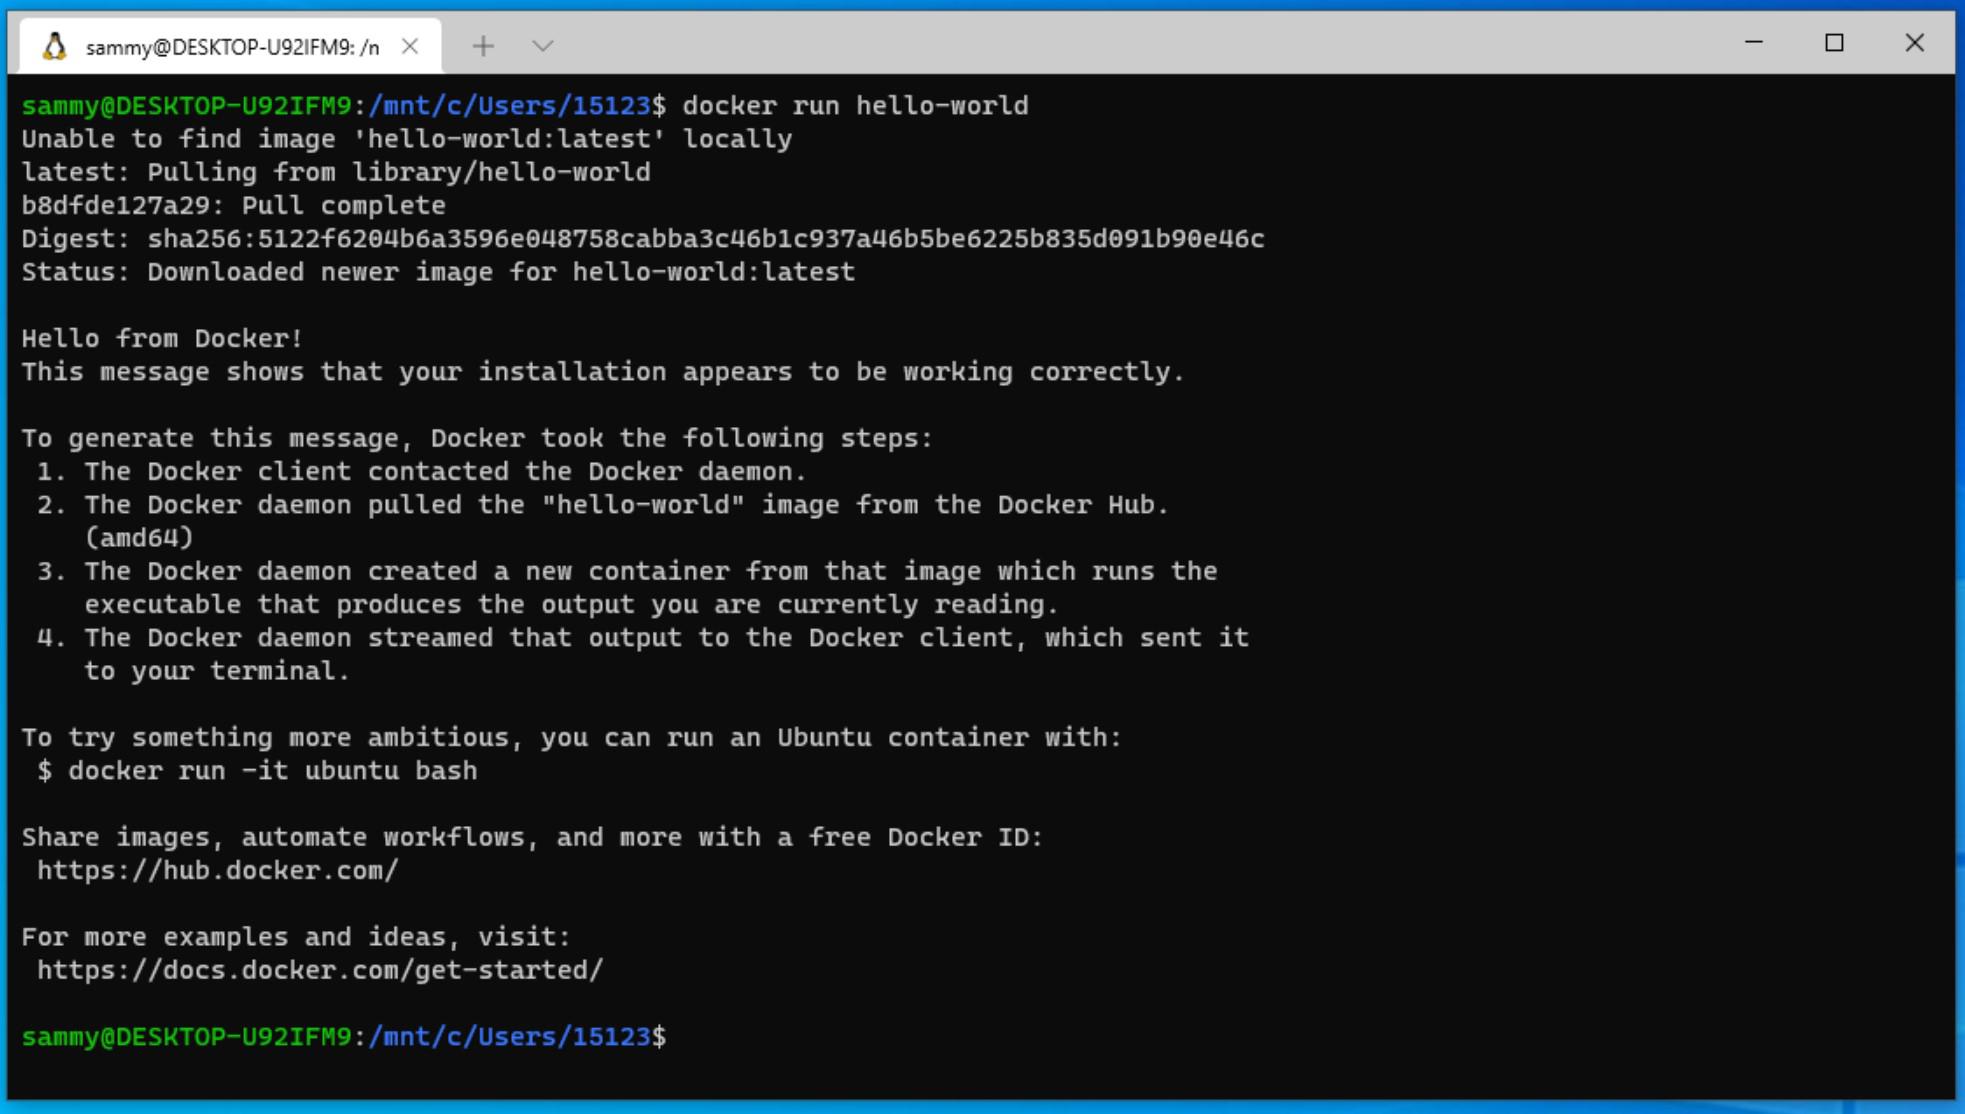
Now you can test your Docker connectivity with the WSL. Open a terminal to the operating system you enabled Docker in, Ubuntu in this case, and run the Docker hello world command:
- docker run hello-world
Your Ubuntu environment should download and run the hello world container and display its output.
Now that you have Docker connected to the WSL you’ll learn how to develop within the WSL directly using Visual Studio Code and the Remote Development Extension.
Step 2 — Using Visual Studio Code’s Remote Extension to Develop within the WSL
You can integrate your WSL Ubuntu environment with your Visual Studio Code, henceforth known as VSCode, to be able to develop directly in a Linux environment.
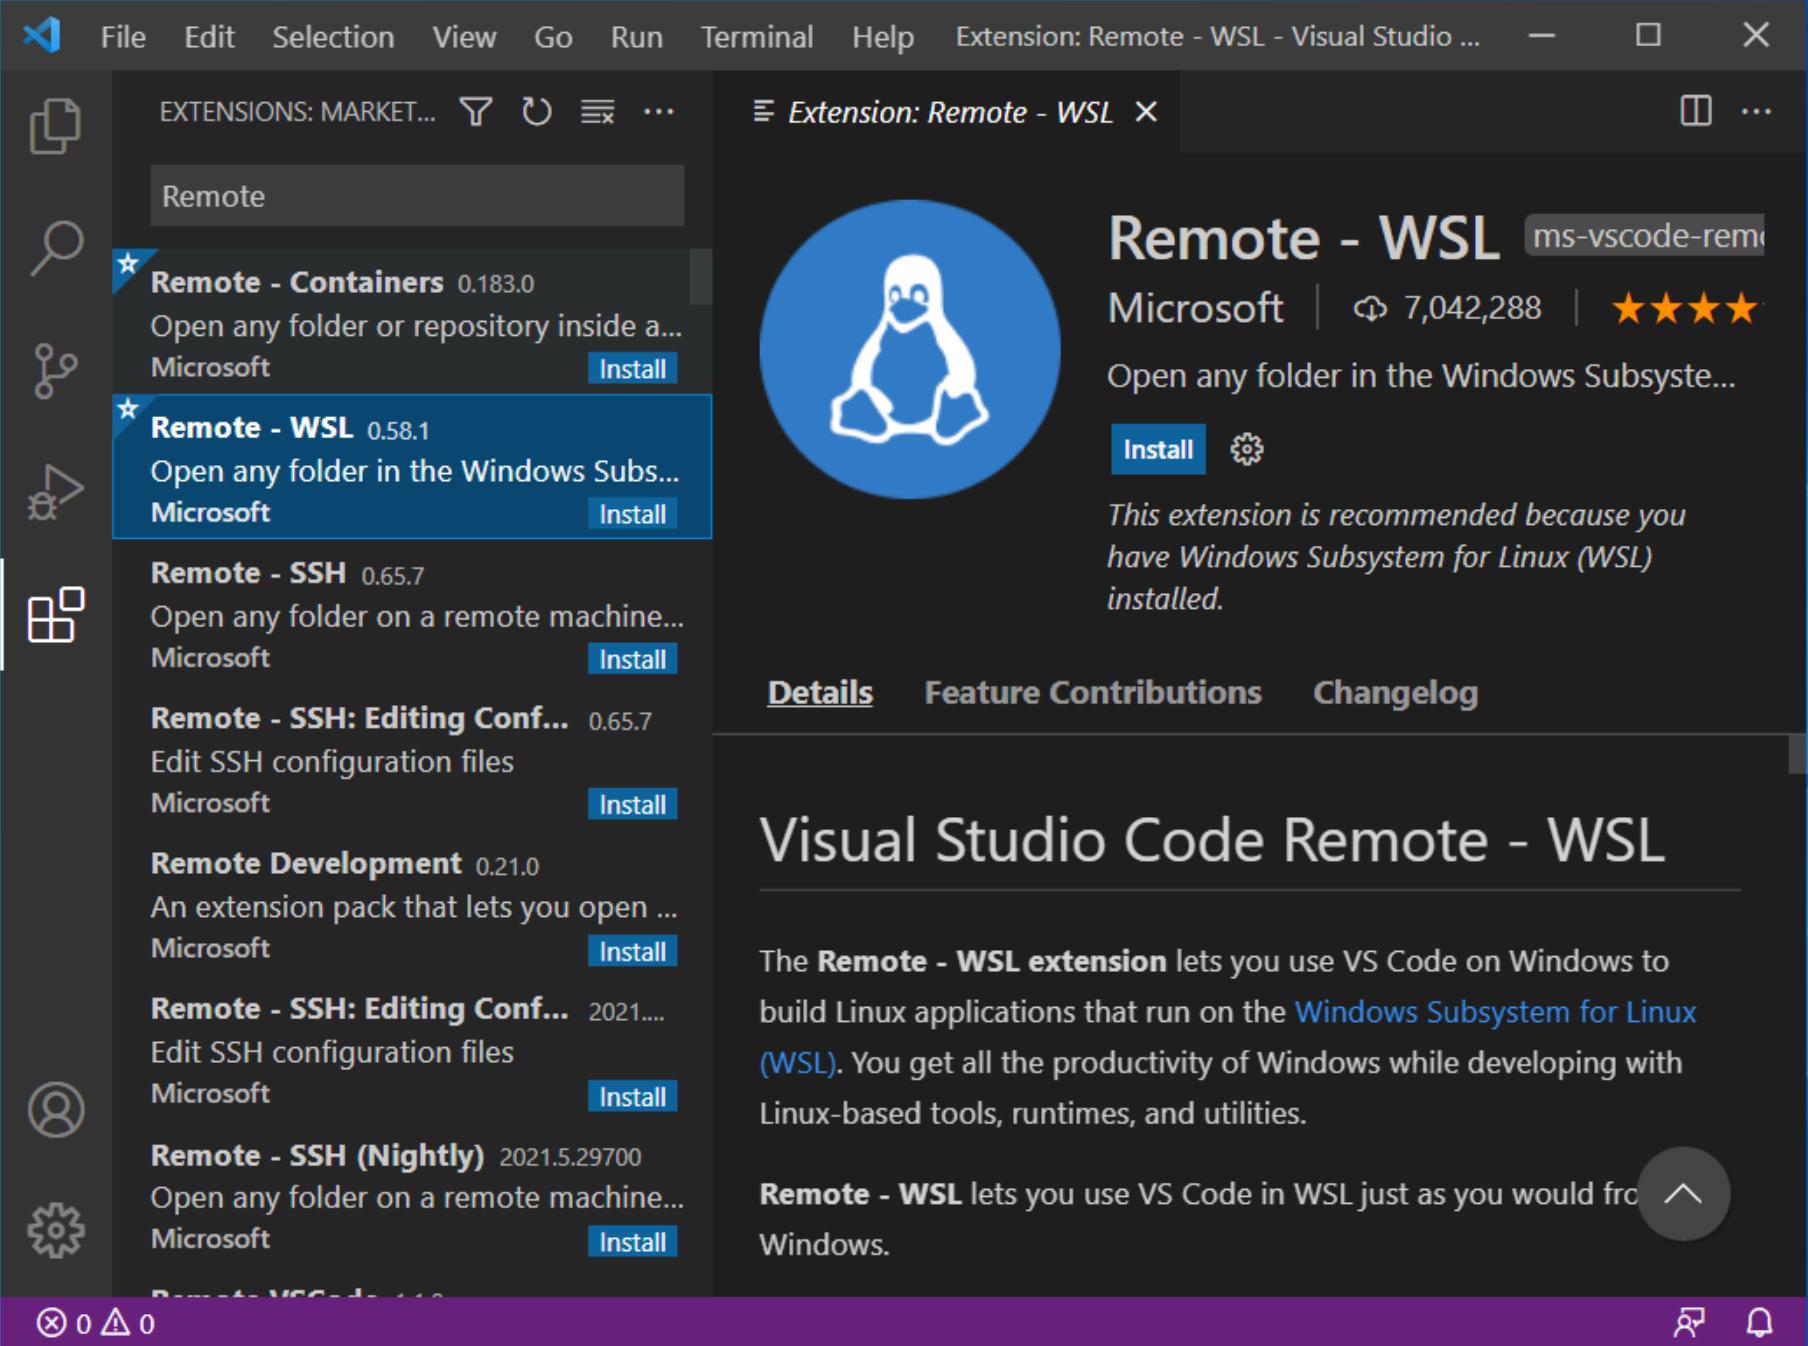
First, open VSCode. Go to the Extensions tab on the left hand side of the window. Search for Remote - WSL and the Remote - WSL extension will appear. Click on it and click Install to install it.
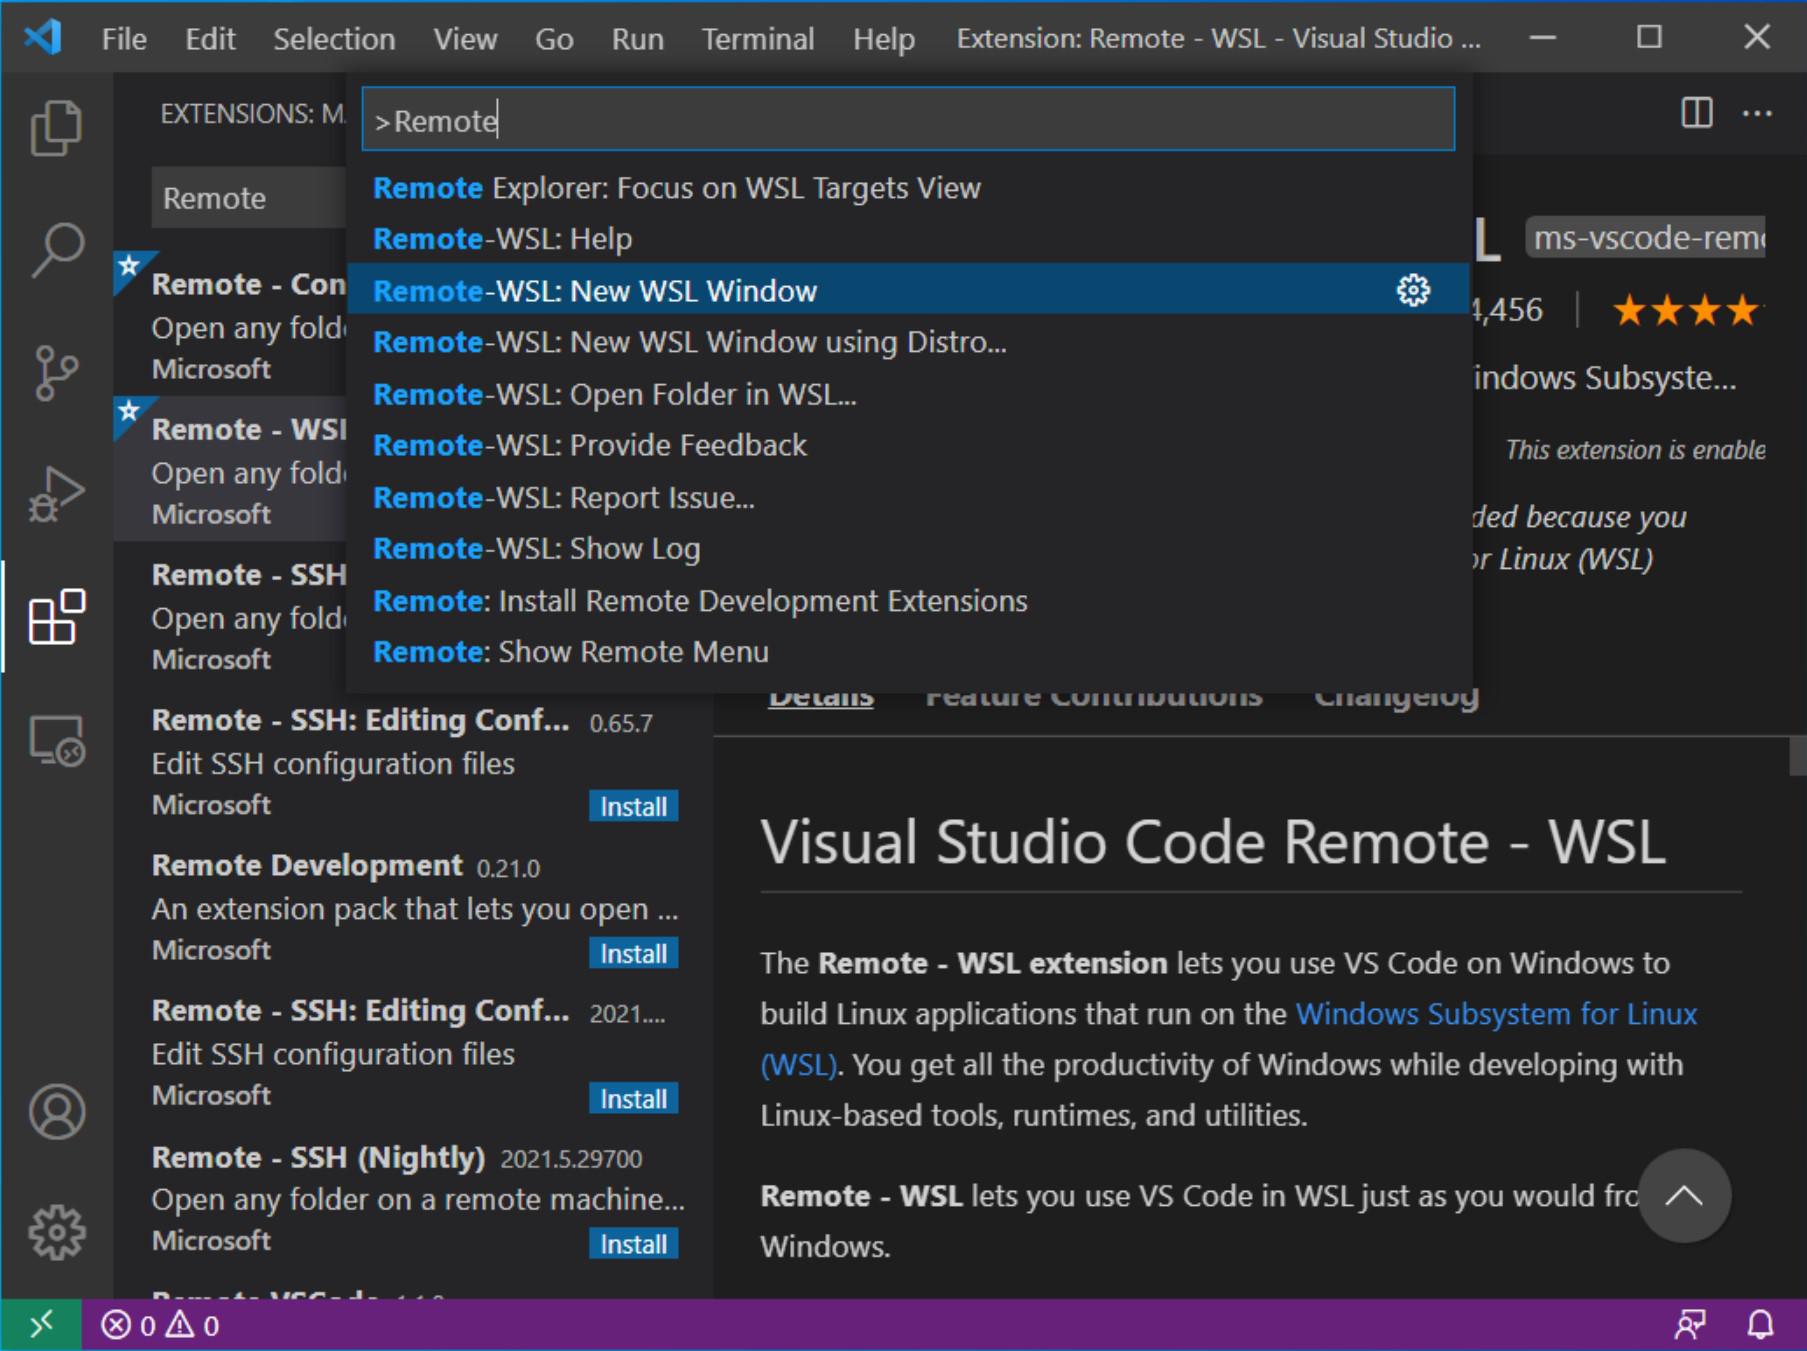
Once the installation is completed, press CTRL + Shift + P to open the VSCode command dialog. Type Remote-WSL and you’ll see a few options appear. You can open a new WSL environment, open an existing folder, etc. Select Remote-WSL: New WSL Window. This will open a new VSCode window connected to the Ubuntu WSL environment.
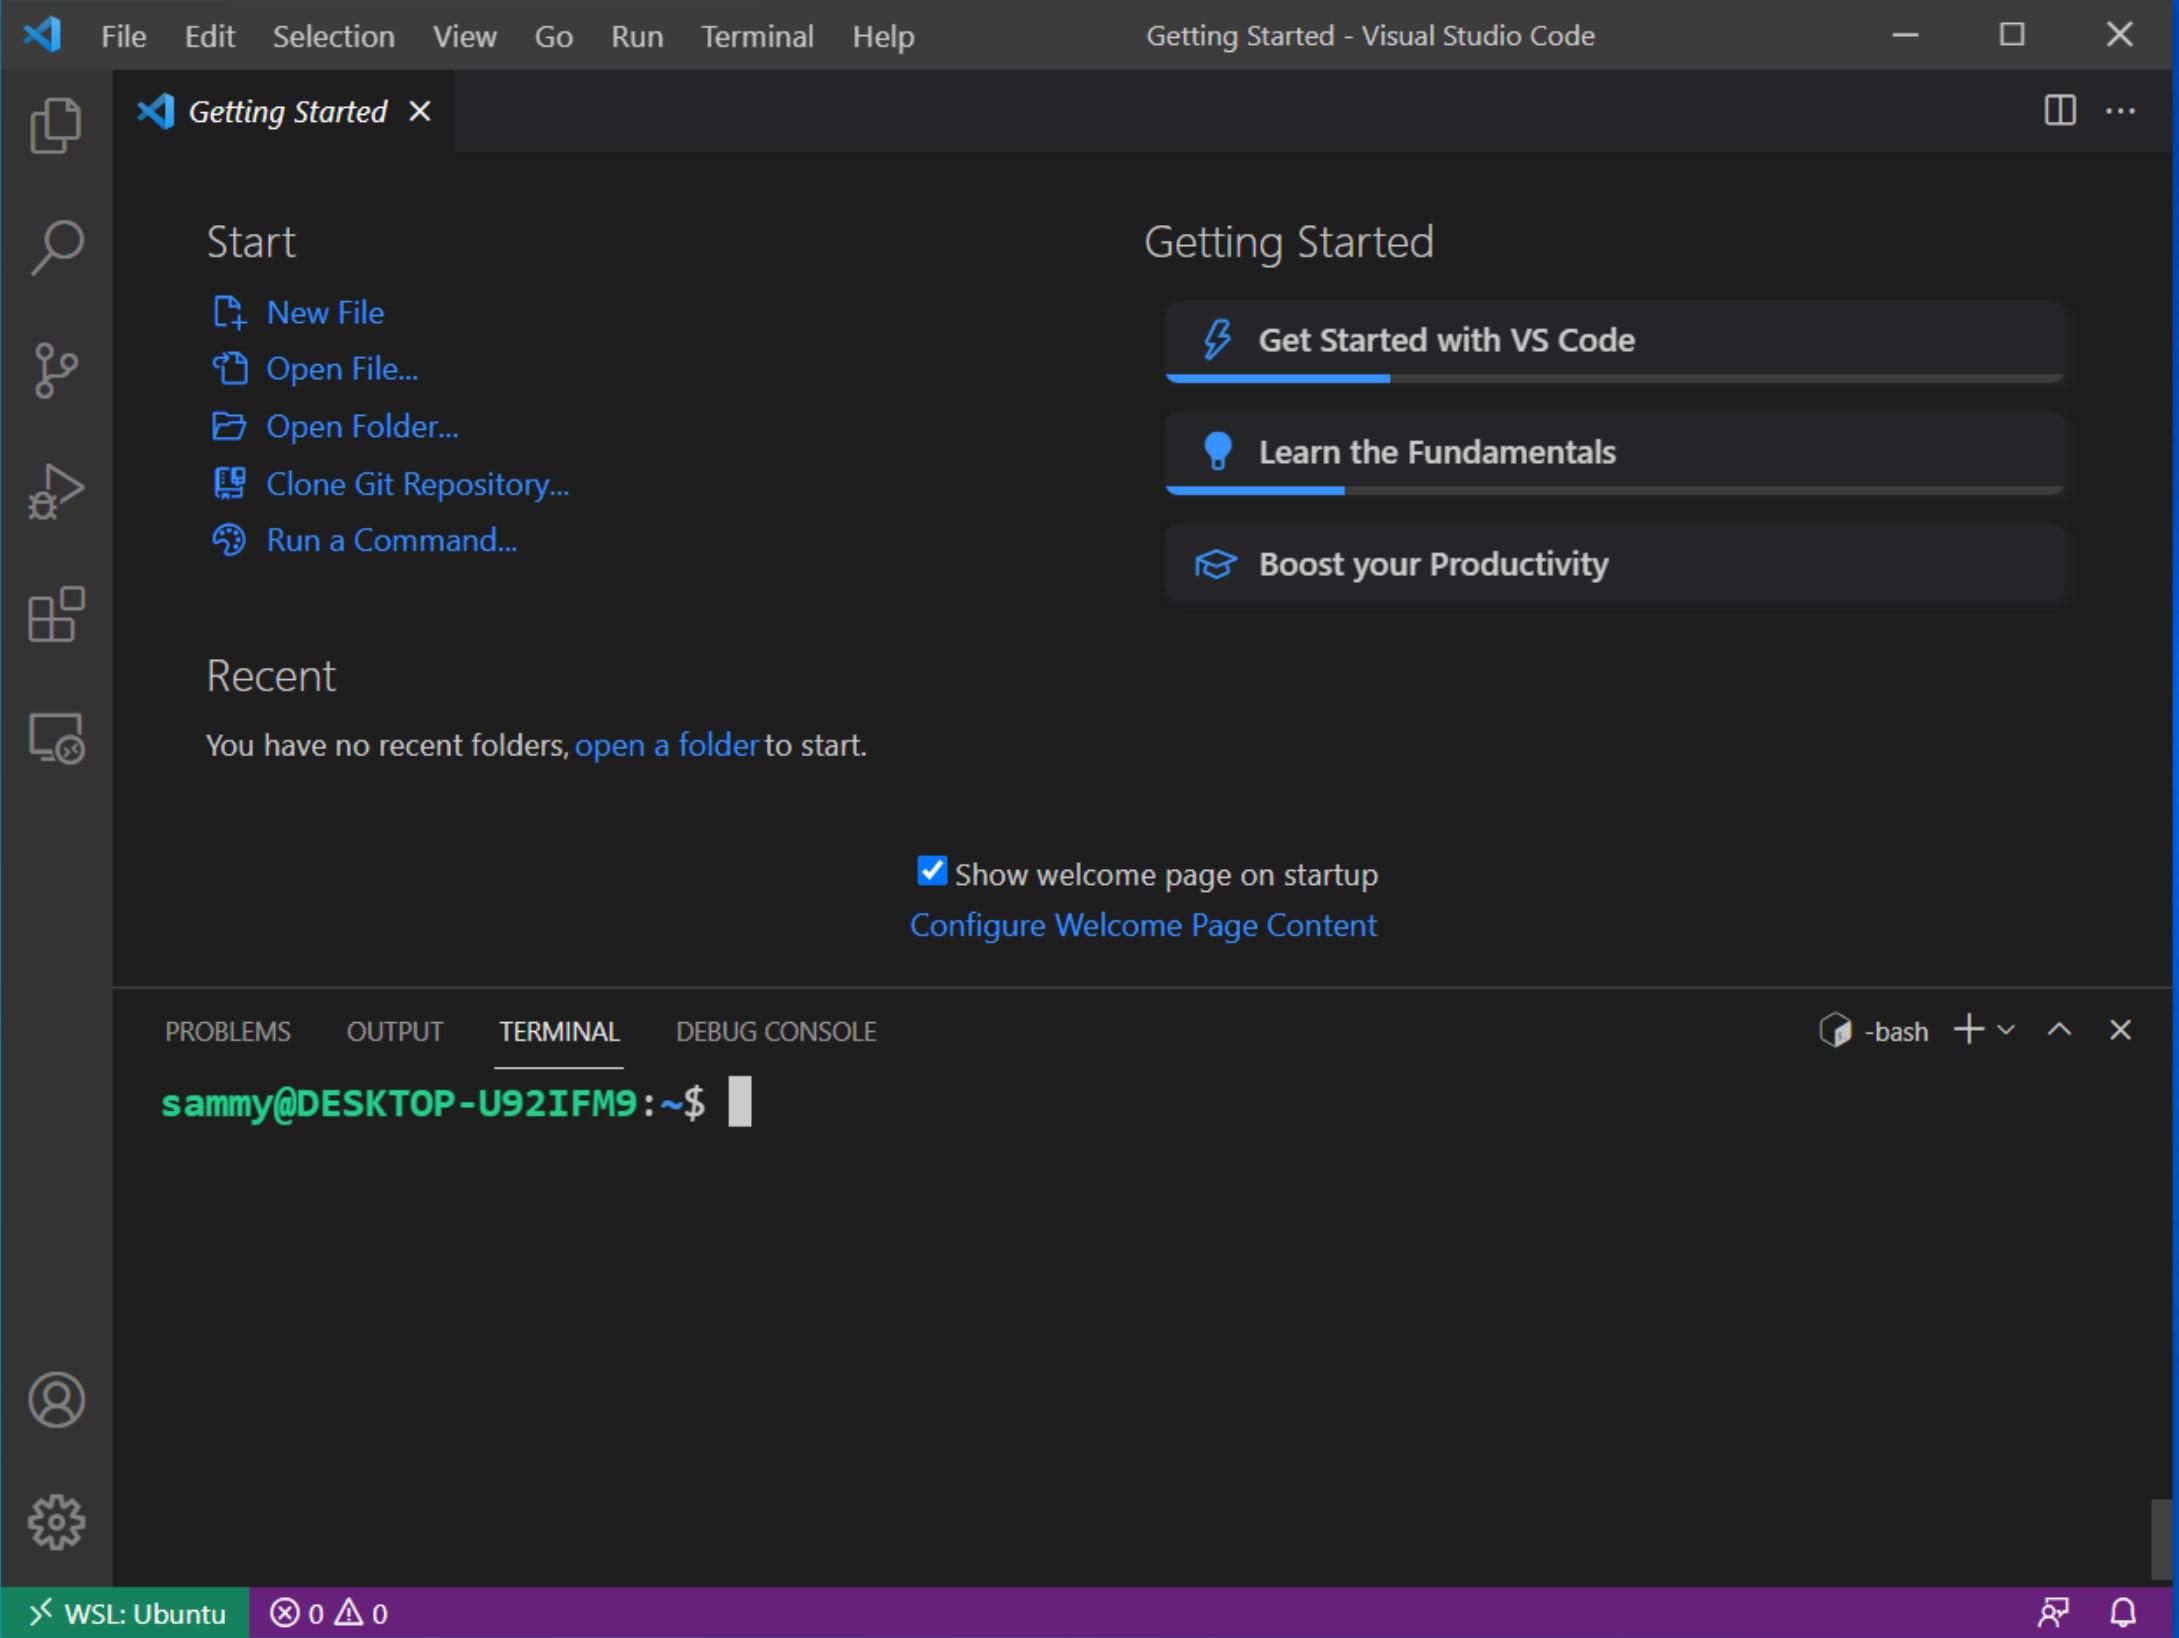
Now that you’re in this new window you can press CTRL + Shift + ` or by clicking on Terminal -> New Terminal in the navigation bar to open up a new terminal and you’ll be dropped into the WSL terminal. Any file you create will be stored in the WSL filesystem as well.
Now that you have your development environment set up, you’ll build a Python microservice using the Flask framework that creates a 301 redirect to a site that you specify as an environment variable and package it within a Docker container.
Step 3 — Setting Up Your Developer Environment
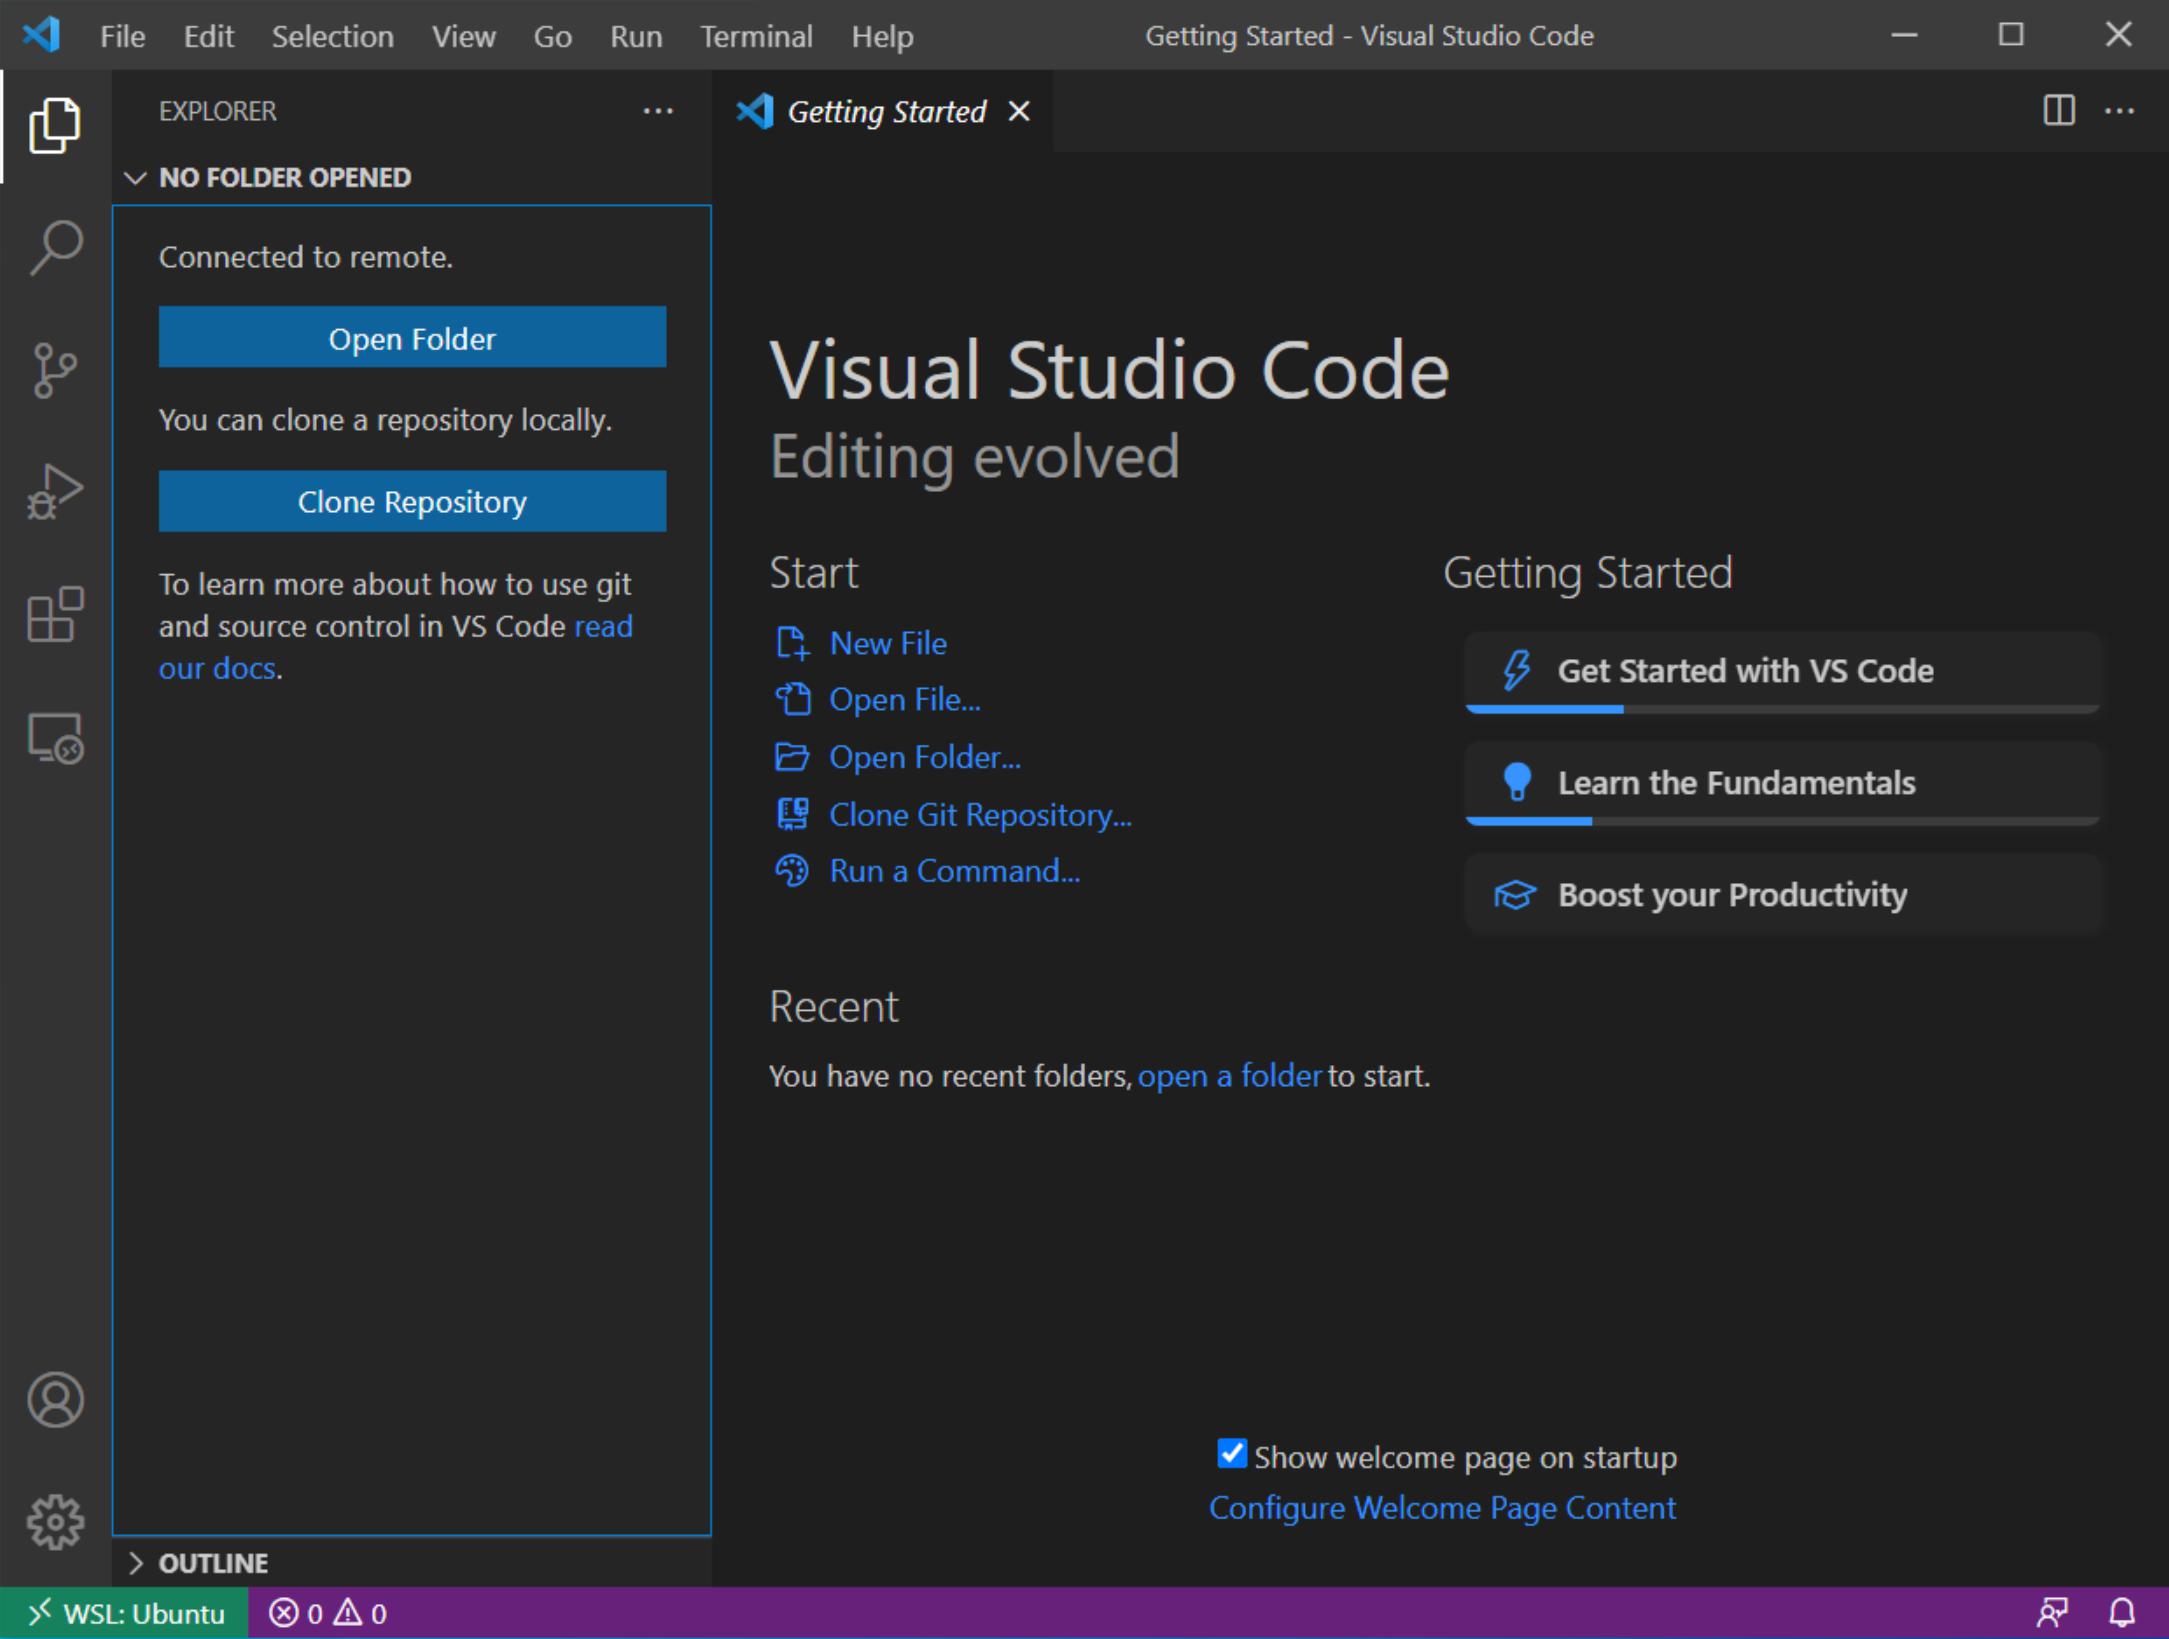
First you’ll want to set up a development environment so you can develop your code using Visual Studio Code. Navigate to the sidebar on the left hand side and click on the topmost icon that looks like a sheet of paper. You will be prompted to either Open a Folder or Clone a Repository.
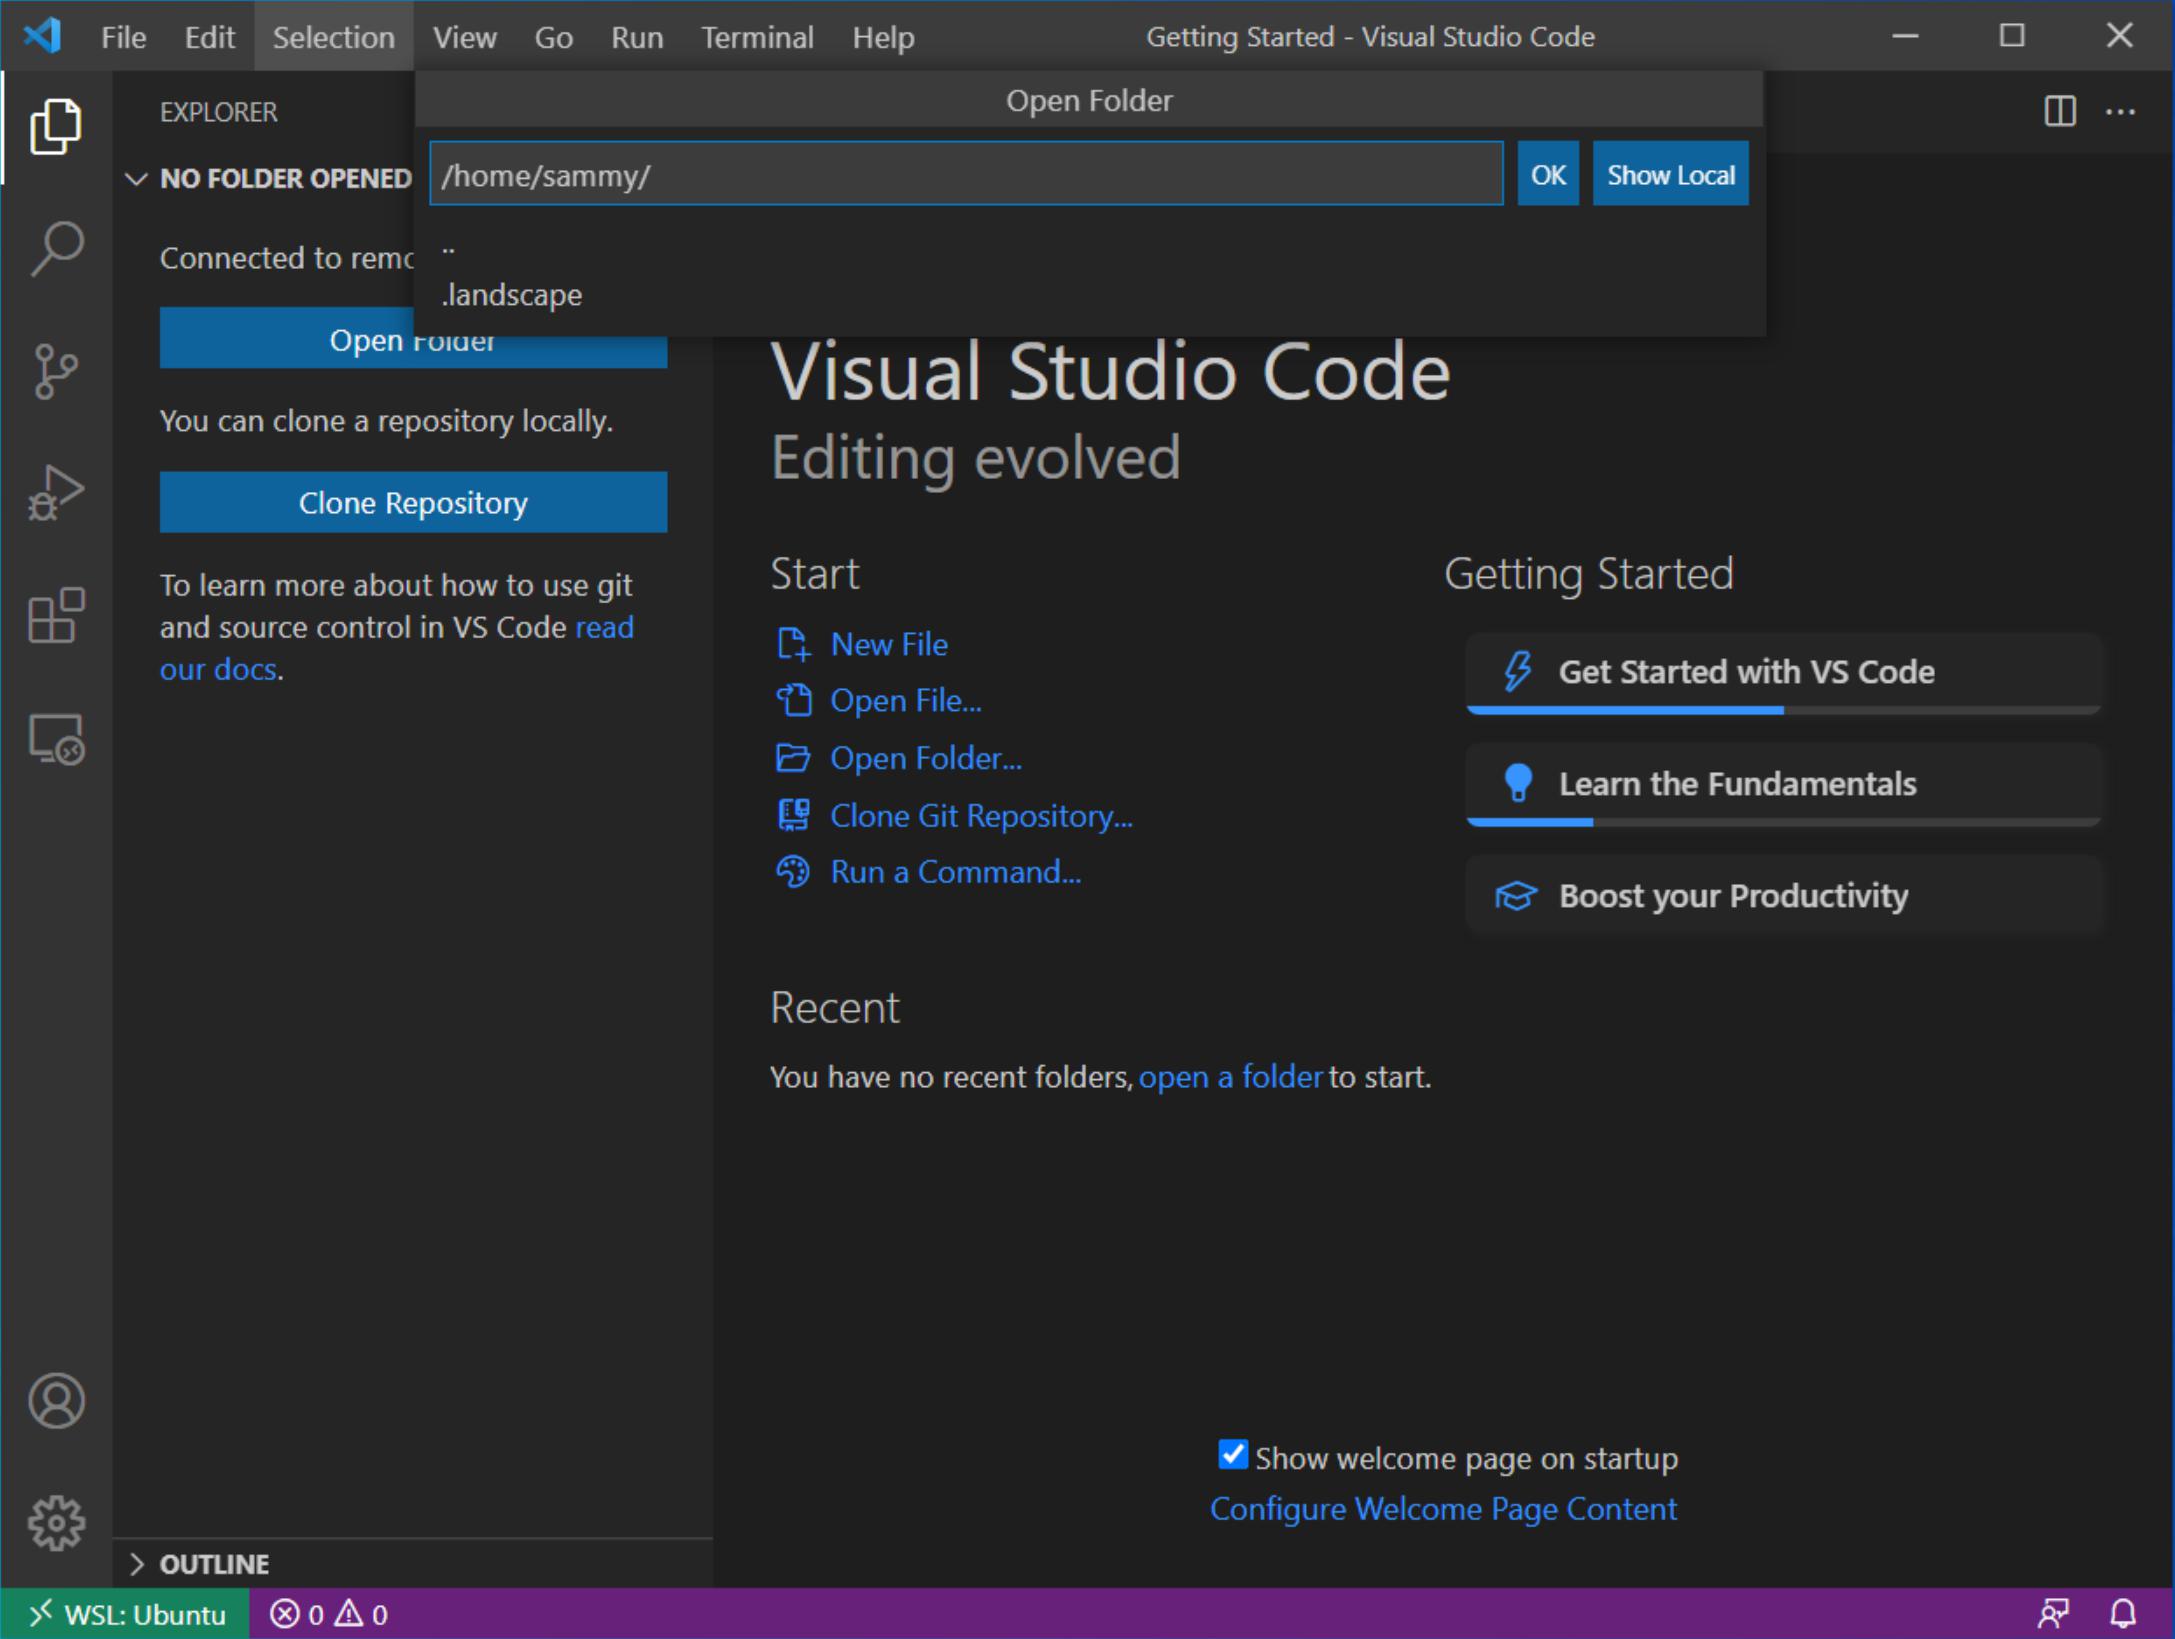
From here select Open a Folder. The default location will be your home directory. Select this option and click OK.
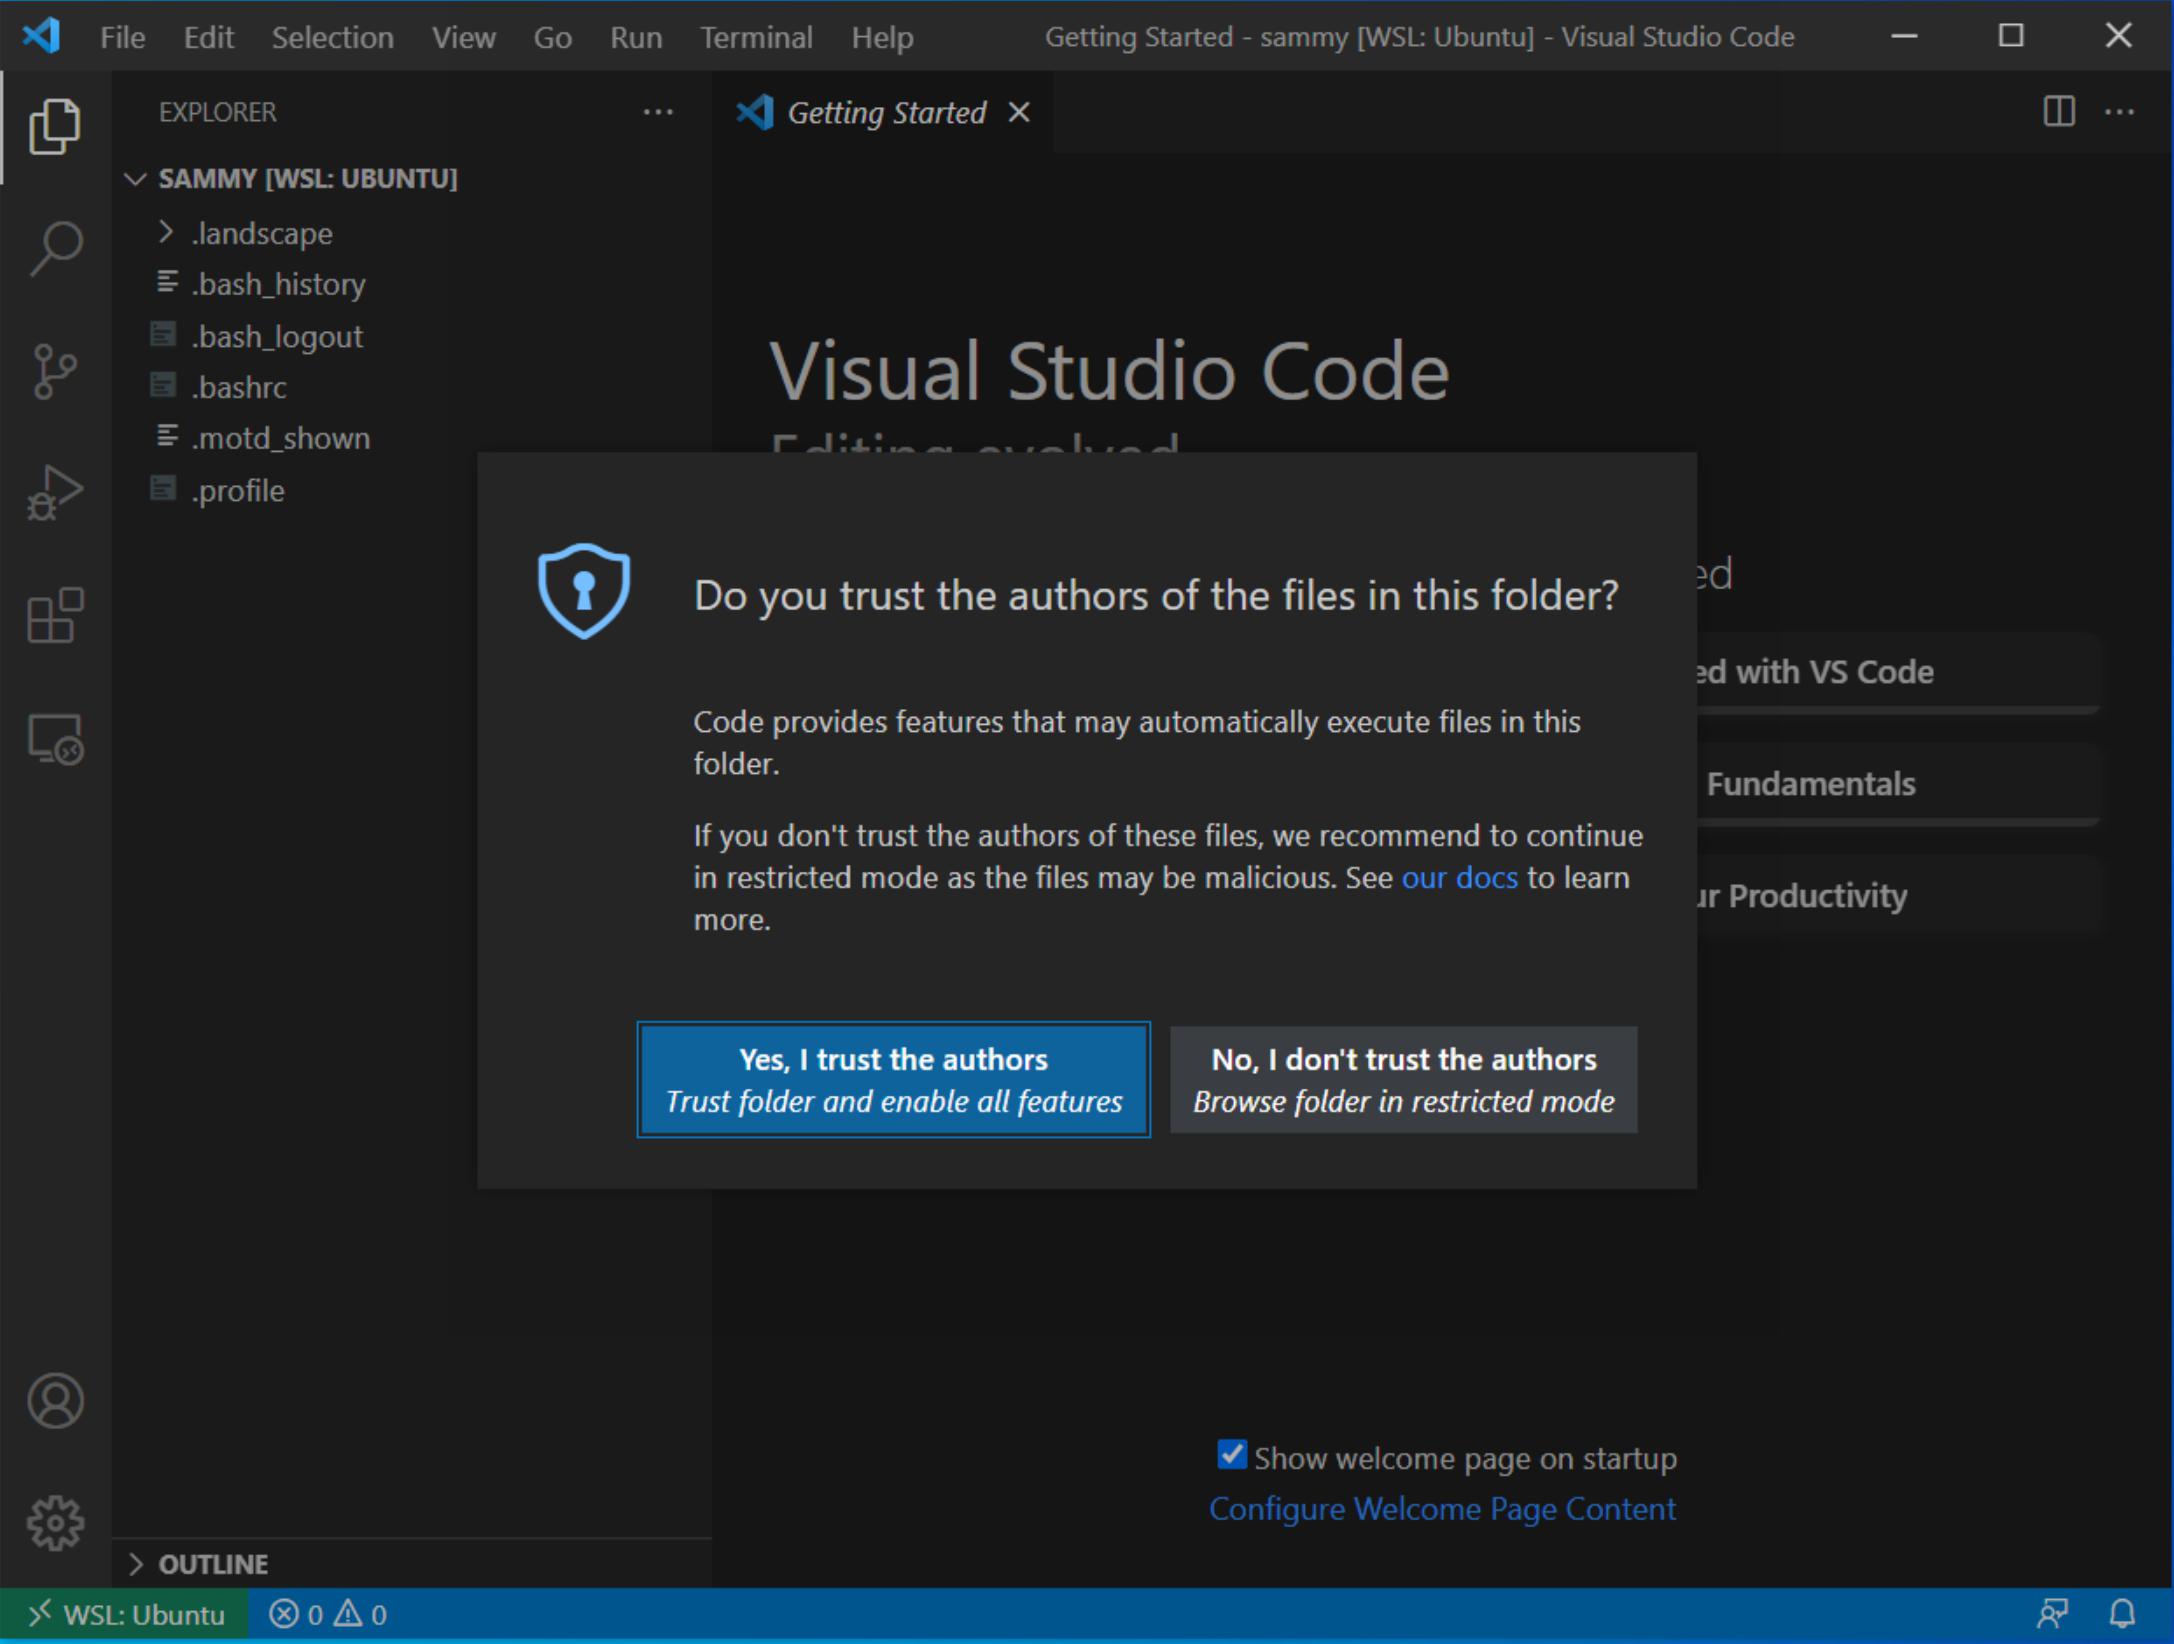
You may be prompted by Visual Studio Code asking if you trust the authors of this folder. This is a security measure to ensure that no automatically executed code can harm your PC. In this case, everything is good so select Yes, I trust the authors.
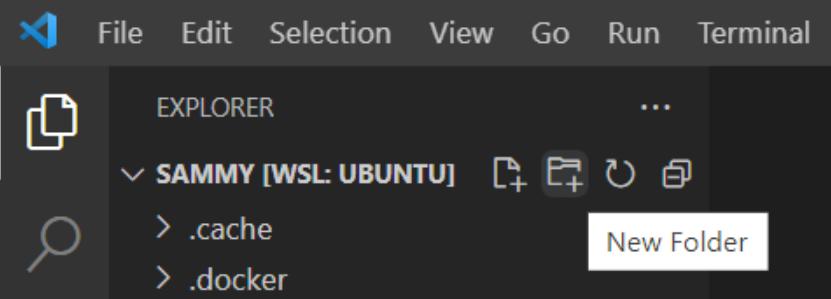
Now you should see your home directory in the file explorer panel to the left. Next, create a directory to store your project. Navigate to the folder icon with a plus symbol. When you hover over the icon a popup should appear saying New Folder. Click on this icon to create a new folder and name it my-app. A new empty directory should appear in the explorer to the right.
 You now have your developer environment set up and ready to build your Python microservice in the next step.
Step 4 — Creating a Python Virtual Environment for Your Project
Before you get started coding, you need to set up your Python developer environment. In this step, you will install and activate your Python requirements within a virtual environment for easier management.
You can do all of this from within the terminal in Visual Studio Code. Press the CTRL + Shift + ` key combo to open a new terminal or click on New Terminal under the Terminal section in the top navigation bar. Once you’ve done this you should see a new terminal appear at the bottom of the Visual Studio Code window.
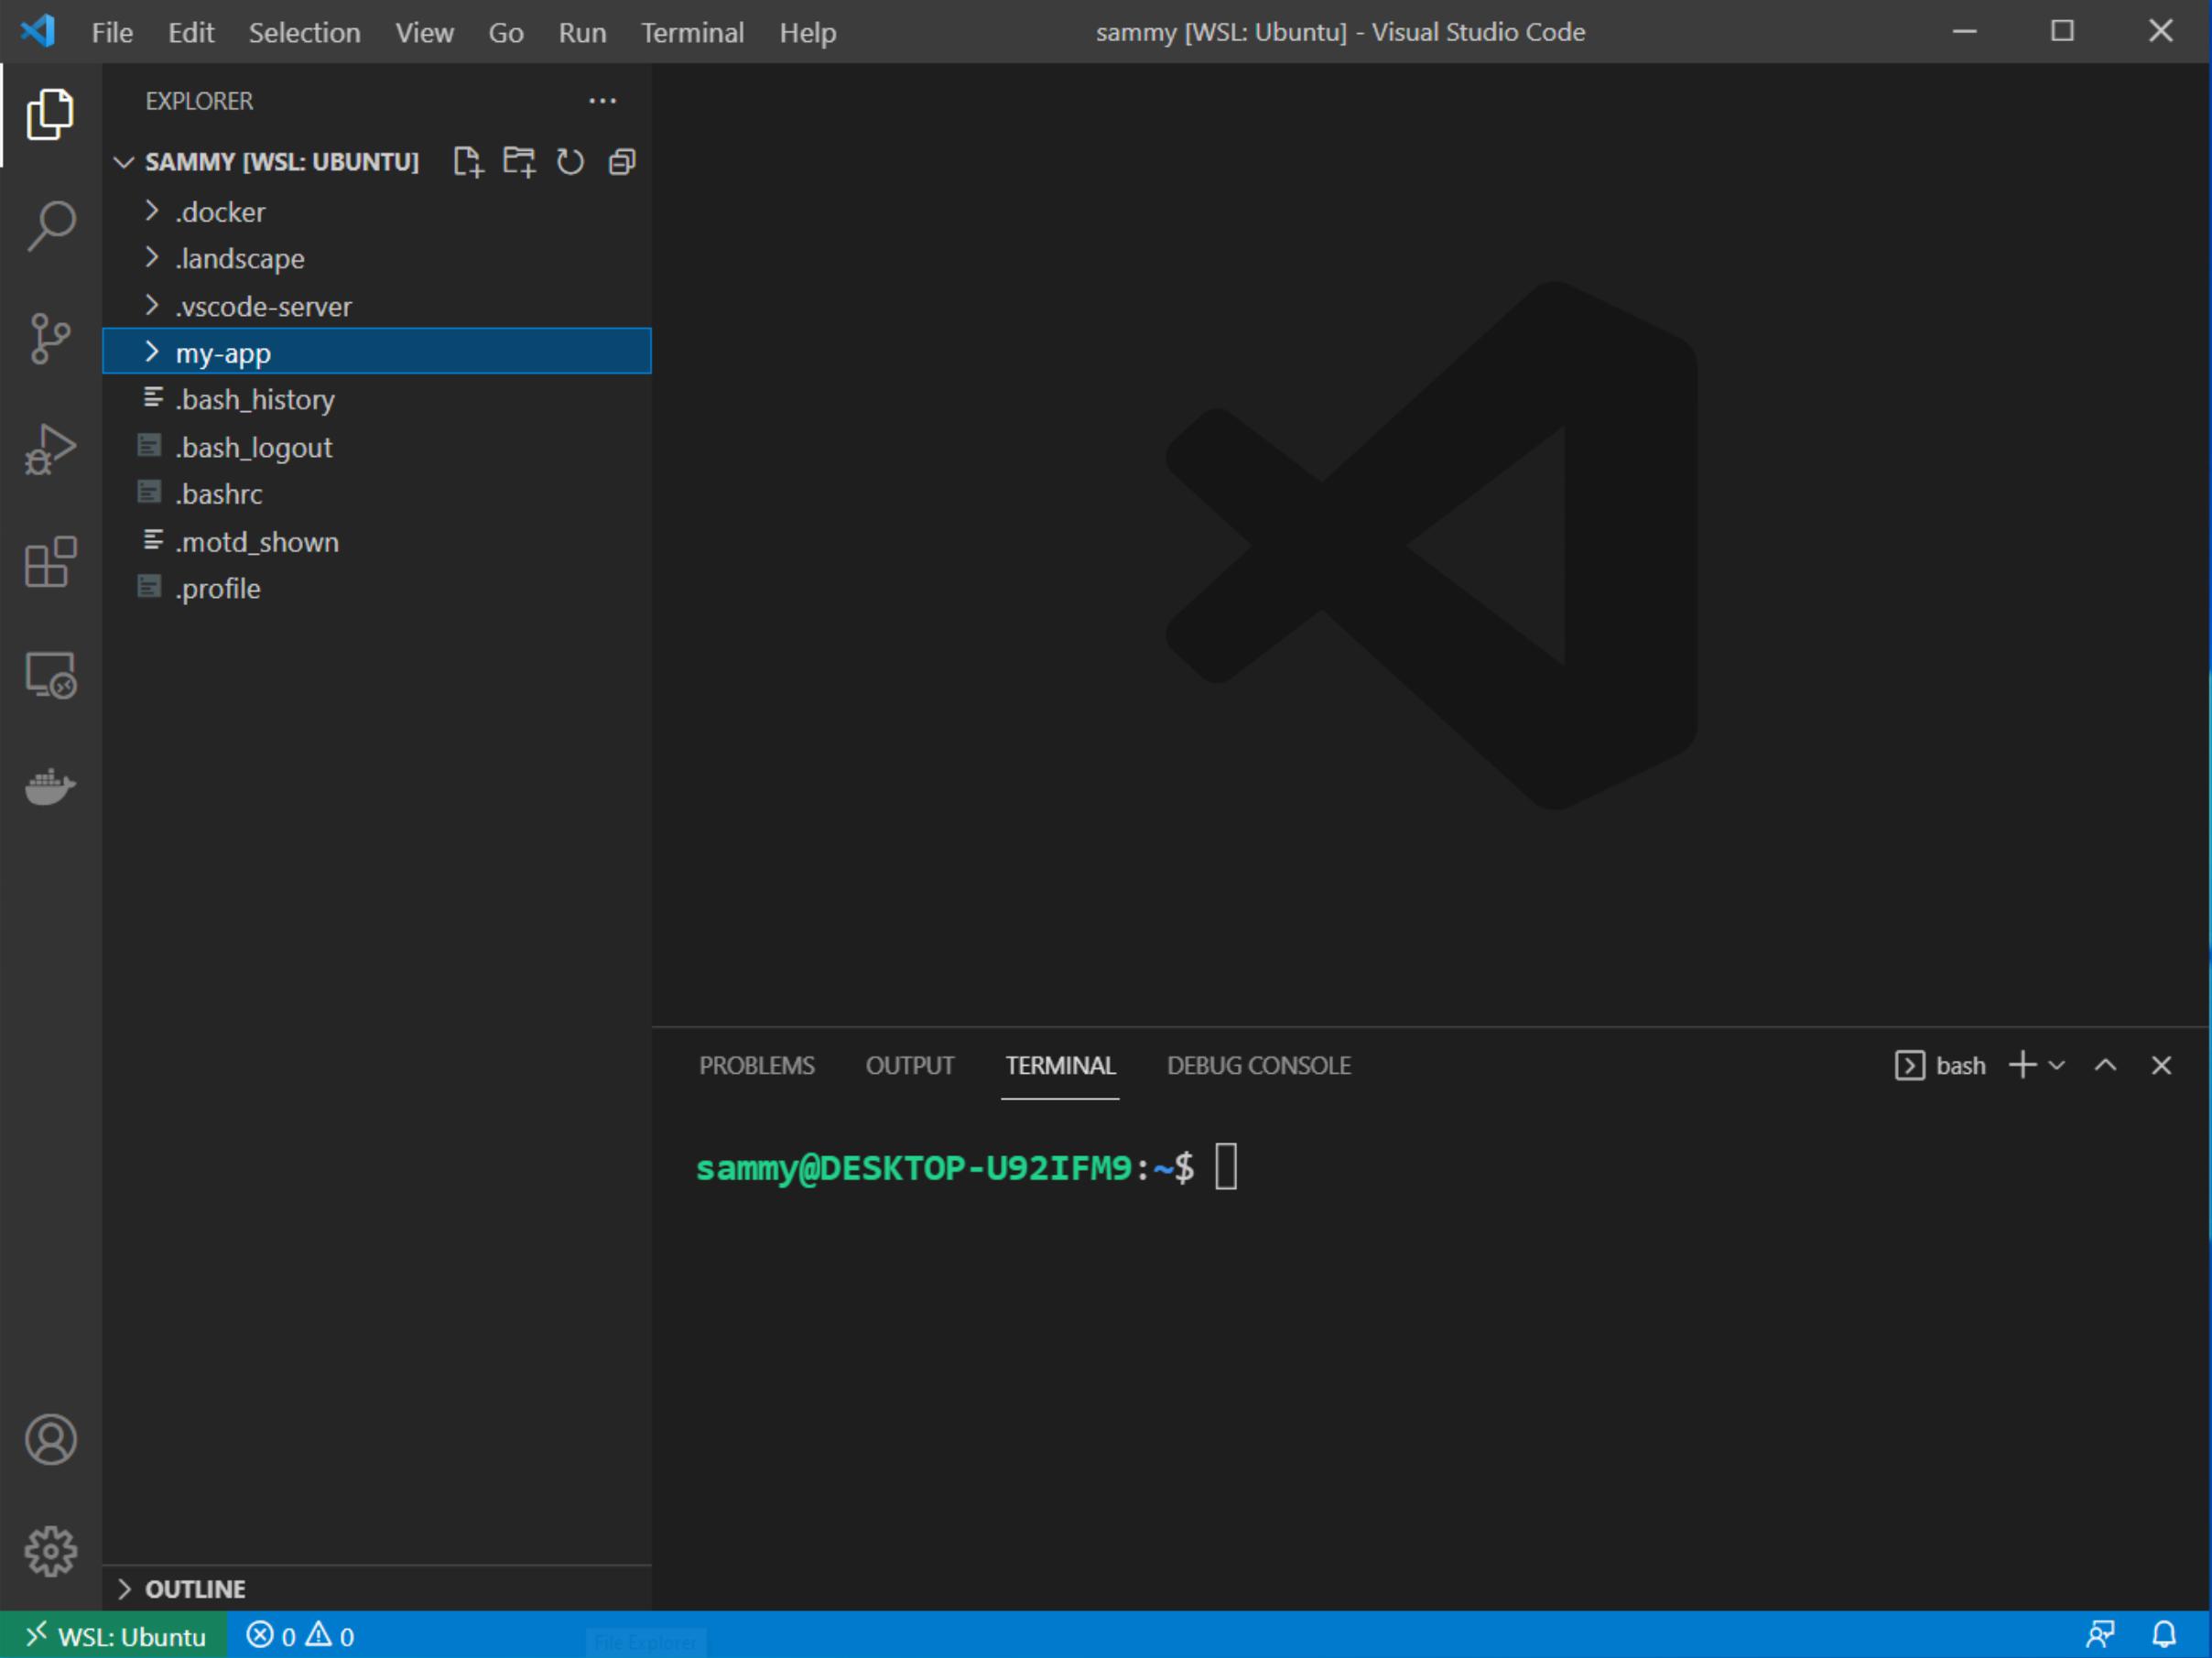
From this terminal navigate into the directory you created for you code, my-app.
- cd my-app
Next, install the python3-venv Ubuntu package so you can create Python virtual environments.
- sudo apt update && sudo apt install python3-venv
Now create your virtual environment using Python:
python3 -m venv myapp
This will create a directory called myapp in your current directory. Inside, it will install a local version of Python and a local version of pip, the package manager for Python. You can use this to install and configure an isolated Python environment for your project.
Before you install your project’s Python requirements, activate the virtual environment:
- source myapp/bin/activate
Your prompt should change to indicate that you are now operating within a Python virtual environment. It will look something like this: (myapp)user@host:~/my-app$.
With your virtual environment active, install flask and gunicorn with the local instance of pip:
- pip install flask gunicorn
Note: Once you have activate your virtual environment (when your prompt has (myapp) preceding it), use pip instead of pip3, even if you are using Python 3. The virtual environment’s copy of the tool is always named pip, regardless of the Python version.
Now that you have the packages installed, you will need to save this requirement and its dependencies. This is good practice so you can recreate your developer environment as needed and will aid in installing the correct packages into your Dockerfile in a later step.
Use pip to save your environment’s information to a requirements.txt file:
- pip freeze > requirements.txt
Now that you have a working virtual environment for development, let’s build the microservice.
Step 5 — Building a Python Microservice to Redirect Traffic
The first thing you’ll need to do is create a Python file named app.py and a Dockerfile to specify your Docker requirements. You can create files via the terminal with the touch command and then refreshing the explorer:
- touch app.py
You can also use the file explorer to create a new file by clicking on your my-app folder, then clicking on the New File icon that looks like a piece of paper with a plus sign, then typing out the full name and extension of the file.
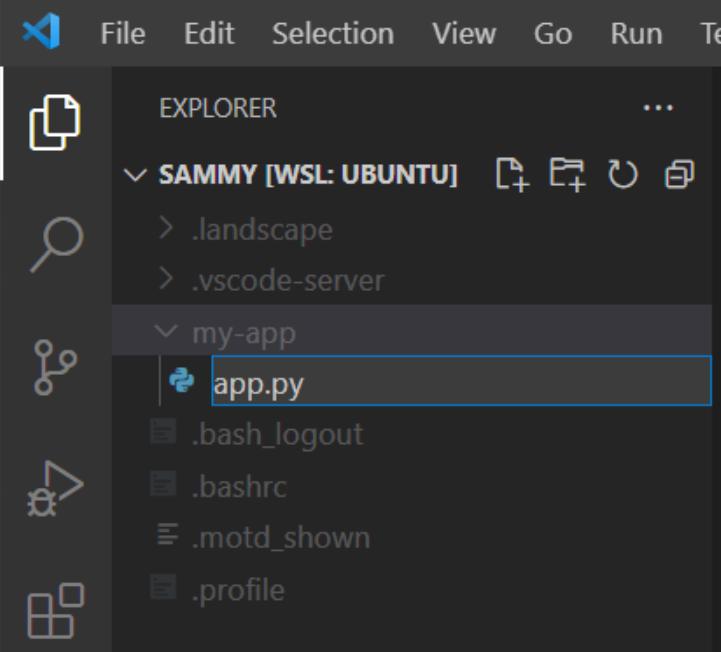
Use either method to create app.py and Dockerfile.
Once you’ve done this, open app.py. The microservice you are going to write today will have only one endpoint, as defined by the @app.route("/") decorator. This endpoint will use the redirect method within the Flask library to perform a 301 redirect to a site that is specified in an environment variable. If no environment variable is set, the app will redirect to DigitalOcean’s website by default.
Open app.py by clicking on it and add the following lines of code.
Add an import statement to import the os package, which will enable the microservice to read the environment variable you’ll define later:
import os
Next, import the Flask class and redirect function from the flask library. You’ll use these to set up your web framework and to redirect traffic to another site.
from flask import Flask,redirect
Next, create a Flask object that can be acted upon within the code. This is the instance of your web app that you will register routes to.
app = Flask(__name__)
Create a single method at the / route. You’ll use your Flask instance to decorate the function to specify the route. Within the function, you will use the Flask redirect function to perform a 301 redirect to another site that will be read from an environment variable. If the environment variable is not found, your app will default redirect to DigitalOcean’s home page. This is to ensure your app doesn’t crash if you forget to set an environment variable.
@app.route('/')
def hello():
    # Attempt to read REDIRECT_TO from the environment. If nothing is set
    # perform a 301 redirect to DigitalOcean's website
    return redirect(os.environ.get("REDIRECT_TO", "https://www.digitalocean.com"), code=301)
Finally, create a main function that runs your Flask app externally on port 8080. The address 0.0.0.0 is used to designate that you want your app to run on the externally facing network interface of your device, not the local loopback device, also known as localhost.
if __name__ == '__main__':
    app.run(host='0.0.0.0', port=8080)
The finished app.py can be found below:
# Import the os package to read the environment variable
import os

# Import the Flask class and redirect function from the flask library
from flask import Flask,redirect


# Create a Flask object to be acted upon
app = Flask(__name__)

# Python decorator that specifies the web route that will execute the code below
@app.route('/')
def hello():
    # Attempt to read REDIRECT_TO from the environment. If nothing is set
    # perform a 301 redirect to DigitalOcean's website
    return redirect(os.environ.get("REDIRECT_TO", "https://www.digitalocean.com"), code=301)

# Main function that executes the Flask app
if __name__ == '__main__':
    app.run(host='0.0.0.0', port=8080)
Once you are done, save the file as app.py.
Now that your app is written, let’s test it.
Step 6 — Testing Your Microservice
Now that your app is written, it is time to test it. In the terminal you opened in Visual Studio Code with the activated virtual environment, run the command:
- python app.py
You should see Flask output that looks similar to this:
Output * Serving Flask app 'app' (lazy loading)
 * Environment: production
   WARNING: This is a development server. Do not use it in a production deployment.
   Use a production WSGI server instead
 * Debug mode: off
 * Running on all addresses.
 * WARNING: This is a development server. Do not use it in a production deployment.
 * Running on https://256.333.112.1:8080/ (Press CTRL+C to quit)
This means that your Flask app is running. Open a browser and navigate to localhost:8080. When you do you should see output happen in your terminal and be redirected to DigitalOcean’s website. This is because you have not specified anywhere for your Flask app to redirect to, so it is using the default.
To stop your Flask app, click in the Visual Studio Code window to ensure it is active and then press CTRL+C. You’ll see the prompt stop and you’ll be presented with your terminal again.
Next, run the following command to set your redirect to something else.
- REDIRECT_TO="https://digitalocean.com/community/tutorials"
Run your Flask app again using the command
- python app.py
Go to your browser again and navigate to localhost:8080. You should then be directed to the DigitalOcean tutorials page.
Note: If you plan on testing multiples redirects with the same container, you may want to use a form of incognito mode. Most modern browsers will cache a 301 redirect, so if you change the environment variable, you may end up at the same site and not see your changes reflected. Using an incognito window or clearing your cache will help with this.
With this, your app is done and is ready to be built into a Docker image.
Step 7 — Building and Running Your Microservice in Docker
In this final step you’re going to package your Python app as a microservice using Docker and a Dockerfile. A Dockerfile is a list of build commands that Docker uses to create your image. These can be commands to install packages, copy files, and more.
Open the Dockerfile you created in a previous step so you can edit it. In this file you’re going to specify the base image, tell Docker where you want the code to run, create an environment variable that holds the redirect target, copy over all the necessary files to the Docker image, install the necessary Python packages, and finally add the command that will be executed when the container is run.
Add the following code to Dockerfile to do this.
First, you need to specify the base image you want to use. The python base image will contain the latest version of Python.
FROM python
Next, set your working directory. This is the default directory that Docker will run commands in and drop you into if you connect with ssh.
WORKDIR /var/www/
Set the REDIRECT_TO environment variable to the default location you want to redirect to. Here I’m setting it to DigitalOcean’s Community Tutorial site. This can be changed when you run the image via the command line.
ENV REDIRECT_TO=https://digitalocean.com/community/tutorials
Copy your app.py and requirements.txt into your Docker container, using fully qualified paths for the destination.
COPY ./app.py /var/www/app.py
COPY ./requirements.txt /var/www/requirements.txt
Run the necessary command to install the Python library requirements within your Docker image.
RUN pip install -r /var/www/requirements.txt
Finally, set the image run command to run your app. This is the command that is run whenever anyone tries to run your Docker container.
CMD python3 app.py
The complete Dockerfile is listed below.
# Choose your base image
FROM python

# Set your working directory
WORKDIR /var/www/

# Set environment variable for redirect. Can be overwritten by Docker run command
ENV REDIRECT_TO=https://digitalocean.com/community/tutorials

# Copy the necessary files
COPY ./app.py /var/www/app.py
COPY ./requirements.txt /var/www/requirements.txt

# Install the necessary packages
RUN pip install -r /var/www/requirements.txt

# Run the app
CMD python3 app.py
When you are done, save the file.
Now you can build the Docker image locally for testing. Run the following command to build your image and tag it with the name myapp. The -t option applies the tag to the Docker image:
- docker build -t myapp .
Finally, it’s time to test your Docker image. In your Dockerfile above you set an environment variable REDIRECT_TO to point at a website. This will overwrite the default value in your code so when you run this container, whatever site you specified in the Dockerfile will be your new location.
Note: If you are prompted by windows to grant permission to Docker to access the network, click Allow.
To test your image, run the following command:
- docker run -p 8080:8080 myapp
While your image is running, navigate to a browser and type localhost:8080 in the navigation bar and you should be redirected to the site listed in the Dockerfile.
Warning: Sometimes the WSL terminal doesn’t recognize CTRL + C as a way to stop your Docker image. In this instance you’ll need to open another terminal and search for your running Docker image using the command:
- docker container ls
This will show an output similar to this:
OutputCONTAINER ID   IMAGE     COMMAND                  CREATED              STATUS              PORTS                                       NAMES
3f081712283e   myapp     "/bin/sh -c 'python3…"   About a minute ago   Up About a minute   0.0.0.0:8080->8080/tcp, :::8080->8080/tcp   reverent_saha
Take the container id, which in this example is 3f081712283e and use the docker kill command to stop it.
- docker kill 3f081712283e
Finally, let’s test changing the environment variable of the redirect in the docker run command.
Type the following command to change the environment variable to the DigitalOcean cloud console page, https://cloud.digitalocean.com.
- docker run -p 8080:8080 -e REDIRECT_TO=https://cloud.digitalocean.com myapp
Now if you go to a browser and browse to localhost:8080 you will be redirected to the site specified on the command line.
Conclusion
You have successfully set up a developer environment on Windows using the WSL, Visual Studio Code, and Docker Desktop. You’ve demonstrated how to build, test, and package code on Windows, allowing you to have more options when it comes to developer environments.
更多推荐
 已为社区贡献15557条内容



所有评论(0)