
基于Flask+Vue.js+YOLOv9的智能轴承缺陷检测系统
·
一、项目概述
1.1 项目名称
轴承缺陷检测系统(Bearing Defect Detection System)
1.2 项目简介
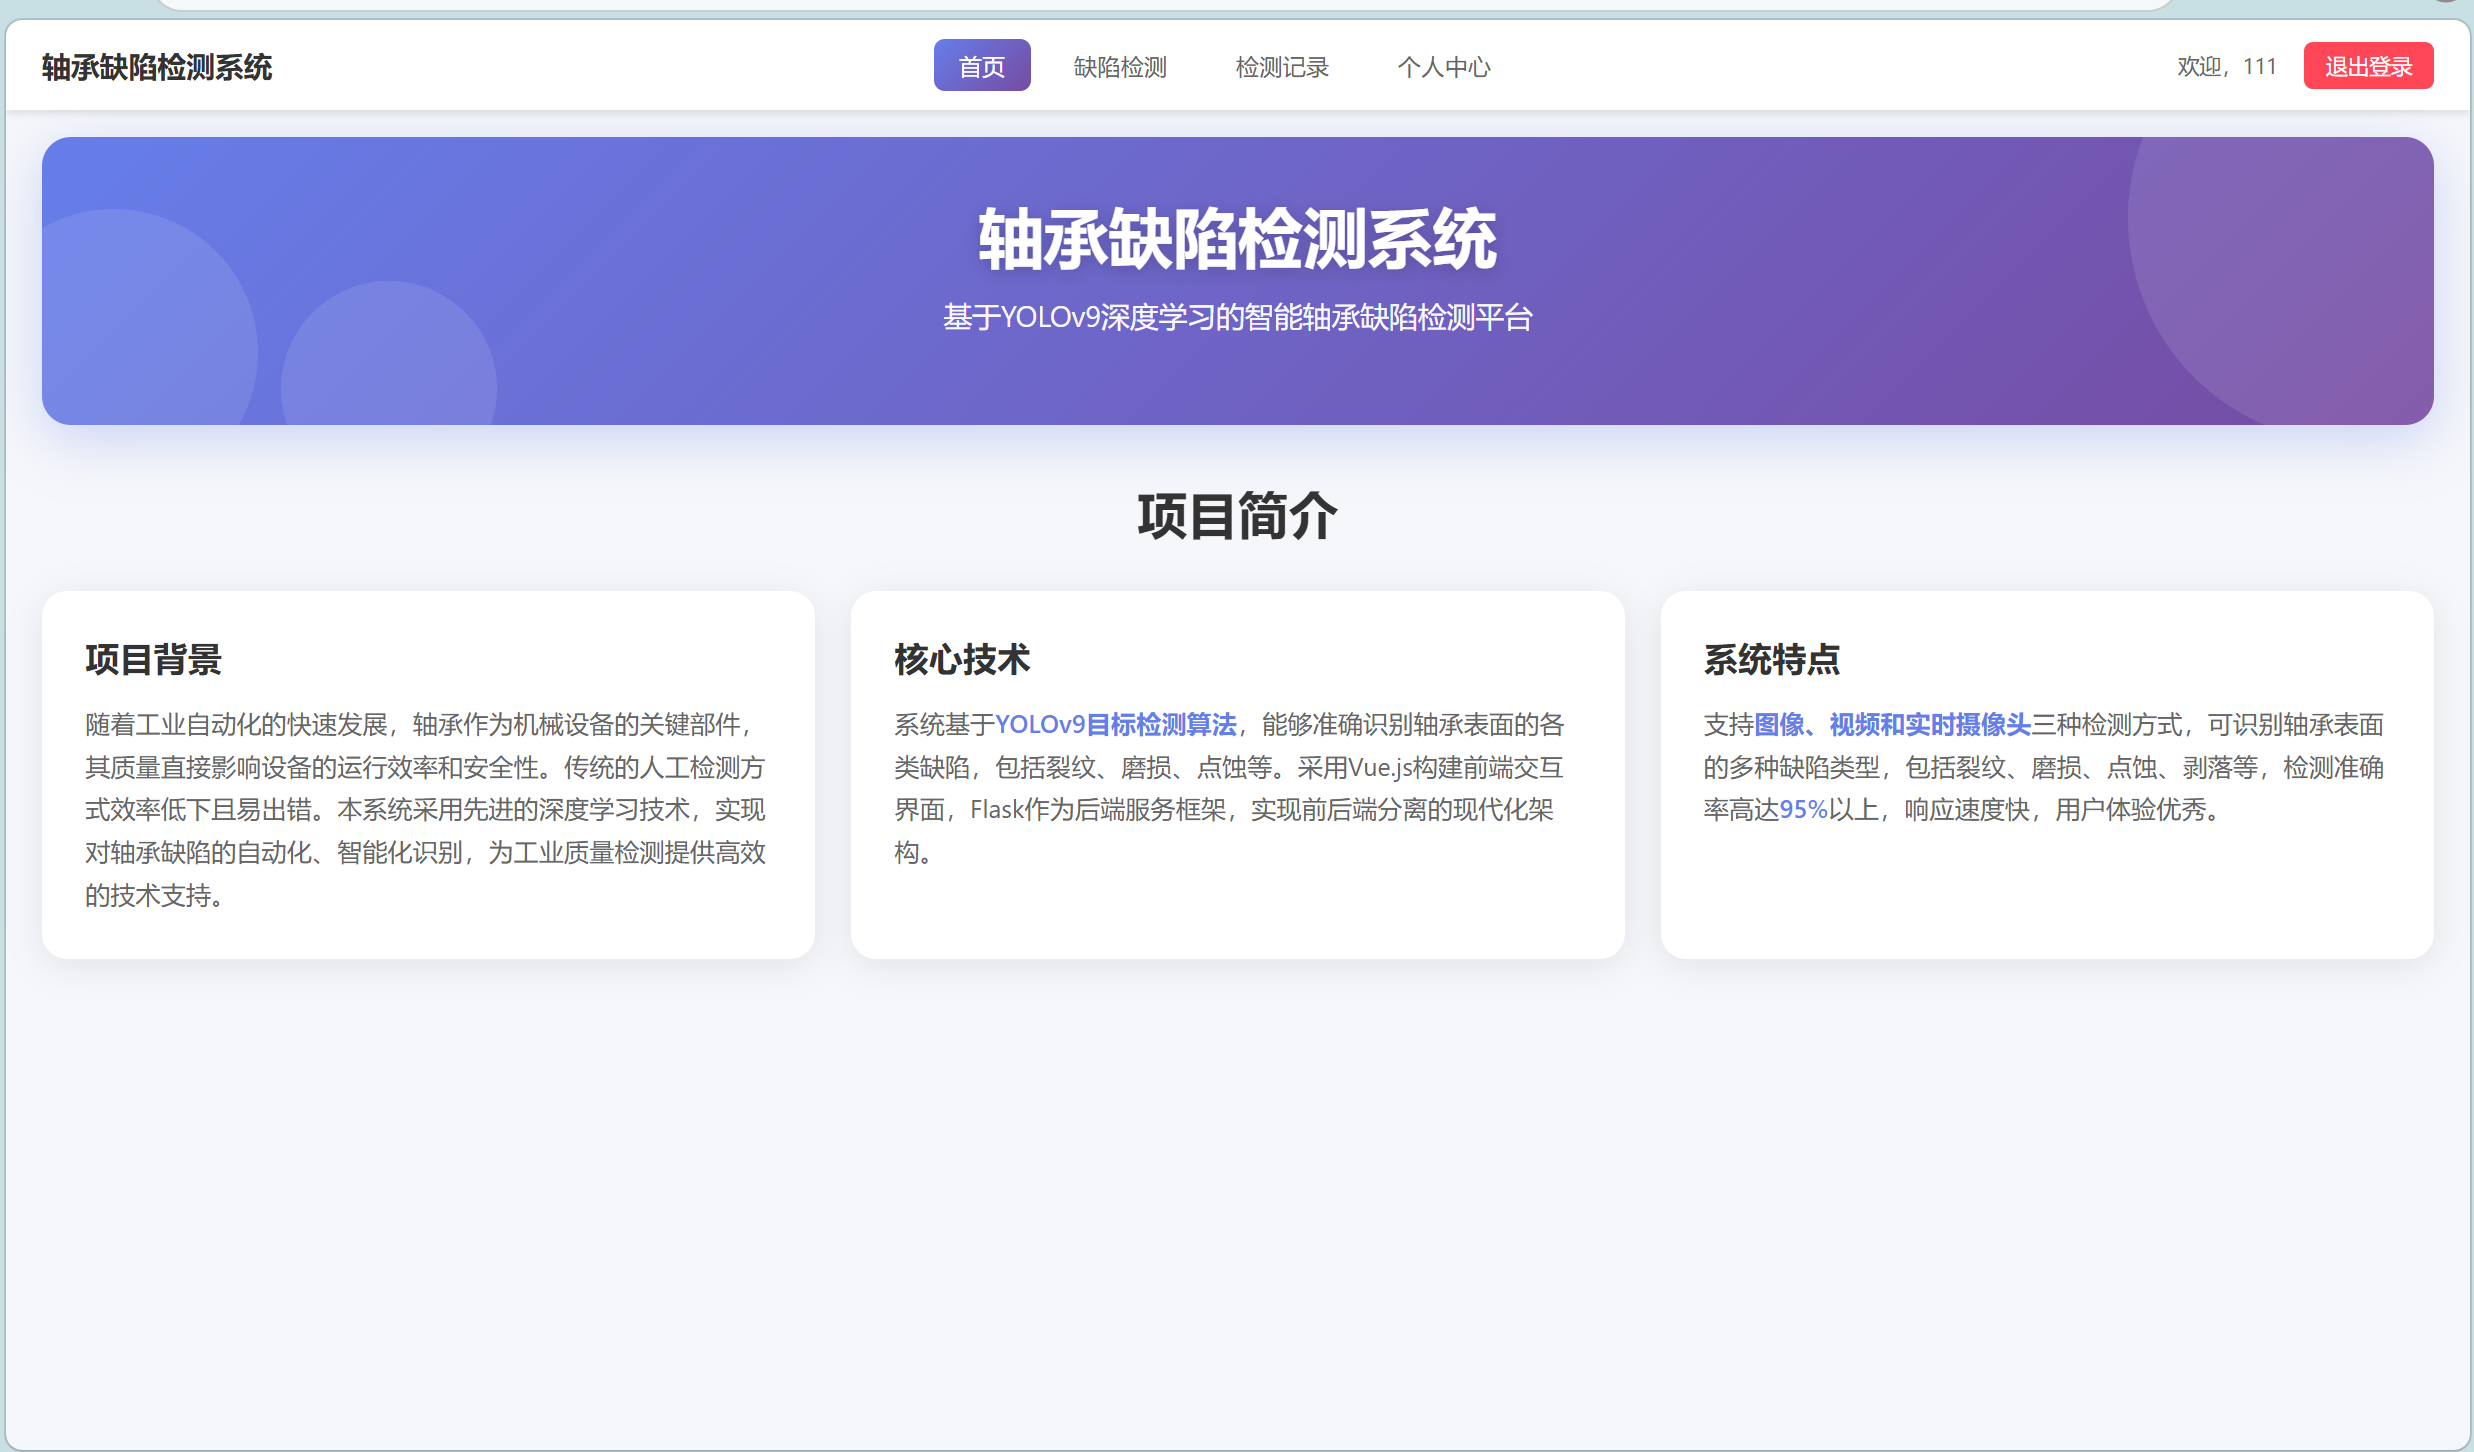
系统是一个基于YOLOv9深度学习算法的智能轴承缺陷检测平台,采用前后端分离架构,实现对轴承表面缺陷的自动化识别与管理。系统支持图像上传、摄像头实时检测和视频检测三种方式,能够准确识别铸造毛刺、裂纹、划痕、凹坑等8种缺陷类型。
1.3 技术栈
- 前端:Vue.js 3.2.13、Vue Router 4.6.3、Axios 1.12.2;
- 后端:Flask 3.0.3、Flask-SQLAlchemy、Flask-JWT-Extended;
- 深度学习:YOLOv9、PyTorch 2.0+、OpenCV 4.8+;
- 数据库:SQLite。
二、系统架构
2.1 整体架构
系统采用前后端分离的B/S架构:
- 前端:Vue.js单页应用,提供用户交互界面;
- 后端:Flask RESTful API服务,处理业务逻辑;
- AI模型:YOLOv9目标检测模型,负责缺陷识别;
- 数据库:SQLite存储用户信息和检测记录。
2.2 目录结构
项目根目录/
├── fxapp-frontend/          # 前端Vue项目
│   ├── src/
│   │   ├── views/           # 页面组件
│   │   ├── services/        # API服务
│   │   ├── router/          # 路由配置
│   │   └── App.vue          # 根组件
│   └── package.json
├── fxapp-backend/           # 后端Flask项目
│   ├── app.py               # 主应用文件
│   └── instance/            # 数据库文件
├── yolov9-main/             # YOLOv9模型
│   ├── data1/               # 训练数据集
│   └── runs/                # 训练结果
└── requirements.txt         # Python依赖
三、功能模块
3.1 用户管理模块
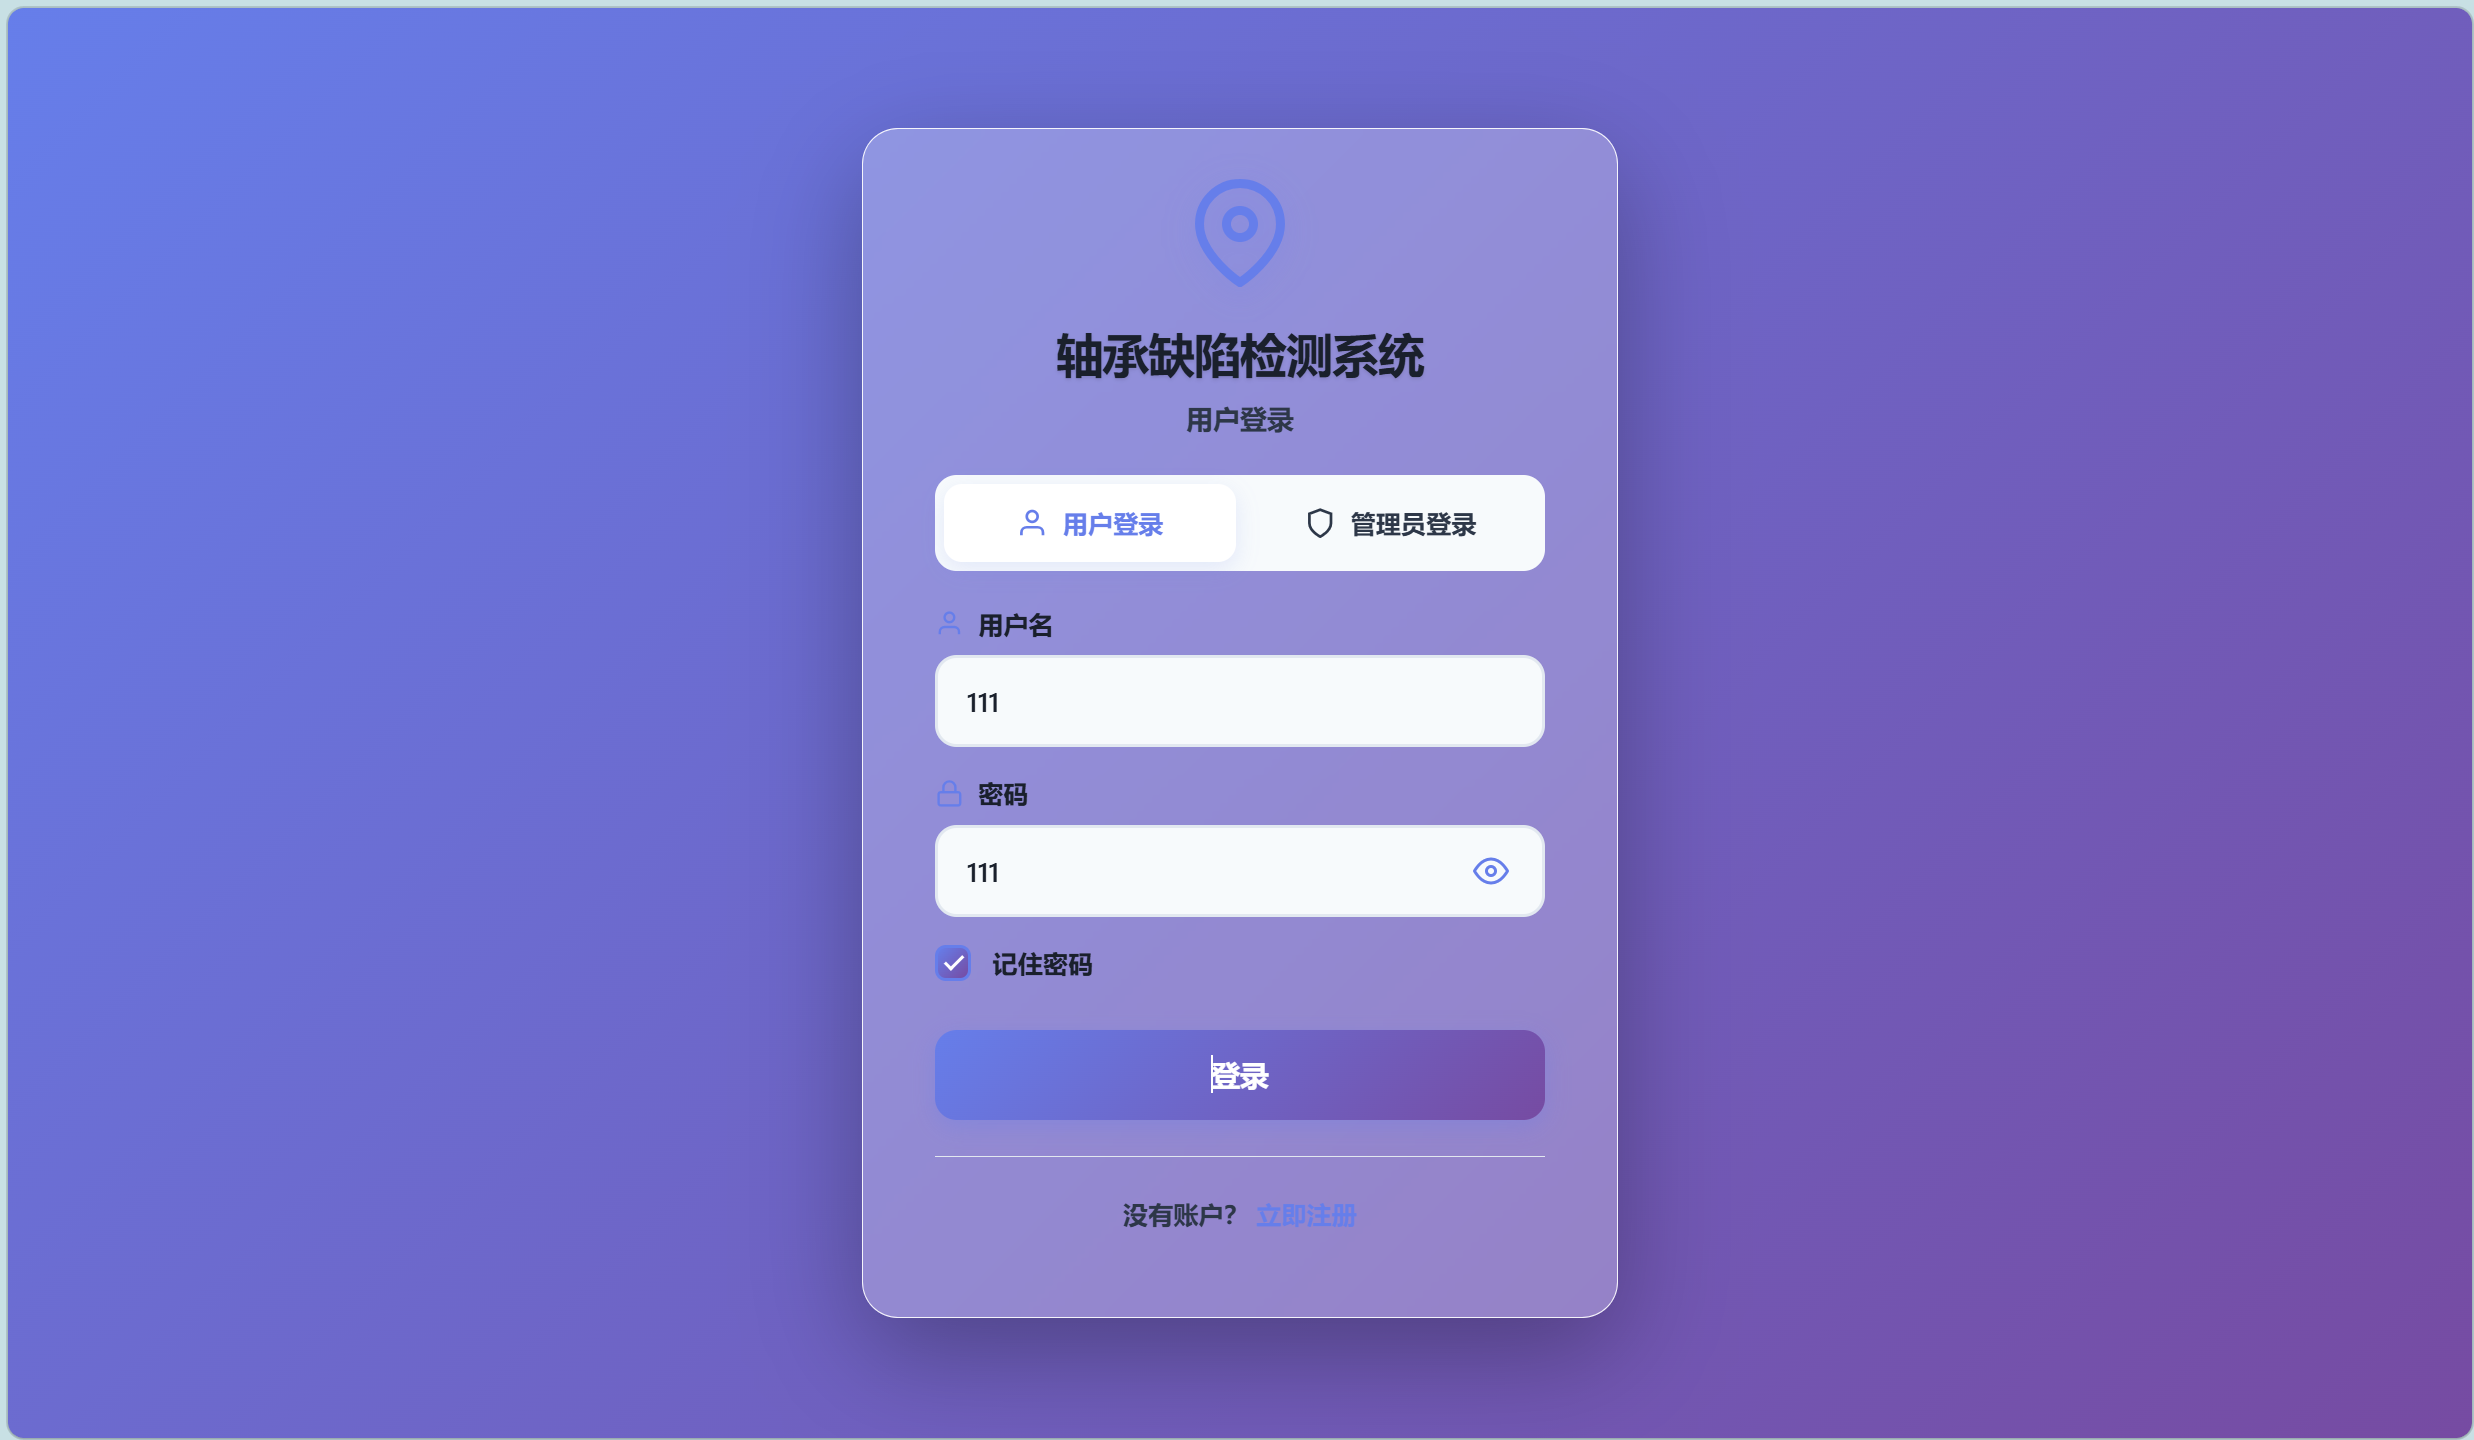
- 用户注册:用户名、手机号、密码注册,支持手机号格式验证;
- 用户登录:支持普通用户和管理员登录,JWT Token认证;
- 权限控制:普通用户查看个人数据,管理员管理全局数据。
# 用户登录
@app.route('/api/login', methods=['POST'])
def login():
    data = request.get_json()
    username = data['username']
    password = data['password']
    # 检查管理员
    if username == 'admin' and password == 'admin123':
        access_token = create_access_token(
            identity={'username': 'admin', 'is_admin': True, 'id': 0}
        )
        return jsonify({'access_token': access_token}), 200
    # 普通用户验证
    user = User.query.filter_by(username=username).first()
    if user and user.check_password(password):
        access_token = create_access_token(identity={'username': user.username, 'id': user.id})
        return jsonify({'access_token': access_token, 'user': user.to_dict()}), 200
3.2 缺陷检测模块
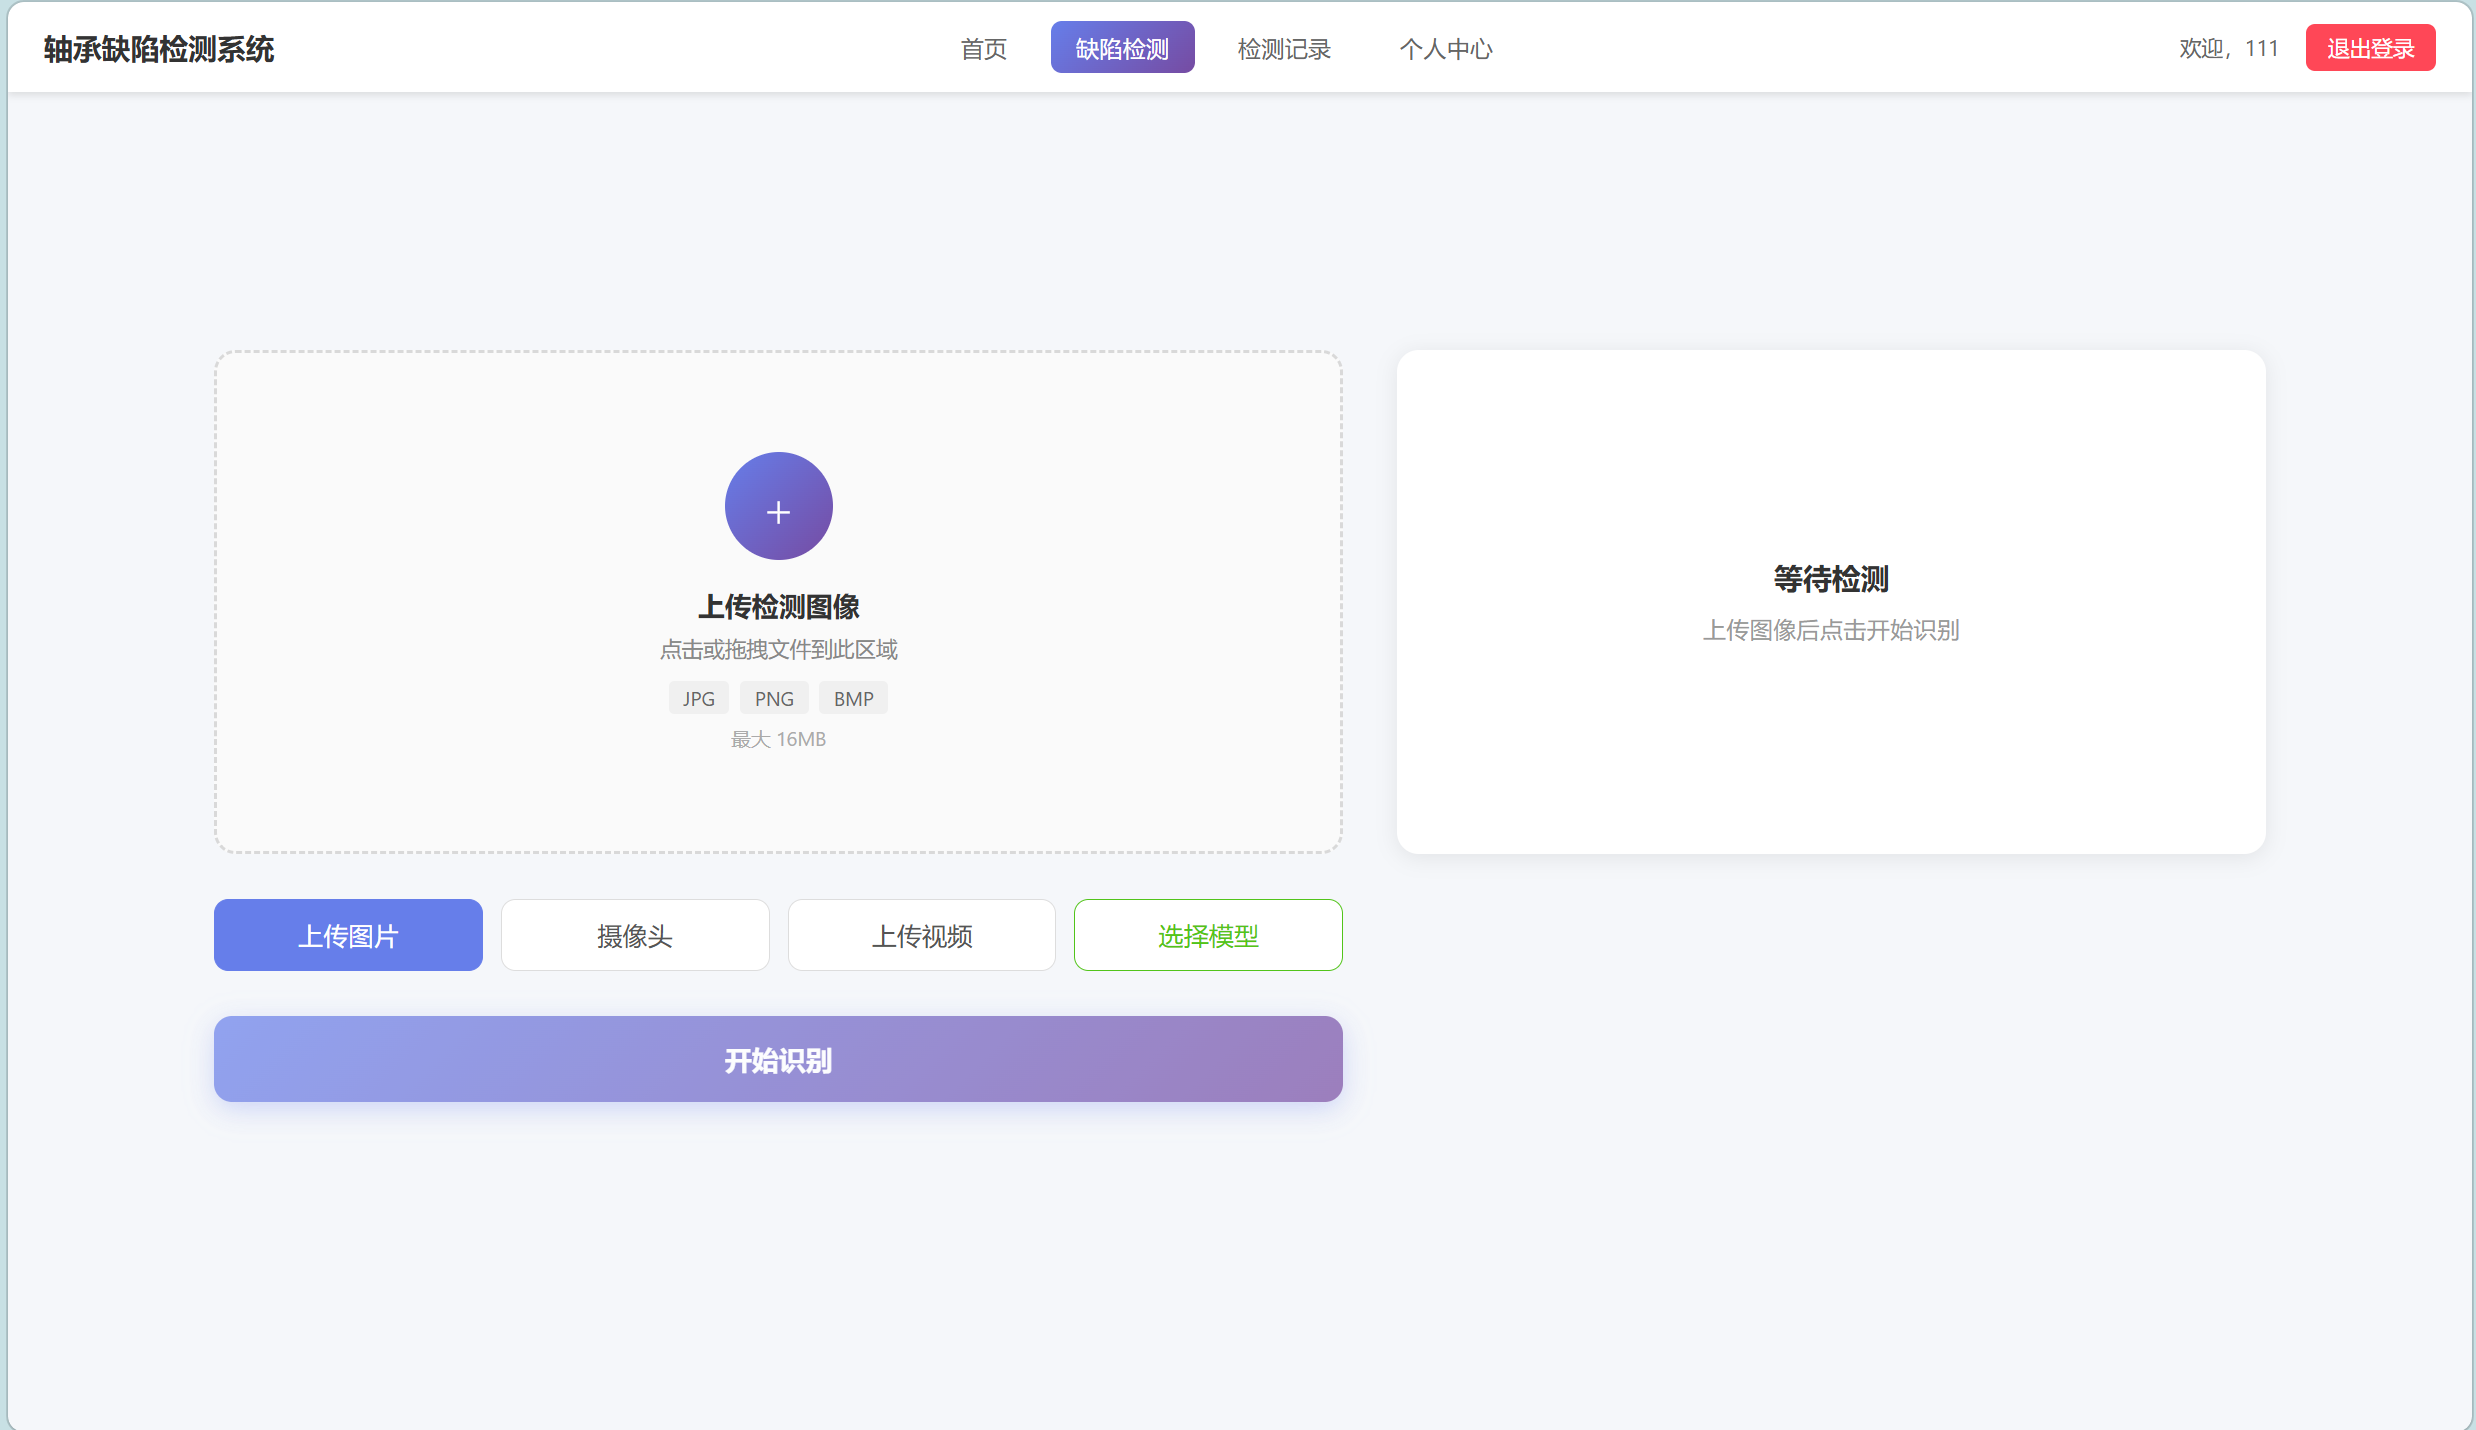
- 图像上传检测:支持JPG/PNG/BMP格式,最大16MB,拖拽上传;
- 摄像头实时检测:调用设备摄像头,实时拍照检测;
- 缺陷识别:识别8种轴承缺陷(铸造毛刺、裂纹、划痕、凹坑、抛光铸件、应变、未抛光铸件、毛刺);
- 结果展示:标注图像、缺陷类型、置信度、坐标信息。
# 缺陷检测
def detect_violation(image_path):
    # 加载模型
    yolo_model = torch.hub.load('../yolov9-main', 'custom', path=model_path, source='local')
    yolo_model.conf = 0.25
    # 读取图像并检测
    img = cv2.imread(image_path)
    results = yolo_model(img)
    detections = results.pandas().xyxy[0]
    # 解析结果
    detected_objects = {'defects': []}
    for idx, row in detections.iterrows():
        defect_type = translate_label_to_chinese(row['name'])
        detected_objects['defects'].append({
            'type': defect_type,
            'confidence': float(row['confidence']),
            'bbox': [int(row['xmin']), int(row['ymin']), int(row['xmax']), int(row['ymax'])]
        })
    return {'violation_type': defect_type, 'detected_objects': detected_objects}
3.3 记录管理模块
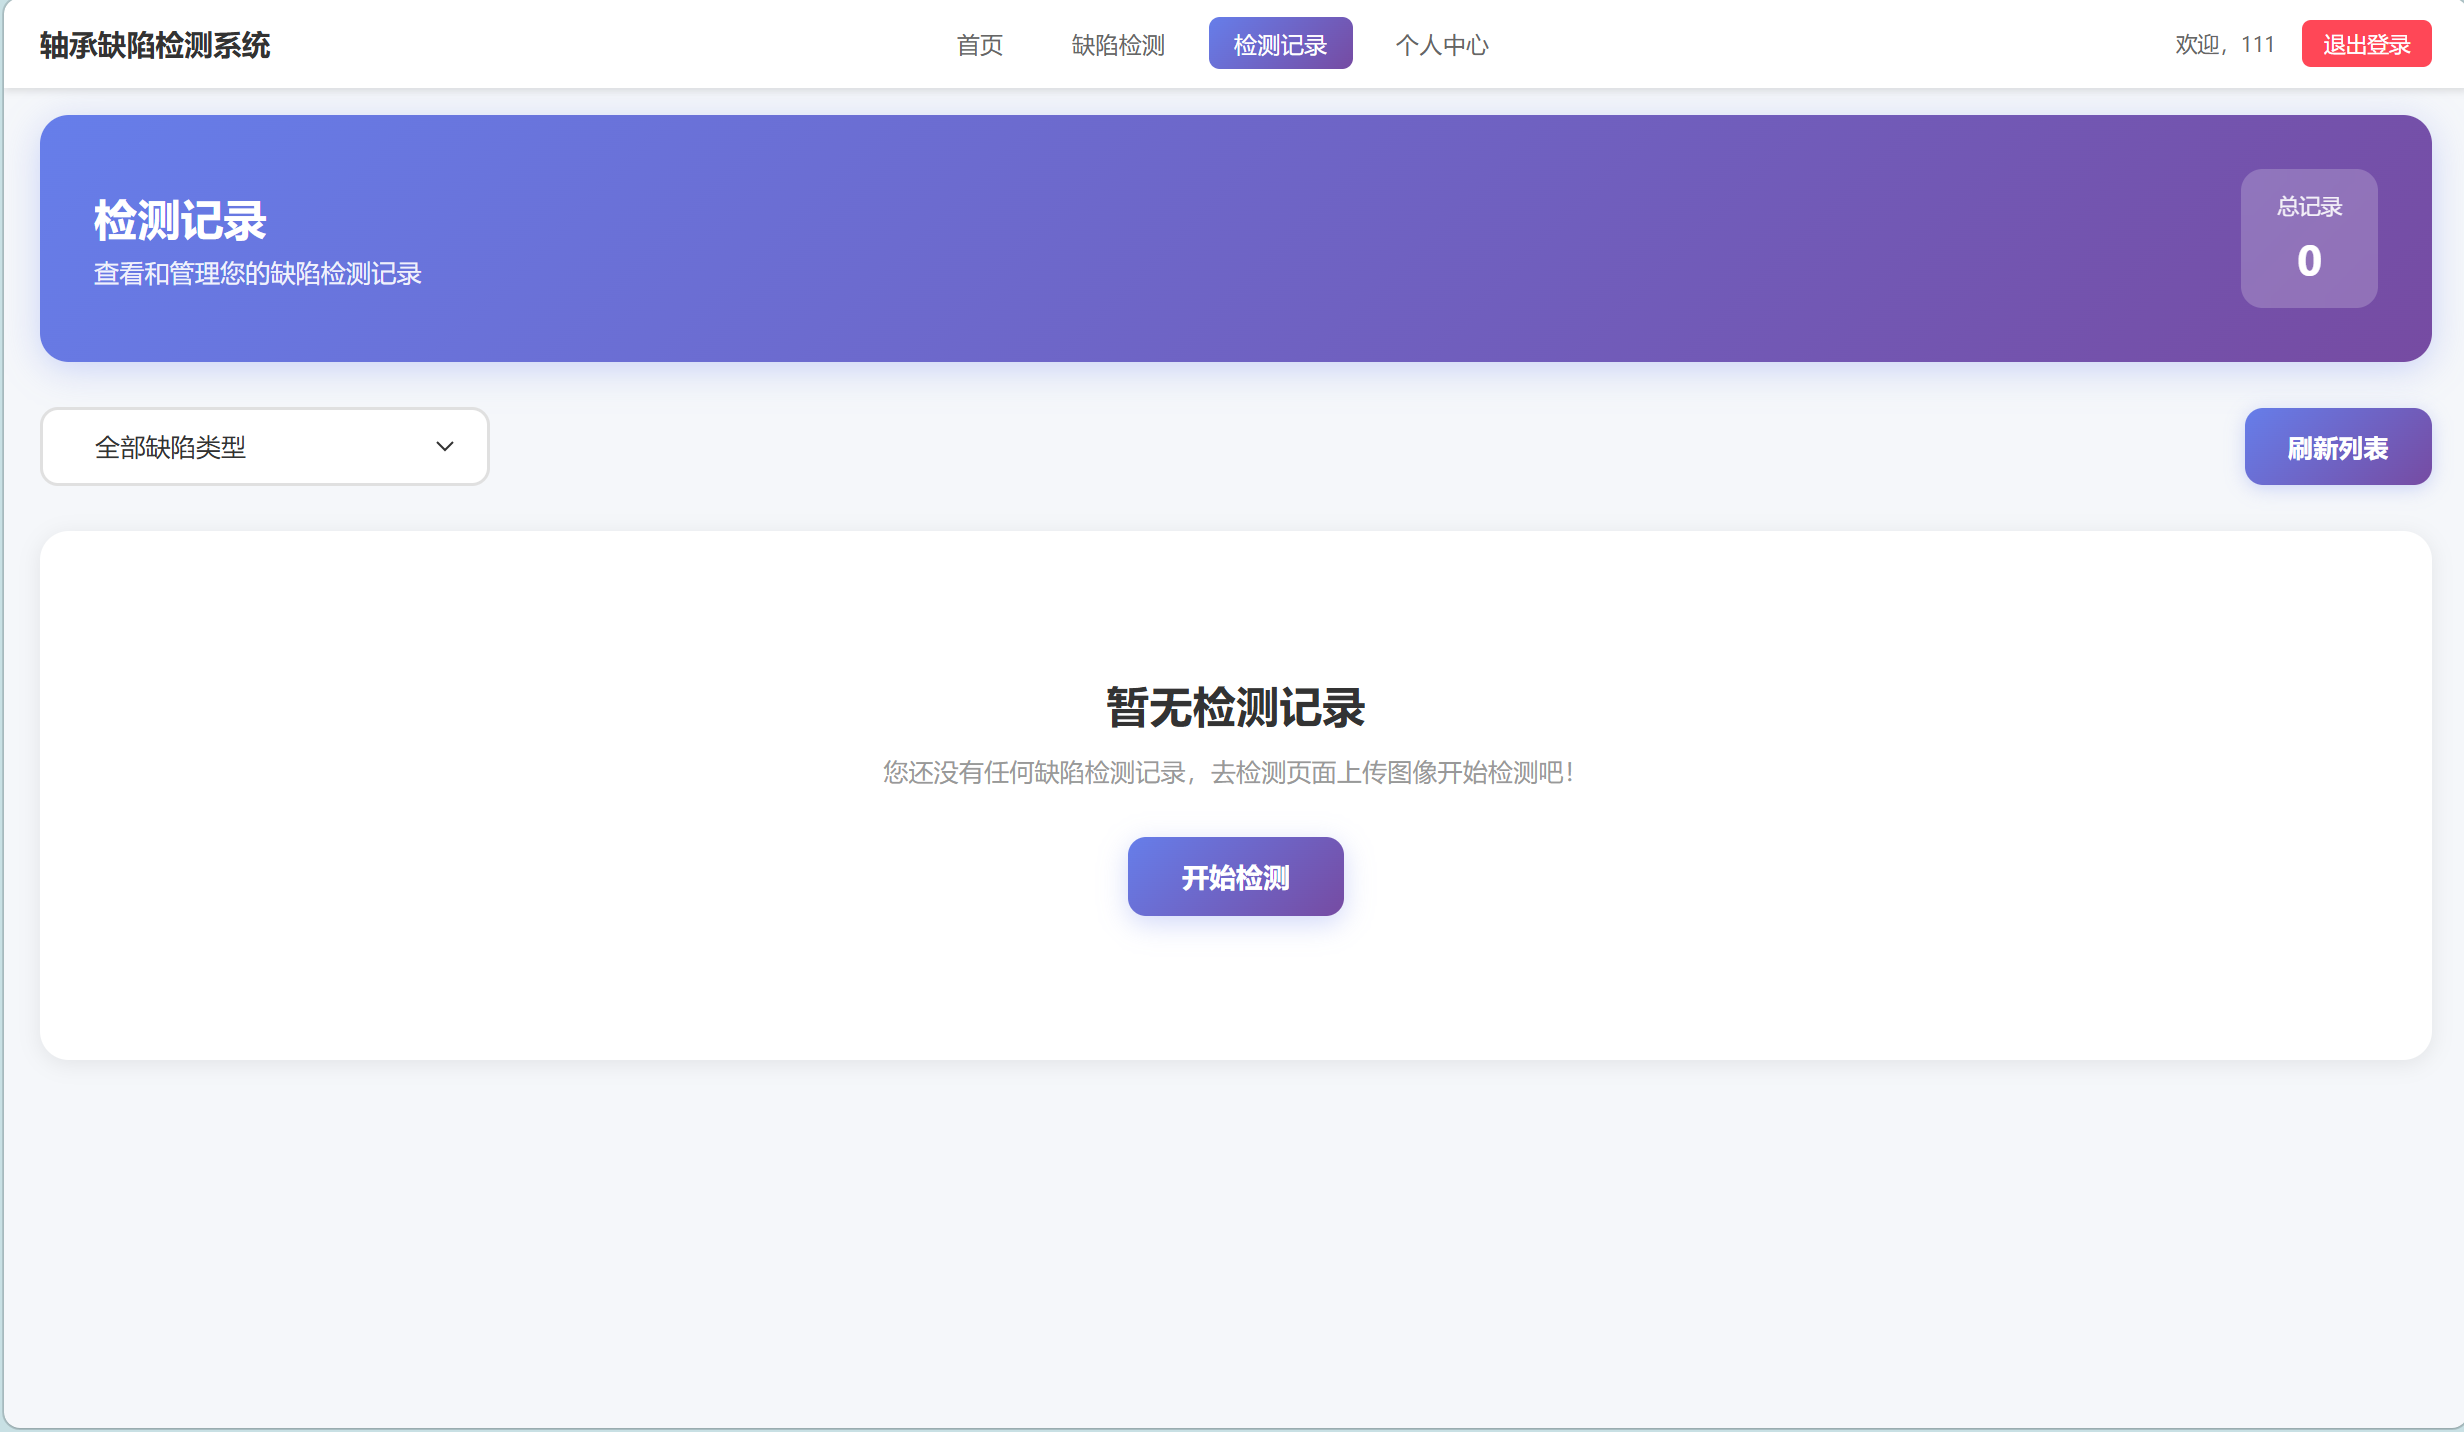
- 记录列表:分页显示、按类型筛选、批量删除;
- 记录详情:查看标注图像和详细信息。
# 获取记录列表
@app.route('/api/violations/records', methods=['GET'])
@jwt_required()
def get_violation_records():
    current_user = get_jwt_identity()
    page = request.args.get('page', 1, type=int)
    # 查询记录
    query = ViolationRecord.query.filter_by(user_id=current_user['id'])
    pagination = query.order_by(ViolationRecord.created_at.desc()).paginate(page=page, per_page=10)
    return jsonify({
        'records': [record.to_dict() for record in pagination.items],
        'total': pagination.total
    }), 200
3.4 统计分析模块
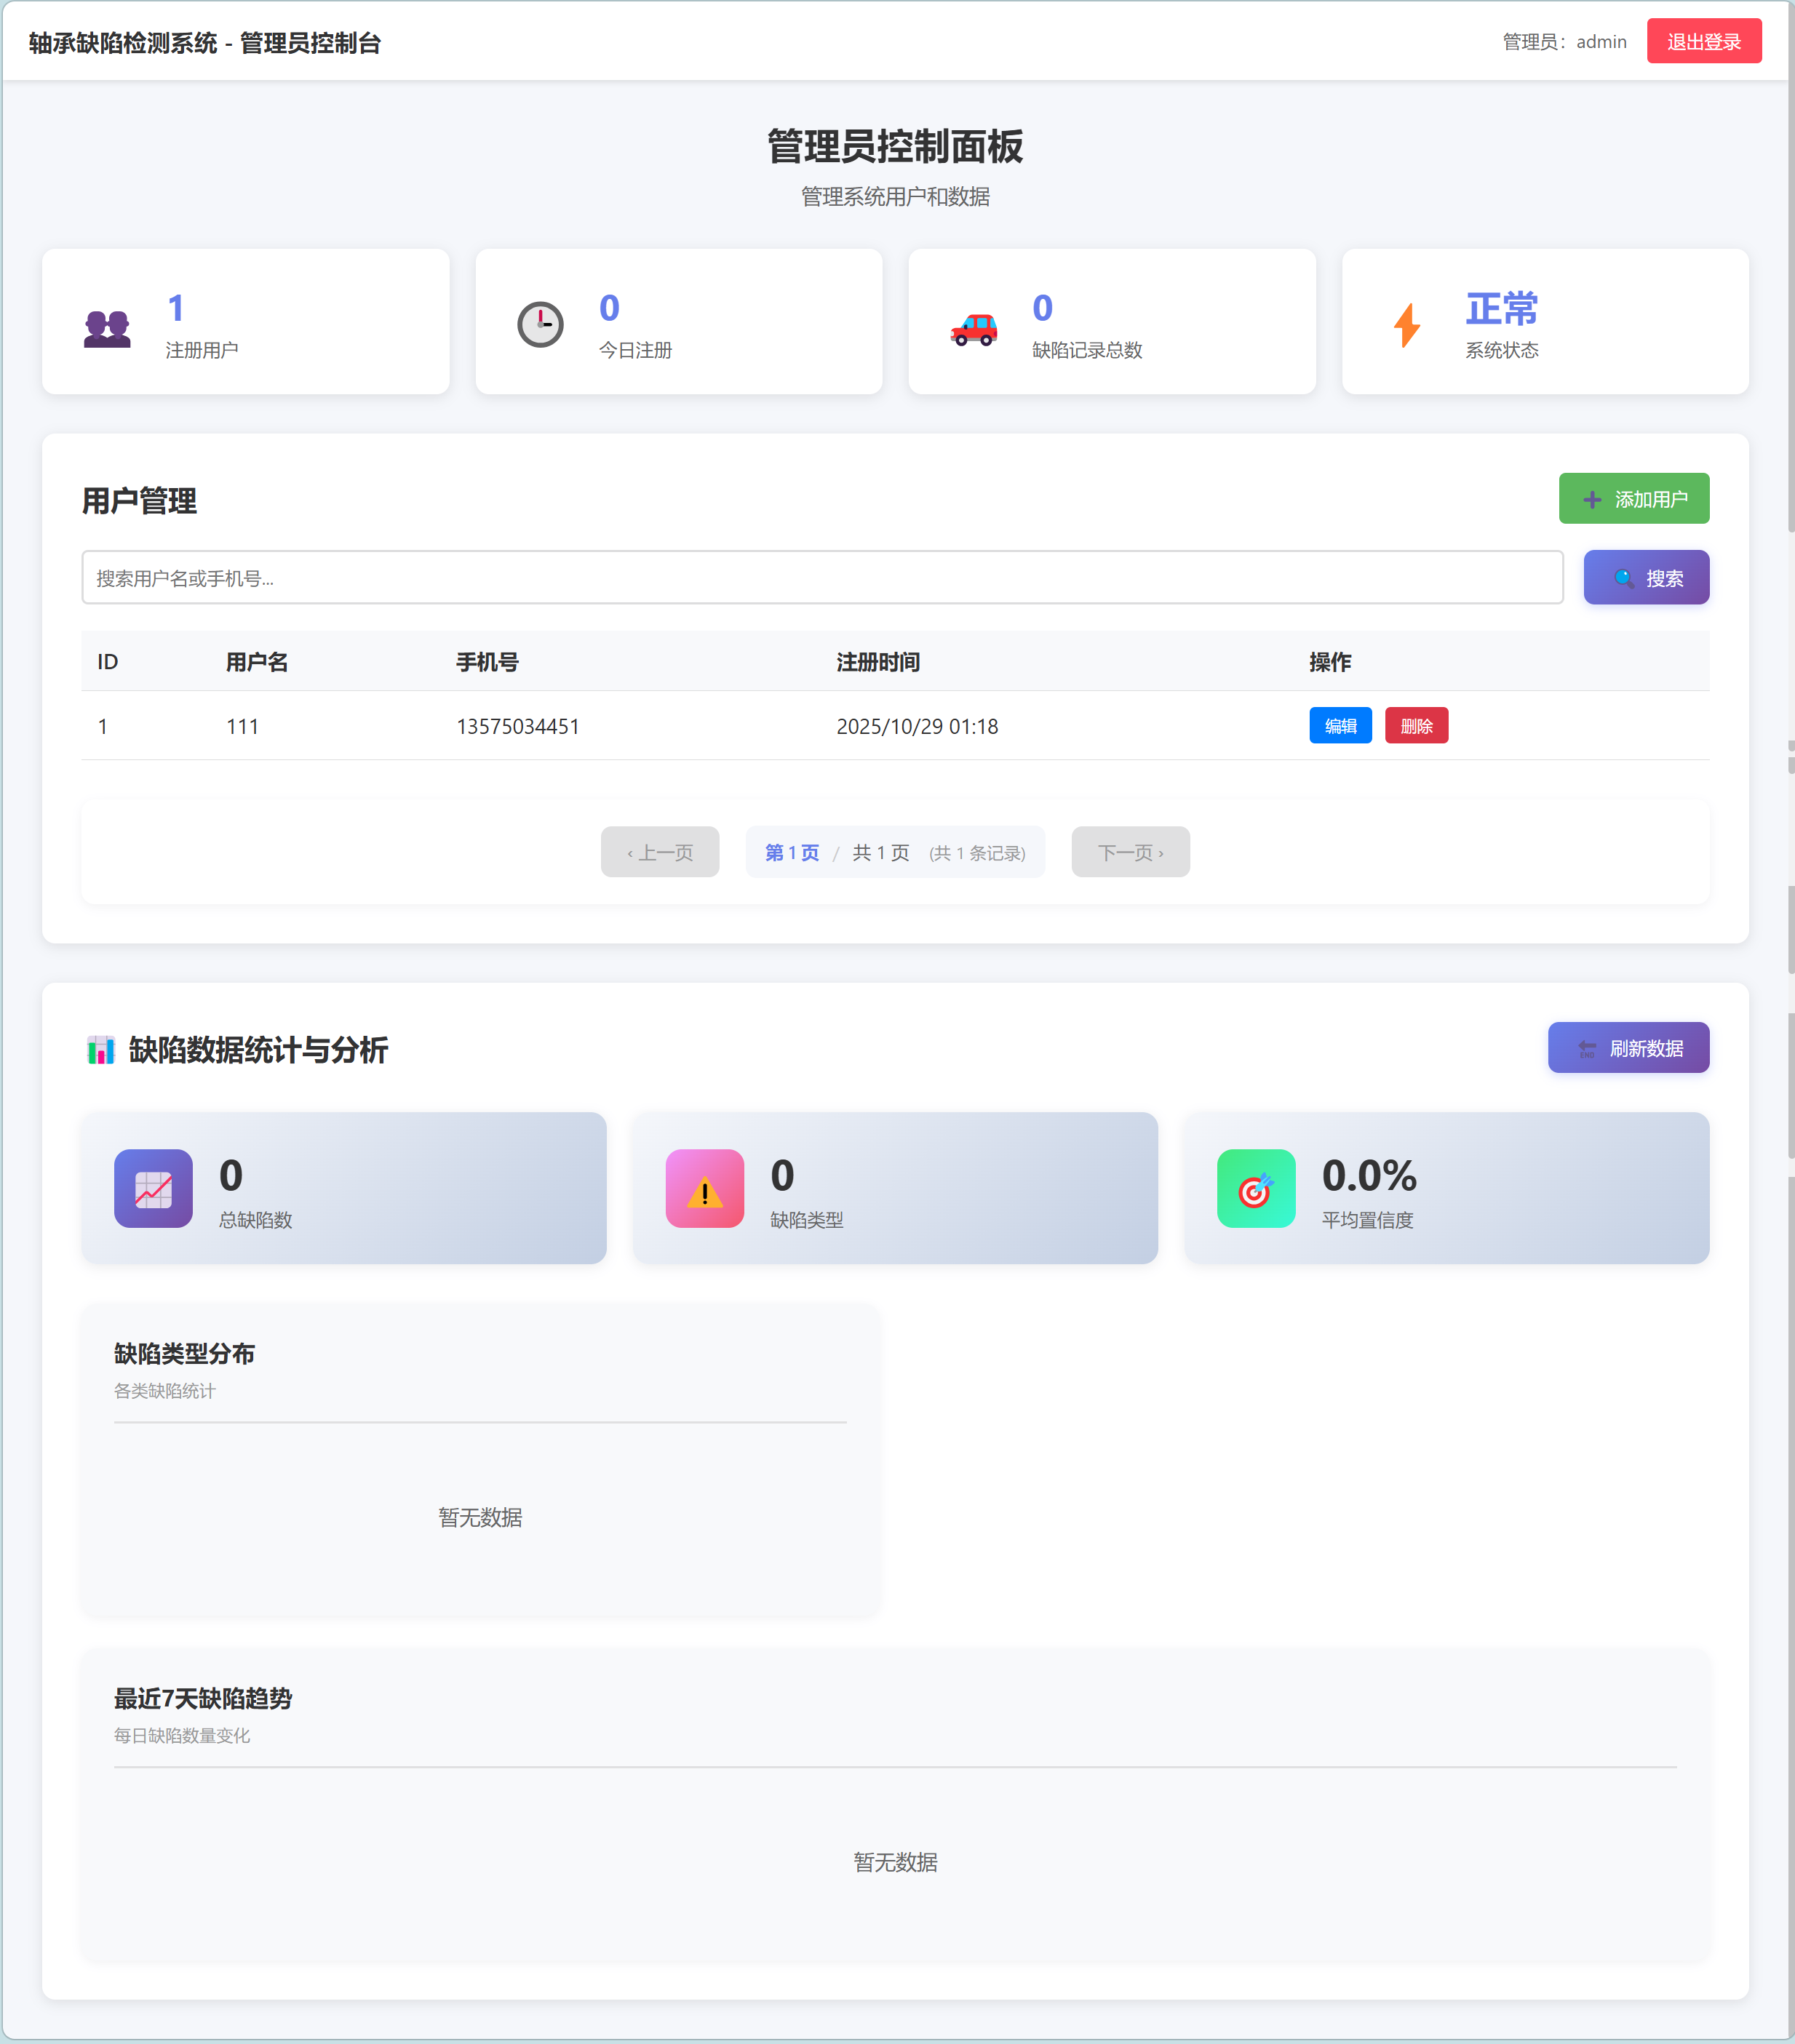
- 用户统计:总记录数、活跃天数、平均置信度、本月检测次数;
- 管理员统计:用户总数、缺陷分布图、7天趋势图。
# 获取统计数据
@app.route('/api/violations/statistics', methods=['GET'])
@jwt_required()
def get_violation_statistics():
    current_user = get_jwt_identity()
    # 总数统计
    total_violations = ViolationRecord.query.filter_by(user_id=current_user['id']).count()
    # 按类型统计
    violation_by_type = db.session.query(
        ViolationRecord.violation_type,
        func.count(ViolationRecord.id).label('count')
    ).filter_by(user_id=current_user['id']).group_by(ViolationRecord.violation_type).all()
    # 平均置信度
    avg_confidence = db.session.query(
        func.avg(ViolationRecord.confidence)
    ).filter_by(user_id=current_user['id']).scalar()
    return jsonify({
        'total_violations': total_violations,
        'violation_by_type': [{'type': t, 'count': c} for t, c in violation_by_type],
        'avg_confidence': round(float(avg_confidence), 2)
    }), 200
四、数据库设计
4.1 用户表(User)
| 字段名 | 类型 | 说明 |
| id | integer | 主键 |
| username | String(80) | 用户名(唯一) |
| phone | tring(11) | 手机号(唯一) |
| password_hash | String(60) | 密码哈希 |
| is_admin | Boolean | 是否管理员 |
| created_at | DateTime | 创建时间 |
4.2 违章记录表(ViolationRecord)
| 字段名 | 类型 | 说明 |
| id | Integer | 主键 |
| user_id | Integer | 用户ID(外键) |
| image_path | String(255) | 图像路径(Base64) |
| vehicle_type | String(50) | 车辆类型 |
| plate_number | String(20) | 车牌号 |
| violation_type | String(100) | 违章类型 |
| confidence | Float | 置信度 |
| location | String(255) | 地点 |
| description | Text | 描述 |
| detected_objects | Text | 检测对象(JSON) |
| created_at | DateTime | 创建时间 |
五、YOLOv9模型配置
5.1 数据集配置
data1.yaml
path: C:/Users/admin/Desktop/yolov9-main/data1
train: images/train  # 2559张训练图像
val: images/val      # 732张验证图像
nc: 8                # 8个类别
names:
  0: Casting_burr
  1: crack
  2: scratch
  3: pit
  4: Polished_casting
  5: strain
  6: unpolished_casting
  7: burr
5.2 模型参数
置信度阈值:0.25
NMS IOU阈值:0.45
模型路径:../yolov9-main/runs/train/exp/weights/best.pt
5.3 检测流程
加载YOLOv9模型 --> 读取输入图像 --> 执行目标检测 --> 解析检测结果 --> 绘制标注框和中文标签 --> 保存标注图像 --> 返回检测结果
六、部署说明
6.1 环境要求
Python 3.8+
Node.js 14+
支持CUDA的GPU(可选,用于加速)
6.2 后端部署
# 安装依赖
pip install -r requirements.txt
# 运行后端服务
cd fxapp-backend
python app.py
# 服务运行在 http://localhost:5000
6.3 前端部署
# 安装依赖
cd fxapp-frontend
npm install
# 开发模式运行
npm run serve
# 访问 http://localhost:8080
# 生产构建
npm run build
6.4 默认账户
管理员账户:
用户名:admin
密码:admin123
七、视频演示
轴承缺陷检测
更多推荐

 10
10 0
0- 0


 已为社区贡献4条内容

所有评论(0)