
一、文档说明

1.1 适用环境

  • 操作系统:CentOS 7(64位)
  • 核心目标:基于 Docker 部署 Nginx 服务,实现 HTTP 自动跳转 HTTPS,解决中文乱码、证书挂载、镜像检测等问题
  • 前置条件:服务器以 root 用户登录,且能访问外网(已手动拉取 nginx:1.21 镜像)

1.2 最终效果

  • 访问 http://192.168.10.110 自动跳转至 https://192.168.10.110
  • HTTPS 页面正常显示中文,无乱码
  • Nginx 容器开机自启,配置/证书/日志持久化存储

二、详细部署步骤

步骤1:环境检查与基础准备

1.1 检查用户权限(必须 root)

1

2

3

# 验证当前用户是否为 root

id -u

# 输出 0 表示为 root 用户,否则切换 root:su root

1.2 安装基础工具(解决依赖)

1

2

# 安装 lsof(端口检测)、openssl(证书生成)等工具

yum install -y lsof openssl net-tools wget curl &>/dev/null

1.3 检查端口可用性(80/443 必须空闲)

1

2

3

4

5

6

7

# 检查 80 端口

lsof -i:80

# 检查 443 端口

lsof -i:443

# 若端口被占用,关闭占用进程(示例:关闭 80 端口占用进程)

kill -9 $(lsof -t -i:80)

步骤2:创建工作目录(统一管理资源)

1

2

3

4

# 创建核心目录(配置/证书/页面/日志)

mkdir -p /opt/nginx-https/{conf,cert,wwwroot,logs}

# 设置目录权限(避免容器挂载后权限不足)

chmod -R 755 /opt/nginx-https

步骤3:生成 SSL 自签名证书

1

2

3

4

5

6

7

8

9

10

11

12

13

14

15

16

17

18

19

20

21

# 进入证书目录

cd /opt/nginx-https/cert

# 1. 生成 2048 位私钥(无密码)

openssl genrsa -out nginx.key 2048 &>/dev/null

# 2. 生成证书请求文件(无交互,适配主机 IP)

openssl req -new -key nginx.key -out nginx.csr -subj "/C=CN/ST=Beijing/L=Beijing/O=Test/OU=IT/CN=192.168.10.110" &>/dev/null

# 3. 生成自签名证书(有效期 365 天)

openssl x509 -req -days 365 -in nginx.csr -signkey nginx.key -out nginx.crt &>/dev/null

# 4. 验证证书文件(必须存在 nginx.key 和 nginx.crt)

ls -l /opt/nginx-https/cert/

# 输出如下则成功:

# -rw-r--r-- 1 root root 1027 12月 28 23:00 nginx.crt

# -rw-r--r-- 1 root root 1086 12月 28 23:00 nginx.csr

# -rw-r--r-- 1 root root 1675 12月 28 23:00 nginx.key

# 5. 设置证书权限(Nginx 需读取权限)

chmod 644 /opt/nginx-https/cert/nginx.key /opt/nginx-https/cert/nginx.crt

步骤4:编写 Nginx HTTPS 配置文件

4.1 创建配置文件

1

vim /opt/nginx-https/conf/nginx.conf

4.2 粘贴完整配置(含 UTF-8 编码,解决中文乱码)

1

2

3

4

5

6

7

8

9

10

11

12

13

14

15

16

17

18

19

20

21

22

23

24

25

26

27

28

29

30

31

32

33

34

35

36

37

38

39

40

41

42

43

44

45

46

47

48

49

50

51

52

53

54

55

56

worker_processes  1;

error_log  /var/log/nginx/error.log warn;

pid        /var/run/nginx.pid;

events {

    worker_connections  1024;

}

http {

    # 核心:解决中文乱码,全局指定 UTF-8 编码

    charset utf-8;

    include       /etc/nginx/mime.types;

    default_type  application/octet-stream;

    log_format  main  '$remote_addr [$time_local] "$request" '

                      '$status $body_bytes_sent "$http_referer" '

                      '"$http_user_agent" "$http_x_forwarded_for"';

    access_log  /var/log/nginx/access.log  main;

    sendfile        on;

    keepalive_timeout  65;

    # HTTP 服务:自动跳转 HTTPS

    server {

        listen       80;

        server_name  192.168.10.110;

        return 301 https://$host$request_uri;

    }

    # HTTPS 核心配置

    server {

        listen       443 ssl;

        server_name  192.168.10.110;

        # 证书挂载路径(容器内路径,对应宿主机 /opt/nginx-https/cert)

        ssl_certificate      /etc/nginx/cert/nginx.crt;

        ssl_certificate_key  /etc/nginx/cert/nginx.key;

        # SSL 优化配置

        ssl_session_cache    shared:SSL:1m;

        ssl_session_timeout  5m;

        ssl_ciphers  HIGH:!aNULL:!MD5;

        ssl_prefer_server_ciphers  on;

        # 静态页面目录(挂载宿主机 /opt/nginx-https/wwwroot)

        location / {

            root   /usr/share/nginx/html;

            index  index.html index.htm;

        }

        # 错误页面配置

        error_page   500 502 503 504  /50x.html;

        location = /50x.html {

            root   /usr/share/nginx/html;

        }

    }

}

4.3 验证配置语法(关键:挂载证书目录验证)

1

2

3

4

5

6

7

8

9

# 用容器内 Nginx 验证配置(同时挂载配置和证书目录)

docker run --rm \

-v /opt/nginx-https/conf/nginx.conf:/etc/nginx/nginx.conf \

-v /opt/nginx-https/cert:/etc/nginx/cert \

nginx:1.21 nginx -t

# 输出如下则配置正确:

# nginx: the configuration file /etc/nginx/nginx.conf syntax is ok

# nginx: configuration file /etc/nginx/nginx.conf test is successful

步骤5:创建测试页面(解决中文乱码)

1

2

# 编辑测试页面,指定 UTF-8 编码

vim /opt/nginx-https/wwwroot/index.html

粘贴以下内容:

1

2

3

4

5

6

7

8

9

10

<!DOCTYPE html>

<html>

<head>

    <meta charset="UTF-8">

</head>

<body>

    <h1>Nginx HTTPS 部署成功!</h1>

    <p>主机IP:192.168.10.110</p>

</body>

</html>

设置页面权限:

1

chmod 644 /opt/nginx-https/wwwroot/index.html

步骤6:启动 Nginx 容器

6.1 清理旧容器(避免冲突)

1

2

3

# 停止并删除同名旧容器(若存在)

docker stop nginx-https &>/dev/null

docker rm nginx-https &>/dev/null

6.2 启动新容器(完整挂载所有目录)

1

2

3

4

5

6

7

8

9

10

11

docker run -d \

--name nginx-https \

--privileged=true \

-p 80:80 \

-p 443:443 \

-v /opt/nginx-https/conf/nginx.conf:/etc/nginx/nginx.conf \

-v /opt/nginx-https/cert:/etc/nginx/cert \

-v /opt/nginx-https/wwwroot:/usr/share/nginx/html \

-v /opt/nginx-https/logs:/var/log/nginx \

--restart=always \

nginx:1.21

参数说明:

参数作用
--name nginx-https容器命名为 nginx-https
--privileged=true提升容器权限,解决挂载目录权限不足问题
-p 80:80/-p 443:443宿主机端口映射到容器端口
-v 宿主机路径:容器路径目录挂载,实现配置/证书/页面/日志持久化(修改宿主机文件无需重建容器)
--restart=always容器随 Docker 开机自启

6.3 验证容器启动状态

1

2

3

4

5

# 查看容器是否运行(状态为 Up 则成功)

docker ps | grep nginx-https

# 输出示例:

# abc123456789   nginx:1.21   "/docker-entrypoint.…"   10 seconds ago   Up 9 seconds   0.0.0.0:80->80/tcp, 0.0.0.0:443->443/tcp   nginx-https

三、验证部署结果

3.1 命令行验证

3.1.1 验证 HTTP 自动跳转

1

2

3

4

curl -I http://192.168.10.110

# 输出 301 跳转则成功:

# HTTP/1.1 301 Moved Permanently

# Location: https://192.168.10.110/

3.1.2 验证 HTTPS 访问(忽略自签名证书)

1

2

curl -k https://192.168.10.110

# 输出测试页面 HTML 内容则成功(无乱码)

3.2 浏览器验证

  1. 打开浏览器,访问 https://192.168.10.110
  2. 忽略“不安全连接”警告(自签名证书正常现象);
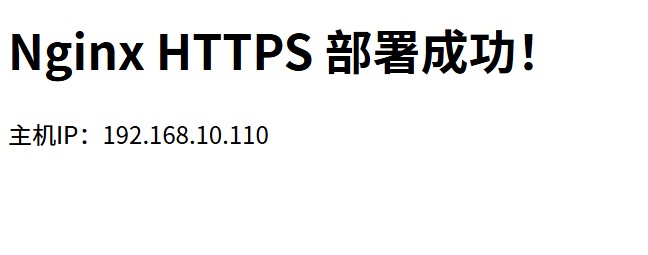
  3. 页面显示“Nginx HTTPS 部署成功!主机IP:192.168.10.110”,中文无乱码则完成。
四、常见问题排查

4.1 镜像检测失败

现象:提示“nginx:1.21 镜像不存在”,但已拉取;
解决:用格式化命令验证镜像:

1

2

docker images --format "{{.Repository}}:{{.Tag}}" | grep nginx:1.21

# 输出 nginx:1.21 则镜像存在,重新执行启动命令即可

4.2 证书文件不存在

现象:Nginx 配置测试提示“cannot load certificate”;
解决

1

2

3

# 检查证书文件是否存在

ls -l /opt/nginx-https/cert/

# 重新生成证书(步骤3),确保 nginx.key 和 nginx.crt 存在

4.3 中文乱码

现象:页面中文显示为方框/乱码;
解决

  1. 确认测试页面添加 <meta charset="UTF-8">
  2. 确认 Nginx 配置 http 块内添加 charset utf-8
  3. 重启容器:docker restart nginx-https

4.4 端口占用

现象:容器启动失败,提示端口被占用;
解决

1

2

3

4

# 查找占用端口的进程

lsof -i:80

# 关闭进程(示例)

kill -9 $(lsof -t -i:80)

五、日常运维命令

5.1 容器启停/重启

1

2

3

4

5

6

# 启动

docker start nginx-https

# 停止

docker stop nginx-https

# 重启(配置修改后生效)

docker restart nginx-https

5.2 查看日志

1

2

3

4

5

6

# 查看容器启动日志

docker logs nginx-https

# 查看 Nginx 访问日志

cat /opt/nginx-https/logs/access.log

# 查看 Nginx 错误日志

cat /opt/nginx-https/logs/error.log

5.3 修改配置后生效

1

2

3

4

5

6

# 1. 修改宿主机配置文件

vim /opt/nginx-https/conf/nginx.conf

# 2. 验证配置语法

docker run --rm -v /opt/nginx-https/conf/nginx.conf:/etc/nginx/nginx.conf -v /opt/nginx-https/cert:/etc/nginx/cert nginx:1.21 nginx -t

# 3. 重启容器

docker restart nginx-https

5.4 删除容器(如需重装)

1

2

3

docker stop nginx-https && docker rm nginx-https

# 可选:删除工作目录(谨慎操作)

rm -rf /opt/nginx-https

到此这篇关于Docker部署Nginx HTTPS服务的实现步骤的文章就介绍到这了

更多推荐
