
基于YOLOv8深度学习的变电站液体泄露红外检测系统(YOLOv8+YOLO数据集+UI界面+Python项目源码+模型)
摘要
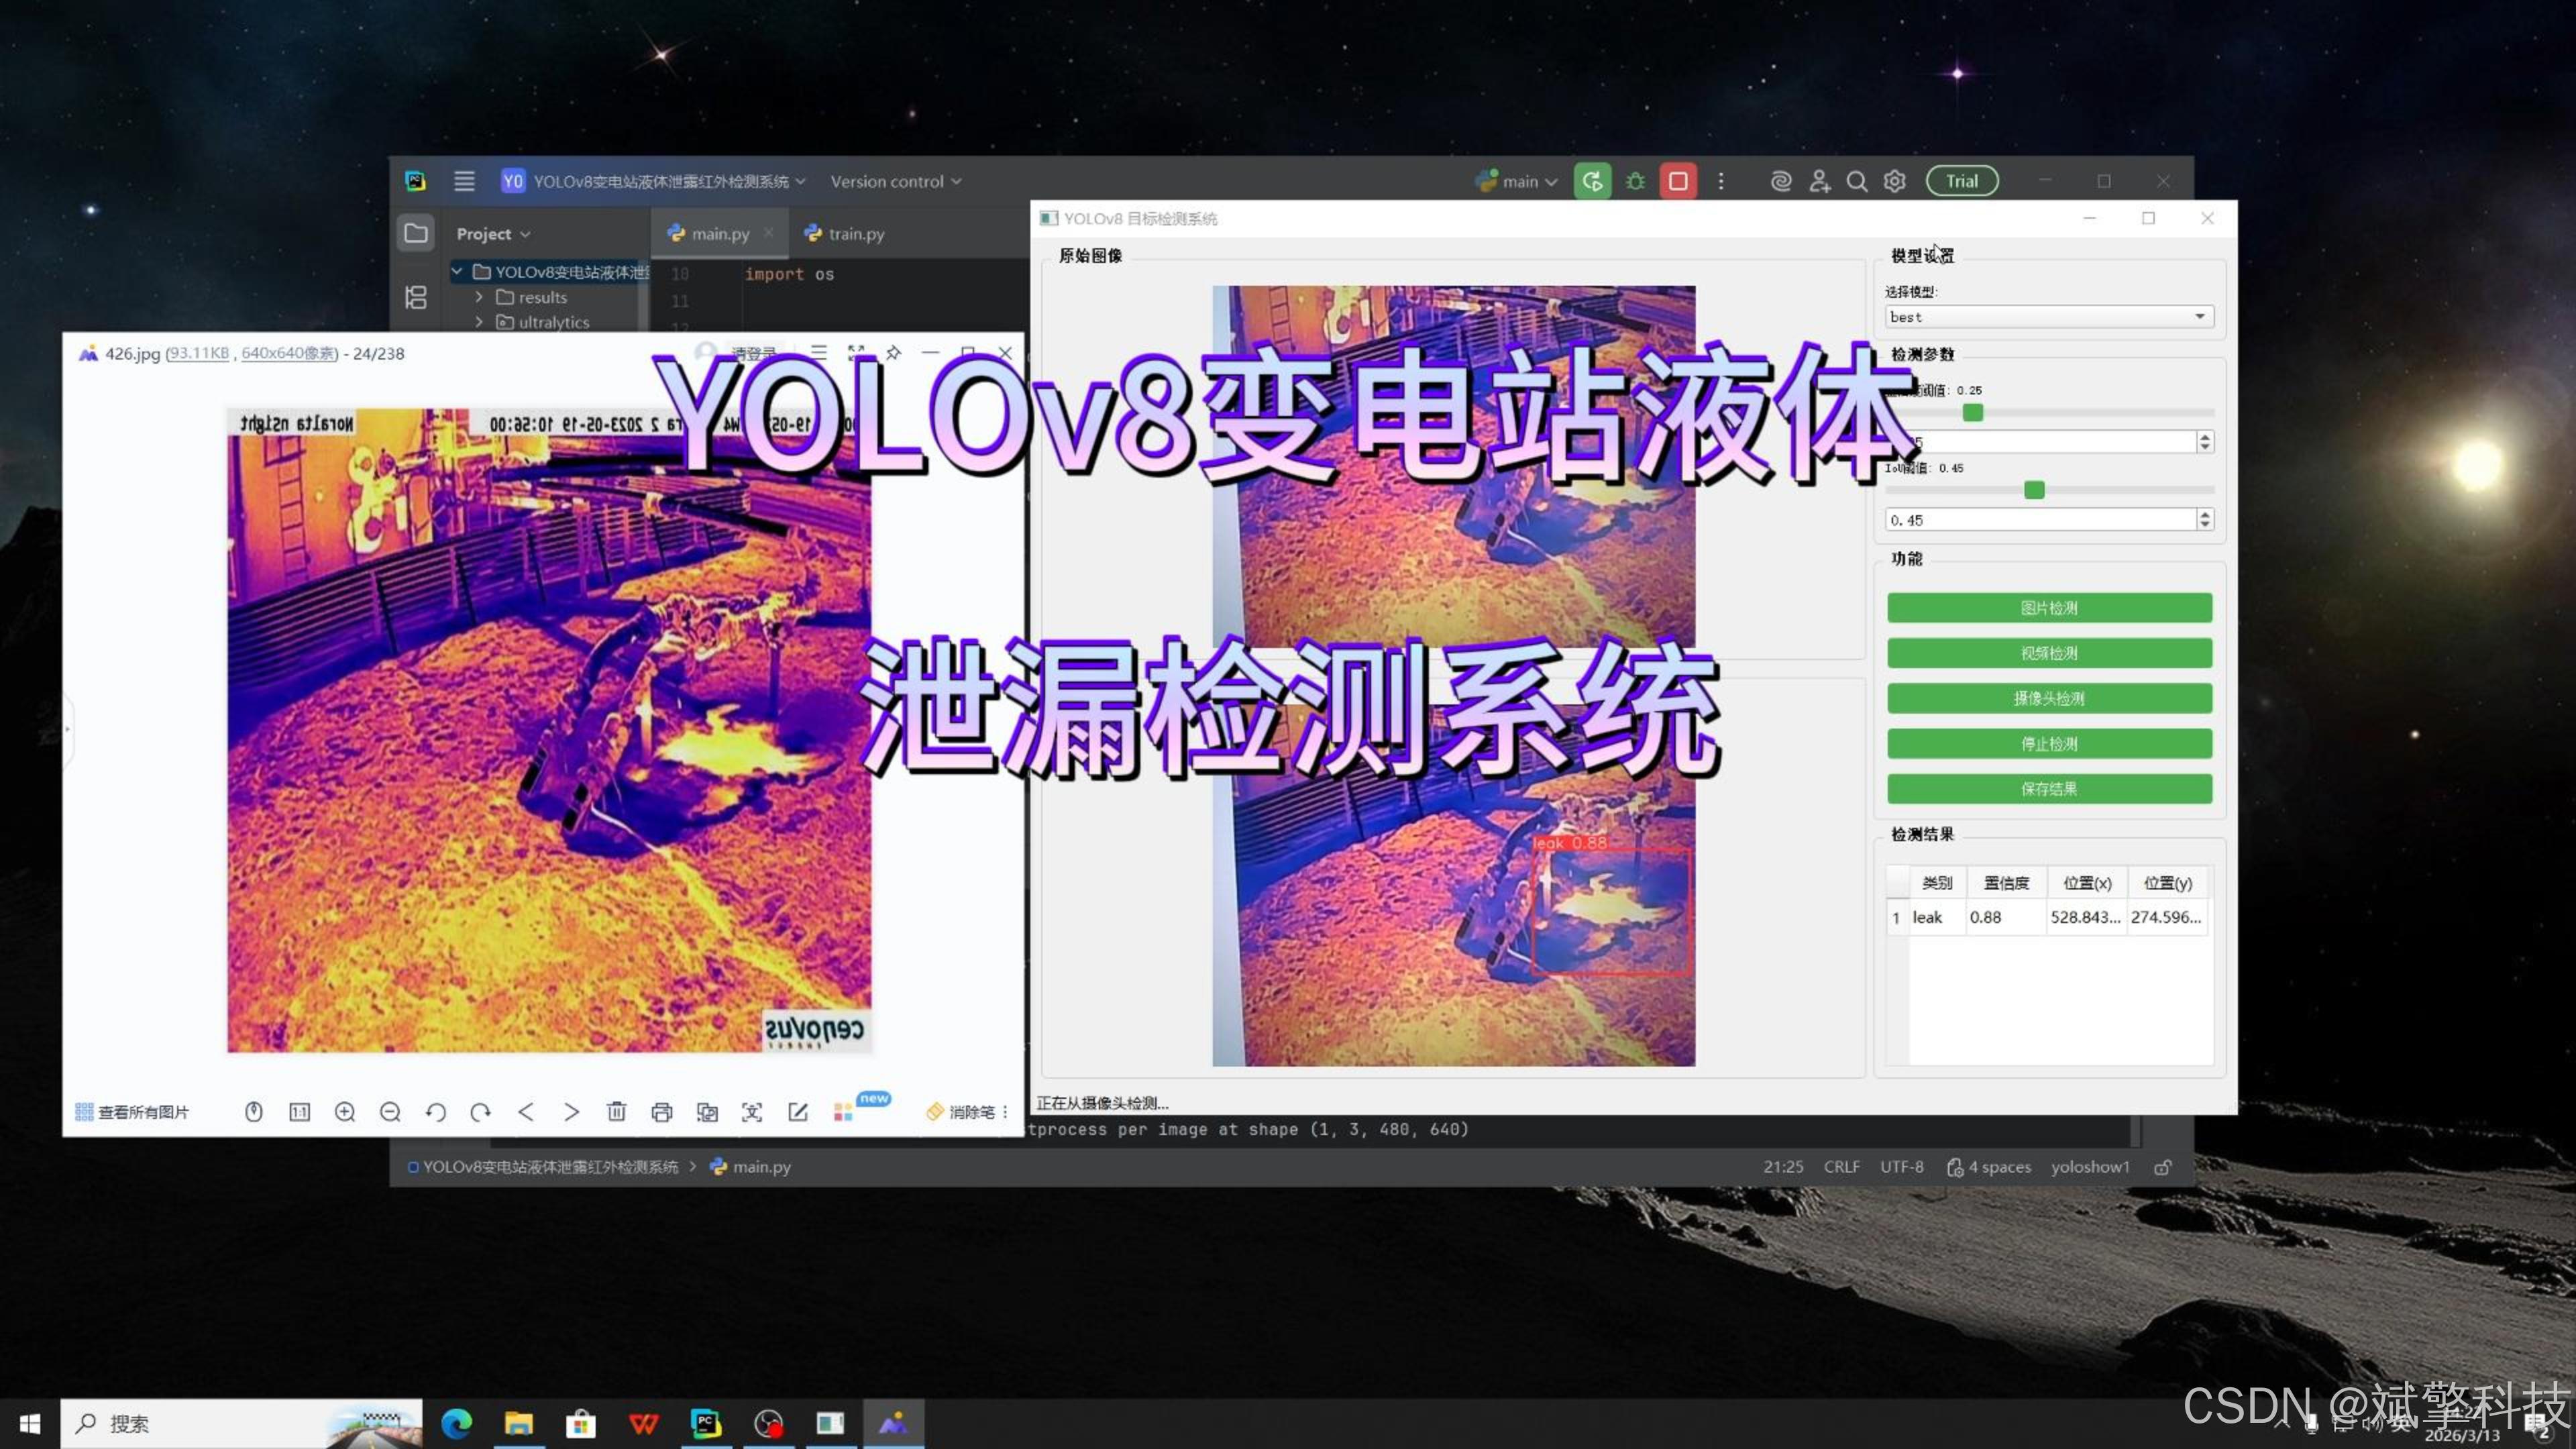
变电站作为电力系统的核心枢纽,其内部充油设备(如变压器、电抗器、套管等)的液体泄漏问题若不及时发现,不仅会造成设备故障,还可能引发严重的安全事故。针对传统人工巡检效率低、难以发现早期微小泄漏的问题,本项目提出并实现了一种基于YOLOv8深度学习架构的红外检测系统。该系统利用红外热成像技术捕捉设备温度场异常,结合YOLOv8算法卓越的目标检测与实时处理能力,对图像、视频及实时摄像头流中的泄漏区域进行精准识别与定位。实验结果表明,该系统在复杂背景下具有较高的准确率和召回率,为变电站的无人化巡检与智能化运维提供了一种高效、可靠的解决方案。
项目意义
1. 提升设备运维效率,推动巡检模式智能化变革
传统的变电站泄漏检测主要依赖人工定期巡检或肉眼观察,存在效率低、主观性强、难以发现早期微小渗漏等弊端。尤其是在夜间、恶劣天气或巡检周期空白期,泄漏隐患极易被忽视。本系统具备图片、视频、实时摄像头三种检测模式,能够实现7×24小时无人化值守监控。
2. 实现早期微小隐患精准识别,提升电网本质安全水平
液体泄漏往往是一个由小变大的渐变过程。在泄漏初期,油迹面积小、颜色浅,人眼或普通可见光相机极难发现。红外热成像技术利用泄漏液体与设备本体之间的温度差异形成鲜明对比,从物理层面放大了泄漏特征,项目引入YOLOv8深度学习算法,模型能够从数千张红外图像中自动学习泄漏区域的纹理、温度梯度、形状等深层特征,具备极强的抗干扰能力。
3. 促进人工智能与传统电力行业的深度融合
本项目是“人工智能+能源”战略在电力巡检领域的一次典型落地实践。YOLOv8作为当前目标检测领域的先进算法,具备检测速度快、精度高、易于部署等优势。
4. 保障电力供应稳定性,具有良好的经济效益与社会效益
变电站的安全运行关系到千家万户的用电安全与工业生产的正常运转。
演示视频
基于YOLOv8深度学习的变电站液体泄露红外检测系统(YOLOv8+YOLO数据集+UI界面+Python项目源码+模型)_哔哩哔哩_bilibili
基于YOLOv8深度学习的变电站液体泄露红外检测系统(YOLOv8+YOLO数据集+UI界面+Python项目源码+模型)_哔哩哔哩_bilibili https://www.bilibili.com/video/BV1hJQ2B2Eku/?spm_id_from=333.1387.homepage.video_card.clickhttps://www.bilibili.com/video/BV1hJQ2B2Eku/
目录
二、项目功能展示
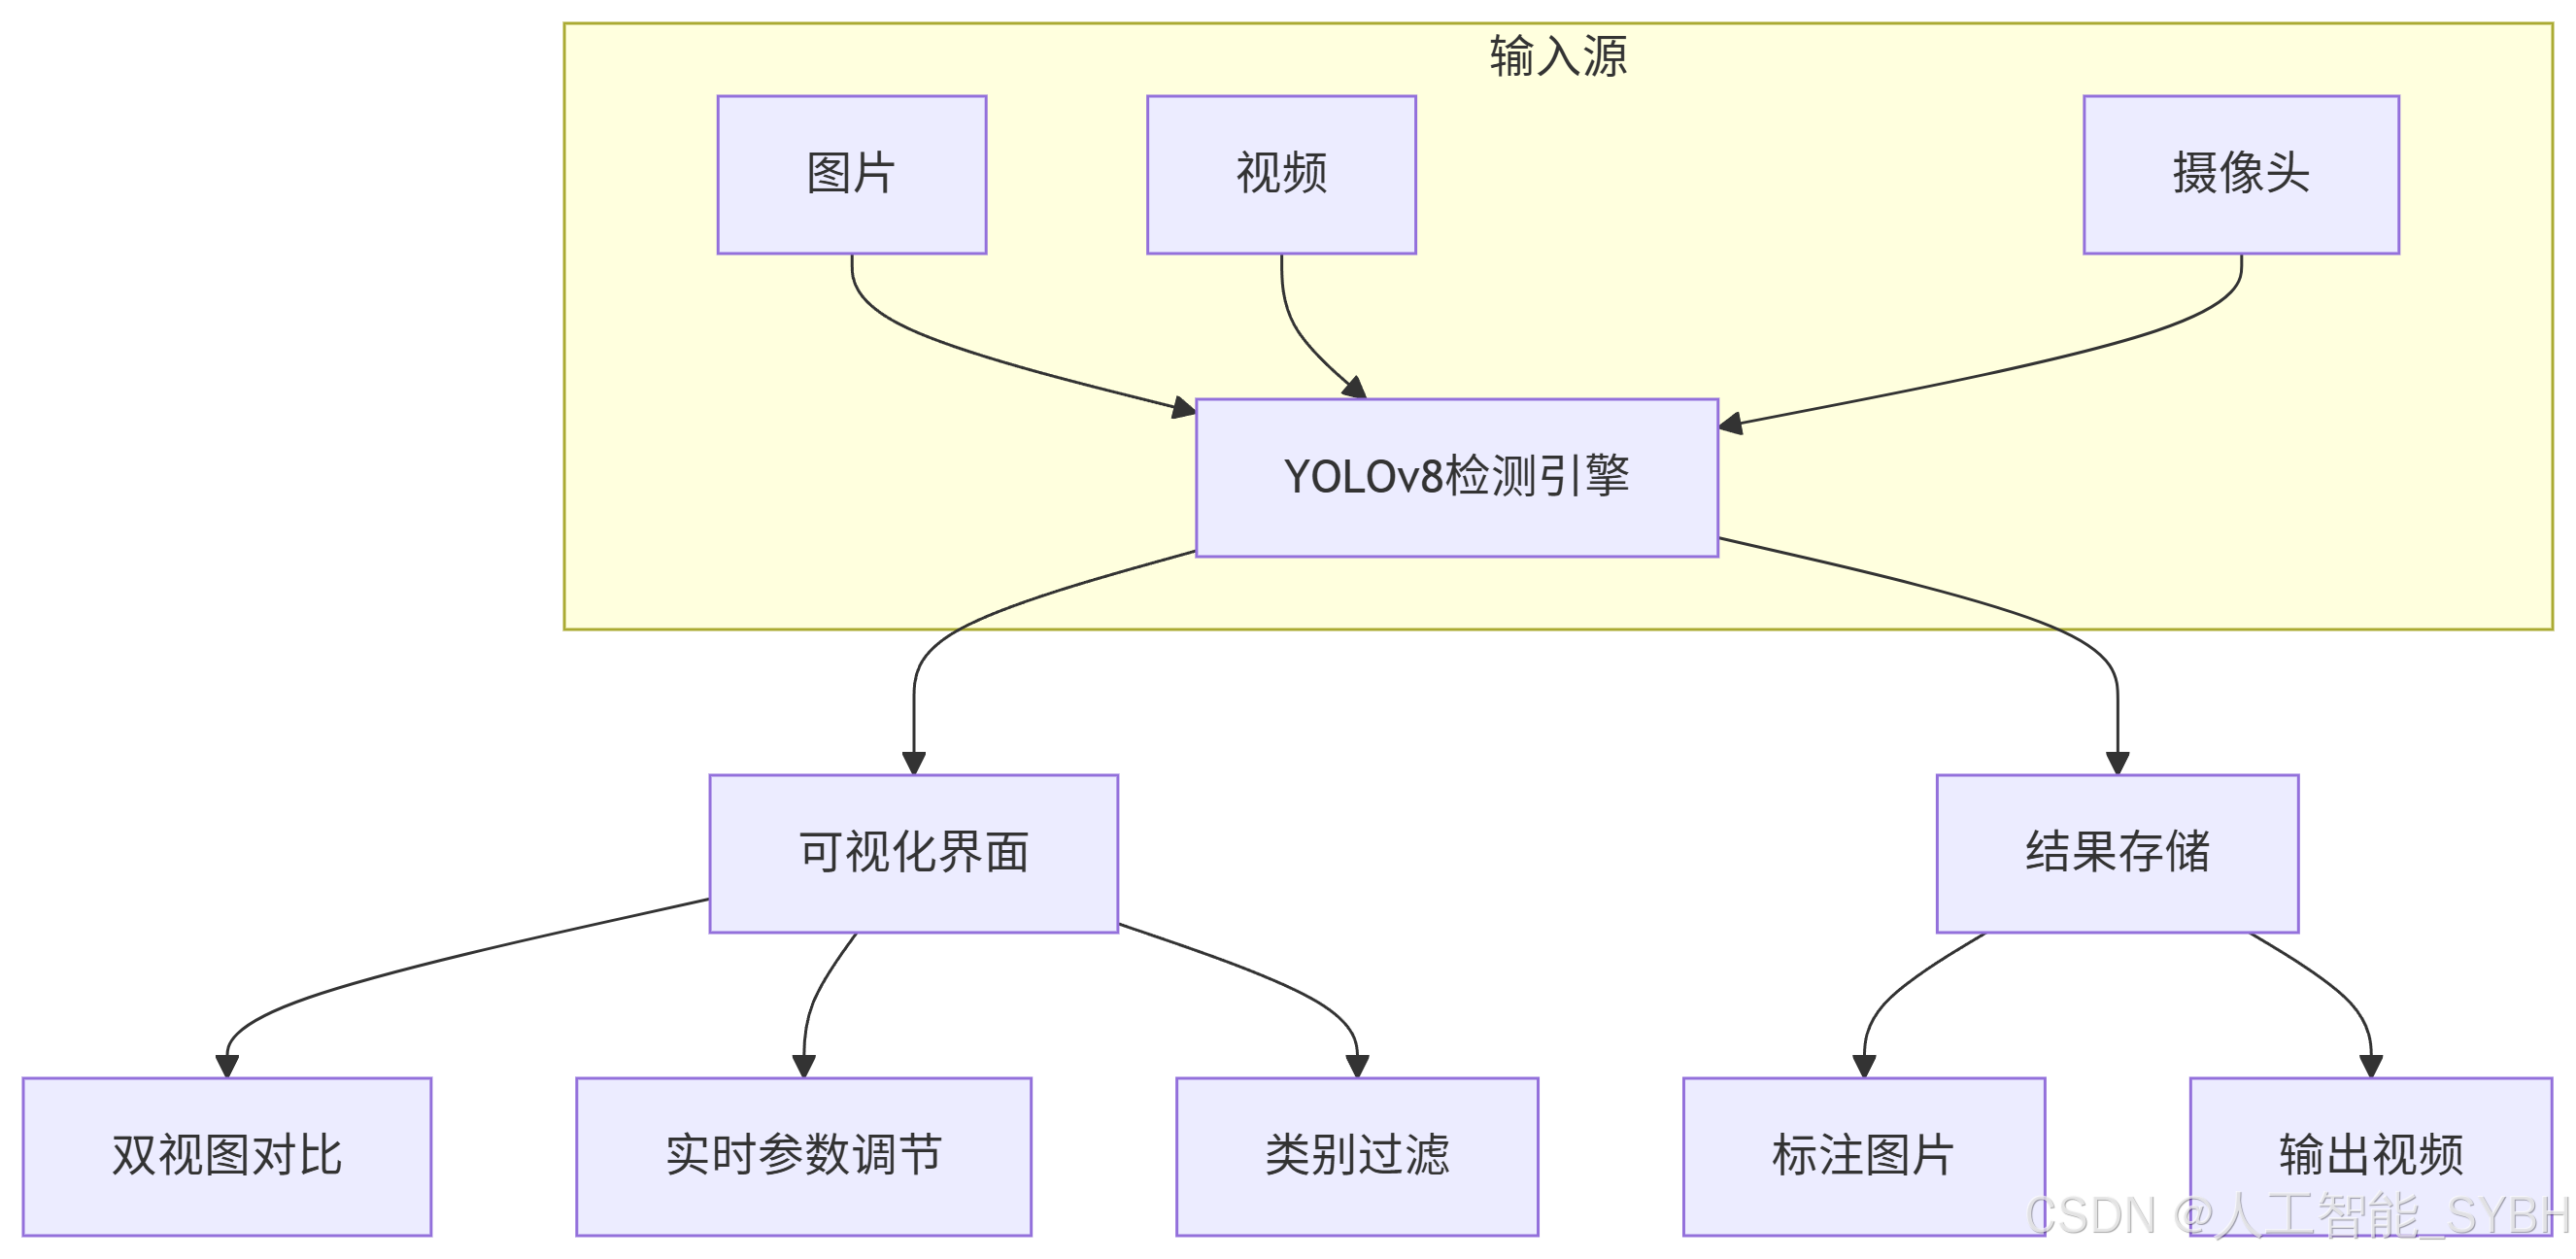
系统功能
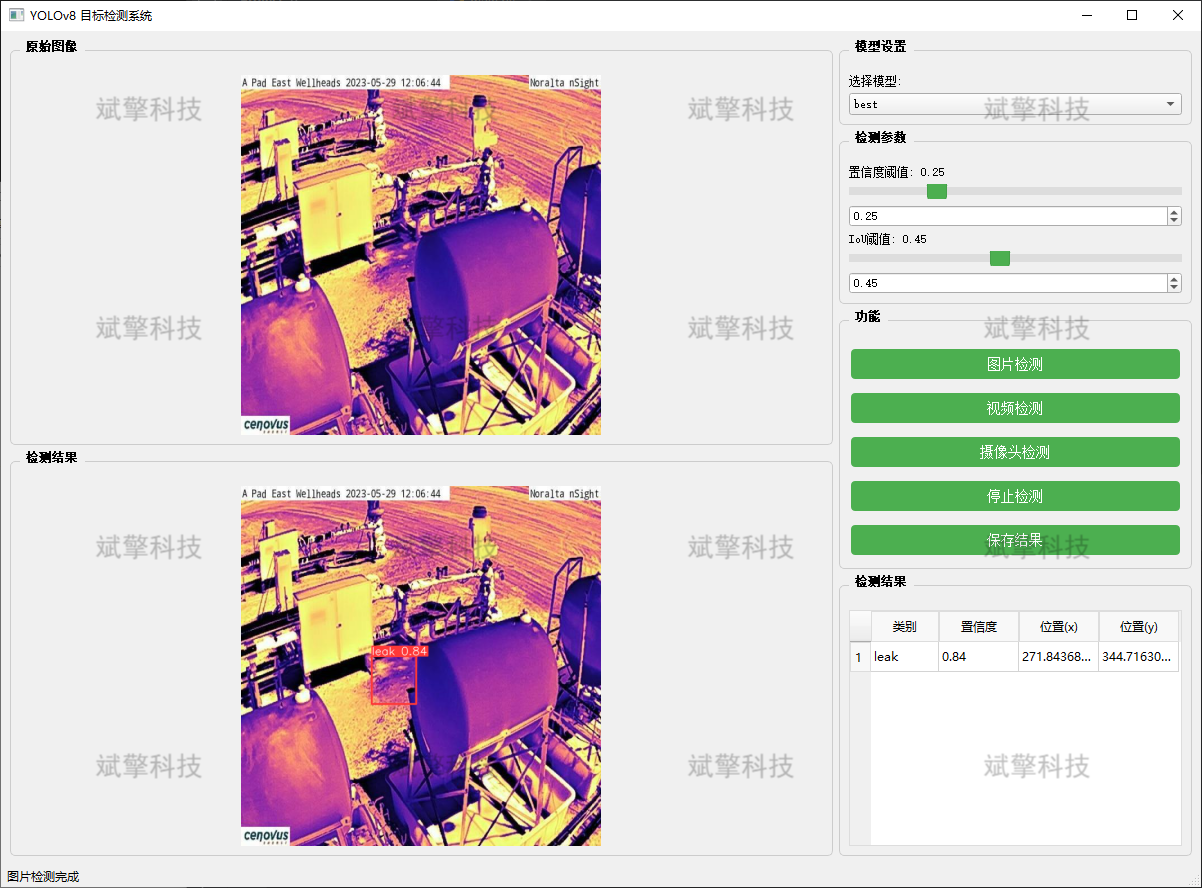
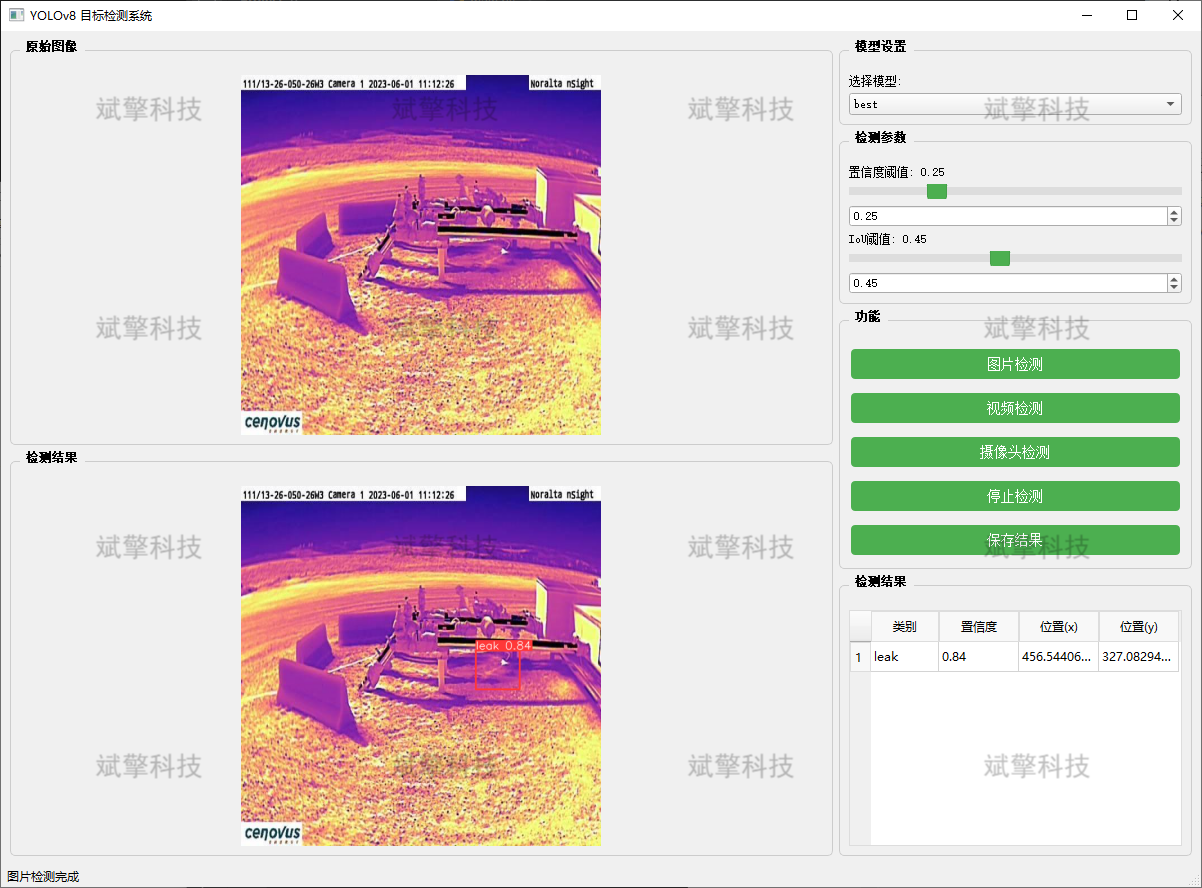
✅ 图片检测:可对图片进行检测,返回检测框及类别信息。
✅ 视频检测:支持视频文件输入,检测视频中每一帧的情况。
✅ 摄像头实时检测:连接USB 摄像头,实现实时监测。
✅参数实时调节(置信度和IoU阈值)
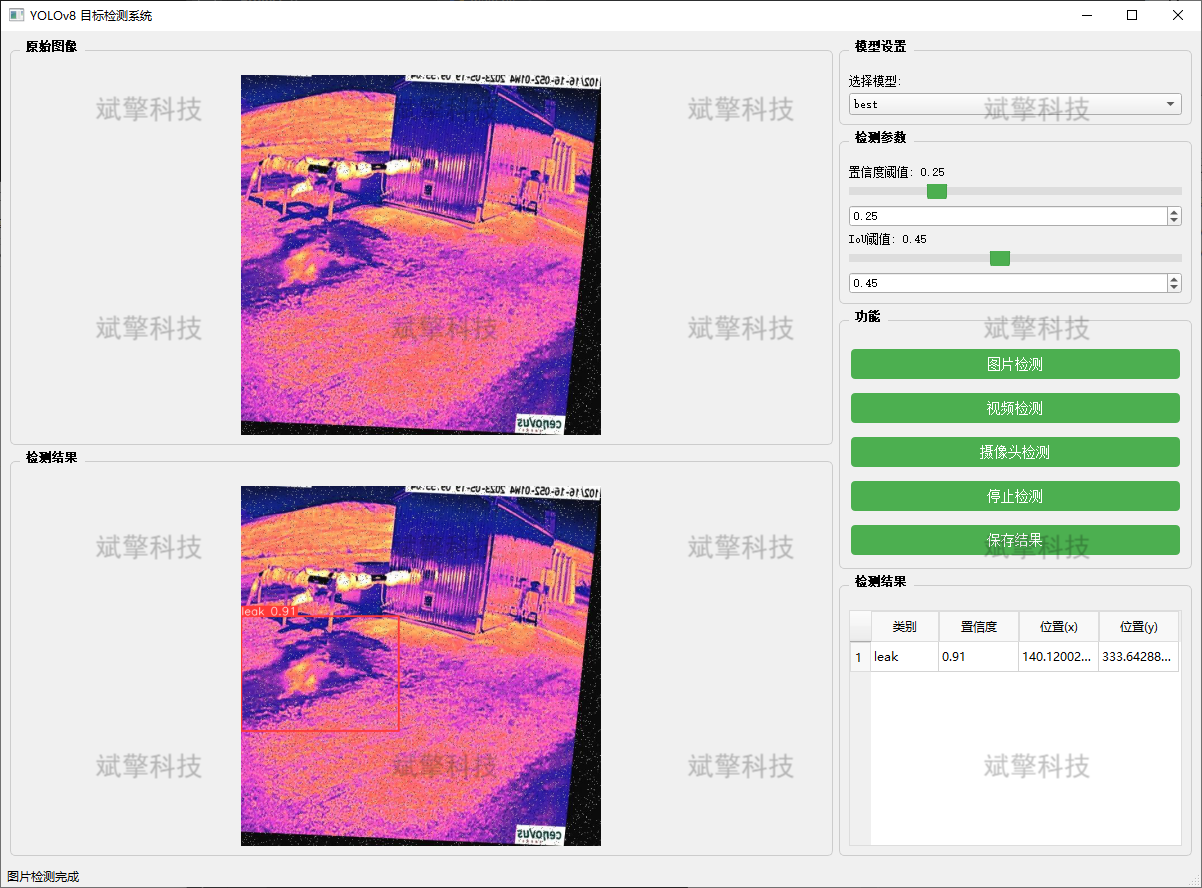
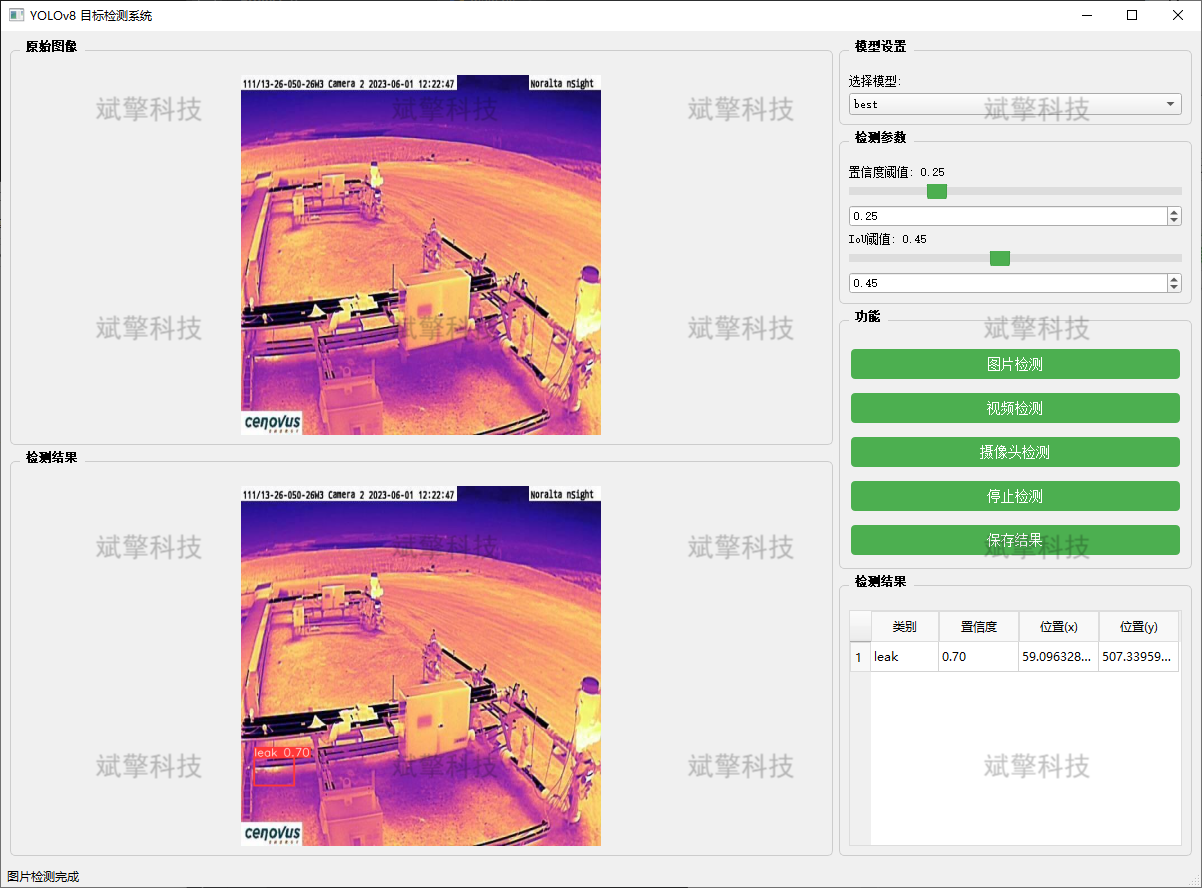
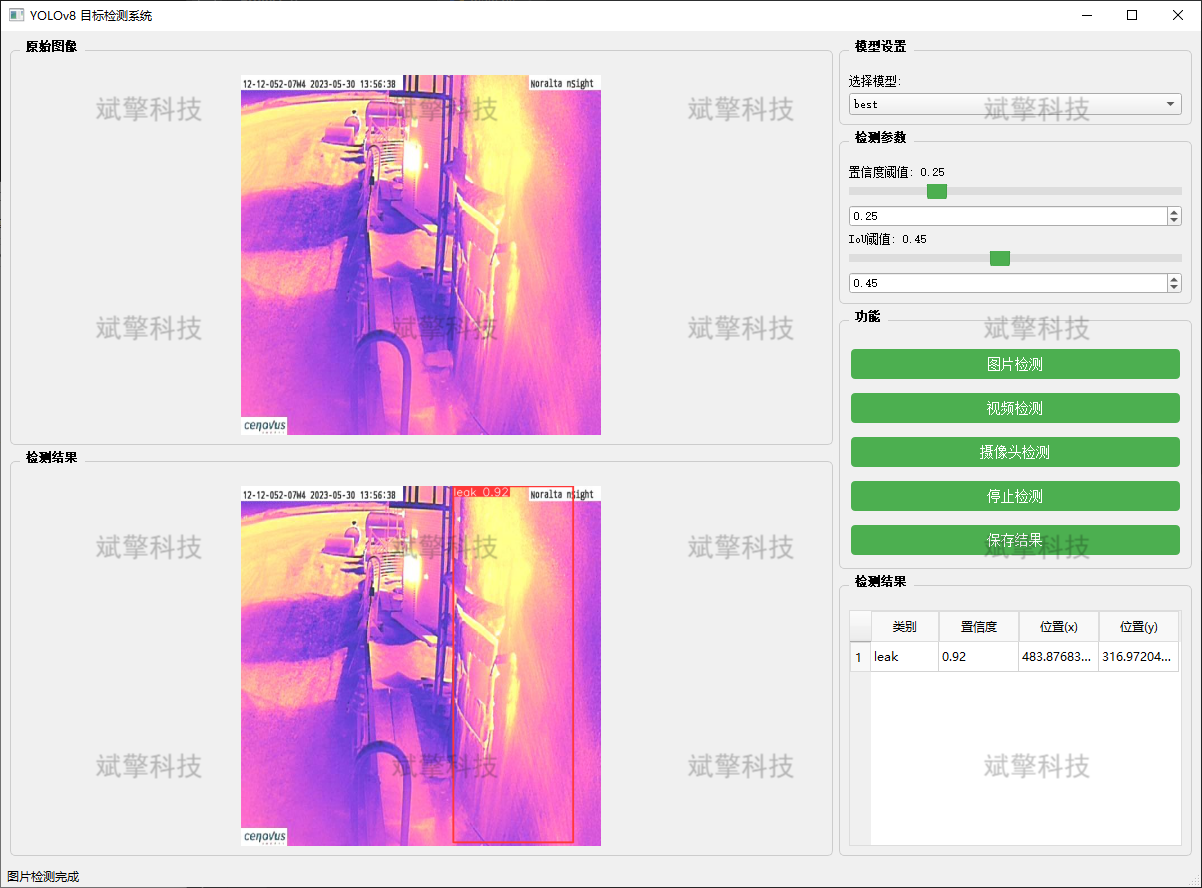
-
图片检测
该功能允许用户通过单张图片进行目标检测。输入一张图片后,YOLO模型会实时分析图像,识别出其中的目标,并在图像中框出检测到的目标,输出带有目标框的图像。
-
视频检测
视频检测功能允许用户将视频文件作为输入。YOLO模型将逐帧分析视频,并在每一帧中标记出检测到的目标。最终结果可以是带有目标框的视频文件或实时展示,适用于视频监控和分析等场景。
-
摄像头实时检测
该功能支持通过连接摄像头进行实时目标检测。YOLO模型能够在摄像头拍摄的实时视频流中进行目标检测,实时识别并显示检测结果。此功能非常适用于安防监控、无人驾驶、智能交通等应用,提供即时反馈。
核心特点:
- 高精度:基于YOLO模型,提供精确的目标检测能力,适用于不同类型的图像和视频。
- 实时性:特别优化的算法使得实时目标检测成为可能,无论是在视频还是摄像头实时检测中,响应速度都非常快。
- 批量处理:支持高效的批量图像和视频处理,适合大规模数据分析。
三、数据集介绍
数据集概述
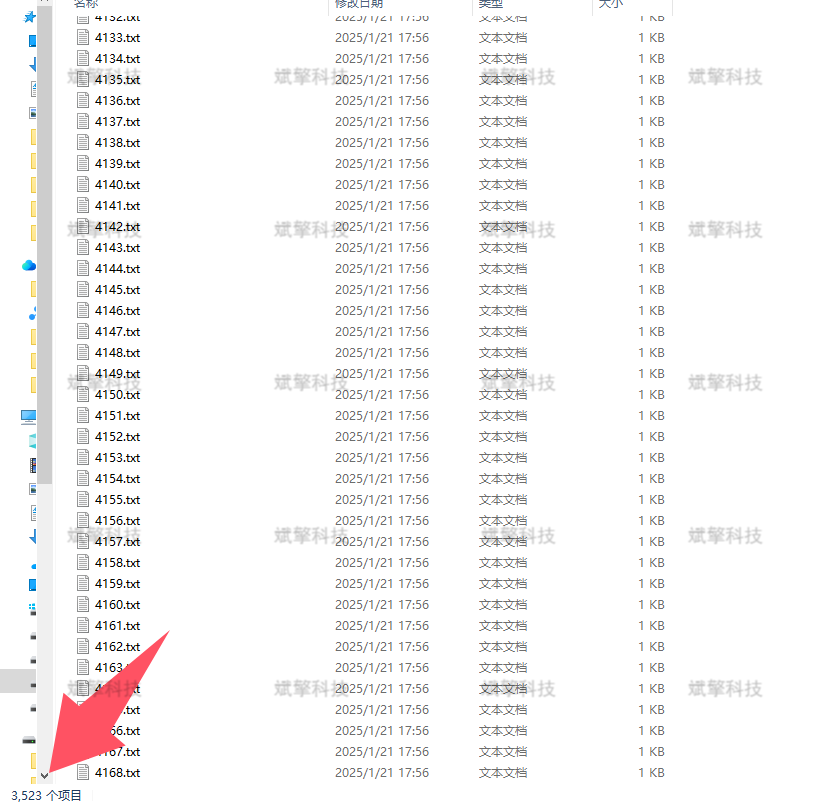
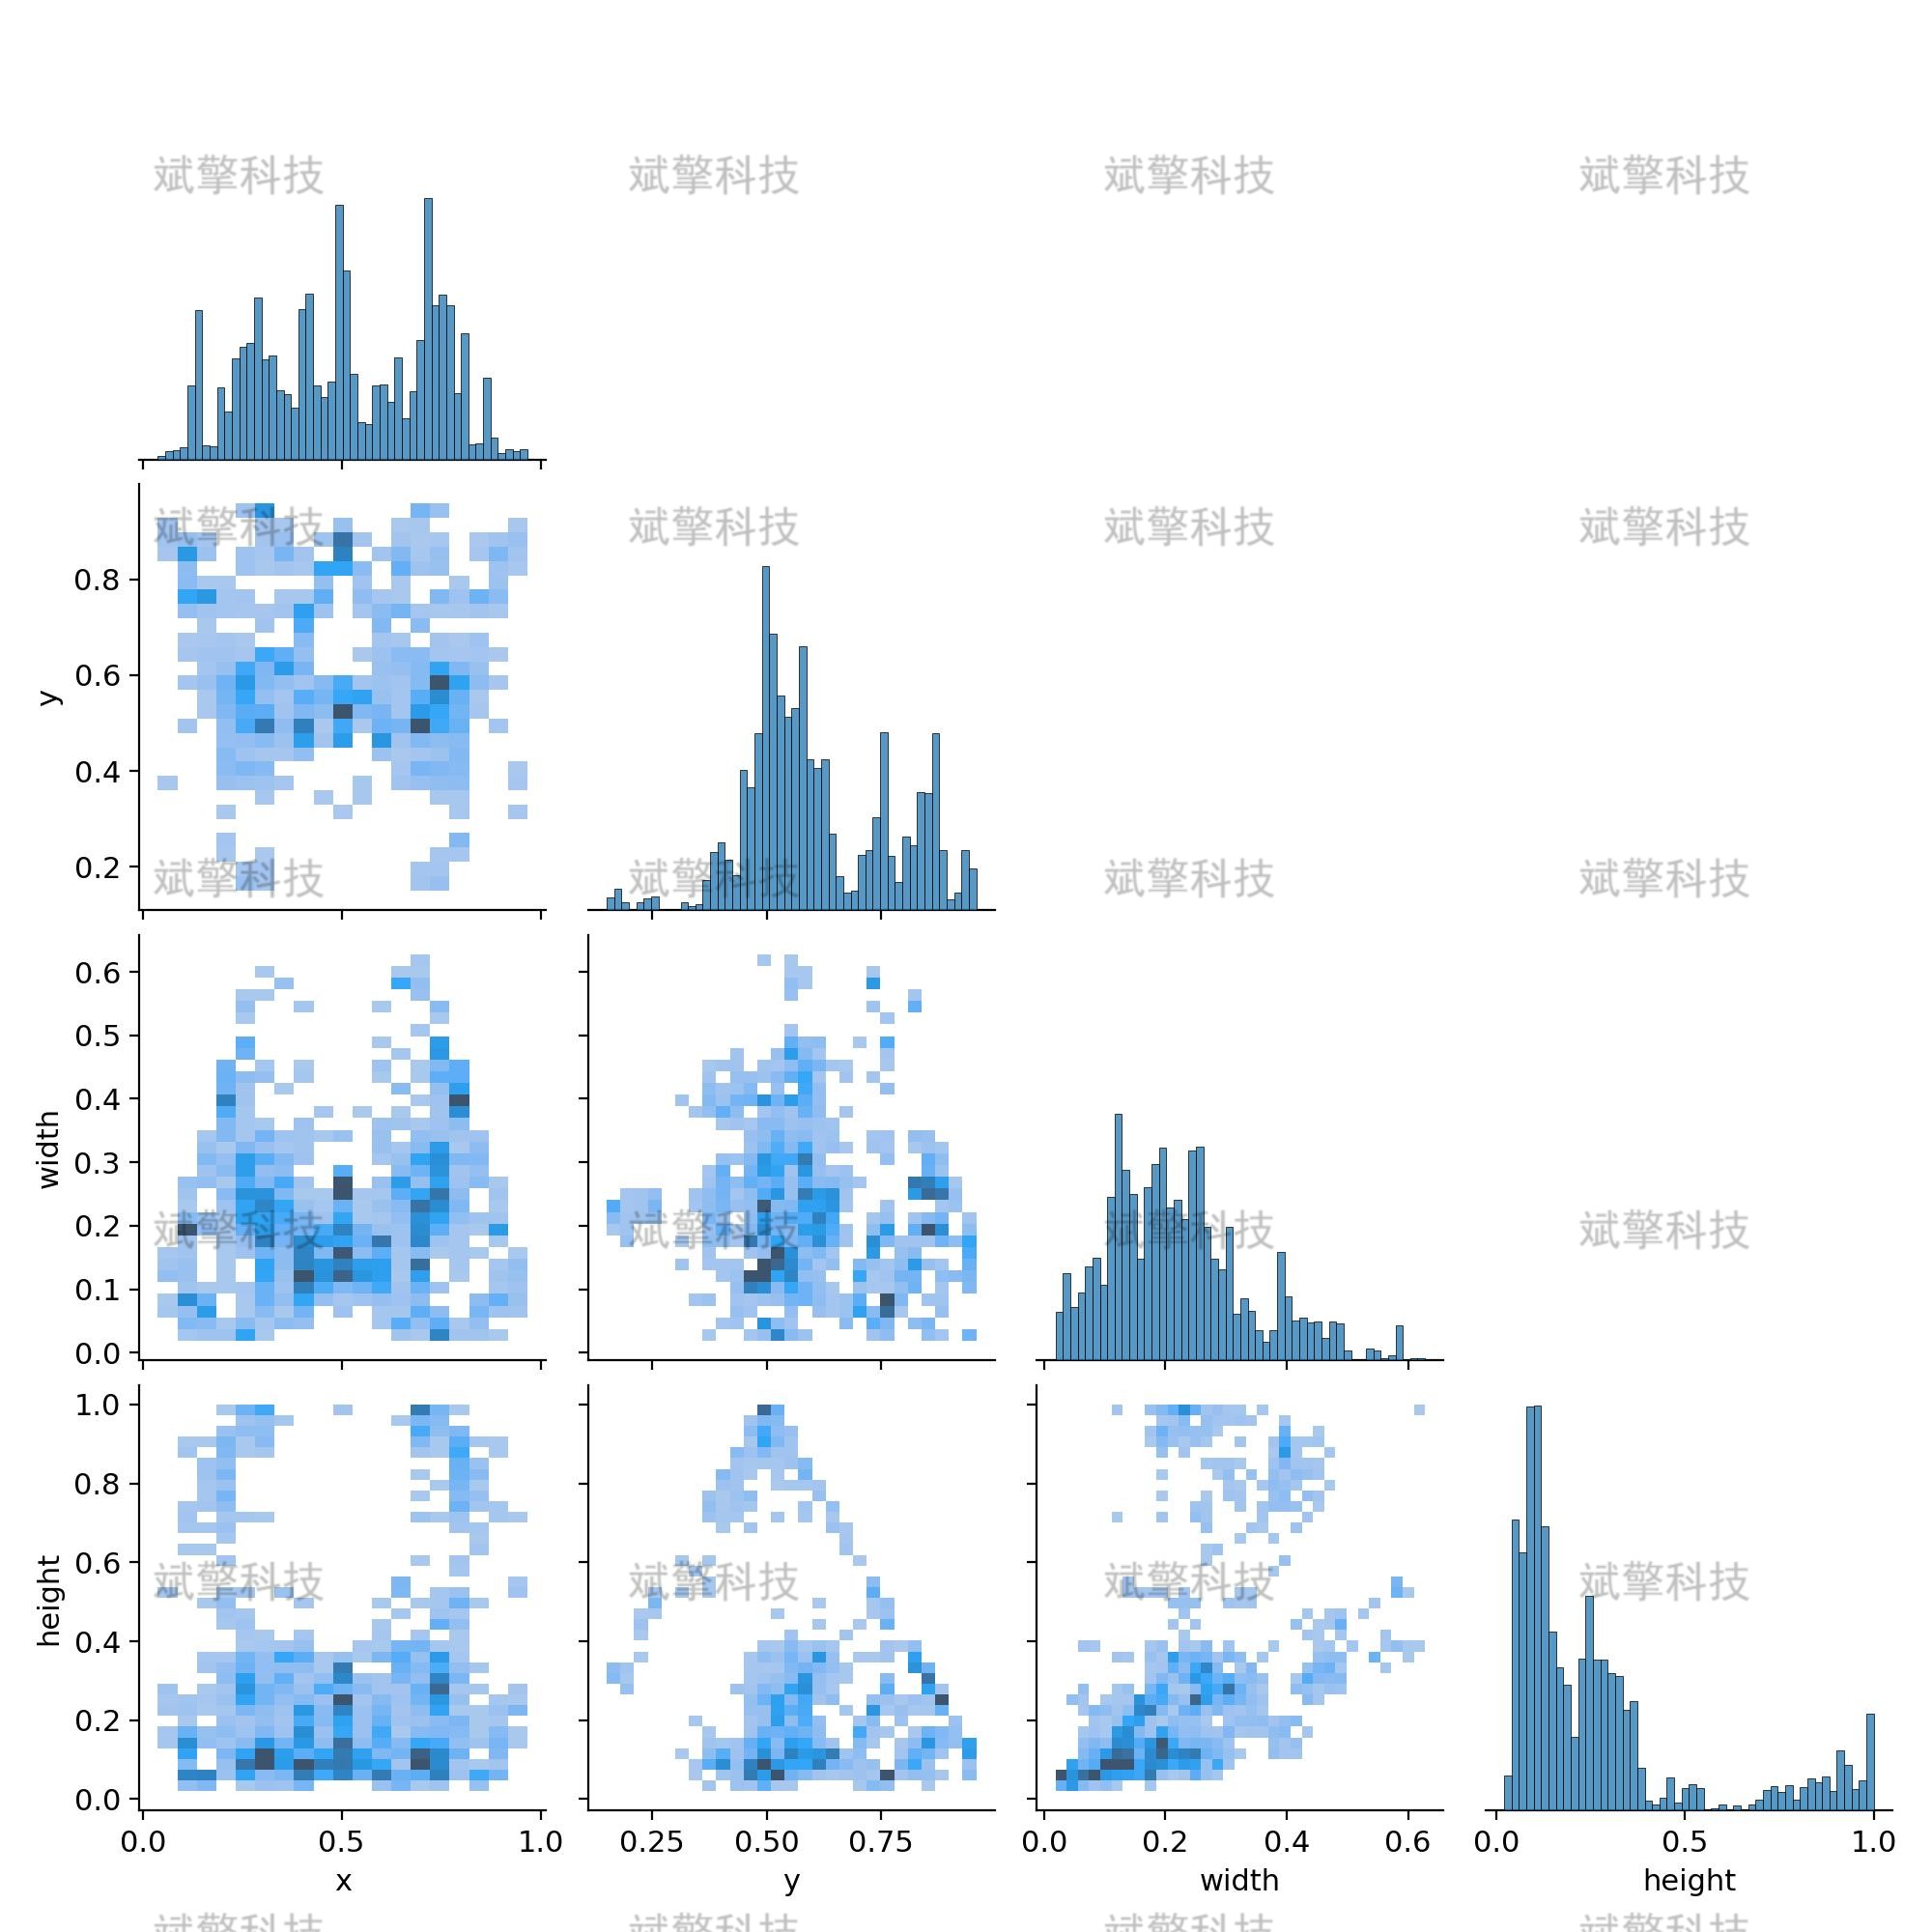
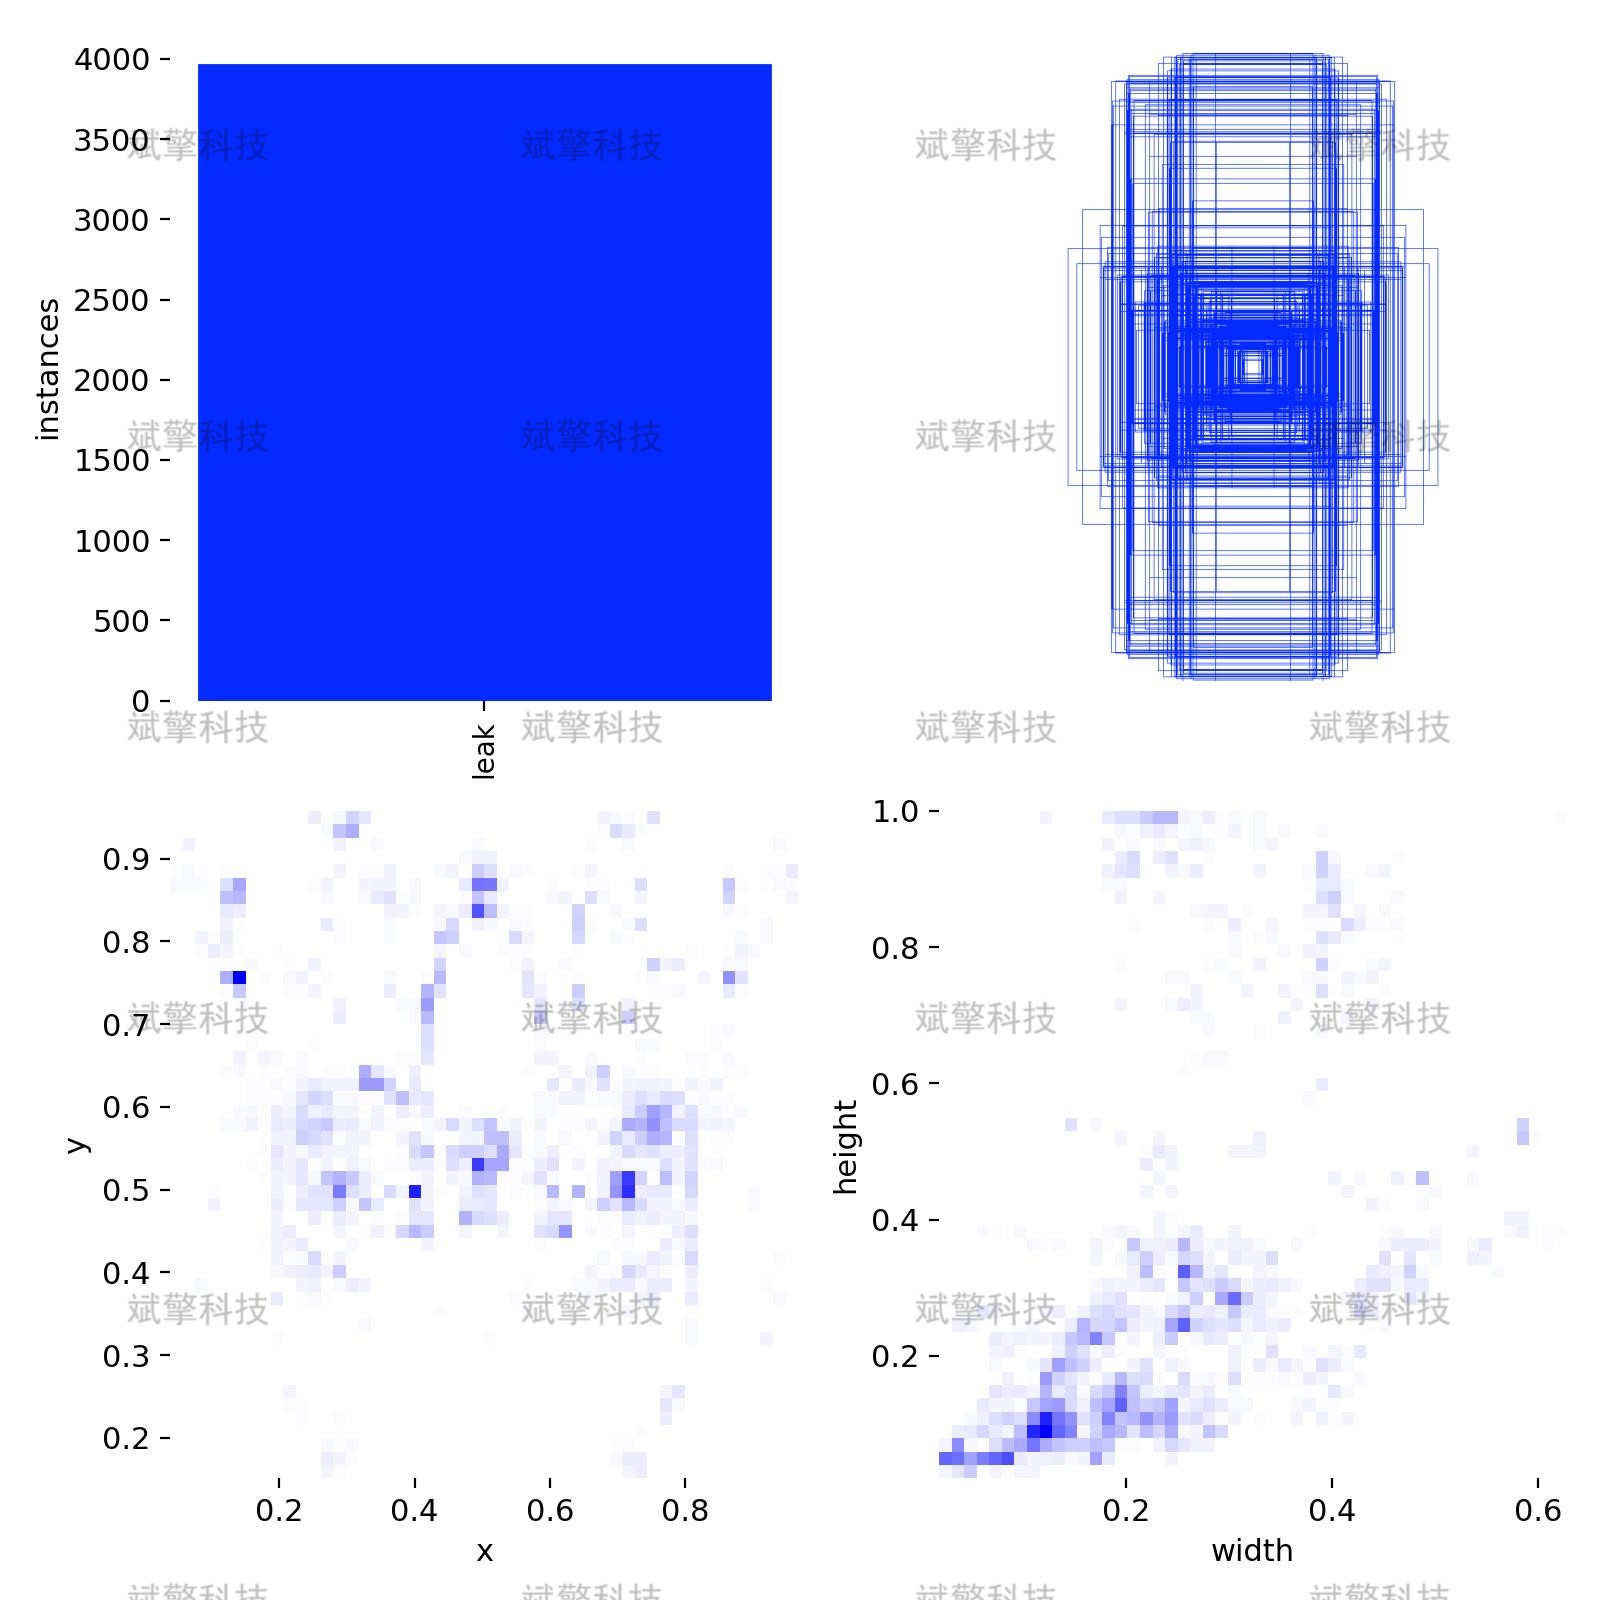
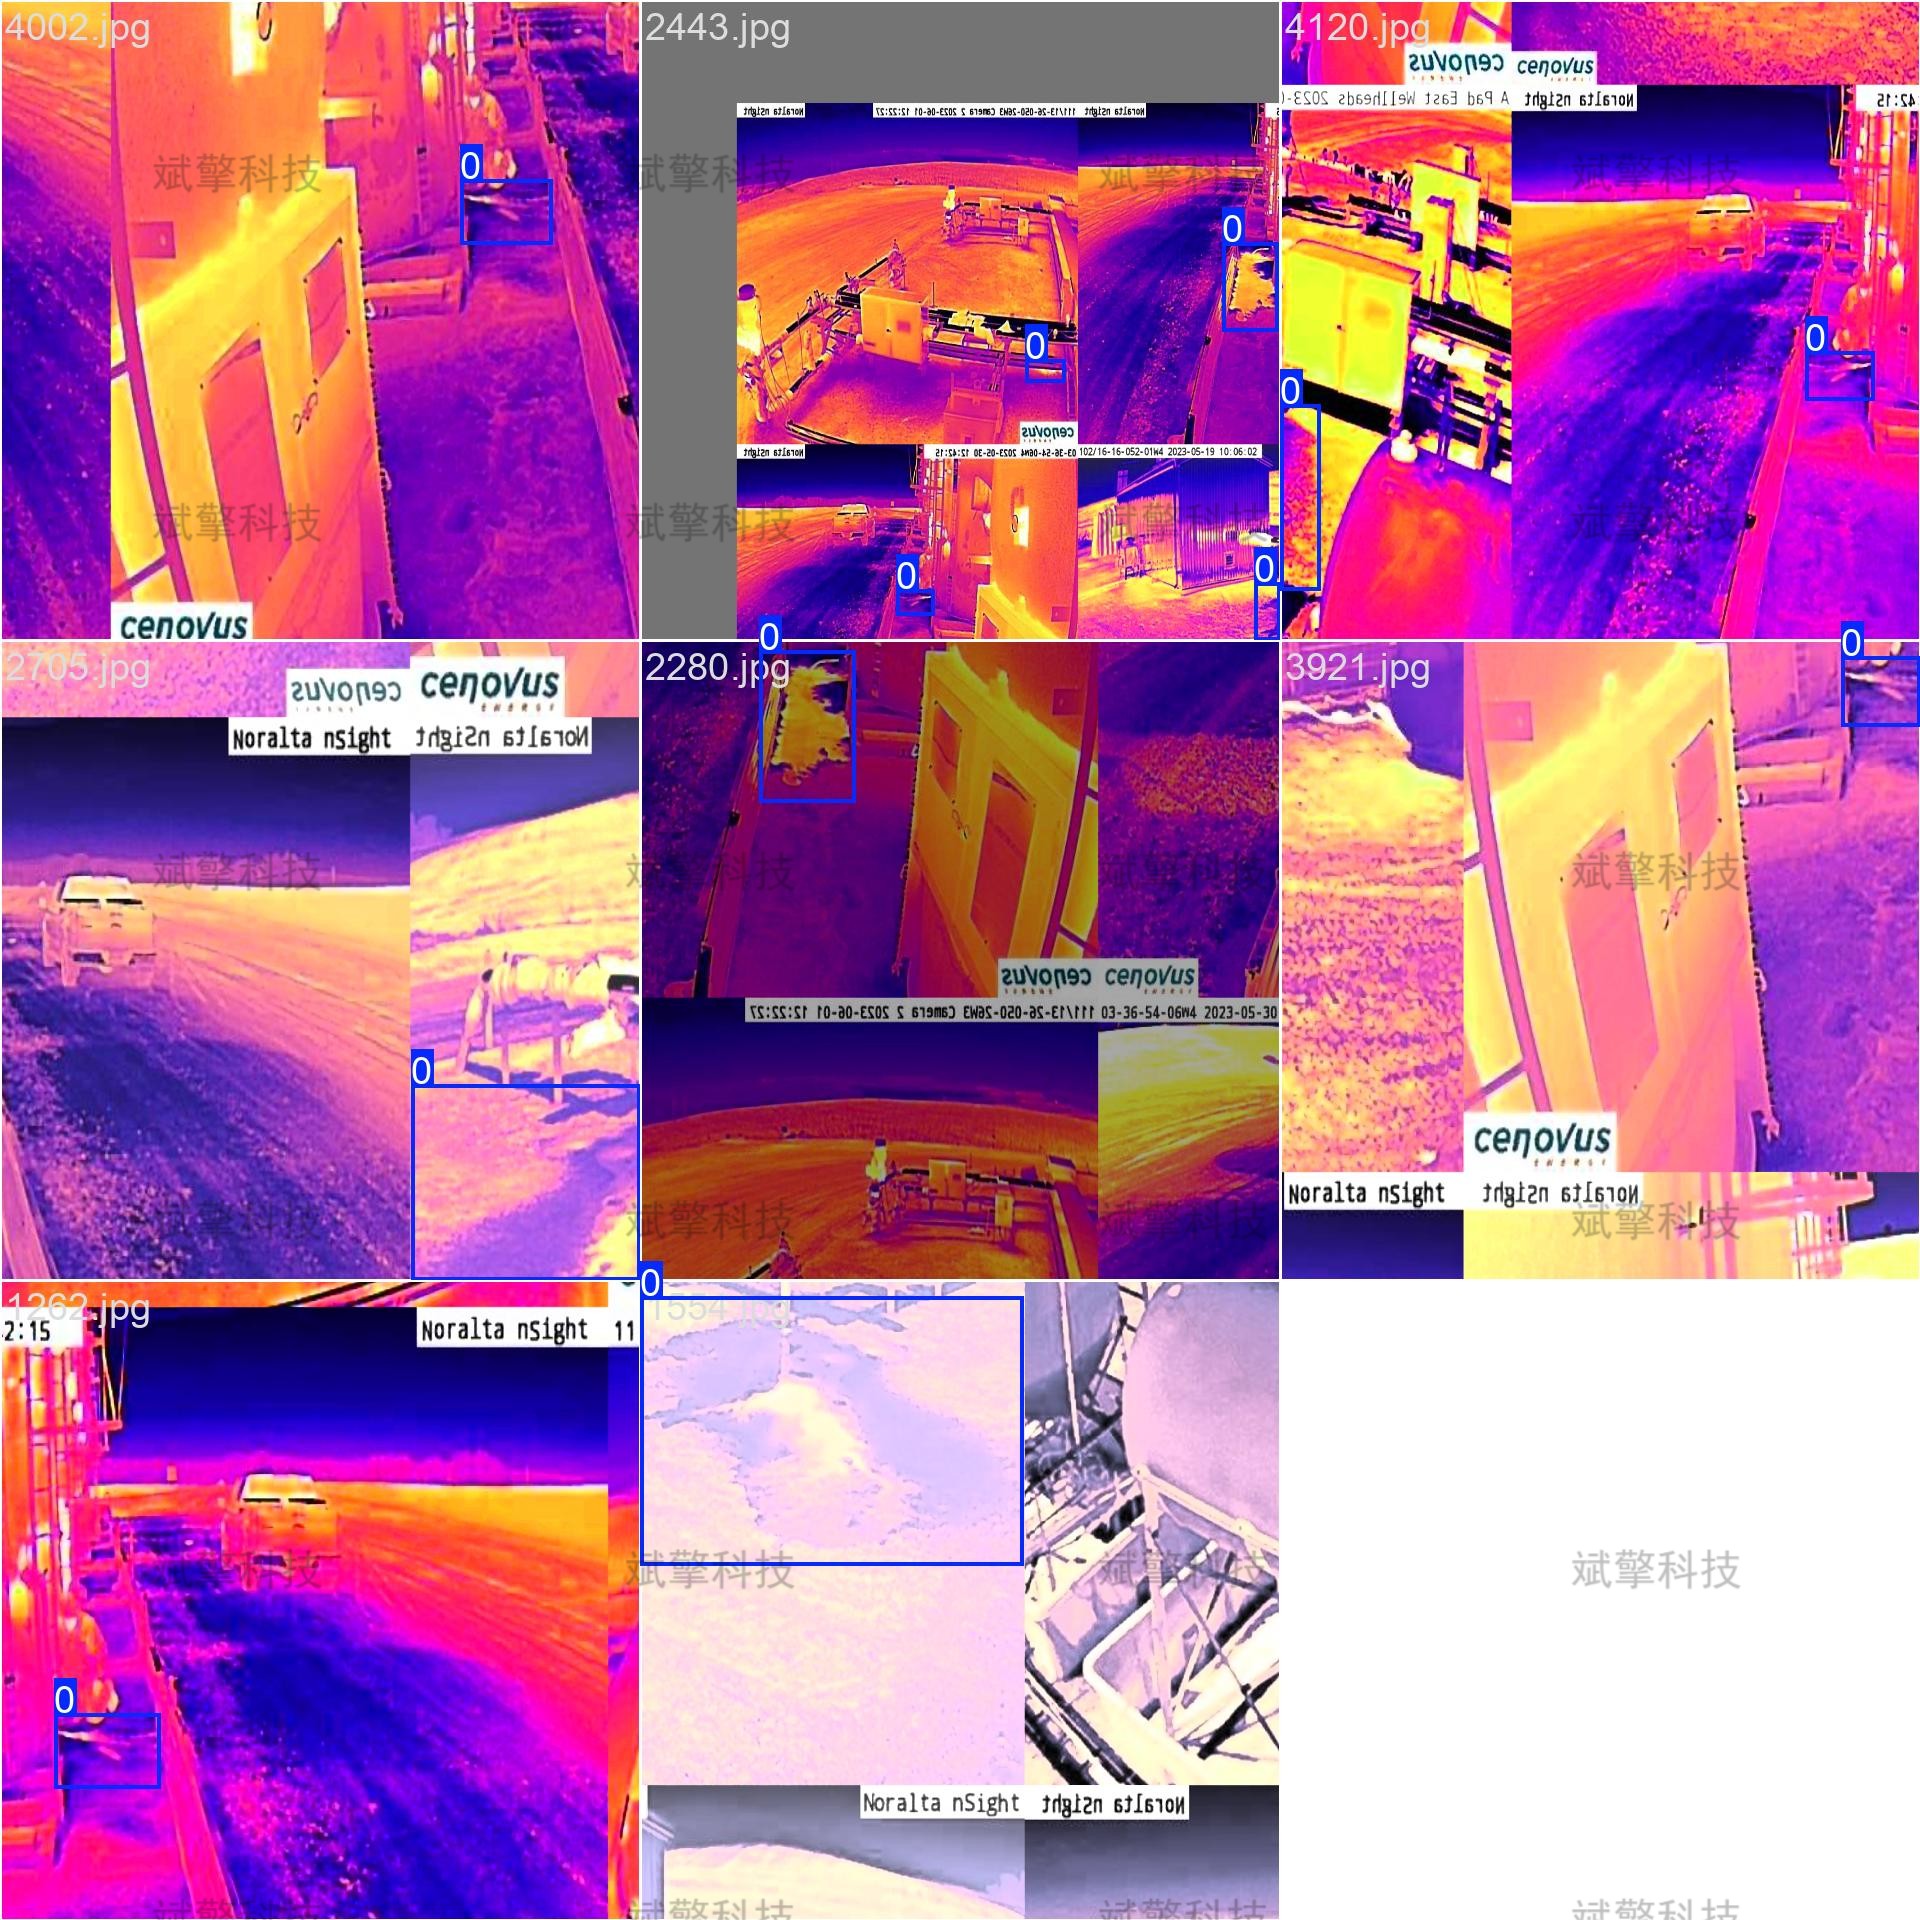
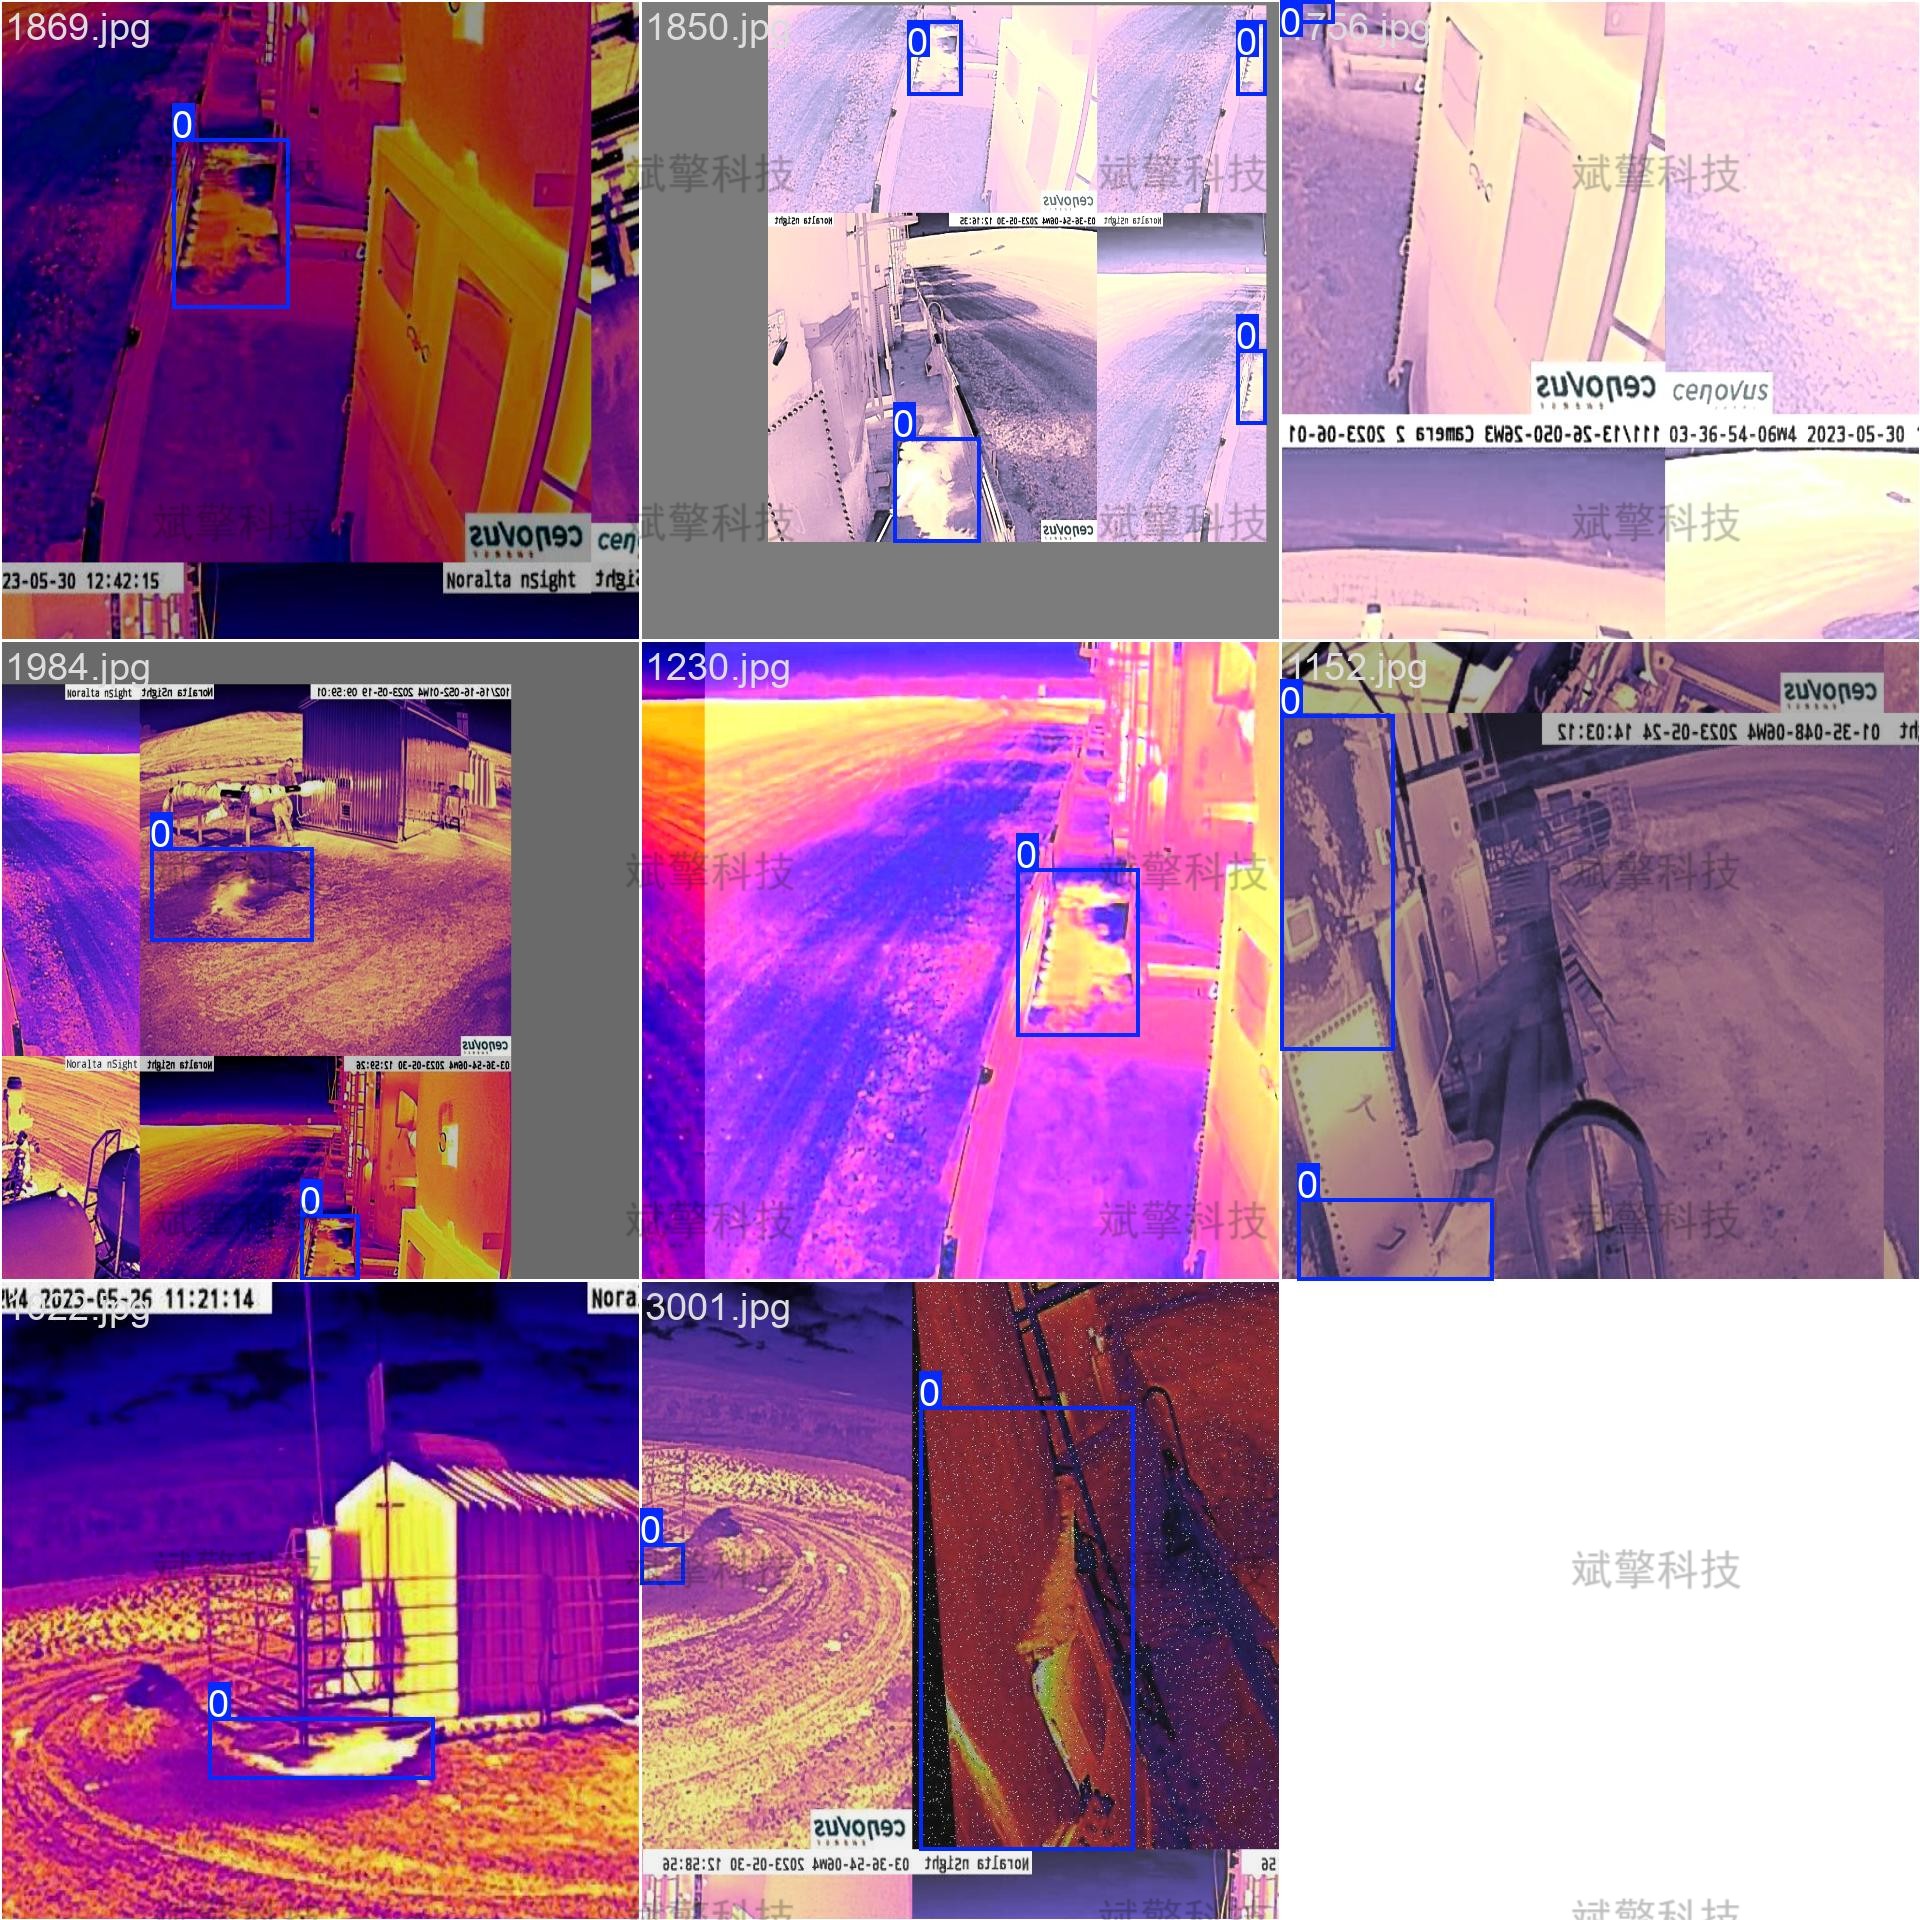
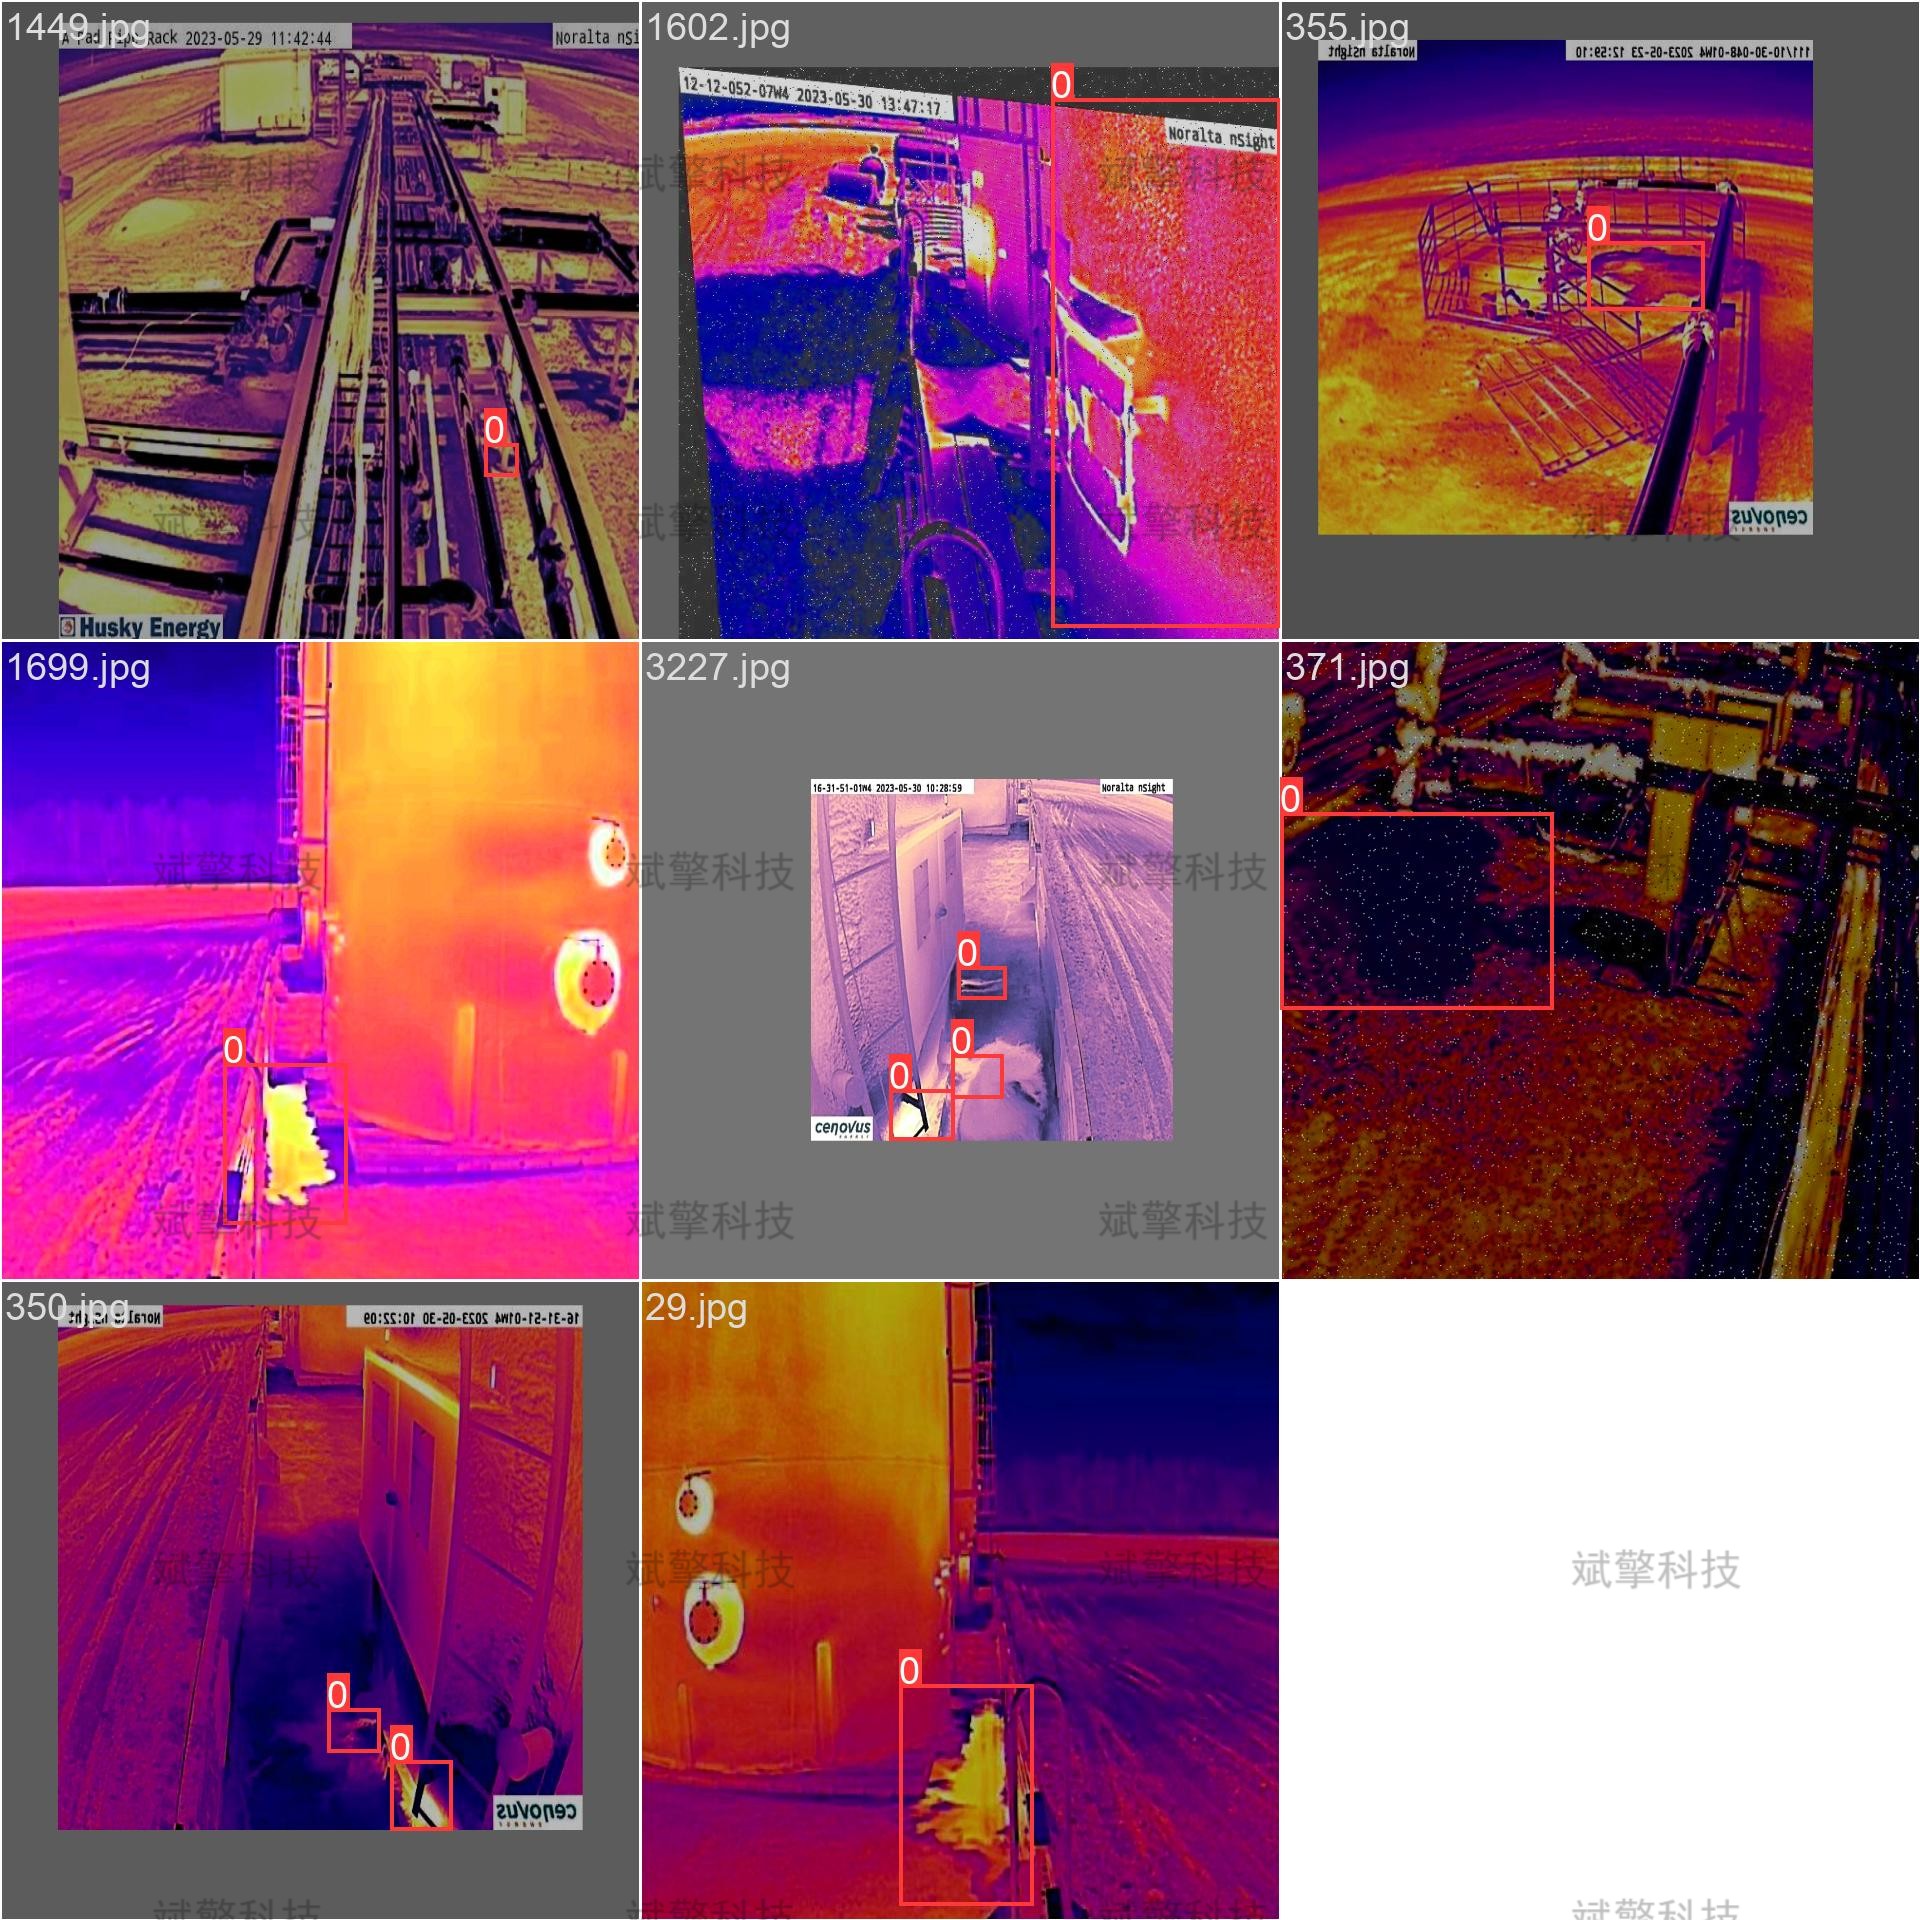
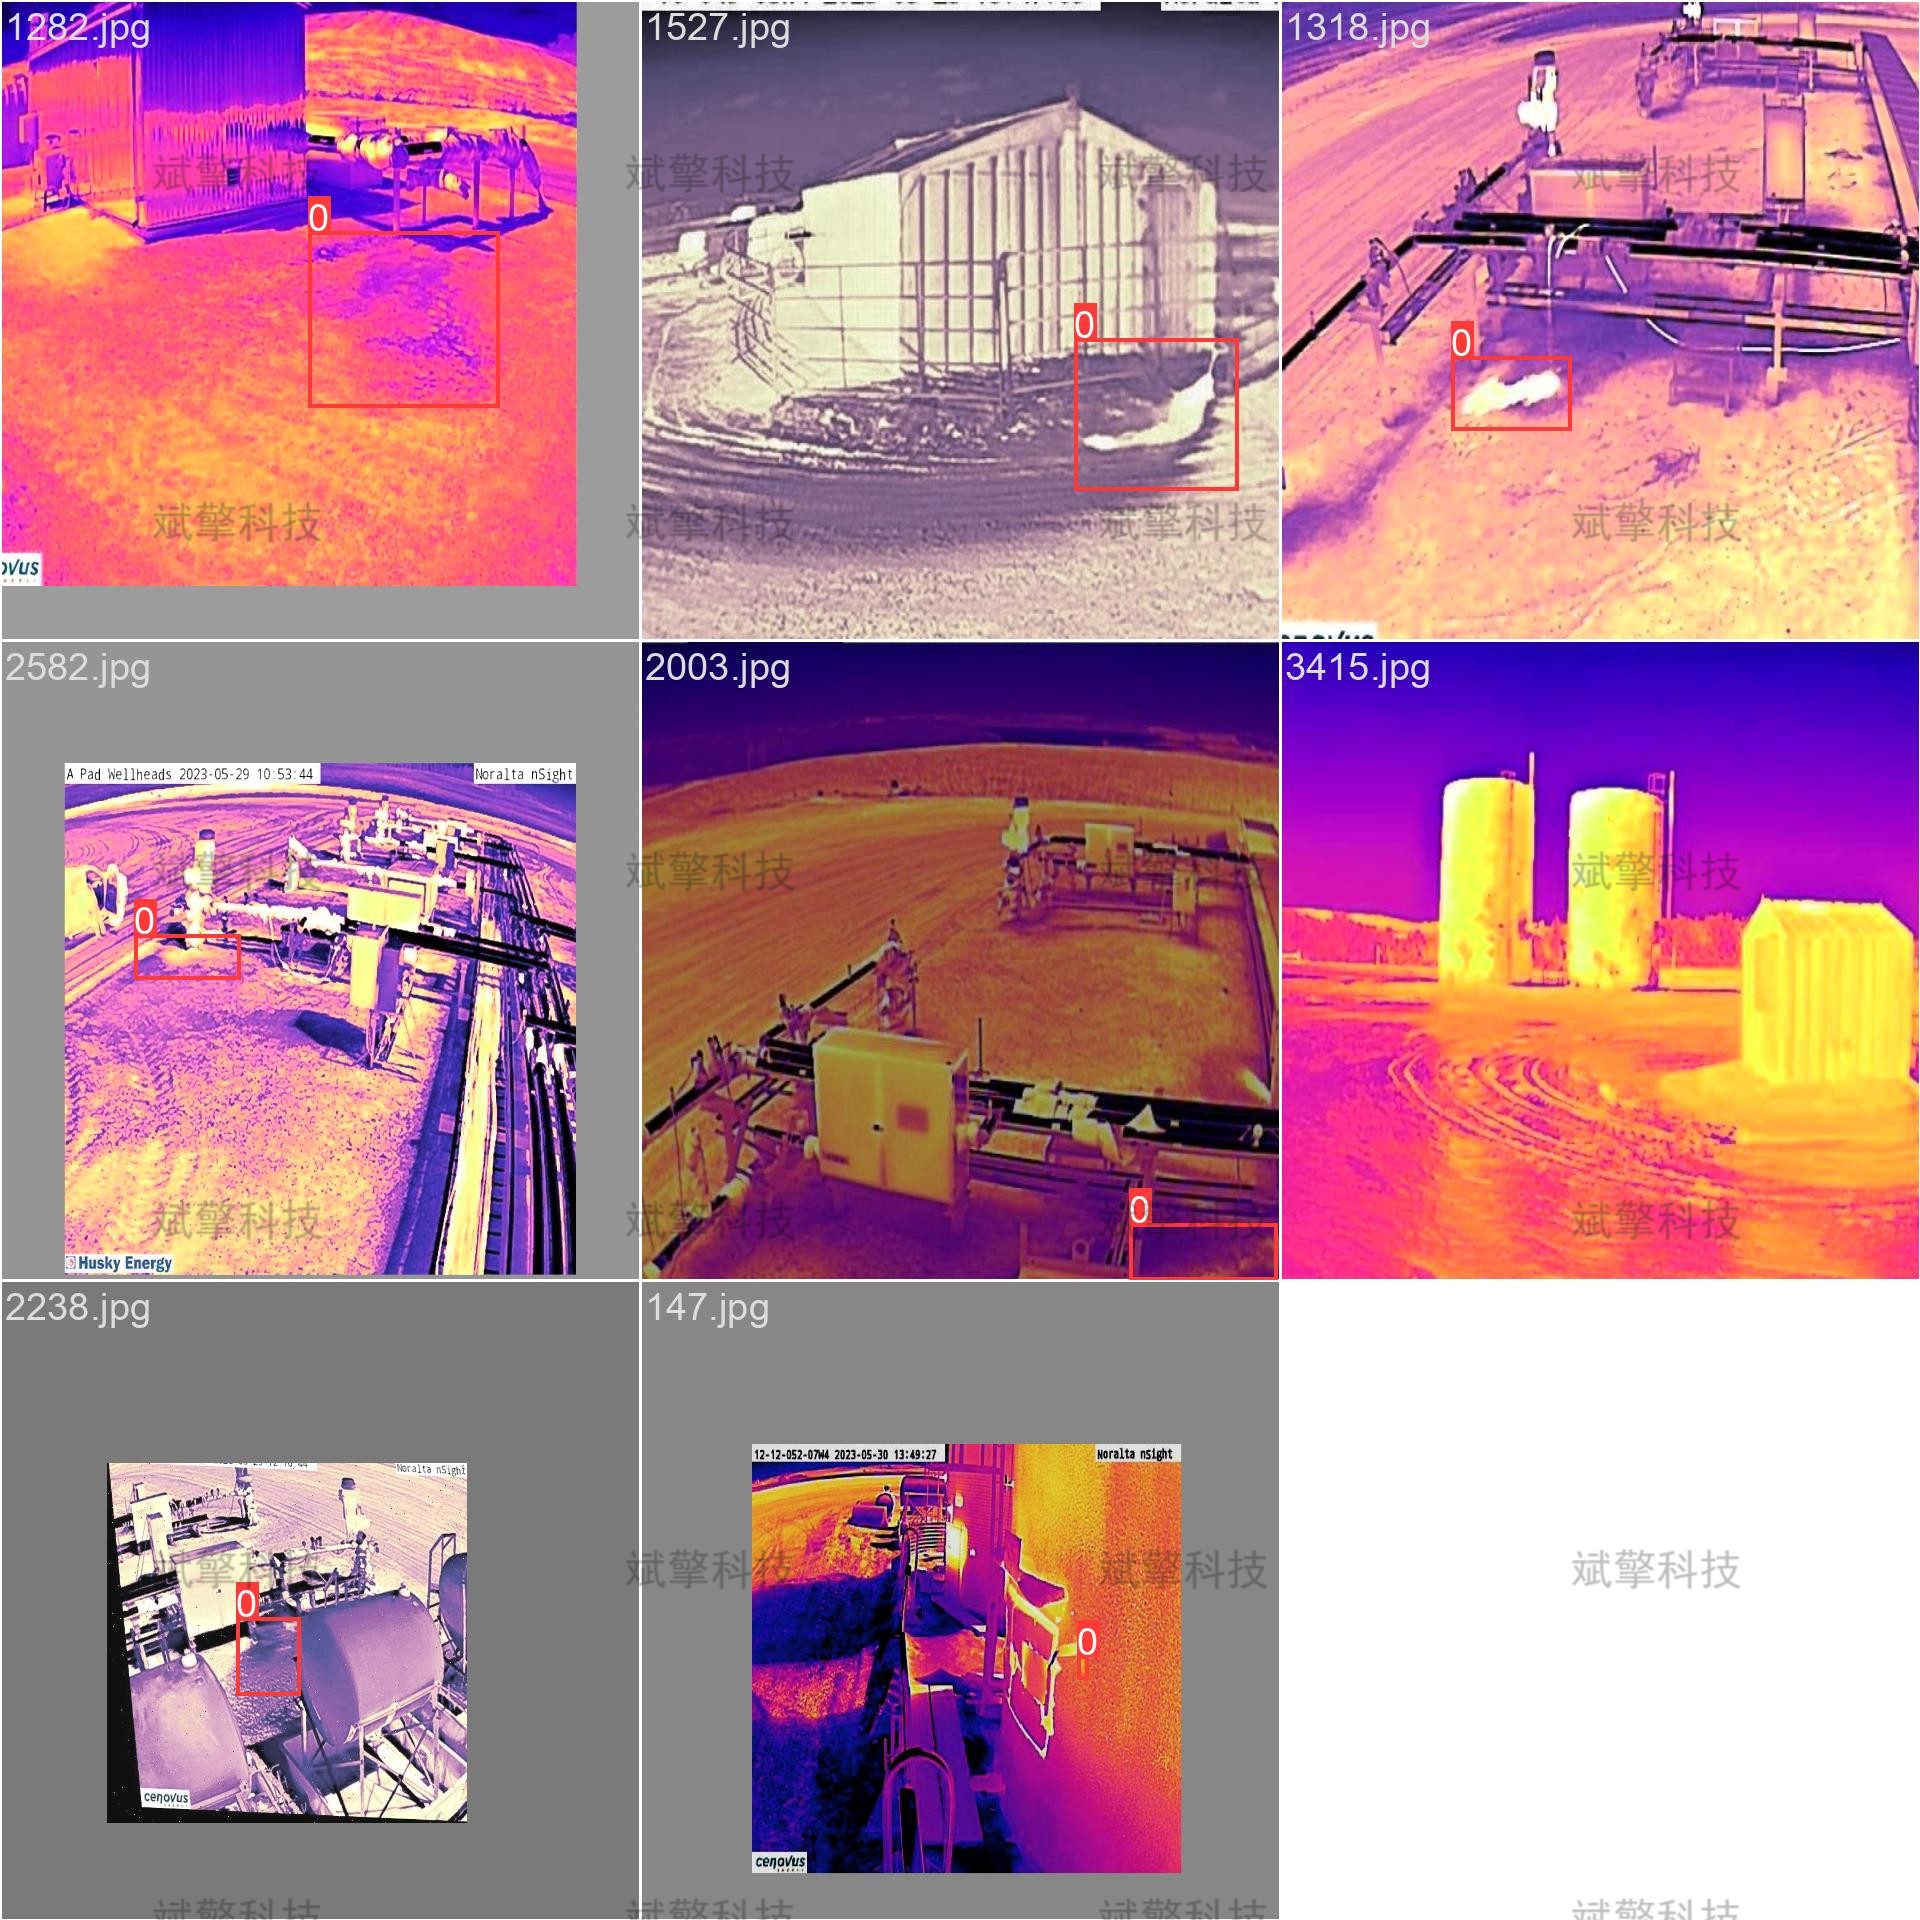
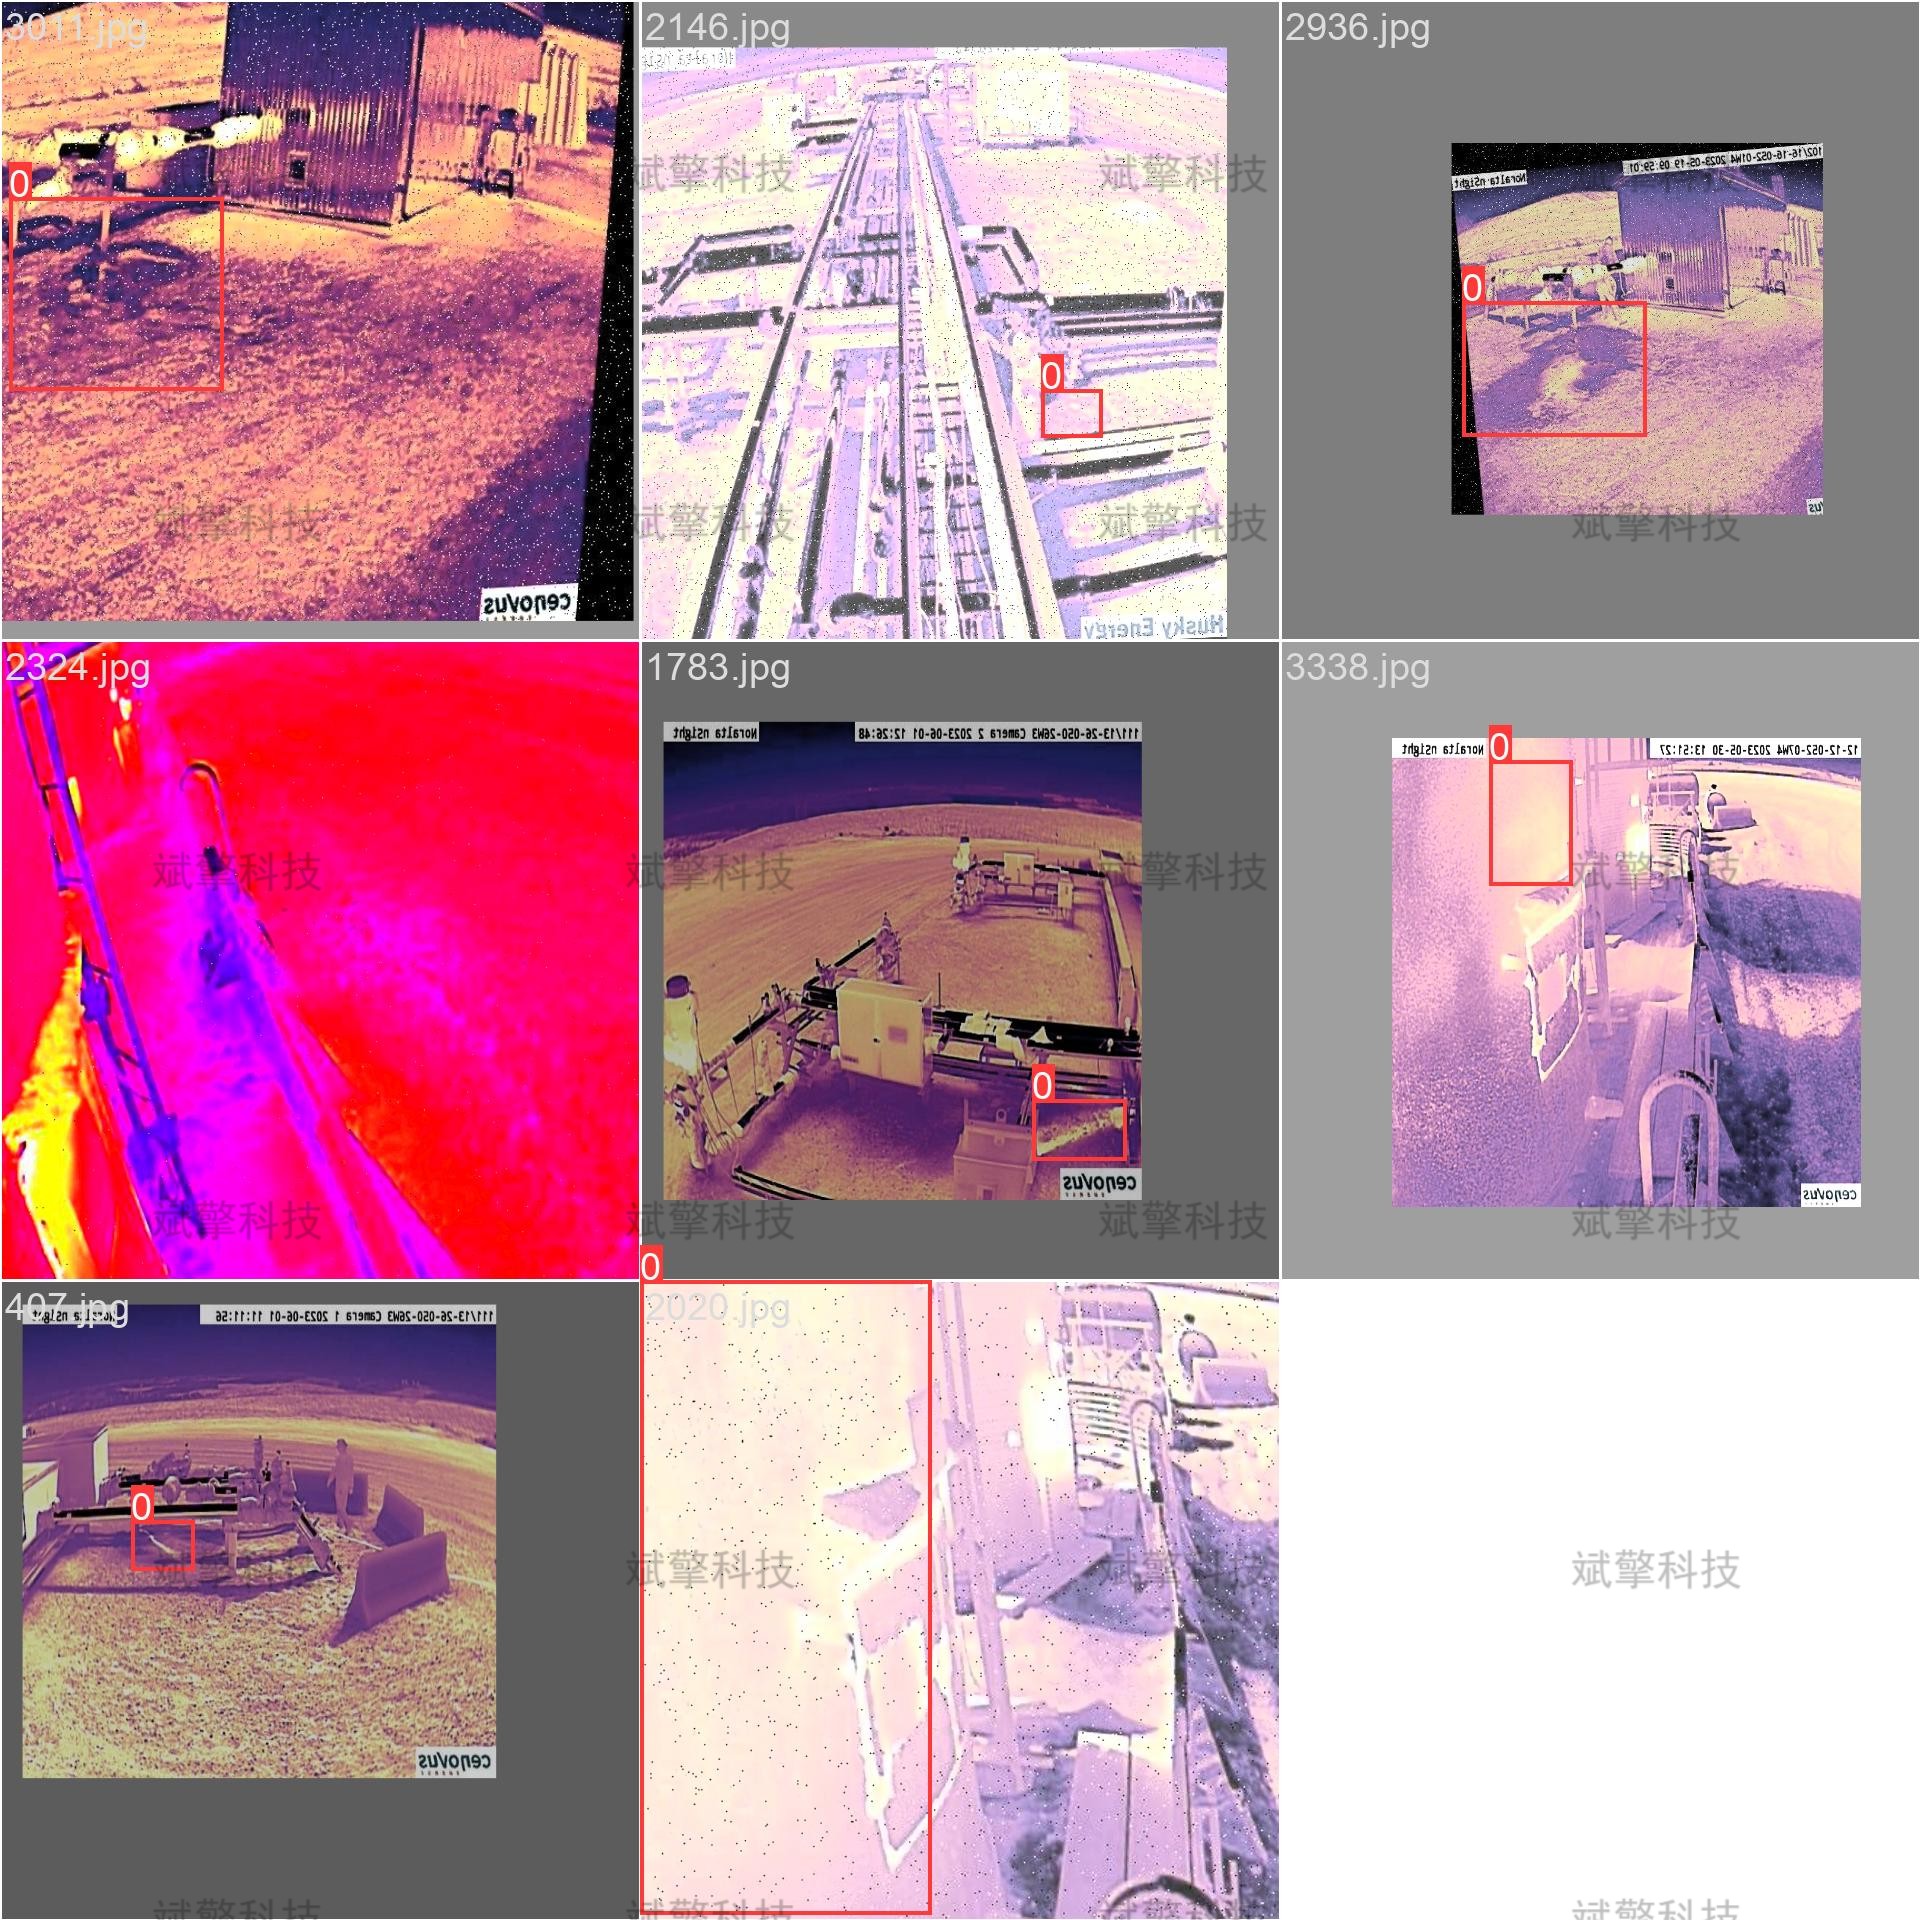
针对变电站复杂环境下的液体泄漏检测任务,我们构建了一个专门的红外图像数据集。系统所使用的数据集是针对变电站场景专门采集和标注的红外热成像液体泄漏数据集。
-
训练集: 3524 张。
-
验证集: 504 张。
-
测试集: 1007 张。
数据集配置文件
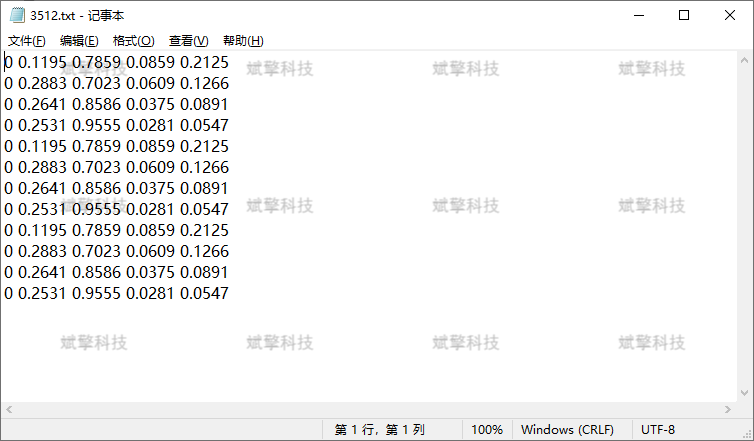
数据集采用YOLO格式的配置文件,主要包含以下内容:
train: //root//autodl-tmp//144//train//images
val: //root//autodl-tmp//144//val//images
test:

nc: 1
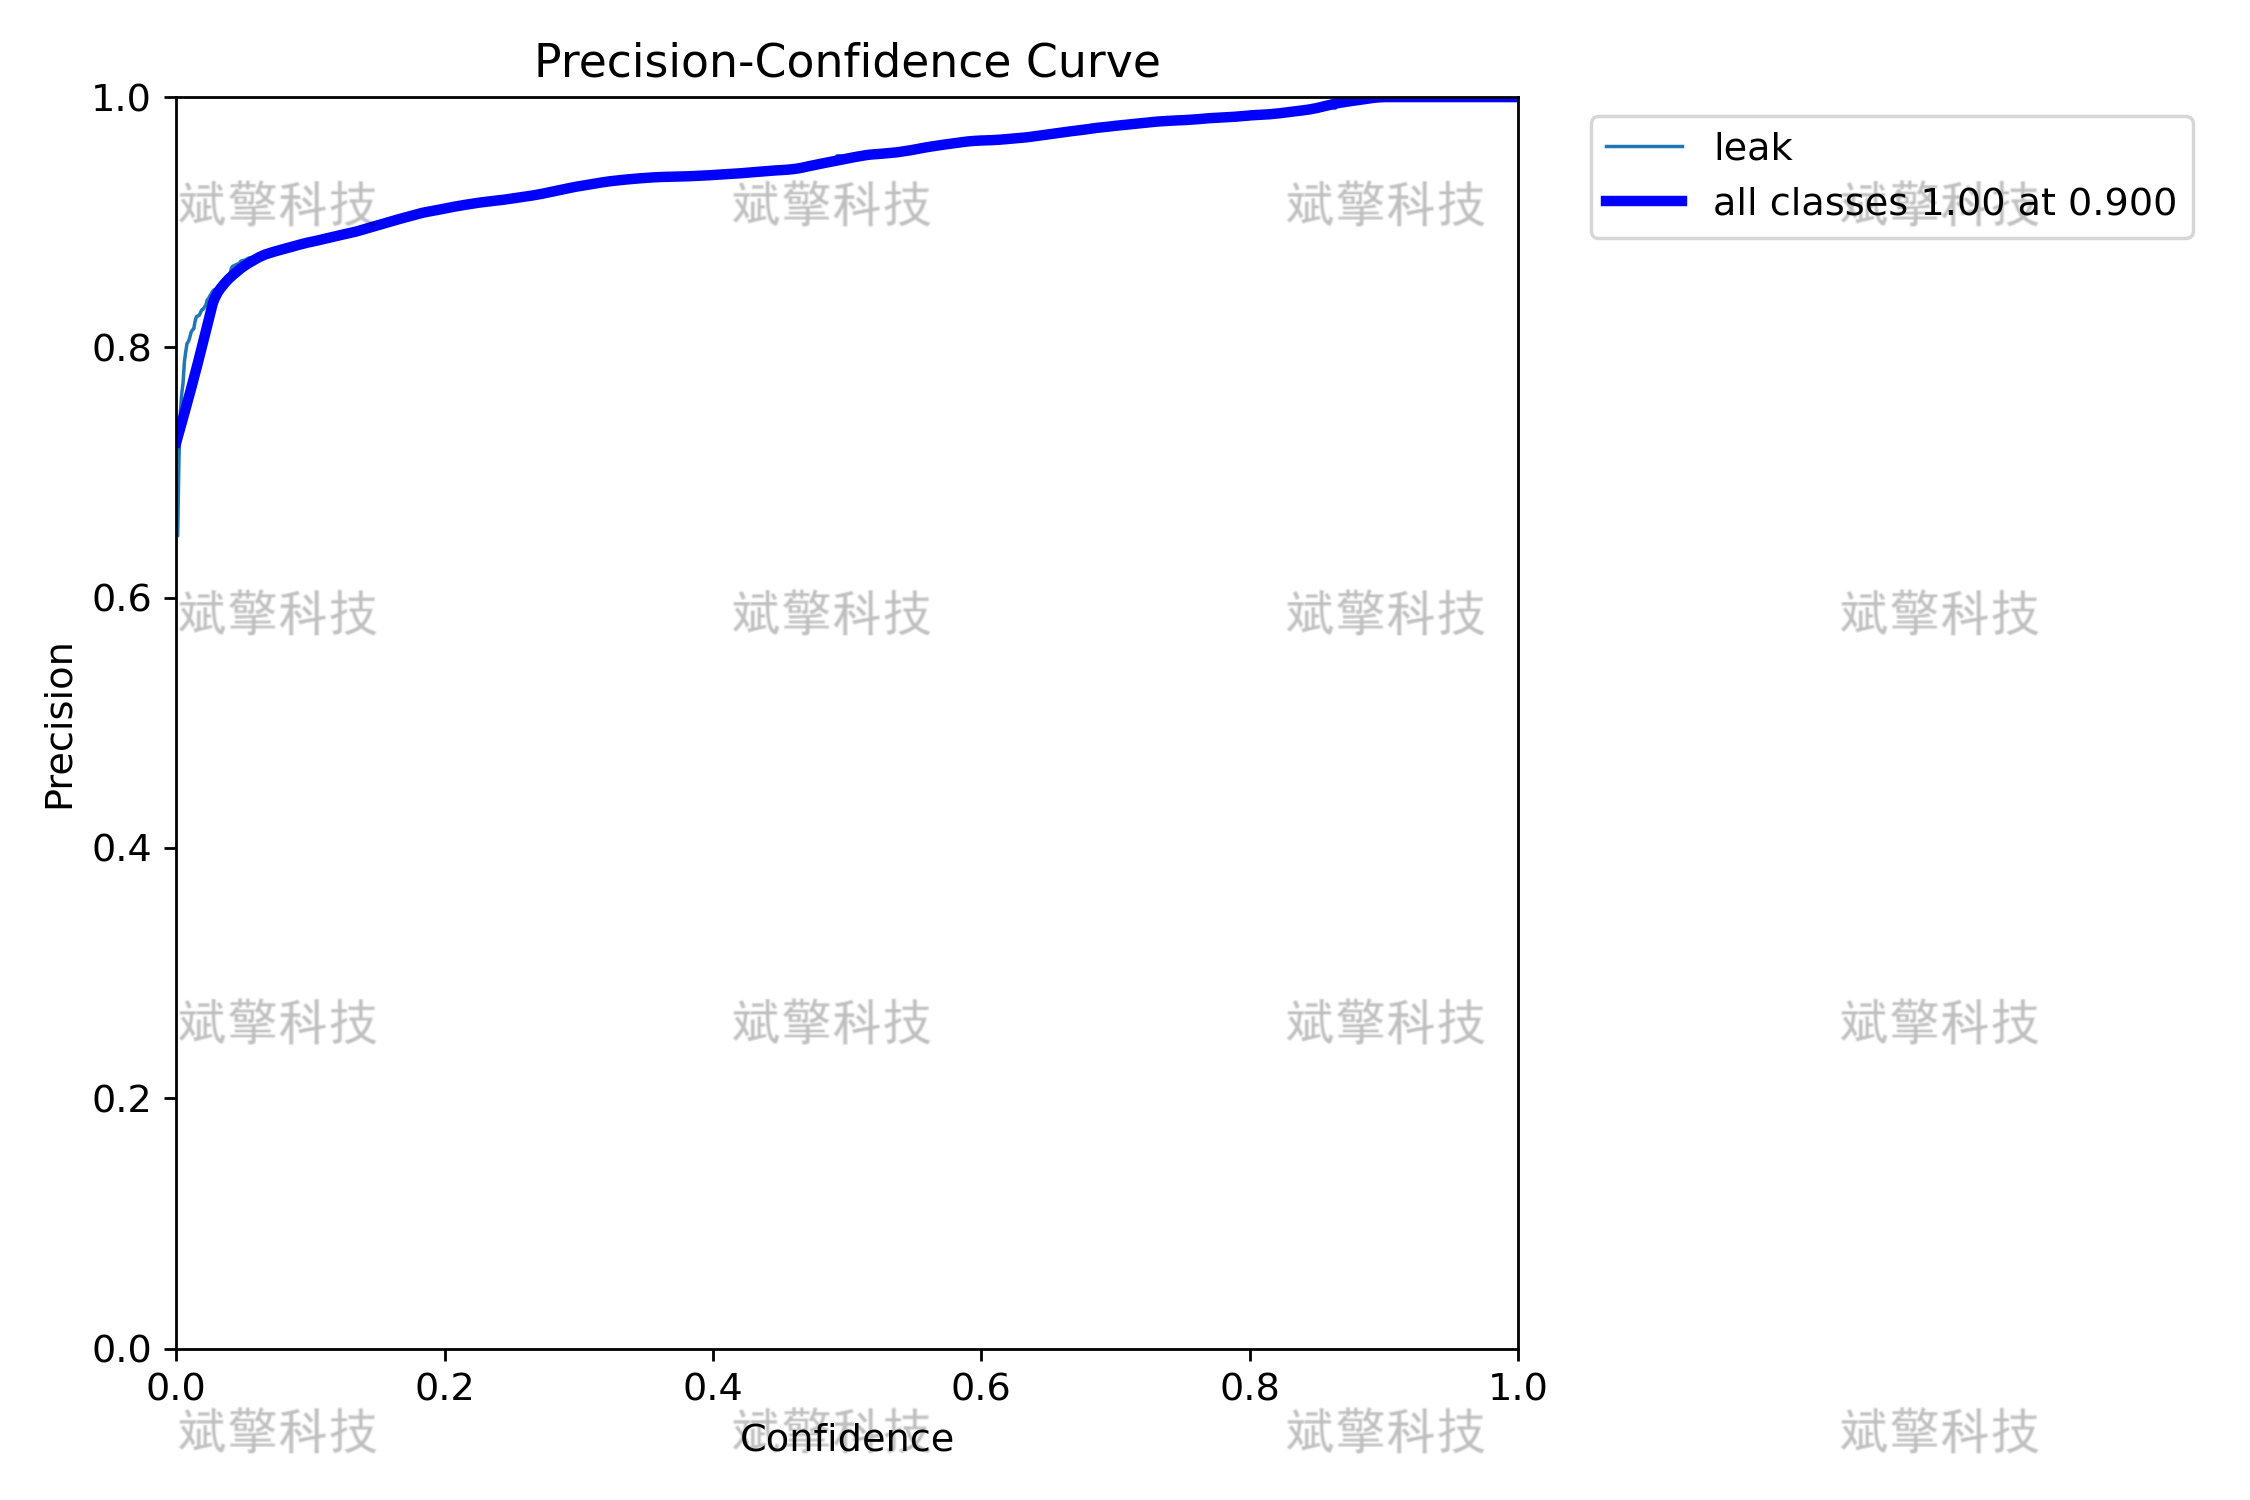
names: ['leak'] 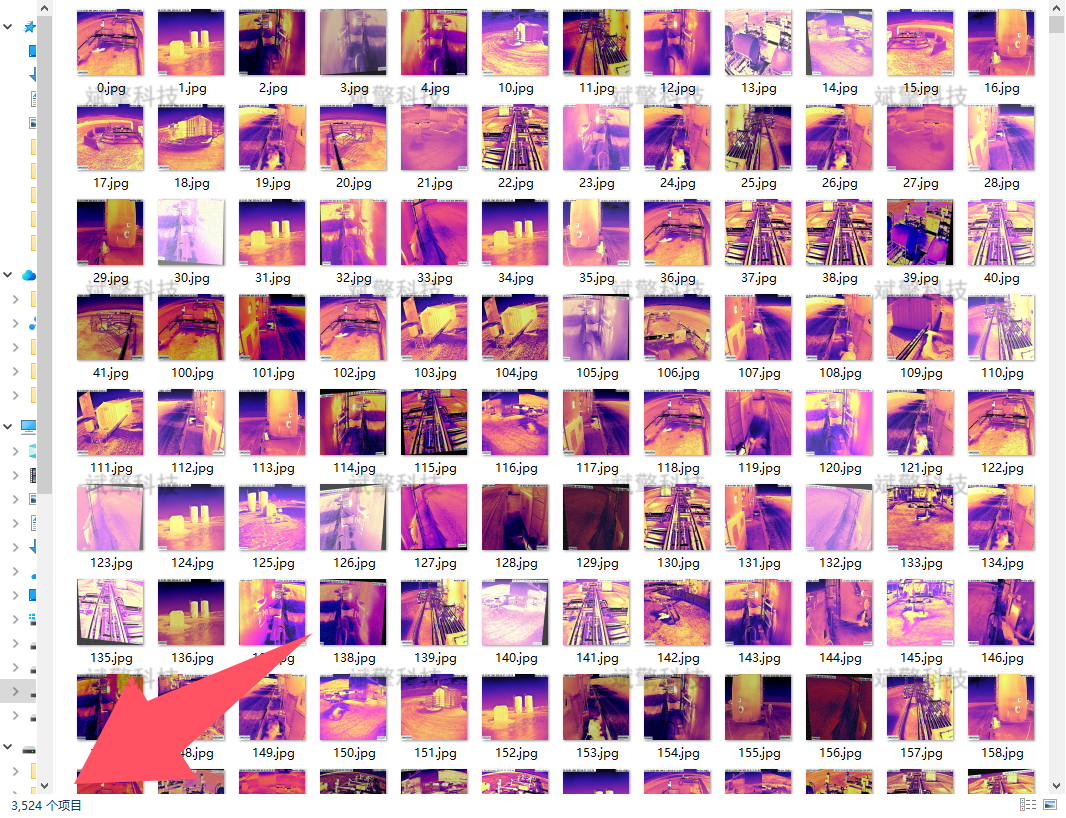
四、项目环境配置
创建虚拟环境
首先新建一个Anaconda环境,每个项目用不同的环境,这样项目中所用的依赖包互不干扰。
终端输入
conda create -n yolov8 python==3.9

激活虚拟环境
conda activate yolov8

安装cpu版本pytorch
pip install torch torchvision torchaudio

pycharm中配置anaconda


安装所需要库
pip install -r requirements.txt

五、模型训练
训练代码
from ultralytics import YOLO

model_path = 'yolov8s.pt'
data_path = 'datasets/data.yaml'

if __name__ == '__main__':
    model = YOLO(model_path)
    results = model.train(data=data_path,
                          epochs=500,
                          batch=64,
                          device='0',
                          workers=0,
                          project='runs/detect',
                          name='exp',
                          )
根据实际情况更换模型 yolov8n.yaml (nano):轻量化模型,适合嵌入式设备,速度快但精度略低。 yolov8s.yaml (small):小模型,适合实时任务。 yolov8m.yaml (medium):中等大小模型,兼顾速度和精度。 yolov8b.yaml (base):基本版模型,适合大部分应用场景。 yolov8l.yaml (large):大型模型,适合对精度要求高的任务。
--batch 64:每批次64张图像。--epochs 500:训练500轮。--datasets/data.yaml:数据集配置文件。--weights yolov8s.pt:初始化模型权重,yolov8s.pt是预训练的轻量级YOLO模型。
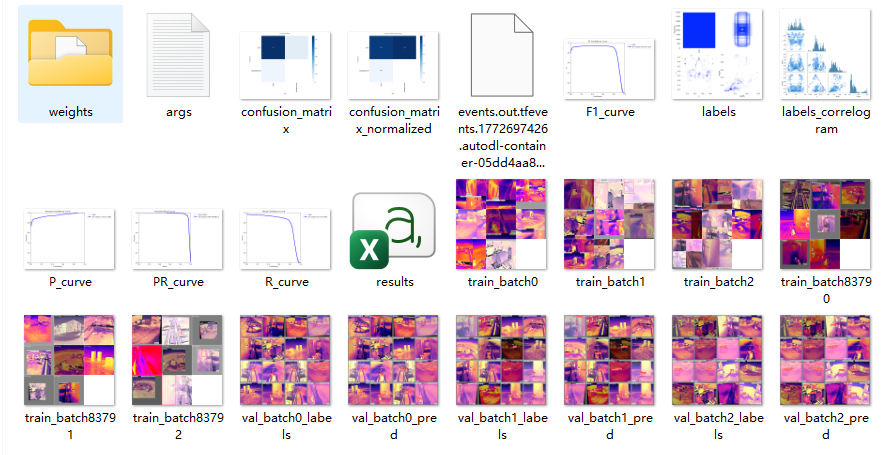
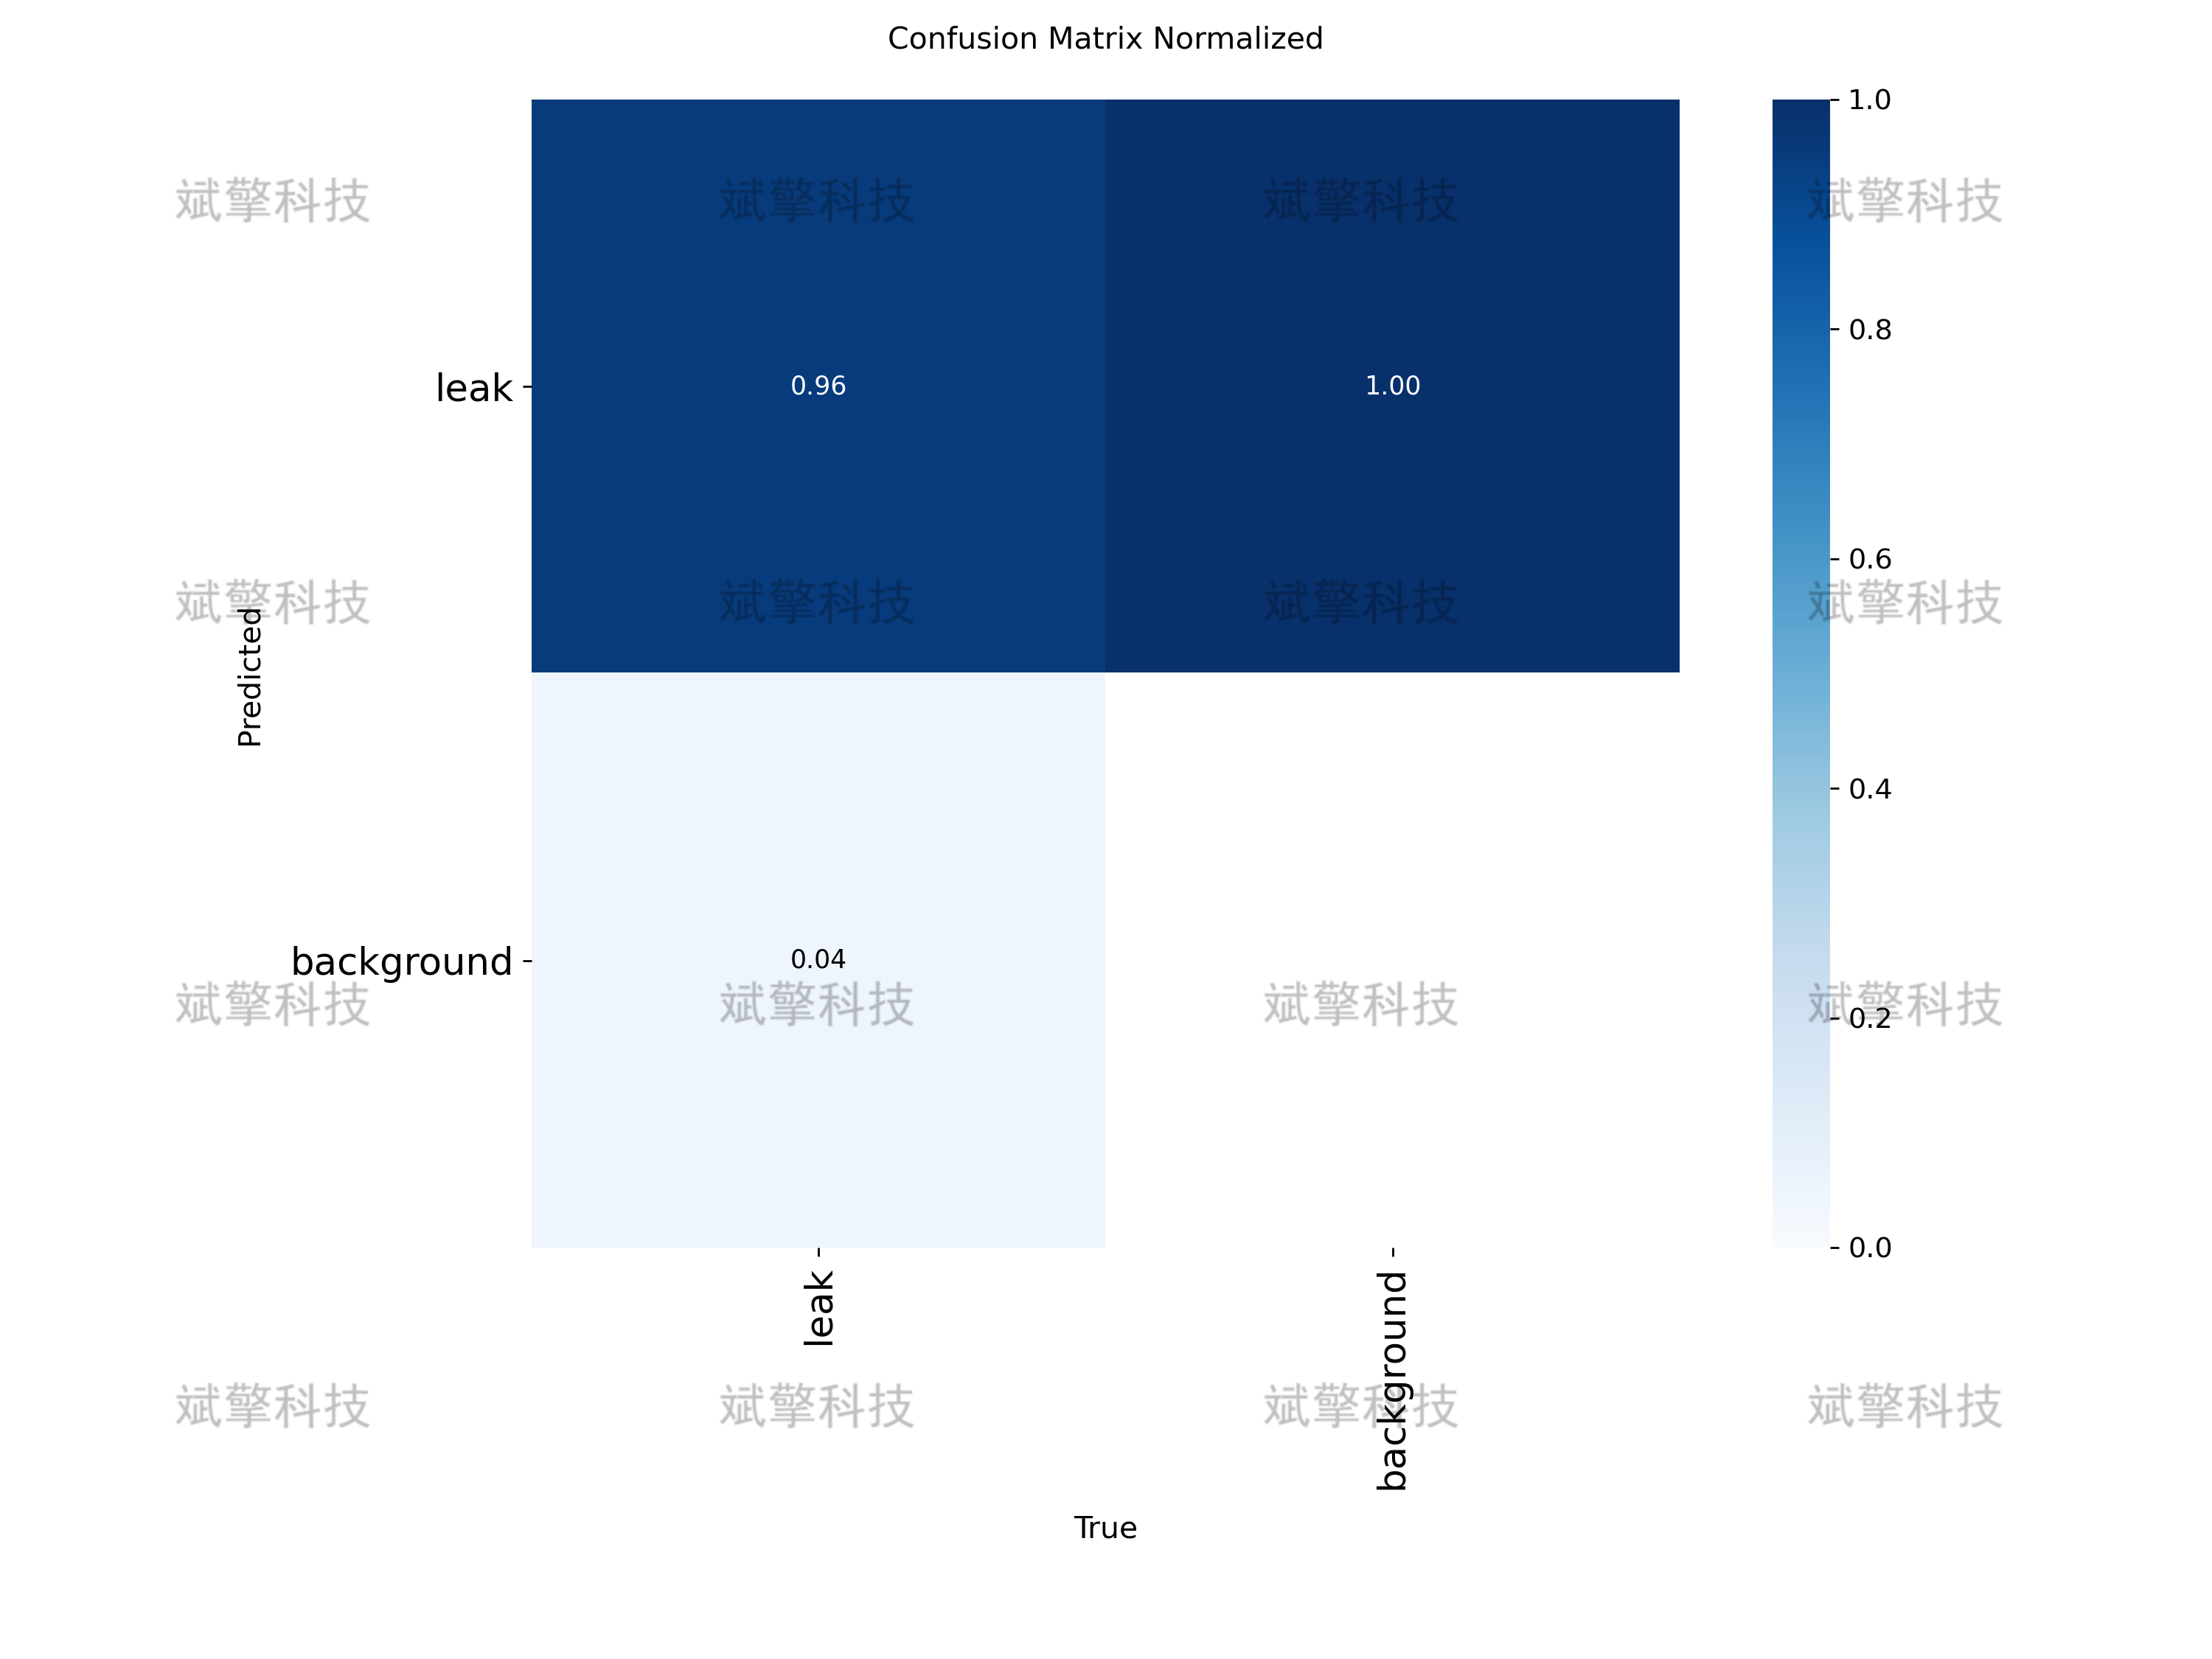
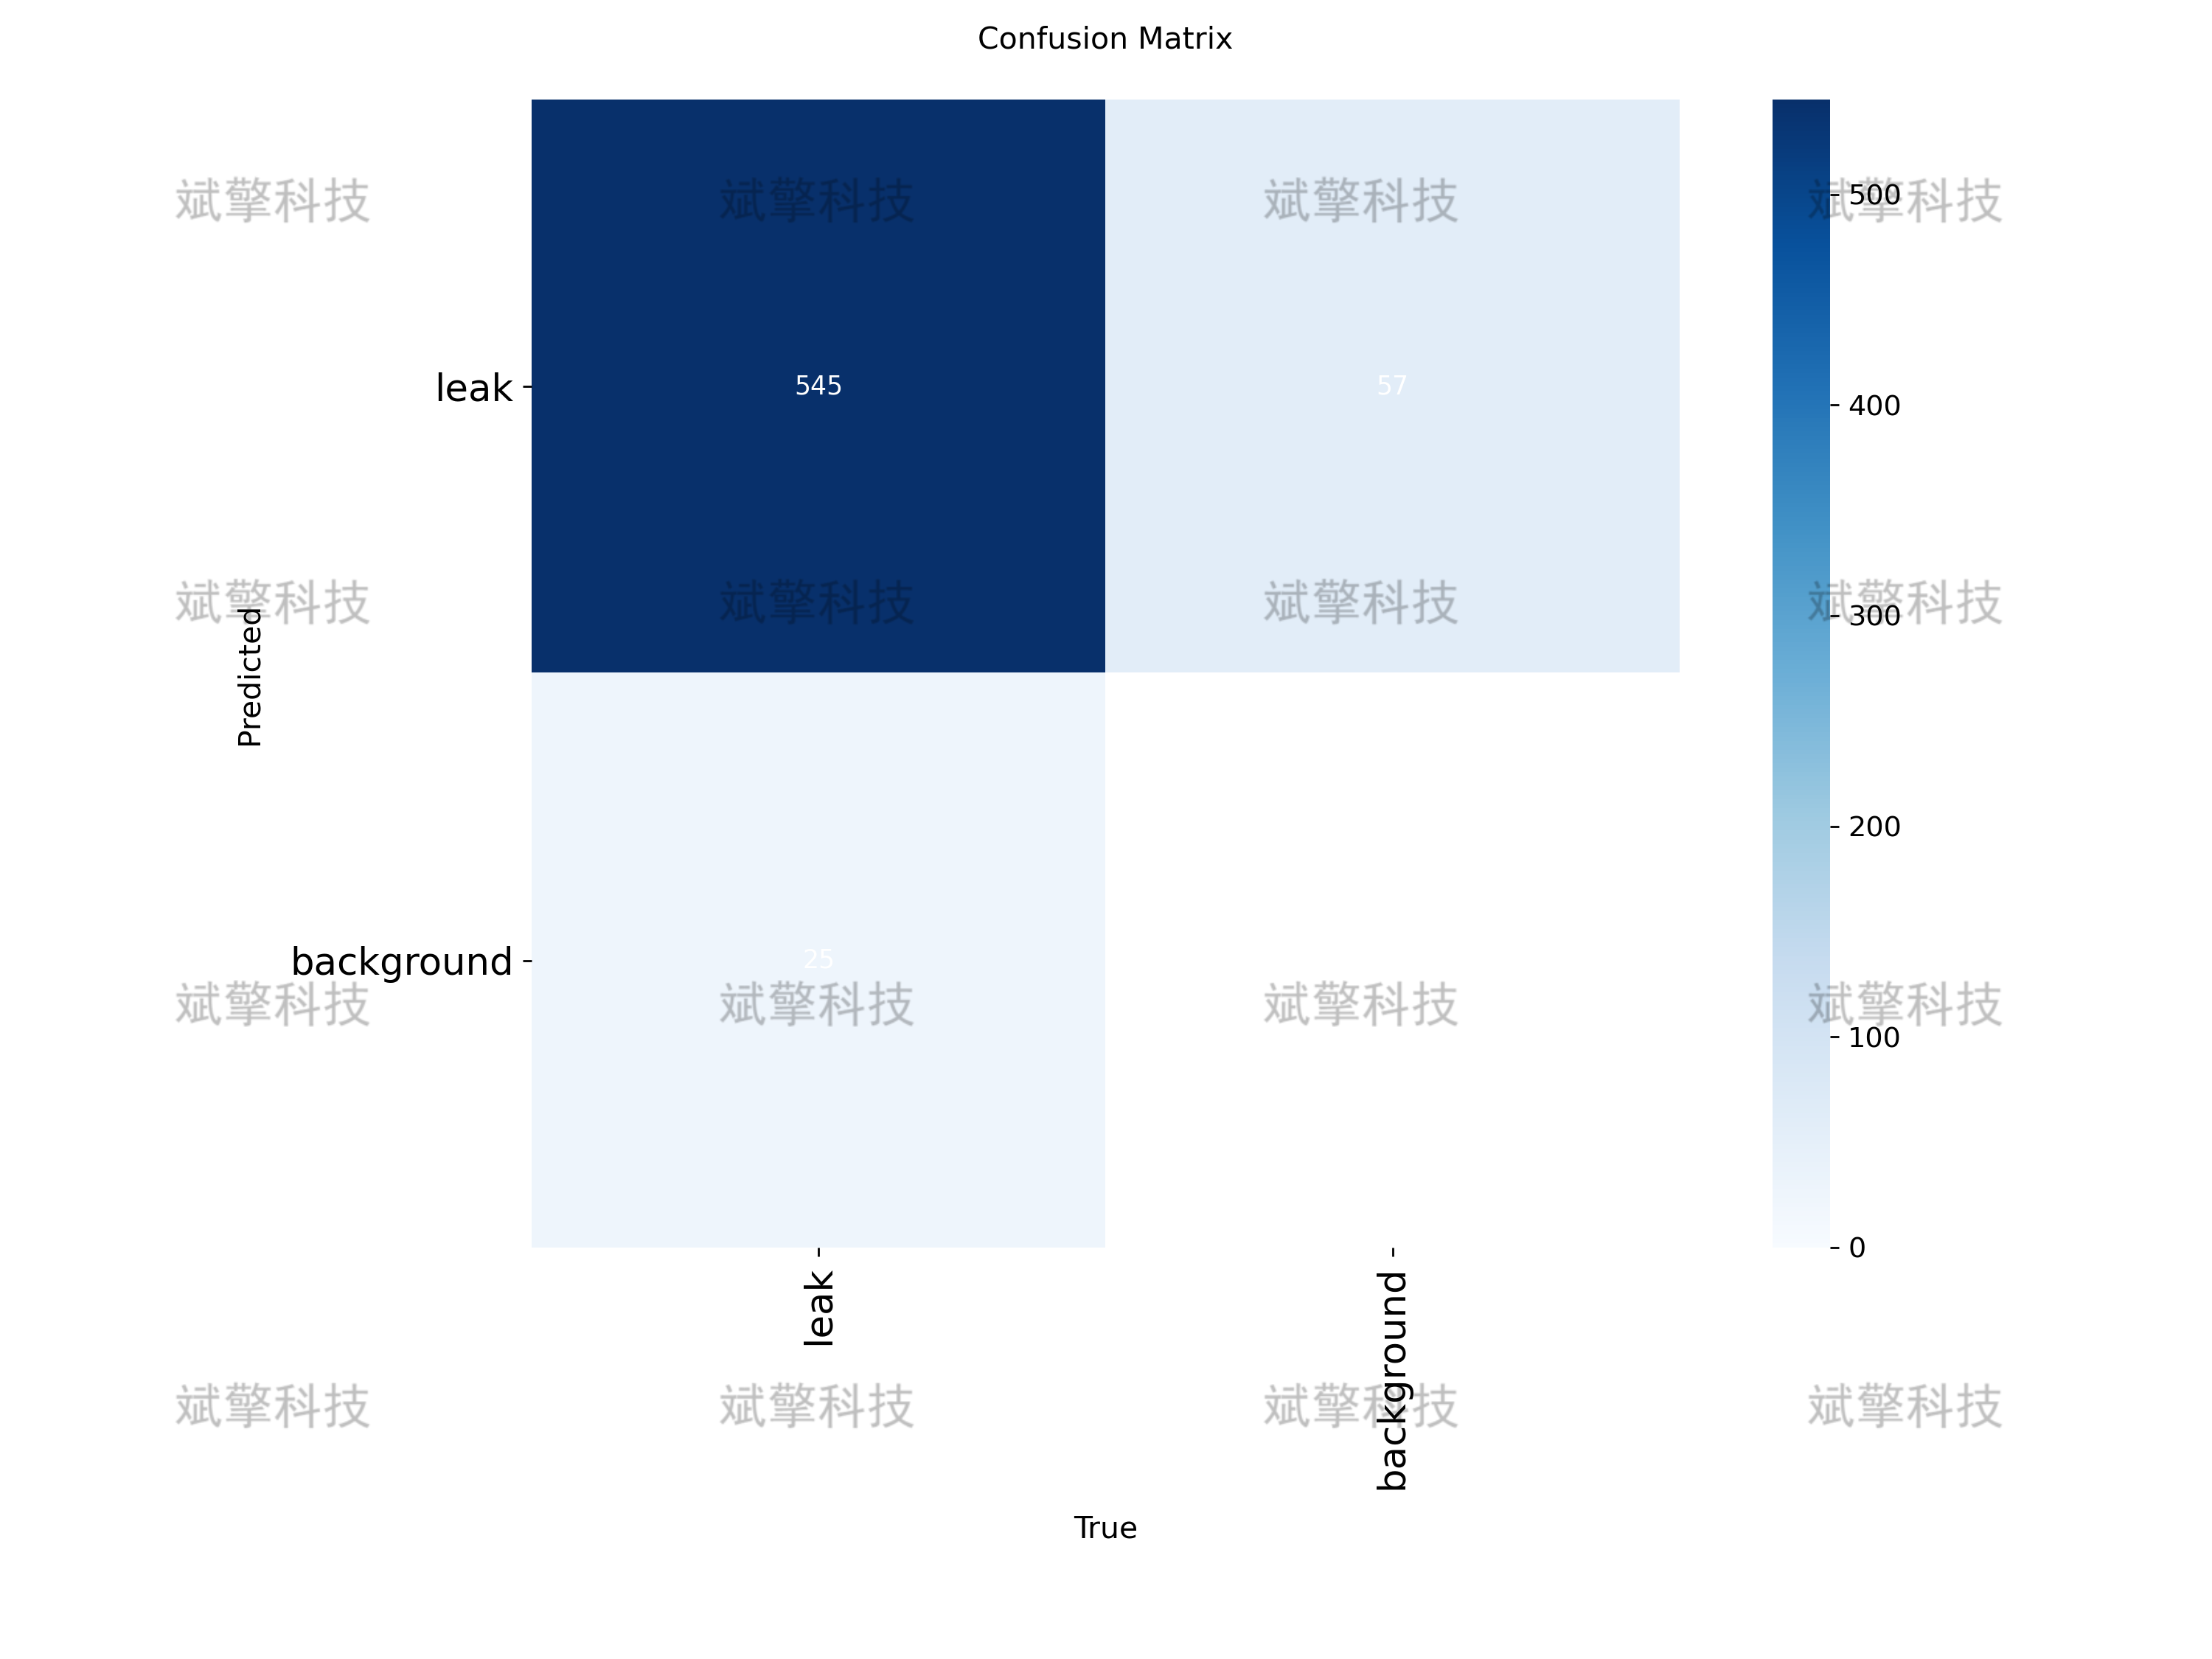
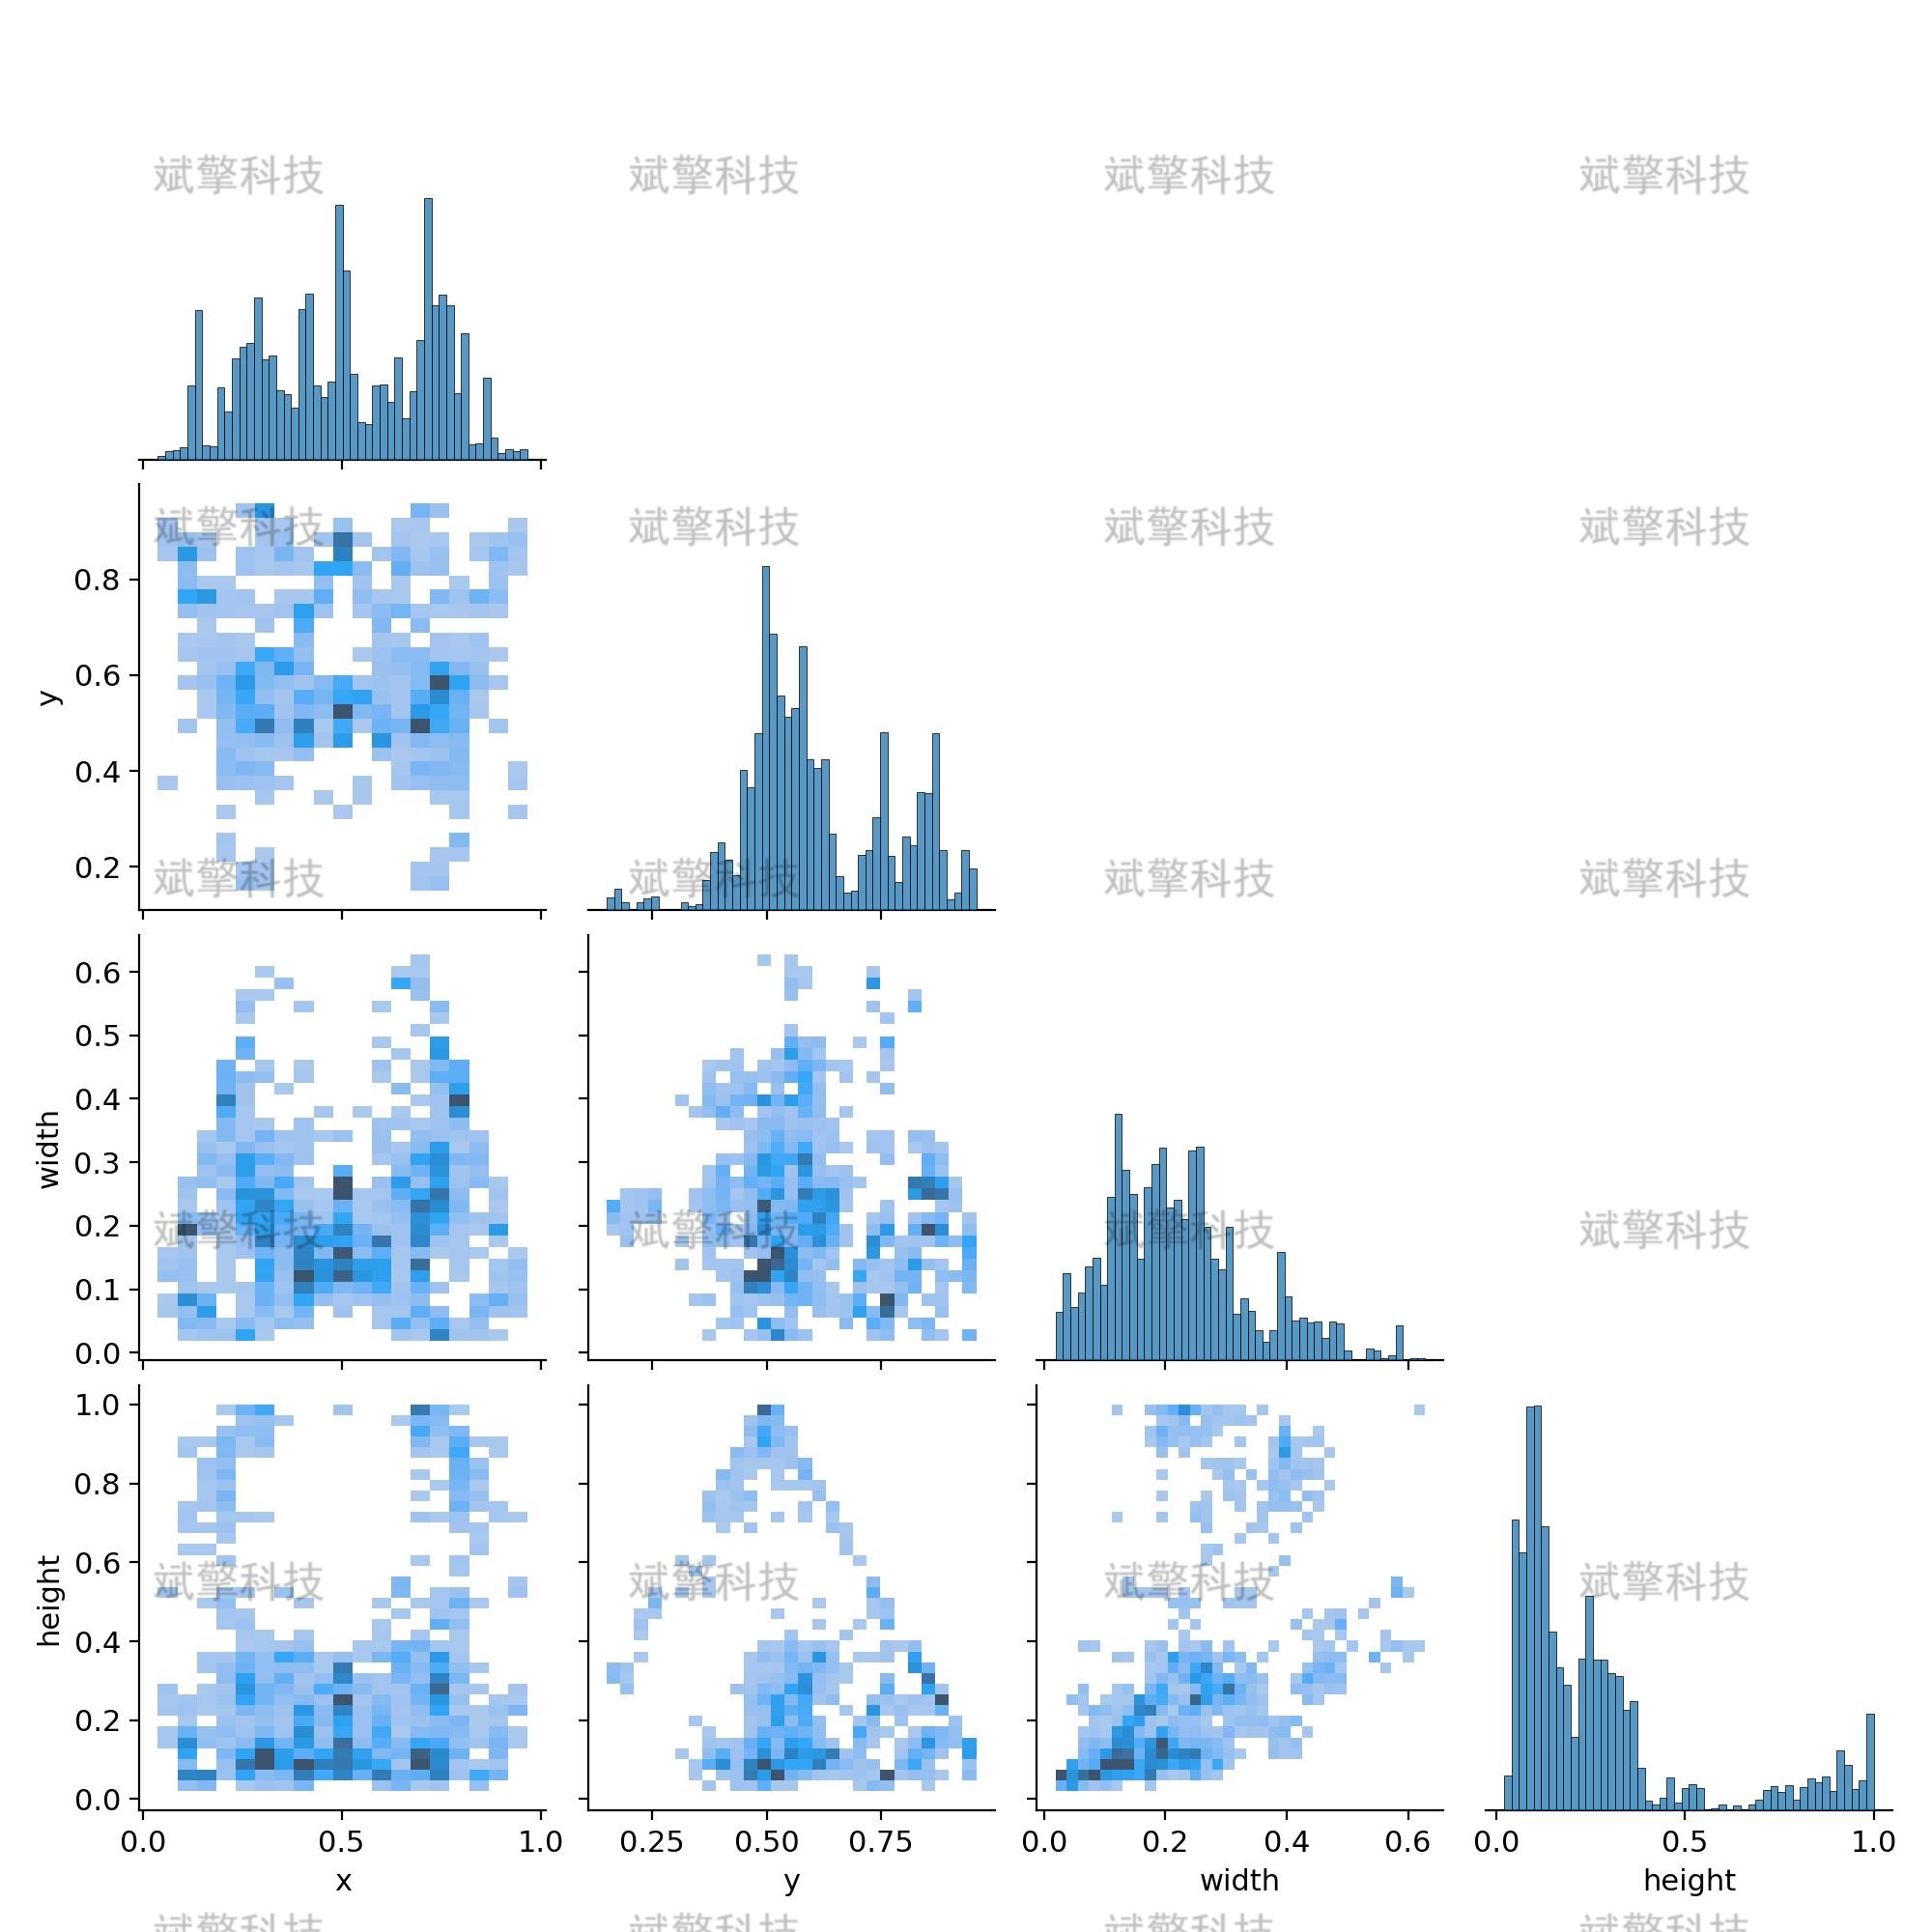
训练结果
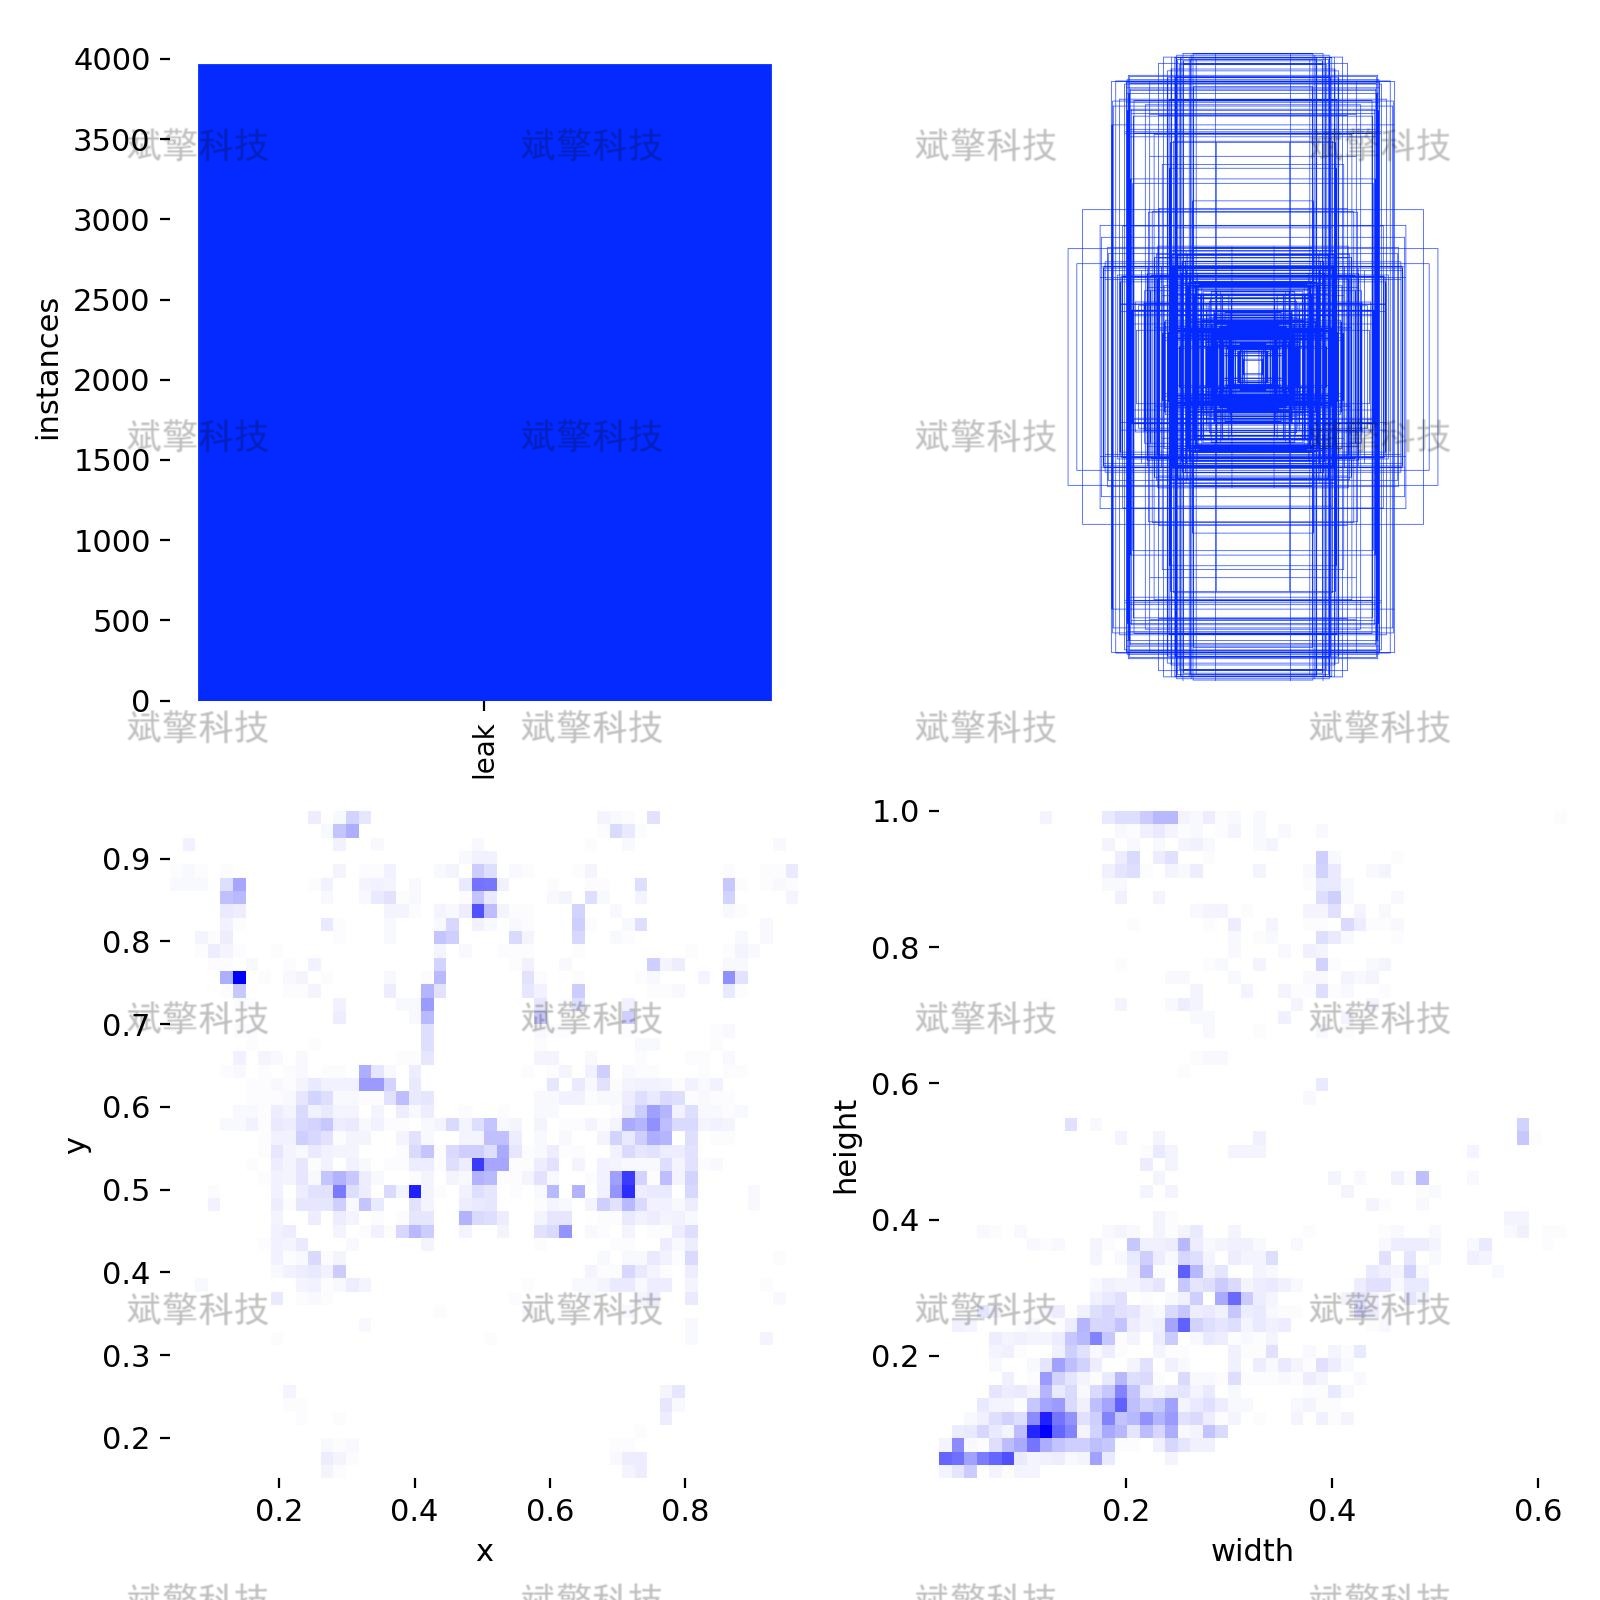
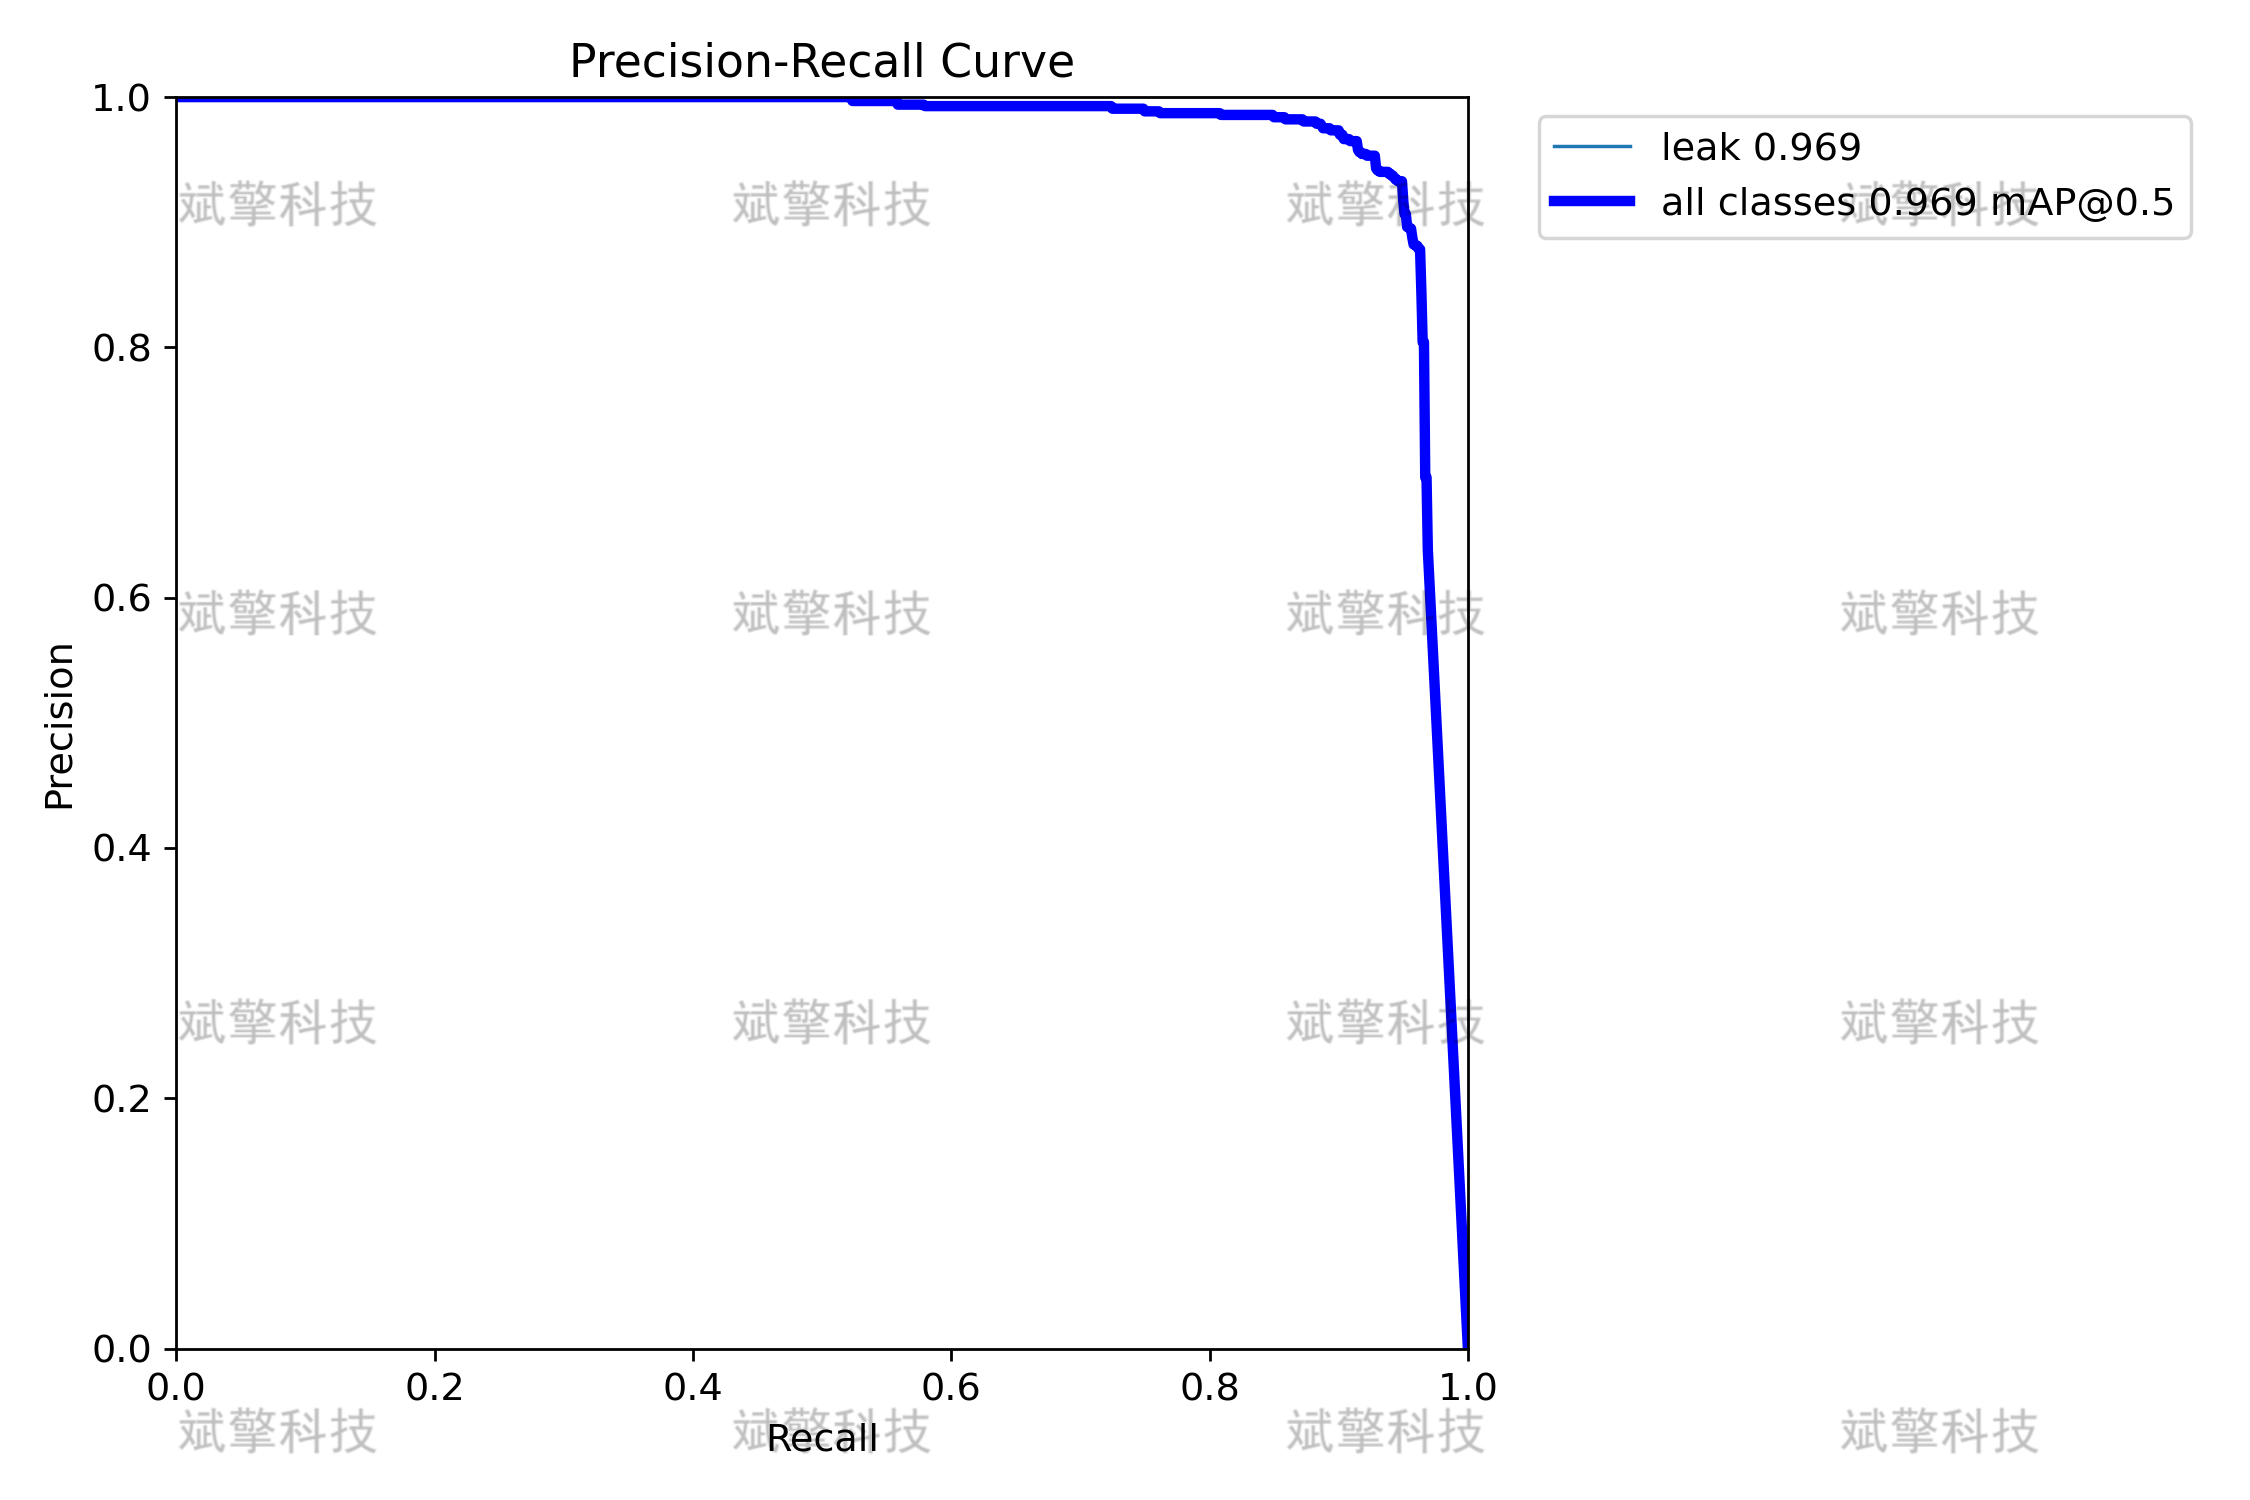
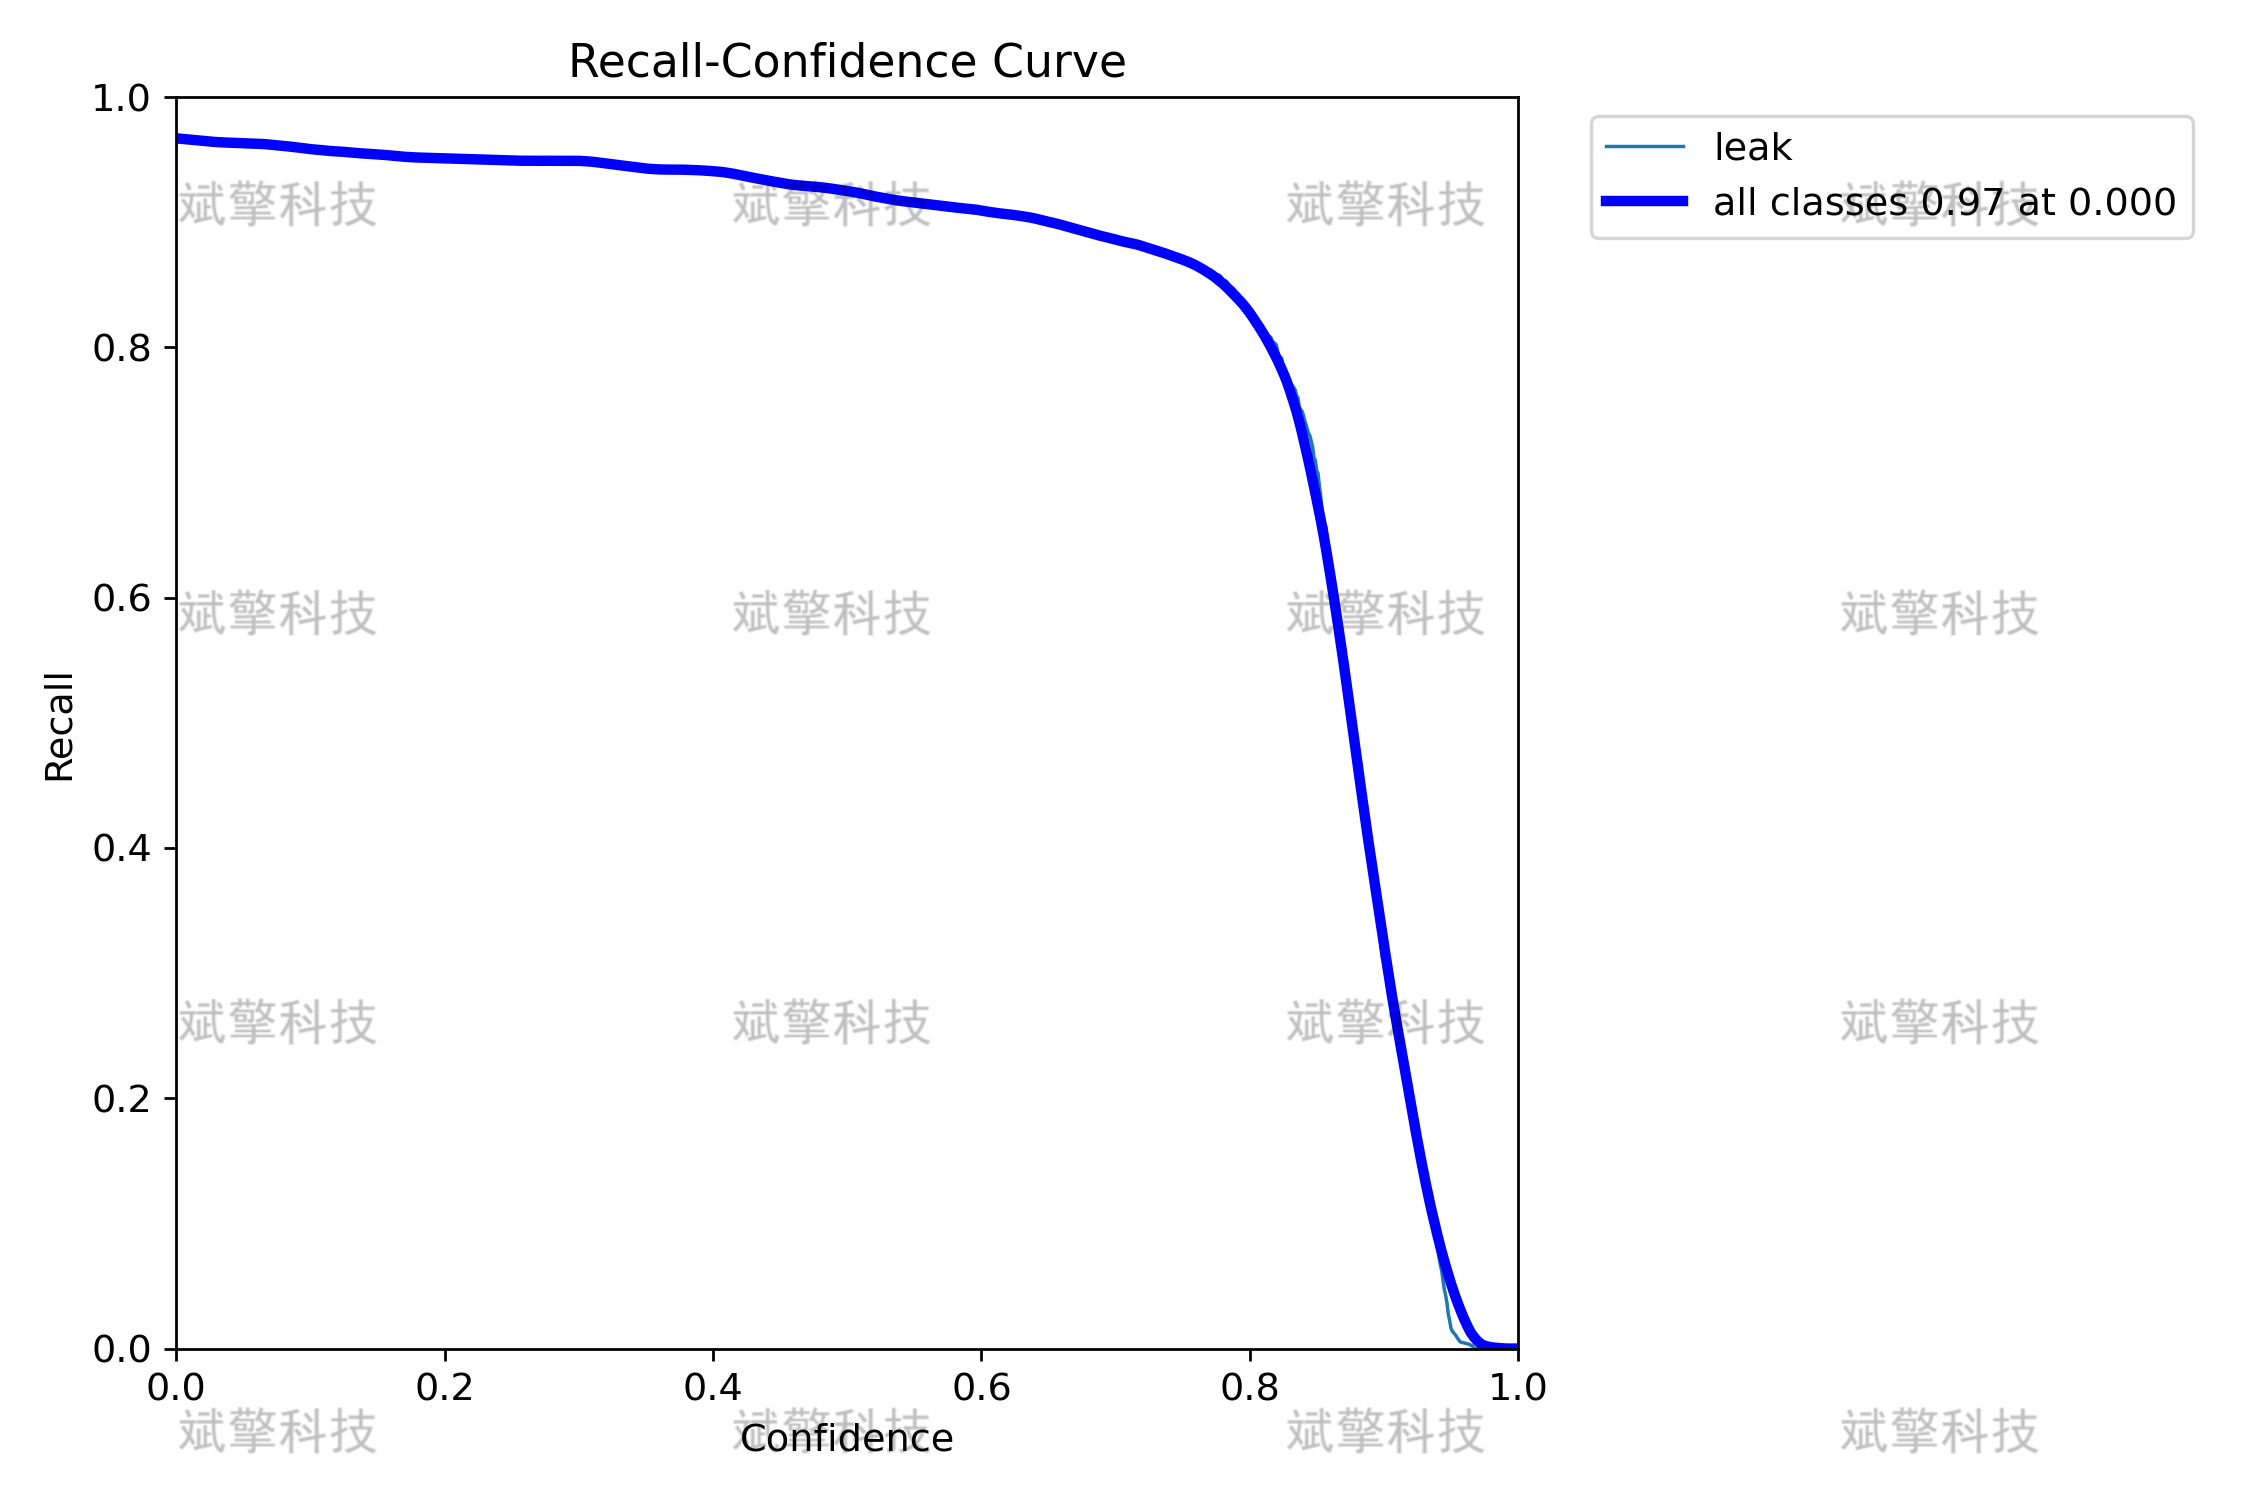
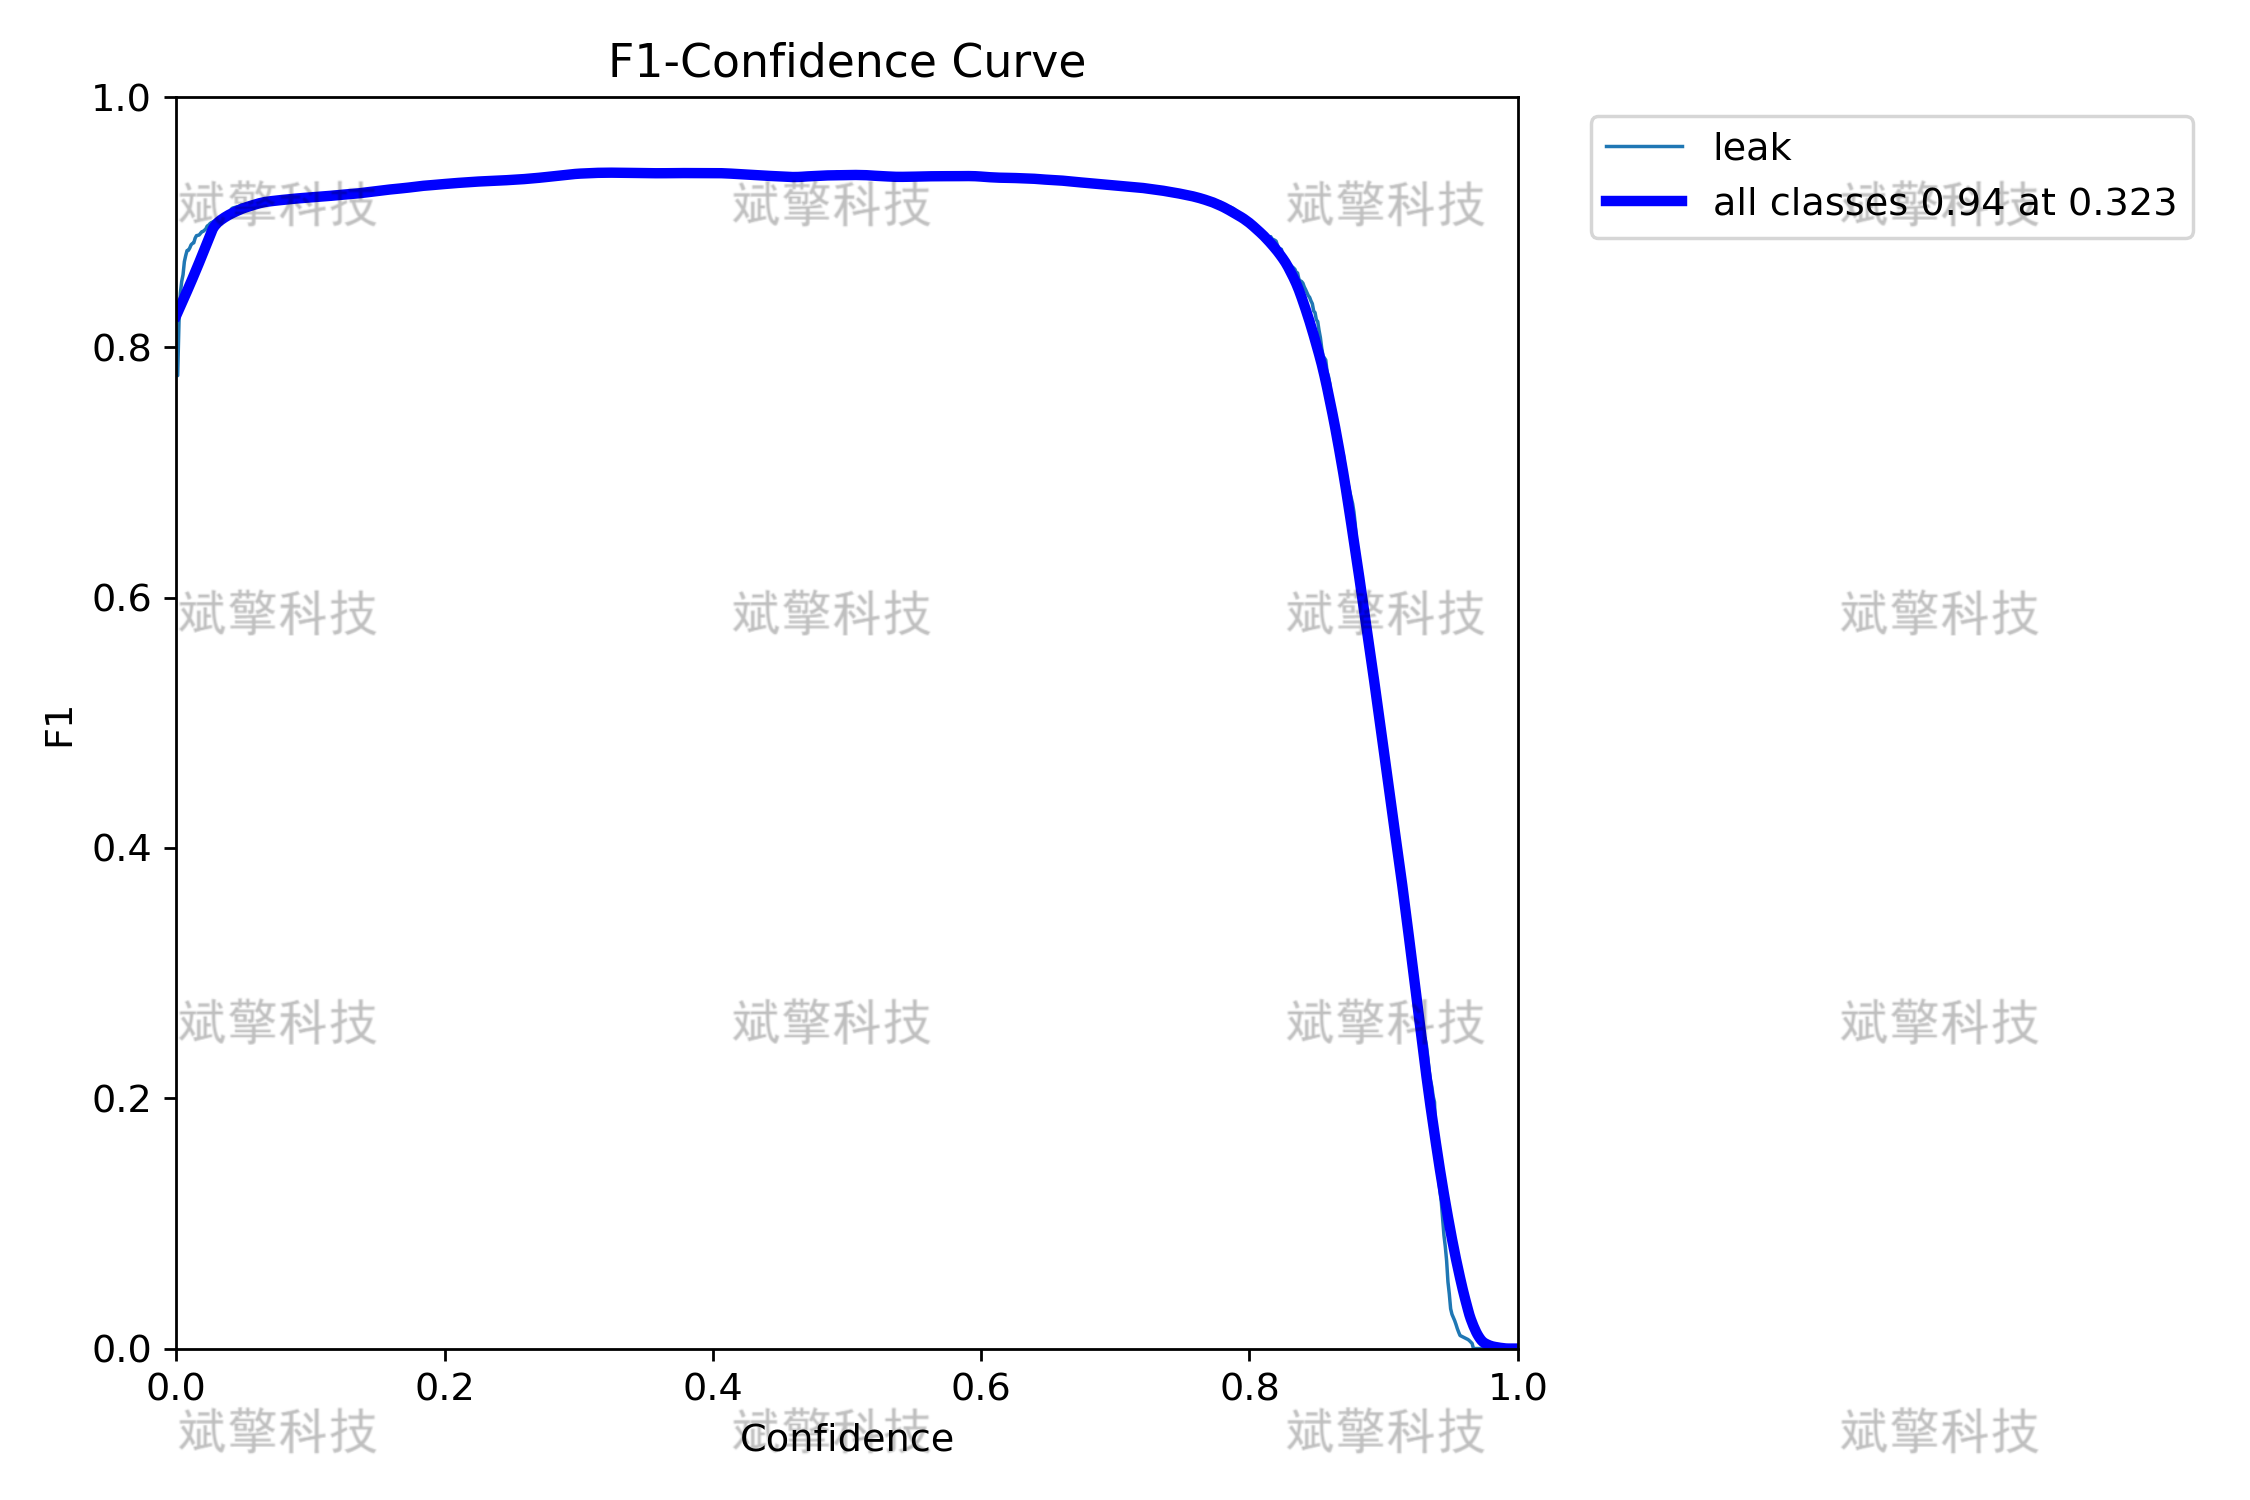
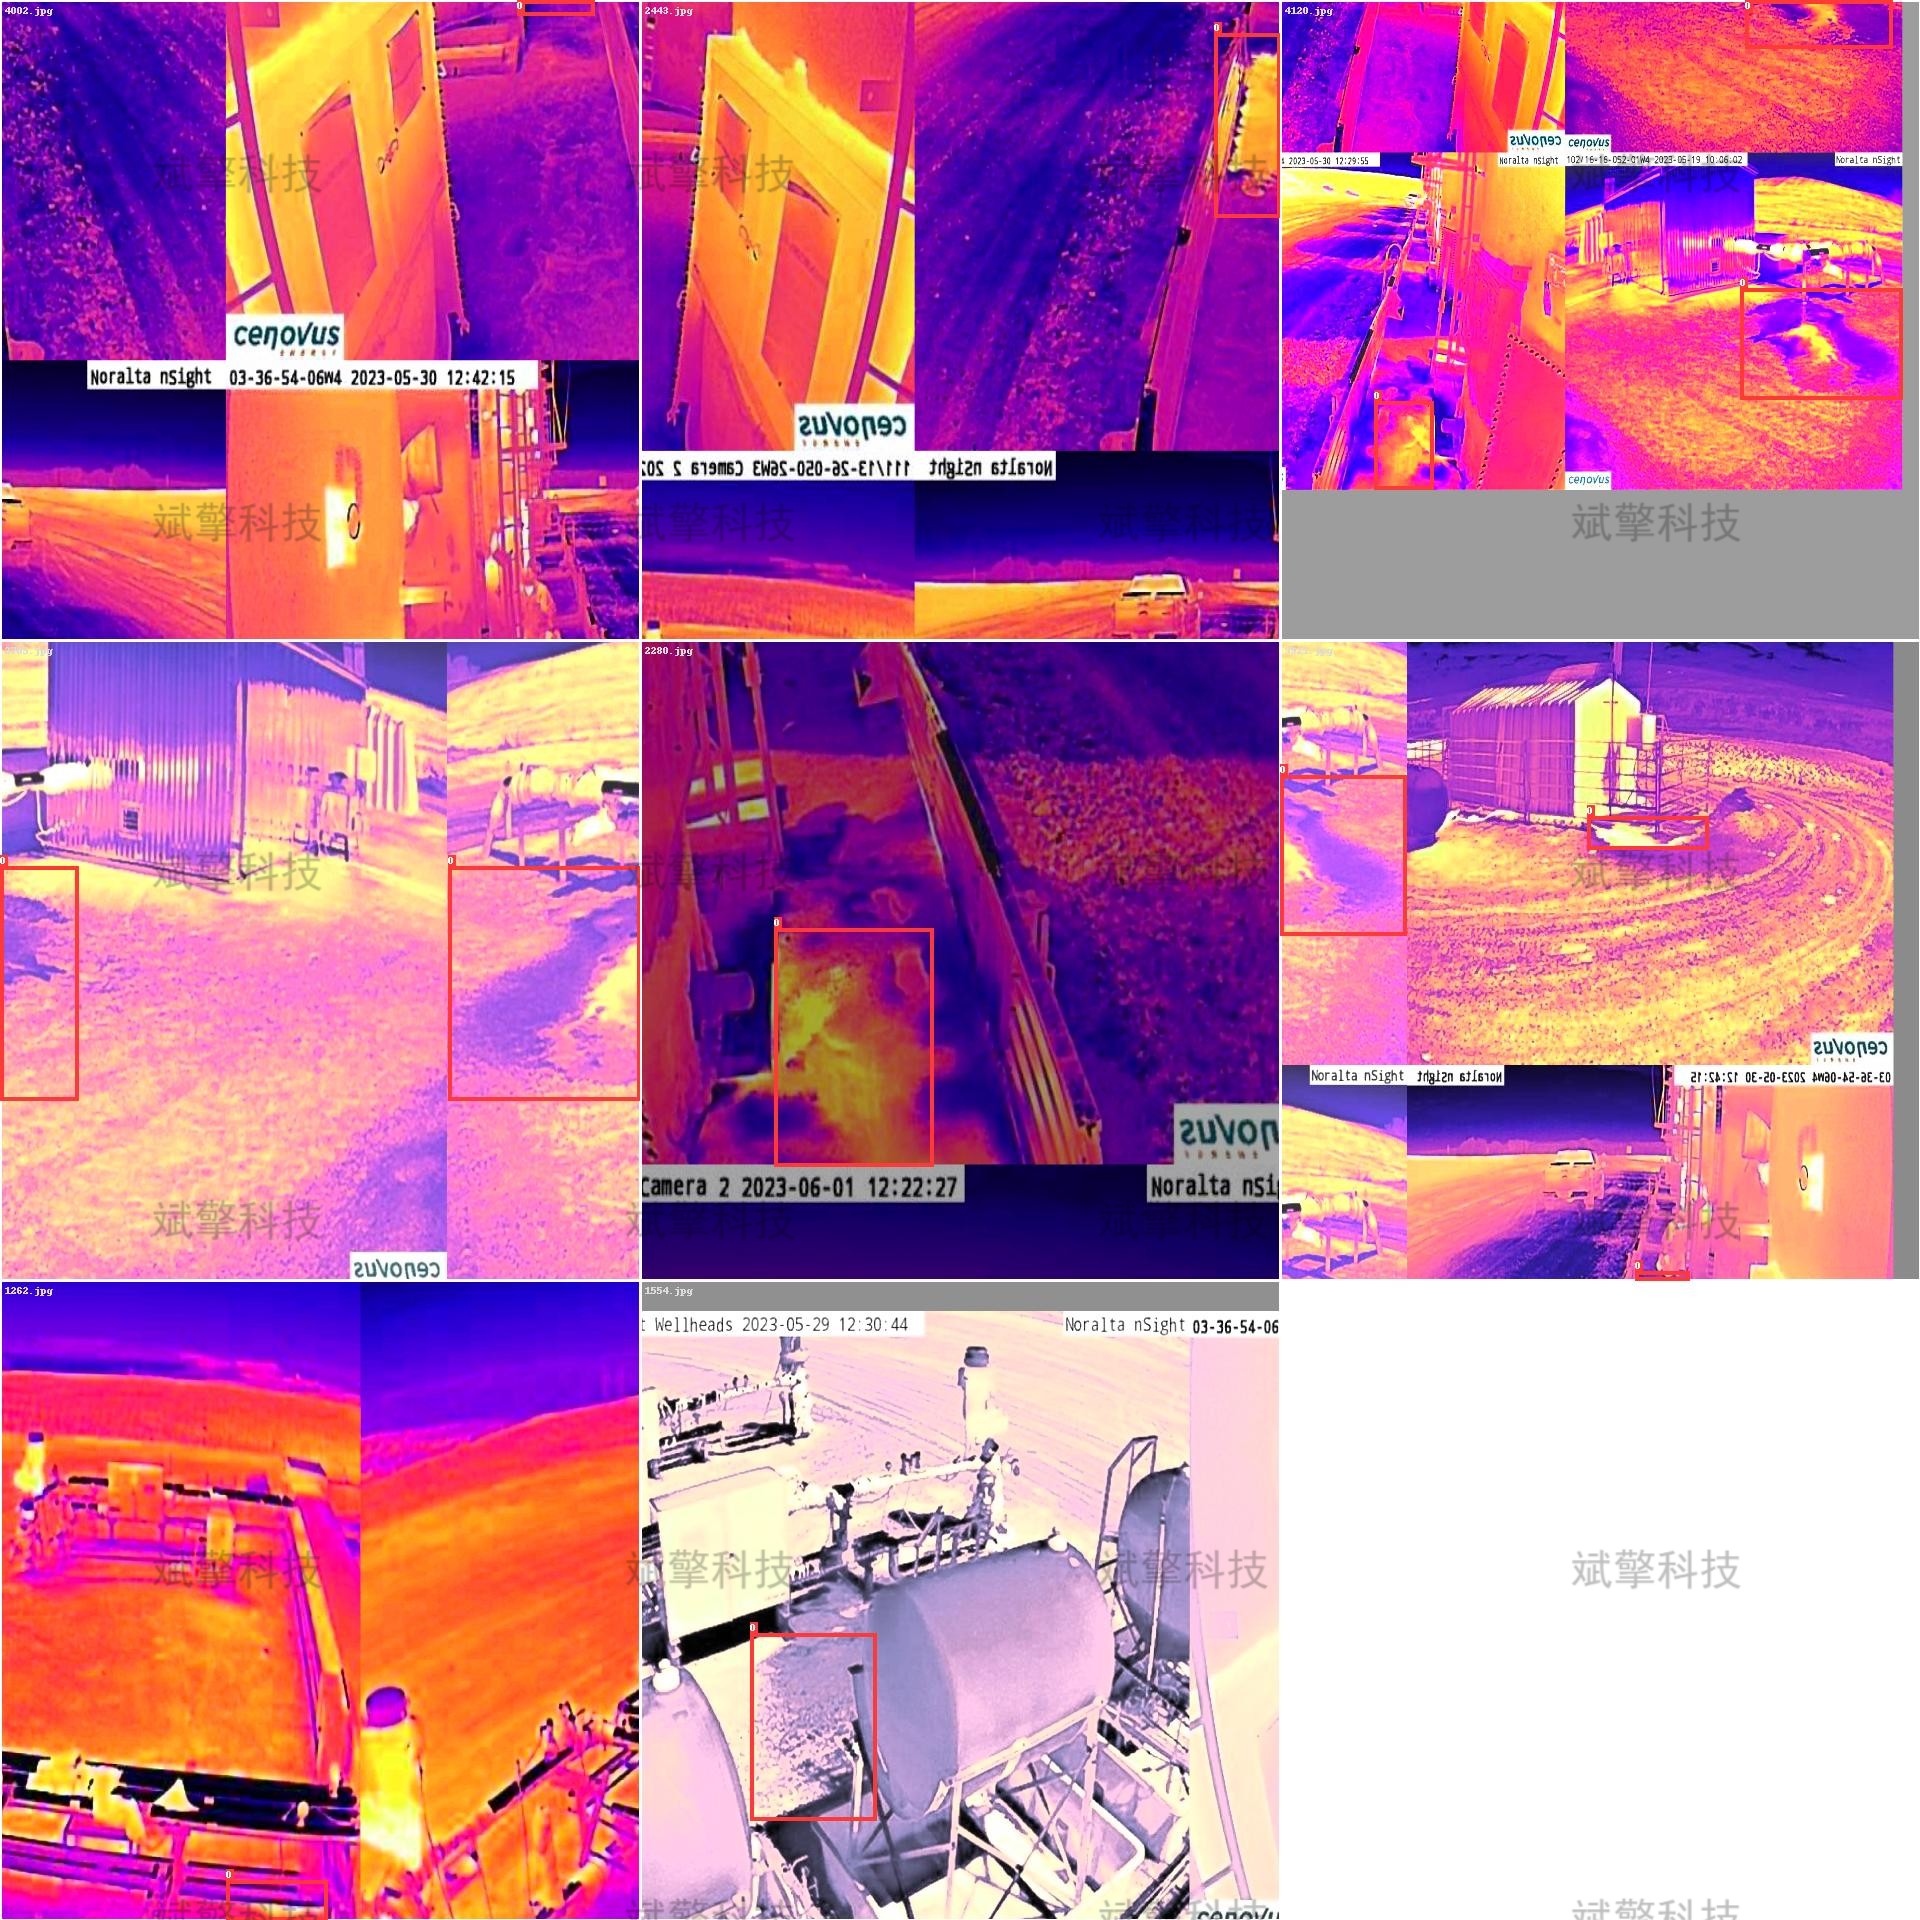
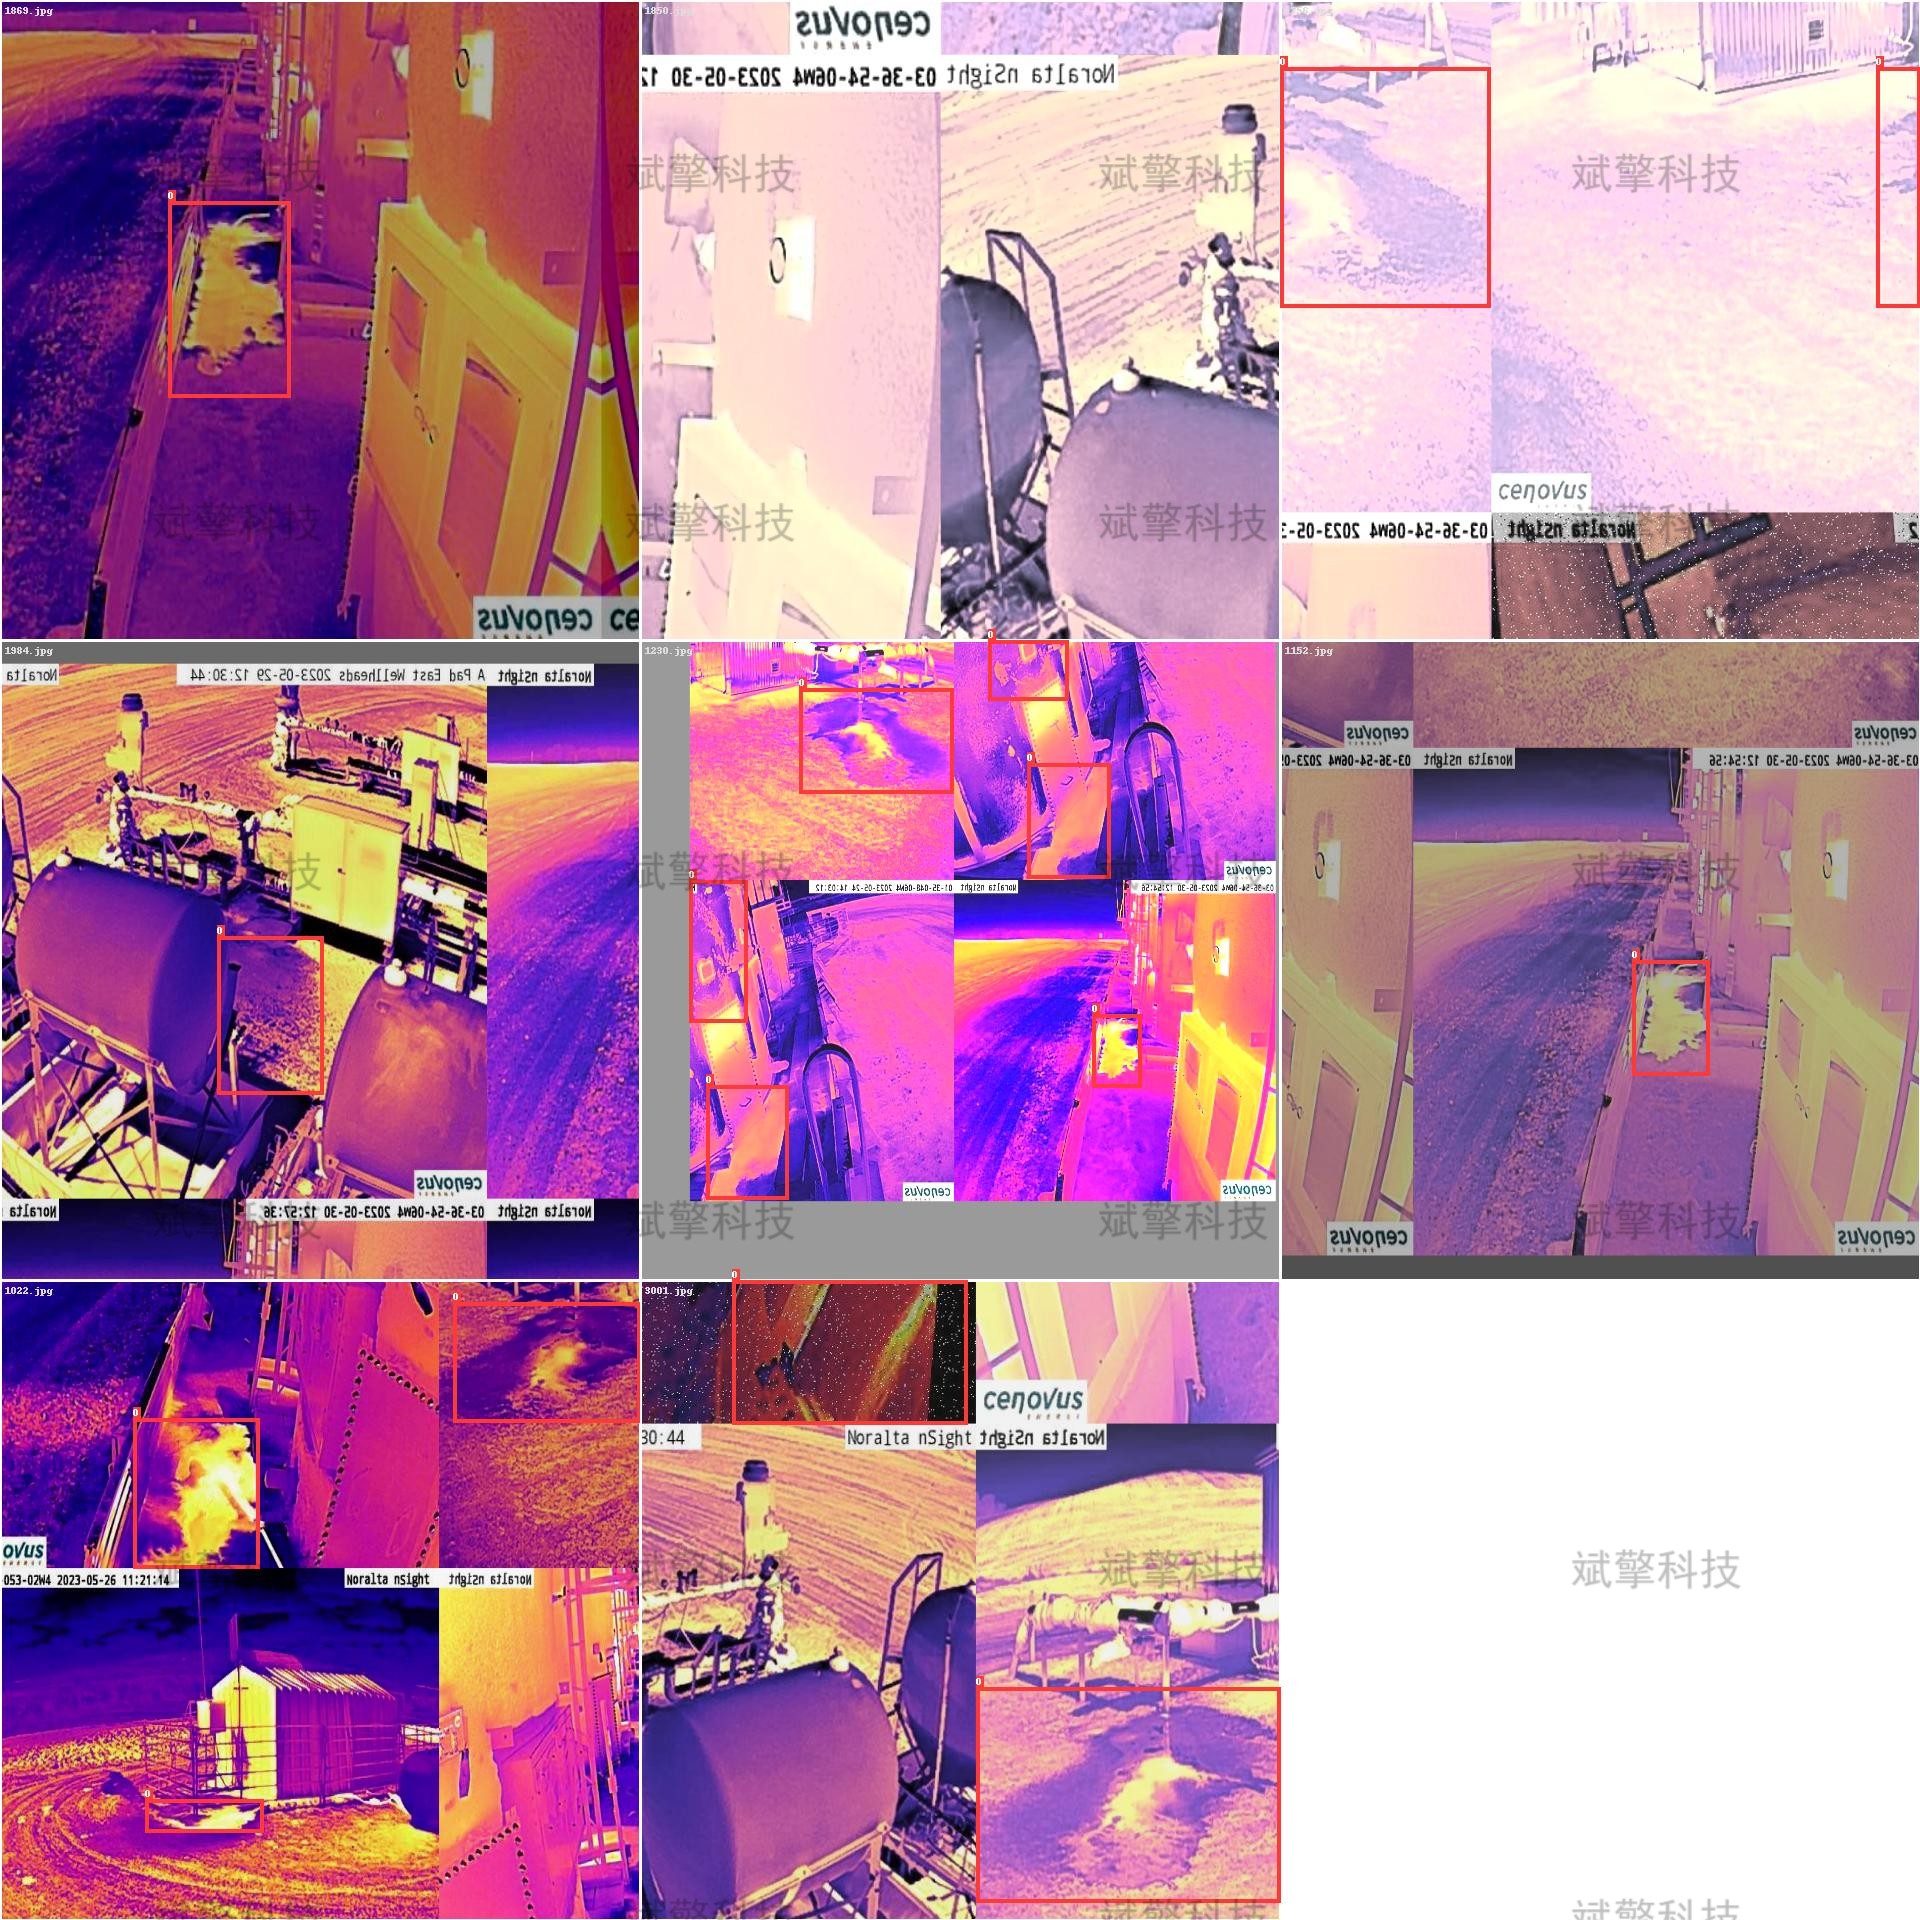
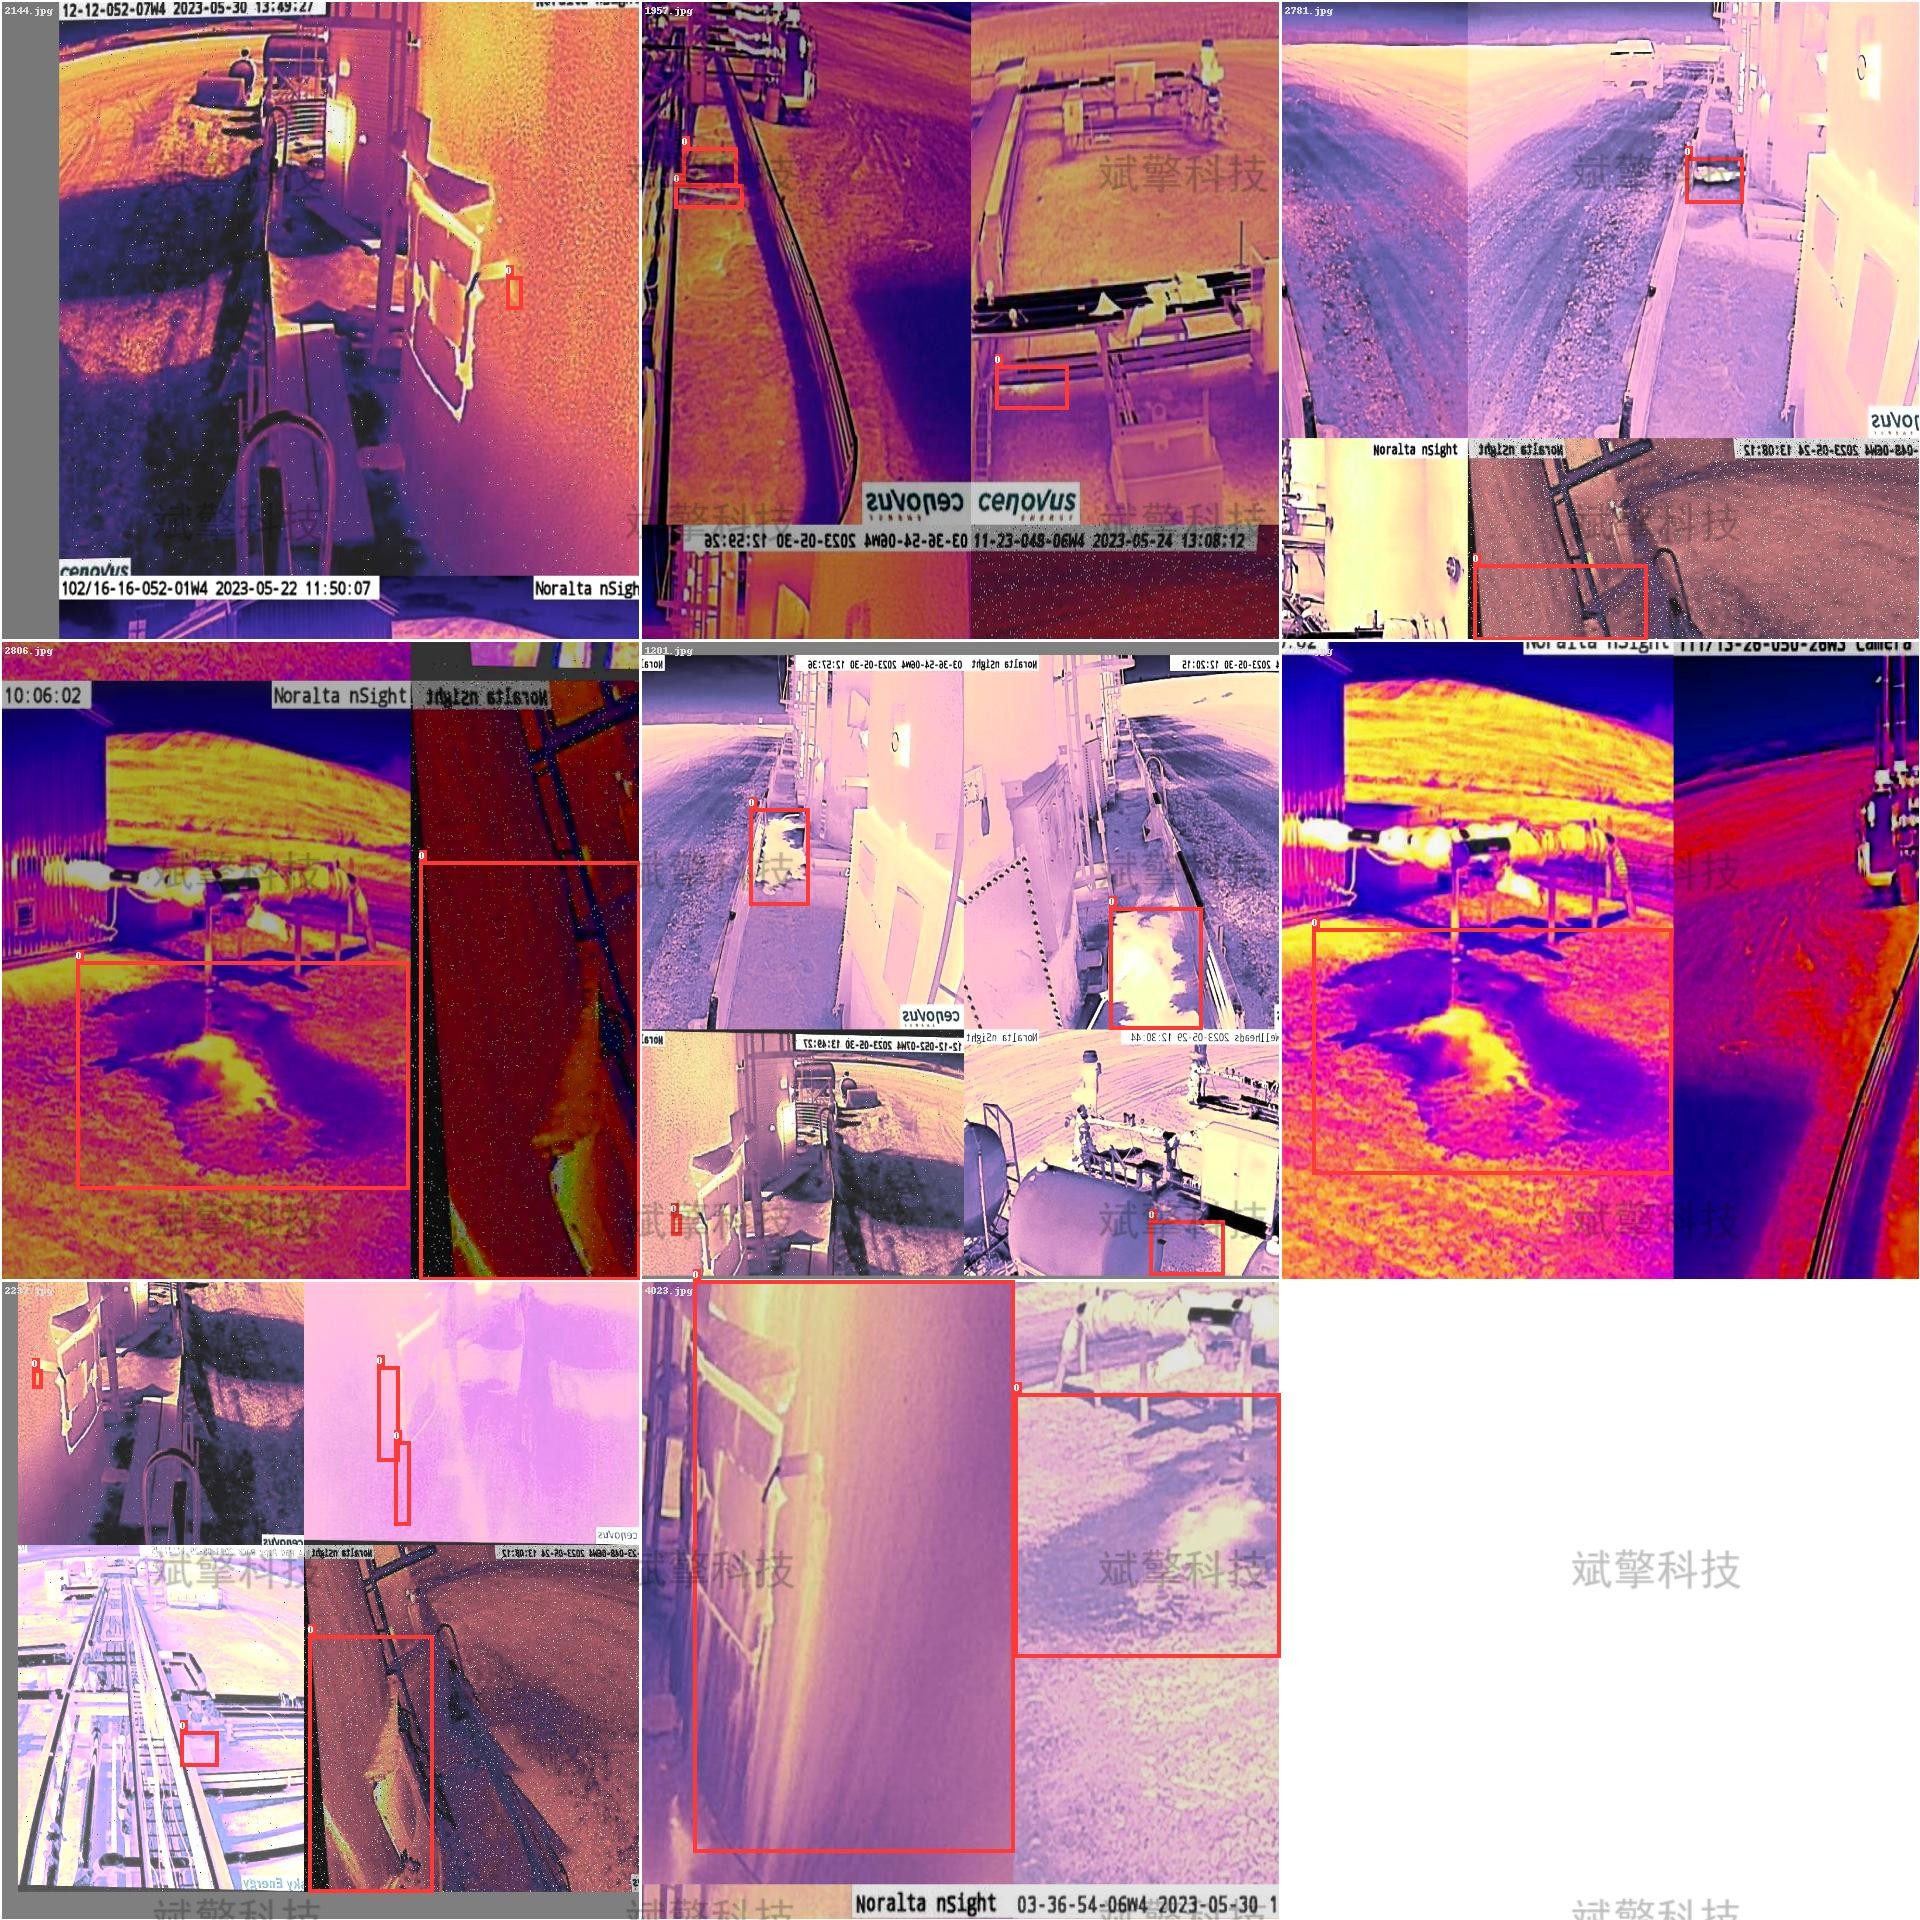
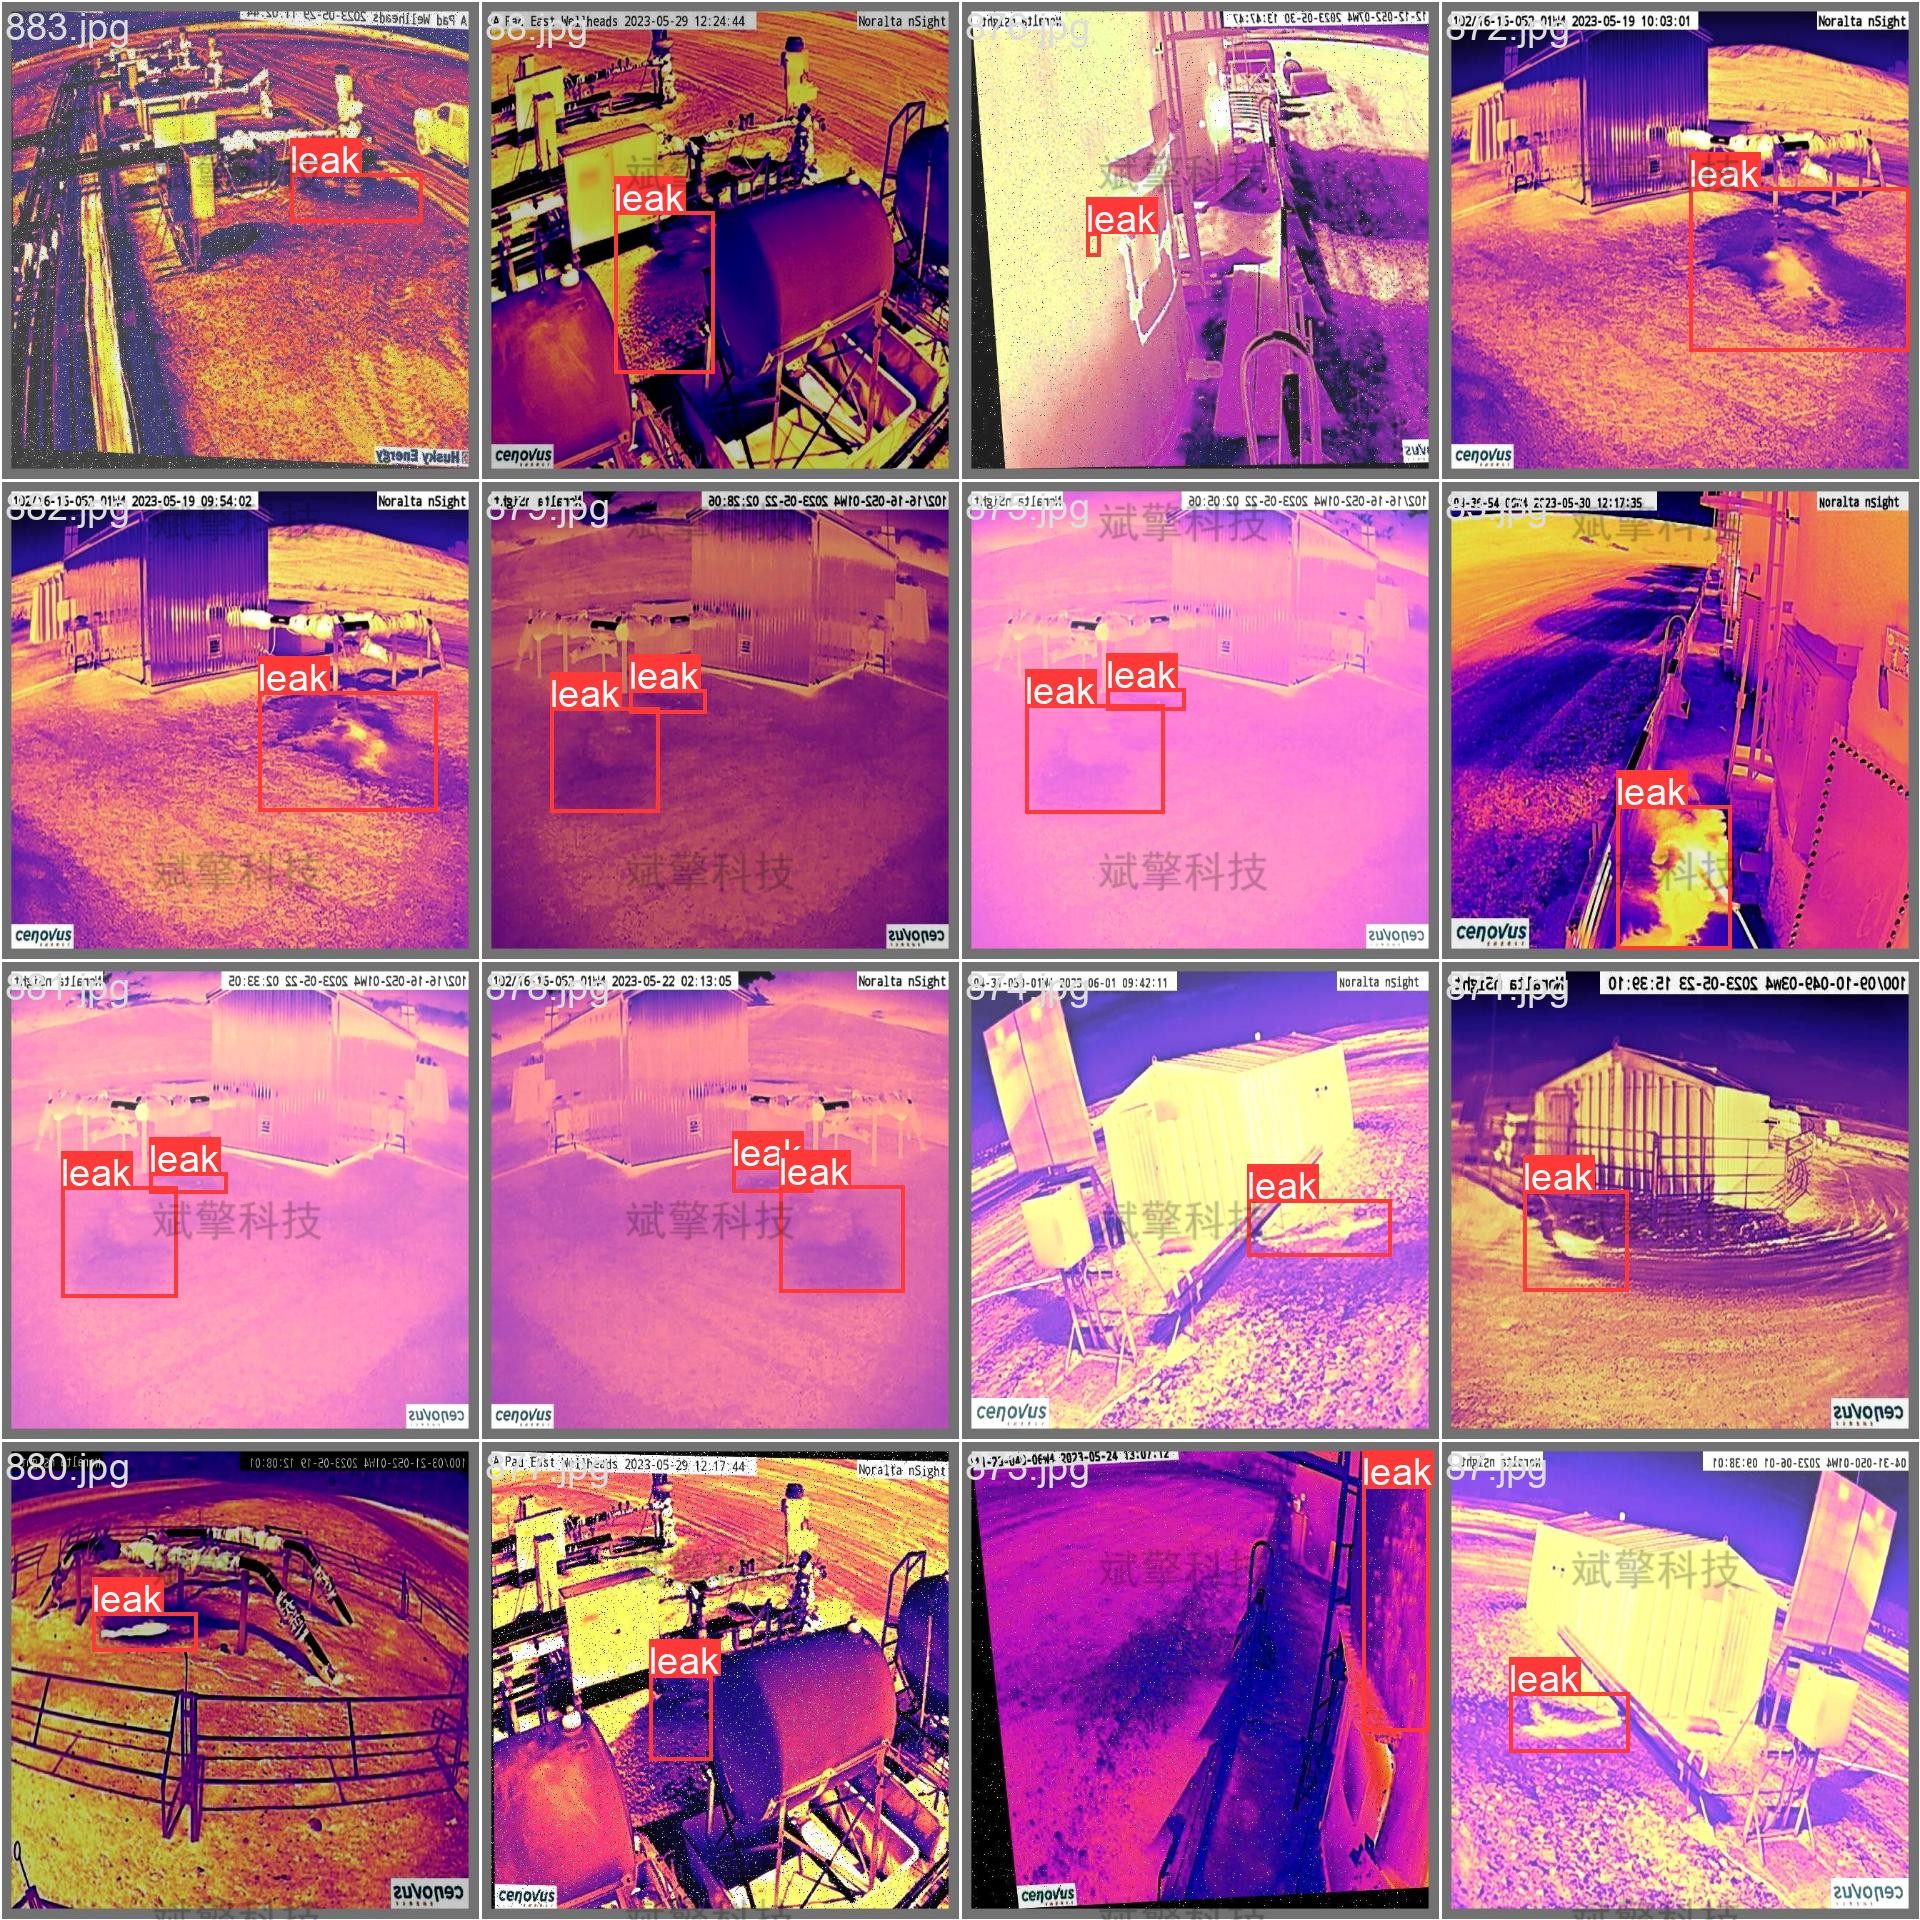
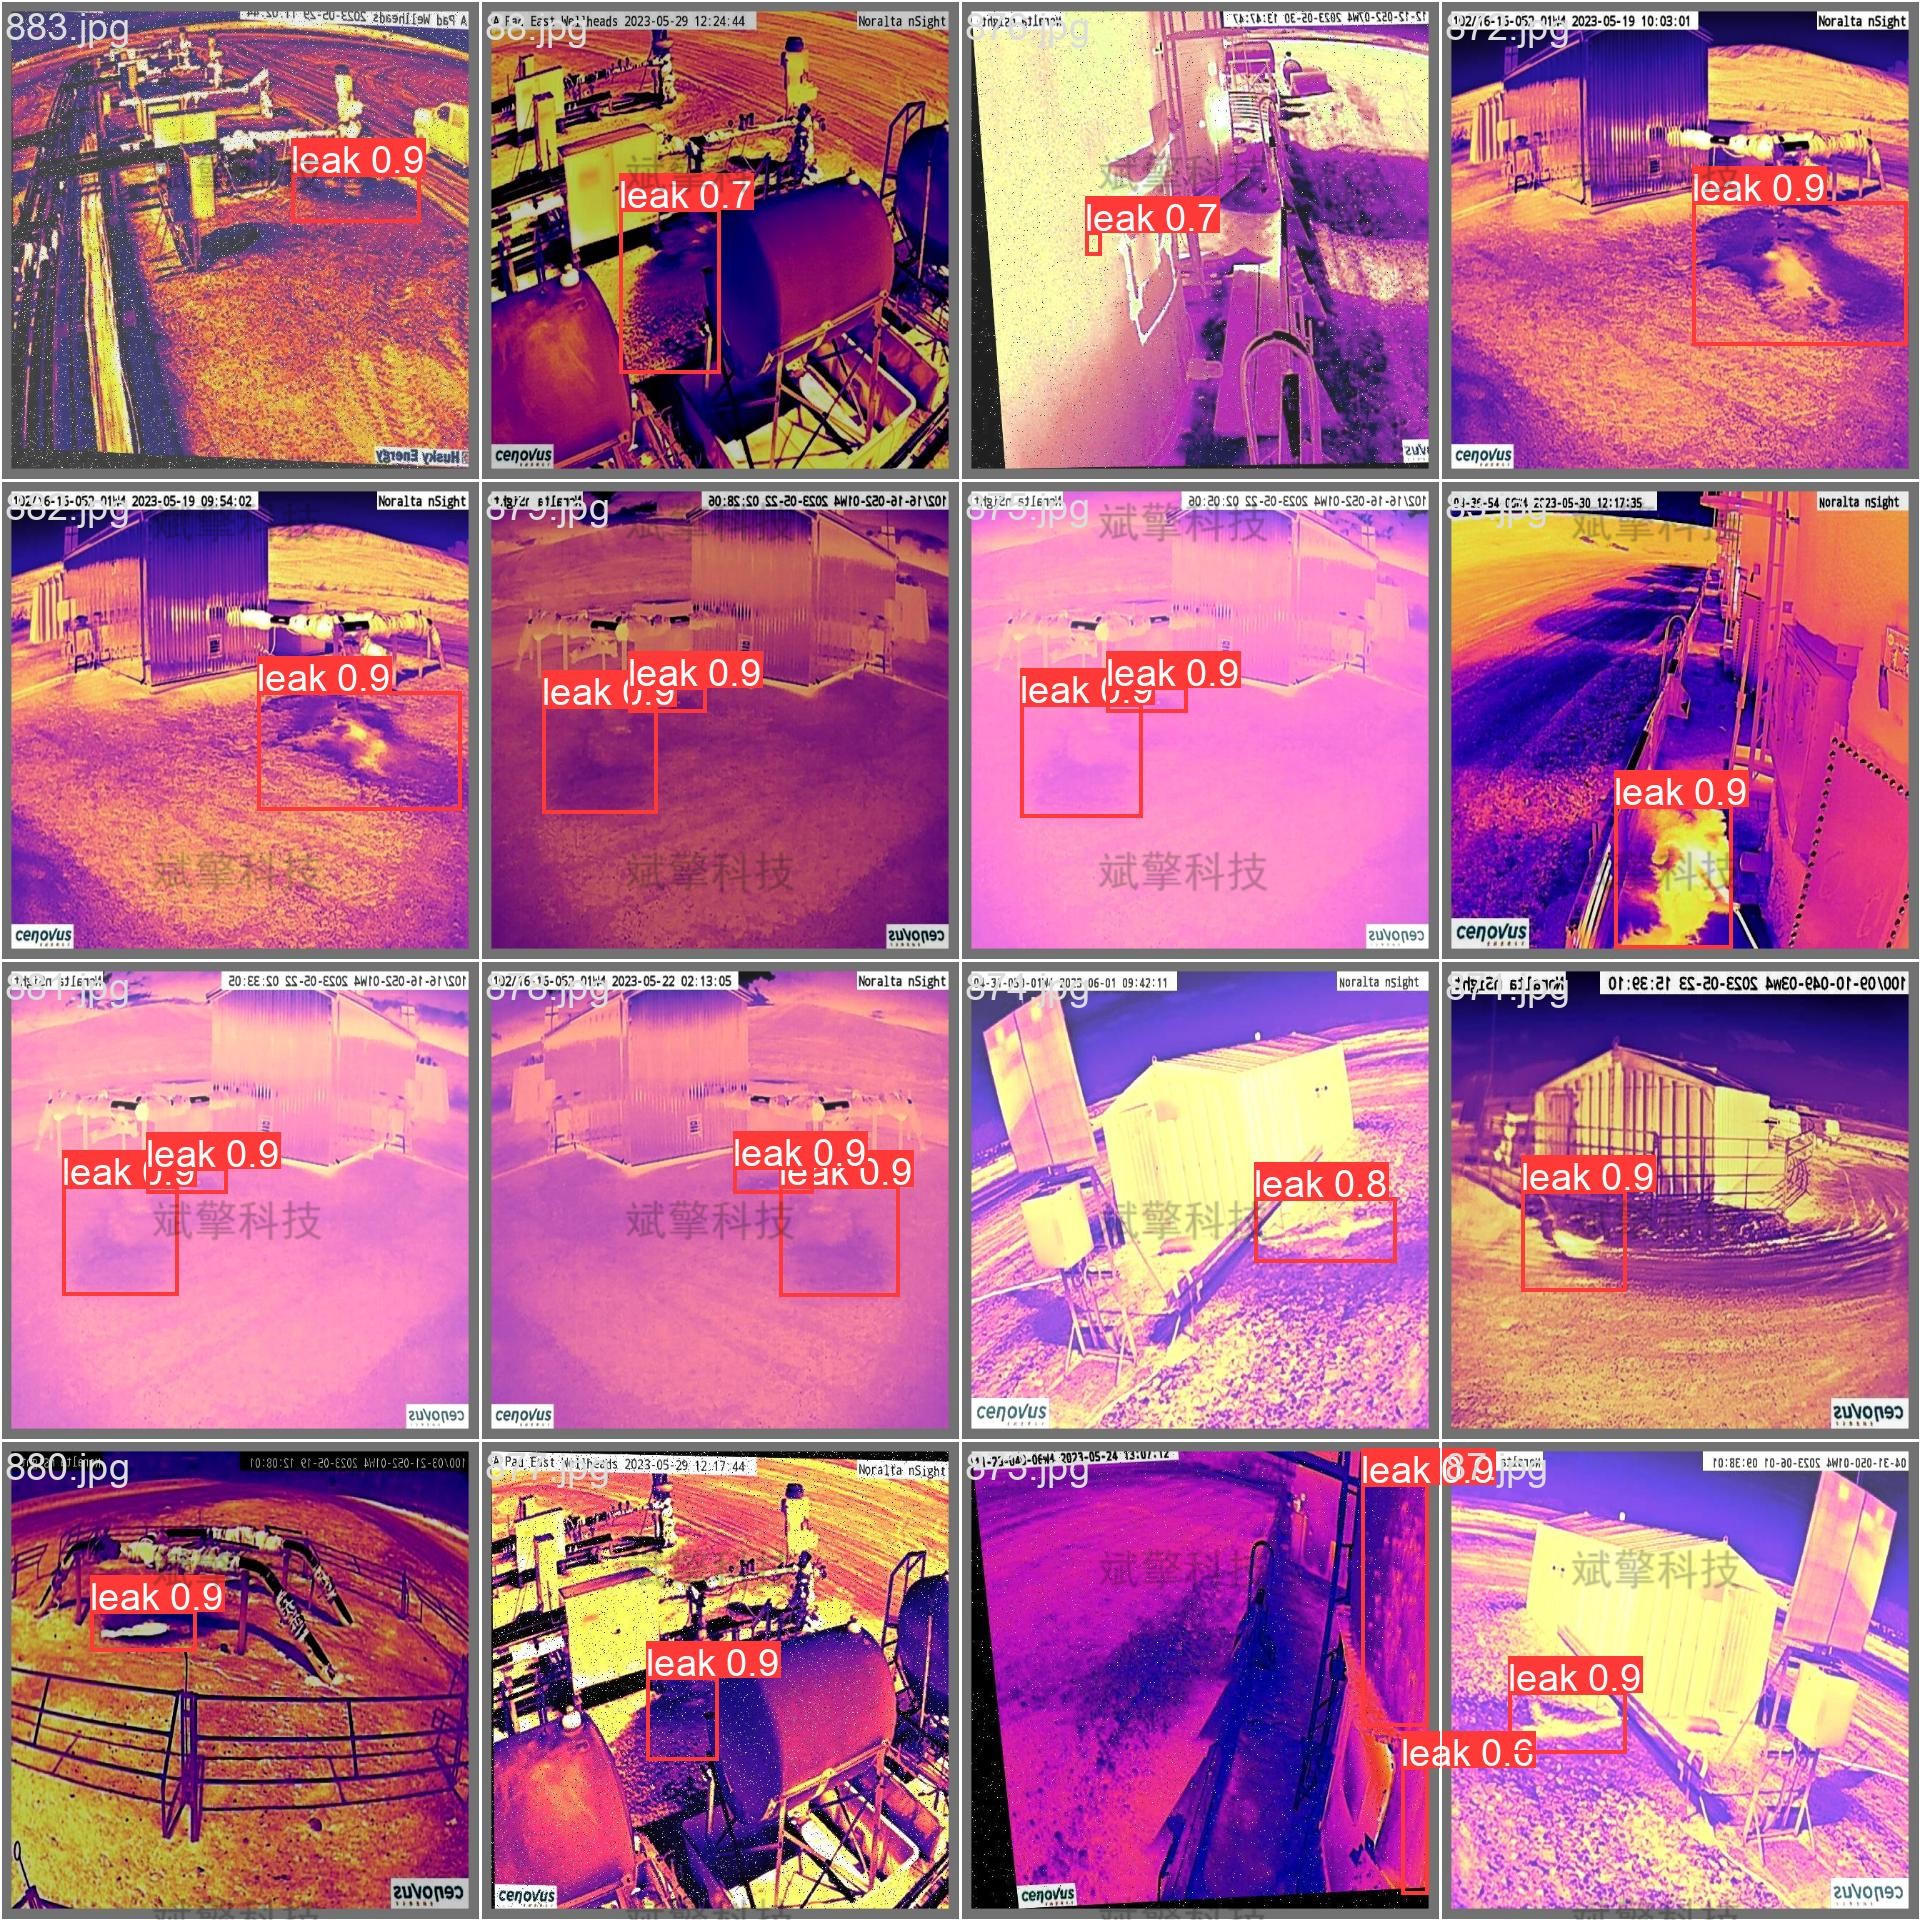
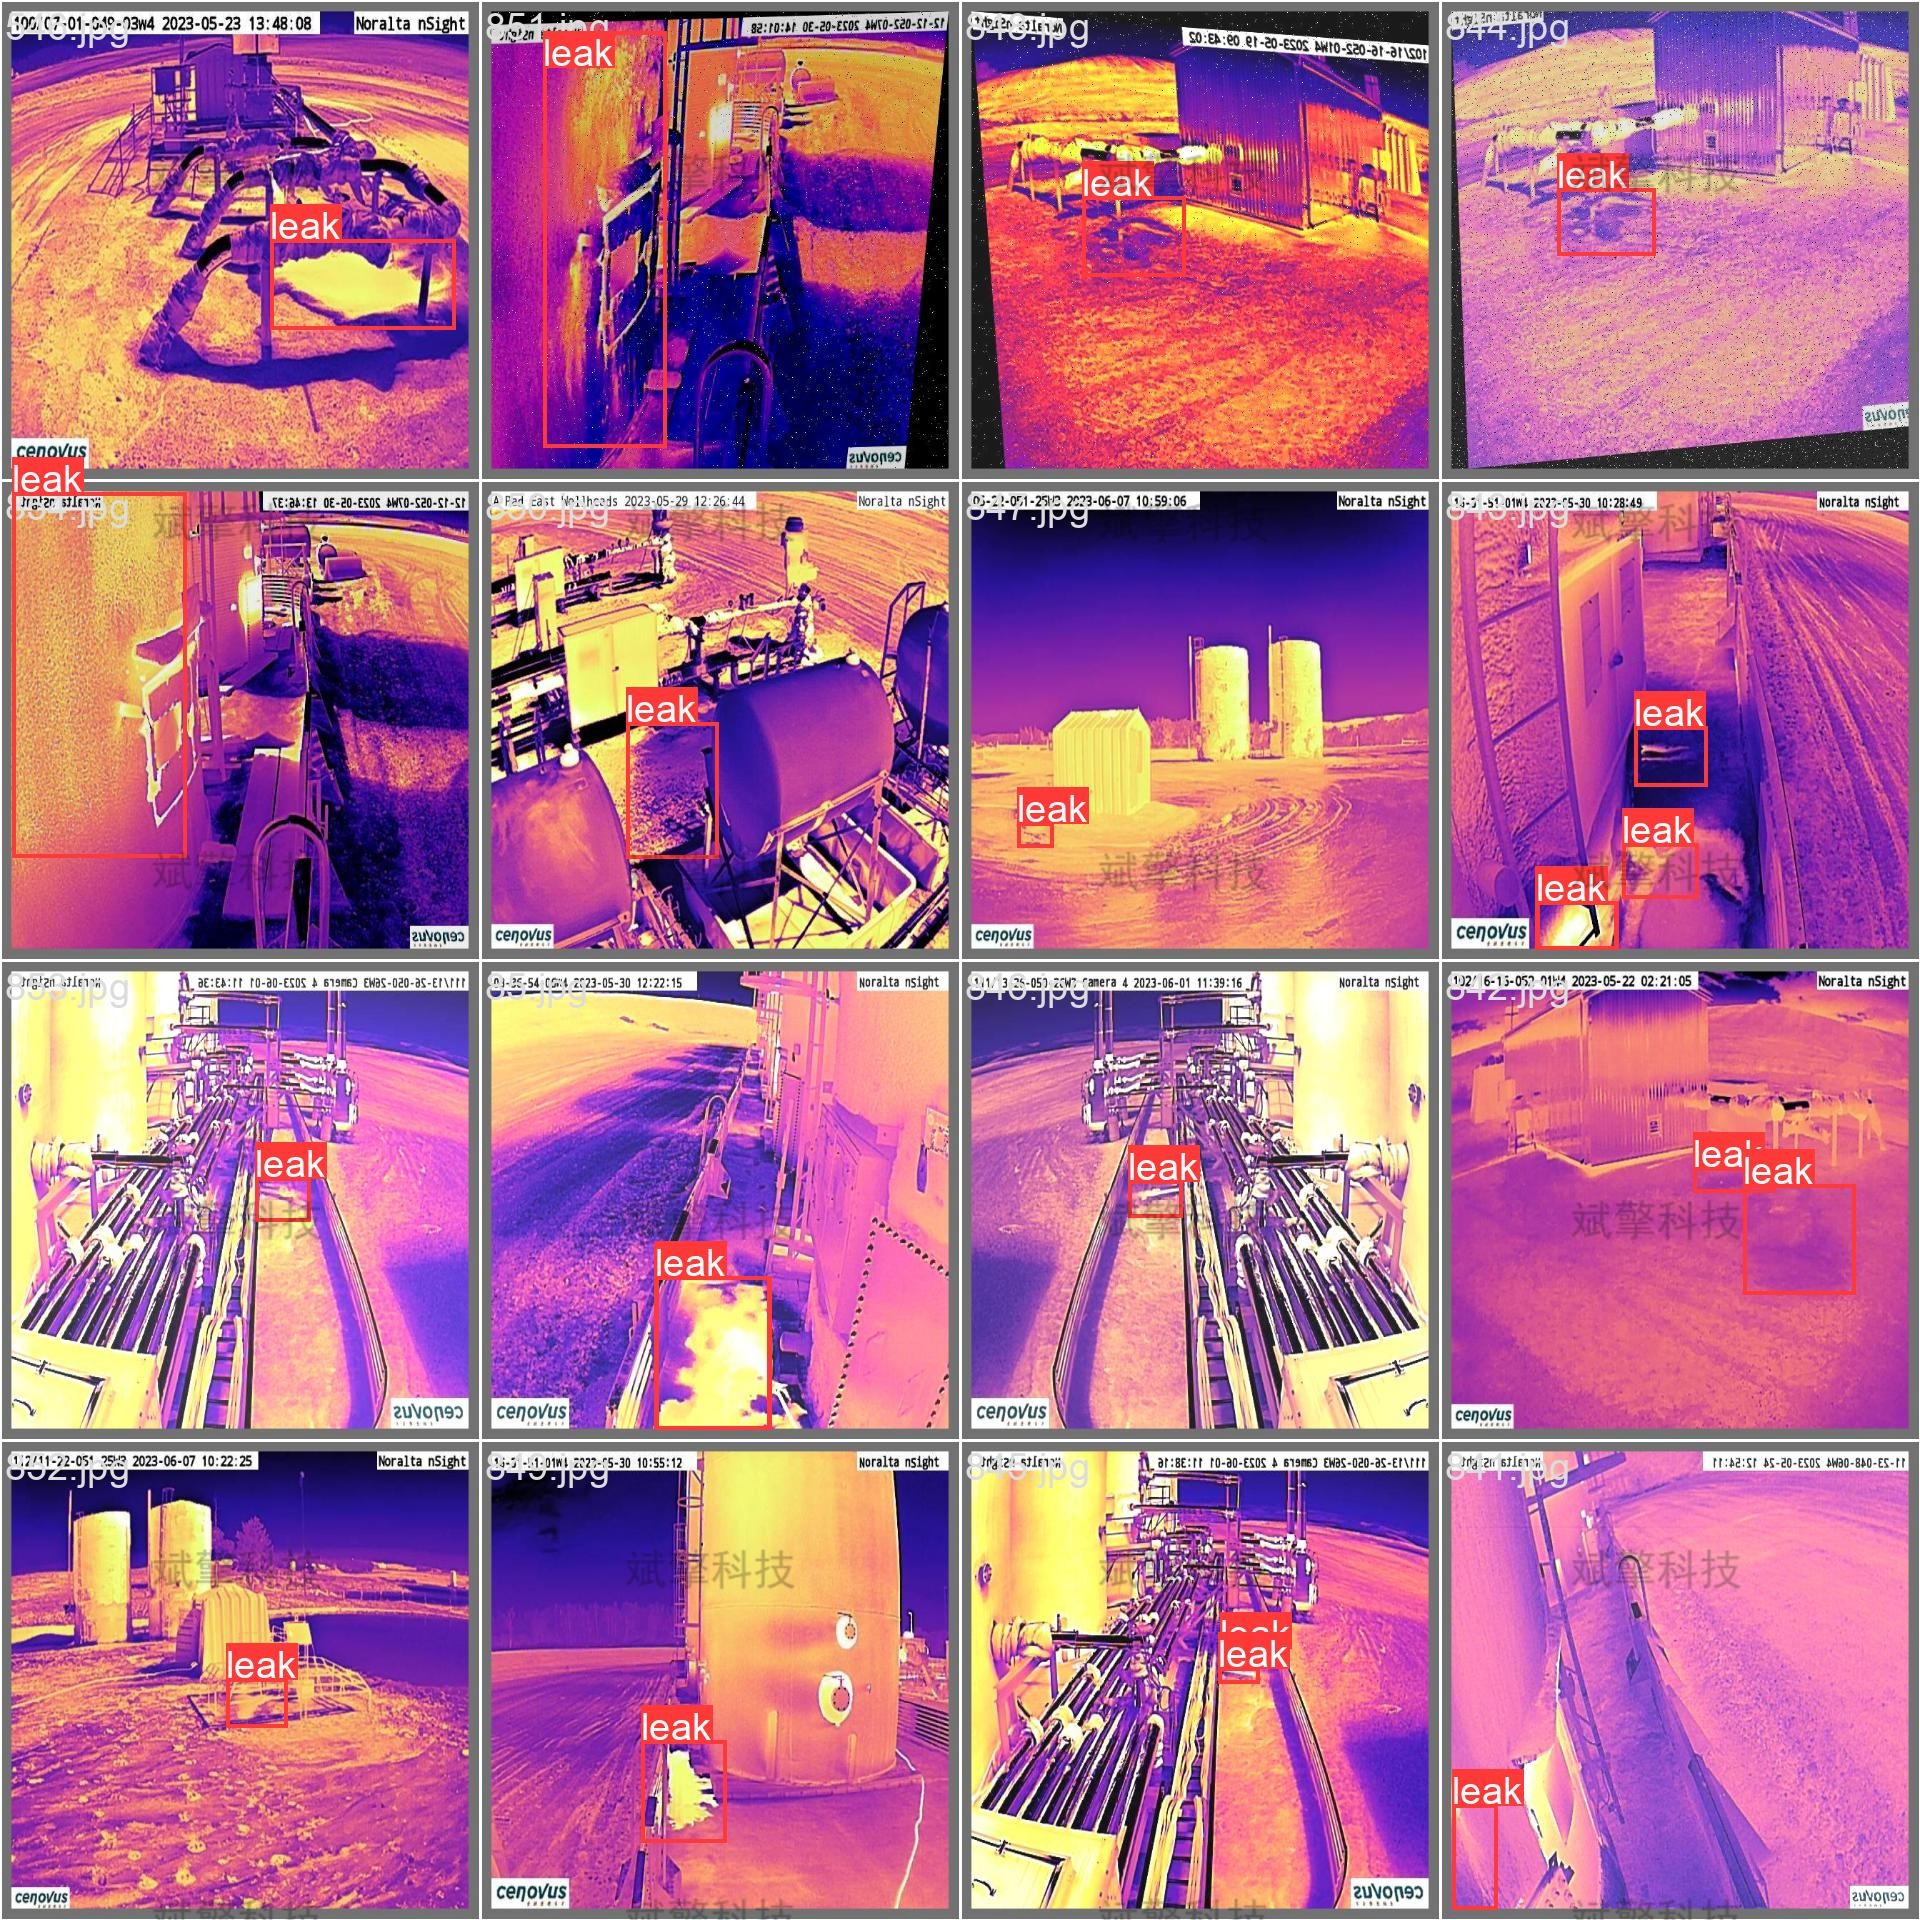
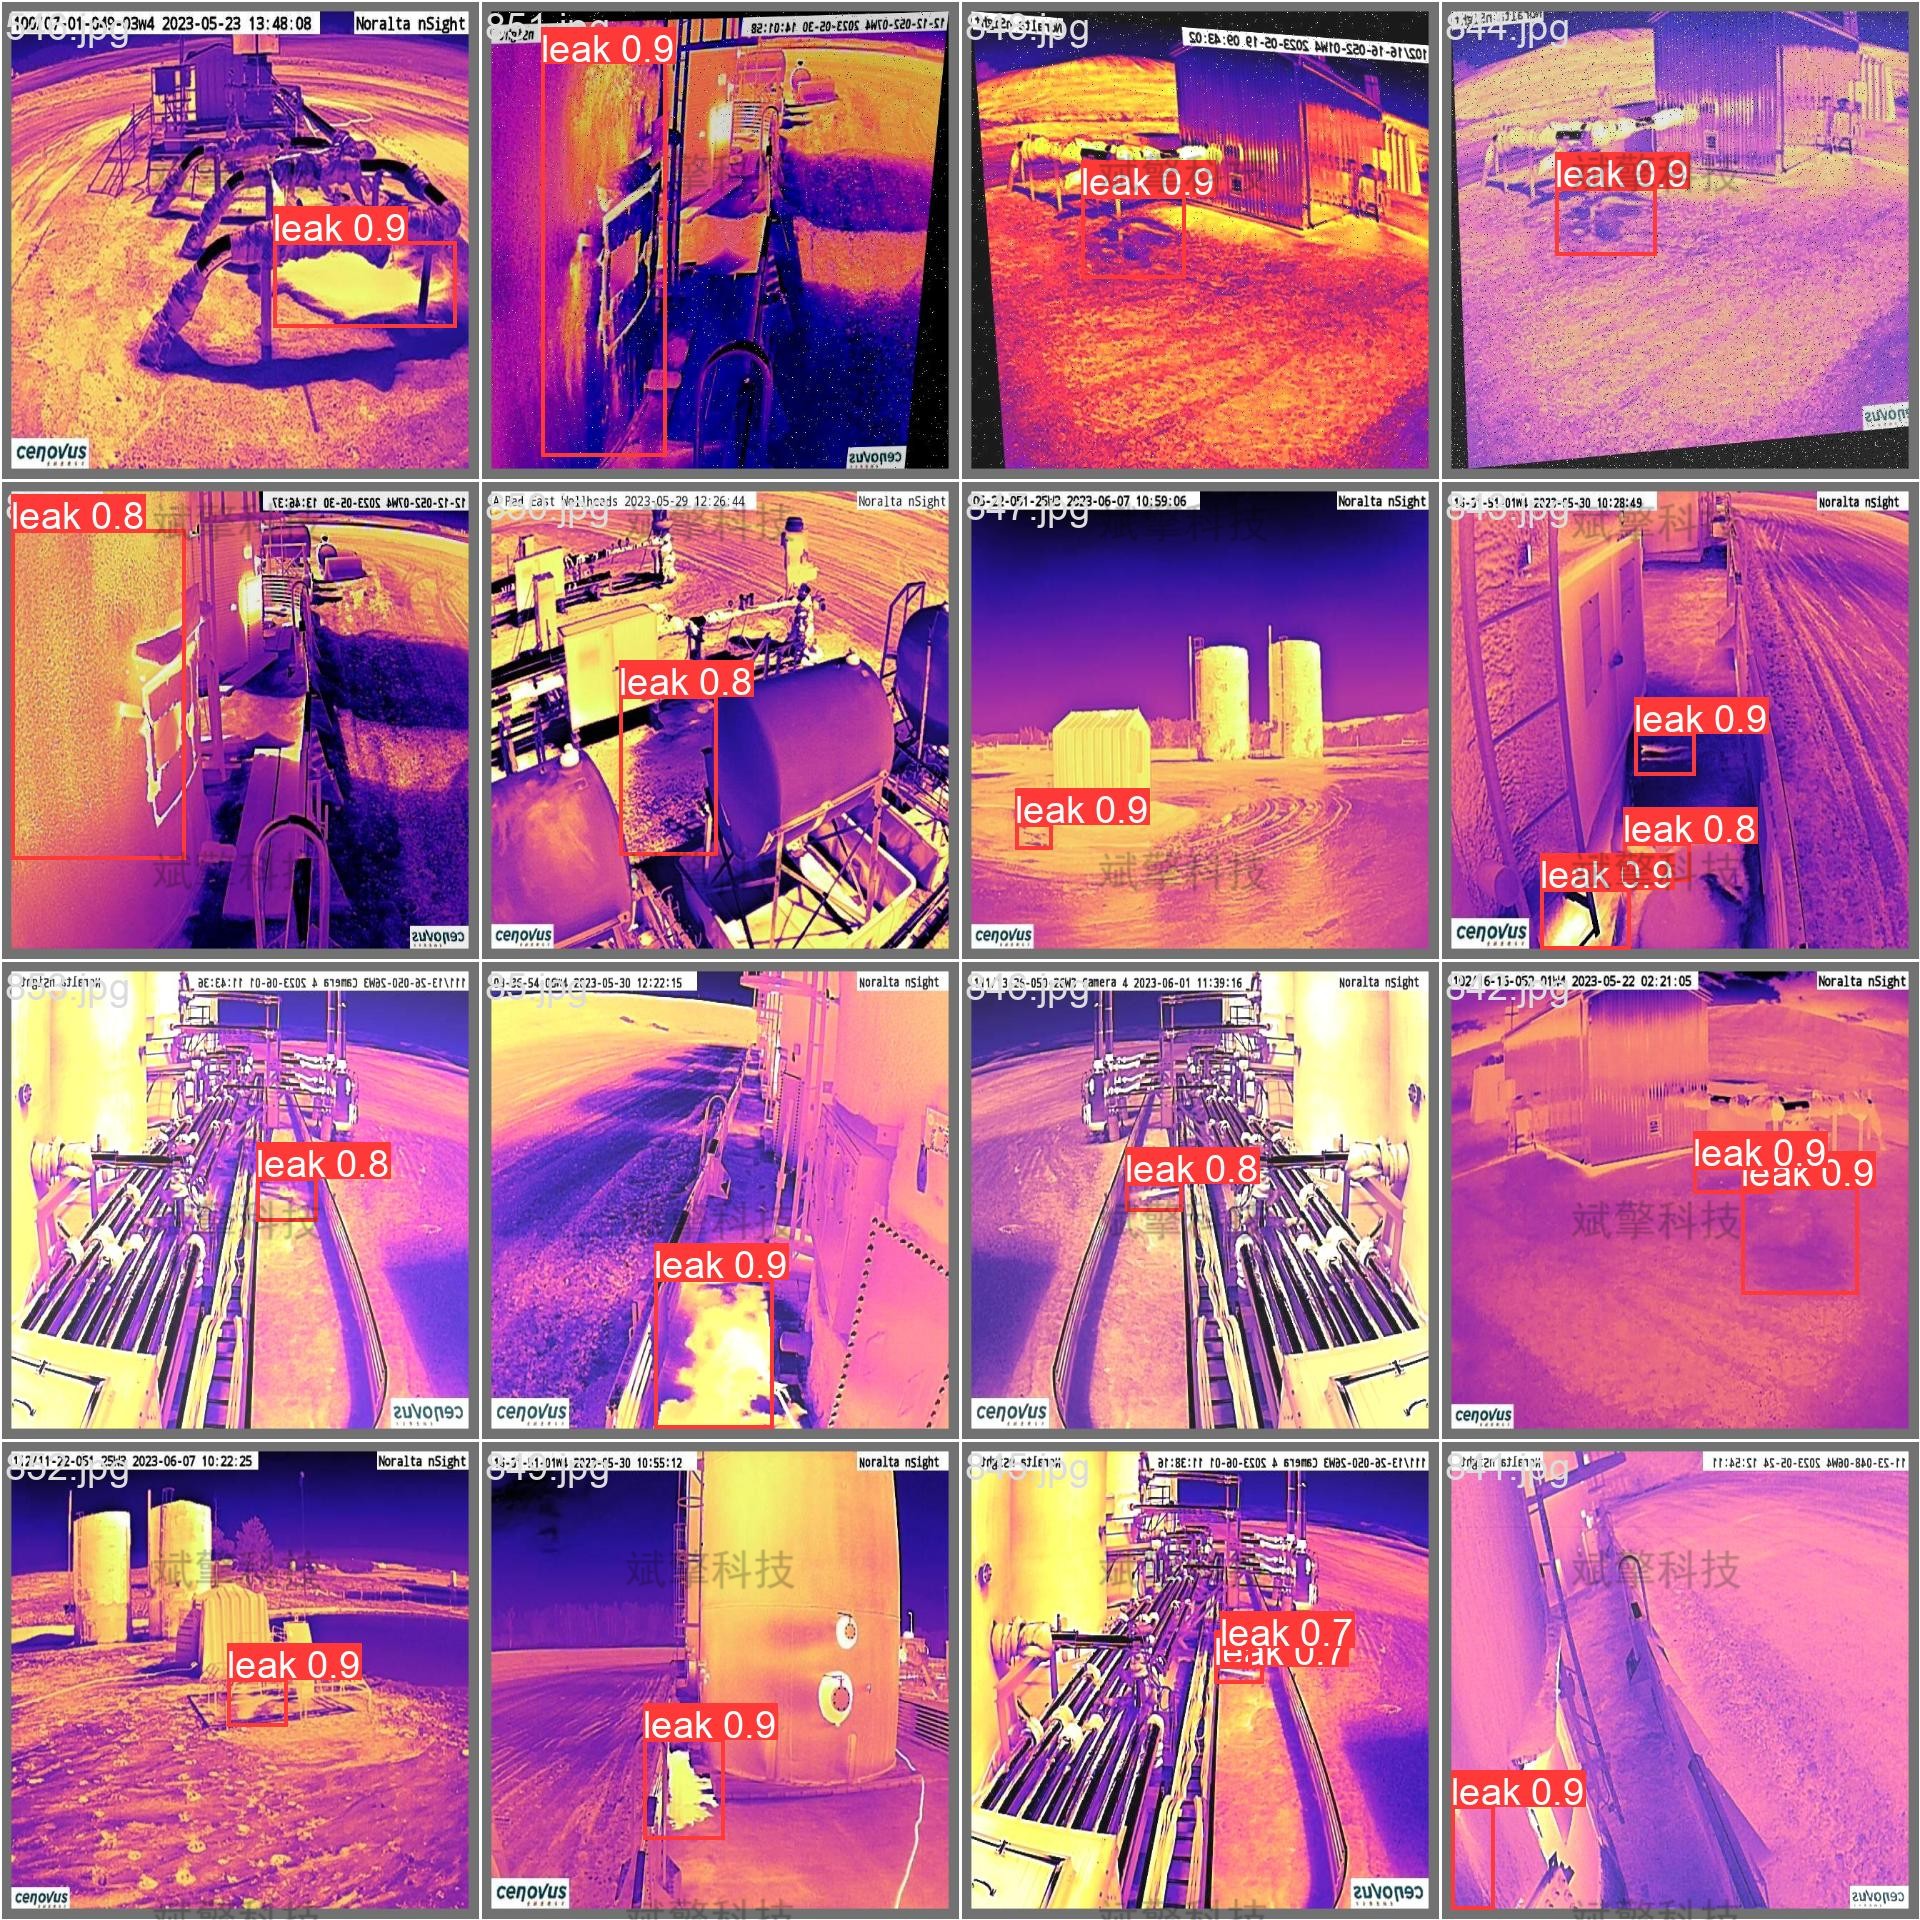
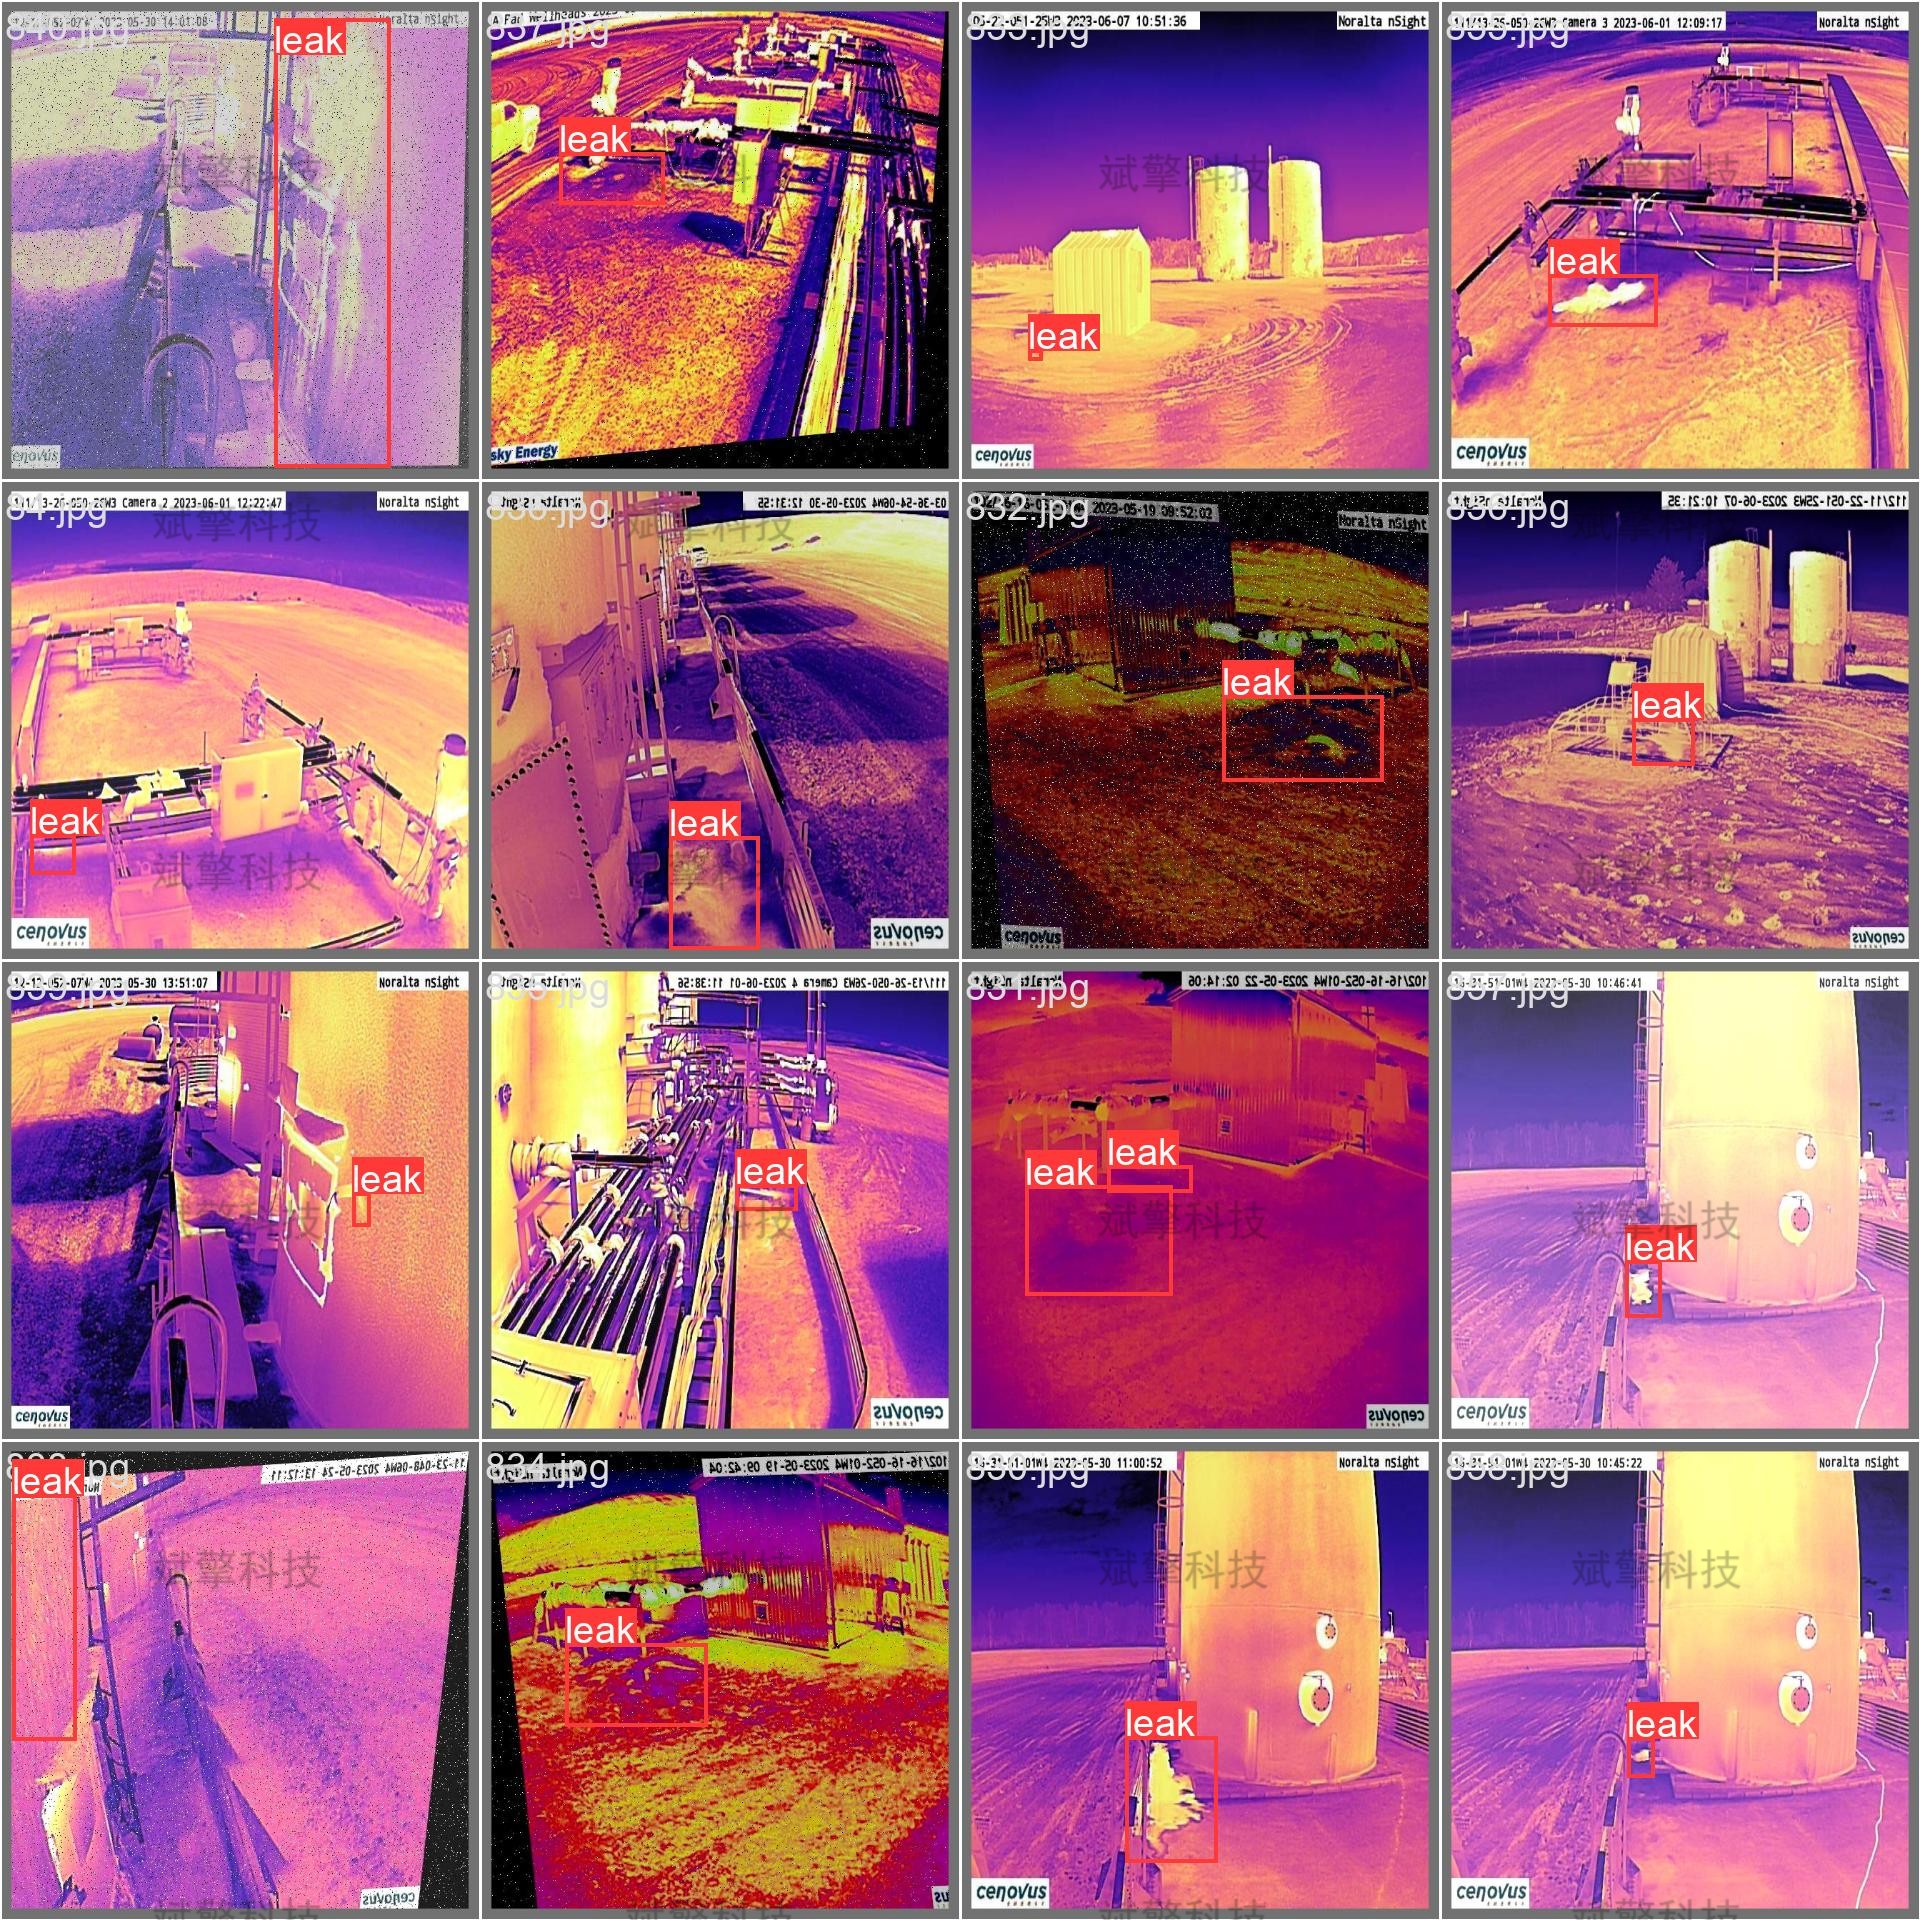
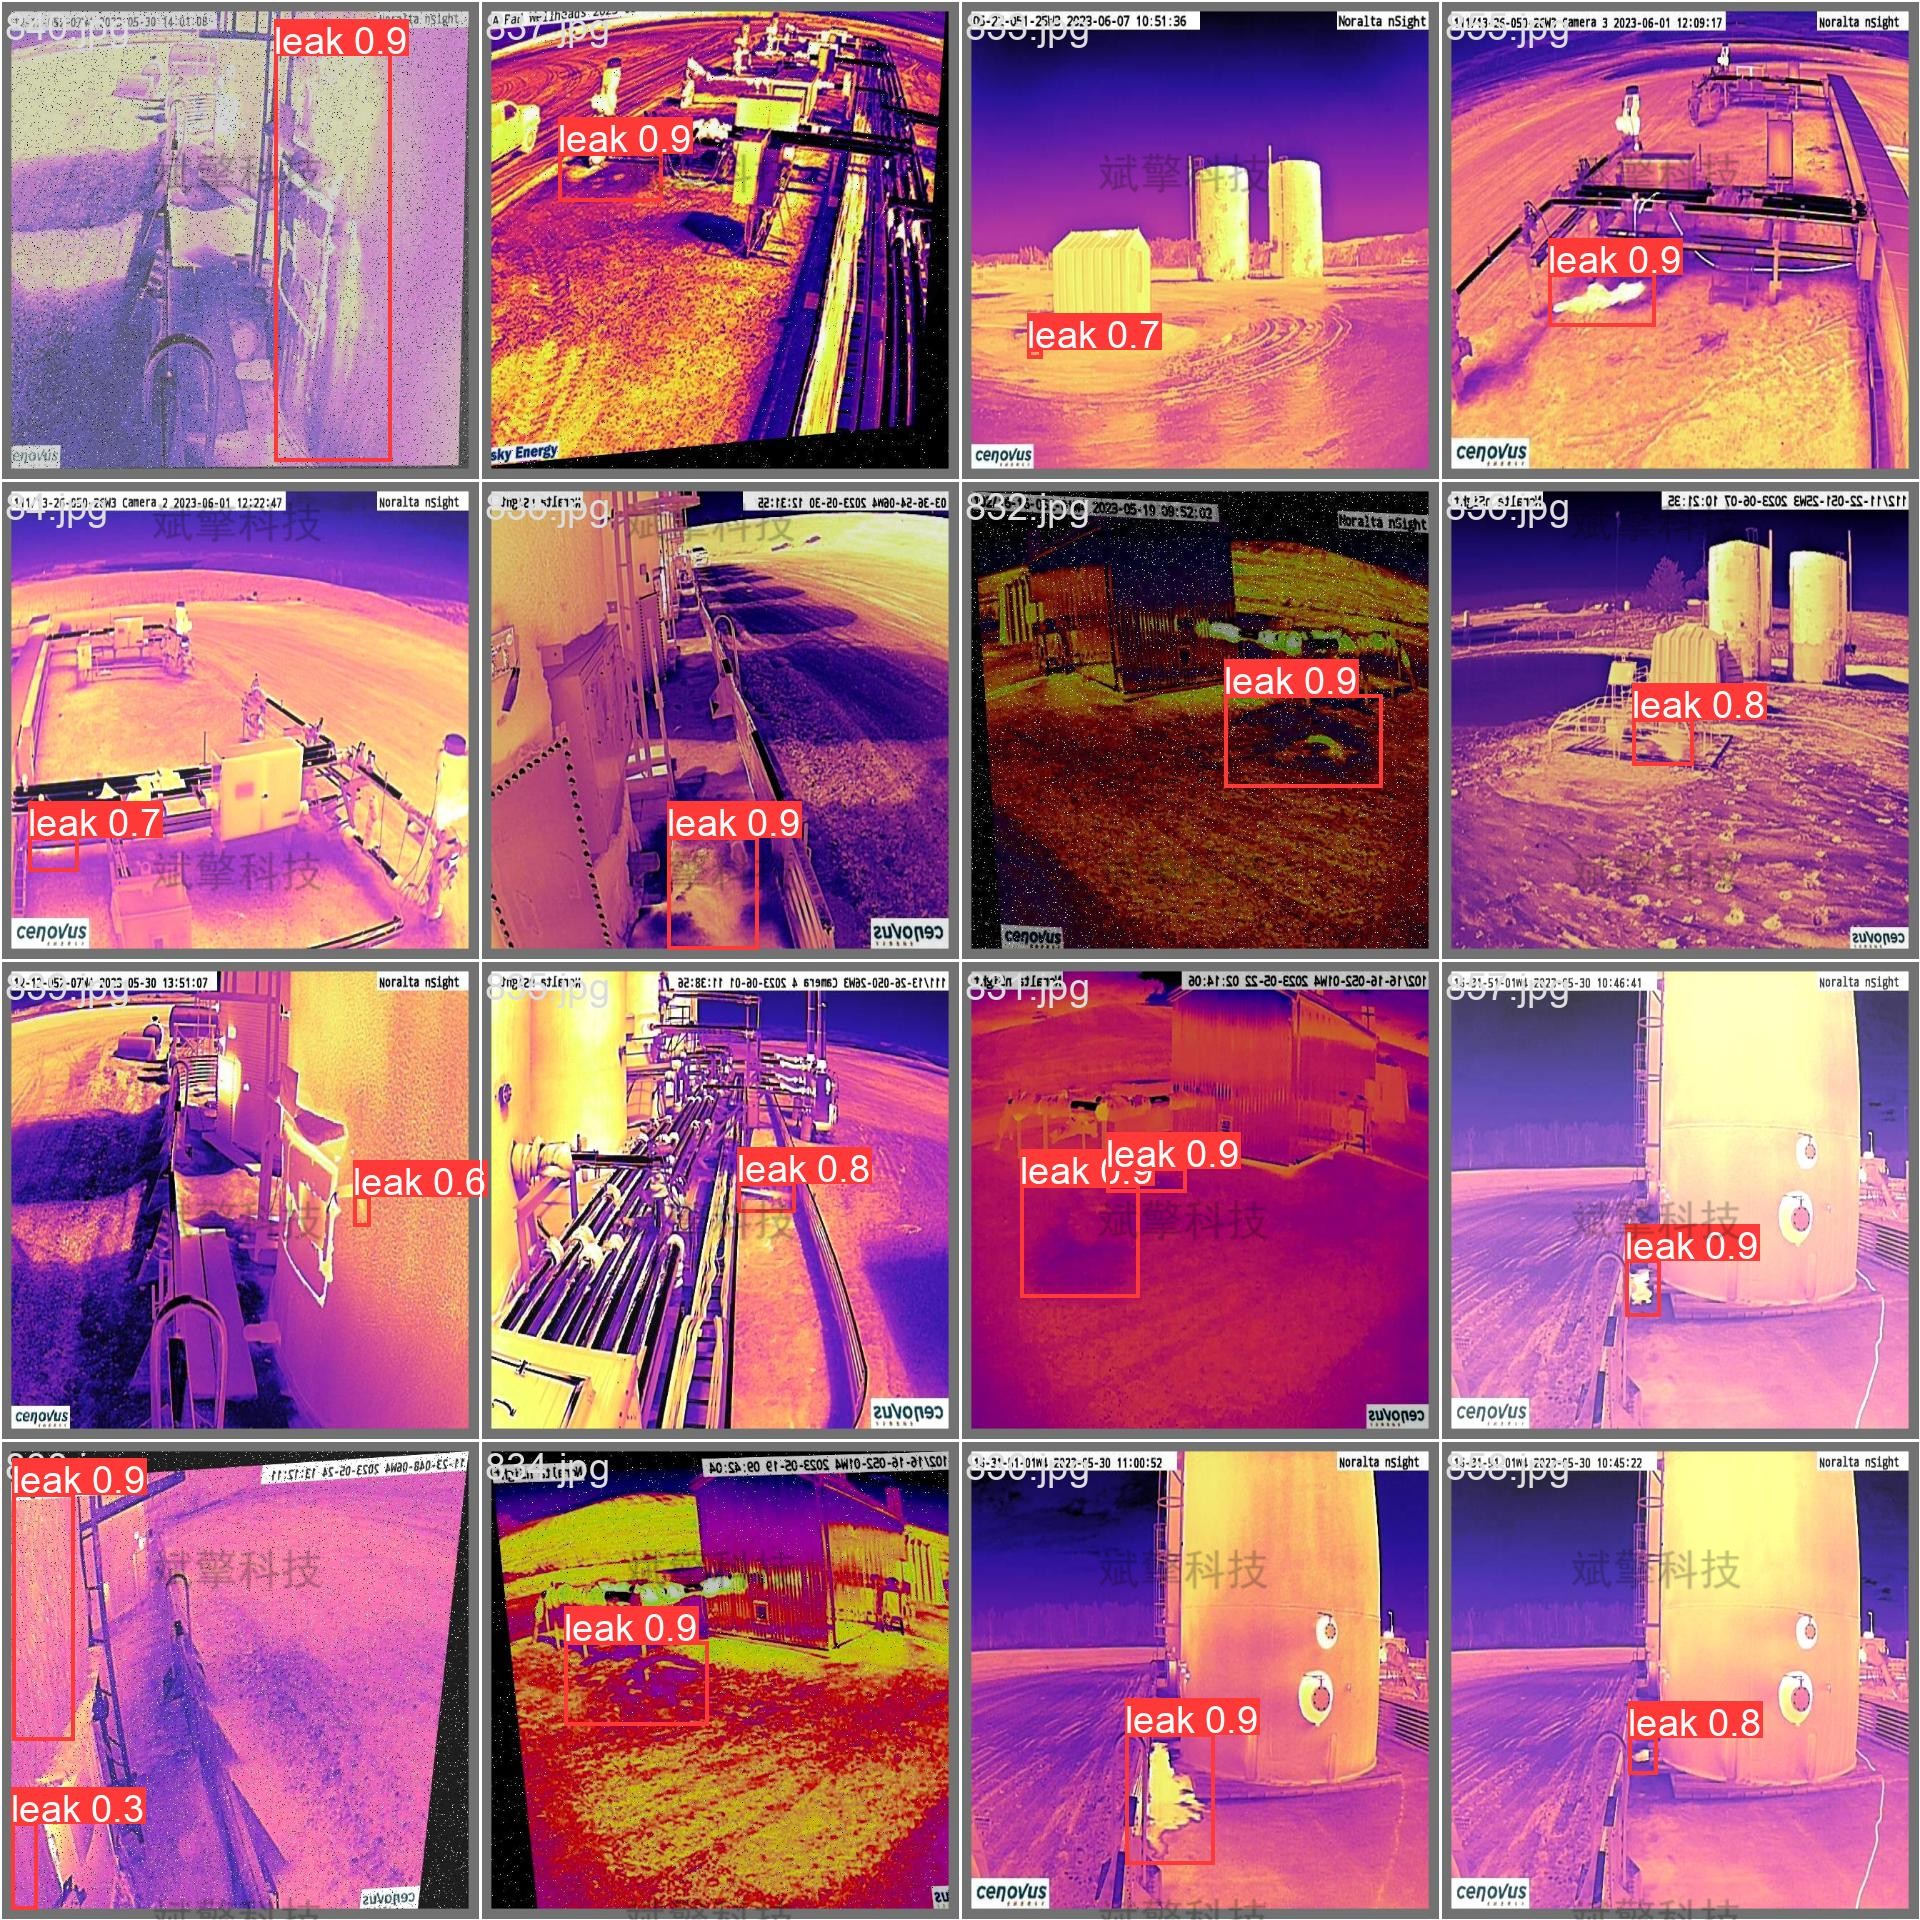
六、核心代码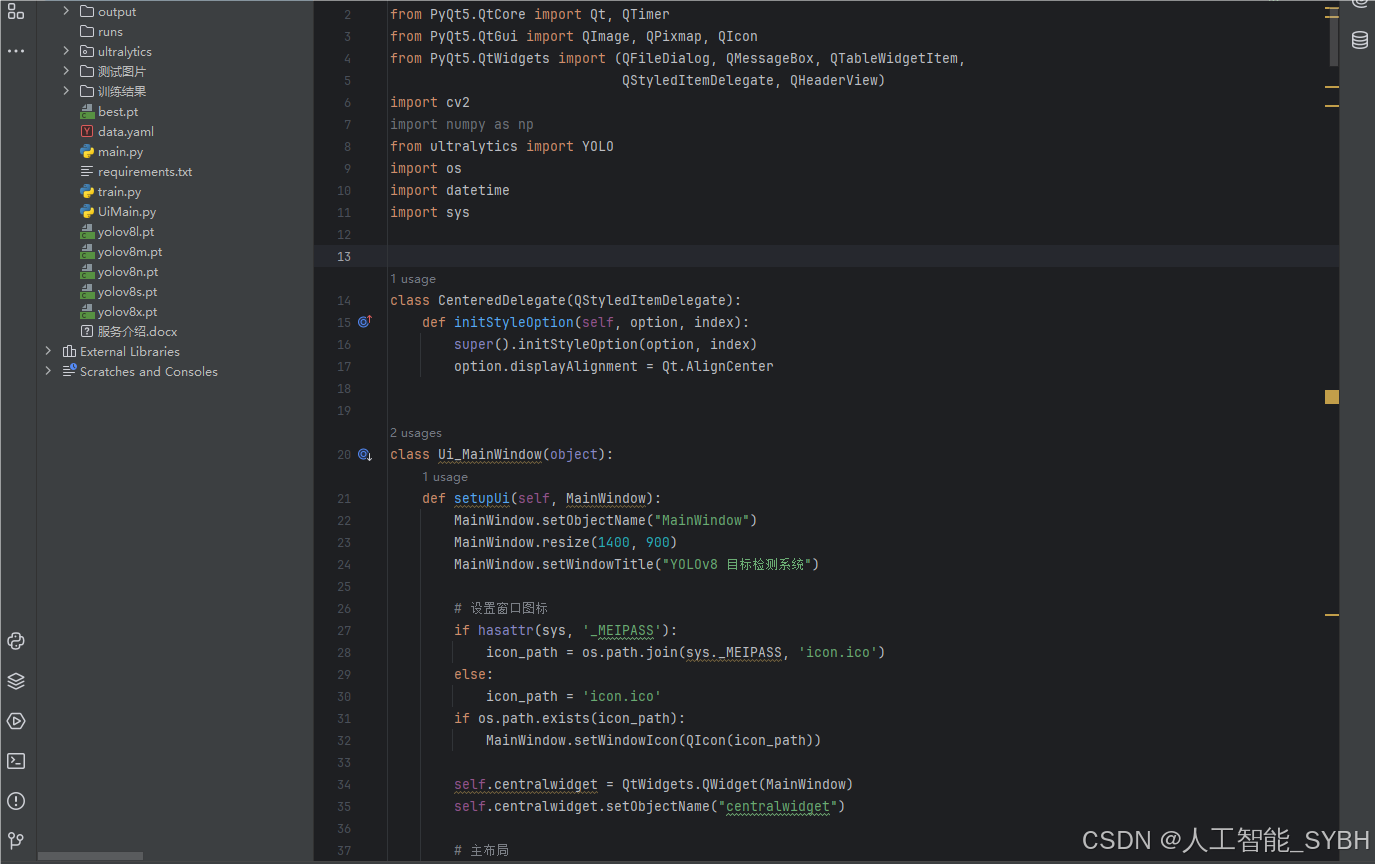
from PyQt5 import QtCore, QtGui, QtWidgets
from PyQt5.QtCore import Qt, QTimer
from PyQt5.QtGui import QImage, QPixmap, QIcon
from PyQt5.QtWidgets import (QFileDialog, QMessageBox, QTableWidgetItem,
                             QStyledItemDelegate, QHeaderView)
import cv2
import numpy as np
from ultralytics import YOLO
import os
import datetime
import sys


class CenteredDelegate(QStyledItemDelegate):
    def initStyleOption(self, option, index):
        super().initStyleOption(option, index)
        option.displayAlignment = Qt.AlignCenter


class Ui_MainWindow(object):
    def setupUi(self, MainWindow):
        MainWindow.setObjectName("MainWindow")
        MainWindow.resize(1400, 900)
        MainWindow.setWindowTitle("YOLOv8 目标检测系统")

        # 设置窗口图标
        if hasattr(sys, '_MEIPASS'):
            icon_path = os.path.join(sys._MEIPASS, 'icon.ico')
        else:
            icon_path = 'icon.ico'
        if os.path.exists(icon_path):
            MainWindow.setWindowIcon(QIcon(icon_path))

        self.centralwidget = QtWidgets.QWidget(MainWindow)
        self.centralwidget.setObjectName("centralwidget")

        # 主布局
        self.main_layout = QtWidgets.QHBoxLayout(self.centralwidget)
        self.main_layout.setContentsMargins(10, 10, 10, 10)
        self.main_layout.setSpacing(15)

        # 左侧布局 (图像显示)
        self.left_layout = QtWidgets.QVBoxLayout()
        self.left_layout.setSpacing(15)

        # 原始图像组
        self.original_group = QtWidgets.QGroupBox("原始图像")
        self.original_group.setMinimumHeight(400)
        self.original_img_label = QtWidgets.QLabel()
        self.original_img_label.setAlignment(QtCore.Qt.AlignCenter)
        self.original_img_label.setText("等待加载图像...")
        self.original_img_label.setStyleSheet("background-color: #F0F0F0; border: 1px solid #CCCCCC;")

        original_layout = QtWidgets.QVBoxLayout()
        original_layout.addWidget(self.original_img_label)
        self.original_group.setLayout(original_layout)
        self.left_layout.addWidget(self.original_group)

        # 检测结果图像组
        self.result_group = QtWidgets.QGroupBox("检测结果")
        self.result_group.setMinimumHeight(400)
        self.result_img_label = QtWidgets.QLabel()
        self.result_img_label.setAlignment(QtCore.Qt.AlignCenter)
        self.result_img_label.setText("检测结果将显示在这里")
        self.result_img_label.setStyleSheet("background-color: #F0F0F0; border: 1px solid #CCCCCC;")

        result_layout = QtWidgets.QVBoxLayout()
        result_layout.addWidget(self.result_img_label)
        self.result_group.setLayout(result_layout)
        self.left_layout.addWidget(self.result_group)

        self.main_layout.addLayout(self.left_layout, stretch=3)

        # 右侧布局 (控制面板)
        self.right_layout = QtWidgets.QVBoxLayout()
        self.right_layout.setSpacing(15)

        # 模型选择组
        self.model_group = QtWidgets.QGroupBox("模型设置")
        self.model_group.setStyleSheet("QGroupBox { font-weight: bold; }")
        self.model_layout = QtWidgets.QVBoxLayout()

        # 模型选择
        self.model_combo = QtWidgets.QComboBox()
        self.model_combo.addItems(["best.pt"])
        self.model_combo.setCurrentIndex(0)

        # 加载模型按钮
        self.load_model_btn = QtWidgets.QPushButton(" 加载模型")
        self.load_model_btn.setIcon(QIcon.fromTheme("document-open"))
        self.load_model_btn.setStyleSheet(
            "QPushButton { padding: 8px; background-color: #4CAF50; color: white; border-radius: 4px; }"
            "QPushButton:hover { background-color: #45a049; }"
        )

        self.model_layout.addWidget(self.model_combo)
        self.model_layout.addWidget(self.load_model_btn)
        self.model_group.setLayout(self.model_layout)
        self.right_layout.addWidget(self.model_group)

        # 参数设置组
        self.param_group = QtWidgets.QGroupBox("检测参数")
        self.param_group.setStyleSheet("QGroupBox { font-weight: bold; }")
        self.param_layout = QtWidgets.QFormLayout()
        self.param_layout.setLabelAlignment(Qt.AlignLeft)
        self.param_layout.setFormAlignment(Qt.AlignLeft)
        self.param_layout.setVerticalSpacing(15)

        # 置信度滑块
        self.conf_slider = QtWidgets.QSlider(Qt.Horizontal)
        self.conf_slider.setRange(1, 99)
        self.conf_slider.setValue(25)
        self.conf_value = QtWidgets.QLabel("0.25")
        self.conf_value.setAlignment(Qt.AlignCenter)
        self.conf_value.setStyleSheet("font-weight: bold; color: #2196F3;")

        # IoU滑块
        self.iou_slider = QtWidgets.QSlider(Qt.Horizontal)
        self.iou_slider.setRange(1, 99)
        self.iou_slider.setValue(45)
        self.iou_value = QtWidgets.QLabel("0.45")
        self.iou_value.setAlignment(Qt.AlignCenter)
        self.iou_value.setStyleSheet("font-weight: bold; color: #2196F3;")

        self.param_layout.addRow("置信度阈值:", self.conf_slider)
        self.param_layout.addRow("当前值:", self.conf_value)
        self.param_layout.addRow(QtWidgets.QLabel(""))  # 空行
        self.param_layout.addRow("IoU阈值:", self.iou_slider)
        self.param_layout.addRow("当前值:", self.iou_value)

        self.param_group.setLayout(self.param_layout)
        self.right_layout.addWidget(self.param_group)

        # 功能按钮组
        self.func_group = QtWidgets.QGroupBox("检测功能")
        self.func_group.setStyleSheet("QGroupBox { font-weight: bold; }")
        self.func_layout = QtWidgets.QVBoxLayout()
        self.func_layout.setSpacing(10)

        # 图片检测按钮
        self.image_btn = QtWidgets.QPushButton(" 图片检测")
        self.image_btn.setIcon(QIcon.fromTheme("image-x-generic"))

        # 视频检测按钮
        self.video_btn = QtWidgets.QPushButton(" 视频检测")
        self.video_btn.setIcon(QIcon.fromTheme("video-x-generic"))

        # 摄像头检测按钮
        self.camera_btn = QtWidgets.QPushButton(" 摄像头检测")
        self.camera_btn.setIcon(QIcon.fromTheme("camera-web"))

        # 停止检测按钮
        self.stop_btn = QtWidgets.QPushButton(" 停止检测")
        self.stop_btn.setIcon(QIcon.fromTheme("process-stop"))
        self.stop_btn.setEnabled(False)

        # 保存结果按钮
        self.save_btn = QtWidgets.QPushButton(" 保存结果")
        self.save_btn.setIcon(QIcon.fromTheme("document-save"))
        self.save_btn.setEnabled(False)

        # 设置按钮样式
        button_style = """
        QPushButton {
            padding: 10px;
            background-color: #2196F3;
            color: white;
            border: none;
            border-radius: 4px;
            text-align: left;
        }
        QPushButton:hover {
            background-color: #0b7dda;
        }
        QPushButton:disabled {
            background-color: #cccccc;
        }
        """

        for btn in [self.image_btn, self.video_btn, self.camera_btn,
                    self.stop_btn, self.save_btn]:
            btn.setStyleSheet(button_style)
            self.func_layout.addWidget(btn)

        self.func_group.setLayout(self.func_layout)
        self.right_layout.addWidget(self.func_group)

        # 检测结果表格组
        self.table_group = QtWidgets.QGroupBox("检测结果详情")
        self.table_group.setStyleSheet("QGroupBox { font-weight: bold; }")
        self.table_layout = QtWidgets.QVBoxLayout()

        self.result_table = QtWidgets.QTableWidget()
        self.result_table.setColumnCount(4)
        self.result_table.setHorizontalHeaderLabels(["类别", "置信度", "左上坐标", "右下坐标"])
        self.result_table.horizontalHeader().setSectionResizeMode(QHeaderView.Stretch)
        self.result_table.verticalHeader().setVisible(False)
        self.result_table.setSelectionBehavior(QtWidgets.QAbstractItemView.SelectRows)
        self.result_table.setEditTriggers(QtWidgets.QAbstractItemView.NoEditTriggers)

        # 设置表格样式
        self.result_table.setStyleSheet("""
            QTableWidget {
                border: 1px solid #e0e0e0;
                alternate-background-color: #f5f5f5;
            }
            QHeaderView::section {
                background-color: #2196F3;
                color: white;
                padding: 5px;
                border: none;
            }
            QTableWidget::item {
                padding: 5px;
            }
        """)

        # 设置居中代理
        delegate = CenteredDelegate(self.result_table)
        self.result_table.setItemDelegate(delegate)

        self.table_layout.addWidget(self.result_table)
        self.table_group.setLayout(self.table_layout)
        self.right_layout.addWidget(self.table_group, stretch=1)

        self.main_layout.addLayout(self.right_layout, stretch=1)

        MainWindow.setCentralWidget(self.centralwidget)

        # 状态栏
        self.statusbar = QtWidgets.QStatusBar(MainWindow)
        self.statusbar.setStyleSheet("QStatusBar { border-top: 1px solid #c0c0c0; }")
        MainWindow.setStatusBar(self.statusbar)

        # 初始化变量
        self.model = None
        self.cap = None
        self.timer = QTimer()
        self.is_camera_running = False
        self.current_image = None
        self.current_result = None
        self.video_writer = None
        self.output_path = "output"

        # 创建输出目录
        if not os.path.exists(self.output_path):
            os.makedirs(self.output_path)

        # 连接信号槽
        self.load_model_btn.clicked.connect(self.load_model)
        self.image_btn.clicked.connect(self.detect_image)
        self.video_btn.clicked.connect(self.detect_video)
        self.camera_btn.clicked.connect(self.detect_camera)
        self.stop_btn.clicked.connect(self.stop_detection)
        self.save_btn.clicked.connect(self.save_result)
        self.conf_slider.valueChanged.connect(self.update_conf_value)
        self.iou_slider.valueChanged.connect(self.update_iou_value)
        self.timer.timeout.connect(self.update_camera_frame)

        # 设置全局样式
        self.set_style()

    def set_style(self):
        style = """
        QMainWindow {
            background-color: #f5f5f5;
        }
        QGroupBox {
            border: 1px solid #e0e0e0;
            border-radius: 5px;
            margin-top: 10px;
            padding-top: 15px;
        }
        QGroupBox::title {
            subcontrol-origin: margin;
            left: 10px;
            padding: 0 3px;
        }
        QLabel {
            color: #333333;
        }
        QComboBox {
            padding: 5px;
            border: 1px solid #cccccc;
            border-radius: 3px;
        }
        QSlider::groove:horizontal {
            height: 6px;
            background: #e0e0e0;
            border-radius: 3px;
        }
        QSlider::handle:horizontal {
            width: 16px;
            height: 16px;
            margin: -5px 0;
            background: #2196F3;
            border-radius: 8px;
        }
        QSlider::sub-page:horizontal {
            background: #2196F3;
            border-radius: 3px;
        }
        """
        self.centralwidget.setStyleSheet(style)

    def load_model(self):
        model_name = self.model_combo.currentText().split(" ")[0]
        try:
            self.model = YOLO(model_name)
            self.statusbar.showMessage(f"模型 {model_name} 加载成功", 3000)
            self.image_btn.setEnabled(True)
            self.video_btn.setEnabled(True)
            self.camera_btn.setEnabled(True)
        except Exception as e:
            QMessageBox.critical(None, "错误", f"模型加载失败: {str(e)}")

    def update_conf_value(self):
        conf = self.conf_slider.value() / 100
        self.conf_value.setText(f"{conf:.2f}")

    def update_iou_value(self):
        iou = self.iou_slider.value() / 100
        self.iou_value.setText(f"{iou:.2f}")

    def detect_image(self):
        if self.model is None:
            QMessageBox.warning(None, "警告", "请先加载模型")
            return

        file_path, _ = QFileDialog.getOpenFileName(
            None, "选择图片", "",
            "图片文件 (*.jpg *.jpeg *.png *.bmp);;所有文件 (*)"
        )
        if file_path:
            try:
                # 读取图片
                img = cv2.imread(file_path)
                img = cv2.cvtColor(img, cv2.COLOR_BGR2RGB)

                # 显示原始图片
                self.display_image(img, self.original_img_label)
                self.current_image = img.copy()

                # 检测图片
                conf = self.conf_slider.value() / 100
                iou = self.iou_slider.value() / 100

                self.statusbar.showMessage("正在检测图片...")
                QtWidgets.QApplication.processEvents()  # 更新UI

                results = self.model.predict(img, conf=conf, iou=iou)
                result_img = results[0].plot()

                # 显示检测结果
                self.display_image(result_img, self.result_img_label)
                self.current_result = result_img.copy()

                # 更新结果表格
                self.update_result_table(results[0])

                self.save_btn.setEnabled(True)
                self.statusbar.showMessage(f"图片检测完成: {os.path.basename(file_path)}", 3000)

            except Exception as e:
                QMessageBox.critical(None, "错误", f"图片检测失败: {str(e)}")
                self.statusbar.showMessage("图片检测失败", 3000)

    def detect_video(self):
        if self.model is None:
            QMessageBox.warning(None, "警告", "请先加载模型")
            return

        file_path, _ = QFileDialog.getOpenFileName(
            None, "选择视频", "",
            "视频文件 (*.mp4 *.avi *.mov *.mkv);;所有文件 (*)"
        )
        if file_path:
            try:
                self.cap = cv2.VideoCapture(file_path)
                if not self.cap.isOpened():
                    raise Exception("无法打开视频文件")

                # 获取视频信息
                fps = self.cap.get(cv2.CAP_PROP_FPS)
                width = int(self.cap.get(cv2.CAP_PROP_FRAME_WIDTH))
                height = int(self.cap.get(cv2.CAP_PROP_FRAME_HEIGHT))

                # 创建视频写入器
                timestamp = datetime.datetime.now().strftime("%Y%m%d_%H%M%S")
                output_file = os.path.join(self.output_path, f"output_{timestamp}.mp4")
                fourcc = cv2.VideoWriter_fourcc(*'mp4v')
                self.video_writer = cv2.VideoWriter(output_file, fourcc, fps, (width, height))

                # 启用停止按钮,禁用其他按钮
                self.stop_btn.setEnabled(True)
                self.save_btn.setEnabled(True)
                self.image_btn.setEnabled(False)
                self.video_btn.setEnabled(False)
                self.camera_btn.setEnabled(False)

                # 开始处理视频
                self.timer.start(30)  # 30ms间隔
                self.statusbar.showMessage(f"正在处理视频: {os.path.basename(file_path)}...")

            except Exception as e:
                QMessageBox.critical(None, "错误", f"视频检测失败: {str(e)}")
                self.statusbar.showMessage("视频检测失败", 3000)
七、项目源码(视频简介内)
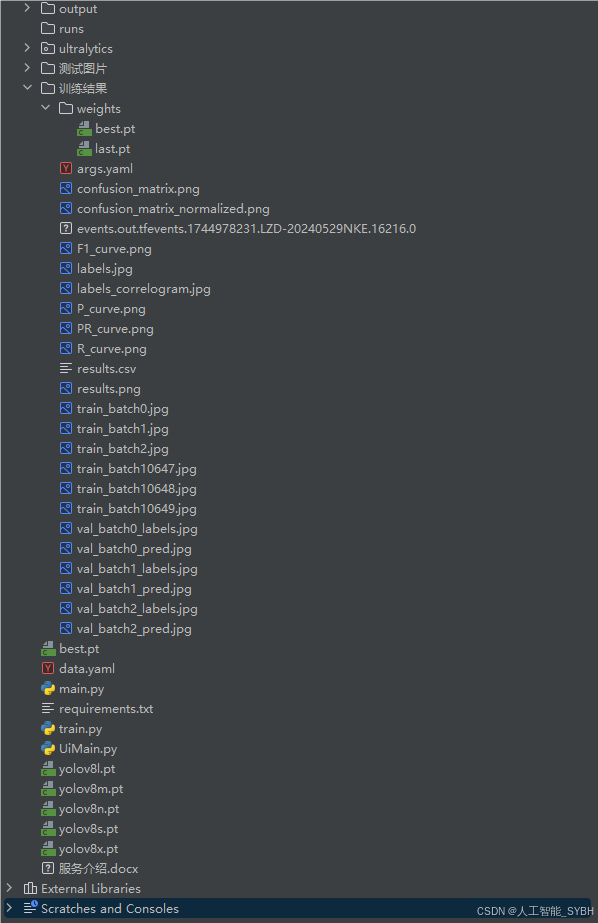
完整全部资源文件(包括测试图片,py文件,训练数据集、训练代码、界面代码等),这里已打包上传至博主的面包多平台,见可参考博客与视频,已将所有涉及的文件同时打包到里面,点击即可运行,完整文件截图如下:
演示视频
基于YOLOv8深度学习的变电站液体泄露红外检测系统(YOLOv8+YOLO数据集+UI界面+Python项目源码+模型)_哔哩哔哩_bilibili
基于YOLOv8深度学习的变电站液体泄露红外检测系统(YOLOv8+YOLO数据集+UI界面+Python项目源码+模型)_哔哩哔哩_bilibilihttps://www.bilibili.com/video/BV1hJQ2B2Eku/?spm_id_from=333.1387.homepage.video_card.clickhttps://www.bilibili.com/video/BV1hJQ2B2Eku/

小龙虾开发者社区是 CSDN 旗下专注 OpenClaw 生态的官方阵地,聚焦技能开发、插件实践与部署教程,为开发者提供可直接落地的方案、工具与交流平台,助力高效构建与落地 AI 应用
更多推荐



 24
24 0
0- 0



 已为社区贡献18条内容

所有评论(0)