
Dify使用Python代码提供的MCP Server(SSE)
·
Dify部署看这里:win11系统使用DockerDesktop搭建Dify实现知识库问答
MCP协议:https://modelcontextprotocol.io/docs/getting-started/intro
Python代码:
模拟查询天气,新增一个文件mcp_weather_fastmcp.py,使用fastmcp包,代码更加简洁:
pip install fastmcpfrom fastmcp import FastMCP
from typing import Annotated
# 1. 初始化 MCP 服务
mcp = FastMCP("weather-server")
# 模拟天气数据
MOCK_WEATHER_DATA = {
"beijing": {"weather": "多云转晴", "temp": "22°C", "humidity": "30%", "wind": "北风 3级"},
"shanghai": {"weather": "小雨", "temp": "19°C", "humidity": "85%", "wind": "东南风 4级"},
"shenzhen": {"weather": "雷阵雨", "temp": "28°C", "humidity": "90%", "wind": "微风"},
"hangzhou": {"weather": "晴", "temp": "24°C", "humidity": "45%", "wind": "西风 2级"},
}
# 2. 定义工具
@mcp.tool()
def get_weather(
city: Annotated[str, "城市名称的拼音,例如: beijing, shanghai, hangzhou"]
) -> str:
"""
查询指定城市的实时天气状况
"""
city = city.lower()
data = MOCK_WEATHER_DATA.get(city)
if data:
return (f"**{city}** 天气:\n"
f"- 天气: {data['weather']}\n"
f"- 温度: {data['temp']}\n"
f"- 湿度: {data['humidity']}\n"
f"- 风力: {data['wind']}")
else:
return f"未找到 **{city}** 的天气数据。"
# 3. 启动服务
if __name__ == "__main__":
# run 方法默认会启动一个 SSE 服务器
# host="0.0.0.0" 允许外部(如 Docker)访问
# port=9000 指定端口号
mcp.run(transport='sse', host="0.0.0.0", port=9000)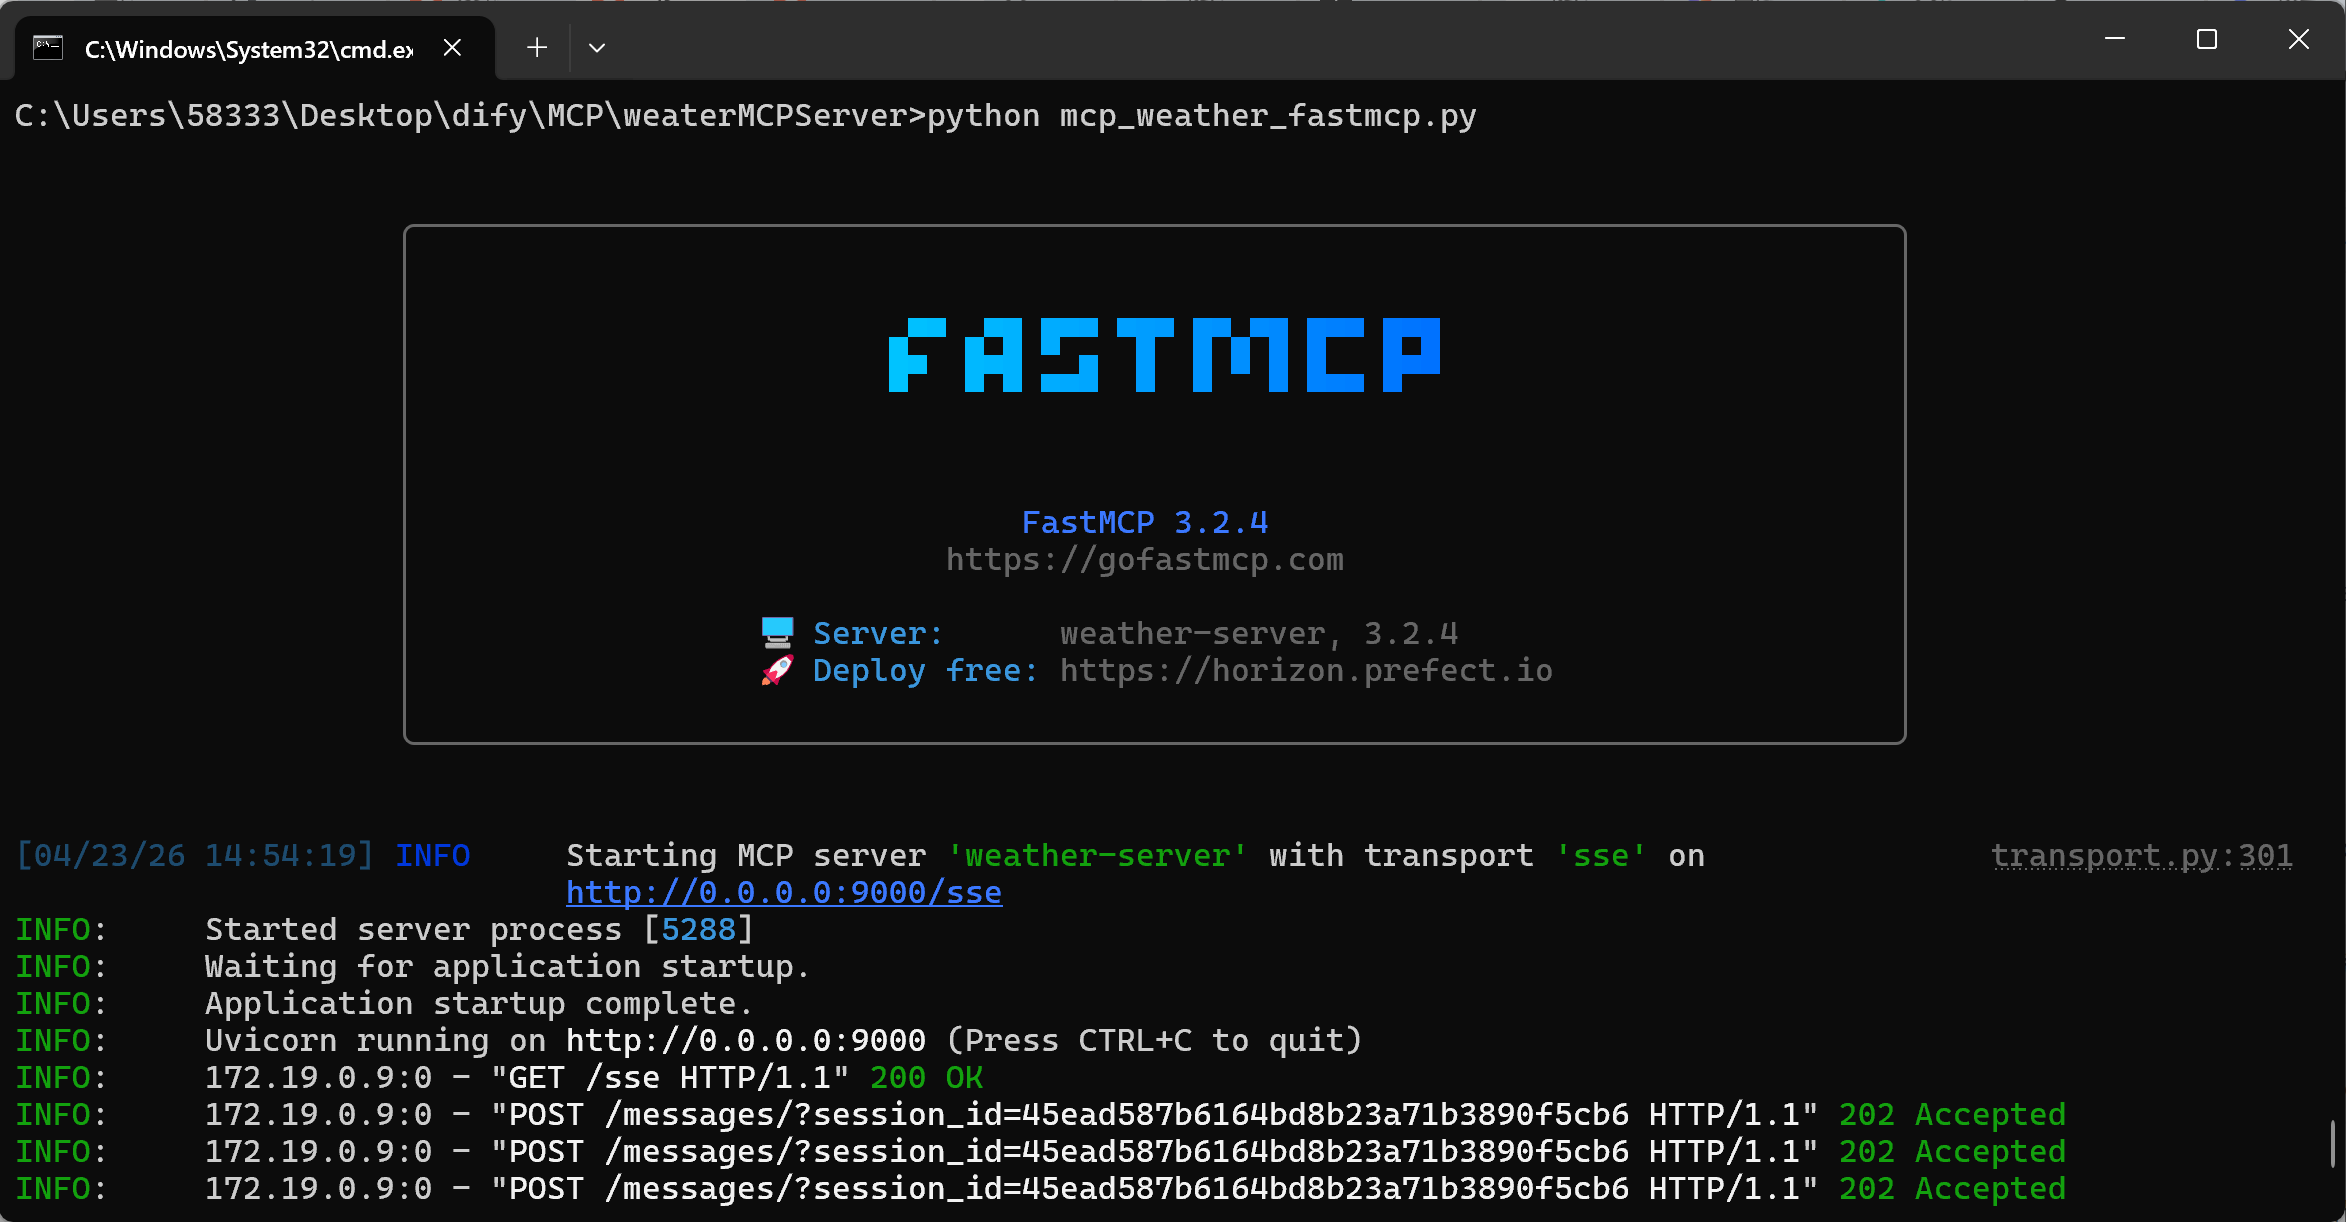
当前目录下打开cmd,启动代码:
python mcp_weather_fastmcp.py在Dify上配置MCP:
顶上“工具”-“MCP”,点击添加MCP服务。
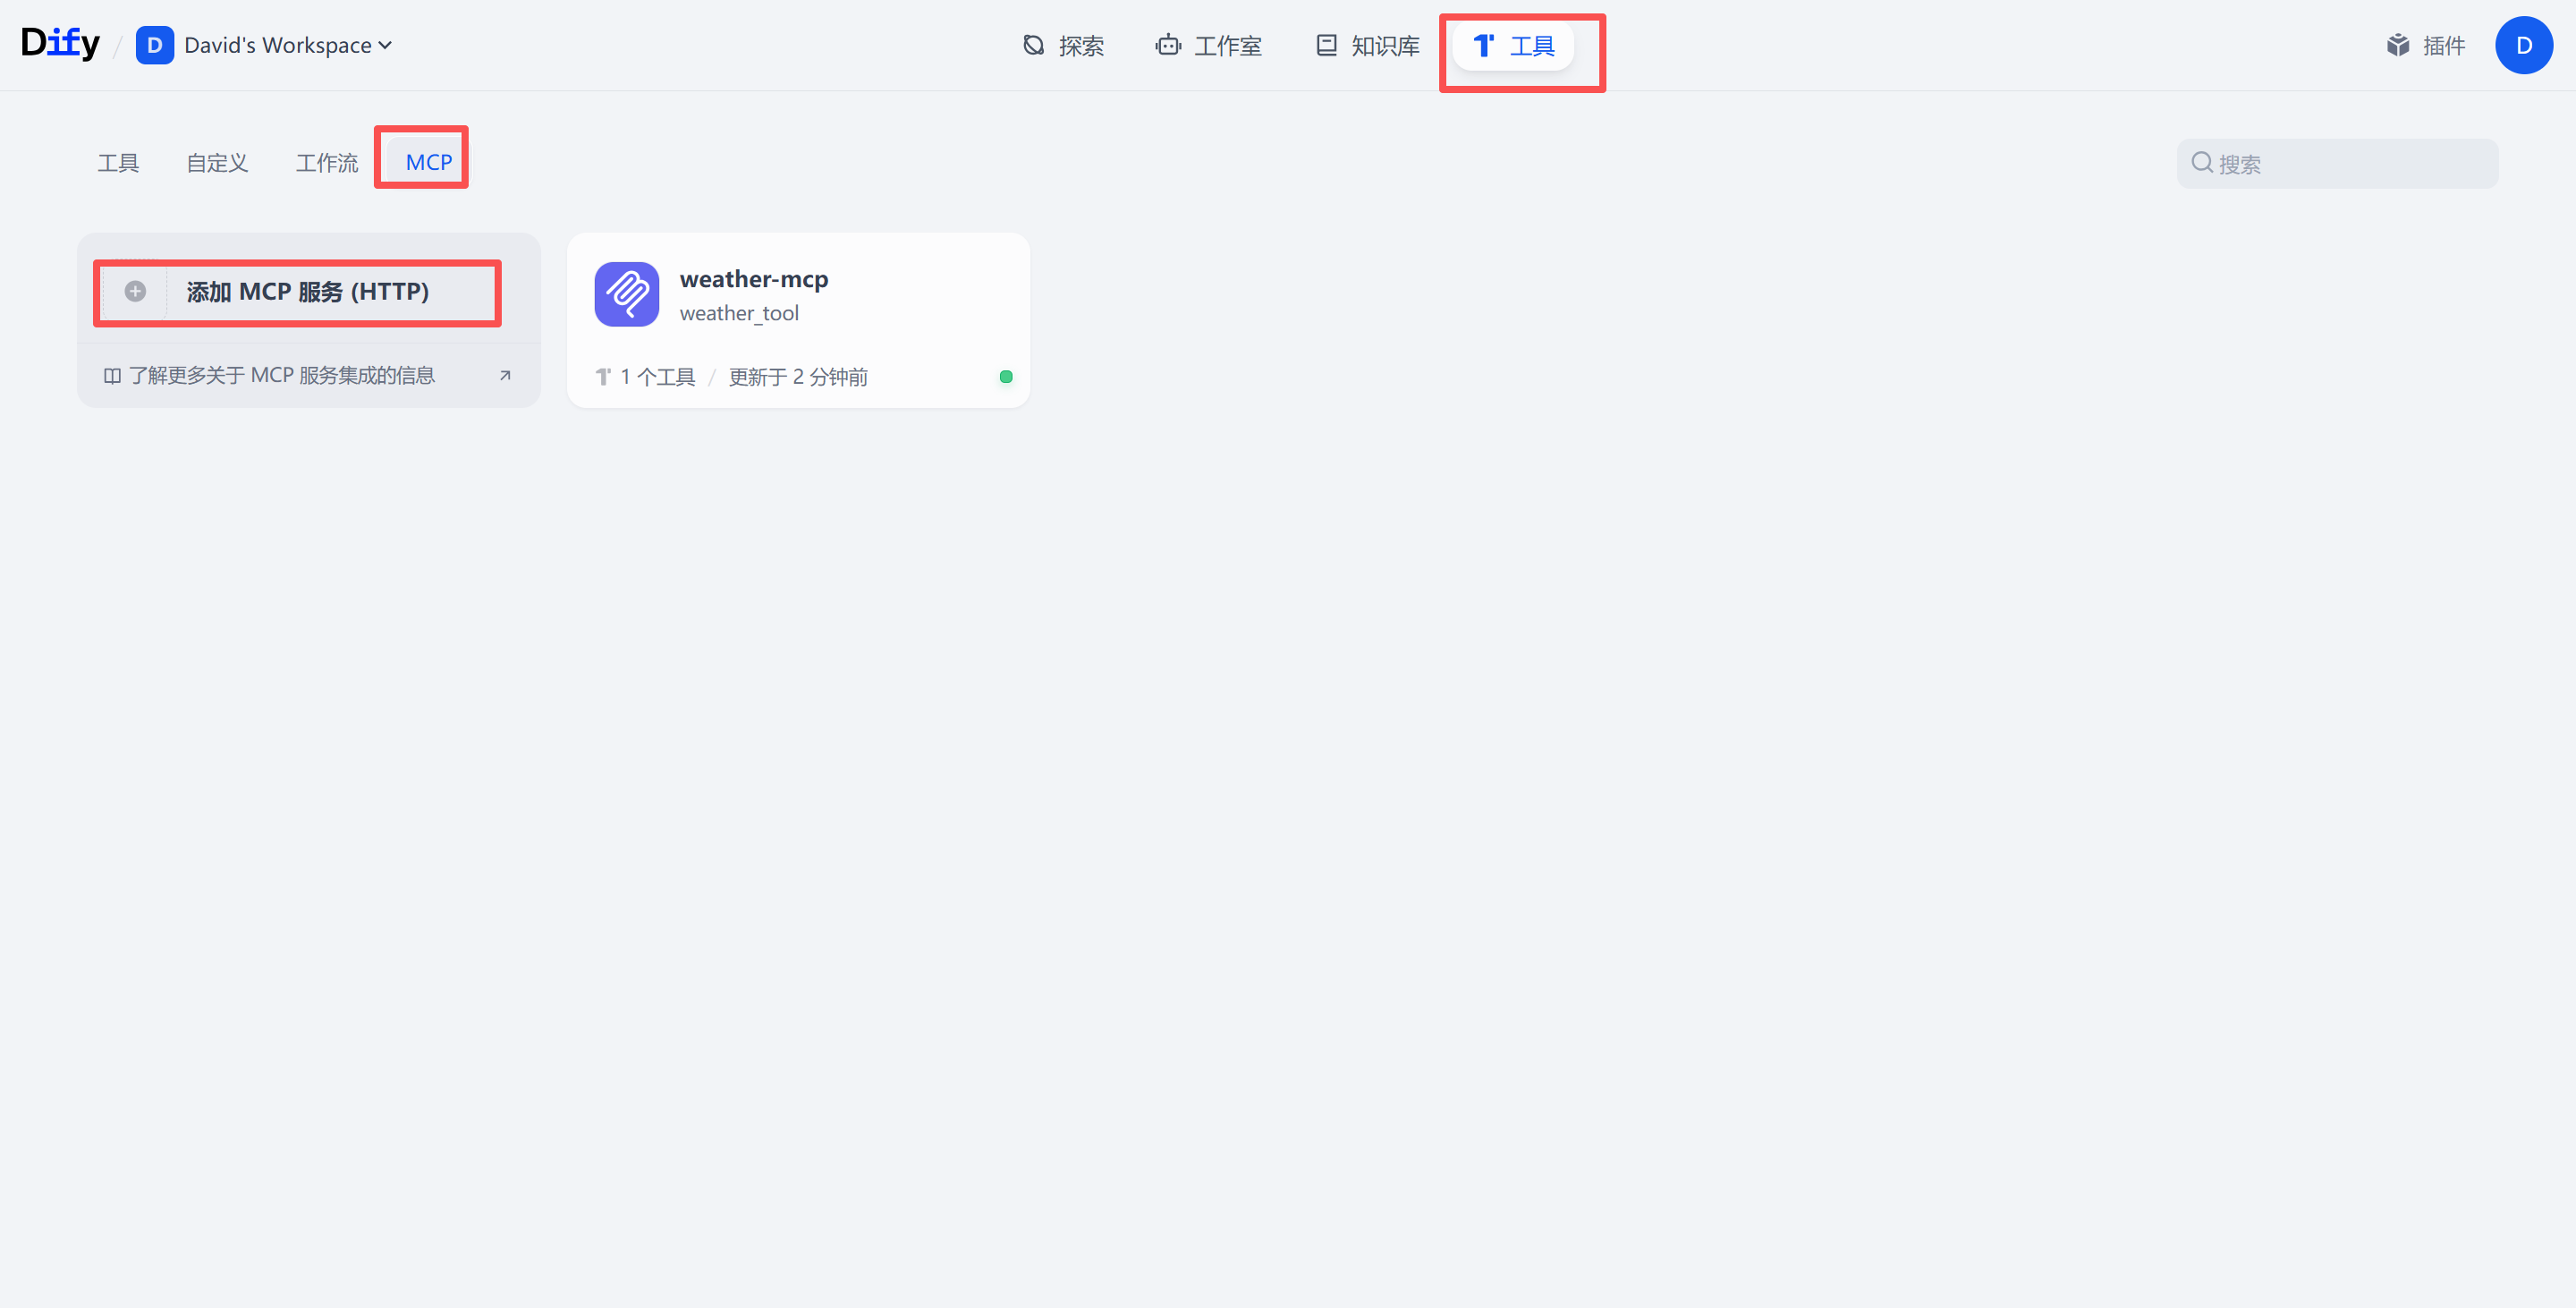
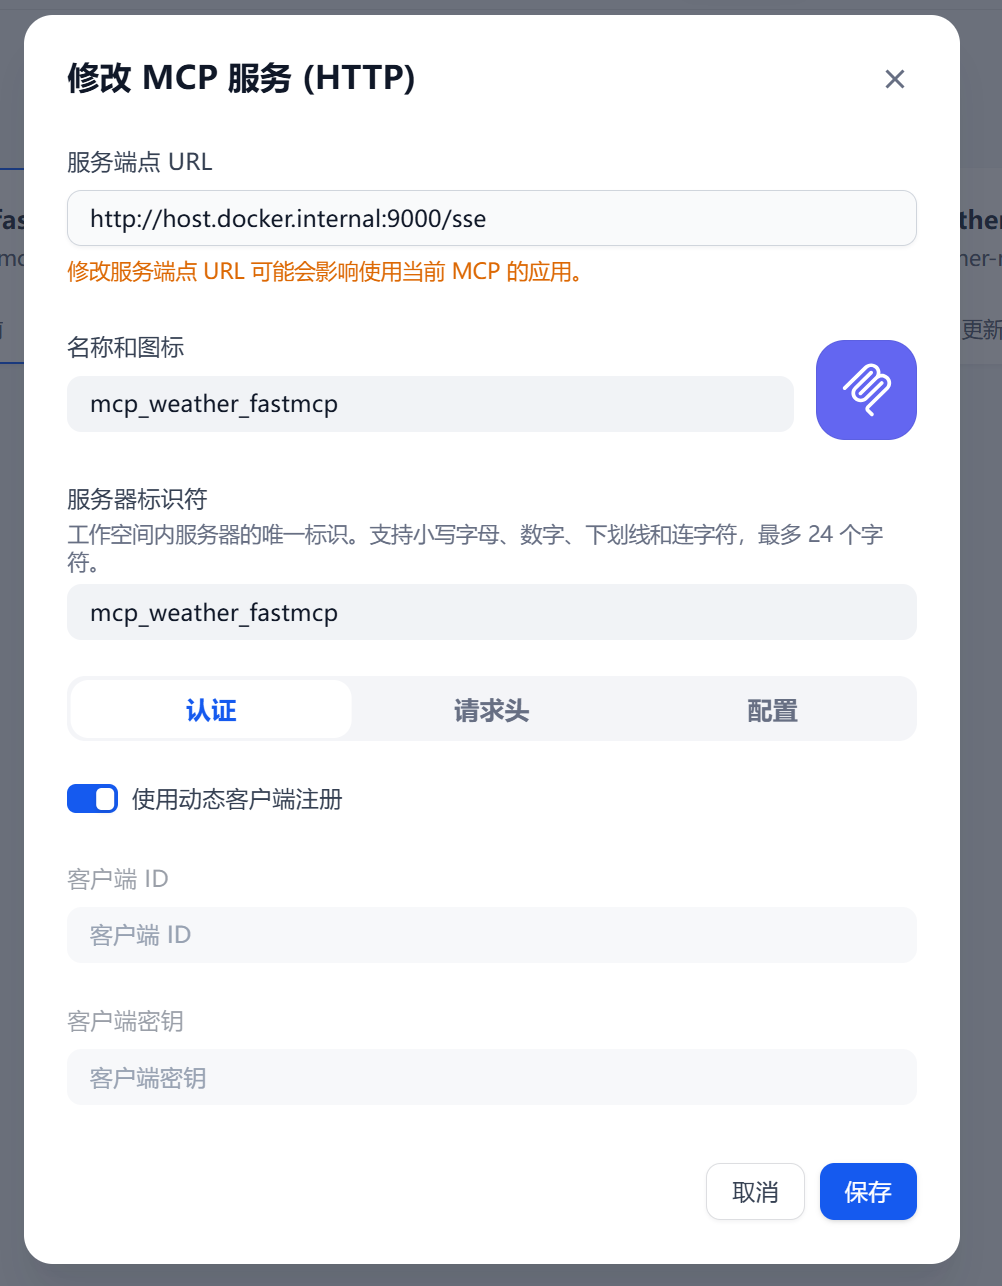
因为Dify是部署在docker里面的地址如下:
http://host.docker.internal:9000/sse我这里没有做授权,需要的可以自己在代码里加
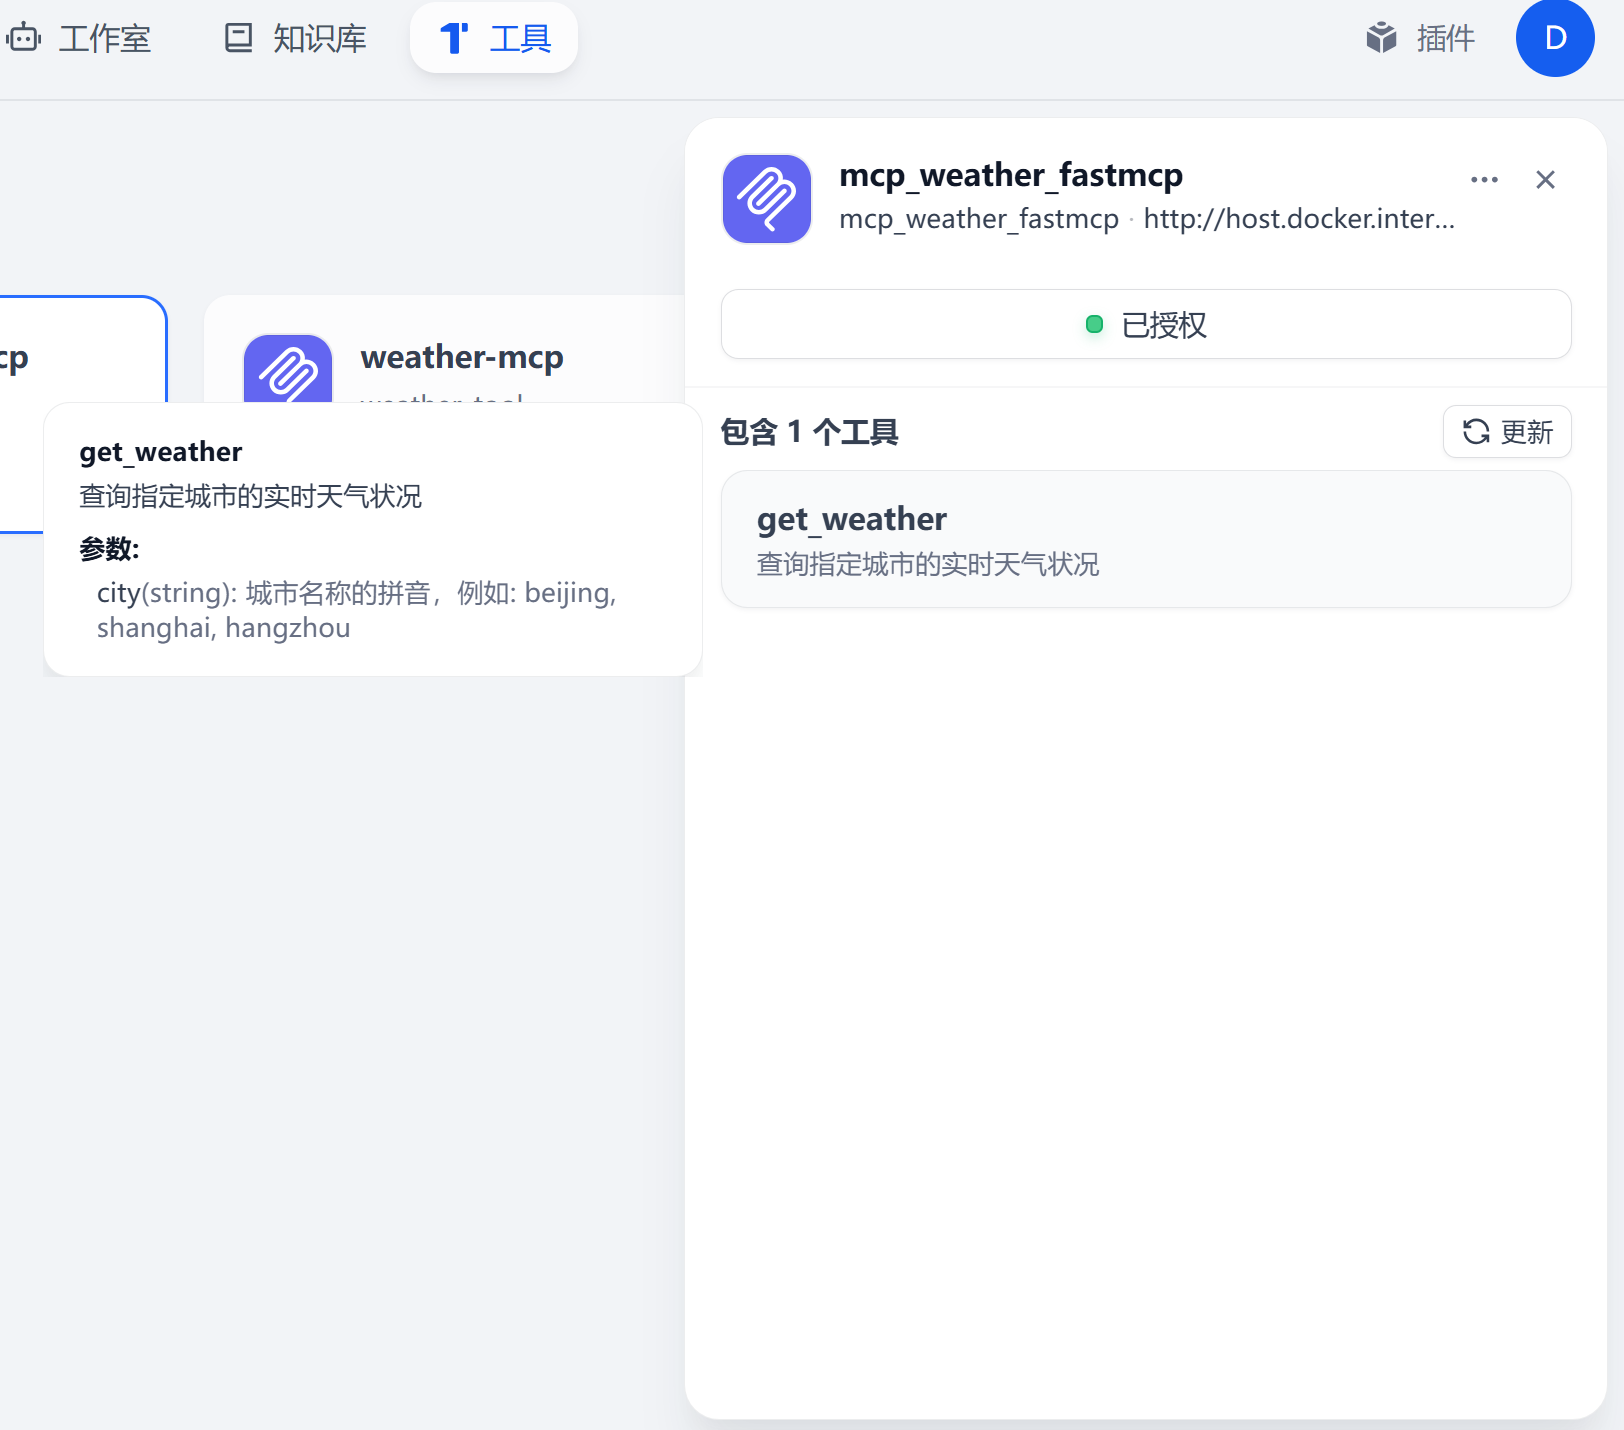
保存之后点”授权“,下面就会出现的工具列表,如果报错就看具体的错误信息解决就行了
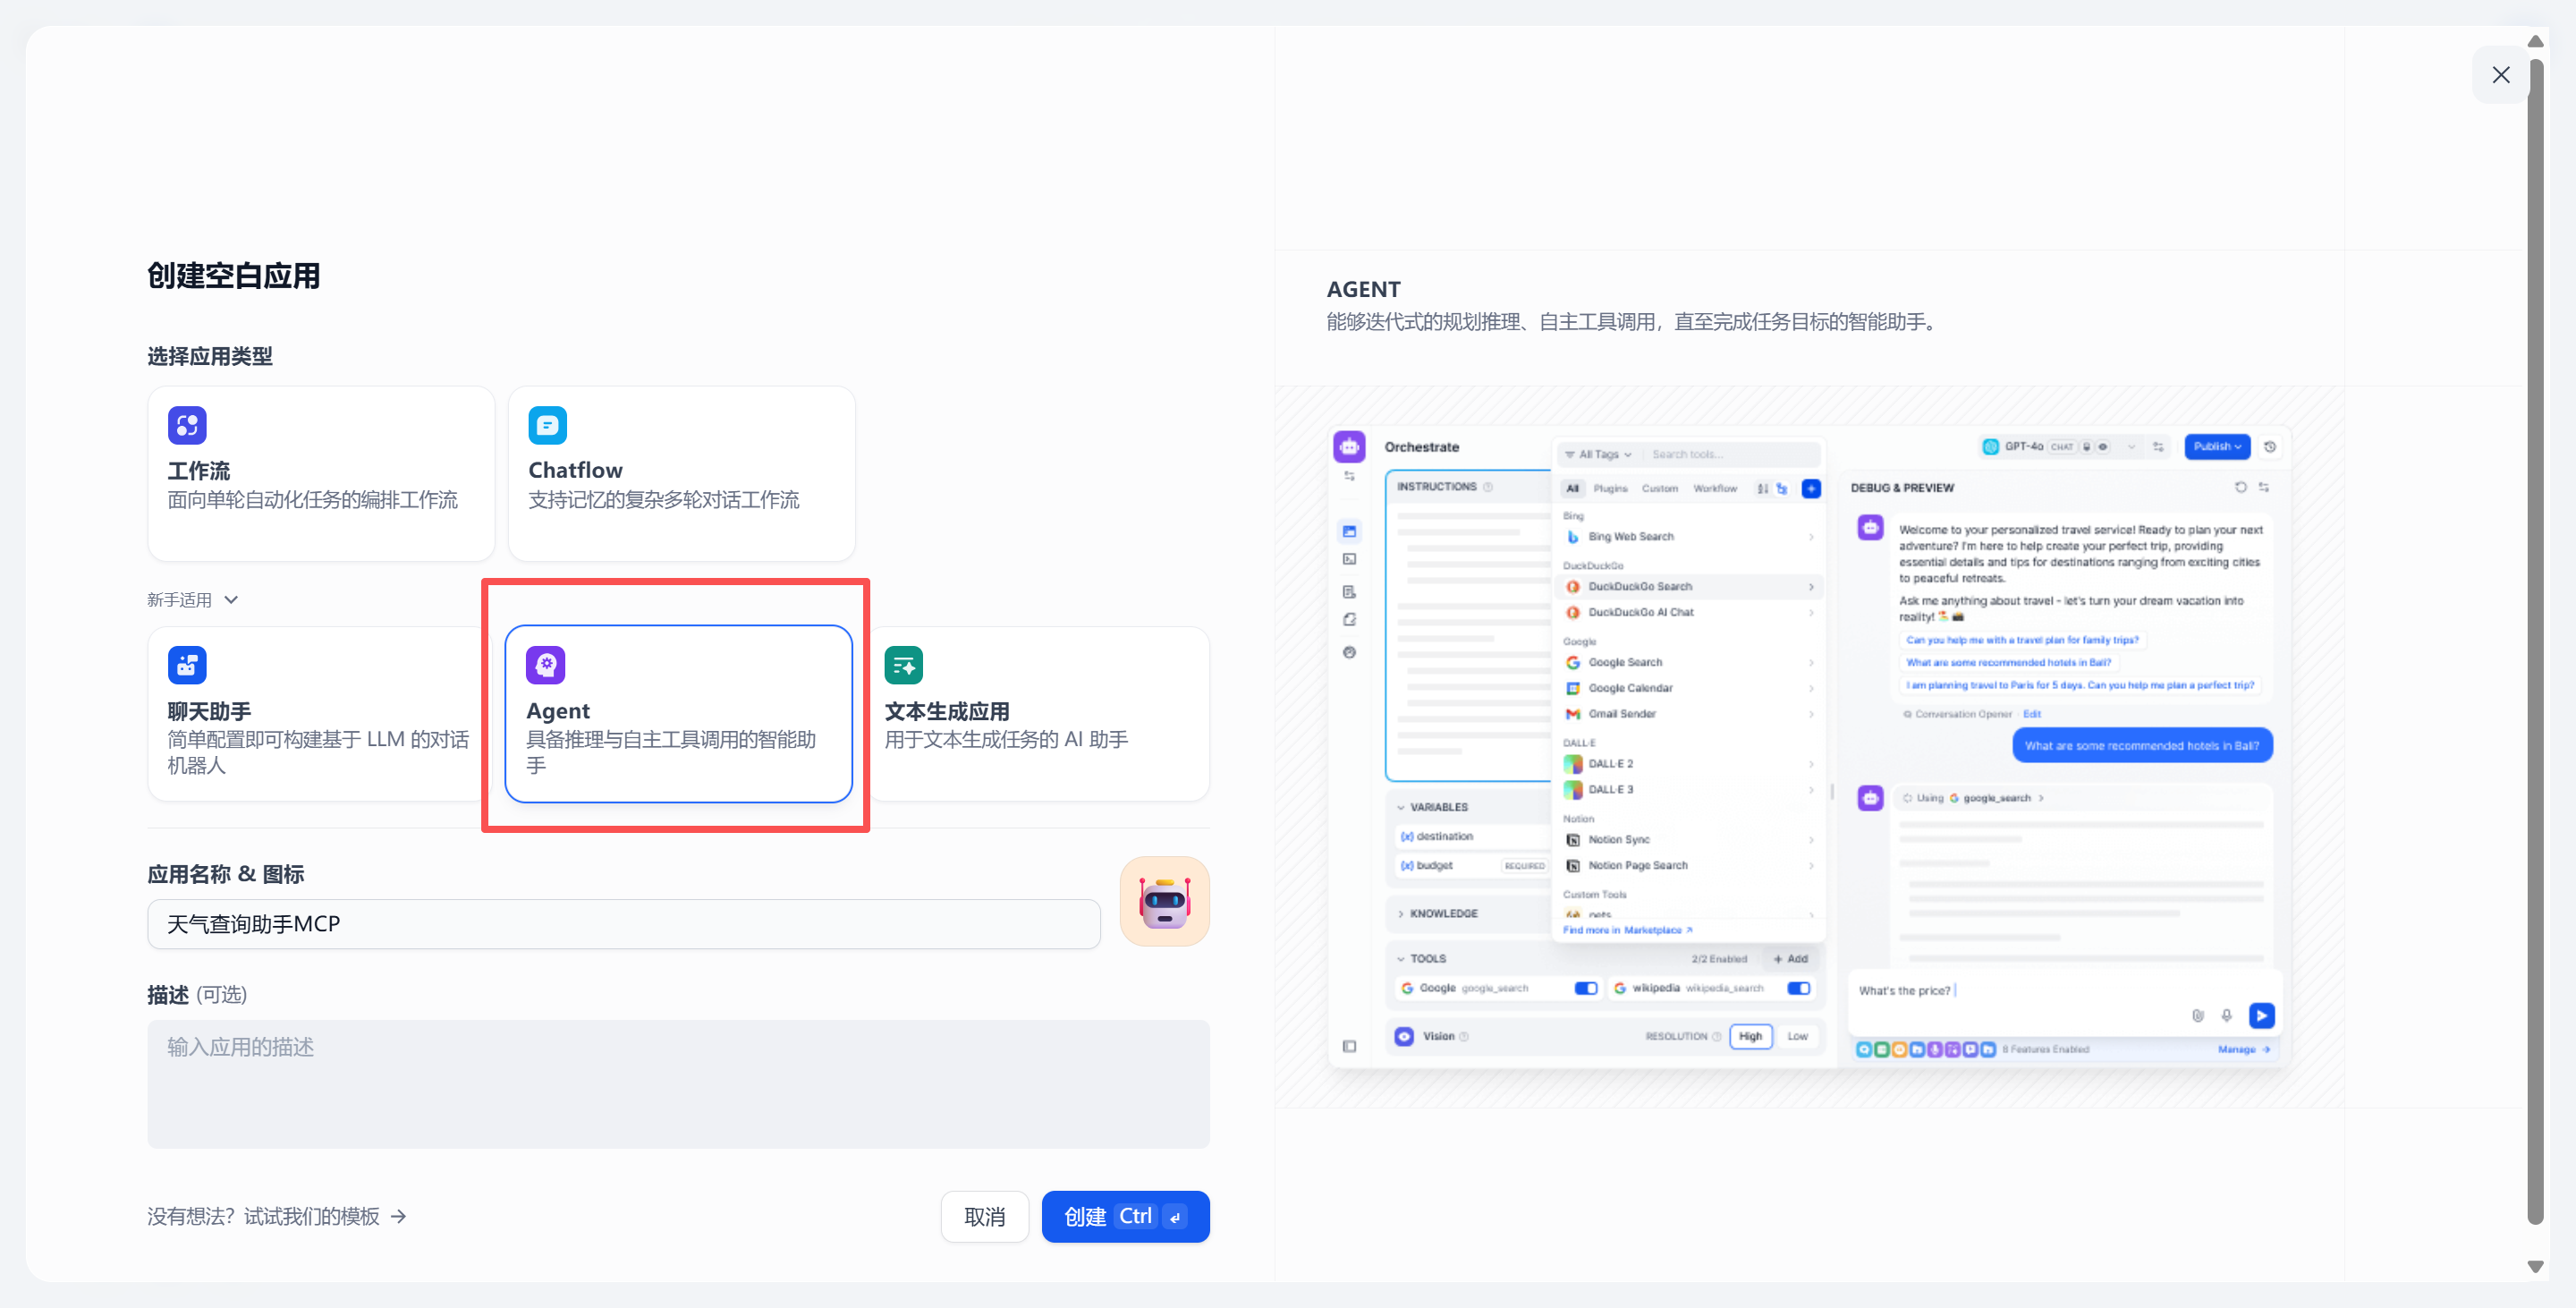
新建一个Agent应用
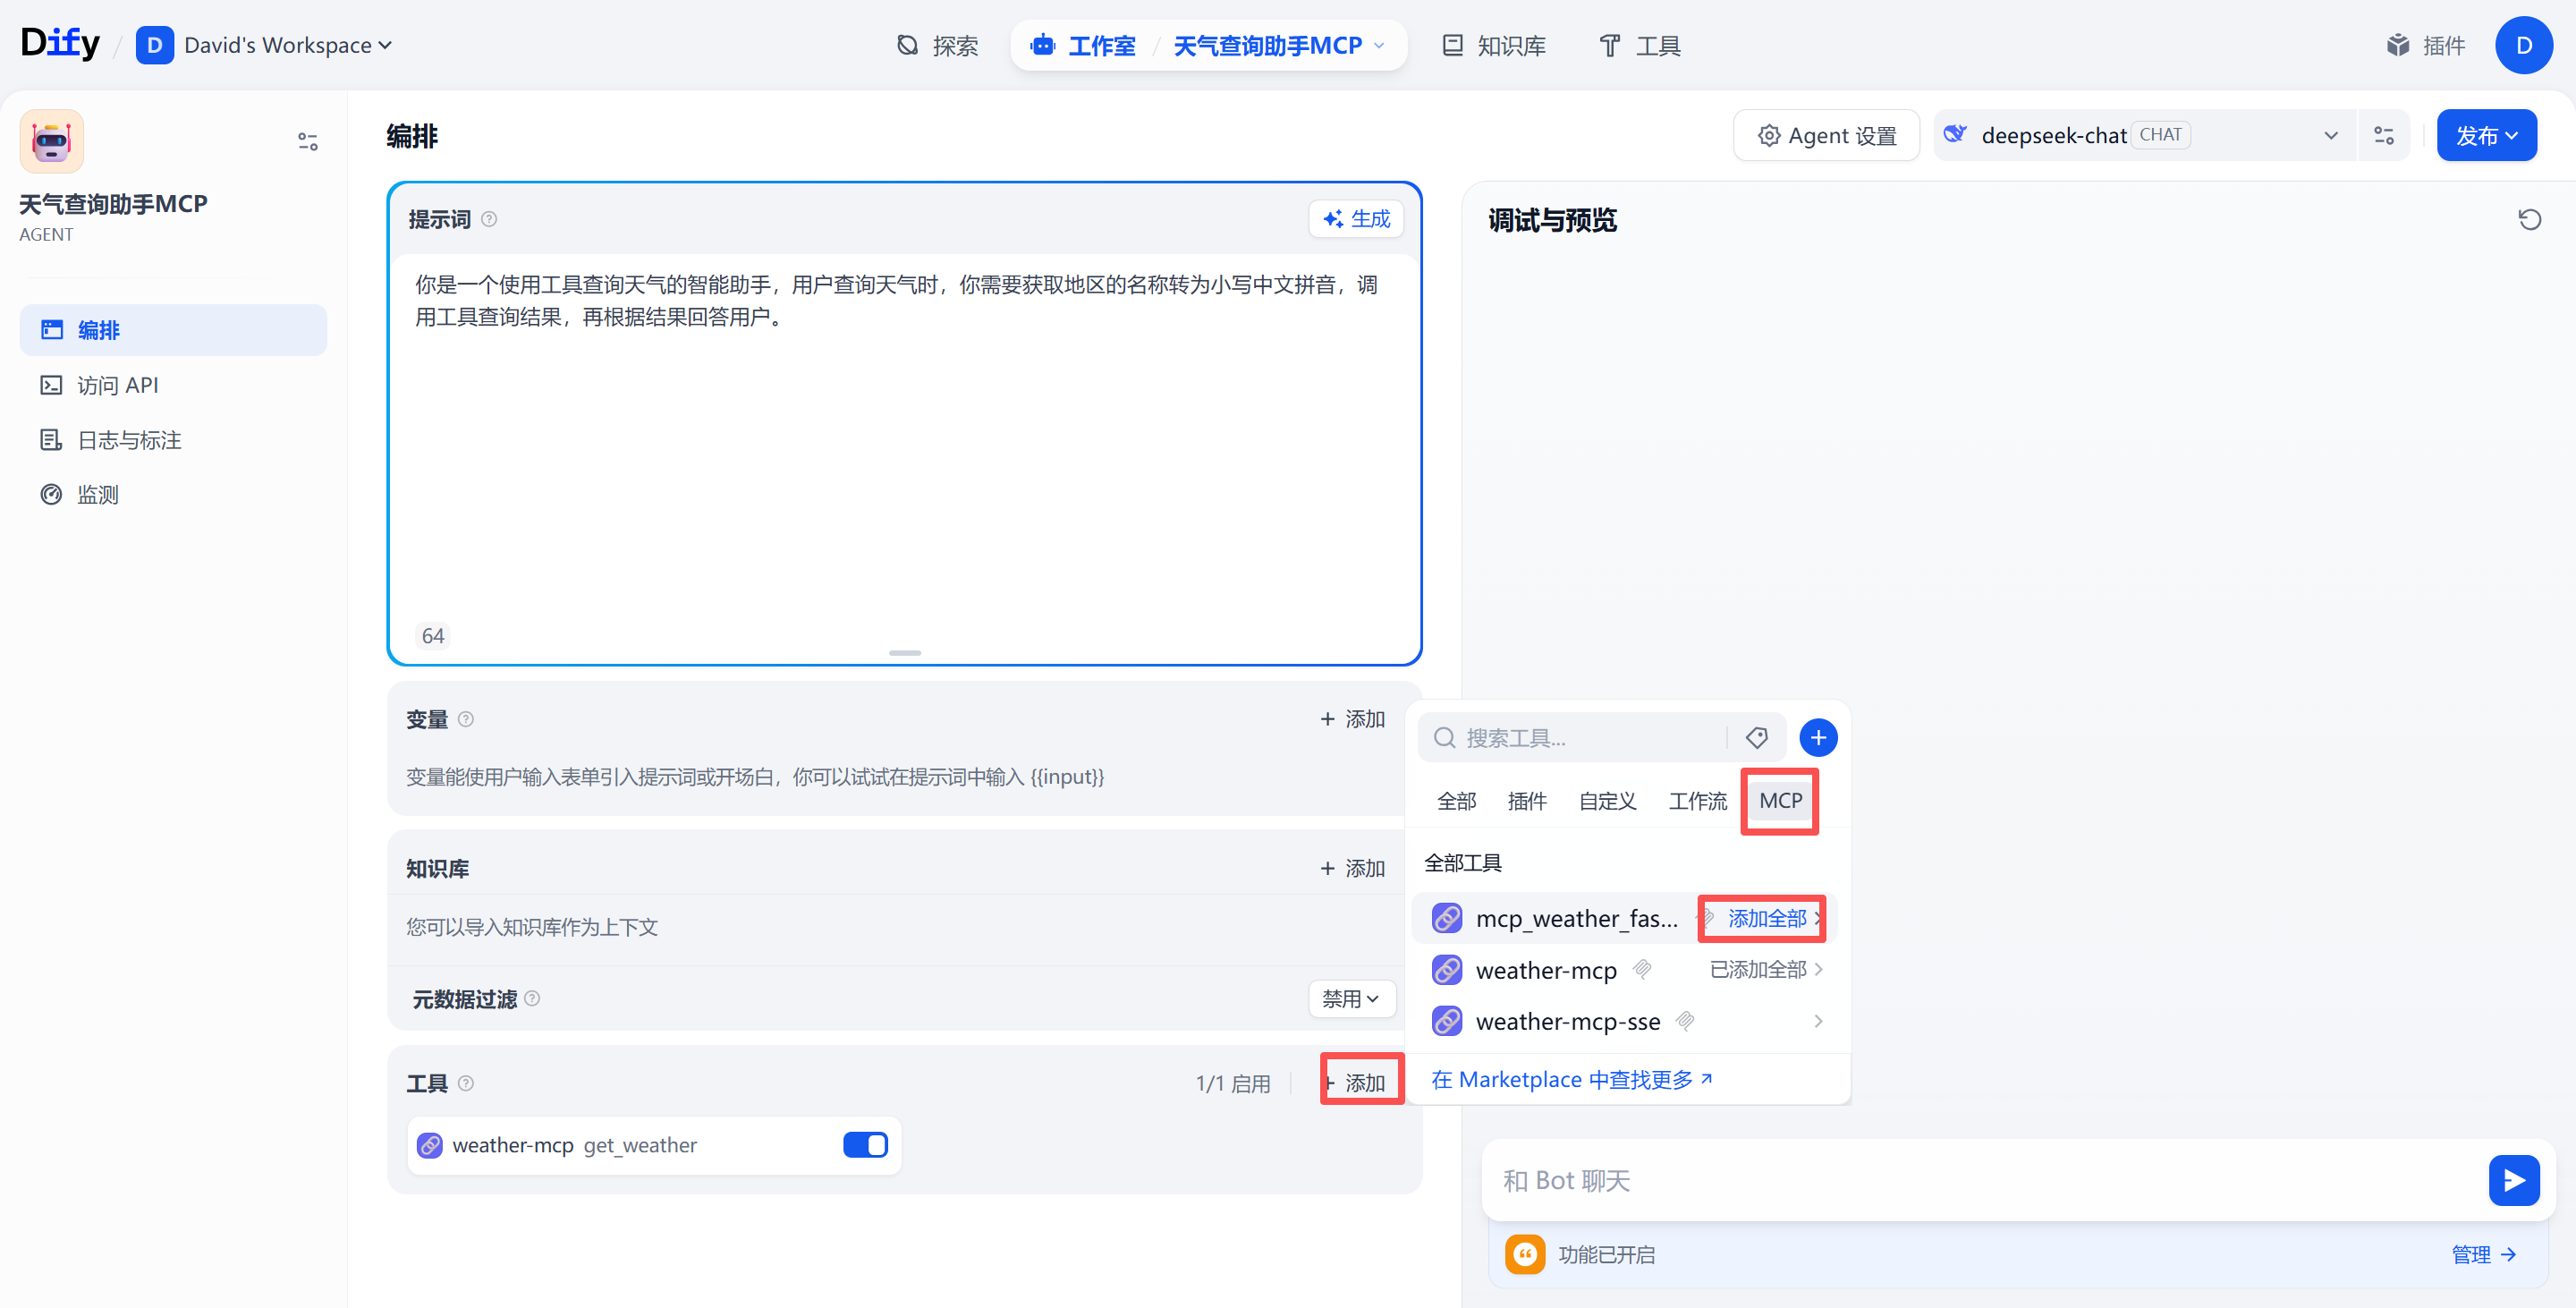
然后配置提示词和工具MCP
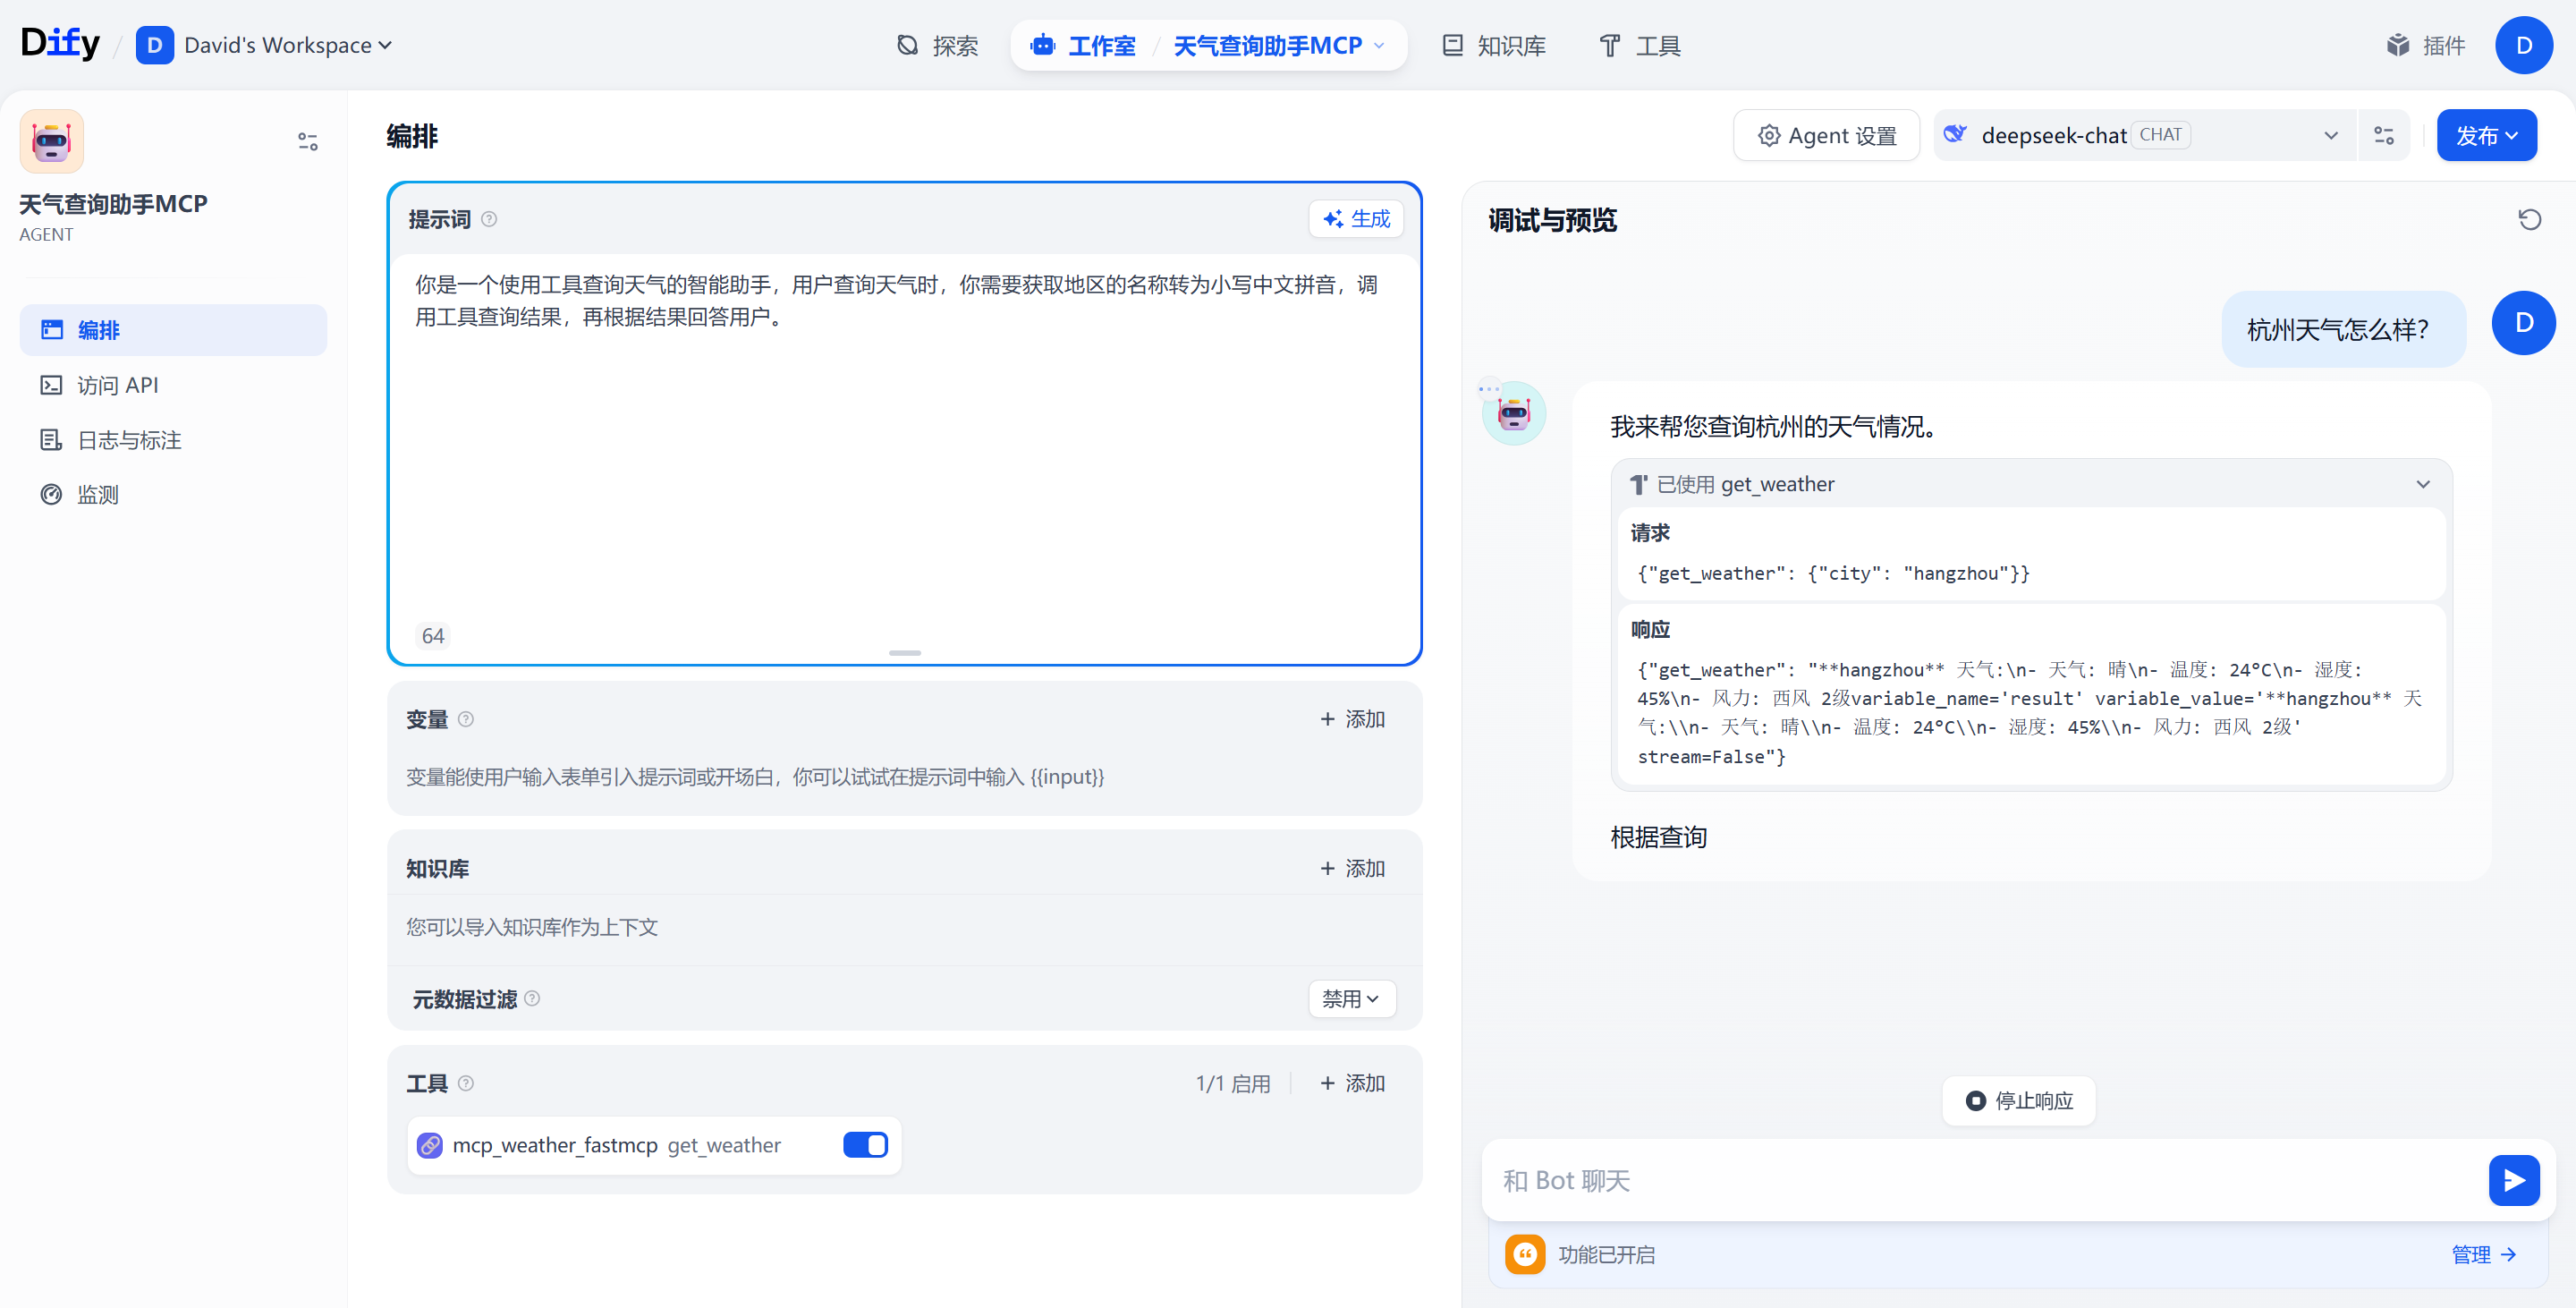
测试结果
| 传统方式 | MCP 方案 |
|---|---|
| 每个数据库独立开发接口 | 统一协议即插即用 |
| 需要预定义所有查询方式 | 支持动态发现新工具 |
| 单向数据请求 | 双向实时通信 |
| 分散的安全策略 | 统一权限控制体系 |

小龙虾开发者社区是 CSDN 旗下专注 OpenClaw 生态的官方阵地,聚焦技能开发、插件实践与部署教程,为开发者提供可直接落地的方案、工具与交流平台,助力高效构建与落地 AI 应用
更多推荐



 0
0 0
0- 0


 已为社区贡献2条内容

所有评论(0)