
OpenClaw+feishu实现手机飞书软件访问电脑端环境配置
Openclaw环境配置(Windows 11)
·
一、Windows环境配置(Ubuntu)
1、下载虚拟机APP
	https://www.microsoft.com/store/productId/9PDXGNCFSCZV,选择 Retail,下载 .appx 文件

2、ubuntu下创建用户账户和密码

3、验证安装环境
	sudo apt update
	uname -a
	ls -l /mnt/c/		#Windows C 盘对应 Linux 中的 /mnt/c

4、从 Windows 访问 Linux 文件
	在文件资源管理器地址栏输入:\\wsl$\Ubuntu\home\你的用户名
	直接点击「网络」→「wsl$」→「Ubuntu」
二、Ubuntu 部署 OpenClaw
1、更新系统并安装基础工具
sudo apt update && sudo apt upgrade -y
sudo apt install -y curl git build-essential
2、安装 Node.js 22.x(推荐 LTS 版本)
curl -fsSL https://deb.nodesource.com/setup_22.x | sudo -E bash -
sudo apt install -y nodejs
3、全局安装 OpenClaw
npm install -g openclaw
4、 创建工作区并初始化
mkdir -p ~/openclaw-workspace
cd ~/openclaw-workspace
openclaw init
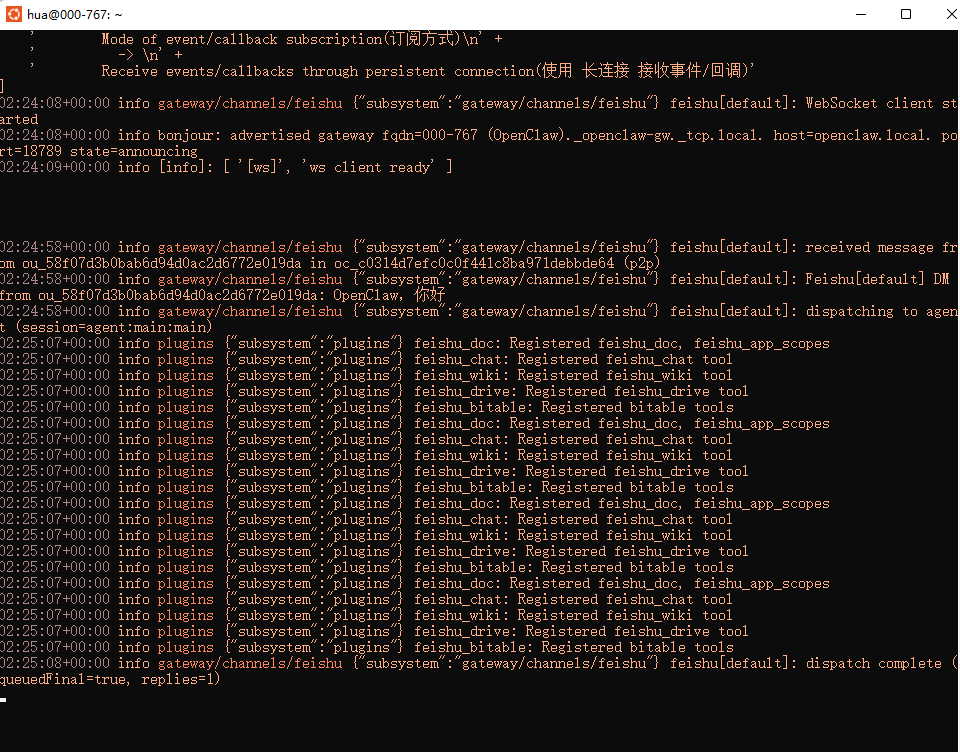
5、启动网关并验证
openclaw gateway start
Gateway listening on http://localhost:18789 #Windows访问 http://localhost:18789,出现异常
openclaw config set gateway.bindMode lan #设置网关绑定模式为 lan(监听所有网络接口)
systemctl --user restart openclaw-gateway.service #http://xxx.xxx.xxx.xxx:18789,访问正常
三、飞书侧网页配置
1、访问 飞书开放平台 https://open.feishu.cn/app,使用飞书扫码登录

2、点击「创建企业自建应用」,填写名称和描述,选择图标后创建

3、在左侧菜单「凭证与基础信息」中,复制保存:App ID(格式如 cli_xxx)和App Secret

4、左侧菜单点击「添加应用能力」→ 选择「机器人」→ 添加

5、2.4 配置权限(批量导入)

6、进入「权限管理」→ 点击「批量导入/导出权限」→ 粘贴以下 JSON 配置:
	json
	{
	  "scopes": {
	    "tenant": [
	      "aily:file:read",
	      "aily:file:write",
	      "application:application.app_message_stats.overview:readonly",
	      "application:application:self_manage",
	      "application:bot.menu:write",
	      "cardkit:card:write",
	      "contact:user.employee_id:readonly",
	      "corehr:file:download",
	      "docs:document.content:read",
	      "event:ip_list",
	      "im:chat",
	      "im:chat.access_event.bot_p2p_chat:read",
	      "im:chat.members:bot_access",
	      "im:message",
	      "im:message.group_at_msg:readonly",
	      "im:message.group_msg",
	      "im:message.p2p_msg:readonly",
	      "im:message:readonly",
	      "im:message:send_as_bot",
	      "im:resource",
	      "sheets:spreadsheet",
	      "wiki:wiki:readonly"
	    ],
	    "user": [
	      "aily:file:read",
	      "aily:file:write",
	      "im:chat.access_event.bot_p2p_chat:read"
	    ]
	  }
	}

7、配置事件订阅:进入「事件与回调」→ 订阅方式选择「使用长连接接收事件」→ 保存
	点击「添加事件」→ 搜索 im.message.receive_v1(接收消息)→ 确认添加

8、点击 添加权限,搜索 contact,勾选以下权限之一(推荐第一个):
	contact:contact.base:readonly — 获取用户基本信息(头像、昵称等)
	或 contact:contact:readonly(如果找不到基础版,就选这个)
	确认添加后,点击 批量开通 或 保存

8、发布应用:进入「版本管理与发布」→ 创建版本 → 填写版本号(如 1.0.0)→ 保存并提交审核(企业自建应用通常自动通过)
四、OpenClaw 侧配置
1、安装飞书插件
	openclaw plugins install @openclaw/feishu
2、配置飞书频道
	openclaw channels add
	openclaw configure ->model->feishu

	按提示操作:
	是否配置聊天渠道?→ Yes
	选择渠道类型 → Feishu
	输入 App ID → 粘贴你的 App ID
	输入 App Secret → 粘贴你的 App Secret
	飞书域名 → 选择 China(国内用户)
	群聊策略 → 可选 Open(开放)或 Allowlist(白名单)
	私聊策略 → 可选 Open 或 Pairing(配对模式,更安全)

3、 重启网关使配置生效
	openclaw gateway restart

4、检查连接状态
	openclaw gateway status
	openclaw logs --follow

5、安装飞书插件
	openclaw plugins install @openclaw/feishu
	npm install -g @openclaw/feishu
	sudo npm install -g @openclaw/feishu
	mkdir -p ~/.openclaw/plugins		# 创建用户插件目录
	cp -r /usr/lib/node_modules/@openclaw/feishu ~/.openclaw/plugins/
	openclaw gateway restart
	openclaw plugins list
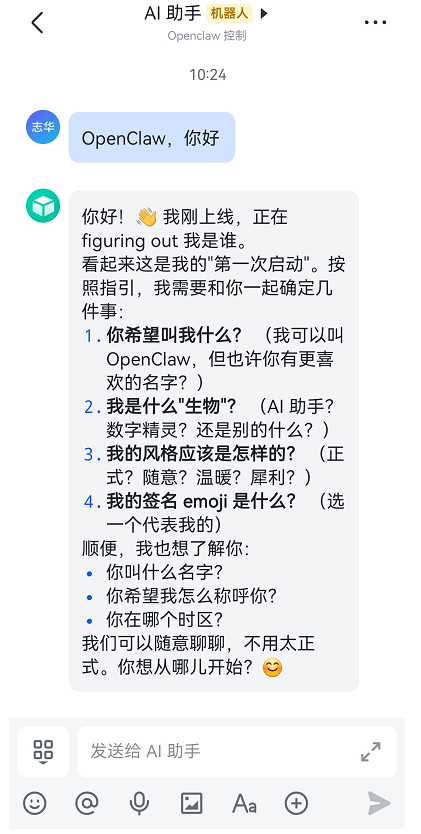
五、完成配对
1、在飞书中找到机器人应用,发送任意消息(如 Hello)

2、机器人会回复一个配对码(如 123456)

3、Ubuntu 终端执行配对命令
	openclaw pairing approve feishu 123456
六、使用阿里云千问(Qwen)免费额度
1、注册/登录 阿里云官网,开通 灵积模型服务(DashScope)。
2、获取 API Key:进入控制台 → API-KEY 管理 → 创建 API Key。
3、配置 OpenClaw:
	openclaw config set agent.model "qwen-max"
	openclaw config set agent.model.provider "alibaba"
	openclaw config set agent.model.apiKey "sk-xxxxxxxxxxxxxxxxx"
	openclaw gateway restart
花了几个小时配置环境,下一步学习Openclaw通讯解析原理和skill编写

小龙虾开发者社区是 CSDN 旗下专注 OpenClaw 生态的官方阵地,聚焦技能开发、插件实践与部署教程,为开发者提供可直接落地的方案、工具与交流平台,助力高效构建与落地 AI 应用
更多推荐

 0
0 0
0- 0


 已为社区贡献1条内容

所有评论(0)