你有没有遇到过以下问题?
内容产出成本高
社区从0到1的创建时,没有产出垂类技术内容的创作者和冷启动流量,研发和内容成本巨高不下。
无法持续获取流量
内容体系搭建周期长,没有办法配备对应的安全审核团队、强大的SEO和内容分发体系。
用户增长规模受限
花了大量时间和精力完成了社区搭建,但无法提高社区影响力,触达和影响开发者与决策层。
自动化运营,聚焦增长

DevPress为您提供一站式服务,冷启动流量
连接海量技术内容与创作者,强大的SEO与CSDN流量分发 ,7*24小时内容安全审核服务
连接海量技术内容与创作者,强大的SEO与CSDN流量分发 ,7*24小时内容安全审核服务
只需要三步
帮你快速触达和影响开发者与决策层
帮你快速触达和影响开发者与决策层
第一步:快速构建社区
只需要您提供社区的想法与方向,快速搭建理想社区。


第二步:构建社区生态
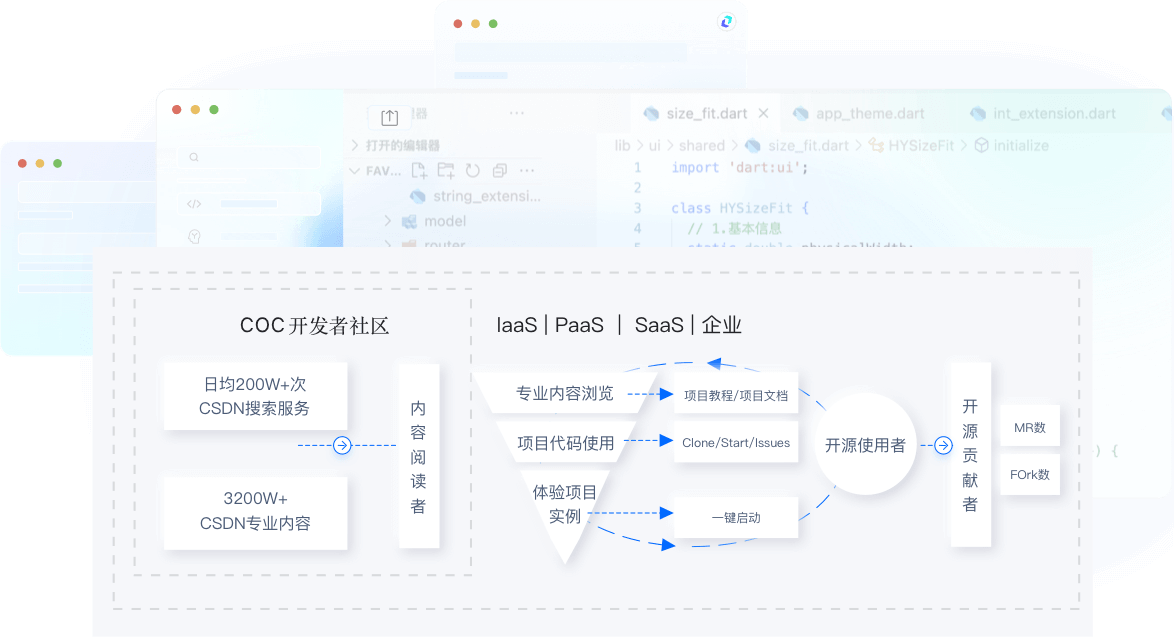
高效触达内容创作者与开发者,覆盖从开发者到企业的全场景全生命周期生态场景。
第三步:奔赴目标
精准分发社区流量,提高个路径转化率,达成业务目标。

解决方案
技术产品支持
基于用户画像分发,扩大产品的影响力度,让更多用户关注/下载/试用等
社区影响力
通过内容、专家布道、直播、沙龙等内容沉底,源源不断的触达开发者,提升社区影响力
开发者生态运营
打通CSDN社区与社区的内容、产品、活动等,覆盖从开发者到企业的全场景全生命周期生态场景
客户支持
Devpress拥有专业的客户成功和实施团队,为客户提供产品服务,让客户在构建社区过程中遇到任何问题都会获取帮助。
最佳实践
Devpress整合CSDN社区的内容、用户、流量、运营等优势,围绕各产品线对应社区建设的各个发展阶段,提供社区产品、内容构建、联合运营、和开发者用户等一站式服务,助力企业高效构建开发者社区推广技术。
华为开发者空间
华为开发者空间,是为全球开发者打造的专属开发空间,汇聚了华为优质开发资源及工具,致力于让每一位开发者拥有一台云主机,基于华为根生态开发、创新。
4475509成员
https://huaweicloud.csdn.net开放原子开发者工作坊
开放原子开发者工作坊旨在鼓励更多人参与开源活动,与志同道合的开发者们相互交流开发经验、分享开发心得、获取前沿技术趋势。工作坊有多种形式的开发者活动,如meetup、训练营等,主打技术交流,干货满满,真诚地邀请各位开发者共同参与!
608475成员
https://openatomworkshop.csdn.netViewDesign
基于 Vue.js 3 的企业级 UI 组件库和中后台系统解决方案,为数万开发者服务。
407021成员
https://devpress.csdn.net/view-design松山湖开发者村综合服务平台
助力广东及东莞地区开发者,代码托管、在线学习与竞赛、技术交流与分享、资源共享、职业发展,成为松山湖开发者首选的工作与学习平台
80357成员
https://community.sslcode.com.cnModelScope魔搭社区
ModelScope旨在打造下一代开源的模型即服务共享平台,为泛AI开发者提供灵活、易用、低成本的一站式模型服务产品,让模型应用更简单。
67073成员
https://community.modelscope.cnCSDN开发云
本社区面向用户介绍CSDN开发云部门内部产品使用和产品迭代功能,产品功能迭代和产品建议更透明和便捷
57930成员
https://devpress.csdn.net/devcloud永洪数据分析社区
永洪科技,致力于打造全球领先的数据技术厂商,具备从数据应用方案咨询、BI、AIGC智能分析、数字孪生、数据资产、数据治理、数据实施的端到端大数据价值服务能力。
43953成员
https://yonghongtech.csdn.netAuthing身份云
Authing 是一款以开发者为中心的全场景身份云产品,集成了所有主流身份认证协议,为企业和开发者提供完善安全的用户认证和访问管理服务
25027成员
https://authing.csdn.net龙蜥社区
龙蜥社区(OpenAnolis)成立于 2020 年 9 月,是由阿里云、统信软件等 24 家国内外头部企业联合建立的操作系统开源社区,到目前超800家合作伙伴参与共建,是国内领先的操作系统开源社区,具备较为领先的产业和技术影响力。加入我们,一起打造面向云时代的开源操作系统。
21013成员
https://community.openanolis.cn中科创新烁智
中科创新烁智旗下专注于学术科研、教学指导的科技创新社区,致力于为科研人员提供全方位高效便捷的科研解决方案。 社区秉承“科技赋能科研,创新引领未来”的理念,助力科研人员突破瓶颈,攀登学术高峰,让科研之路不再迷茫。
3388成员
https://devpress.csdn.net/cscitech华为开发者空间
华为开发者空间,是为全球开发者打造的专属开发空间,汇聚了华为优质开发资源及工具,致力于让每一位开发者拥有一台云主机,基于华为根生态开发、创新。
4475509成员
https://huaweicloud.csdn.net开放原子开发者工作坊
开放原子开发者工作坊旨在鼓励更多人参与开源活动,与志同道合的开发者们相互交流开发经验、分享开发心得、获取前沿技术趋势。工作坊有多种形式的开发者活动,如meetup、训练营等,主打技术交流,干货满满,真诚地邀请各位开发者共同参与!
608475成员
https://openatomworkshop.csdn.netViewDesign
基于 Vue.js 3 的企业级 UI 组件库和中后台系统解决方案,为数万开发者服务。
407021成员
https://devpress.csdn.net/view-design松山湖开发者村综合服务平台
助力广东及东莞地区开发者,代码托管、在线学习与竞赛、技术交流与分享、资源共享、职业发展,成为松山湖开发者首选的工作与学习平台
80357成员
https://community.sslcode.com.cnModelScope魔搭社区
ModelScope旨在打造下一代开源的模型即服务共享平台,为泛AI开发者提供灵活、易用、低成本的一站式模型服务产品,让模型应用更简单。
67073成员
https://community.modelscope.cnCSDN开发云
本社区面向用户介绍CSDN开发云部门内部产品使用和产品迭代功能,产品功能迭代和产品建议更透明和便捷
57930成员
https://devpress.csdn.net/devcloud永洪数据分析社区
永洪科技,致力于打造全球领先的数据技术厂商,具备从数据应用方案咨询、BI、AIGC智能分析、数字孪生、数据资产、数据治理、数据实施的端到端大数据价值服务能力。
43953成员
https://yonghongtech.csdn.netAuthing身份云
Authing 是一款以开发者为中心的全场景身份云产品,集成了所有主流身份认证协议,为企业和开发者提供完善安全的用户认证和访问管理服务
25027成员
https://authing.csdn.net龙蜥社区
龙蜥社区(OpenAnolis)成立于 2020 年 9 月,是由阿里云、统信软件等 24 家国内外头部企业联合建立的操作系统开源社区,到目前超800家合作伙伴参与共建,是国内领先的操作系统开源社区,具备较为领先的产业和技术影响力。加入我们,一起打造面向云时代的开源操作系统。
21013成员
https://community.openanolis.cn中科创新烁智
中科创新烁智旗下专注于学术科研、教学指导的科技创新社区,致力于为科研人员提供全方位高效便捷的科研解决方案。 社区秉承“科技赋能科研,创新引领未来”的理念,助力科研人员突破瓶颈,攀登学术高峰,让科研之路不再迷茫。
3388成员
https://devpress.csdn.net/cscitech申请加入
申请演示
立即开始免费试用
Devpress整合CSDN社区的内容、用户、流量、运营等优势,围绕各产品线对应社区建设的各个发展阶段,提供社区产品、内容构建、联合运营、和开发者用户等一站式服务,助力企业高效构建开发者社区推广技术。
申请加入
更多服务
线上/线下活动推广
提升品牌形象:将企业品牌推广给更多潜在客户,提高市场曝光度和提升客户信任。
增进客户关系:线下活动可实现与客户面对面交流,增进客户关系,提高客户满意度。
拓展合作伙伴:通过活动,建立新的合作关系,拓展业务合作渠道。
实现销售目标:分析活动数据,提高营销效率,有效推动产品销售,达成销售目标。
增进客户关系:线下活动可实现与客户面对面交流,增进客户关系,提高客户满意度。
拓展合作伙伴:通过活动,建立新的合作关系,拓展业务合作渠道。
实现销售目标:分析活动数据,提高营销效率,有效推动产品销售,达成销售目标。
立即申请
Leads 收集
拓展客户群体:通过收集潜在客户信息,拓展客户群体,提高市场份额。
提高转化率:对收集到的 Leads 进行有效跟进,提高潜在客户转化为实际客户的概率。
市场调查:分析 Leads 数据,了解市场需求,为产品研发和市场策略提供参考。
客户维护:通过对 Leads 进行有效维护,提高客户满意度和忠诚度。
提高转化率:对收集到的 Leads 进行有效跟进,提高潜在客户转化为实际客户的概率。
市场调查:分析 Leads 数据,了解市场需求,为产品研发和市场策略提供参考。
客户维护:通过对 Leads 进行有效维护,提高客户满意度和忠诚度。
立即申请
社区用户增长
增加品牌曝光:社区用户的增长意味着更多的曝光机会,提升品牌知名度。
增强企业影响力:拥有庞大用户群体的社区将提升企业在行业内的影响力和地位。
创新产品反馈:社区用户可为企业提供宝贵的产品反馈和建议,促进产品创新。
降低获客成本:社区的口碑传播将降低获客成本,提高营销效益。
增强企业影响力:拥有庞大用户群体的社区将提升企业在行业内的影响力和地位。
创新产品反馈:社区用户可为企业提供宝贵的产品反馈和建议,促进产品创新。
降低获客成本:社区的口碑传播将降低获客成本,提高营销效益。
立即申请
线上线下培训认证
提升技能水平:采用多种教学方式,获取最新的知识和技术,提升个人技能水平和职业竞争力。
获得认证证书:完成培训并通过考核后,可获得认证证书,有助于增加求职和职场晋升过程中的竞争优势。
拓宽职业发展道路:帮助客户在职业发展道路上拓展更多选择,从而实现更好的职业规划。
企业人才提升:提升员工的技能水平,增强企业的核心竞争力,促进企业发展。
获得认证证书:完成培训并通过考核后,可获得认证证书,有助于增加求职和职场晋升过程中的竞争优势。
拓宽职业发展道路:帮助客户在职业发展道路上拓展更多选择,从而实现更好的职业规划。
企业人才提升:提升员工的技能水平,增强企业的核心竞争力,促进企业发展。
立即申请


