
Ehcache详解(转载)
Ehcache 是一种基于标准的开源缓存,可提高性能,卸载数据库并简化可伸缩性。它是使用最广泛的基于 Java 的缓存,因为它功能强大,经过验证,功能齐全,并与其他流行的库和框架集成。
基本介绍:Ehcache 是一种基于标准的开源缓存,可提高性能,卸载数据库并简化可伸缩性。
它是使用最广泛的基于 Java 的缓存,因为它功能强大,经过验证,功能齐全,并与其他流行的库和框架集成。
Ehcache 可以从进程内缓存扩展到使用 TB 级缓存的混合进程内/进程外部署。
Ehcache 应用场景如下图:

Ehcache 应用场景
的架构如下图:

Ehcache 架构图
Ehcache 的主要特征如下图:
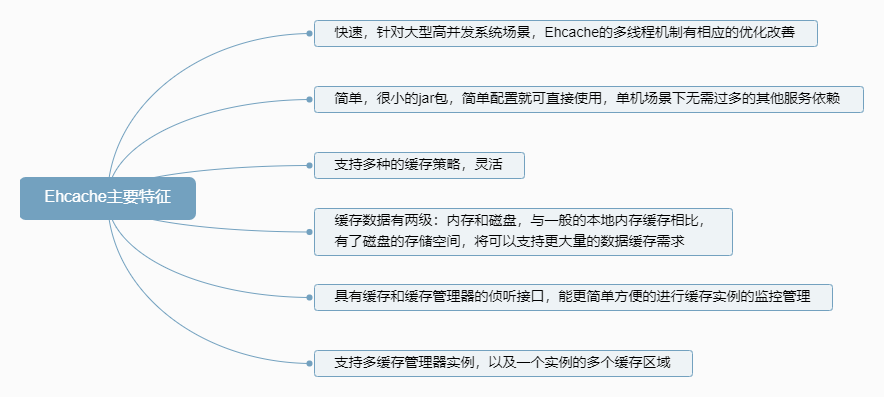
Ehcache 主要特征
Ehcache 缓存数据过期策略如下图:

缓存数据过期策略
Ehcache 过期数据淘汰机制:即懒淘汰机制,每次往缓存放入数据的时候,都会存一个时间,在读取的时候要和设置的时间做 TTL 比较来判断是否过期
基本介绍
- EhCache 是一个纯Java的进程内缓存框架,具有快速、精干等特点,是Hibernate中默认CacheProvider。Ehcache是一种广泛使用的开源Java分布式缓存。主要面向通用缓存,Java EE和轻量级容器。它具有内存和磁盘存储,缓存加载器,缓存扩展,缓存异常处理程序,一个gzip缓存servlet过滤器,支持REST和SOAP api等特点。
- Spring 提供了对缓存功能的抽象:即允许绑定不同的缓存解决方案(如Ehcache),但本身不直接提供缓存功能的实现。它支持注解方式使用缓存,非常方便。
主要的特性
- 快速
- 简单
- 多种缓存策略
- 缓存数据有两级:内存和磁盘,因此无需担心容量问题
- 缓存数据会在虚拟机重启的过程中写入磁盘
- 可以通过RMI、可插入API等方式进行分布式缓存
- 具有缓存和缓存管理器的侦听接口
- 支持多缓存管理器实例,以及一个实例的多个缓存区域
- 提供Hibernate的缓存实现
- 可以单独使用,一般在第三方库中被用到的比较多(如mybatis、shiro等)ehcache 对分布式支持不够好,多个节点不能同步,通常和redis一块使用
ehcache 和 redis 比较
- ehcache直接在jvm虚拟机中缓存,速度快,效率高;但是缓存共享麻烦,集群分布式应用不方便。
- redis是通过socket访问到缓存服务,效率比Ehcache低,比数据库要快很多,处理集群和分布式缓存方便,有成熟的方案。如果是单个应用或者对缓存访问要求很高的应用,用ehcache。如果是大型系统,存在缓存共享、分布式部署、缓存内容很大的,建议用redis。
ehcache也有缓存共享方案,不过是通过RMI或者Jgroup多播方式进行广播缓存通知更新,缓存共享复杂,维护不方便;简单的共享可以,但是涉及到缓存恢复,大数据缓存,则不合适。
ehcache 2
在pom.xml中引入依赖
    <dependency>
        <groupId>net.sf.ehcache</groupId>
        <artifactId>ehcache</artifactId>
        <version>2.10.2</version>
    </dependency>
xml配置
- 在src/main/resources/创建一个配置文件 ehcache.xml
默认情况下Ehcache会自动加载classpath根目录下名为ehcache.xml文件,也可以将该文件放到其他地方在使用时指定文件的位置
diskStore : ehcache支持内存和磁盘两种存储
path :指定磁盘存储的位置
defaultCache : 默认的缓存
maxEntriesLocalHeap=“10000”
eternal=“false”
timeToIdleSeconds=“120”
timeToLiveSeconds=“120”
maxEntriesLocalDisk=“10000000”
diskExpiryThreadIntervalSeconds=“120”
memoryStoreEvictionPolicy=“LRU”

cache :自定的缓存,当自定的配置不满足实际情况时可以通过自定义(可以包含多个cache节点)
name : 缓存的名称,可以通过指定名称获取指定的某个Cache对象
maxElementsInMemory :内存中允许存储的最大的元素个数,0代表无限个
clearOnFlush:内存数量最大时是否清除。
eternal :设置缓存中对象是否为永久的,如果是,超时设置将被忽略,对象从不过期。根据存储数据的不同,例如一些静态不变的数据如省市区等可以设置为永不过时
timeToIdleSeconds : 设置对象在失效前的允许闲置时间(单位:秒)。仅当eternal=false对象不是永久有效时使用,可选属性,默认值是0,也就是可闲置时间无穷大。
timeToLiveSeconds :缓存数据的生存时间(TTL),也就是一个元素从构建到消亡的最大时间间隔值,这只能在元素不是永久驻留时有效,如果该值是0就意味着元素可以停顿无穷长的时间。
overflowToDisk :内存不足时,是否启用磁盘缓存。
maxEntriesLocalDisk:当内存中对象数量达到maxElementsInMemory时,Ehcache将会对象写到磁盘中。
maxElementsOnDisk:硬盘最大缓存个数。
diskSpoolBufferSizeMB:这个参数设置DiskStore(磁盘缓存)的缓存区大小。默认是30MB。每个Cache都应该有自己的一个缓冲区。
diskPersistent:是否在VM重启时存储硬盘的缓存数据。默认值是false。
diskExpiryThreadIntervalSeconds:磁盘失效线程运行时间间隔,默认是120秒。
java内配置
Cache cache = manager.getCache("mycache");
CacheConfiguration config = cache.getCacheConfiguration();
config.setTimeToIdleSeconds(60);
config.setTimeToLiveSeconds(120);
config.setmaxEntriesLocalHeap(10000);
config.setmaxEntriesLocalDisk(1000000);
ehcache3
Ehcache 目前提供四层模型,支持四种级别:
- heap
- off-heap
- disk
- clustered
之前的版本是2级缓存,内存和磁盘,新版增加了更灵活的一级,堆外缓存(off-heap),这既是独立的进程缓存,还是JVM堆外的系统缓存 .
提供线程池、事务、管理器等,并支持扩展和监听事件,提供了disk持久化以及clustered持久化。
Ehcache3支持堆、堆外、磁盘以及集群缓存;但是除了堆之外外的三种缓存,缓存的键值对必须支持序列化和反序列化。
我们在使用的时候,可以单独使用任意一个,比如:
- heap:堆缓存,受到jvm的管控,可以不序列化,速度最快;默认使用的是引用传递,也可以使用复制器来进行值传递。可以设置缓存条数或者缓存的大小来进行堆缓存大小的设置。尽量不要设置的过大,否则容易引起GC.(如果设置缓存的大小,则计算比较麻烦,同时又多了一个计算缓存大小的过程)。
- off-heap:堆外缓存,不受jvm的管控,受到RAM的限制,在ehcache中配置,至少1M。通过-XX:MaxDirectMemorySize限制ehcache可分配的最大堆外内存,但是实际使用发现,不配置也能使用。如果不配置,使用堆外缓存时,ehcache将会使用jvm的内存,最大值为堆内存,但实际比-Xmx要小,可以通过Runtime,getRuntime().maxMemory()获取。因此,对于堆内对垃圾收集的影响过于严重的大量数据,应该选择堆外。
- disk:磁盘存储,尽量使用高性能的SSD。这一层的存储,不能在不同的CacheManager之间共享!
- clustered:群集存储-该数据存储是远程服务器上的缓存
层组合
如果要使用多个层,则必须遵守一些约束条件:
- 必须始终有堆内存
- disk和clusterd不能同时存在
- 层的大小应采用金字塔式的大小,即,金字塔较高的层配置为使用的内存比下方较低的层少。
根据规则可能出现的层组合
- heap + offheap
- heap + offheap + disk
- heap + offheap + clustered
- heap + disk
- heap + clustered
多层组合put/get的顺序
- 将值放入高速缓存时,它会直接进入最低层,比如heap + offheap + disk直接会存储在disk层。
- 当获取一个值,从最高层获取,如果没有继续向下一层获取,一旦获取到,会向上层推送,同时上层存储该值。
访问模式
Ehcache支持以下几种模式:
- Cache-aside
- Cache-as-SoR
- Read-through
- Write-through
- Write-behind
在pom.xml中引入依赖
<!-- cache 的实现 -->
<dependency>
    <groupId>org.ehcache</groupId>
    <artifactId>ehcache</artifactId>
    <version>3.9.0</version>
</dependency>
<!-- cache 的接口 -->
<dependency>
    <groupId>javax.cache</groupId>
    <artifactId>cache-api</artifactId>
</dependency>
java内配置
CacheManager cacheManager = CacheManagerBuilder.newCacheManagerBuilder()
    .withCache("preConfigured",
        CacheConfigurationBuilder.newCacheConfigurationBuilder(Long.class, String.class, ResourcePoolsBuilder.newResourcePoolsBuilder()
                                .heap(10, EntryUnit.ENTRIES)
                                .offheap(1, MemoryUnit.MB)
                                .disk(20, MemoryUnit.MB, true)))
    .build();
cacheManager.init();
Cache<Long, String> preConfigured =
    cacheManager.getCache("preConfigured", Long.class, String.class);
Cache<Long, String> myCache = cacheManager.createCache("myCache",
    CacheConfigurationBuilder.newCacheConfigurationBuilder(Long.class, String.class, ResourcePoolsBuilder.heap(10)));
myCache.put(1L, "da one!");
String value = myCache.get(1L);
cacheManager.removeCache("preConfigured");
cacheManager.close();
- CacheManagerBuilder.newCacheManagerBuilder返回一个CacheManagerBuilder实例
- CacheConfigurationBuilder.newCacheConfigurationBuilder 返回一个CacheConfigurationBuilder实例用于创建CacheConfiguration
- ResourcePoolsBuilder.newResourcePoolsBuilder返回一个ResourcePoolsBuilder实例用于缓存使用可分组,disk持久层设置为true存储到磁盘
- 在使用CacheManager,需要对其进行初始化,可以通过2种方式之一进行初始化:CacheManager.init(),或者在CacheManagerBuilder.build(boolean init)
- cacheManager.close()释放所有的临时资源
xml配置
<config
    xmlns:xsi='http://www.w3.org/2001/XMLSchema-instance'
    xmlns='http://www.ehcache.org/v3'
    xsi:schemaLocation="http://www.ehcache.org/v3 http://www.ehcache.org/schema/ehcache-core.xsd">
  <cache alias="foo"> //1
    <key-type>java.lang.String</key-type> //2
    <value-type>java.lang.String</value-type> //2
    <resources>
      <heap unit="entries">20</heap> //3
      <offheap unit="MB">10</offheap> //4
    </resources>
  </cache>
  <cache-template name="myDefaults"> //5
    <key-type>java.lang.Long</key-type>
    <value-type>java.lang.String</value-type>
    <heap unit="entries">200</heap>
  </cache-template>
  <cache alias="bar" uses-template="myDefaults"> //6
    <key-type>java.lang.Number</key-type>
  </cache>
  <cache alias="simpleCache" uses-template="myDefaults" /> //7
</config>
- 给Cache别名为foo。
- foo的key,value的type定义为String;如果没有特别定义,默认是java.lang.Object。
- foo最多在堆中有2000个entry。
- 最多500MB的堆外内存。
- <cache-template>可以让你创建一个abstract配置并以后extend它。
- 命名为bar的缓存用到了命名为myDefaults的并override它的key-type到java.lang.Number。
- 命名为simpleCache的缓存用myDefaults来作为它的缓存配置。
为了解析一个XML配置,你可以用XmlConfiguration:
URL myUrl = getClass().getResource("/my-config.xml"); //1
Configuration xmlConfig = new XmlConfiguration(myUrl); //2
CacheManager myCacheManager = CacheManagerBuilder.newCacheManager(xmlConfig); //3
- 添加XML路径。
- 实例化XMLConfiguration。
- 用静态方法org.ehcache.config.builders.CacheManagerBuilder.newCacheManager(org.ehcache.config.Configuration)创建CacheManager实例。
集群方案下创建cache manager
为了支持Terracotta集群方案,需要先启动start the Terracotta server。此外,为了创建集群方案的cache manager,亦需要提供集群服务的配置:
CacheManagerBuilder<PersistentCacheManager> clusteredCacheManagerBuilder =
    CacheManagerBuilder.newCacheManagerBuilder()
        .with(ClusteringServiceConfigurationBuilder.cluster(URI.create("terracotta://localhost/my-application"))
            .autoCreate(c -> c));
PersistentCacheManager cacheManager = clusteredCacheManagerBuilder.build(true);

cacheManager.close();

1. 返回org.ehcache.config.builders.CacheManagerBuilder实例。
2. 用静态方法ClusteringServiceConfigurationBuilder.cluster(URI)来连接对应URI的集群。例子中的URI指向identifier为my-application的集群(默认端口号9410);auto-create会在server中的集群不存在时创建。
3. 返回一个完全初始化的cache manager。
4. 集群没有时会自动创建。
5. 关闭cache manager。
Storage Tiers存储层级
- Ehcache可以在数据越来越大时,存储到相对较慢的层级中。
- 因为快速的存储资源相对稀有,所以hottest的资源会存在这里。因此那些较少用到的data会被移动到较慢但存储容量更大的层级中。更频繁用到的数据会移动到更快的层级中。
经典的3层级带硬盘存储的方案:
PersistentCacheManager persistentCacheManager = CacheManagerBuilder.newCacheManagerBuilder()
    .with(CacheManagerBuilder.persistence(new File(getStoragePath(), "myData"))) //1
    .withCache("threeTieredCache",
        CacheConfigurationBuilder.newCacheConfigurationBuilder(Long.class, String.class,
            ResourcePoolsBuilder.newResourcePoolsBuilder()
                .heap(10, EntryUnit.ENTRIES) //2
                .offheap(1, MemoryUnit.MB) //3
                .disk(20, MemoryUnit.MB, true) //4
            )
    ).build(true);

Cache<Long, String> threeTieredCache = persistentCacheManager.getCache("threeTieredCache", Long.class, String.class);
threeTieredCache.put(1L, "stillAvailableAfterRestart"); //5

persistentCacheManager.close();

1. 如果你希望使用硬盘存储,你要提供一个path给CacheManagerBuilder.persistence()方法。
2. 给堆定义一个资源池。这是一个较快但是较小的池。
3. 给堆外内存定义一个资源池。这是一个较快单大一点的池。
4. 给硬盘定义一个持久化的资源池。
5. 所有存在cache中的值都可以在JVM重启后获得。
Data freshness缓存失效
缓存失效通过Expiry控制。下面这个例子展示了如果控制缓存失效:
CacheConfiguration<Long, String> cacheConfiguration = CacheConfigurationBuilder.newCacheConfigurationBuilder(Long.class, String.class,
        ResourcePoolsBuilder.heap(100)) //1
    .withExpiry(ExpiryPolicyBuilder.timeToLiveExpiration(Duration.ofSeconds(20))) //2
    .build();

1. Expiry在定义cache confuguration的时候配置的。
2. 通过Duration配置time-to-live失效时间。
缓存过期和淘汰策略
过期策略
- no expiry : 永不过期
- time-to-live :创建后一段时间过期
- time-to-idle : 访问后一段时间过期
淘汰策略
- FIFO
- LRU 默认策略
- LFU
java代码
CacheConfiguration<Long, String> cacheConfiguration = CacheConfigurationBuilder.newCacheConfigurationBuilder(Long.class, String.class,
        ResourcePoolsBuilder.heap(100))
    .withExpiry(ExpiryPolicyBuilder.timeToLiveExpiration(Duration.ofSeconds(20)))
    .build();
XML
<cache alias="withExpiry">
  <expiry>
    <ttl unit="seconds">20</ttl>
  </expiry>
  <heap>100</heap>
</cache>
自定义过期策略
实现ExpiryPolicy接口
接口方法返回值
| 返回值类型 | 含义 |
|---|---|
| some Duration | 表示将在该持续时间之后过期, |
| Duration.ZERO | 表示立即过期, |
| Duration.INFINITE | 表示映射将永不过期, |
| null Duration | 表示将保留先前的到期时间不变,这在创建时是非法的。 |
使用自定义过期策略:
java
CacheConfiguration<Long, String> cacheConfiguration = CacheConfigurationBuilder.newCacheConfigurationBuilder(Long.class, String.class,
        ResourcePoolsBuilder.heap(100))
    .withExpiry(new CustomExpiry())
    .build();
XML
<cache alias="withCustomExpiry">
  <expiry>
    <class>com.pany.ehcache.MyExpiry</class>
  </expiry>
  <heap>100</heap>
</cache>
序列化
除了堆上的存储外,所有存储都需要某种形式的对象序列化/反序列化才能存储和检索映射。这是因为它们不能在内部存储纯Java对象,而只能存储它们的二进制表示形式。
配置序列化
- 缓存配置级
- CacheConfigurationBuilder.withKeySerializer(Class<? extends Serializer> keySerializerClass)
- CacheConfigurationBuilder.withKeySerializer(Serializer keySerializer)
- CacheConfigurationBuilder.withValueSerializer(Class<? extends Serializer> valueSerializerClass)
- CacheConfigurationBuilder.withValueSerializer(Serializer valueSerializer)
- 缓存管理器级
- CacheManagerBuilder.withSerializer(Class clazz, Class<? extends Serializer> serializer)
缓存配置优先于缓存管理器,即缓存配置会覆盖缓存管理器
Ehcache支持以下序列化,按顺序处理
- java.io.Serializable
- java.lang.Long
- java.lang.Integer
- java.lang.Float
- java.lang.Double
- java.lang.Character
- java.lang.String
- byte[]
自定义序列化
自定义序列化需要实现org.ehcache.spi.serialization.Serializer接口
- 实现类必须提供一个带有ClassLoader参数的构造器
- 实现类必须线程安全
- 被序列化对象的class必须被保存;被序列化对象的class与反序列化后的对象的class必须相等。(如果在构造CacheManager时没有指定classLoader,则使用ehcache的默认classLoader)
- 同时如果实现 java.io.Closeable 接口,当关闭缓存管理器时,将调用该序列化器的close方法。
用户管理缓存
用户管理的缓存提供了一种直接配置缓存的简单方法,而无需设置或使用CacheManager的复杂性。即缓存要求比较简单可以使用考虑用户管理缓存。
UserManagedCache主要使用:方法本地缓存,线程本地缓存或缓存的生命周期短于应用程序生命周期的任何其他地方。
UserManagedCache<Long, String> userManagedCache =
    UserManagedCacheBuilder.newUserManagedCacheBuilder(Long.class, String.class)
        .build(false);
userManagedCache.init();
userManagedCache.put(1L, "da one!");
userManagedCache.close();
用户管理持久化缓存
如果需要缓存持久化可以使用PersistentUserManagedCache.如果要使用磁盘持久性缓存,则需要创建持久性服务并对其进行生命周期管理:
LocalPersistenceService persistenceService = new DefaultLocalPersistenceService(new DefaultPersistenceConfiguration(new File(getStoragePath(), "myUserData")));

PersistentUserManagedCache<Long, String> cache = UserManagedCacheBuilder.newUserManagedCacheBuilder(Long.class, String.class)
    .with(new UserManagedPersistenceContext<>("cache-name", persistenceService))
    .withResourcePools(ResourcePoolsBuilder.newResourcePoolsBuilder()
        .heap(10L, EntryUnit.ENTRIES)
        .disk(10L, MemoryUnit.MB, true))
    .build(true);

// Work with the cache
cache.put(42L, "The Answer!");
assertThat(cache.get(42L), is("The Answer!"));

cache.close();
cache.destroy();

persistenceService.stop();
缓存监听
Ehcache 提供 CacheEventListerner 来监听缓存事件。
- 缓存侦听器允许实现者注册将在发生缓存事件时执行的回调方法。
- 监听器是在缓存级别注册的,因此只接收已注册的缓存的事件。
CacheEventListenerConfigurationBuilder cacheEventListenerConfiguration = CacheEventListenerConfigurationBuilder
    .newEventListenerConfiguration(new ListenerObject(), EventType.CREATED, EventType.UPDATED)
    .unordered().asynchronous();

final CacheManager manager = CacheManagerBuilder.newCacheManagerBuilder()
    .withCache("foo",
        CacheConfigurationBuilder.newCacheConfigurationBuilder(String.class, String.class, ResourcePoolsBuilder.heap(10))
            .add(cacheEventListenerConfiguration)
    ).build(true);

final Cache<String, String> cache = manager.getCache("foo", String.class, String.class);
cache.put("Hello", "World");
cache.put("Hello", "Everyone");
cache.remove("Hello");
- CacheEventListenerConfiguration使用构建器创建一个侦听器和要接收的事件的构建器
在使用缓存时,也可以添加和删除缓存事件侦听器。
ListenerObject listener = new ListenerObject();
cache.getRuntimeConfiguration().registerCacheEventListener(listener, EventOrdering.ORDERED,
    EventFiring.ASYNCHRONOUS, EnumSet.of(EventType.CREATED, EventType.REMOVED));

cache.put(1L, "one");
cache.put(2L, "two");
cache.remove(1L);
cache.remove(2L);

cache.getRuntimeConfiguration().deregisterCacheEventListener(listener);

cache.put(1L, "one again");
cache.remove(1L);
事件触发行为
| 初始值 | 操作 | 新值 | 事件 |
|---|---|---|---|
| {} | put(K, V) | {K, V} | created {K, null, V} |
| {K, V1} | put(K, V2) | {K, V2} | updated {K, V1, V2} |
| {} | put(K, V) [immediately expired] | {} | none |
| {K, V1} | put(K, V2) [immediately expired] | {} | none |
| {} | putIfAbsent(K, V) | {K, V} | created {K, null, V} |
| {} | putIfAbsent(K, V) [immediately expired] | {} | none |
| {K, V1} | replace(K, V2) | {K, V2} | updated {K, V1, V2} |
| {K, V1} | replace(K, V2) [immediately expired] | {} | none |
| {K, V1} | replace(K, V1, V2) | {K, V2} | updated {K, V1, V2} |
| {K, V1} | replace(K, V1, V2) [immediately expired] | {} | no events |
| {K, V} | remove(K) | {} | removed {K, V, null} |
SpringBoot整合ehcache
application.yml配置:
spring:
  cache:
    jcache:
      config: classpath:ehcache.xml
记得加入classpath:表示ehcache.xml在根路径下
- @EnableCaching
将@EnableCaching定义在SpringBoot启动类上,相当于启用缓存功能,内部就会创建 CacheManager(注意是spring框架的), 并交给spring容器管理。
在需要开启缓存的方法上方加上:@Cacheable(cacheNames="缓存名(在配置文件中定义的)",key = 与配置文件中的value相对(类型) )
注意key=的写法一般写字符串类型 如:
key = "'dept_' + #deptId" (springEL表达式)
除此之外:@CacheEvict ,写在需要删除缓存的方法上,用来删除某个key value,或者清空整个缓存, 用在执行了数据的增删改时,这三种情况下,都应该让缓存失效。
缓存执行流程:
-
- 先访问的是设置缓存类的代理对象 (由于cglib 生成该类的子类对象作为代理对象)。
- 代理对象重写了目标方法, 在该方法内, 通过缓存管理器(cache)找对应缓存名称的缓存。
- Cache.get(key)去获取value, 第一次访问value为空, 执行的是原本的方法。
- 该类的方法返回结果作为value放入缓存中。
- 第二次访问的时候,先访问的是该类的代理对象。
- 代理对象重写了目标方法,方法内部,通过缓存管理器(cacheManager)找到对应缓存。
- Cache.get(key)去获取对应value, 返回value不为空,直接返回缓存中的value, 没有执行原本的方法,而是执行代理对象中的目标方法。
缓存一般使用在读多写少的程序中。
Ehcache基本使用
Ehcache 是一个成熟的缓存框架,你可以直接使用它来管理你的缓存。
Spring 提供了对缓存功能的抽象:即允许绑定不同的缓存解决方案(如Ehcache),但本身不直接提供缓存功能的实现。它支持注解方式使用缓存,非常方便。
EhCache 是一个纯Java的进程内缓存框架,具有快速、精干等特点。它是Hibernate中的默认缓存框架。
1) EhcacheDemo.java
Ehcache会自动加载classpath根目录下名为ehcache.xml文件。
EhcacheDemo的工作步骤如下:
在EhcacheDemo中,我们引用ehcache.xml声明的名为helloworld的缓存来创建Cache对象;
然后我们用一个键值对来实例化Element对象;
将Element对象添加到Cache;
然后用Cache的get方法获取Element对象。


public class EhcacheDemo {
    public static void main(String[] args) throws Exception {
        // Create a cache manager
        final CacheManager cacheManager = new CacheManager();

        // create the cache called "helloworld"
        final Cache cache = cacheManager.getCache("helloworld");

        // create a key to map the data to
        final String key = "greeting";

        // Create a data element
        final Element putGreeting = new Element(key, "Hello, World!");

        // Put the element into the data store
        cache.put(putGreeting);

        // Retrieve the data element
        final Element getGreeting = cache.get(key);

        // Print the value
        System.out.println(getGreeting.getObjectValue());
    }
}


Ehcache基本操作
Element、Cache、CacheManager是Ehcache最重要的API。
- Element:缓存的元素,它维护着一个键值对。
- Cache:它是Ehcache的核心类,它有多个
Element,并被CacheManager管理。它实现了对缓存的逻辑行为。 -
CacheManager:
Cache的容器对象,并管理着Cache的生命周期。创建CacheManager
下面的代码列举了创建
CacheManager的五种方式。
使用静态方法create()会以默认配置来创建单例的CacheManager实例。newInstance()方法是一个工厂方法,以默认配置创建一个新的CacheManager实例。
此外,newInstance()还有几个重载函数,分别可以通过传入String、URL、InputStream参数来加载配置文件,然后创建CacheManager实例。


// 使用Ehcache默认配置获取单例的CacheManager实例
CacheManager.create();
String[] cacheNames = CacheManager.getInstance().getCacheNames();

// 使用Ehcache默认配置新建一个CacheManager实例
CacheManager.newInstance();
String[] cacheNames = manager.getCacheNames();

// 使用不同的配置文件分别创建一个CacheManager实例
CacheManager manager1 = CacheManager.newInstance("src/config/ehcache1.xml");
CacheManager manager2 = CacheManager.newInstance("src/config/ehcache2.xml");
String[] cacheNamesForManager1 = manager1.getCacheNames();
String[] cacheNamesForManager2 = manager2.getCacheNames();

// 基于classpath下的配置文件创建CacheManager实例
URL url = getClass().getResource("/anotherconfigurationname.xml");
CacheManager manager = CacheManager.newInstance(url);

// 基于文件流得到配置文件,并创建CacheManager实例
InputStream fis = new FileInputStream(new File
("src/config/ehcache.xml").getAbsolutePath());
try {
 CacheManager manager = CacheManager.newInstance(fis);
} finally {
 fis.close();
}


添加缓存
需要强调一点,Cache对象在用addCache方法添加到CacheManager之前,是无效的。
使用CacheManager的addCache方法可以根据缓存名将ehcache.xml中声明的cache添加到容器中;它也可以直接将Cache对象添加到缓存容器中。Cache有多个构造函数,提供了不同方式去加载缓存的配置参数。
有时候,你可能需要使用API来动态的添加缓存,下面的例子就提供了这样的范例。


// 除了可以使用xml文件中配置的缓存,你也可以使用API动态增删缓存
// 添加缓存
manager.addCache(cacheName);

// 使用默认配置添加缓存
CacheManager singletonManager = CacheManager.create();
singletonManager.addCache("testCache");
Cache test = singletonManager.getCache("testCache");

// 使用自定义配置添加缓存,注意缓存未添加进CacheManager之前并不可用
CacheManager singletonManager = CacheManager.create();
Cache memoryOnlyCache = new Cache("testCache", 5000, false, false, 5, 2);
singletonManager.addCache(memoryOnlyCache);
Cache test = singletonManager.getCache("testCache");

// 使用特定的配置添加缓存
CacheManager manager = CacheManager.create();
Cache testCache = new Cache(
 new CacheConfiguration("testCache", maxEntriesLocalHeap)
 .memoryStoreEvictionPolicy(MemoryStoreEvictionPolicy.LFU)
 .eternal(false)
 .timeToLiveSeconds(60)
 .timeToIdleSeconds(30)
 .diskExpiryThreadIntervalSeconds(0)
 .persistence(new PersistenceConfiguration().strategy(Strategy.LOCALTEMPSWAP)));
 manager.addCache(testCache);


删除缓存
删除缓存比较简单,你只需要将指定的缓存名传入removeCache方法即可。
CacheManager singletonManager = CacheManager.create();
singletonManager.removeCache("sampleCache1");
实现基本缓存操作
Cache最重要的两个方法就是put和get,分别用来添加Element和获取Element。
Cache还提供了一系列的get、set方法来设置或获取缓存参数,这里不一一列举,更多API操作可参考官方API开发手册。


/**
 * 测试:使用默认配置或使用指定配置来创建CacheManager
 *
 * @author Zhang Peng
 */
public class CacheOperationTest {
    private final Logger log = LoggerFactory.getLogger(CacheOperationTest.class);

    /**
     * 使用Ehcache默认配置(classpath下的ehcache.xml)获取单例的CacheManager实例
     */
    @Test
    public void operation() {
        CacheManager manager = CacheManager.newInstance("src/test/resources/ehcache/ehcache.xml");

        // 获得Cache的引用
        Cache cache = manager.getCache("userCache");

        // 将一个Element添加到Cache
        cache.put(new Element("key1", "value1"));

        // 获取Element,Element类支持序列化,所以下面两种方法都可以用
        Element element1 = cache.get("key1");
        // 获取非序列化的值
        log.debug("key:{}, value:{}", element1.getObjectKey(), element1.getObjectValue());
        // 获取序列化的值
        log.debug("key:{}, value:{}", element1.getKey(), element1.getValue());

        // 更新Cache中的Element
        cache.put(new Element("key1", "value2"));
        Element element2 = cache.get("key1");
        log.debug("key:{}, value:{}", element2.getObjectKey(), element2.getObjectValue());

        // 获取Cache的元素数
        log.debug("cache size:{}", cache.getSize());

        // 获取MemoryStore的元素数
        log.debug("MemoryStoreSize:{}", cache.getMemoryStoreSize());

        // 获取DiskStore的元素数
        log.debug("DiskStoreSize:{}", cache.getDiskStoreSize());

        // 移除Element
        cache.remove("key1");
        log.debug("cache size:{}", cache.getSize());

        // 关闭当前CacheManager对象
        manager.shutdown();

        // 关闭CacheManager单例实例
        CacheManager.getInstance().shutdown();
    }
}


缓存配置
Ehcache支持通过xml文件和API两种方式进行配置。
xml方式
Ehcache的CacheManager构造函数或工厂方法被调用时,会默认加载classpath下名为ehcache.xml的配置文件。如果加载失败,会加载Ehcache jar包中的ehcache-failsafe.xml文件,这个文件中含有简单的默认配置。
ehcache.xml配置参数说明:
- name:缓存名称。
- maxElementsInMemory:缓存最大个数。
- eternal:缓存中对象是否为永久的,如果是,超时设置将被忽略,对象从不过期。
- timeToIdleSeconds:置对象在失效前的允许闲置时间(单位:秒)。仅当eternal=false对象不是永久有效时使用,可选属性,默认值是0,也就是可闲置时间无穷大。
- timeToLiveSeconds:缓存数据的生存时间(TTL),也就是一个元素从构建到消亡的最大时间间隔值,这只能在元素不是永久驻留时有效,如果该值是0就意味着元素可以停顿无穷长的时间。
- maxEntriesLocalDisk:当内存中对象数量达到maxElementsInMemory时,Ehcache将会对象写到磁盘中。
- overflowToDisk:内存不足时,是否启用磁盘缓存。
- diskSpoolBufferSizeMB:这个参数设置DiskStore(磁盘缓存)的缓存区大小。默认是30MB。每个Cache都应该有自己的一个缓冲区。
- maxElementsOnDisk:硬盘最大缓存个数。
- diskPersistent:是否在VM重启时存储硬盘的缓存数据。默认值是false。
- diskExpiryThreadIntervalSeconds:磁盘失效线程运行时间间隔,默认是120秒。
- memoryStoreEvictionPolicy:当达到maxElementsInMemory限制时,Ehcache将会根据指定的策略去清理内存。默认策略是LRU(最近最少使用)。你可以设置为FIFO(先进先出)或是LFU(较少使用)。
- clearOnFlush:内存数量最大时是否清除。
ehcache.xml的一个范例


<?xml version="1.0" encoding="UTF-8"?>
<ehcache xmlns:xsi="http://www.w3.org/2001/XMLSchema-instance"
         xsi:noNamespaceSchemaLocation="http://ehcache.org/ehcache.xsd">

  <!-- 磁盘缓存位置 -->
  <diskStore path="java.io.tmpdir/ehcache"/>

  <!-- 默认缓存 -->
  <defaultCache
          maxEntriesLocalHeap="10000"
          eternal="false"
          timeToIdleSeconds="120"
          timeToLiveSeconds="120"
          maxEntriesLocalDisk="10000000"
          diskExpiryThreadIntervalSeconds="120"
          memoryStoreEvictionPolicy="LRU">
    <persistence strategy="localTempSwap"/>
  </defaultCache>

  <cache name="userCache"
         maxElementsInMemory="1000"
         eternal="false"
         timeToIdleSeconds="3"
         timeToLiveSeconds="3"
         maxEntriesLocalDisk="10000000"
         overflowToDisk="false"
         memoryStoreEvictionPolicy="LRU"/>
</ehcache>


API方式
xml配置的参数也可以直接通过编程方式来动态的进行配置(dynamicConfig没有设为false)。

Cache cache = manager.getCache("sampleCache");
CacheConfiguration config = cache.getCacheConfiguration();
config.setTimeToIdleSeconds(60);
config.setTimeToLiveSeconds(120);
config.setmaxEntriesLocalHeap(10000);
config.setmaxEntriesLocalDisk(1000000);

也可以通过disableDynamicFeatures()方式关闭动态配置开关。配置以后你将无法再以编程方式配置参数。
Cache cache = manager.getCache("sampleCache");
cache.disableDynamicFeatures();
注解基本使用方法
Spring对缓存的支持类似于对事务的支持。
首先使用注解标记方法,相当于定义了切点,然后使用Aop技术在这个方法的调用前、调用后获取方法的入参和返回值,进而实现了缓存的逻辑。
下面三个注解都是方法级别:
@Cacheable
表明所修饰的方法是可以缓存的:当第一次调用这个方法时,它的结果会被缓存下来,在缓存的有效时间内,以后访问这个方法都直接返回缓存结果,不再执行方法中的代码段。
这个注解可以用condition属性来设置条件,如果不满足条件,就不使用缓存能力,直接执行方法。
可以使用key属性来指定key的生成规则。
@CachePut
与@Cacheable不同,@CachePut不仅会缓存方法的结果,还会执行方法的代码段。
它支持的属性和用法都与@Cacheable一致。
@CacheEvict
与@Cacheable功能相反,@CacheEvict表明所修饰的方法是用来删除失效或无用的缓存数据。
下面是@Cacheable、@CacheEvict和@CachePut基本使用方法的一个集中展示:


@Service
public class UserService {
    // @Cacheable可以设置多个缓存,形式如:@Cacheable({"books", "isbns"})
    @Cacheable({"users"})
    public User findUser(User user) {
        return findUserInDB(user.getId());
    }

    @Cacheable(value = "users", condition = "#user.getId() <= 2")
    public User findUserInLimit(User user) {
        return findUserInDB(user.getId());
    }

    @CachePut(value = "users", key = "#user.getId()")
    public void updateUser(User user) {
        updateUserInDB(user);
    }

    @CacheEvict(value = "users")
    public void removeUser(User user) {
        removeUserInDB(user.getId());
    }

    @CacheEvict(value = "users", allEntries = true)
    public void clear() {
        removeAllInDB();
    }
}


@Caching
如果需要使用同一个缓存注解(@Cacheable、@CacheEvict或@CachePut)多次修饰一个方法,就需要用到@Caching。
@Caching(evict = { @CacheEvict("primary"), @CacheEvict(cacheNames="secondary", key="#p0") })
public Book importBooks(String deposit, Date date)
@CacheConfig
与前面的缓存注解不同,这是一个类级别的注解。
如果类的所有操作都是缓存操作,你可以使用@CacheConfig来指定类,省去一些配置。
@CacheConfig("books")
public class BookRepositoryImpl implements BookRepository {
    @Cacheable
    public Book findBook(ISBN isbn) {...}
}
Ehcache使用教程
1. 首先引入依赖
<dependency>
<groupId>org.springframework.boot</groupId>
<artifactId>spring-boot-starter-cache</artifactId>
</dependency>
<dependency>
<groupId>net.sf.ehcache</groupId>
<artifactId>ehcache</artifactId>
</dependency>
2. yml配置
spring:
cache:
type: ehcache
ehcache:
config: classpath:ehcache.xml
3. ehcache的xml配置
<ehcache
xmlns:xsi="http://www.w3.org/2001/XMLSchema-instance"
xsi:noNamespaceSchemaLocation="http://ehcache.org/ehcache.xsd"
updateCheck="false">
<!--缓存路径,用户目录下的base_ehcache目录-->
<diskStore path="user.home/base_ehcache"/>
<defaultCache
maxElementsInMemory="20000"
maxElementsOnDisk="10000000"
eternal="false"
timeToIdleSeconds="120"
timeToLiveSeconds="120"
overflowToDisk="true"
diskPersistent="false"
diskExpiryThreadIntervalSeconds="120"
memoryStoreEvictionPolicy="LRU"/>
<!--
缓存文件名:user,同样的可以配置多个缓存
maxElementsInMemory:内存中最多存储
eternal:外部存储
overflowToDisk:超出缓存到磁盘
diskPersistent:磁盘持久化
timeToLiveSeconds:缓存时间
diskExpiryThreadIntervalSeconds:磁盘过期时间
-->
<!-- 举个列子 -->
<cache name="user"
maxElementsInMemory="20000"
eternal="true"
overflowToDisk="true"
diskPersistent="false"
timeToLiveSeconds="0"
diskExpiryThreadIntervalSeconds="120"/>
</ehcache>
<!--
以下属性是必须的:
name: Cache的名称,必须是唯一的(ehcache会把这个cache放到HashMap里)。
iskStore : 指定数据存储位置,可指定磁盘中的文件夹位置
defaultCache : 默认的管理策略
maxElementsInMemory: 在内存中缓存的element的最大数目。
maxElementsOnDisk: 在磁盘上缓存的element的最大数目,默认值为0,表示不限制。
eternal: 设定缓存的elements是否永远不过期。如果为true,则缓存的数据始终有效,如果为 false那么还要根据timeToIdleSeconds,timeToLiveSeconds判断。
overflowToDisk: 如果内存中数据超过内存限制,是否要缓存到磁盘上。
以下属性是可选的:
timeToIdleSeconds: 对象空闲时间,指对象在多长时间没有被访问就会失效。只对eternal为false的有效。默认值0,表示一直可以访问。
timeToLiveSeconds: 对象存活时间,指对象从创建到失效所需要的时间。只对eternal为false的有效。默认值0,表示一直可以访问。
diskPersistent: 是否在磁盘上持久化。指重启jvm后,数据是否有效。默认为false。
diskExpiryThreadIntervalSeconds: 对象检测线程运行时间间隔。标识对象状态的线程多长时间运行一次。
diskSpoolBufferSizeMB: DiskStore使用的磁盘大小,默认值30MB。每个cache使用各自的DiskStore。
memoryStoreEvictionPolicy: 如果内存中数据超过内存限制,向磁盘缓存时的策略。默认值LRU,可选FIFO、LFU。
缓存的3 种清空策略 :
FIFO ,first in first out (先进先出).
LFU , Less Frequently Used (最少使用).意思是一直以来最少被使用的。缓存的元素有一个hit 属性,hit 值最小的将会被清出缓存。
LRU ,Least Recently Used(最近最少使用). (ehcache 默认值).缓存的元素有一个时间戳,当缓存容量满了,而又需要腾出地方来缓存新的元素的时候,那么现有缓存元素中时间戳离当前时间最远的元素将被清出缓存。
4. 在启动类上加上注解@EnableCaching
5. 在需要使用的接口上加相关注解
5.1 添加缓存 @Cacheable(value = "user", key = "#user.id")
5.2 删除缓存 @CacheEvict(value = "user", key = "#id")
5.3 更新缓存 @CachePut(value="myCache")
更新缓存 :@CachePut标注的方法在执行前不会去检查缓存中是否存在之前执行过的结果,而是每次都会执行该方法,并将执行结果以键值对的形式存入指定的缓存中。
注意: 要实现缓存的实体必须要序列化
6. 说明
Spring Cache是作用在方法上的,其核心思想是这样的:当我们在调用一个缓存方法时会把该方法参数和返回结果作为一个键值对存放在缓存中,等到下次利用同样的参数来调用该方法时将不再执行该方法,而是直接从缓存中获取结果进行返回。所以在使用Spring Cache的时候我们要保证我们缓存的方法对于相同的方法参数要有相同的返回结果。使用Spring Cache需要我们做两方面的事:
声明某些方法使用缓存
配置Spring对Cache的支持
Spring为我们提供了几个注解来支持Spring Cache。其核心主要是@Cacheable和@CacheEvict。使用@Cacheable标记的方法在执行后Spring Cache将缓存其返回结果,而使用@CacheEvict标记的方法会在方法执行前或者执行后移除Spring Cache中的某些元素。
这里只介绍几个常用的属性。
基于注解的相关概念:
6.1 @Cacheable
可以标记在一个方法上,也可以标记在一个类上。当标记在一个方法上时表示该方法是支持缓存的,当标记在一个类上时则表示该类所有的方法都是支持缓存的。对于一个支持缓存的方法,Spring会在其被调用后将其返回值缓存起来,以保证下次利用同样的参数来执行该方法时可以直接从缓存中获取结果,而不需要再次执行该方法。Spring在缓存方法的返回值时是以键值对进行缓存的,值就是方法的返回结果,至于键的话,Spring又支持两种策略,默认策略和自定义策略。
需要注意的是当一个支持缓存的方法在对象内部被调用时是不会触发缓存功能的。@Cacheable可以指定三个属性,value、key和condition。
6.2 @CachePut
在支持Spring Cache的环境下,对于使用@Cacheable标注的方法,Spring在每次执行前都会检查Cache中是否存在相同key的缓存元素,如果存在就不再执行该方法,而是直接从缓存中获取结果进行返回,否则才会执行并将返回结果存入指定的缓存中。而@CachePut也可以声明一个方法支持缓存功能。与@Cacheable不同的是使用@CachePut标注的方法在执行前不会去检查缓存中是否存在之前执行过的结果,而是每次都会执行该方法,并将执行结果以键值对的形式存入指定的缓存中。
@CachePut也可以标注在类上和方法上。
使用@CachePut时我们可以指定的属性跟@Cacheable是一样的。
6.3 @CacheEvict
@CacheEvict是用来标注在需要清除缓存元素的方法或类上的。当标记在一个类上时表示其中所有的方法的执行都会触发缓存的清除操作。@CacheEvict可以指定的属性有value、key、condition、allEntries和beforeInvocation。其中value、key和condition的语义与@Cacheable对应的属性类似。即value表示清除操作是发生在哪些Cache上的(对应Cache的名称);key表示需要清除的是哪个key,如未指定则会使用默认策略生成的key;condition表示清除操作发生的条件。
属性一 :value
必须指定的,其表示当前方法的返回值是会被缓存在哪个Cache上的,对应Cache的名称,为ehcache.xml中的 。其可以是一个Cache也可以是多个Cache,当需要指定多个Cache时其是一个数组。
属性二 :key
缓存的Key,当我们没有指定该属性时,Spring将使用默认策略生成key(表示使用方法的参数类型及参数值作为key),key属性是用来指定Spring缓存方法的返回结果时对应的key的。该属性支持SpringEL表达式。我们还可以自定义策略:自定义策略是指我们可以通过Spring的EL表达式来指定我们的key。这里的EL表达式可以使用方法参数及它们对应的属性。使用方法参数时我们可以直接使用“#参数名”或者“#p参数index”
key的生成策略有两种:一种是默认策略,一种是自定义策略
¹默认的key生成策略是通过KeyGenerator生成的,其默认策略如下:
1.如果方法没有参数,则使用0作为key。
2.如果只有一个参数的话则使用该参数作为key。
3.如果参数多余一个的话则使用所有参数的hashCode作为key
²自定义策略是指我们可以通过Spring的EL表达式来指定我们的key。这里的EL表达式可以使用方法参数及它们对应的属性。使用方法参数时我们可以直接使用“#参数名”或者“#p参数index
属性三 :condition
有的时候我们可能并不希望缓存一个方法所有的返回结果。通过condition属性可以实现这一功能。
condition属性默认为空,表示将缓存所有的调用情形。其值是通过SpringEL表达式来指定的,当为true时表示进行缓存处理;当为false时表示不进行缓存处理,即每次调用该方法时该方法都会执行一次。如下示例表示只有当user的id为偶数时才会进行缓存
@Cacheable(value={“users”}, key="#user.id", condition="#user.id%2==0")
public User find(User user) {
System.out.println("find user by user " + user);
return user;
}
属性四 :allEntries
是boolean类型,表示是否需要清除缓存中的所有元素。默认为false,表示不需要。当指定了allEntries为true时,Spring Cache将忽略指定的key。有的时候我们需要Cache一下清除所有的元素,这比一个一个清除元素更有效率。
@CacheEvict(value=“users”, allEntries=true)
public void delete(Integer id) {
System.out.println("delete user by id: " + id);
}
属性五 :beforeInvocation
清除操作默认是在对应方法成功执行之后触发的,即方法如果因为抛出异常而未能成功返回时也不会触发清除操作。使用beforeInvocation可以改变触发清除操作的时间,当我们指定该属性值为true时,Spring会在调用该方法之前清除缓存中的指定元素。
@CacheEvict(value=“users”, beforeInvocation=true)
public void delete(Integer id) {
System.out.println("delete user by id: " + id);
}
注意我们也可以使用ehcache的去除策略最近使用(LRU)"策略,其它还有先入先出FIFO,最少使用LFU,较少使用LRU
Ehcache教程
官网链接:Ehcache
官网英文文档链接:Ehcache 3.8 Documentation
Maven 依赖:
    <dependency>
      <groupId>org.ehcache</groupId>
      <artifactId>ehcache</artifactId>
      <version>3.8.1</version>
    </dependency>
Ehcache 3 API 用法:
CacheManager cacheManager = CacheManagerBuilder.newCacheManagerBuilder() //1
    .withCache("preConfigured",
        CacheConfigurationBuilder.newCacheConfigurationBuilder(Long.class, String.class, ResourcePoolsBuilder.heap(10))) //2
    .build(); //3
cacheManager.init(); //4

Cache<Long, String> preConfigured =
    cacheManager.getCache("preConfigured", Long.class, String.class); //5

Cache<Long, String> myCache = cacheManager.createCache("myCache", //6
    CacheConfigurationBuilder.newCacheConfigurationBuilder(Long.class, String.class, ResourcePoolsBuilder.heap(10)));

myCache.put(1L, "da one!"); //7
String value = myCache.get(1L); //8

cacheManager.removeCache("preConfigured"); //9

cacheManager.close(); //10- 静态方法org.ehcache.config.builders.CacheManagerBuilder.newCacheManagerBuilder返回一个新的org.ehcache.config.builders.CacheManagerBuilder实例。
- 用builder来定义一个别名为"preConfigured"的Cache。调用cacheManager.build()时会创建该cache。withCache()方法的第一个参数是cache别名,用来以后取缓存用。第二个参数用来配置Cache,我们用静态方法newCacheConfigurationBuilder()来创建默认的配置。
- 调用build会返回一个已经实例化但还没有初始化的CacheManager。
- 使用CacheManager前需要先初始化。有两种方法可以进行初始化:调用CacheManager.init()或者调用CacheManagerBuilder.build(boolean init)。
- 为了从CacheManager获得一个cache,我们需要传递alias, key type和value type。例如,在第二步中,传递alias="preConfigured",keyType=Long.class,valueType=String.class。如果type不匹配,CacheManager会抛出ClassCastException。这样可以保护Cache不被随机的type污染。
- 实例化并初始化的Cache可以通过CacheManager.getCache来获取。
- 新建的Cache现在可以用来存储元素了。第一个参数是key,第二个是value,key和value的type必须和CacheConfiguration中定义的一直。
- 调用cache.get(key)可以获得值。如果没有值则会返回null。
- 调用CacheManager.removeCache(String)可以删除Cache。CacheManager不仅会删除Cache的reference,同时会关闭Cache。
- CacheManager.close()会关闭所有的Cache实例。
XML configuration配置文件
你可以创建一个XML文件来配置CacheManager。
<config
    xmlns:xsi='http://www.w3.org/2001/XMLSchema-instance'
    xmlns='http://www.ehcache.org/v3'
    xsi:schemaLocation="http://www.ehcache.org/v3 http://www.ehcache.org/schema/ehcache-core.xsd">

  <cache alias="foo"> //1
    <key-type>java.lang.String</key-type> //2
    <value-type>java.lang.String</value-type> //2
    <resources>
      <heap unit="entries">20</heap> //3
      <offheap unit="MB">10</offheap> //4
    </resources>
  </cache>

  <cache-template name="myDefaults"> //5
    <key-type>java.lang.Long</key-type>
    <value-type>java.lang.String</value-type>
    <heap unit="entries">200</heap>
  </cache-template>

  <cache alias="bar" uses-template="myDefaults"> //6
    <key-type>java.lang.Number</key-type>
  </cache>

  <cache alias="simpleCache" uses-template="myDefaults" /> //7

</config>- 给Cache别名为foo。
- foo的key,value的type定义为String;如果没有特别定义,默认是java.lang.Object。
- foo最多在堆中有2000个entry。
- 最多500MB的堆外内存。
- <cache-template>可以让你创建一个abstract配置并以后extend它。
- 命名为bar的缓存用到了命名为myDefaults的<cache-template>并override它的key-type到java.lang.Number。
- 命名为simpleCache的缓存用myDefaults来作为它的缓存配置。
为了解析一个XML配置,你可以用XmlConfiguration:
<config
    xmlns:xsi='http://www.w3.org/2001/XMLSchema-instance'
    xmlns='http://www.ehcache.org/v3'
    xsi:schemaLocation="http://www.ehcache.org/v3 http://www.ehcache.org/schema/ehcache-core.xsd">

  <cache alias="foo"> //1
    <key-type>java.lang.String</key-type> //2
    <value-type>java.lang.String</value-type> //2
    <resources>
      <heap unit="entries">20</heap> //3
      <offheap unit="MB">10</offheap> //4
    </resources>
  </cache>

  <cache-template name="myDefaults"> //5
    <key-type>java.lang.Long</key-type>
    <value-type>java.lang.String</value-type>
    <heap unit="entries">200</heap>
  </cache-template>

  <cache alias="bar" uses-template="myDefaults"> //6
    <key-type>java.lang.Number</key-type>
  </cache>

  <cache alias="simpleCache" uses-template="myDefaults" /> //7

</config>- 添加XML路径。
- 实例化XMLConfiguration。
- 用静态方法org.ehcache.config.builders.CacheManagerBuilder.newCacheManager(org.ehcache.config.Configuration)创建CacheManager实例。
集群方案下创建cache manager
为了支持Terracotta集群方案,需要先启动start the Terracotta server。此外,为了创建集群方案的cache manager,亦需要提供集群服务的配置:
CacheManagerBuilder<PersistentCacheManager> clusteredCacheManagerBuilder =
    CacheManagerBuilder.newCacheManagerBuilder()
        .with(ClusteringServiceConfigurationBuilder.cluster(URI.create("terracotta://localhost/my-application"))
            .autoCreate(c -> c));
PersistentCacheManager cacheManager = clusteredCacheManagerBuilder.build(true);

cacheManager.close(); - 返回org.ehcache.config.builders.CacheManagerBuilder实例。
- 用静态方法ClusteringServiceConfigurationBuilder.cluster(URI)来连接对应URI的集群。例子中的URI指向identifier为my-application的集群(默认端口号9410);auto-create会在server中的集群不存在时创建。
- 返回一个完全初始化的cache manager。
- 集群没有时会自动创建。
- 关闭cache manager。
Storage Tiers存储层级
Ehcache可以在数据越来越大时,存储到相对较慢的层级中。
因为快速的存储资源相对稀有,所以hottest的资源会存在这里。因此那些较少用到的data会被移动到较慢但存储容量更大的层级中。更频繁用到的数据会移动到更快的层级中。
经典的3层级带硬盘存储的方案:
PersistentCacheManager persistentCacheManager = CacheManagerBuilder.newCacheManagerBuilder()
    .with(CacheManagerBuilder.persistence(new File(getStoragePath(), "myData"))) //1
    .withCache("threeTieredCache",
        CacheConfigurationBuilder.newCacheConfigurationBuilder(Long.class, String.class,
            ResourcePoolsBuilder.newResourcePoolsBuilder()
                .heap(10, EntryUnit.ENTRIES) //2
                .offheap(1, MemoryUnit.MB) //3
                .disk(20, MemoryUnit.MB, true) //4
            )
    ).build(true);

Cache<Long, String> threeTieredCache = persistentCacheManager.getCache("threeTieredCache", Long.class, String.class);
threeTieredCache.put(1L, "stillAvailableAfterRestart"); //5

persistentCacheManager.close();- 如果你希望使用硬盘存储,你要提供一个path给CacheManagerBuilder.persistence()方法。
- 给堆定义一个资源池。这是一个较快但是较小的池。
- 给堆外内存定义一个资源池。这是一个较快单大一点的池。
- 给硬盘定义一个持久化的资源池。
- 所有存在cache中的值都可以在JVM重启后获得。
Data freshness缓存失效
缓存失效通过Expiry控制。下面这个例子展示了如果控制缓存失效:
CacheConfiguration<Long, String> cacheConfiguration = CacheConfigurationBuilder.newCacheConfigurationBuilder(Long.class, String.class,
        ResourcePoolsBuilder.heap(100)) //1
    .withExpiry(ExpiryPolicyBuilder.timeToLiveExpiration(Duration.ofSeconds(20))) //2
.build();- Expiry在定义cache confuguration的时候配置的。
- 通过Duration配置time-to-live失效时间。
一:目录
- EhCache 简介
- Hello World 示例
- Spring 整合
二: 简介
2.1、基本介绍
EhCache 是一个纯Java的进程内缓存框架,具有快速、精干等特点,是Hibernate中默认CacheProvider。
Ehcache是一种广泛使用的开源Java分布式缓存。
主要面向通用缓存,Java EE和轻量级容器。它具有内存和磁盘存储,缓存加载器,缓存扩展,缓存异常处理程序,一个gzip缓存servlet过滤器,支持REST和SOAP api等特点。
Spring 提供了对缓存功能的抽象:即允许绑定不同的缓存解决方案(如Ehcache),但本身不直接提供缓存功能的实现。它支持注解方式使用缓存,非常方便。
2.2、 主要的特性
- 快速
- 简单
- 多种缓存策略
- 缓存数据有两级:内存和磁盘,因此无需担心容量问题
- 缓存数据会在虚拟机重启的过程中写入磁盘
- 可以通过RMI、可插入API等方式进行分布式缓存
- 具有缓存和缓存管理器的侦听接口
- 支持多缓存管理器实例,以及一个实例的多个缓存区域
- 提供Hibernate的缓存实现
2.3、 集成
可以单独使用,一般在第三方库中被用到的比较多(如mybatis、shiro等)ehcache 对分布式支持不够好,多个节点不能同步,通常和redis一块使用
2.4、 ehcache 和 redis 比较
ehcache直接在jvm虚拟机中缓存,速度快,效率高;但是缓存共享麻烦,集群分布式应用不方便。
redis是通过socket访问到缓存服务,效率比Ehcache低,比数据库要快很多,处理集群和分布式缓存方便,有成熟的方案。
如果是单个应用或者对缓存访问要求很高的应用,用ehcache。
如果是大型系统,存在缓存共享、分布式部署、缓存内容很大的,建议用redis。
ehcache也有缓存共享方案,不过是通过RMI或者Jgroup多播方式进行广播缓存通知更新,缓存共享复杂,维护不方便;简单的共享可以,但是涉及到缓存恢复,大数据缓存,则不合适。
三:事例
3.1、在pom.xml中引入依赖
<dependency>
    <groupId>net.sf.ehcache</groupId>
    <artifactId>ehcache</artifactId>
    <version>2.10.2</version>
</dependency>
3.2、在src/main/resources/创建一个配置文件 ehcache.xml
默认情况下Ehcache会自动加载classpath根目录下名为ehcache.xml文件,也可以将该文件放到其他地方在使用时指定文件的位置


<?xml version="1.0" encoding="UTF-8"?>
<ehcache xmlns:xsi="http://www.w3.org/2001/XMLSchema-instance"
         xsi:noNamespaceSchemaLocation="http://ehcache.org/ehcache.xsd">

  <!-- 磁盘缓存位置 -->
  <diskStore path="java.io.tmpdir/ehcache"/>

  <!-- 默认缓存 -->
  <defaultCache
          maxEntriesLocalHeap="10000"
          eternal="false"
          timeToIdleSeconds="120"
          timeToLiveSeconds="120"
          maxEntriesLocalDisk="10000000"
          diskExpiryThreadIntervalSeconds="120"
          memoryStoreEvictionPolicy="LRU">
    <persistence strategy="localTempSwap"/>
  </defaultCache>

  <!-- helloworld缓存 -->
  <cache name="HelloWorldCache"
         maxElementsInMemory="1000"
         eternal="false"
         timeToIdleSeconds="5"
         timeToLiveSeconds="5"
         overflowToDisk="false"
         memoryStoreEvictionPolicy="LRU"/>
</ehcache>


3.3、测试类
| 1 2 3 4 5 6 7 8 9 10 11 12 13 14 15 16 17 18 19 20 21 22 23 24 25 26 27 28 29 30 31 32 33 34 35 36 37 38 39 40 41 42 43 44 45 |
|
| 1 2 3 4 5 6 7 8 9 10 11 12 13 14 15 16 17 18 19 20 21 22 23 24 25 26 27 28 29 30 31 32 33 34 35 36 37 38 39 |
|
3.4、缓存配置
一:xml配置方式:


diskStore : ehcache支持内存和磁盘两种存储

path :指定磁盘存储的位置
defaultCache : 默认的缓存

maxEntriesLocalHeap=“10000”
eternal=“false”
timeToIdleSeconds=“120”
timeToLiveSeconds=“120”
maxEntriesLocalDisk=“10000000”
diskExpiryThreadIntervalSeconds=“120”
memoryStoreEvictionPolicy=“LRU”
cache :自定的缓存,当自定的配置不满足实际情况时可以通过自定义(可以包含多个cache节点)

name : 缓存的名称,可以通过指定名称获取指定的某个Cache对象

maxElementsInMemory :内存中允许存储的最大的元素个数,0代表无限个

clearOnFlush:内存数量最大时是否清除。

eternal :设置缓存中对象是否为永久的,如果是,超时设置将被忽略,对象从不过期。根据存储数据的不同,例如一些静态不变的数据如省市区等可以设置为永不过时

timeToIdleSeconds : 设置对象在失效前的允许闲置时间(单位:秒)。仅当eternal=false对象不是永久有效时使用,可选属性,默认值是0,也就是可闲置时间无穷大。

timeToLiveSeconds :缓存数据的生存时间(TTL),也就是一个元素从构建到消亡的最大时间间隔值,这只能在元素不是永久驻留时有效,如果该值是0就意味着元素可以停顿无穷长的时间。

overflowToDisk :内存不足时,是否启用磁盘缓存。

maxEntriesLocalDisk:当内存中对象数量达到maxElementsInMemory时,Ehcache将会对象写到磁盘中。

maxElementsOnDisk:硬盘最大缓存个数。

diskSpoolBufferSizeMB:这个参数设置DiskStore(磁盘缓存)的缓存区大小。默认是30MB。每个Cache都应该有自己的一个缓冲区。

diskPersistent:是否在VM重启时存储硬盘的缓存数据。默认值是false。

diskExpiryThreadIntervalSeconds:磁盘失效线程运行时间间隔,默认是120秒。


二:编程方式配置
| 1 2 3 4 5 6 |
|
3.5、Ehcache API
- CacheManager:Cache的容器对象,并管理着(添加或删除)Cache的生命周期。
| 1 2 3 |
|
Cache: 一个Cache可以包含多个Element,并被CacheManager管理。它实现了对缓存的逻辑行为
Element:需要缓存的元素,它维护着一个键值对, 元素也可以设置有效期,0代表无限制
获取CacheManager的方式:
可以通过create()或者newInstance()方法或重载方法来创建获取CacheManager的方式:
| 1 2 3 4 5 6 |
|
Ehcache的CacheManager构造函数或工厂方法被调用时,会默认加载classpath下名为ehcache.xml的配置文件。
如果加载失败,会加载Ehcache jar包中的ehcache-failsafe.xml文件,这个文件中含有简单的默认配置。
| 1 2 3 4 5 6 7 8 9 10 11 |
|
四:Spring整合
项目结构:

4.1、pom.xml 引入spring和ehcache


<project xmlns="http://maven.apache.org/POM/4.0.0" xmlns:xsi="http://www.w3.org/2001/XMLSchema-instance" xsi:schemaLocation="http://maven.apache.org/POM/4.0.0 http://maven.apache.org/xsd/maven-4.0.0.xsd">
  <modelVersion>4.0.0</modelVersion>
  <groupId>com.gdut.yh</groupId>
  <artifactId>EhcacheSpringTest</artifactId>
  <version>0.0.1-SNAPSHOT</version>

  <properties>
    <project.build.sourceEncoding>UTF-8</project.build.sourceEncoding>
    <junit.version>4.10</junit.version>
    <spring.version>4.2.3.RELEASE</spring.version>
  </properties>

  <dependencies>
      <dependency>
      <groupId>junit</groupId>
      <artifactId>junit</artifactId>
      <version>${junit.version}</version>
    </dependency>
    <dependency>
         <groupId>org.springframework</groupId>
         <artifactId>spring-test</artifactId>
         <version>${spring.version}</version>
     </dependency>

     <!-- springframework -->
    <dependency>
        <groupId>org.springframework</groupId>
        <artifactId>spring-webmvc</artifactId>
        <version>${spring.version}</version>
    </dependency>
    <dependency>
        <groupId>org.springframework</groupId>
        <artifactId>spring-core</artifactId>
        <version>${spring.version}</version>
    </dependency>
    <dependency>
        <groupId>org.springframework</groupId>
        <artifactId>spring-context</artifactId>
        <version>${spring.version}</version>
    </dependency>
    <dependency>
        <groupId>org.springframework</groupId>
        <artifactId>spring-context-support</artifactId>
        <version>${spring.version}</version>
    </dependency>

    <dependency>
        <groupId>net.sf.ehcache</groupId>
        <artifactId>ehcache</artifactId>
        <version>2.10.3</version>
    </dependency>
  </dependencies>
</project>


4.2、在src/main/resources添加ehcache.xml


<?xml version="1.0" encoding="UTF-8"?>
<ehcache xmlns:xsi="http://www.w3.org/2001/XMLSchema-instance"
         xsi:noNamespaceSchemaLocation="http://ehcache.org/ehcache.xsd">

  <!-- 磁盘缓存位置 -->
  <diskStore path="java.io.tmpdir/ehcache" />

  <!-- 默认缓存 -->
  <defaultCache
          maxEntriesLocalHeap="10000"
          eternal="false"
          timeToIdleSeconds="120"
          timeToLiveSeconds="120"
          maxEntriesLocalDisk="10000000"
          diskExpiryThreadIntervalSeconds="120"
          memoryStoreEvictionPolicy="LRU">
    <persistence strategy="localTempSwap"/>
  </defaultCache>

  <!-- helloworld缓存 -->
  <cache name="HelloWorldCache"
         maxElementsInMemory="1000"
         eternal="false"
         timeToIdleSeconds="5"
         timeToLiveSeconds="5"
         overflowToDisk="false"
         memoryStoreEvictionPolicy="LRU"/>

  <cache name="UserCache"
         maxElementsInMemory="1000"
         eternal="false"
         timeToIdleSeconds="1800"
         timeToLiveSeconds="1800"
         overflowToDisk="false"
         memoryStoreEvictionPolicy="LRU"/>
</ehcache>


4.3、在src/main/resources/conf/spring中配置spring-base.xml和spring-ehcache.xml
spring-base.xml


<?xml version="1.0" encoding="UTF-8"?>
<beans xmlns="http://www.springframework.org/schema/beans"
       xmlns:xsi="http://www.w3.org/2001/XMLSchema-instance"
       xmlns:context="http://www.springframework.org/schema/context" xmlns:util="http://www.springframework.org/schema/util"
       xsi:schemaLocation="http://www.springframework.org/schema/beans http://www.springframework.org/schema/beans/spring-beans.xsd http://www.springframework.org/schema/context http://www.springframework.org/schema/context/spring-context.xsd http://www.springframework.org/schema/util http://www.springframework.org/schema/util/spring-util.xsd">

    <context:component-scan base-package="com.gdut.*"/>
</beans>


spring-ehcache.xml


<?xml version="1.0" encoding="UTF-8"?>
<beans xmlns="http://www.springframework.org/schema/beans"
       xmlns:xsi="http://www.w3.org/2001/XMLSchema-instance"
       xmlns:cache="http://www.springframework.org/schema/cache"
       xsi:schemaLocation="http://www.springframework.org/schema/beans
        http://www.springframework.org/schema/beans/spring-beans-3.0.xsd
        http://www.springframework.org/schema/cache
        http://www.springframework.org/schema/cache/spring-cache-3.2.xsd">

  <description>ehcache缓存配置管理文件</description>

  <!-- 启用缓存注解开关 -->
  <cache:annotation-driven cache-manager="cacheManager"/>

  <bean id="cacheManager" class="org.springframework.cache.ehcache.EhCacheCacheManager">
    <property name="cacheManager" ref="ehcache"/>
  </bean>

  <bean id="ehcache" class="org.springframework.cache.ehcache.EhCacheManagerFactoryBean">
    <property name="configLocation" value="classpath:ehcache.xml"/>
  </bean>

</beans>


4.4、在src/main/java/com.mengdee.manager.service/下 创建EhcacheService和EhcacheServiceImpl
EhcacheService.java
| 1 2 3 4 5 6 7 8 9 10 11 12 13 14 15 16 17 18 19 20 |
|
EhcacheServiceImpl.java
| 1 2 3 4 5 6 7 8 9 10 11 12 13 14 15 16 17 18 19 20 21 22 23 24 25 26 27 28 29 30 31 32 33 34 35 36 37 38 39 40 41 42 43 44 45 46 47 48 49 50 51 52 53 54 55 56 57 58 |
|
User .java
| 1 2 3 4 5 6 7 8 9 10 11 12 13 14 15 16 17 18 19 20 21 22 23 24 25 26 27 28 29 30 31 |
|
#注解基本使用方法
Spring对缓存的支持类似于对事务的支持。
首先使用注解标记方法,相当于定义了切点,然后使用Aop技术在这个方法的调用前、调用后获取方法的入参和返回值,进而实现了缓存的逻辑。
@Cacheable
表明所修饰的方法是可以缓存的:当第一次调用这个方法时,它的结果会被缓存下来,在缓存的有效时间内,以后访问这个方法都直接返回缓存结果,不再执行方法中的代码段。
这个注解可以用condition属性来设置条件,如果不满足条件,就不使用缓存能力,直接执行方法。
可以使用key属性来指定key的生成规则。
@Cacheable 支持如下几个参数:
value:缓存位置名称,不能为空,如果使用EHCache,就是ehcache.xml中声明的cache的name, 指明将值缓存到哪个Cache中
key:缓存的key,默认为空,既表示使用方法的参数类型及参数值作为key,支持SpEL,如果要引用参数值使用井号加参数名,如:#userId,一般来说,我们的更新操作只需要刷新缓存中某一个值,所以定义缓存的key值的方式就很重要,最好是能够唯一,因为这样可以准确的清除掉特定的缓存,而不会影响到其它缓存值 ,本例子中使用实体加冒号再加ID组合成键的名称,如"user:1"、"order:223123"等
condition:触发条件,只有满足条件的情况才会加入缓存,默认为空,既表示全部都加入缓存,支持SpEL
| 1 2 3 4 5 6 7 8 9 10 11 12 13 |
|
@CachePut
与@Cacheable不同,@CachePut不仅会缓存方法的结果,还会执行方法的代码段。它支持的属性和用法都与@Cacheable一致。
@CacheEvict
与@Cacheable功能相反,@CacheEvict表明所修饰的方法是用来删除失效或无用的缓存数据。
@CacheEvict 支持如下几个参数:
value:缓存位置名称,不能为空,同上
key:缓存的key,默认为空,同上
condition:触发条件,只有满足条件的情况才会清除缓存,默认为空,支持SpEL
allEntries:true表示清除value中的全部缓存,默认为false
| 1 2 3 4 5 6 7 8 9 10 11 |
|
5、测试
SpringTestCase.java
| 1 2 3 4 5 6 7 8 9 10 11 |
|
EhcacheServiceTest.java
| 1 2 3 4 5 6 7 8 9 10 11 12 13 14 15 16 17 18 19 20 21 22 23 24 25 26 27 28 29 30 31 32 33 34 35 36 37 38 39 40 41 42 43 44 45 46 47 48 49 50 51 52 53 54 55 56 57 58 59 60 61 62 63 64 65 66 67 68 69 70 71 72 73 74 75 76 77 78 79 80 81 82 83 84 85 |
|

旨在为数千万中国开发者提供一个无缝且高效的云端环境,以支持学习、使用和贡献开源项目。
更多推荐


 6
6 0
0- 0


 已为社区贡献1条内容

所有评论(0)