
iOS 微博第三方登录的简单实现
一、下载微博SDK微博SDK的官方github : https://github.com/sinaweibosdk/weibo_ios_sdk下载所需要的SDK二、集成SDK下载后的SDK文件结构如下: 将这个文件夹拖拽到你所要添加的工程中。三、引入依赖库及相关设置如图点击添加依赖库所需依赖库:QuartzCor
一、下载微博SDK
微博SDK的官方github : https://github.com/sinaweibosdk/weibo_ios_sdk
下载所需要的SDK
二、集成SDK
下载后的SDK文件结构如下:
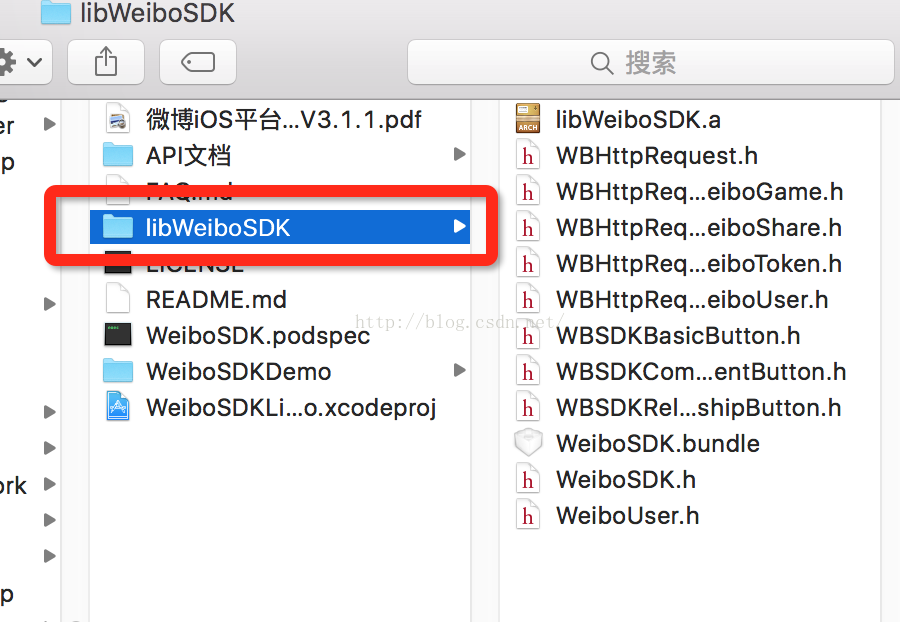
将这个文件夹拖拽到你所要添加的工程中。
三、引入依赖库及相关设置
如图点击添加依赖库
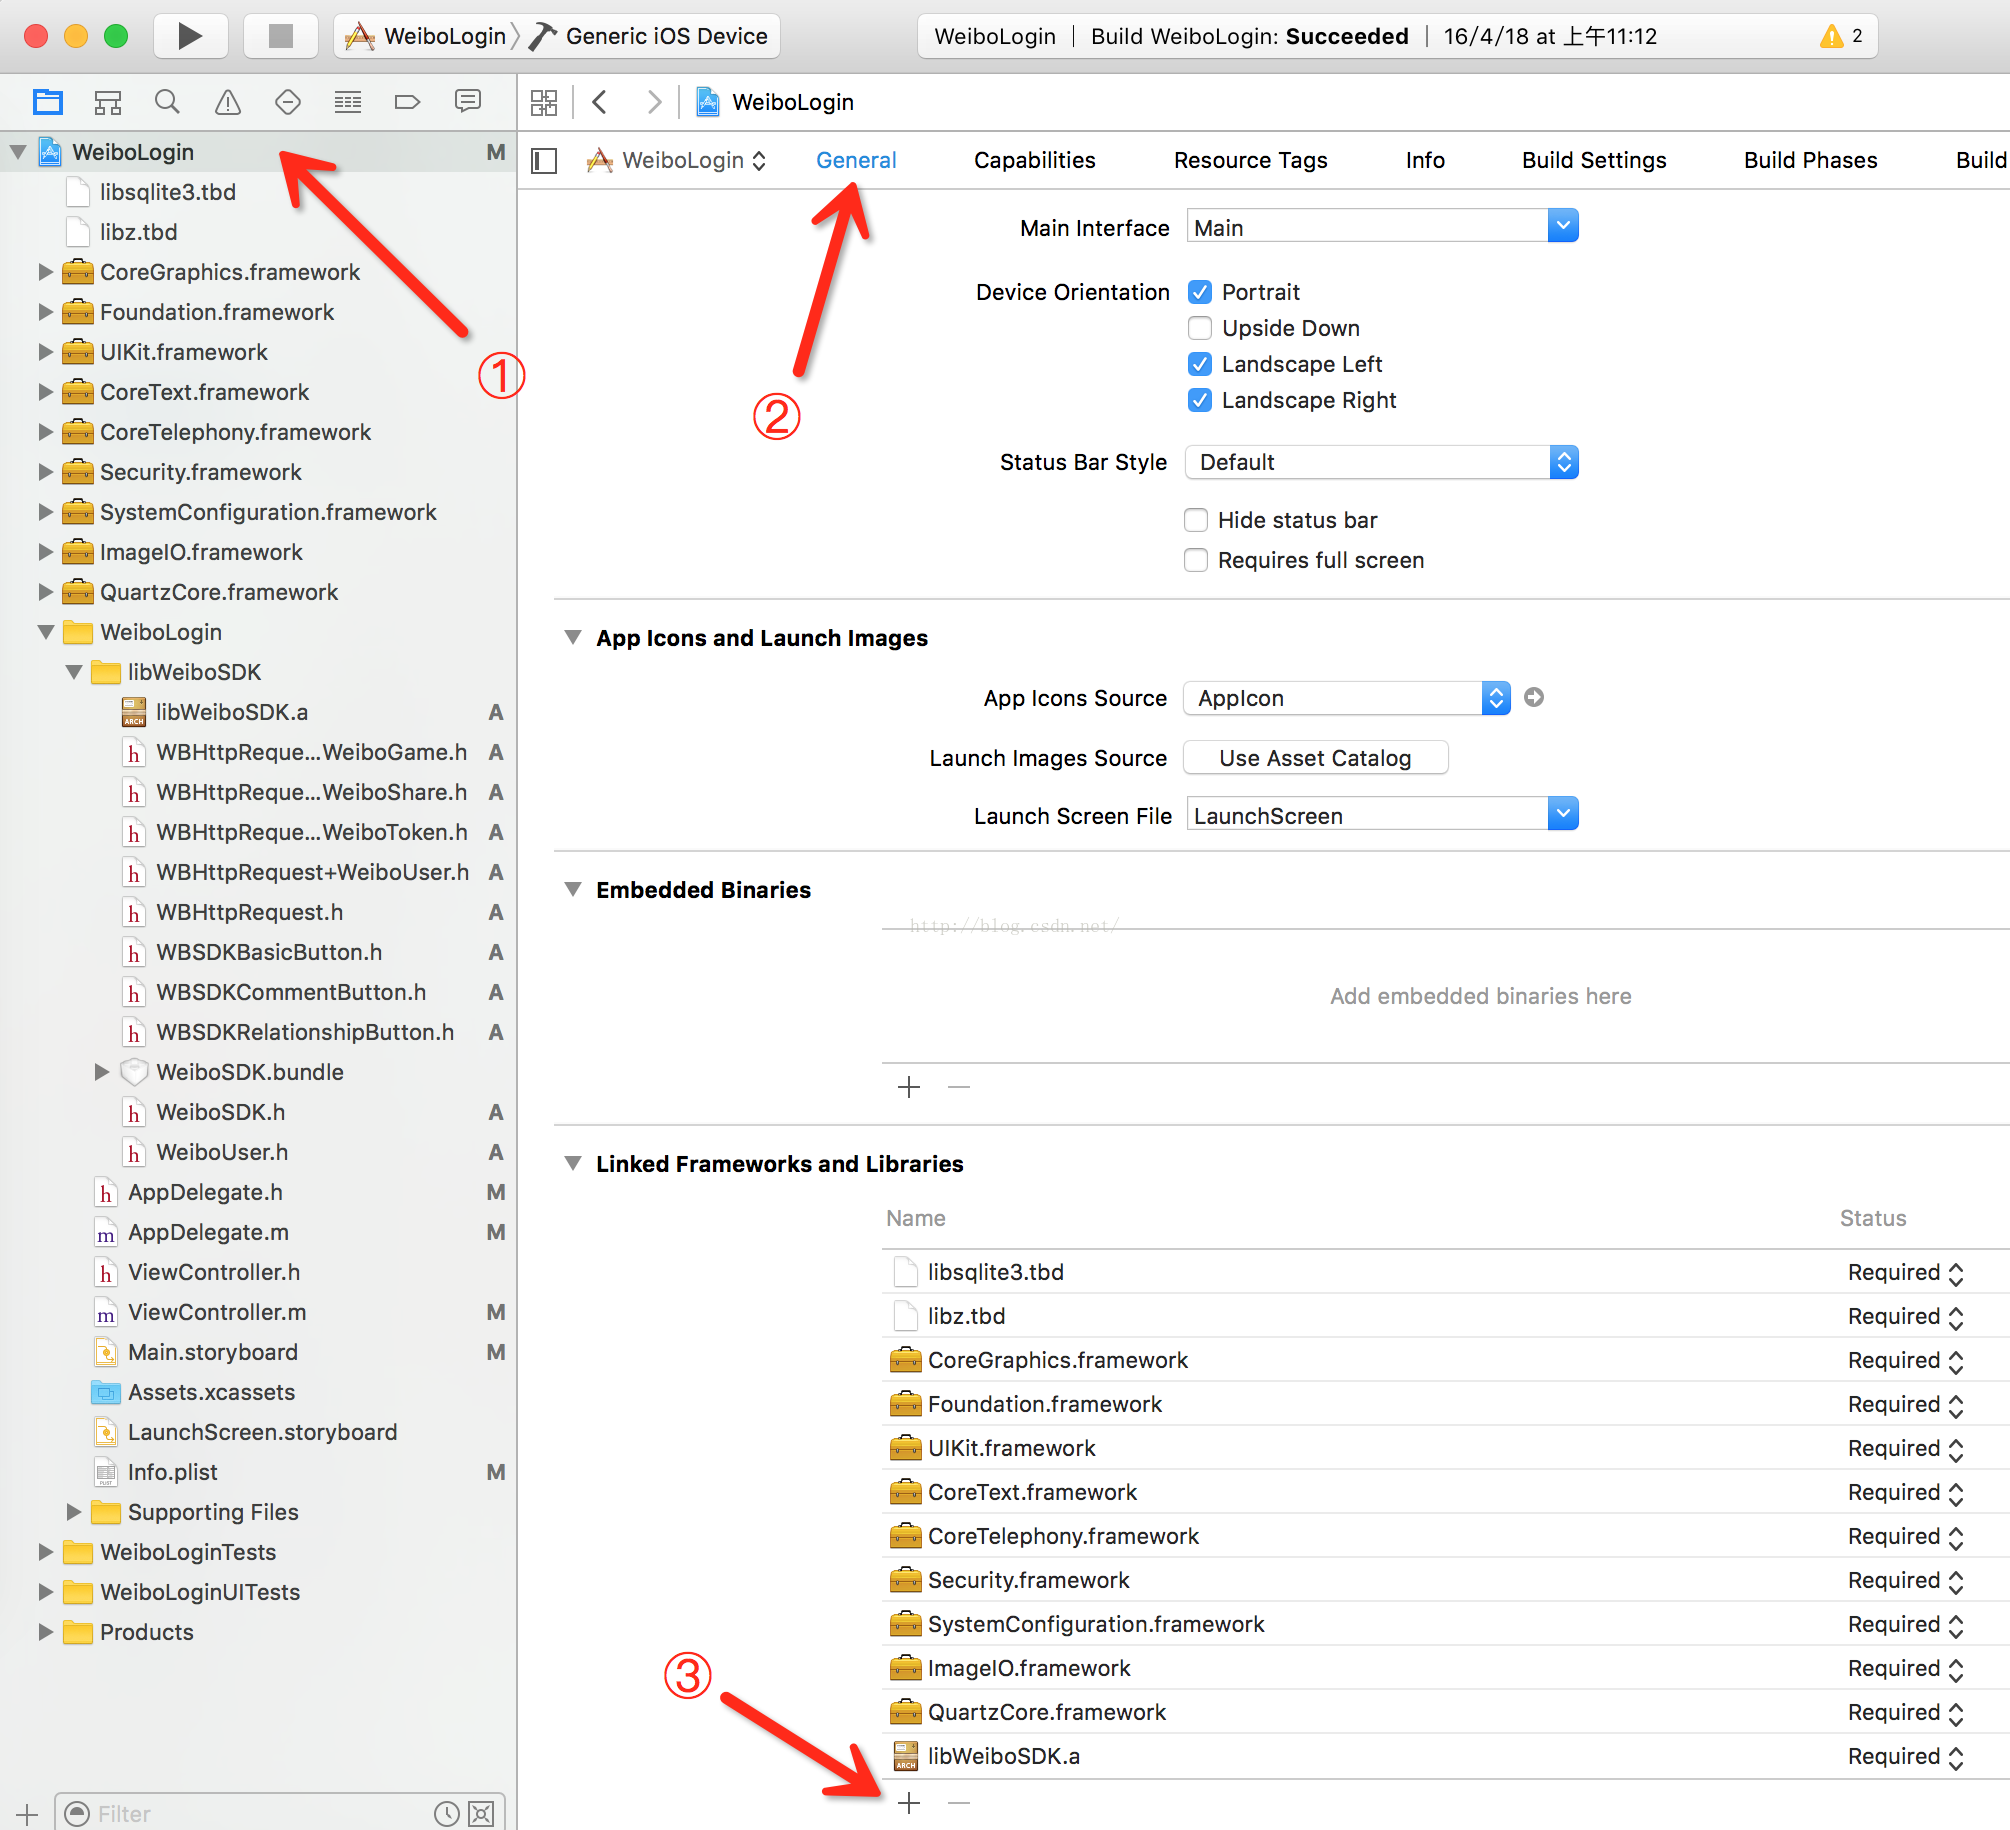
所需依赖库:
QuartzCore.framework,
ImageIO.framework,
SystemConfiguration.framework,
Security.framework,
CoreTelephony.framework,
CoreText.framework,
UIKit.framework,
Foundation.framework,
CoreGraphics.framework,
libz.dylib,
ibsqlite3.dylib
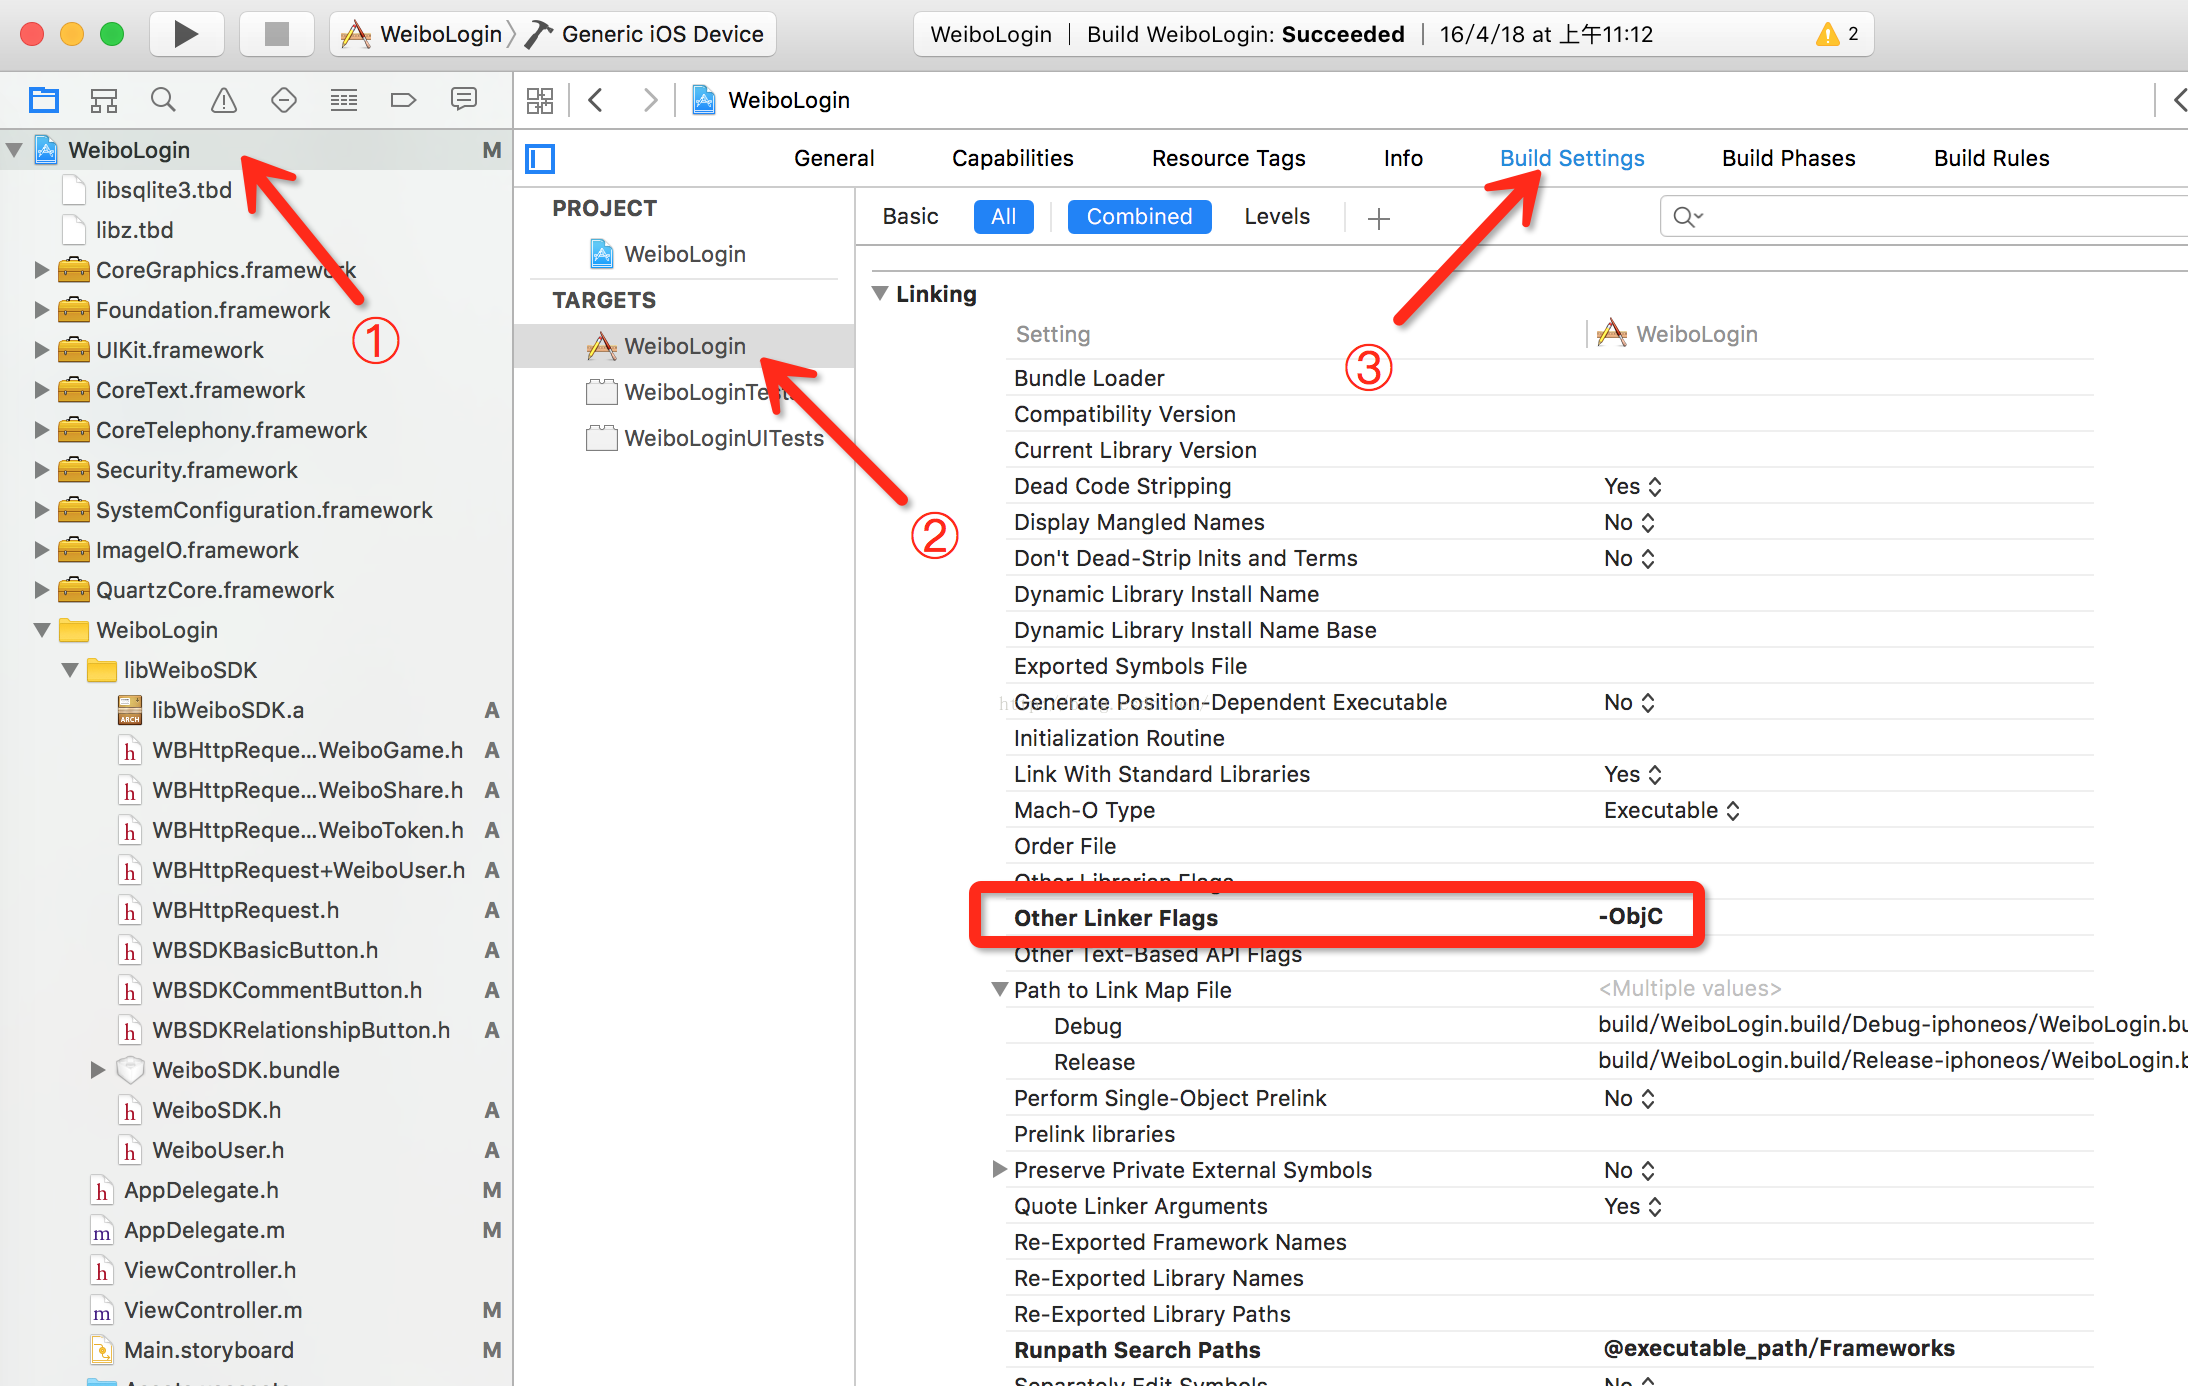
添加编译选项:
引入静态库后,需添加-ObjC编译选项,避免静态库中类加载不全引起崩溃。
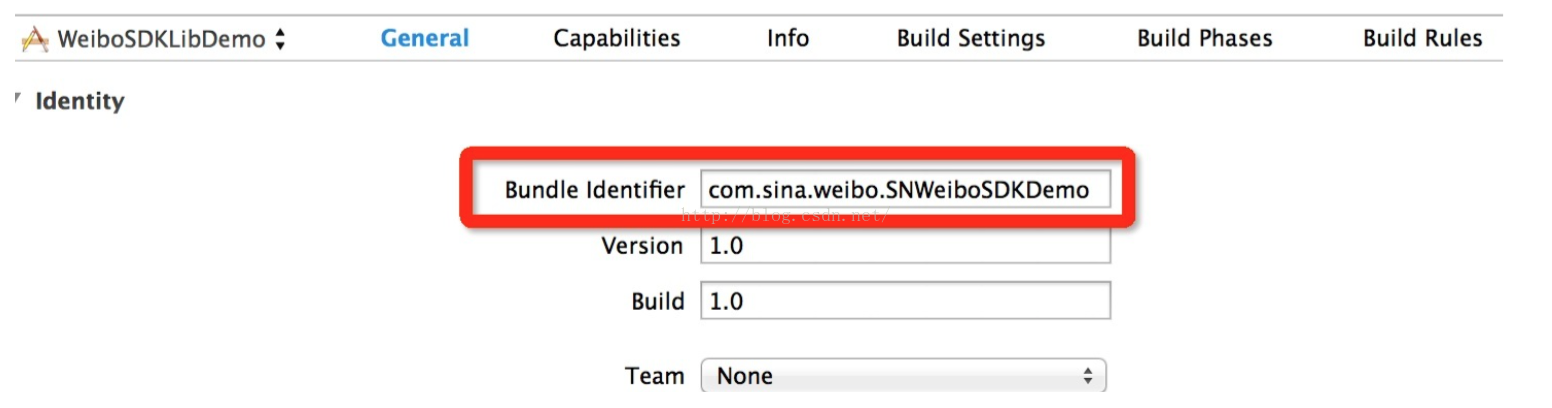
四、创建应用
参考SDK包文件中文档进行应用的创建,这里要强调一下,申请应用时的AppleID和BundleID一定要与工程对应,否则运行会出错,无法进行授权。
五、设置工程回调URL Scheme
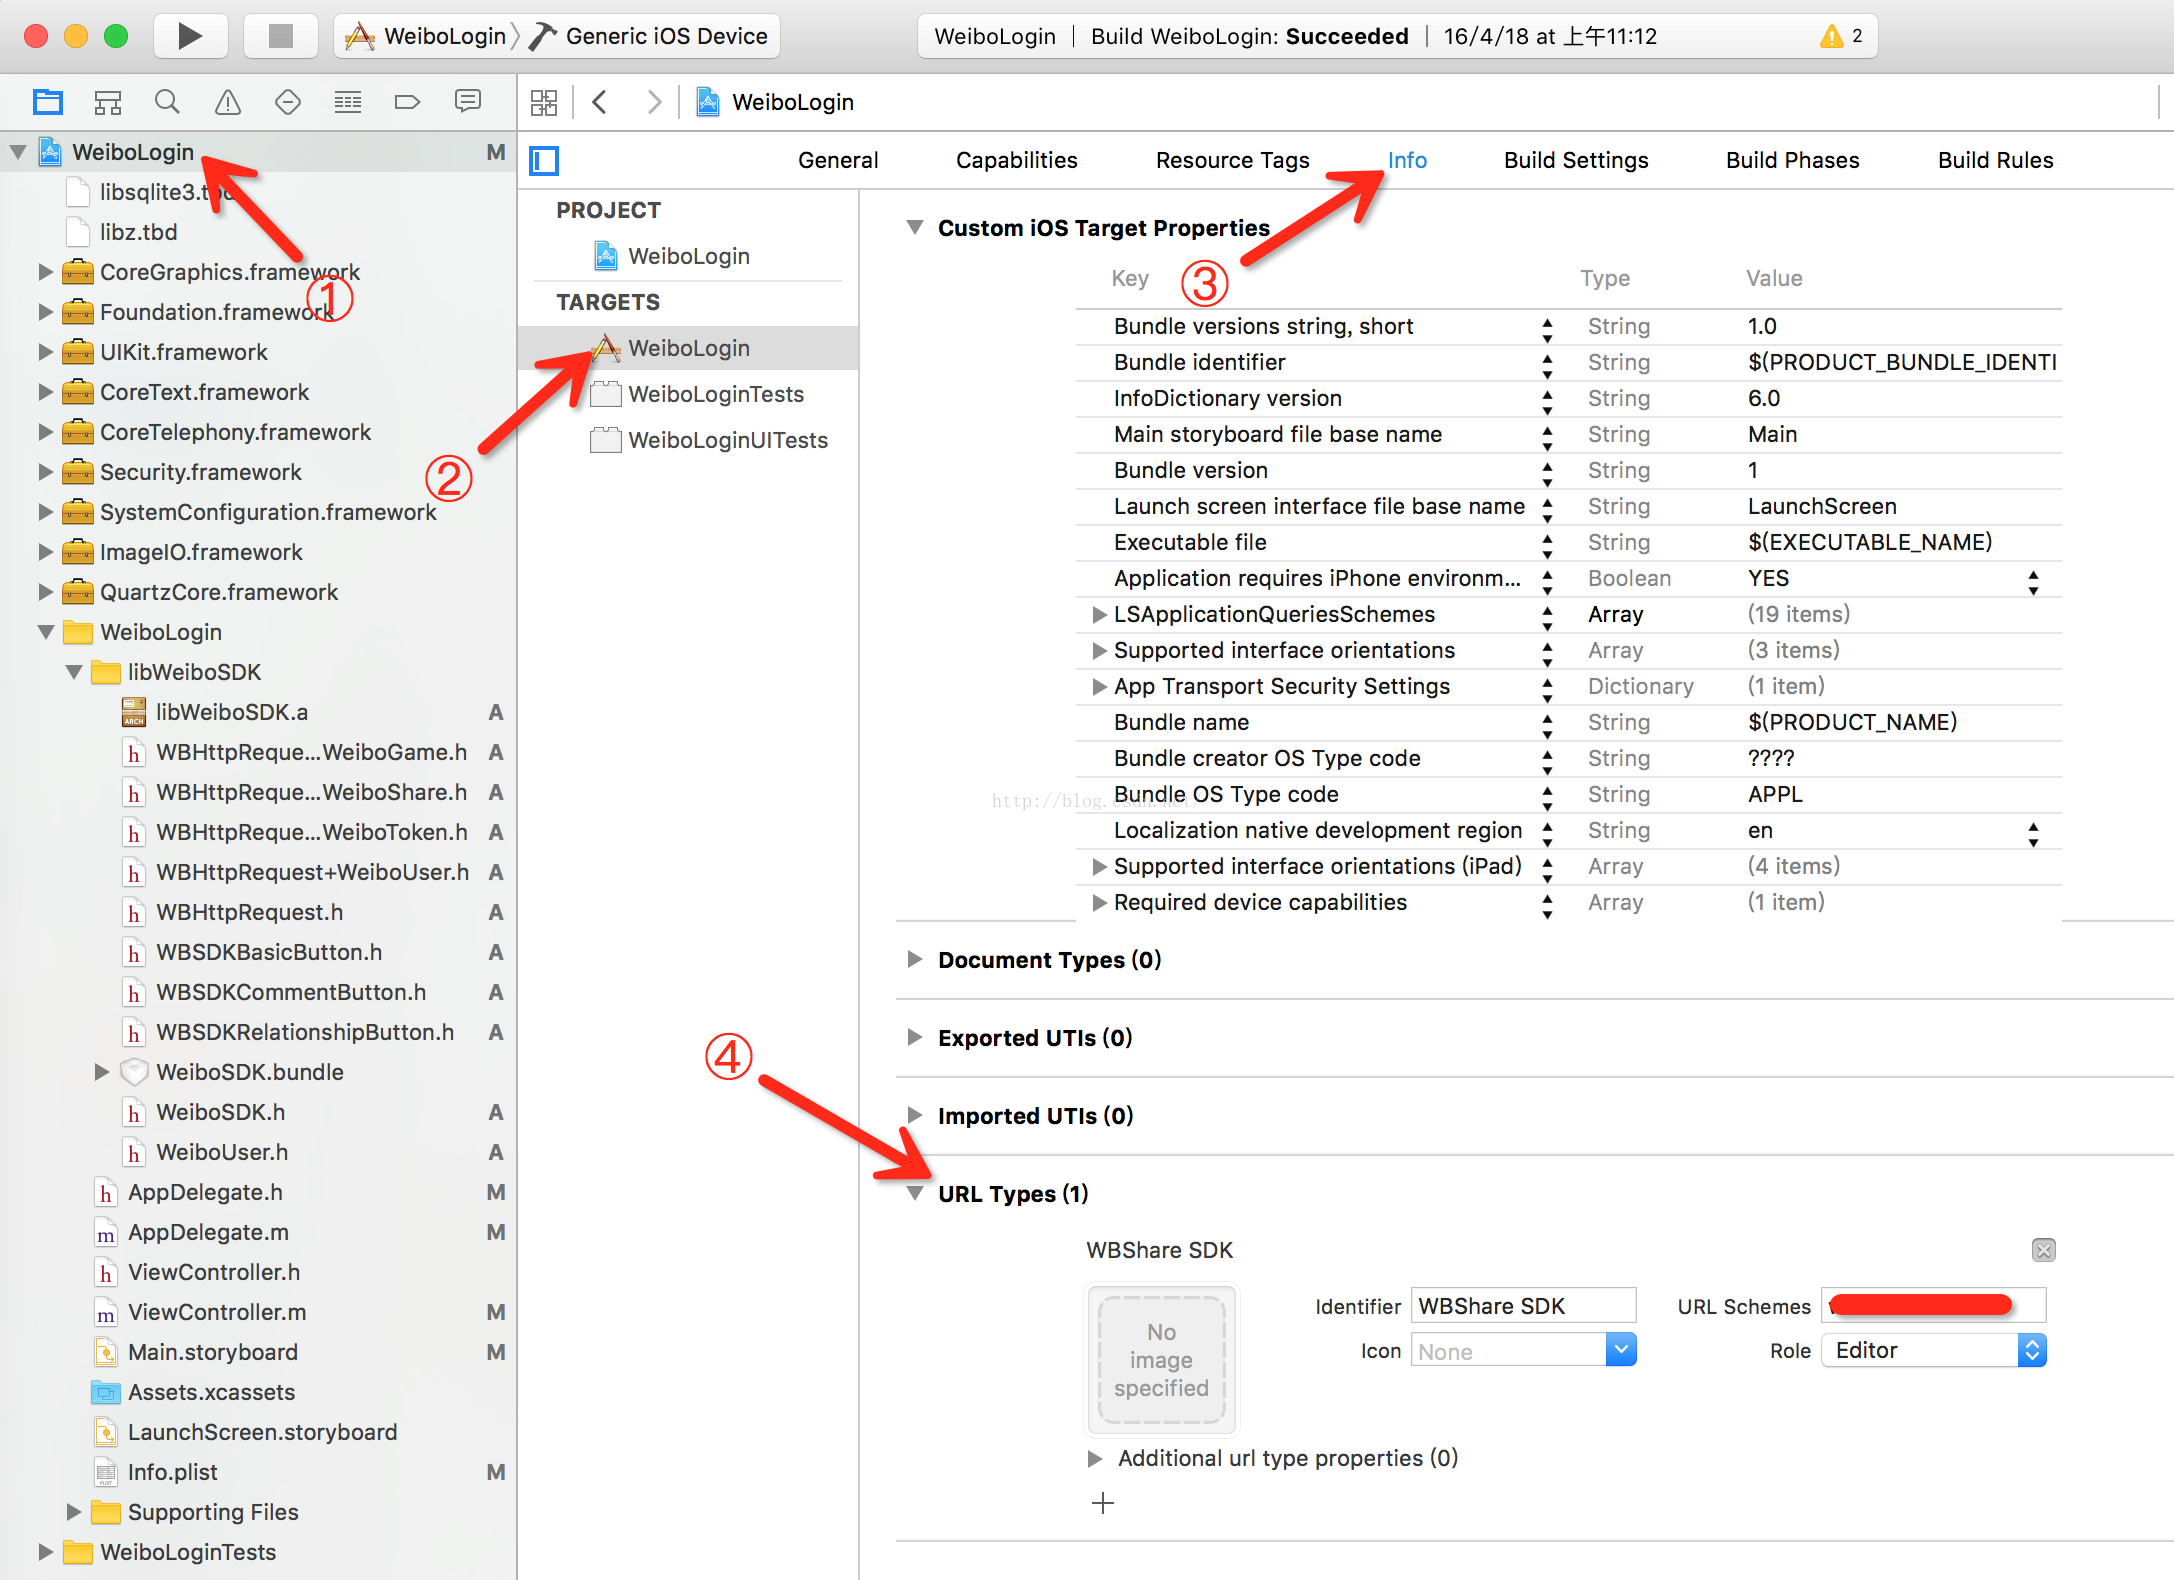
如图,设置URLSchemes为你申请的AppKey,
例如:wb204543436852
六、编写代码
1、在Appdelegate中导入头文件,声明遵循微博代理
#import <UIKit/UIKit.h>
#import "WeiboSDK.h"

#define kAppKey         @"这里是你的AppKey"
#define kRedirectURI    @"这里是你的回调网址"

@interface AppDelegate : UIResponder <UIApplicationDelegate, WeiboSDKDelegate>

@property (strong, nonatomic) UIWindow *window;

@end
- (BOOL)application:(UIApplication *)application didFinishLaunchingWithOptions:(NSDictionary *)launchOptions {
    // Override point for customization after application launch.

    [WeiboSDK enableDebugMode:YES];
    [WeiboSDK registerApp:@"这里填写你申请的Appkey"];

    return YES;
}
3、重写AppDelegate中的handleOpen URL和openURL方法
- (BOOL)application:(UIApplication *)application openURL:(NSURL *)url sourceApplication:(NSString *)sourceApplication annotation:(id)annotation
{
    return [WeiboSDK handleOpenURL:url delegate:self];
}

- (BOOL)application:(UIApplication *)application handleOpenURL:(NSURL *)url
{
    return [WeiboSDK handleOpenURL:url delegate:self];
}4、在你所要添加登录方法的controller中添加以下登录方法,该方法会跳转微博授权
- (void)weiboLoginButtonPressed
{
    NSLog(@"%s",__func__);

    WBAuthorizeRequest *request = [WBAuthorizeRequest request];
    request.redirectURI = kRedirectURI;
    request.scope = @"all";
    request.userInfo = @{@"SSO_From": @"SendMessageToWeiboViewController",
                         @"Other_Info_1": [NSNumber numberWithInt:123],
                         @"Other_Info_2": @[@"obj1", @"obj2"],
                         @"Other_Info_3": @{@"key1": @"obj1", @"key2": @"obj2"}};
    [WeiboSDK sendRequest:request];
}5、在Appdelegate中实现微博的回调方法,获取回调信息
这里说明一下,下面的方法实现在Appdelegate中,当在你所需登录的controller调用的登录方法后会跳转微博进行授权,授权信息会以回调的方式调用Appdelegate中的下面方法,从该方法中我们可以得出授权所得到的userId(用户唯一标识),和accessToken。拿到这两个参数后可以调用微博接口进行一系列的获取个人信息、转发、评论、发表微博等操作,这里我们只需要获取用户的个人信息就可以了。
//微博回调
- (void)didReceiveWeiboResponse:(WBBaseResponse *)response
{
    if ([response isKindOfClass:WBAuthorizeResponse.class])
    {
        NSString *userId = [(WBAuthorizeResponse *)response userID];
        NSString *accessToken = [(WBAuthorizeResponse *)response accessToken];

        NSLog(@"userId %@",userId);
        NSLog(@"accessToken %@",accessToken);

        NSDictionary *notification = @{
                                       @"userId" : userId,
                                       @"accessToken" : accessToken
                                       };

        [[NSNotificationCenter defaultCenter] postNotificationName:@"weiboDidLoginNotification"
                                              object:self userInfo:notification];
    }
}
当获取到 反馈的userID和accessToken后,这里我使用了通知Notification的方式来调用刚才申请第三方登录的controller中的相应的方法。记得使用通知的时候在dealloc方法中进行通知的删除。
6、在实现登录的controller中的相应的通知方法中实现以下功能
用刚刚在微博的回调方法中得到的userId和accessToken来请求微博的接口以获取用户的个人信息
https://api.weibo.com/2/users/show.json
#pragma mark - Weibo Methods

- (void)weiboDidLoginNotification:(NSNotification *)notification
{
    NSLog(@"%s",__func__);

    NSDictionary *userInfo = [notification userInfo];
    NSString *accessToken = [userInfo objectForKey:@"accessToken"];
    NSString *uid = [userInfo objectForKey:@"userId"];

    NSLog(@"userInfo %@",userInfo);

    [self getWeiboUserInfoWithAccessToken:accessToken uid:uid];
}

- (void)getWeiboUserInfoWithAccessToken:(NSString *)accessToken uid:(NSString *)uid
{
    NSString *url =[NSString stringWithFormat:
    @"https://api.weibo.com/2/users/show.json?access_token=%@&uid=%@",accessToken,uid];

    dispatch_async(dispatch_get_global_queue(DISPATCH_QUEUE_PRIORITY_DEFAULT, 0), ^{
        NSURL *zoneUrl = [NSURL URLWithString:url];
        NSString *zoneStr = [NSString stringWithContentsOfURL:zoneUrl
                                                     encoding:NSUTF8StringEncoding error:nil];
        NSData *data = [zoneStr dataUsingEncoding:NSUTF8StringEncoding];
        dispatch_async(dispatch_get_main_queue(), ^{
            if (data)
            {
                NSDictionary *dic = [NSJSONSerialization JSONObjectWithData:data
                                                                    options:NSJSONReadingMutableContainers error:nil];

                NSLog(@"%@",dic);

                NSString *openId = [dic objectForKey:@"id"];
                NSString *memNickName = [dic objectForKey:@"name"];
                NSString *memSex = [[dic objectForKey:@"gender"] isEqualToString:@"m"] ? @"1" : @"0";

                [self loginWithOpenId:openId memNickName:memNickName memSex:memSex];
            }
        });

    });
}
至此,已经获取到了用户微博的UserI d及用户其他的基本信息,用这些信息就可以进行与自己的服务端进行交互来实现第三方登录了。

旨在为数千万中国开发者提供一个无缝且高效的云端环境,以支持学习、使用和贡献开源项目。
更多推荐


 0
0 0
0- 0


 已为社区贡献1条内容

所有评论(0)