
vue3中使用vue3-pdf-app和使用浏览器内置的PDF插件浏览器PDF文件
vue3中使用vue3-pdf-app和使用浏览器内置的PDF插件浏览器PDF文件
文章目录
如果想直接看vue3的内容,就点击对应的目录去看就行了
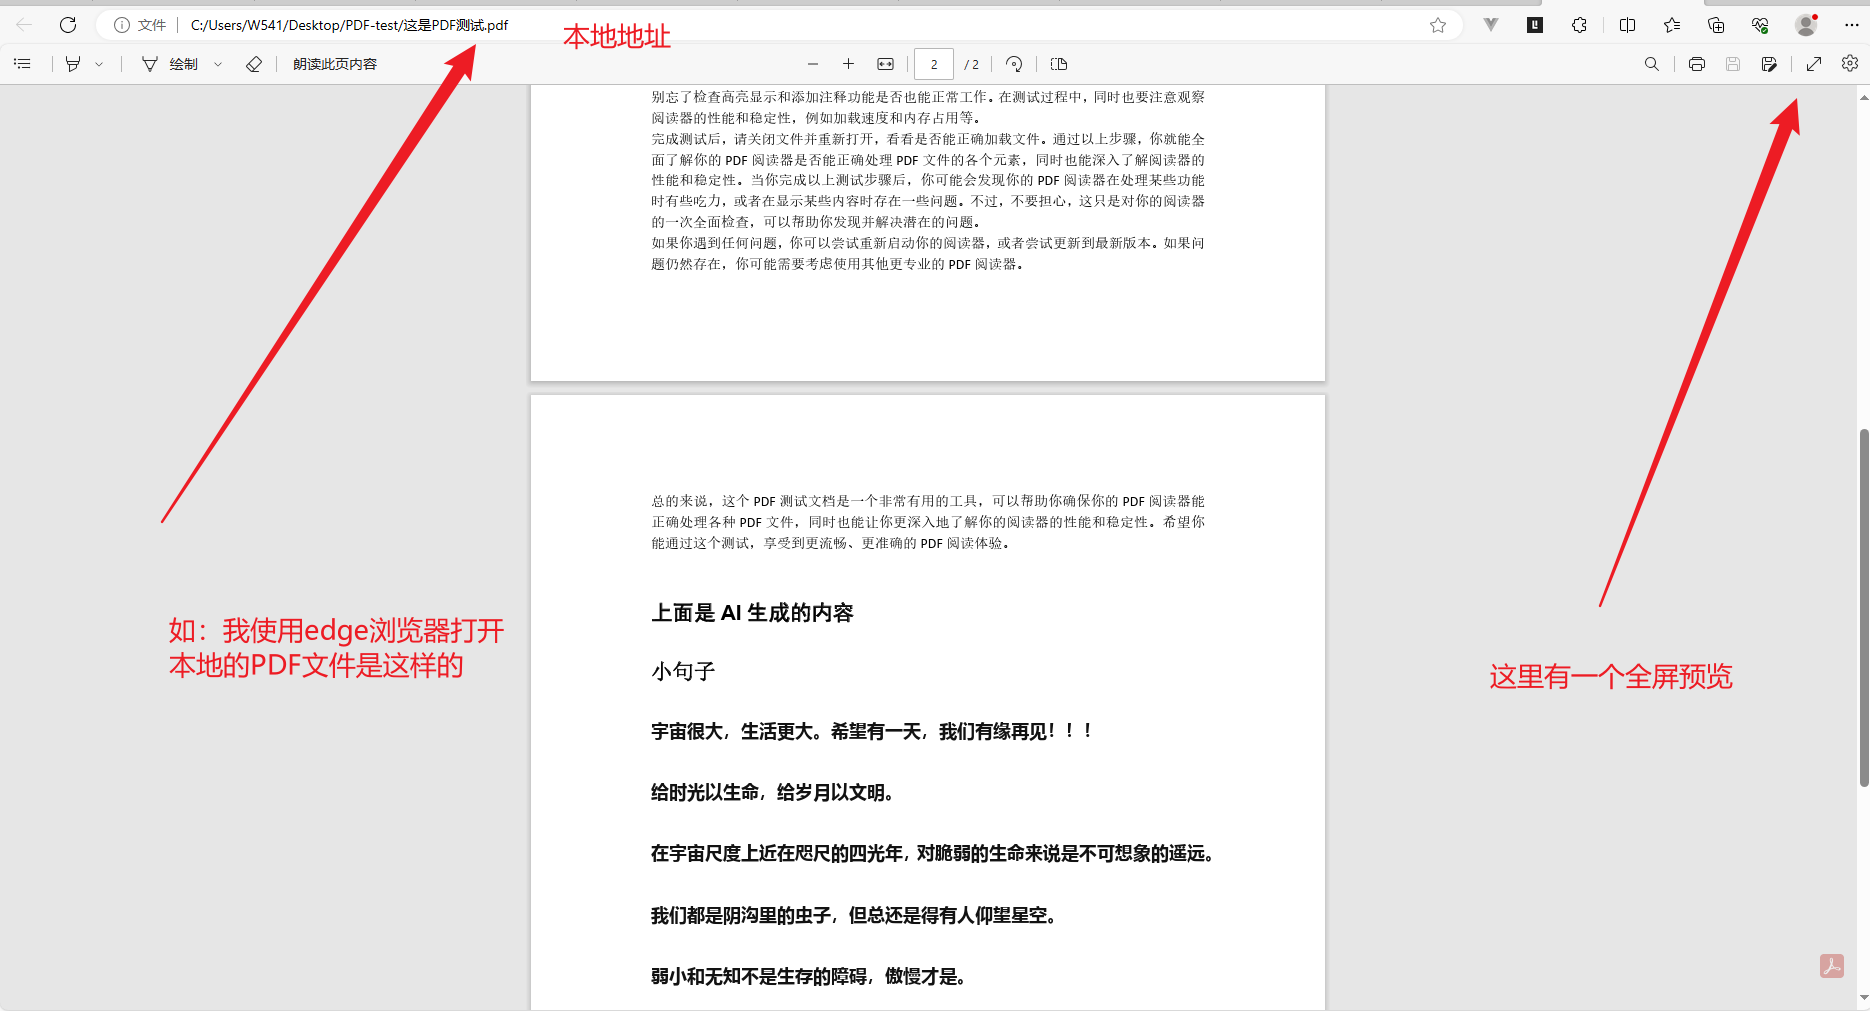
先准备一个PDF
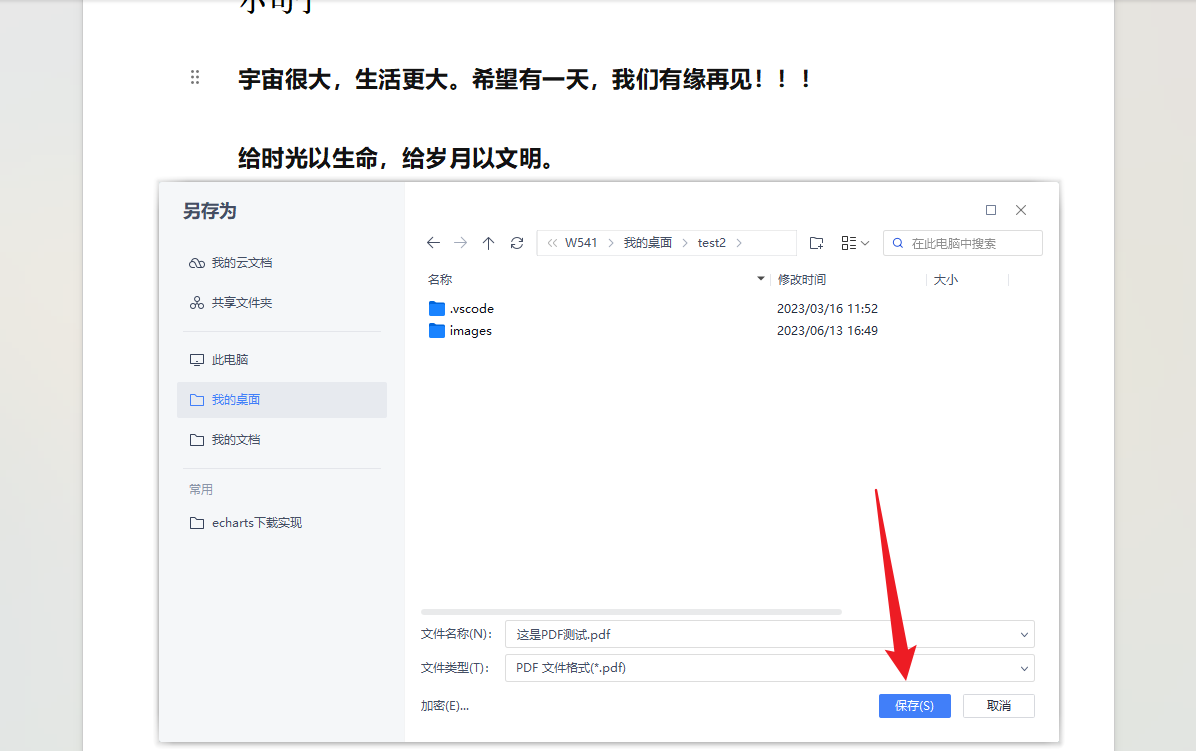
没有的可以使用,WPS直接建立一个,或者建立一个word文档,随便输入一个内容,另存为PDF,就有了。
使用浏览器内置的PDF插件预览PDF
在HTML中使用浏览器插件预览PDF
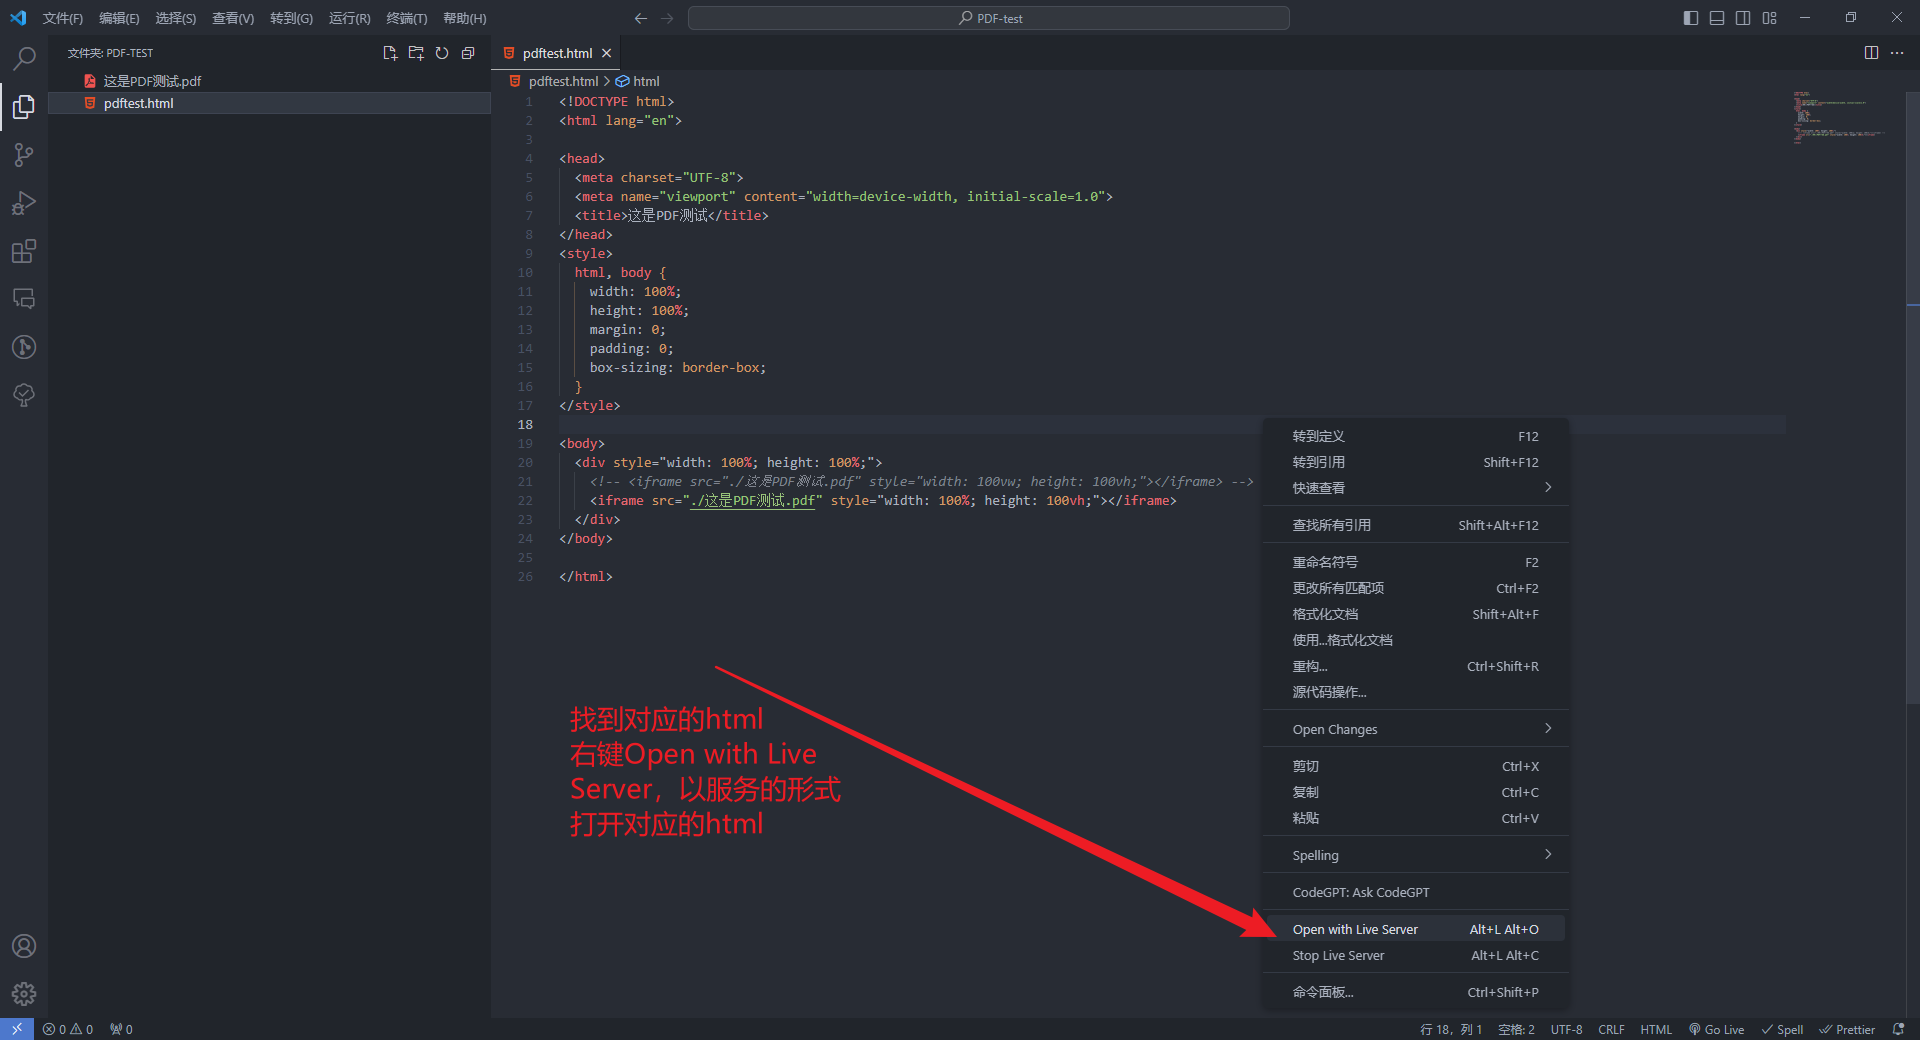
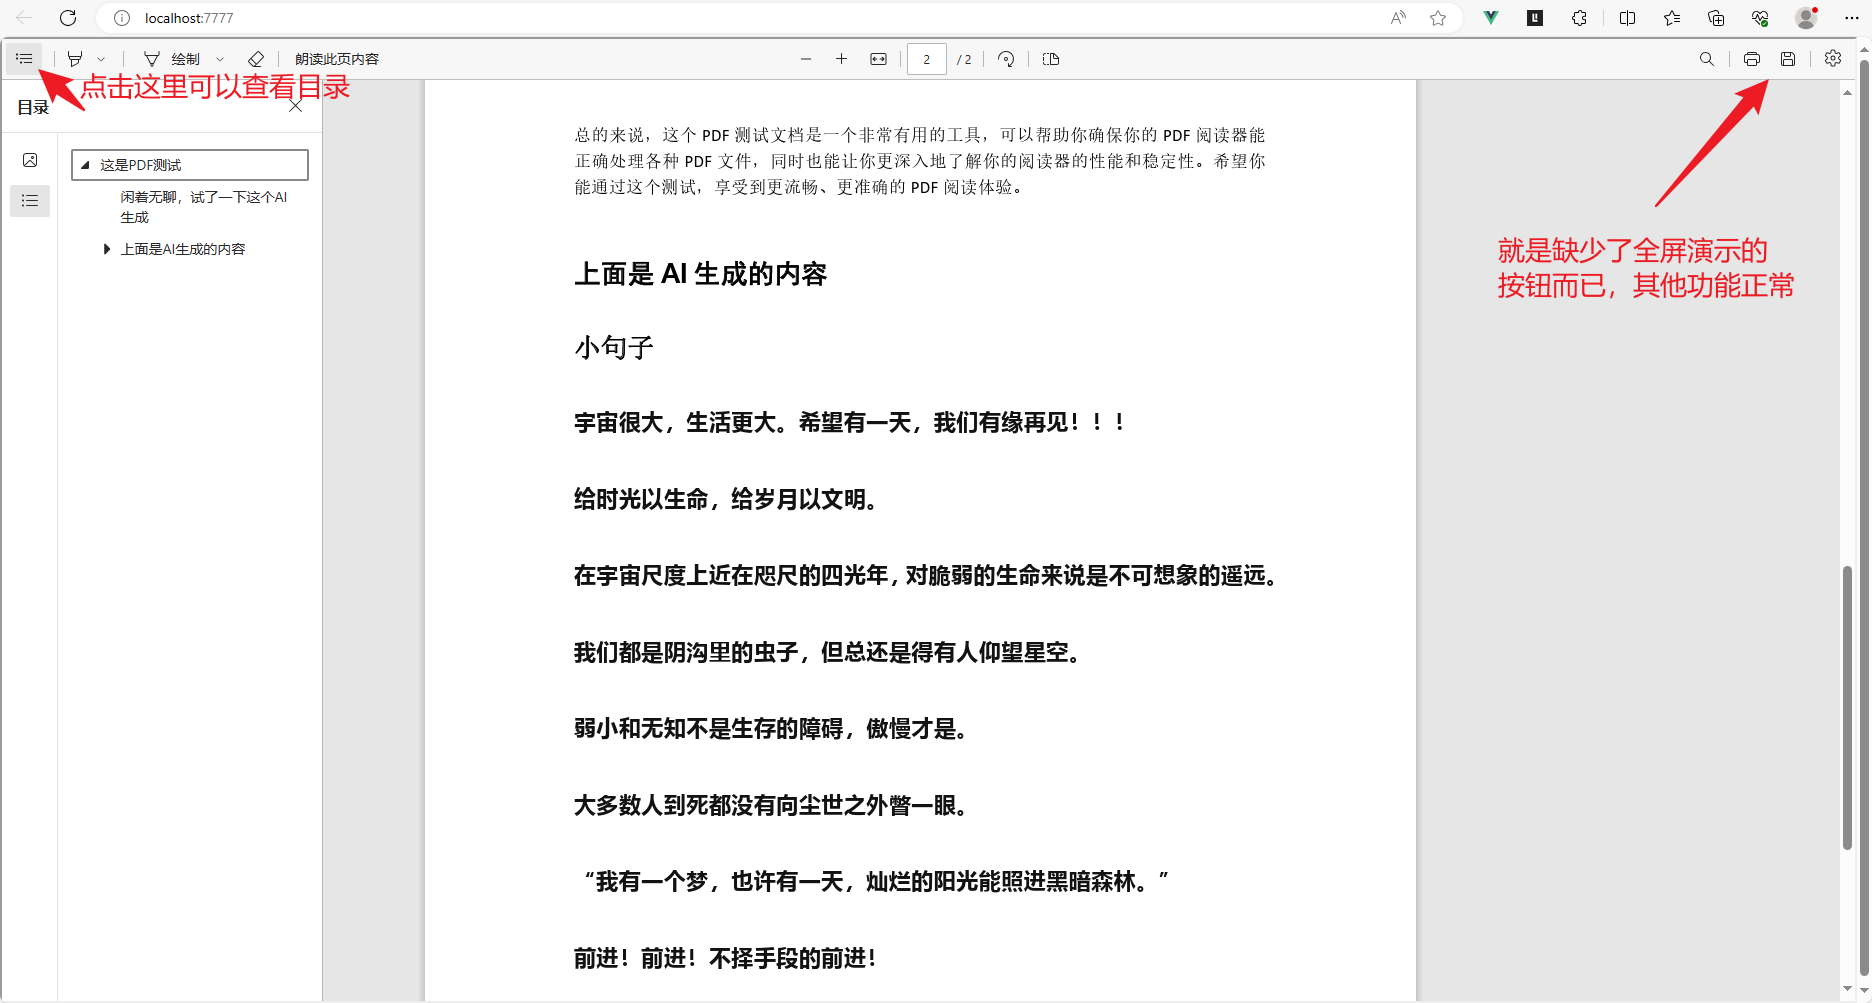
然后我在代码中通过iframe的形式,打开PDF文件,也可以正常预览PDF文件,代码在截图后面
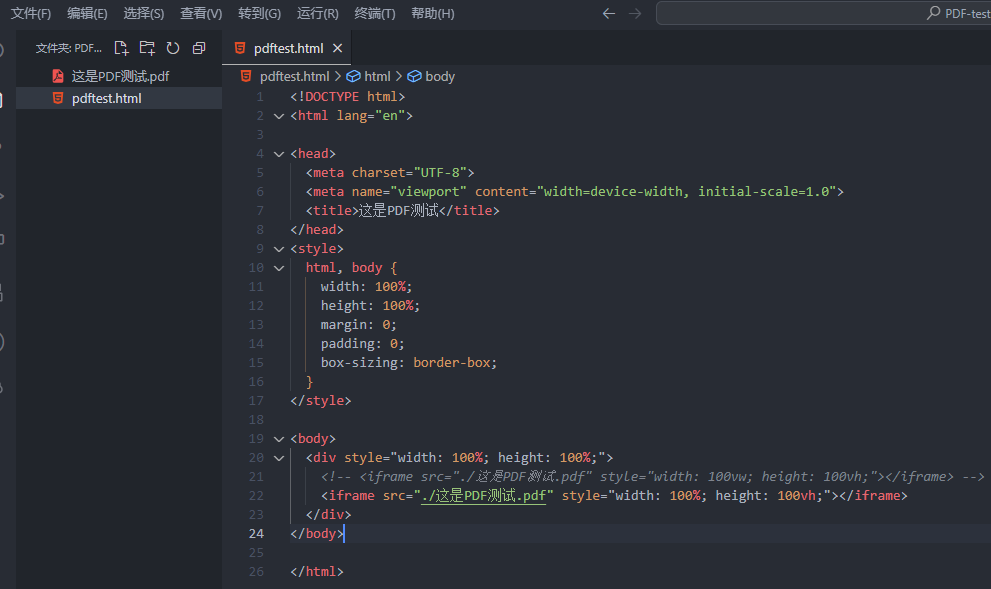
代码如下所示
<!DOCTYPE html>
<html lang="en">

<head>
  <meta charset="UTF-8">
  <meta name="viewport" content="width=device-width, initial-scale=1.0">
  <title>这是PDF测试</title>
</head>
<style>
  html, body {
    width: 100%;
    height: 100%;
    margin: 0;
    padding: 0;
    box-sizing: border-box;
  }
</style>

<body>
  <div style="width: 100%; height: 100%;">
    <!-- <iframe src="./这是PDF测试.pdf" style="width: 100vw; height: 100vh;"></iframe> -->
    <iframe src="./这是PDF测试.pdf" style="width: 100%; height: 100vh;"></iframe>
  </div>
</body>

</html>
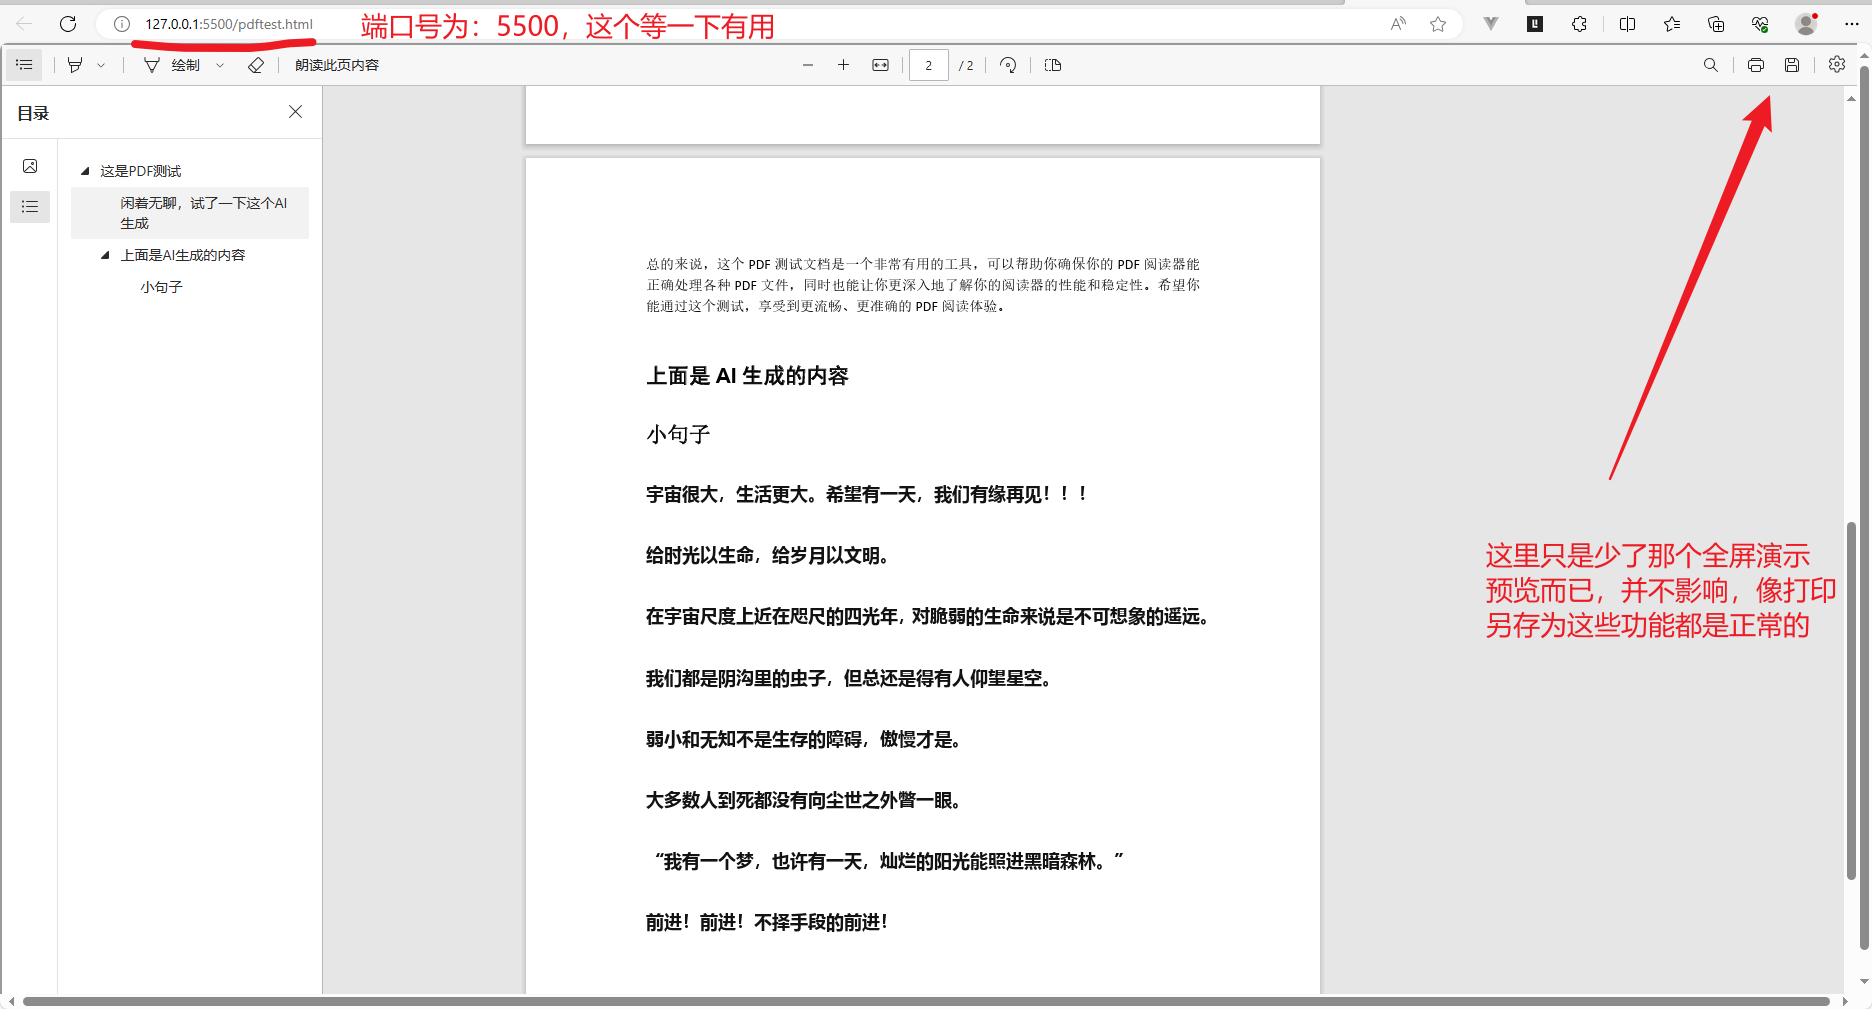
结果如下所示:
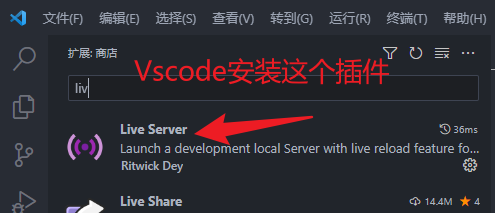
注意了使用插件发布服务之后,千万别关闭Vscode!千万别关闭Vscode!千万别关闭Vscode!千万别关闭Vscode!千万别关闭Vscode!千万别关闭Vscode! 否则,访问不到文件,因为关闭了Vscode就相当于关闭服务了。
Vscode使用插件发布服务后直接通过URL地址访问PDF
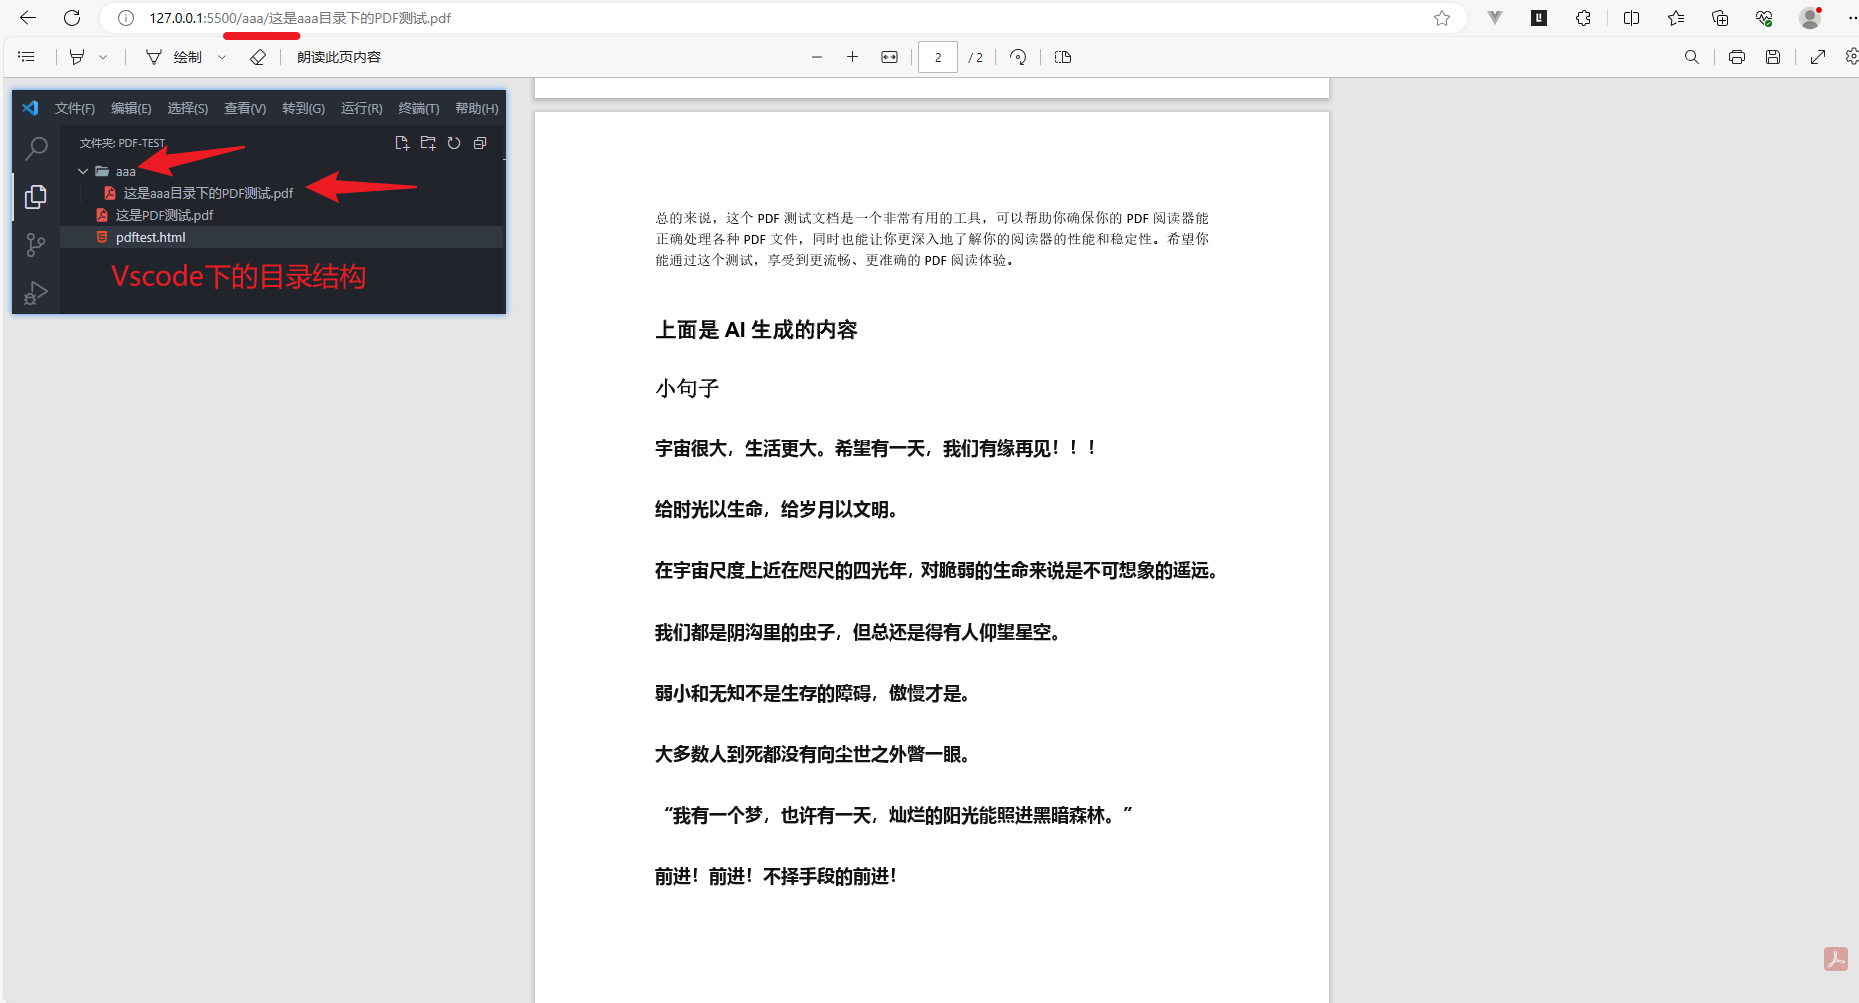
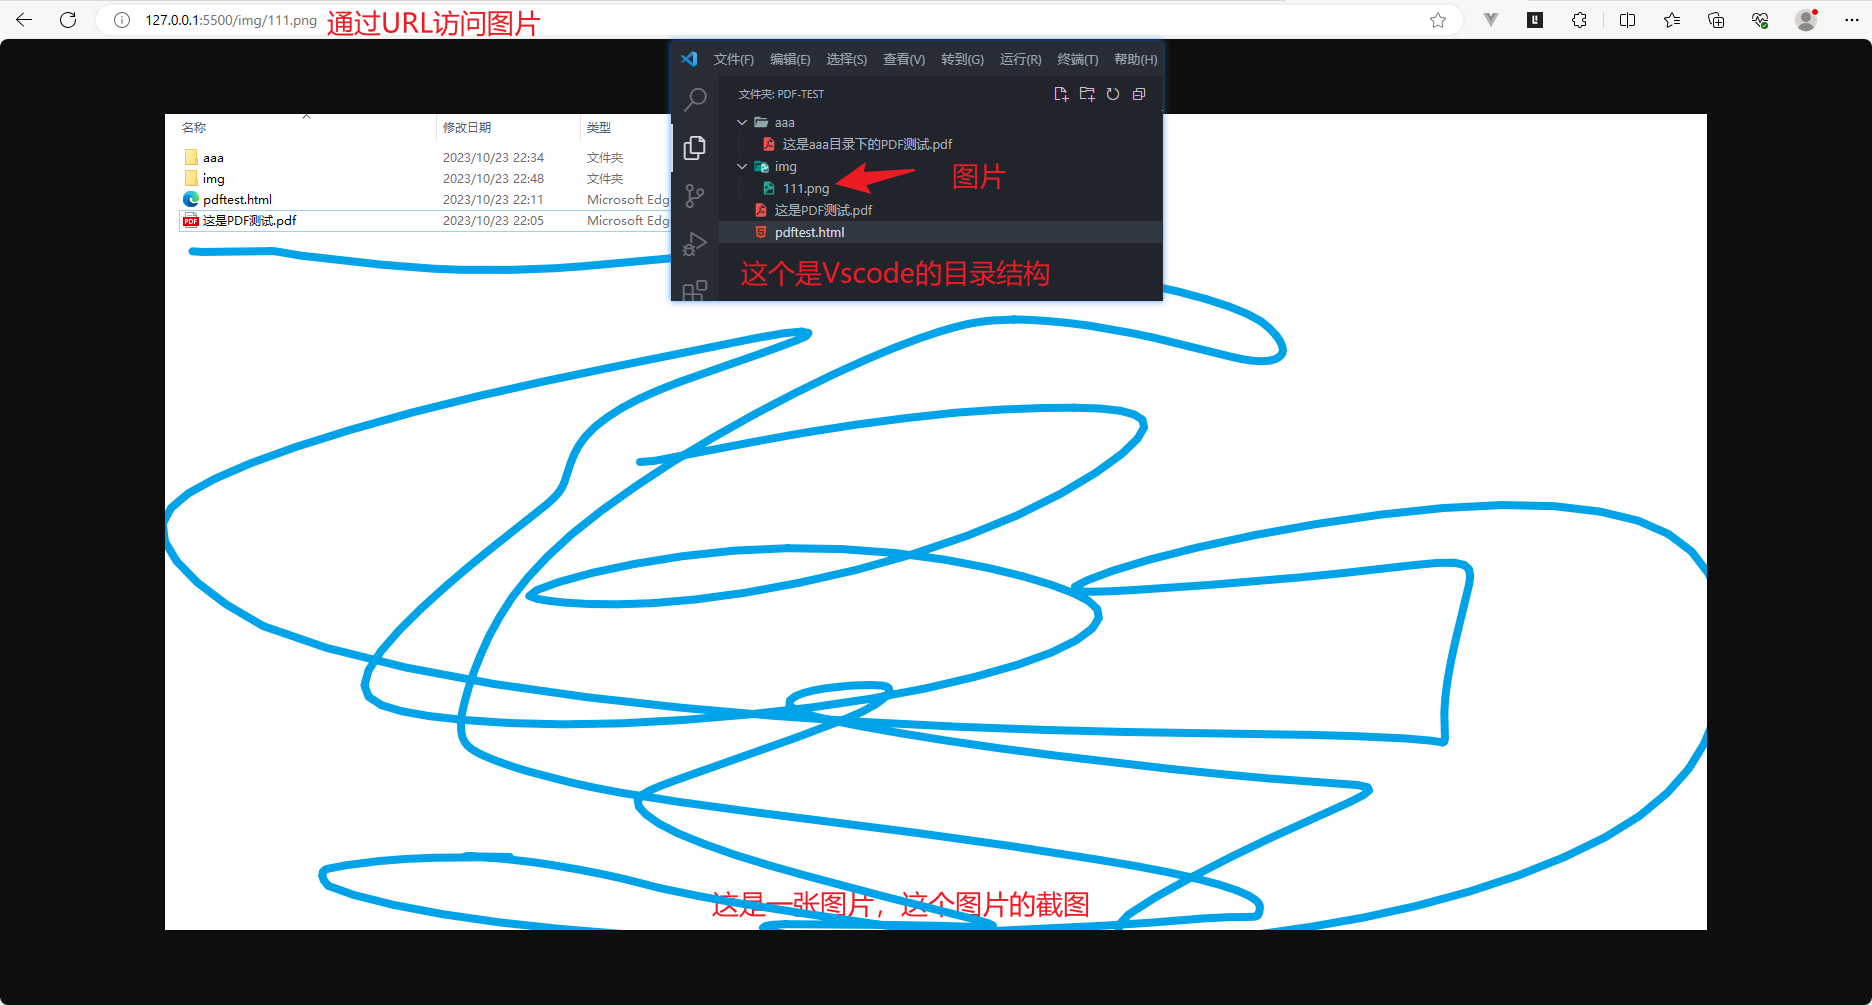
通过上面Vscode的插件,发布为服务之后,将对应pdftest.html所在目录都变成了URL可以访问的内容了,输入端口号和文件名称,就可以实现通过URL地址访问对应的文件了。如下图所示:其中,图中黑色为在Vscode的目录,因为右键发布服务是以上面截图中所示的pdftest.html发布的,所以这里的(这是PDF测试.pdf)跟pdftest.html是同级目录,如果这里有多一层目录,则需要加上这一层目录,看后面截图
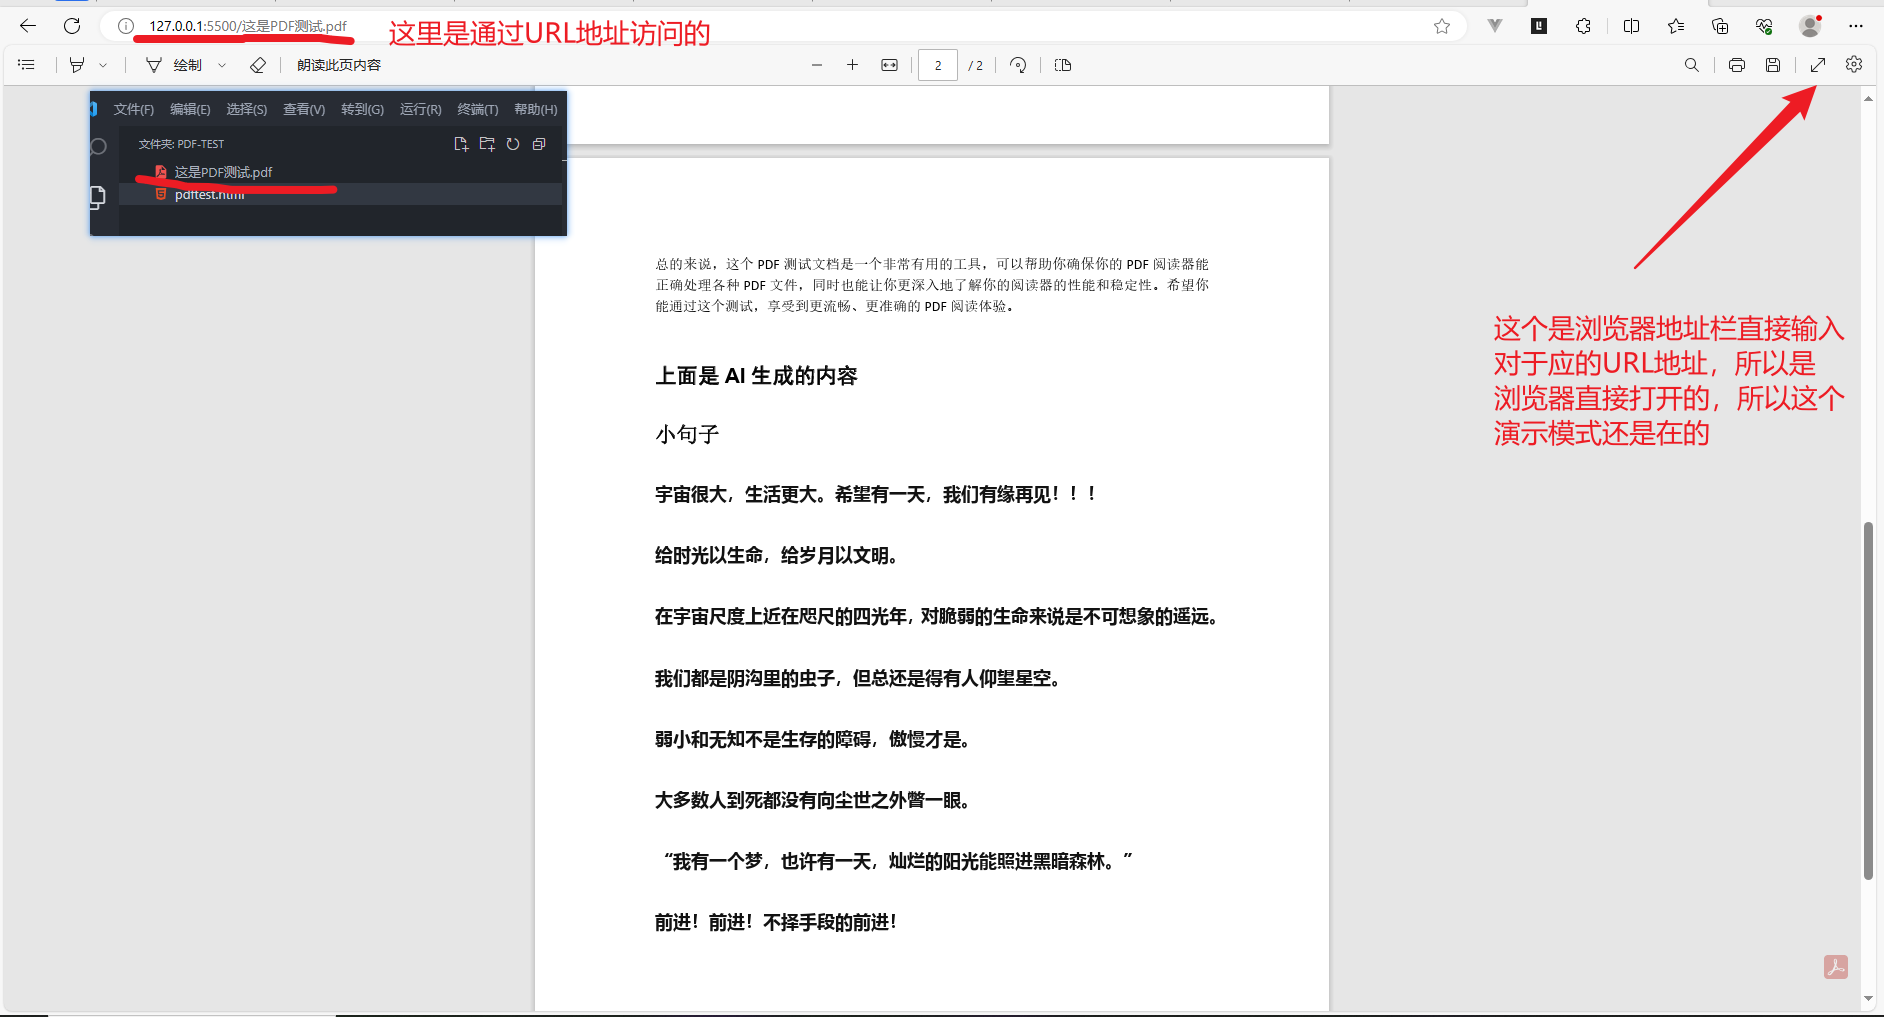
图片也是可以通过这种方式访问的
所以上述的代码还可以改成这样
<!DOCTYPE html>
<html lang="en">
<head>
<meta charset="UTF-8">
<meta name="viewport" content="width=device-width, initial-scale=1.0">
<title>这是PDF测试</title>
</head>
<style>
html, body {
width: 100%;
height: 100%;
margin: 0;
padding: 0;
box-sizing: border-box;
}
</style>
<body>
<div style="width: 100%; height: 100%;">
<!-- <iframe src="./这是PDF测试.pdf" style="width: 100vw; height: 100vh;"></iframe> -->
<!-- <iframe src="./这是PDF测试.pdf" style="width: 100%; height: 100vh;"></iframe> -->
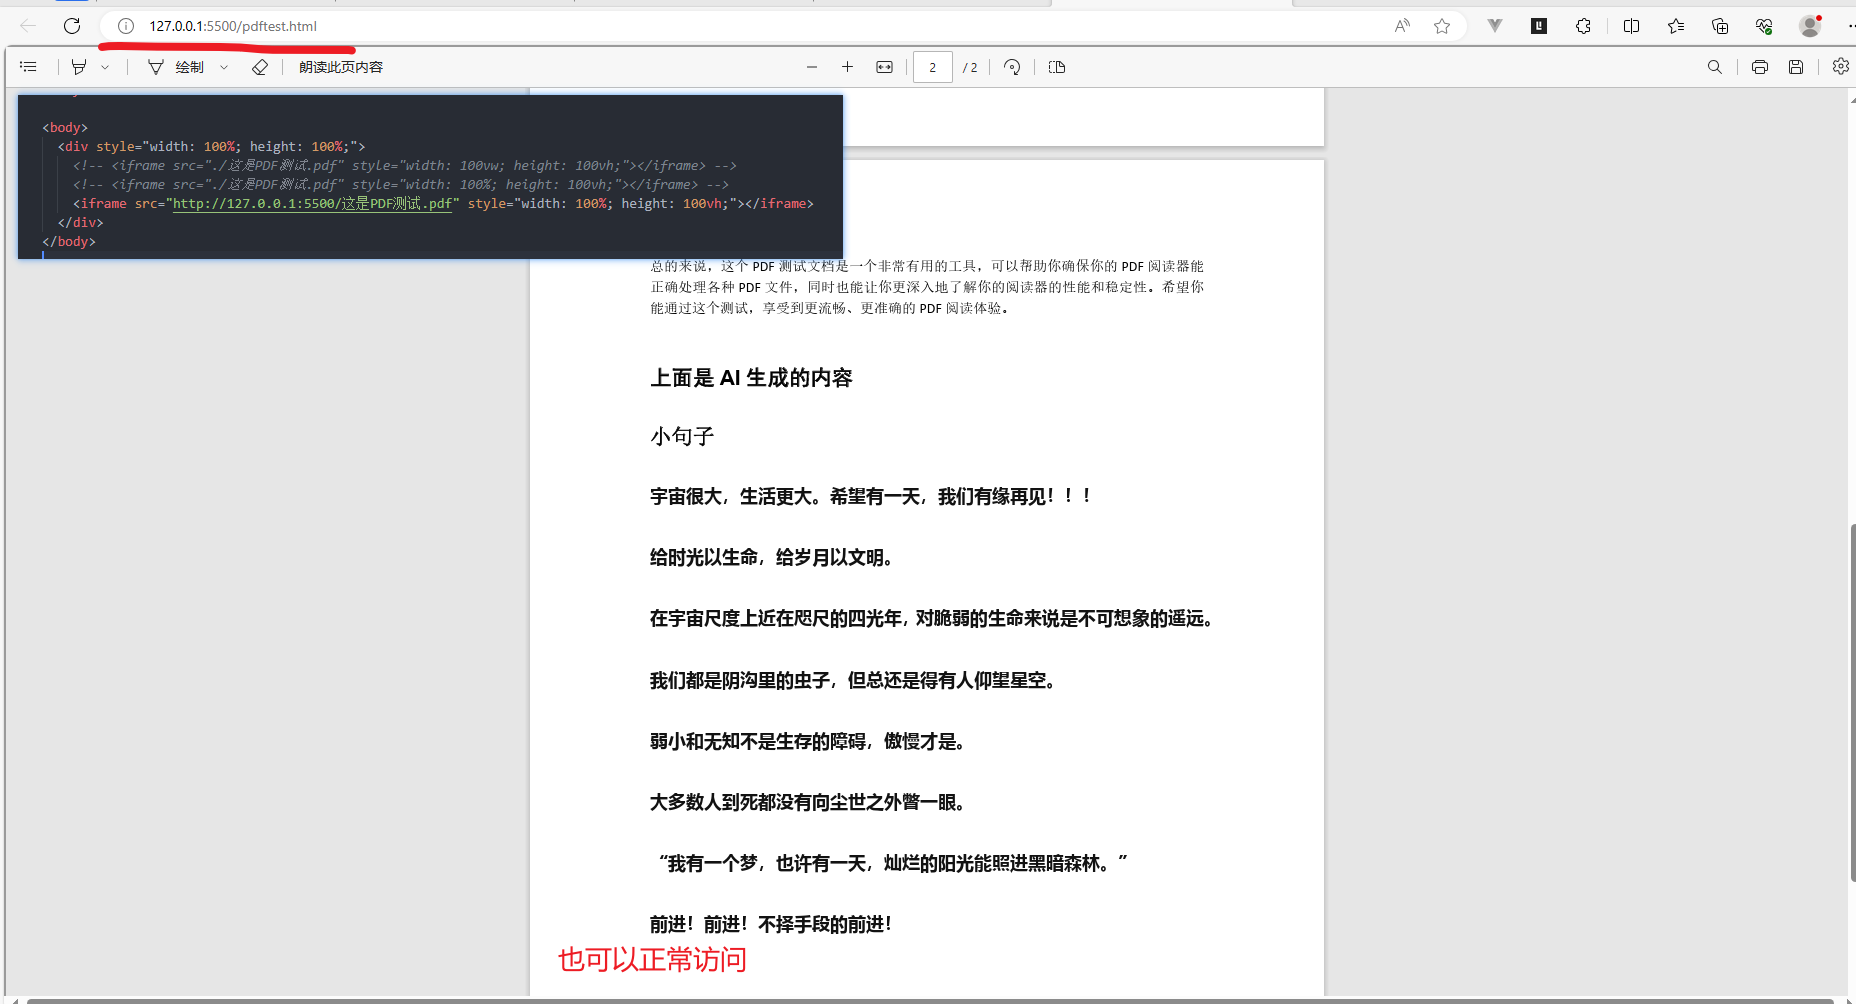
<iframe src="http://127.0.0.1:5500/这是PDF测试.pdf" style="width: 100%; height: 100vh;"></iframe>
</div>
</body>
</html>
结果如下所示
其他的以此类推,有兴趣的可以去试一试,所有的URL地址访问,是以使用Vscode对应的插件发布服务的目位置决定的。我为什么要记录这个呢!是因为我发现如果我想试着找一个在线的PDF进行测试,还要自己找可以访问的PDF。还不如这样来得简单,又不用花时间找。除了使用Vscode发布为服务这种方式通过URL访问文件,还可以通过nginx、SpringBoot设置静态资源映射等多种方式,但Vscode这种方式无疑是最简单的。
以后如果需要访问一些在线的地址测试之类的(如:图片,PDF等),直接使用Vscode使用相应的插件发布为服务即可。无需特意找在线的文件,直接通过这种方式使用URL访问本地文件,方便多了。
可使用的浏览器
通过上面的那种方式,我使用edge、Google Chrome、360浏览器,这些都是可以的。火狐因为平时用不到,电脑也没安装有,就不测试了。IE就更不用说了,都2023年了,这个用的应该挺少了的吧,这已经不在我的考虑范围之内了,这里只是提一下而已。有兴趣的可以自行测试一下。
在vue3项目中预览PDF文件
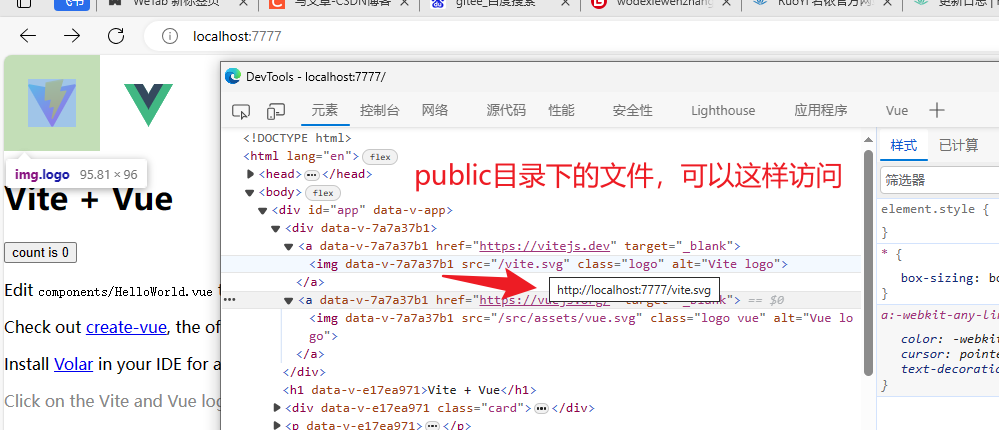
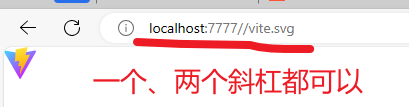
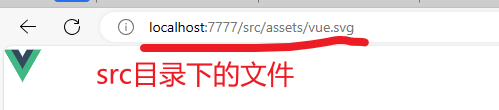
vue3项目也是可以通过URL地址访问文件的
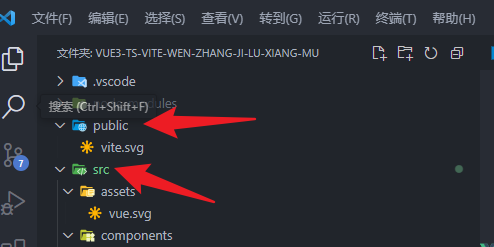
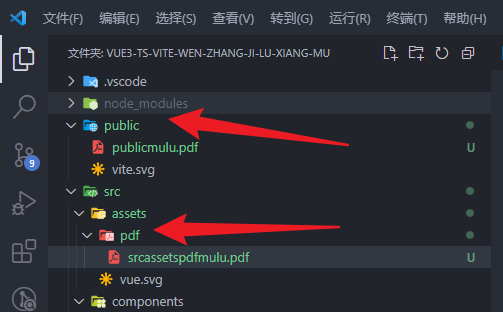
这个前提是,运行起来了,这个需要知道一下,可能后面需要用到,目录结构如下所示
运行项目,通过给的例子,f12查看可知
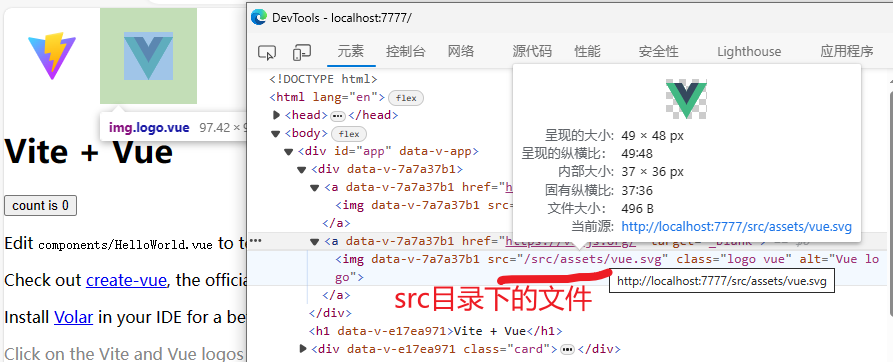
通过上面的两种方式,我们可以把PDF放到对应的目录下,然后运行项目,通过URL地址访问对应的目录文件就可以了。这里我把PDF放在public目录和src的pdf目录下。然后分别使用URL地址访问。对应的目录结构,如下所示
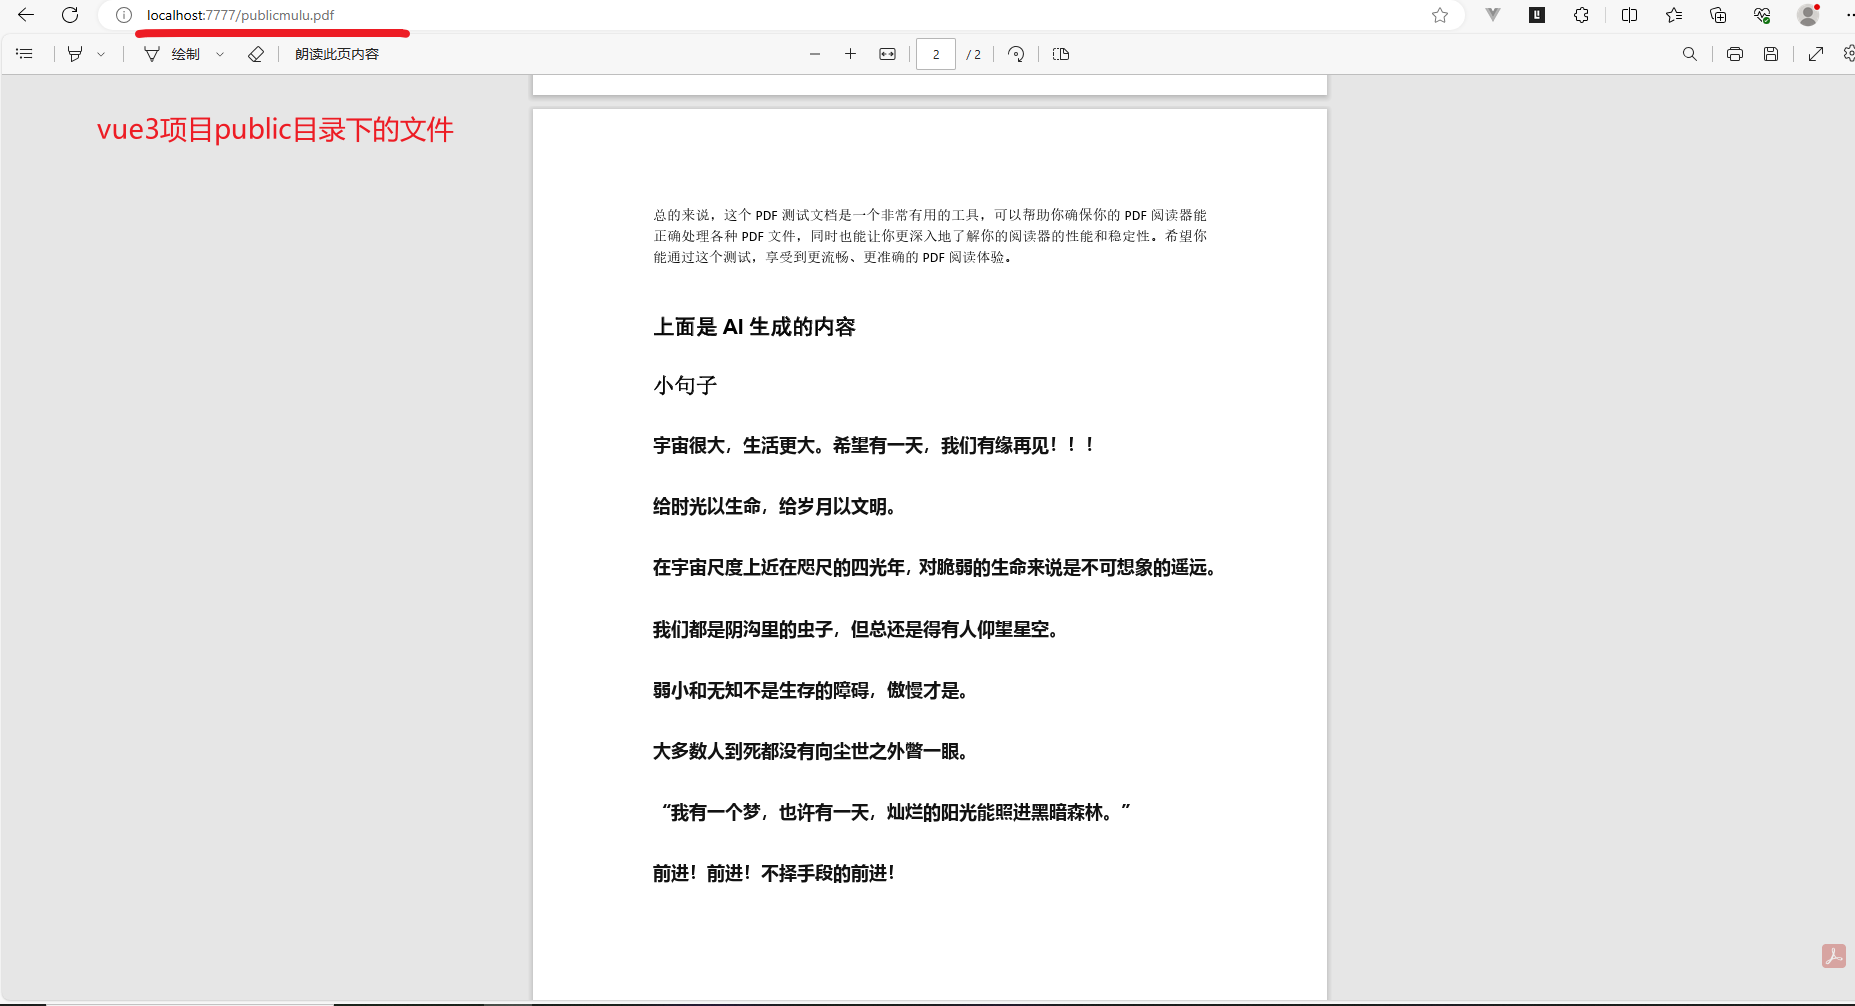
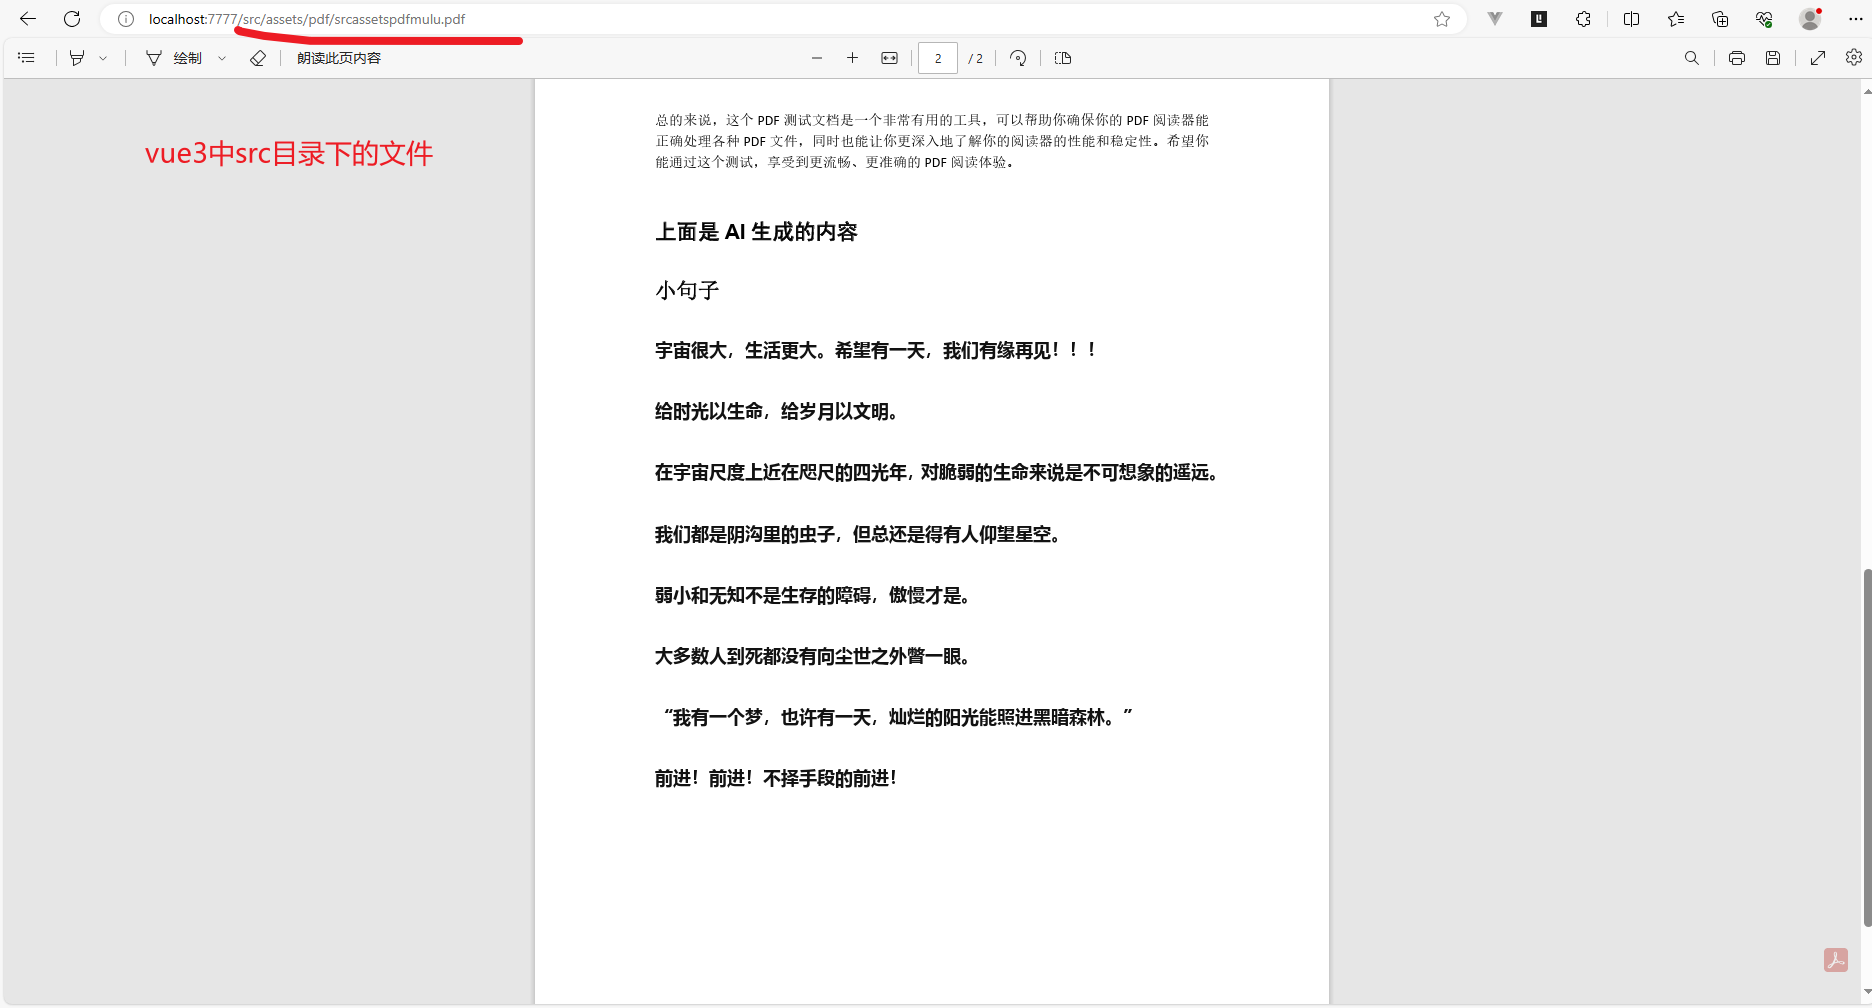
都是可以通过URL正常访问的
vue3中使用浏览器内置的PDF插件预览PDF
目录结构

一样的警告
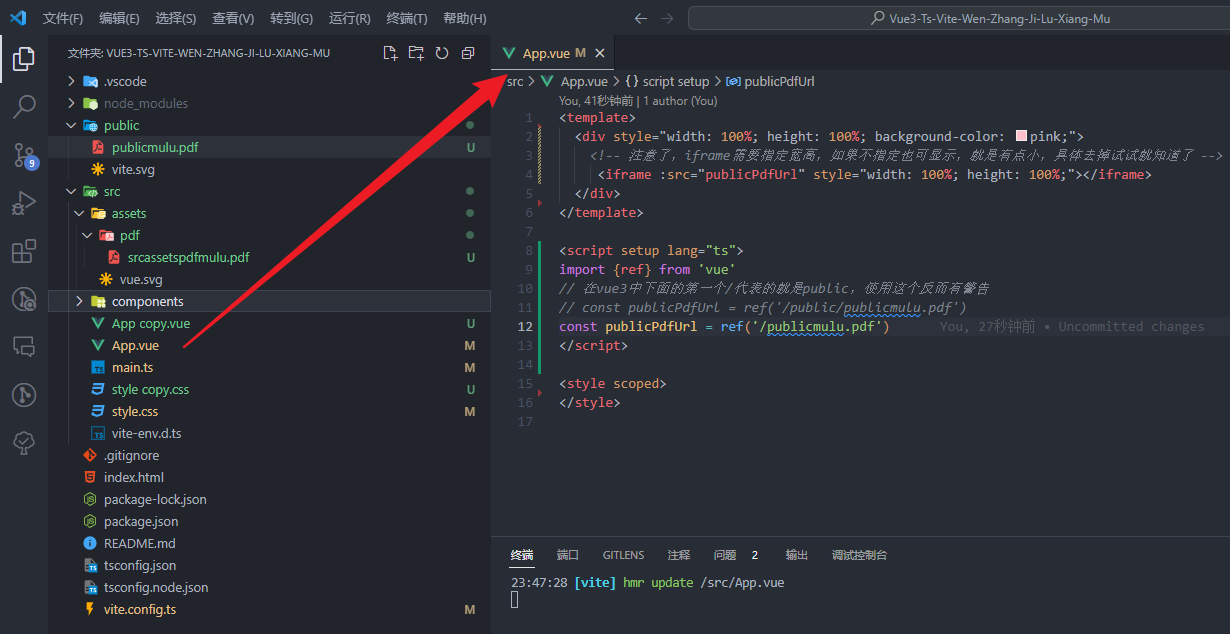
代码如下所示:App.vue
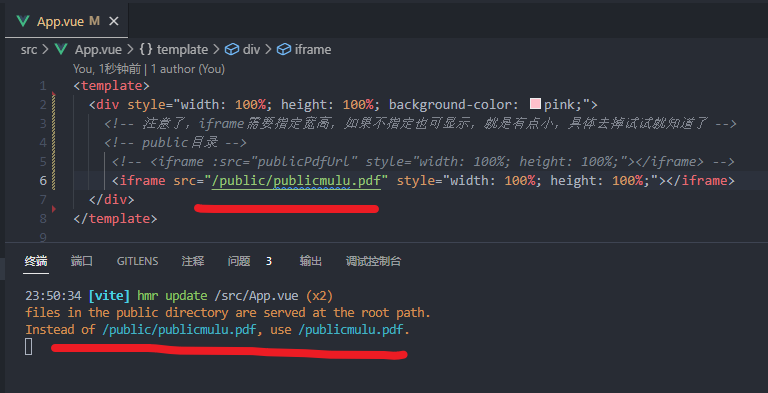
<template>
  <div style="width: 100%; height: 100%; background-color: pink;">
    <!-- 注意了,iframe需要指定宽高,如果不指定也可显示,就是有点小,具体去掉试试就知道了 -->
    <!-- public目录 -->
     <!-- <iframe :src="publicPdfUrl" style="width: 100%; height: 100%;"></iframe> -->
     <!-- <iframe src="/public/publicmulu.pdf" style="width: 100%; height: 100%;"></iframe> -->
     <!-- <iframe src="/publicmulu.pdf" style="width: 100%; height: 100%;"></iframe> -->

     <!-- src目录 -->
    <!-- <iframe :src="srcPdfUrl" style="width: 100%; height: 100%;"></iframe> -->
    <iframe src="/src/assets/pdf/srcassetspdfmulu.pdf" style="width: 100%; height: 100%;"></iframe>

    <!-- 在线URL -->
    <!-- <iframe src="http://localhost:7777/src/assets/pdf/srcassetspdfmulu.pdf" style="width: 100%; height: 100%;"></iframe> -->
    <!-- 或者是访问文章上面发布的那个5500端口的地址也可以 -->
    <!-- <iframe src="http://127.0.0.1:5500/这是PDF测试.pdf.pdf" style="width: 100%; height: 100%;"></iframe> -->
  </div>
</template>

<script setup lang="ts">
// import {ref} from 'vue'
// 在vue3中下面的第一个/代表的就是public,使用这个反而有警告
// const publicPdfUrl = ref('/public/publicmulu.pdf')
// const publicPdfUrl = ref('/publicmulu.pdf')

// src目录
// const srcPdfUrl = ref("/src/assets/pdf/srcassetspdfmulu.pdf")

</script>

<style scoped>
</style>
在vue3中使用组件vue3-pdf-app预览PDF
这个组件我是无意中发现的,vue3-pdf-app - npm (npmjs.com),这个是对应的官网,这里面有对对应的详细的使用案例,这里简单说明一下。
下载安装组件
npm install vue3-pdf-app
App.vue代码
<template>
  <div style="width: 100%; height: 100%;">

    <!-- 下面这几种方式都是可以的,正常访问PDF的 -->

    <!-- <vue-pdf-app style="height: 100vh;" pdf="/publicmulu.pdf"></vue-pdf-app> -->
    <!-- <vue-pdf-app style="height: 100vh;" pdf="/src/assets/pdf/srcassetspdfmulu.pdf"></vue-pdf-app> -->
    <!-- <vue-pdf-app style="height: 100vh;" :pdf="pdfUrl"></vue-pdf-app> -->
    <vue-pdf-app style="height: 100vh;" pdf="http://localhost:7777/src/assets/pdf/srcassetspdfmulu.pdf"></vue-pdf-app>
  </div>
</template>

<script setup lang="ts">
import VuePdfApp from "vue3-pdf-app";
// import this to use default icons for buttons
import "vue3-pdf-app/dist/icons/main.css";

// import {ref} from 'vue'

// const pdfUrl = ref('publicmulu.pdf')
// const pdfUrl = ref('/src/assets/pdf/srcassetspdfmulu.pdf')

</script>

<style scoped>
</style>
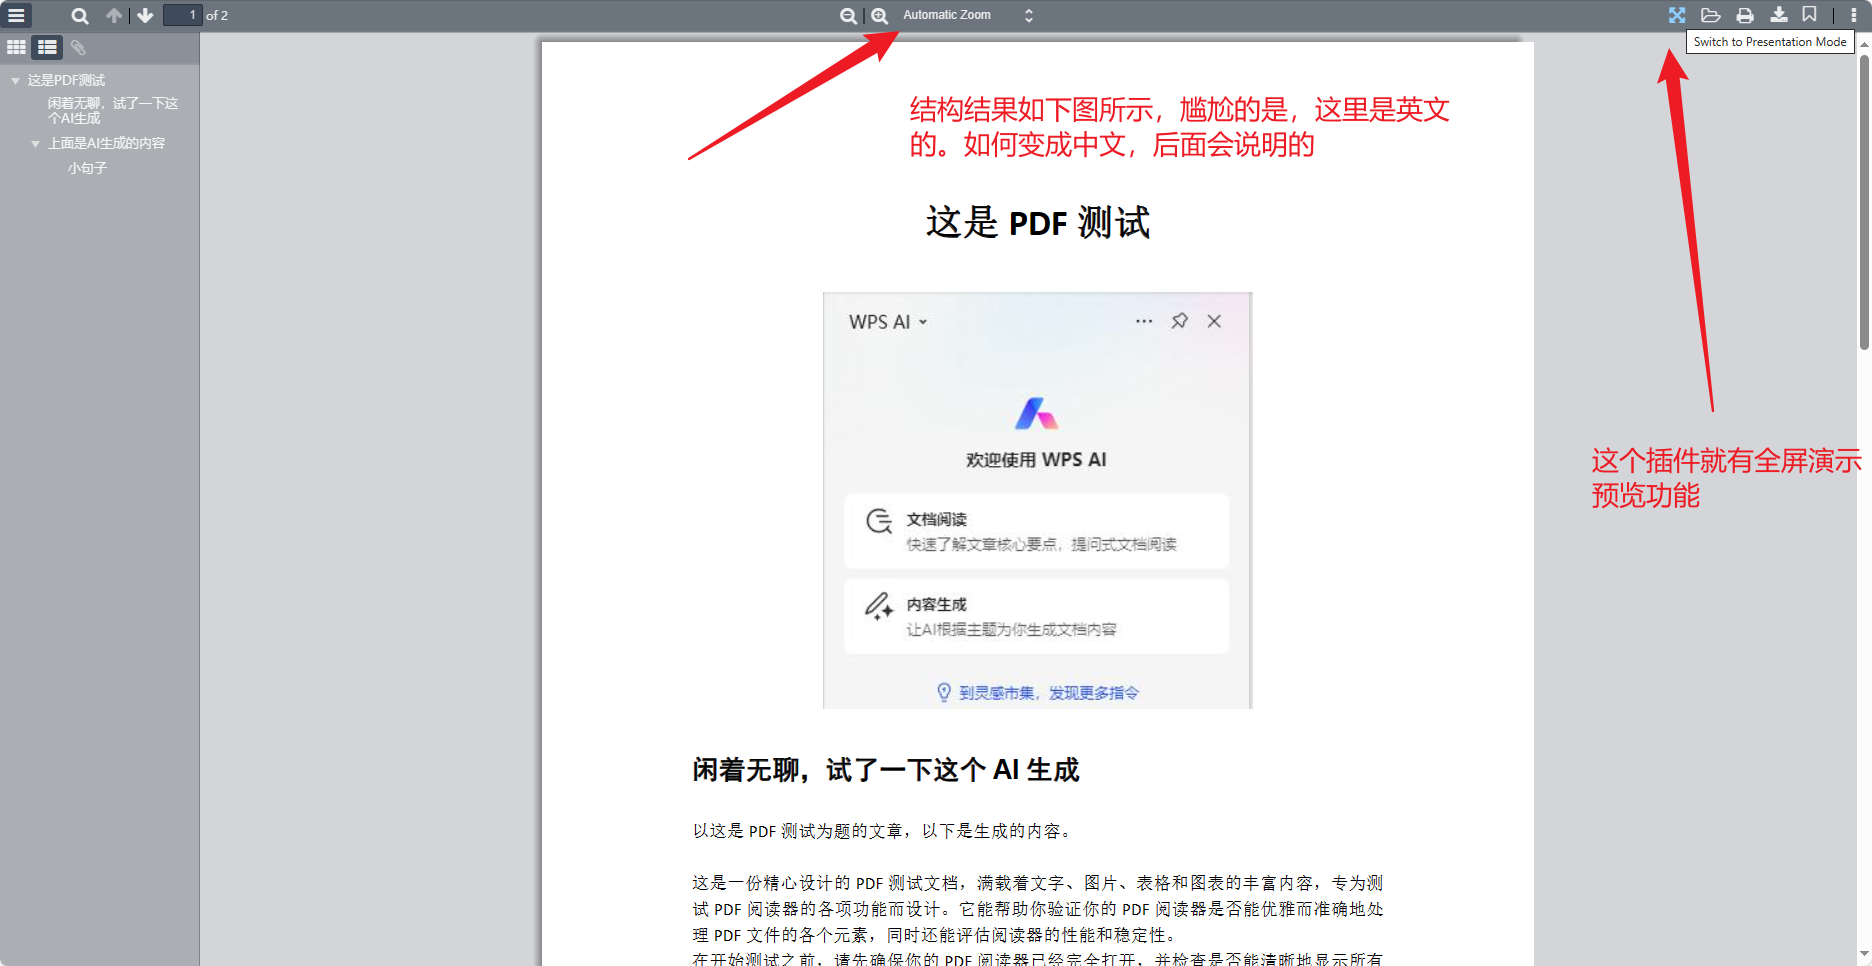
vue3-pdf-app预览PDF结果如下图所示
修改组件主题
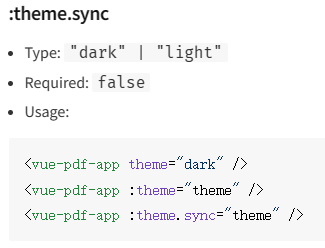
官网都有对应的说明,vue3-pdf-app - npm (npmjs.com) 这里有说明,如我这里改成dark
代码如下所示:App.vue
<template>
  <div style="width: 100%; height: 100%;">

    <!-- 下面这几种方式都是可以的,正常访问PDF的 -->

    <!-- <vue-pdf-app theme="dark"  style="height: 100vh;" pdf="/publicmulu.pdf"></vue-pdf-app> -->
    <vue-pdf-app theme="dark"  style="height: 100vh;" pdf="/src/assets/pdf/srcassetspdfmulu.pdf"></vue-pdf-app>
    <!-- <vue-pdf-app theme="dark"  style="height: 100vh;" :pdf="pdfUrl"></vue-pdf-app> -->
    <!-- <vue-pdf-app theme="dark"  style="height: 100vh;" pdf="http://localhost:7777/src/assets/pdf/srcassetspdfmulu.pdf"></vue-pdf-app> -->
  </div>
</template>

<script setup lang="ts">
import VuePdfApp from "vue3-pdf-app";
// import this to use default icons for buttons
import "vue3-pdf-app/dist/icons/main.css";

// import {ref} from 'vue'

// const pdfUrl = ref('publicmulu.pdf')
// const pdfUrl = ref('/src/assets/pdf/srcassetspdfmulu.pdf')

</script>

<style scoped>
</style>
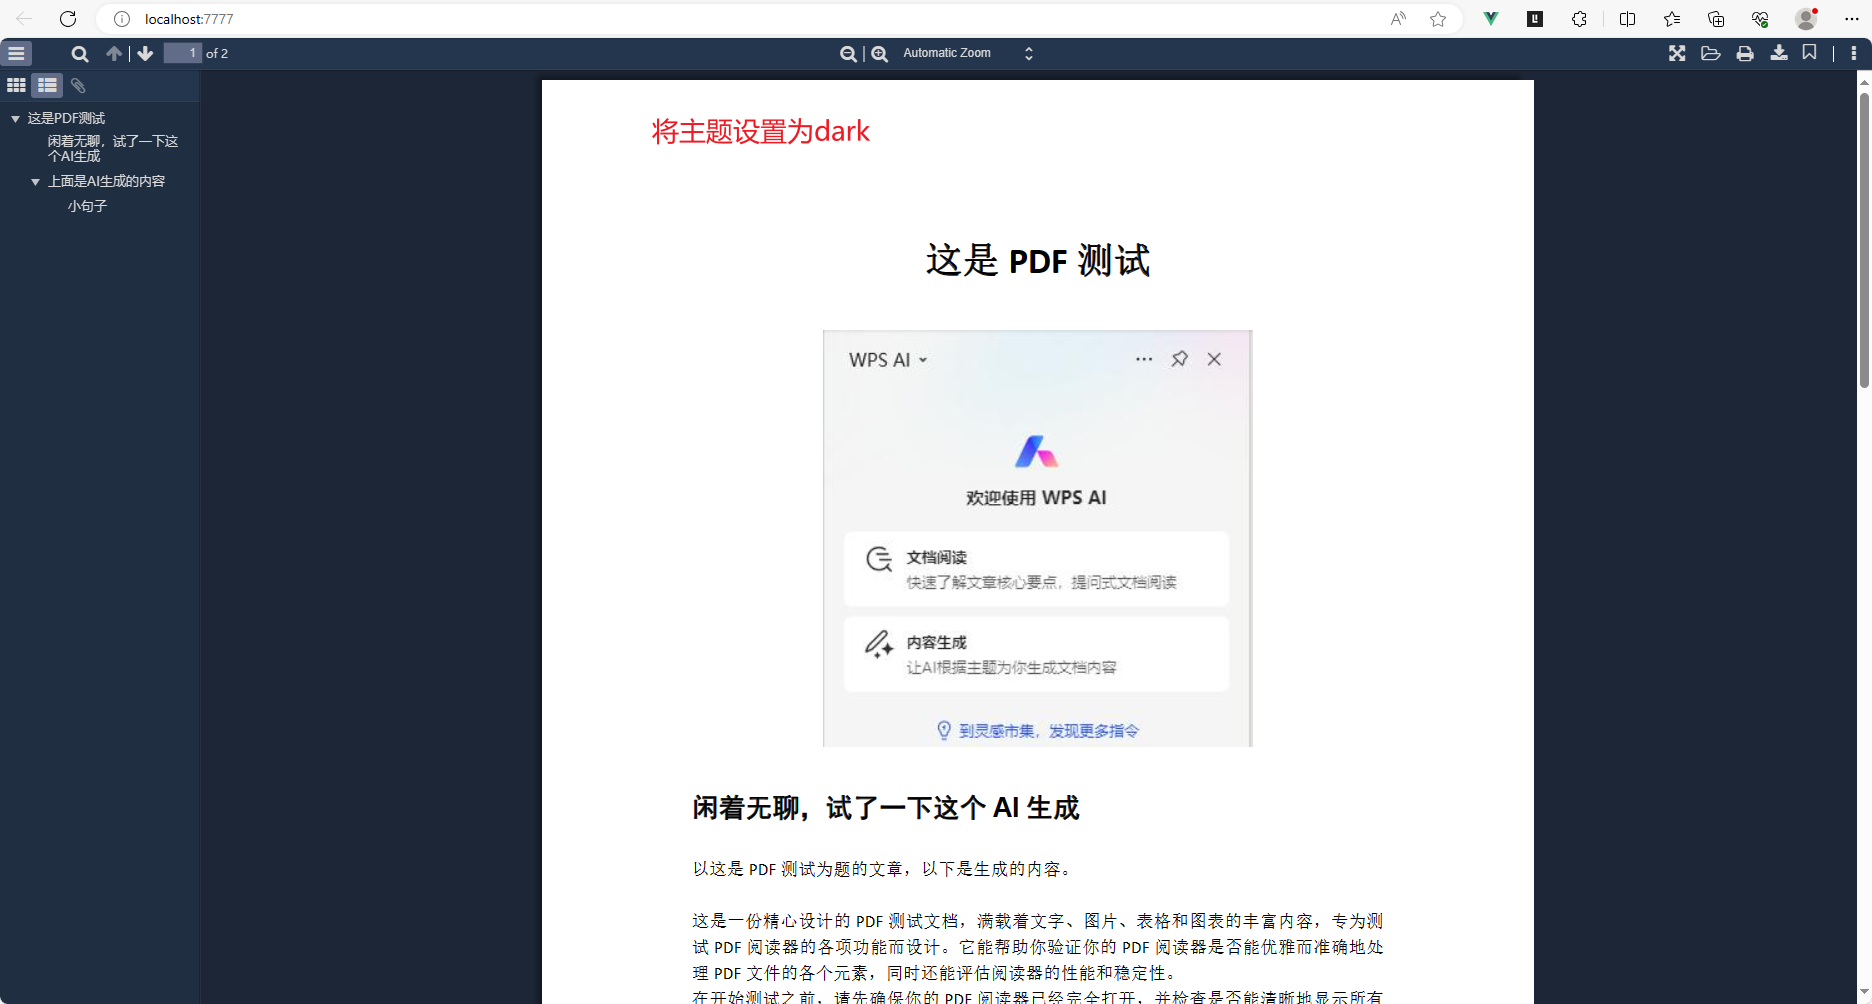
结果如下图所示
修改配置
官网截图如下所示,vue3-pdf-app - npm (npmjs.com),详情看官网,因为这里的配置是在是太多了,这里建议封装成一个组件方便后面复用,具体看后面的代码

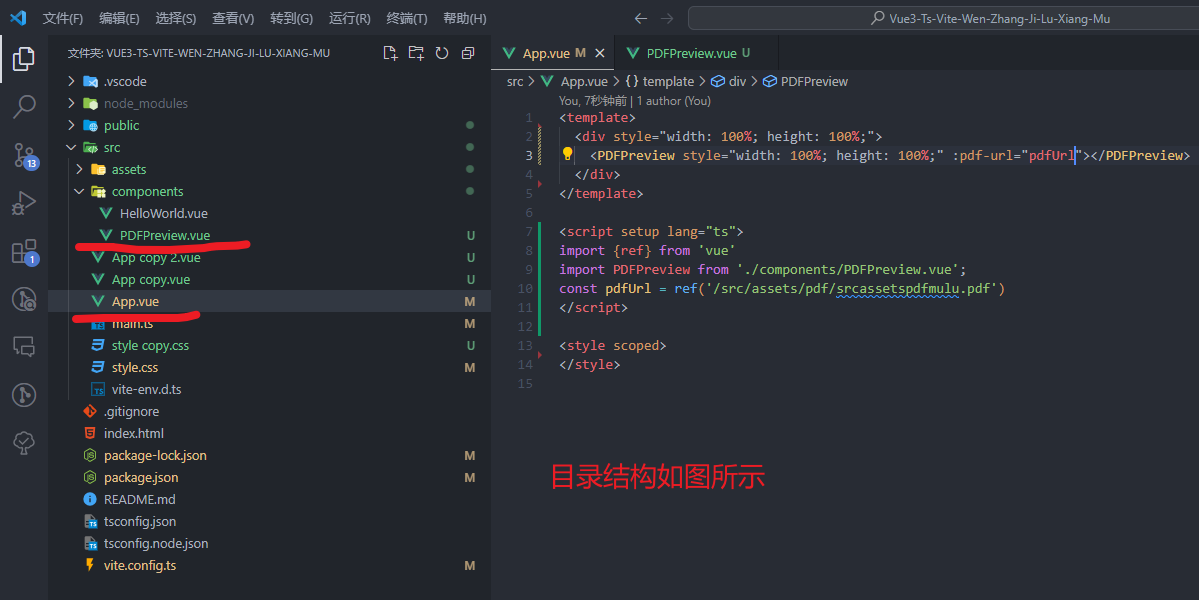
目录结构如图所示,代码在截图后面
PDFPreview.vue
<template>
  <div style="width: 100%; height: 100%;">
    <vue-pdf-app theme="dark"  style="height: 100vh;" :pdf="pdfUrl"></vue-pdf-app>
  </div>
</template>

<script setup lang="ts">
import VuePdfApp from "vue3-pdf-app";
// import this to use default icons for buttons
import "vue3-pdf-app/dist/icons/main.css";

// 宏
defineProps<{
  pdfUrl: string | undefined
}>()
</script>

<style scoped>
</style>
App.vue
<template>
  <div style="width: 100%; height: 100%;">
    <PDFPreview style="width: 100%; height: 100%;" :pdf-url="pdfUrl"></PDFPreview>
  </div>
</template>

<script setup lang="ts">
import {ref} from 'vue'
import PDFPreview from './components/PDFPreview.vue';
const pdfUrl = ref('/src/assets/pdf/srcassetspdfmulu.pdf')
</script>

<style scoped>
</style>
结果如下所示
进行配置,根据官网来。vue3-pdf-app - npm (npmjs.com)
PDFPreview.vue
<template>
  <div style="width: 100%; height: 100%;">
    <vue-pdf-app :config="config" theme="dark" style="height: 100vh;" :pdf="pdfUrl"></vue-pdf-app>
  </div>
</template>

<script setup lang="ts">
import VuePdfApp from "vue3-pdf-app";
// import this to use default icons for buttons
import "vue3-pdf-app/dist/icons/main.css";

// 宏
defineProps<{
  pdfUrl: string | undefined
}>()

// 想不显示那一项,就将对应的true改成false就行了
const config = {
  sidebar: {
    // viewThumbnail: true, 原来的配置
    viewThumbnail: false,
    // viewOutline: true, 原来的配置
    viewOutline: false,
    // viewAttachments: true, 原来的配置
    viewAttachments: false,
  },
  secondaryToolbar: {
    secondaryPresentationMode: true,
    secondaryOpenFile: true,
    secondaryPrint: true,
    secondaryDownload: true,
    secondaryViewBookmark: true,
    firstPage: true,
    lastPage: true,
    pageRotateCw: true,
    pageRotateCcw: true,
    cursorSelectTool: true,
    cursorHandTool: true,
    scrollVertical: true,
    scrollHorizontal: true,
    scrollWrapped: true,
    spreadNone: true,
    spreadOdd: true,
    spreadEven: true,
    documentProperties: true,
  },
  toolbar: {
    toolbarViewerLeft: {
      findbar: true,
      previous: true,
      next: true,
      pageNumber: true,
    },
    toolbarViewerRight: {
      presentationMode: true,
      openFile: true,
      print: true,
      download: true,
      viewBookmark: true,
    },
    toolbarViewerMiddle: {
      zoomOut: true,
      zoomIn: true,
      scaleSelectContainer: true,
    },
  },
  errorWrapper: true,
};

</script>

<style scoped></style>
App.vue
<template>
  <div style="width: 100%; height: 100%;">
    <PDFPreview style="width: 100%; height: 100%;" :pdf-url="pdfUrl"></PDFPreview>
  </div>
</template>

<script setup lang="ts">
import {ref} from 'vue'
import PDFPreview from './components/PDFPreview.vue';
const pdfUrl = ref('/src/assets/pdf/srcassetspdfmulu.pdf')
</script>

<style scoped>
</style>
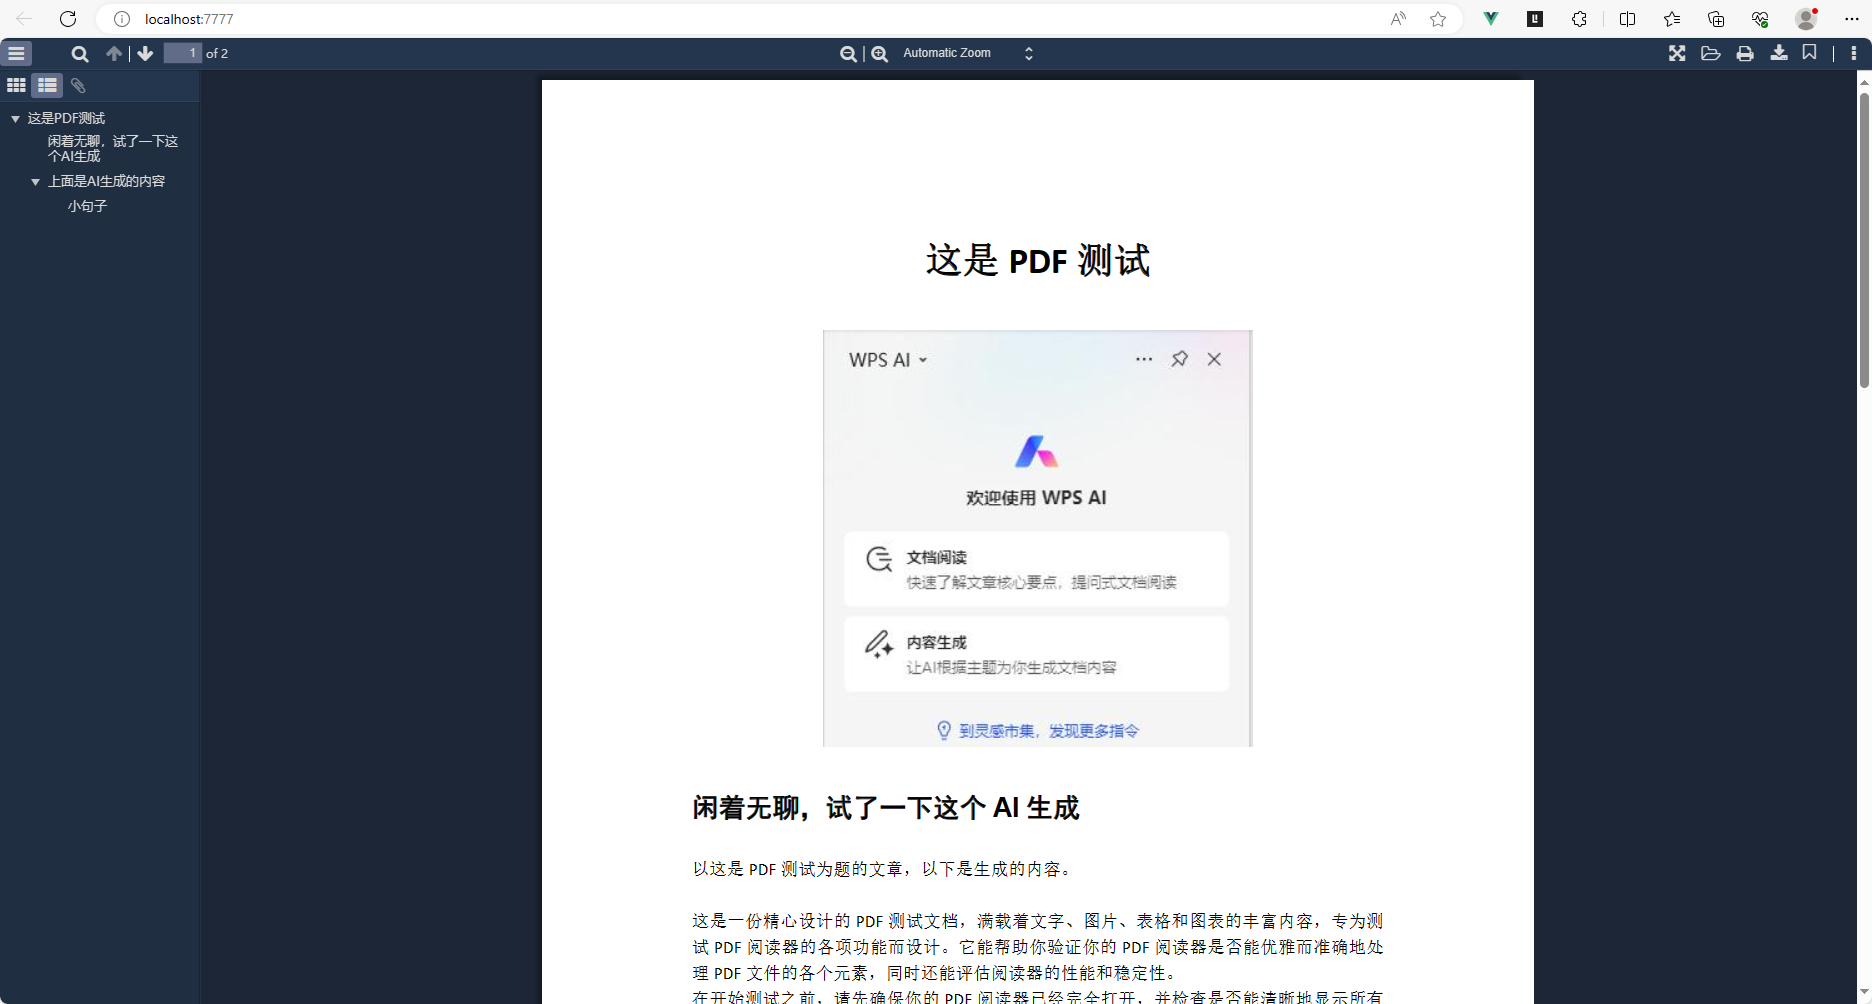
结果如下所示
这个是没有将选项设置为false的情况
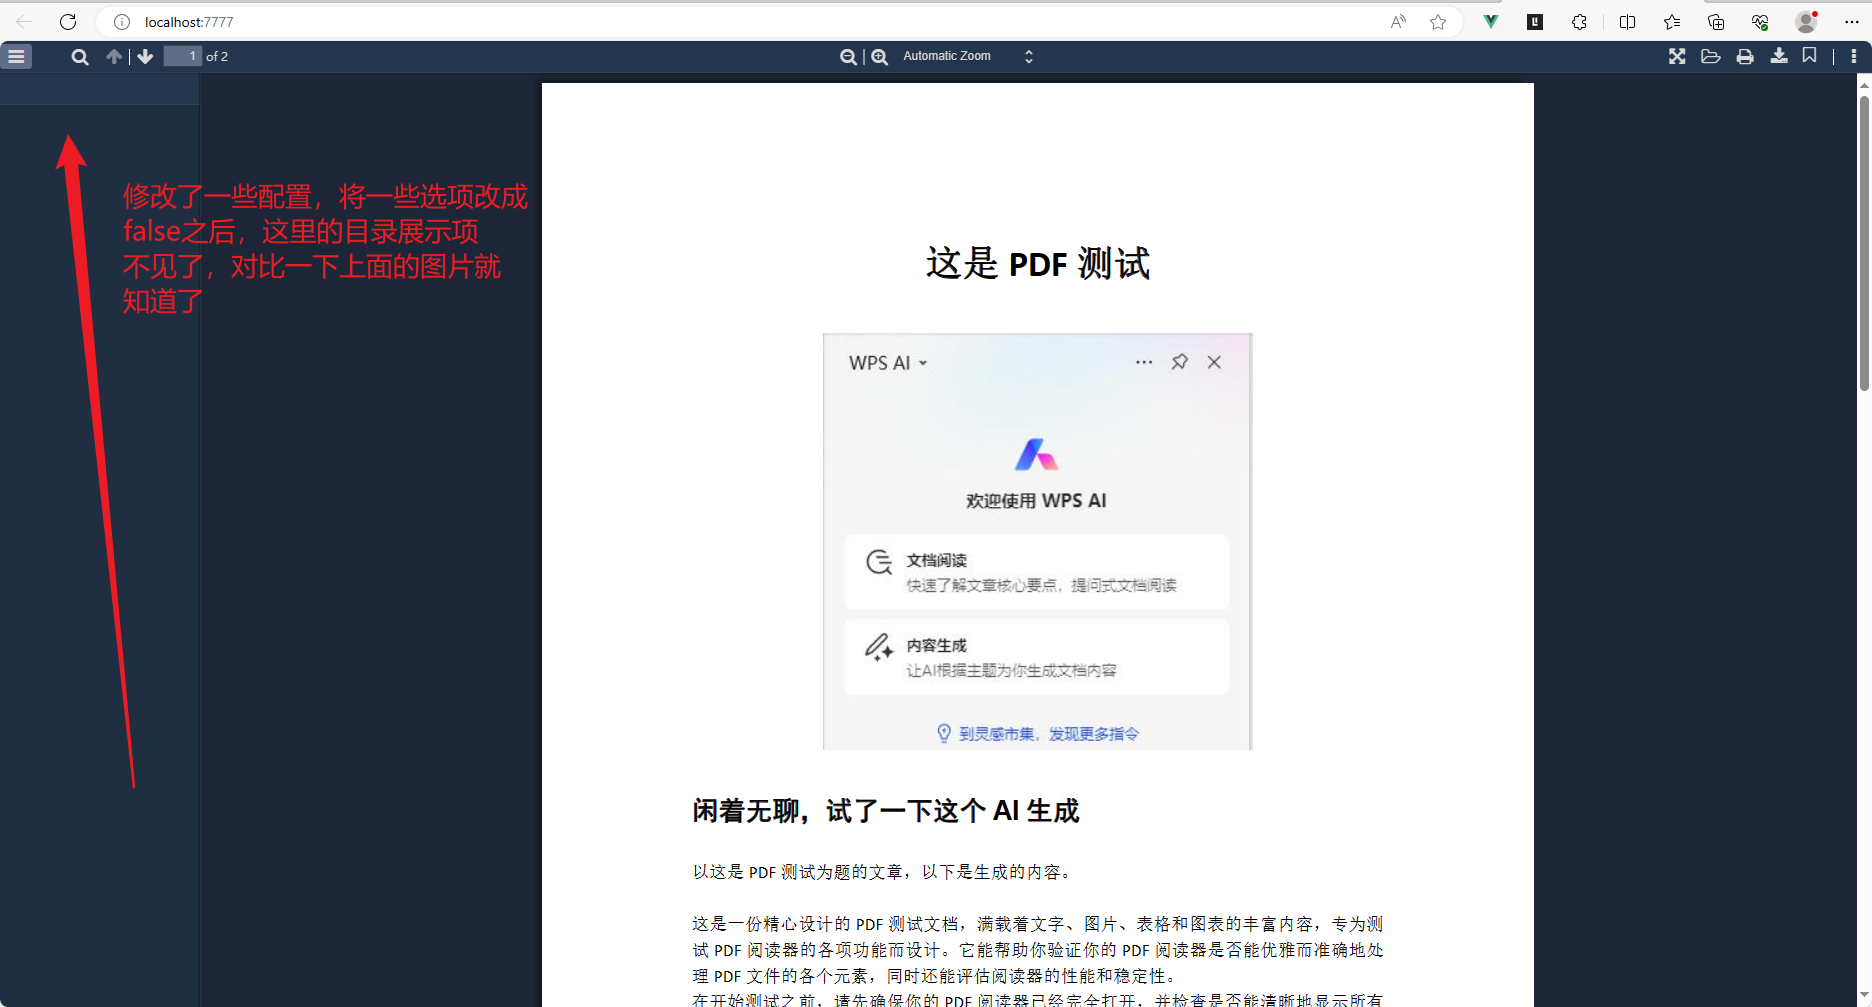
这个是将一些选项设置为false的情况
超级简化版配置
PDFPreview.vue
<template>
  <div style="width: 100%; height: 100%;">
    <vue-pdf-app :config="config" theme="dark" style="height: 100vh;" :pdf="pdfUrl"></vue-pdf-app>
  </div>
</template>

<script setup lang="ts">
import VuePdfApp from "vue3-pdf-app";
// import this to use default icons for buttons
import "vue3-pdf-app/dist/icons/main.css";

// 宏
defineProps<{
  pdfUrl: string | undefined
}>()

// 来一个超级简化版配置,详细配置往后看
const config = {
  sidebar: false,
  secondaryToolbar: false,
  toolbar: false,
  errorWrapper: false,
};


/**

// 想不显示那一项,就将对应的true改成false就行了
const config = {
  sidebar: {
    // viewThumbnail: true, 原来的配置
    viewThumbnail: false,
    // viewOutline: true, 原来的配置
    viewOutline: false,
    // viewAttachments: true, 原来的配置
    viewAttachments: false,
  },
  secondaryToolbar: {
    secondaryPresentationMode: true,
    secondaryOpenFile: true,
    secondaryPrint: true,
    secondaryDownload: true,
    secondaryViewBookmark: true,
    firstPage: true,
    lastPage: true,
    pageRotateCw: true,
    pageRotateCcw: true,
    cursorSelectTool: true,
    cursorHandTool: true,
    scrollVertical: true,
    scrollHorizontal: true,
    scrollWrapped: true,
    spreadNone: true,
    spreadOdd: true,
    spreadEven: true,
    documentProperties: true,
  },
  toolbar: {
    toolbarViewerLeft: {
      findbar: true,
      previous: true,
      next: true,
      pageNumber: true,
    },
    toolbarViewerRight: {
      presentationMode: true,
      openFile: true,
      print: true,
      download: true,
      viewBookmark: true,
    },
    toolbarViewerMiddle: {
      zoomOut: true,
      zoomIn: true,
      scaleSelectContainer: true,
    },
  },
  errorWrapper: true,
};

// 从官网知道,这里有多种配置方法
// disable whole page navigation panel
const config2 = {
  toolbar: {
    toolbarViewerLeft: false
  }
}

// disable whole panel
const config3 = {
  toolbar: false
}
*/

</script>

<style scoped></style>
App.vue
<template>
  <div style="width: 100%; height: 100%;">
    <PDFPreview style="width: 100%; height: 100%;" :pdf-url="pdfUrl"></PDFPreview>
  </div>
</template>

<script setup lang="ts">
import {ref} from 'vue'
import PDFPreview from './components/PDFPreview.vue';
const pdfUrl = ref('/src/assets/pdf/srcassetspdfmulu.pdf')
</script>

<style scoped>
</style>
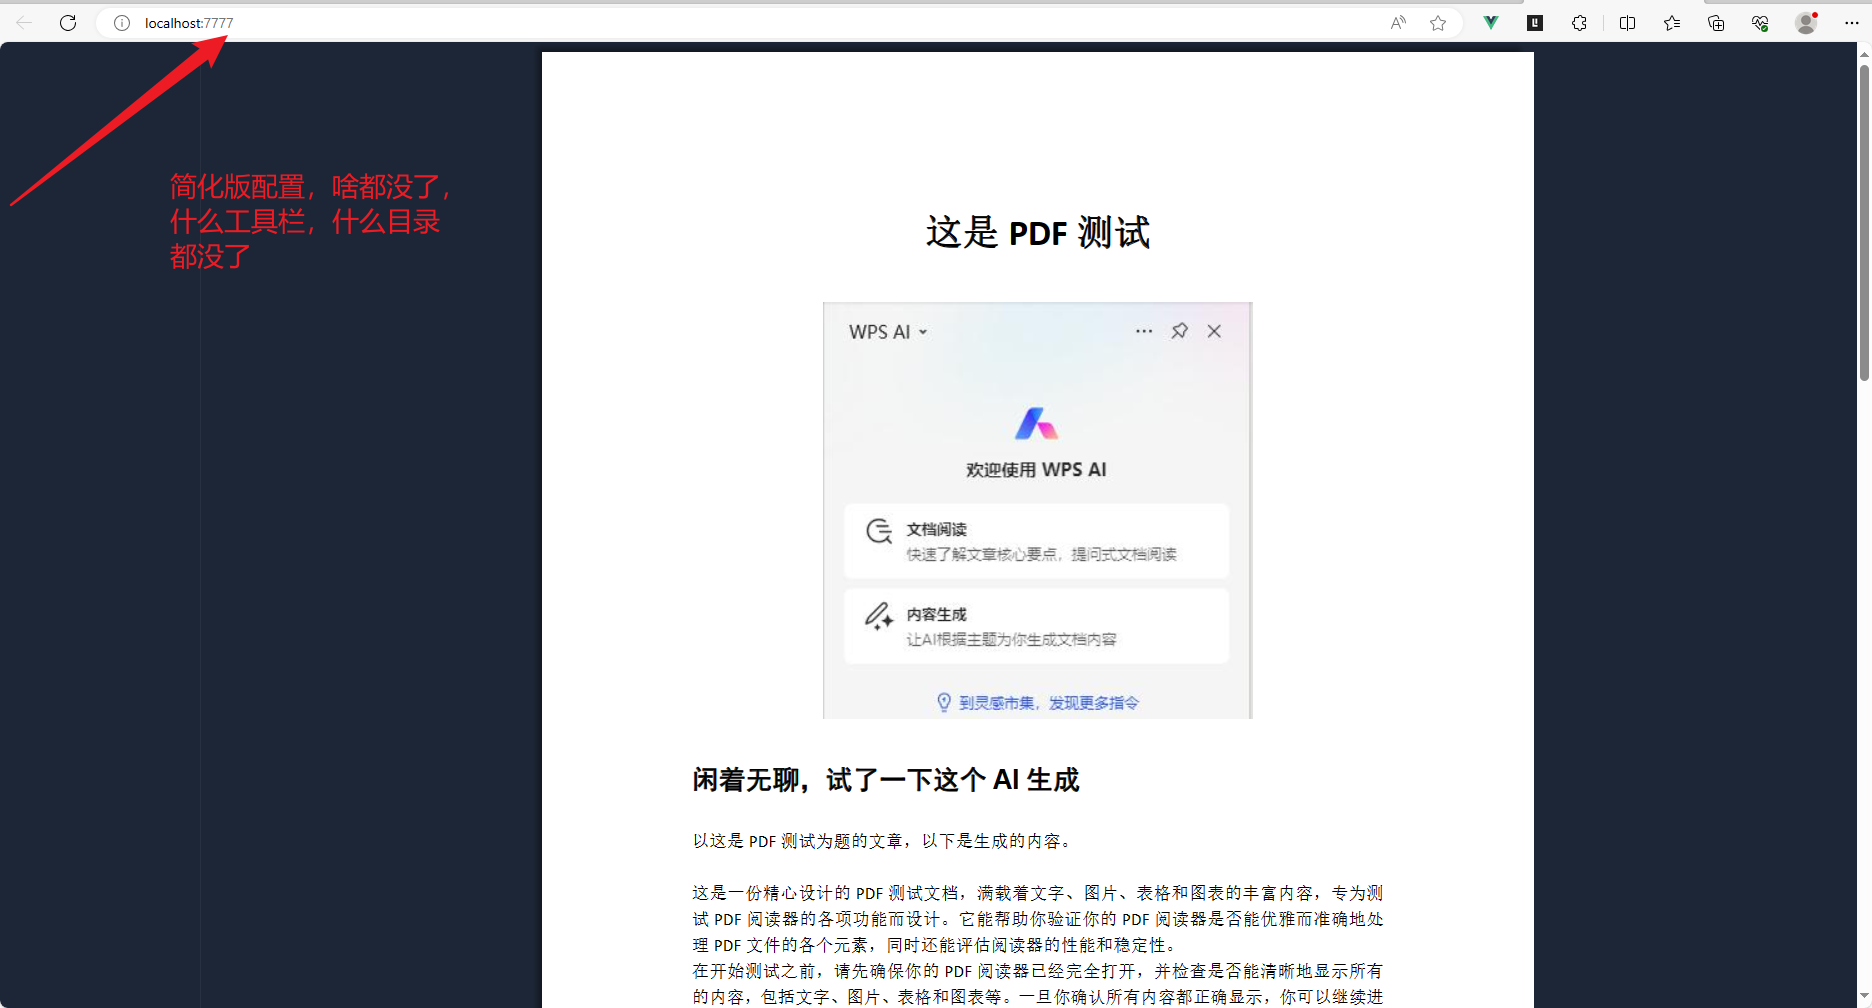
结果如下所示
将英文改成中文显示(国际化)
需要下载国际化的语言配置,https://github.com/mozilla/pdf.js,这是对应的GitHub官网,需要到这里下载对应的国际化语言配置,记住是先下载好对应的文件,至于怎么下载,往后看。有详细的截图说明。
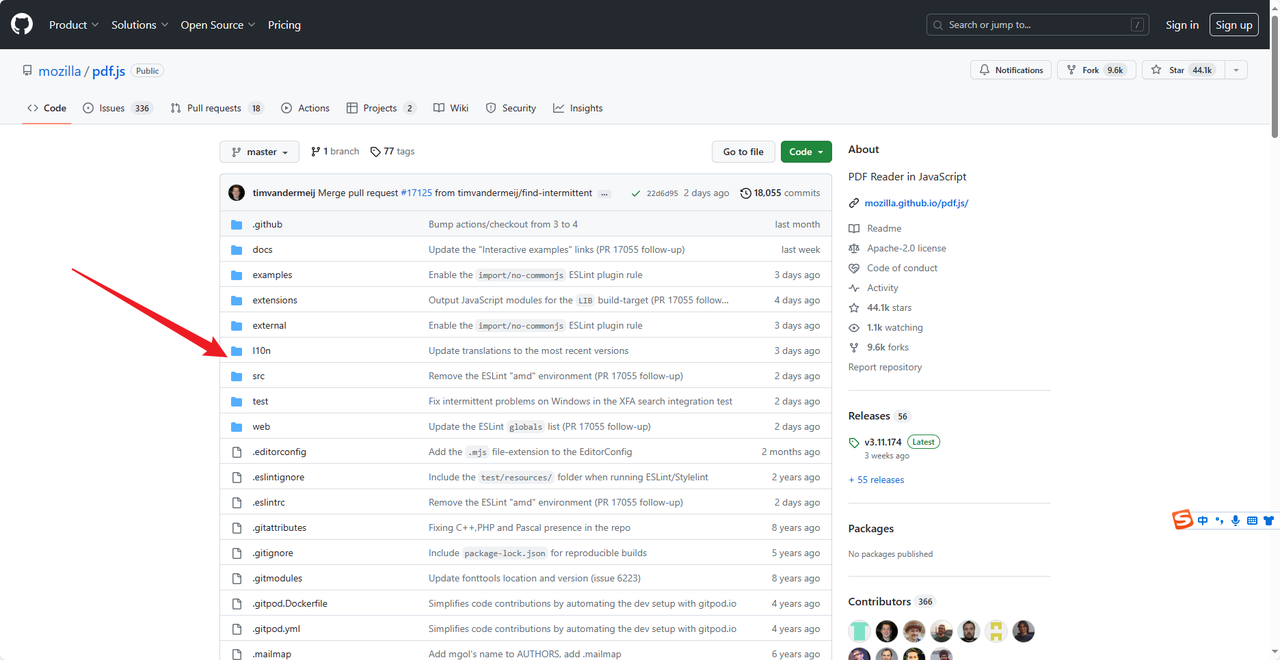
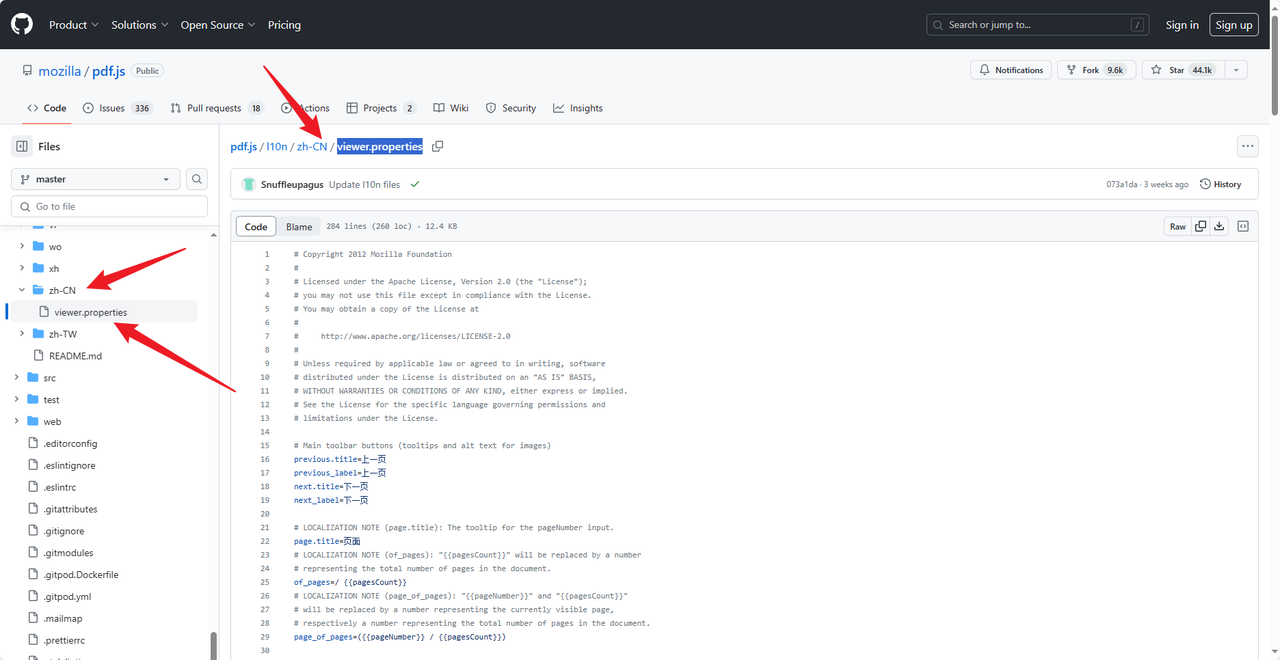
上面的viewer.properties文件下载。如果下载失败,就直接自己新建一个文件(同样的名称和后缀名。viewer.properties。就可以了),然后复制一下里面的代码,粘贴,就可以了。
viewer.properties这个文件来自于https://github.com/mozilla/pdf.js这里,需要自己去下载。
viewer.properties这个文件来自于https://github.com/mozilla/pdf.js这里,需要自己去下载。
viewer.properties这个文件来自于https://github.com/mozilla/pdf.js这里,需要自己去下载。
viewer.properties这个文件来自于https://github.com/mozilla/pdf.js这里,需要自己去下载。
下载好之后,通过
<link rel="resource" type="application/l10n" href="/src/assets/properites/viewer.properties">
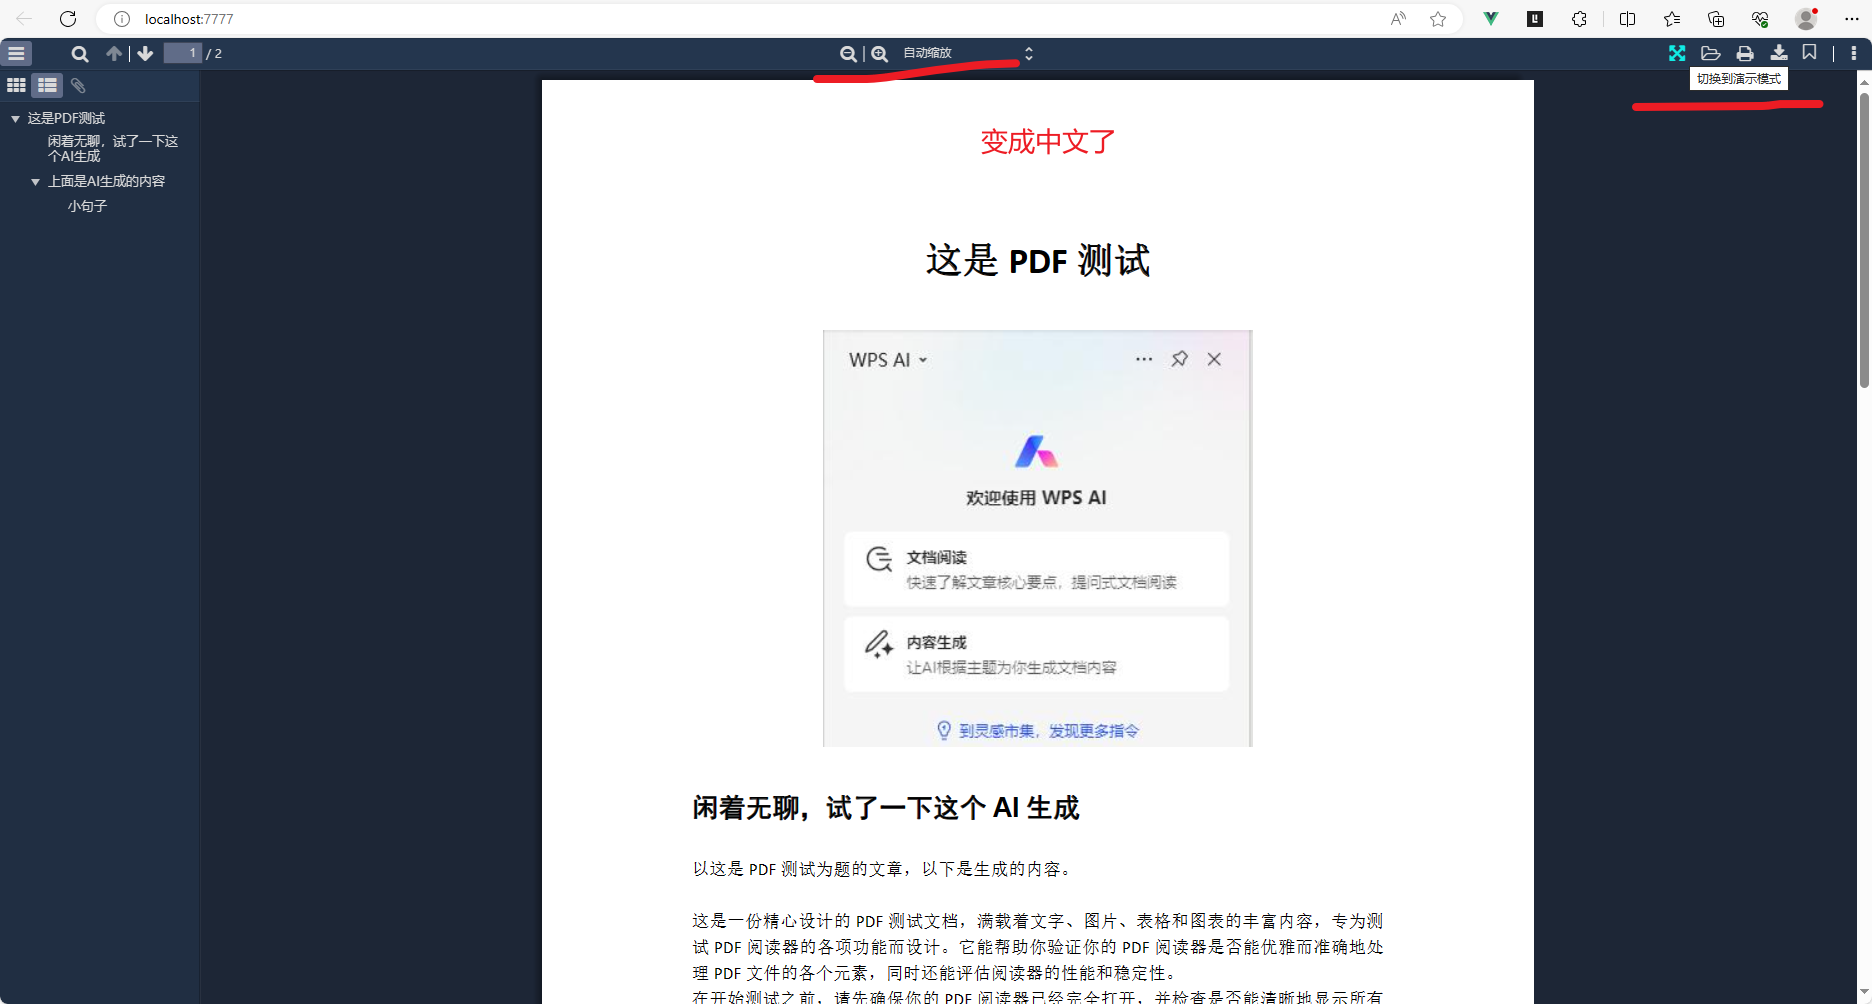
的形式,进行国际化语言配置,变成中文。
把下载好的viewer.properties文件放到项目的某个目录下,目录结构如下所示
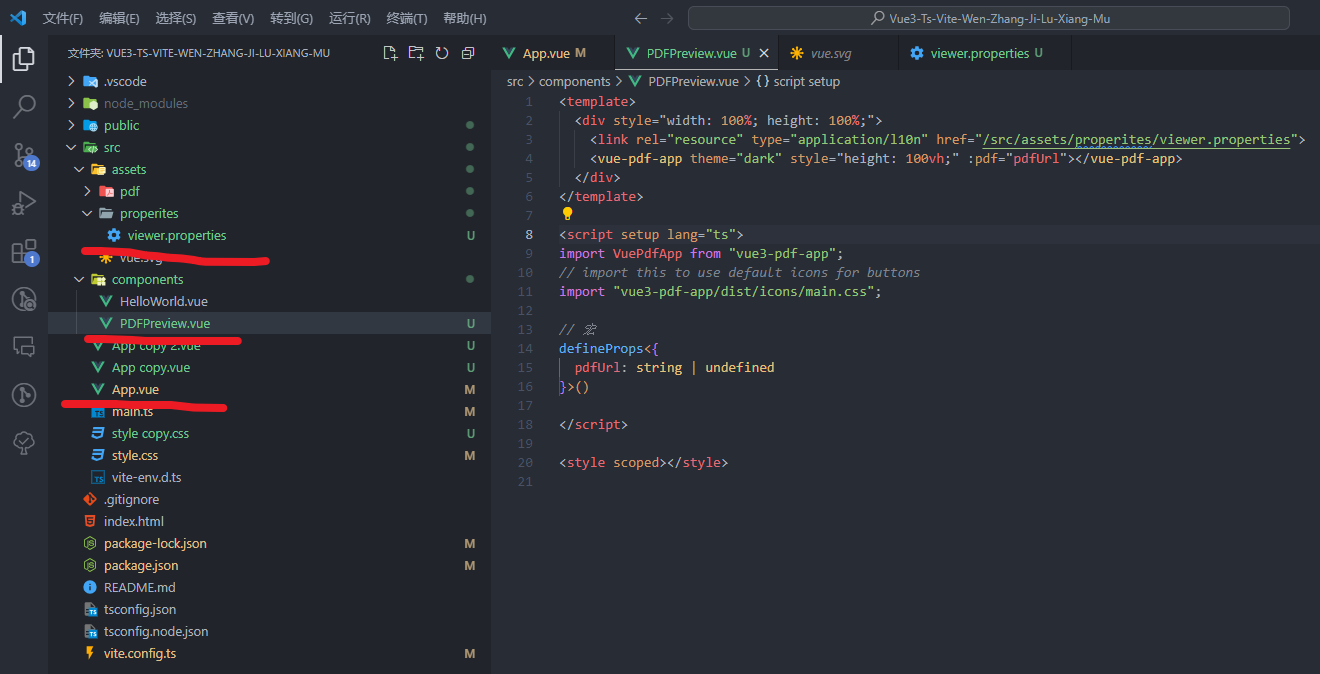
PDFPreview.vue的代码如下
<template>
  <div style="width: 100%; height: 100%;">
    <link rel="resource" type="application/l10n" href="/src/assets/properites/viewer.properties">
    <vue-pdf-app theme="dark" style="height: 100vh;" :pdf="pdfUrl"></vue-pdf-app>
  </div>
</template>

<script setup lang="ts">
import VuePdfApp from "vue3-pdf-app";
// import this to use default icons for buttons
import "vue3-pdf-app/dist/icons/main.css";

// 宏
defineProps<{
  pdfUrl: string | undefined
}>()

</script>

<style scoped></style>
App.vue
<template>
  <div style="width: 100%; height: 100%;">
    <PDFPreview style="width: 100%; height: 100%;" :pdf-url="pdfUrl"></PDFPreview>
  </div>
</template>

<script setup lang="ts">
import {ref} from 'vue'
import PDFPreview from './components/PDFPreview.vue';
const pdfUrl = ref('/src/assets/pdf/srcassetspdfmulu.pdf')
</script>

<style scoped>
</style>
结果如下所示
不过,最后我还是选择使用iframe的形式展示PDF,感觉浏览器内置的PDF插件已经足够强大了,已经符合我要求了。我写这篇文章是因为,我既然了解到了,就顺便记录一下呗!

旨在为数千万中国开发者提供一个无缝且高效的云端环境,以支持学习、使用和贡献开源项目。
更多推荐


 4
4 0
0- 0


 已为社区贡献5条内容

所有评论(0)