
移动开发技术作业一
移动开发技术作业一
功能要求
1、请根据课程内容设计一个app的门户框架,需要实现3-4个tab切换效果;本功能要求需要的技术为:activity、xml、fragment
2、在任一tab页中实现列表效果;本功能的实现需要使用recyclerview;
设计流程
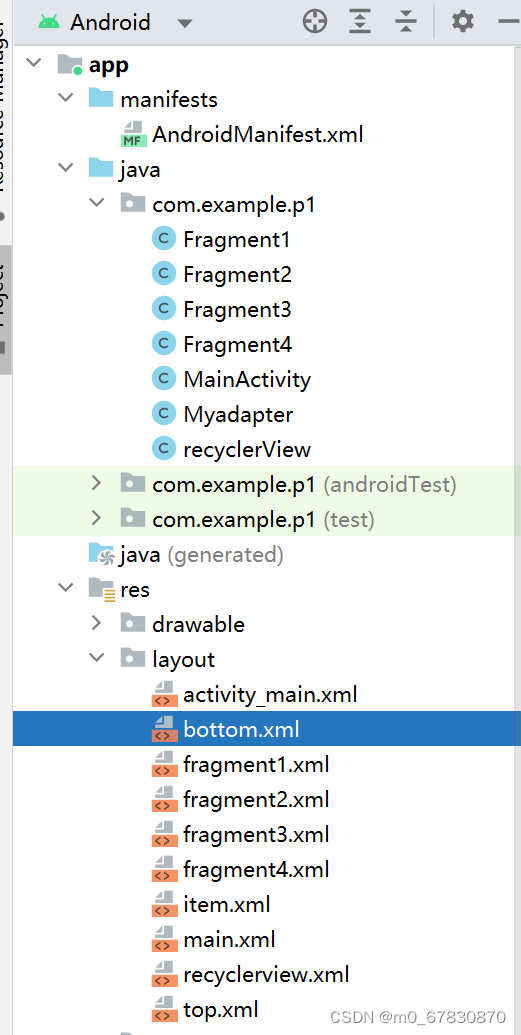
总览:文件目录结构
思路分析:
APP门户框架设计:
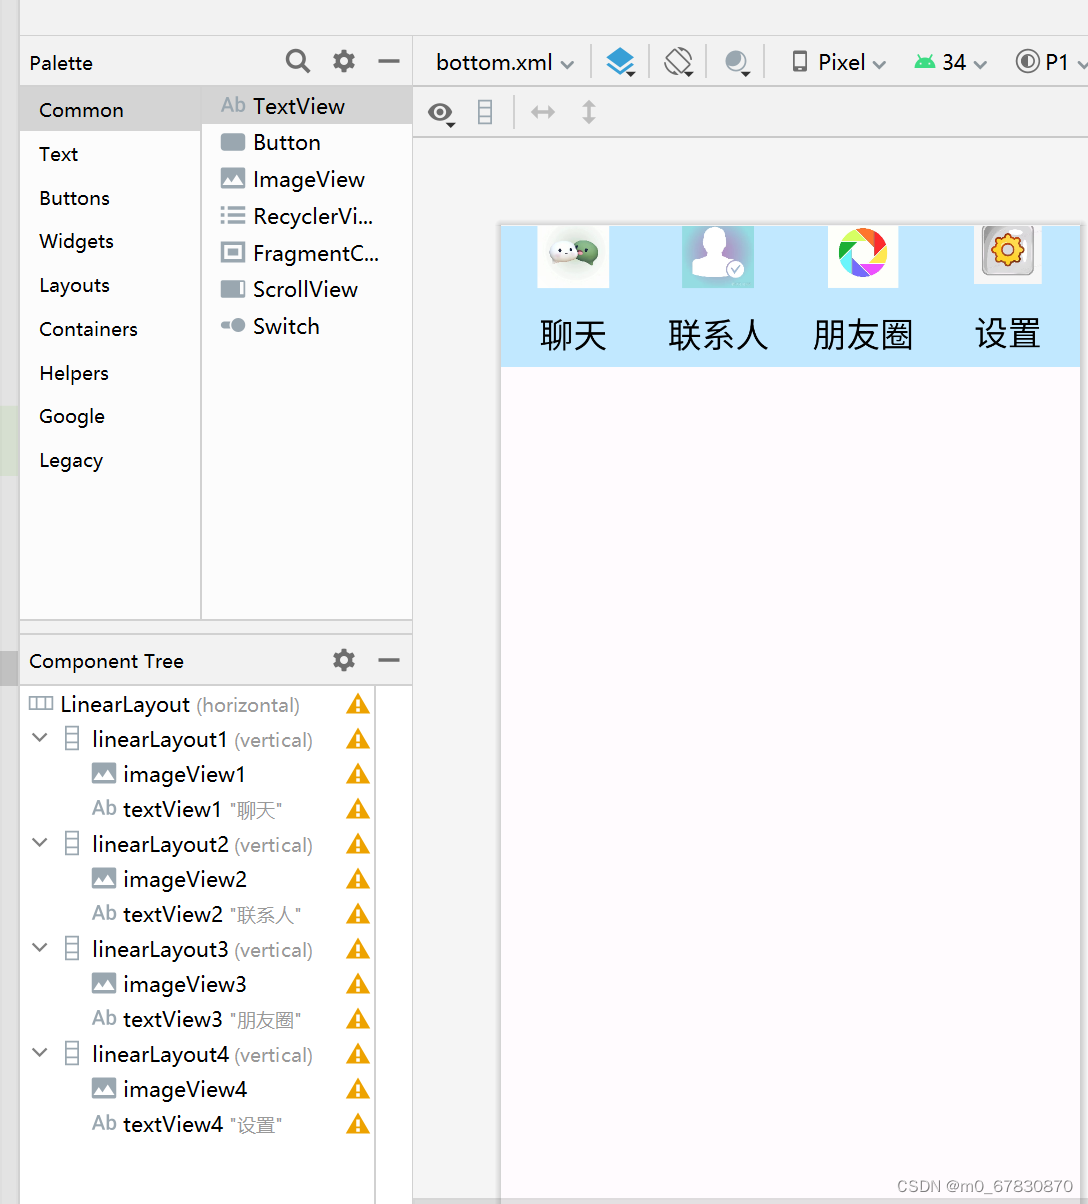
类微信主界面分为上中下三个部分,所以分别使用一个xml进行内容编辑。在微信主界面的中间部分由4个页面叠加,在进行内容选择时变换页面。
(1)导入所需图片到drawable下
(2)创建TextView控件,可通过代码改变字体及背景等样式,并添加图片。
(3)编写java文件,实现界面动态。
实现列表效果:
(1)在tab中添加RecyclerView控件
(2)另外添加一个item.xml文件,为RrcyclerView中的每个item进行样式设计
(3)创建Adapter类,将数据绑定到recyclerview中对应的item上
(4)修改tab页面对应的Fragment类
布局代码
标题栏 top.xml
<?xml version="1.0" encoding="utf-8"?>
<LinearLayout xmlns:android="http://schemas.android.com/apk/res/android"
    android:layout_width="match_parent"
    android:layout_height="50dp"
    android:background="@color/material_dynamic_primary95"
    android:gravity="center"
    android:orientation="vertical">

    <TextView
        android:id="@+id/textView6"
        android:layout_width="wrap_content"
        android:layout_height="40dp"
        android:layout_gravity="center"
        android:text="WeChat"
        android:textColor="@color/black"
        android:textSize="30sp" />

</LinearLayout>
底部导航 bottom.xml
<?xml version="1.0" encoding="utf-8"?>
<LinearLayout xmlns:android="http://schemas.android.com/apk/res/android"
    xmlns:app="http://schemas.android.com/apk/res-auto"

    xmlns:tools="http://schemas.android.com/tools"

    android:layout_width="match_parent"
    android:layout_height="100dp"
    android:background="@color/material_dynamic_primary90"


    >

    <LinearLayout
        android:id="@+id/linearLayout1"
        android:layout_width="0dp"
        android:layout_height="wrap_content"
        android:layout_weight="1"
        android:gravity="center"
        android:orientation="vertical">

        <ImageView
            android:id="@+id/imageView1"
            android:layout_width="match_parent"
            android:layout_height="51dp"
            android:src="@drawable/p1" />

        <TextView
            android:id="@+id/textView1"
            android:layout_width="103dp"
            android:layout_height="63dp"
            android:gravity="center"
            android:text="聊天"
            android:textColor="@color/black"
            android:textSize="24sp" />

    </LinearLayout>

    <LinearLayout
        android:id="@+id/linearLayout2"
        android:layout_width="0dp"
        android:layout_height="wrap_content"
        android:layout_weight="1"
        android:gravity="center"
        android:orientation="vertical">

        <ImageView
            android:id="@+id/imageView2"
            android:layout_width="match_parent"
            android:layout_height="51dp"
            android:src="@drawable/p2" />

        <TextView
            android:id="@+id/textView2"
            android:layout_width="103dp"
            android:layout_height="63dp"
            android:gravity="center"
            android:text="联系人"
            android:textColor="@color/black"
            android:textSize="24sp" />

    </LinearLayout>


    <LinearLayout
        android:id="@+id/linearLayout3"
        android:layout_width="0dp"
        android:layout_height="wrap_content"
        android:layout_weight="1"
        android:gravity="center"
        android:orientation="vertical">

        <ImageView
            android:id="@+id/imageView3"
            android:layout_width="103dp"
            android:layout_height="50dp"
            android:src="@drawable/p3" />


        <TextView
            android:id="@+id/textView3"
            android:layout_width="match_parent"
            android:layout_height="63dp"
            android:gravity="center"
            android:text="朋友圈"
            android:textColor="@color/black"
            android:textSize="24sp" />
    </LinearLayout>

    <LinearLayout
        android:id="@+id/linearLayout4"
        android:layout_width="0dp"
        android:layout_height="wrap_content"
        android:layout_weight="1"

        android:gravity="center"
        android:orientation="vertical">

        <ImageView
            android:id="@+id/imageView4"
            android:layout_width="match_parent"
            android:layout_height="48dp"
            android:src="@drawable/p4"

            />


        <TextView
            android:id="@+id/textView4"
            android:layout_width="match_parent"
            android:layout_height="66dp"
            android:gravity="center"
            android:text="设置"
            android:textColor="@color/black"
            android:textSize="24sp" />

    </LinearLayout>

</LinearLayout>
activity_main.xml
<?xml version="1.0" encoding="utf-8"?>
<LinearLayout xmlns:android="http://schemas.android.com/apk/res/android"
    xmlns:app="http://schemas.android.com/apk/res-auto"
    xmlns:tools="http://schemas.android.com/tools"
    android:layout_width="match_parent"
    android:layout_height="match_parent"
    android:orientation="vertical"
    tools:context=".MainActivity">

    <include layout="@layout/top"/>

    <FrameLayout
        android:background="@color/white"
        android:id="@+id/id_content"
        android:layout_width="match_parent"
        android:layout_height="0dp"
        android:layout_weight="1">

    </FrameLayout>

    <include
        layout="@layout/bottom"
        android:gravity="bottom"/>
</LinearLayout>
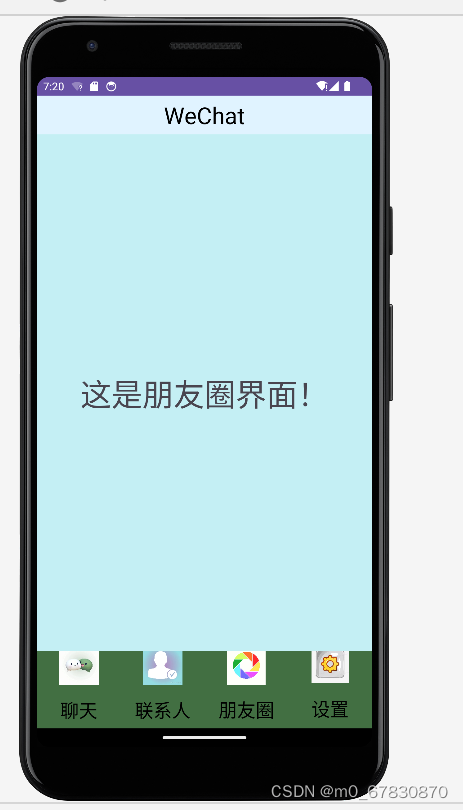
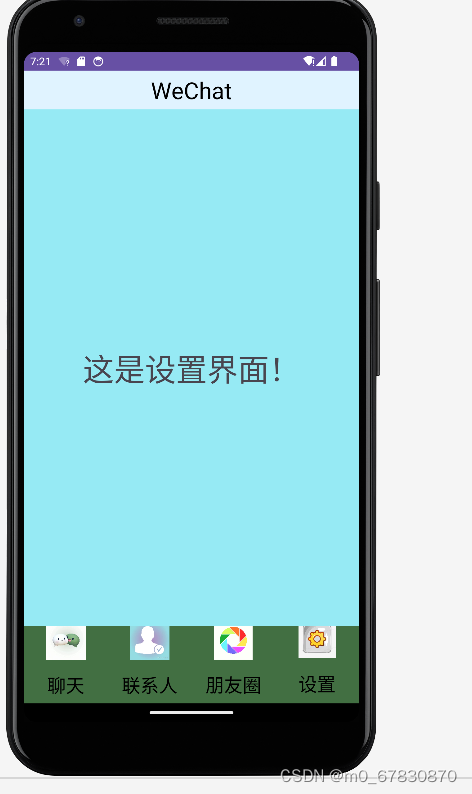
fragment2.xml 另外几个与之类似
<?xml version="1.0" encoding="utf-8"?>
<LinearLayout xmlns:android="http://schemas.android.com/apk/res/android"
xmlns:tools="http://schemas.android.com/tools"
android:layout_width="match_parent"
android:layout_height="match_parent"
android:layout_weight="1"
android:background="#A8EDE7">
<TextView
android:id="@+id/textview1"
android:layout_width="match_parent"
android:layout_height="wrap_content"
android:layout_gravity="center"
android:layout_weight="1"
android:gravity="center"
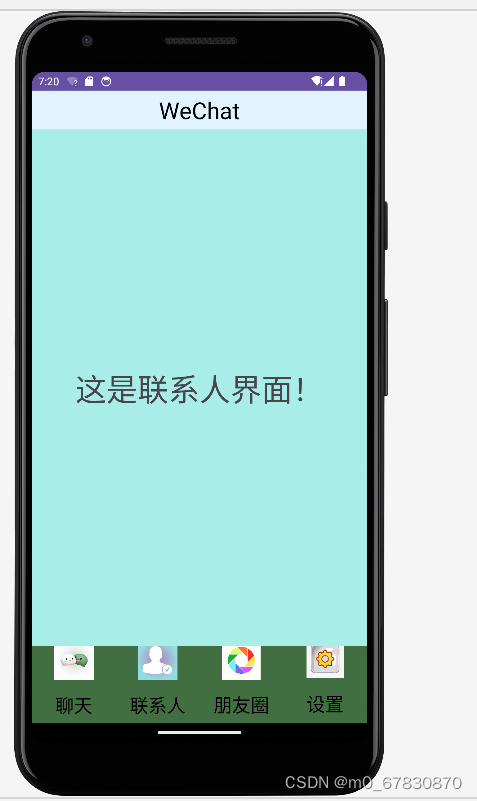
android:text="这是联系人界面!"
android:textSize="40sp" />
</LinearLayout>
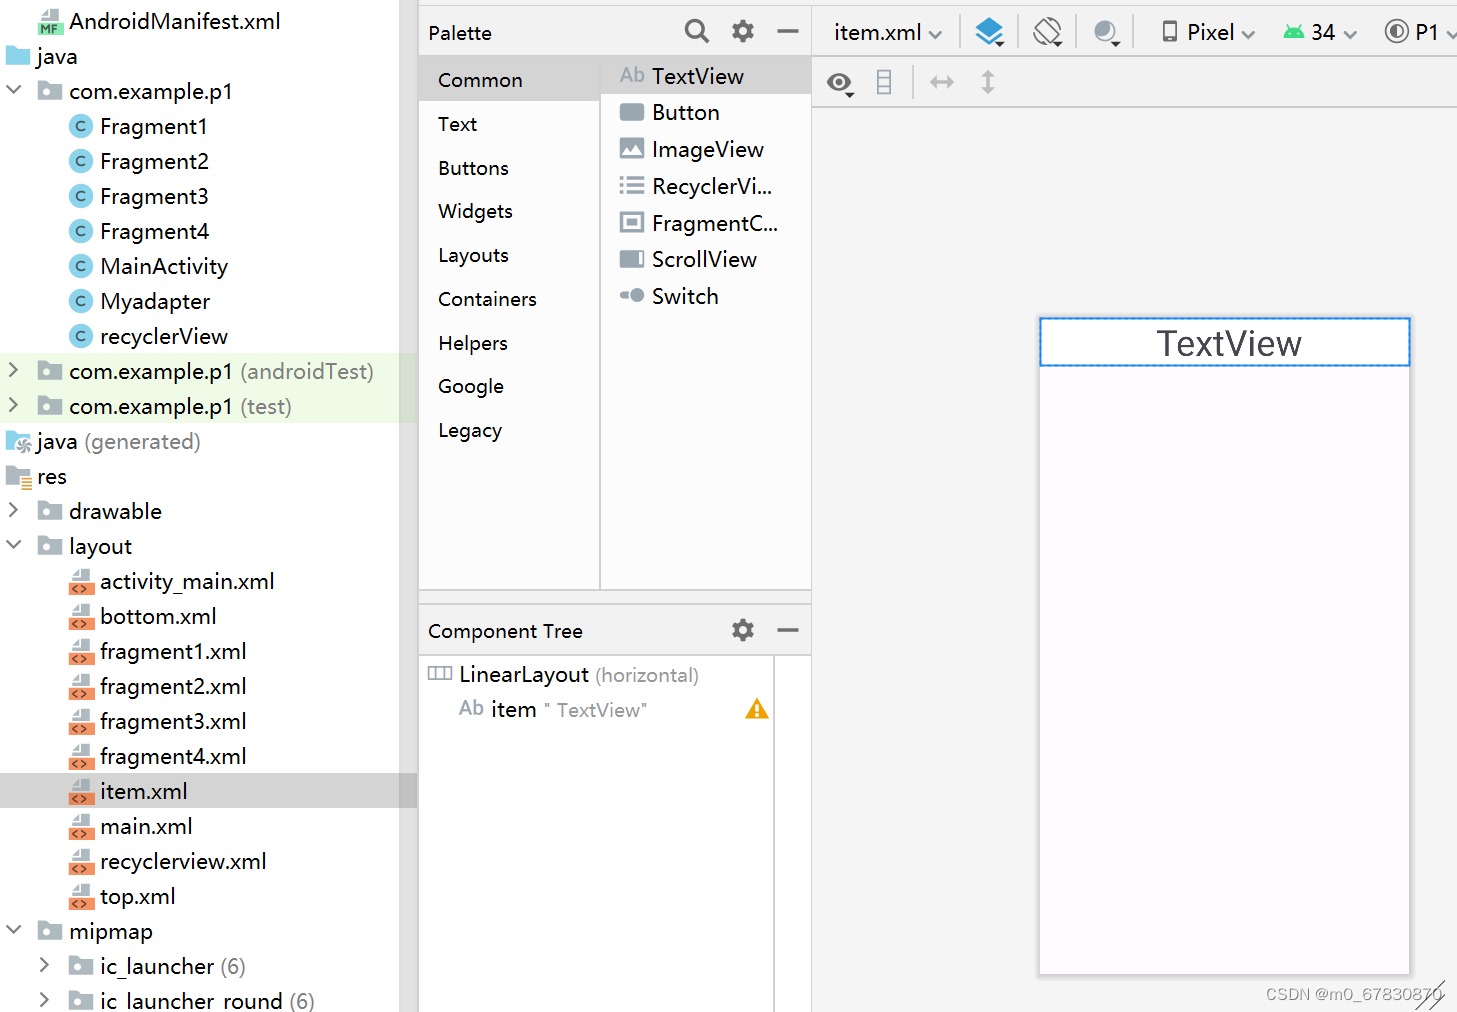
item.xml
<?xml version="1.0" encoding="utf-8"?>
<LinearLayout xmlns:android="http://schemas.android.com/apk/res/android"
    xmlns:app="http://schemas.android.com/apk/res-auto"
    xmlns:tools="http://schemas.android.com/tools"

    android:layout_width="match_parent"
    android:layout_height="wrap_content"
    android:layout_weight="1"

    android:background="@color/white">


    <TextView
        android:id="@+id/item"
        android:layout_width="match_parent"
        android:layout_height="wrap_content"
        android:layout_weight="1"
        android:gravity="center"
        android:text=" TextView"
        android:textSize="40sp" />

</LinearLayout>
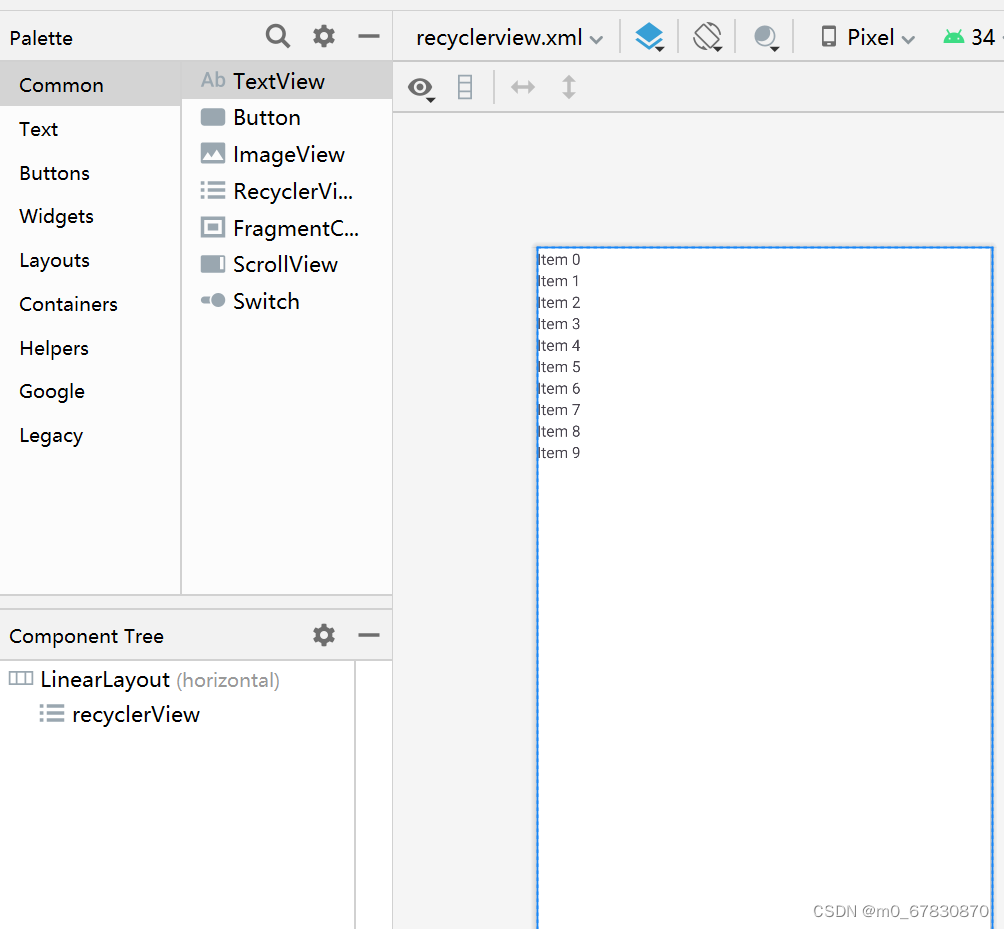
fragment1.xml(增加了recyclerView)
<?xml version="1.0" encoding="utf-8"?>
<LinearLayout xmlns:android="http://schemas.android.com/apk/res/android"
    xmlns:tools="http://schemas.android.com/tools"

    android:layout_width="match_parent"
    android:layout_height="match_parent"
    android:layout_weight="1"
    android:background="@color/white">


    <androidx.recyclerview.widget.RecyclerView
        android:id="@+id/recyclerView"
        android:layout_width="match_parent"
        android:layout_height="match_parent"
        android:layout_weight="1"

        />

</LinearLayout>
Java 代码:
Mainactivity.java
主要包含四部分:
1.初始化:将所有的Fragment加入到main布局中
2.隐藏所有的fragment
3.默认显示第一个fragment
4.点击事件:点击切换页面(修改onClick)
package com.example.p1;
import androidx.appcompat.app.AppCompatActivity;
import android.app.Fragment;
import android.app.FragmentManager;
import android.app.FragmentTransaction;
import android.graphics.Color;
import android.os.Bundle;
import android.view.View;
import android.widget.LinearLayout;
public class MainActivity extends AppCompatActivity implements View.OnClickListener {
    private Fragment fragment1= new Fragment();
    private Fragment fragment2=new Fragment2();
    private Fragment fragment3=new Fragment3();
    private Fragment fragment4=new Fragment4();
    private FragmentManager fragmentManager;
    private LinearLayout linearLayout1,linearLayout2,linearLayout3,linearLayout4;
    @Override
    protected void onCreate(Bundle savedInstanceState) {
        super.onCreate(savedInstanceState);
        setContentView(R.layout.activity_main);
        linearLayout1=findViewById(R.id.linearLayout1);
        linearLayout2=findViewById(R.id.linearLayout2);
        linearLayout3=findViewById(R.id.linearLayout3);
        linearLayout4=findViewById(R.id.linearLayout4);

        linearLayout1.setOnClickListener(this);
        linearLayout2.setOnClickListener(this);
        linearLayout3.setOnClickListener(this);
        linearLayout4.setOnClickListener(this);

        initFragment();
    }

    private void initFragment(){
        fragmentManager=getFragmentManager();
        FragmentTransaction transaction=fragmentManager.beginTransaction();
        transaction.add(R.id.id_content,fragment1);
        transaction.add(R.id.id_content,fragment2);
        transaction.add(R.id.id_content,fragment3);
        transaction.add(R.id.id_content,fragment4);
        hideFragment(transaction);
        transaction.commit();
    }


    private void hideFragment(FragmentTransaction transaction){
        transaction.hide(fragment1);
        transaction.hide(fragment2);
        transaction.hide(fragment3);
        transaction.hide(fragment4);
    }
    private void background(View v)
    {
        if(v.getId()==R.id.linearLayout1)
        {
            linearLayout1.setBackgroundColor(Color.parseColor("#426F42"));
        }
        else if(v.getId()==R.id.linearLayout2)
        {
            linearLayout2.setBackgroundColor(Color.parseColor("#426F42"));
        }
        else if(v.getId()==R.id.linearLayout3)
        {
            linearLayout3.setBackgroundColor(Color.parseColor("#426F42"));
        }
        else
        {
            linearLayout4.setBackgroundColor(Color.parseColor("#426F42"));
        }

        }


    private void backgrounder(View v) {
       if (v.getId()==R.id.linearLayout1)
       {

           linearLayout1.setBackgroundColor(Color.parseColor("#426F42"));
       }
       else if (v.getId()==R.id.linearLayout2)
        {

            linearLayout2.setBackgroundColor(Color.parseColor("#426F42"));
        }
       else if (v.getId()==R.id.linearLayout3)
        {

            linearLayout3.setBackgroundColor(Color.parseColor("#426F42"));
        }
        else
        {

            linearLayout4.setBackgroundColor(Color.parseColor("#426F42"));
        }

        }


    private void fragmentation(int i) {

        FragmentTransaction transaction=fragmentManager.beginTransaction();
        hideFragment(transaction);
        switch (i){
            case 0:
                transaction.show(fragment1);
                background(linearLayout1);
                backgrounder(linearLayout3);
                backgrounder(linearLayout2);
                backgrounder(linearLayout4);
                break;
            case 1:
                transaction.show(fragment2);
                background(linearLayout2);
                backgrounder(linearLayout4);
                backgrounder(linearLayout1);
                backgrounder(linearLayout3);
                break;
            case 2:
                transaction.show(fragment3);
                background(linearLayout3);
                backgrounder(linearLayout4);
                backgrounder(linearLayout2);
                backgrounder(linearLayout1);
                break;
            case 3:
                transaction.show(fragment4);
                background(linearLayout4);
                backgrounder(linearLayout1);
                backgrounder(linearLayout2);
                backgrounder(linearLayout3);
                break;
            default:
                break;
        }
        transaction.commit();
    }

    @Override
    public void onClick(View v) {
        if (v.getId()==R.id.linearLayout1) {

            fragmentation(0);
        }
        else if (v.getId()==R.id.linearLayout2) {

            fragmentation(1);
        }
        else if (v.getId()==R.id.linearLayout3) {

            fragmentation(2);
        }
        else
        {

            fragmentation(3);
        }

    }

}
Fragment2.java 另外几个与之类似
package com.example.p1;


import android.os.Bundle;
import android.app.Fragment;
import android.view.LayoutInflater;
import android.view.View;
import android.view.ViewGroup;
public class Fragment2 extends Fragment {
    public Fragment2() {

    }
    @Override
    public View onCreateView(LayoutInflater inflater, ViewGroup container,
                             Bundle savedInstanceState) {

        return inflater.inflate(R.layout.fragment2, container, false);
    }
}
Myadapter.java
package com.example.p1;

import android.content.Context;
import android.view.LayoutInflater;
import android.view.View;
import android.view.ViewGroup;
import android.widget.TextView;

import androidx.annotation.NonNull;
import androidx.recyclerview.widget.RecyclerView;

import java.util.List;

public class Myadapter extends RecyclerView.Adapter<Myadapter.Holder> {
    Context context1;
    List<String> list1;

    public Myadapter(Context context, List list) {
        context1=context;
        list1=list;

    }

    @NonNull
    @Override
    public Holder onCreateViewHolder(@NonNull ViewGroup parent, int viewType) {

        View view= LayoutInflater.from(context1).inflate(R.layout.item,parent,false);

        Holder holder=new Holder(view);
        return holder;
    }

    @Override
    public void onBindViewHolder(@NonNull Holder holder, int position) {
        holder.textView.setText(list1.get(position));
    }


    public int getItemCount(){
        return list1.size();
    }
    public class Holder extends RecyclerView.ViewHolder{
        TextView textView;
        public Holder(View itemView)
        {
            super(itemView);
            textView=itemView.findViewById(R.id.item);
        }


    }
}
fragment1.java
package com.example.p1;
import android.os.Bundle;
import androidx.fragment.app.Fragment;
import androidx.recyclerview.widget.LinearLayoutManager;
import androidx.recyclerview.widget.RecyclerView;
import android.view.LayoutInflater;
import android.view.View;
import android.view.ViewGroup;
import java.util.ArrayList;
import java.util.List;
public class Fragment1 extends Fragment {
public Fragment1() {
}
View view;
RecyclerView recyclerview;
List<String> list;
Myadapter adapter;
@Override
public View onCreateView(LayoutInflater inflater, ViewGroup container,
Bundle savedInstanceState) {
view= inflater.inflate(R.layout.fragment1, container, true);
recyclerview=view.findViewById(R.id.recyclerView);
list=new ArrayList<>();
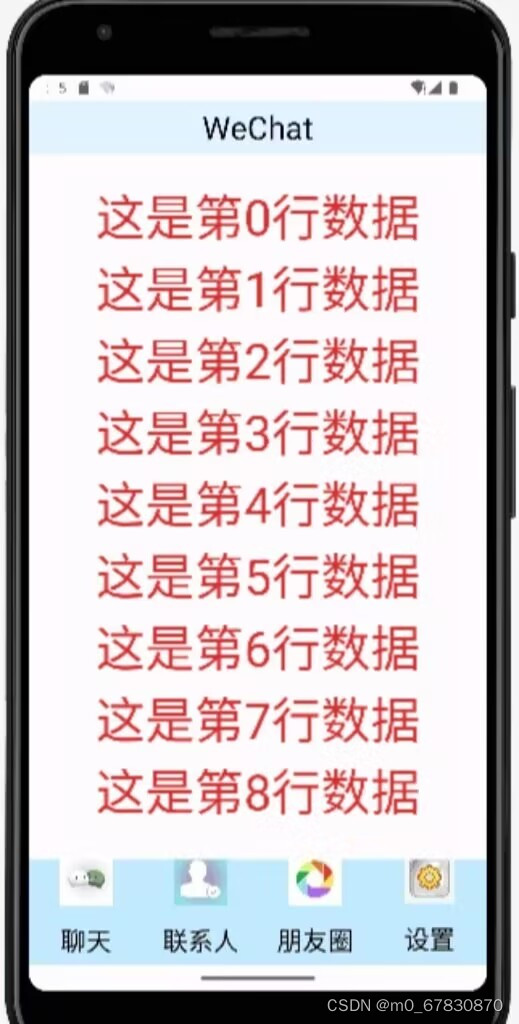
for(int i=0;i<9;i++){
list.add("这是第"+i+"行数据");
}
adapter=new Myadapter(view.getContext(),list);
recyclerview.setAdapter(adapter);
LinearLayoutManager manager=new LinearLayoutManager(view.getContext());
manager.setOrientation(RecyclerView.VERTICAL);
recyclerview.setLayoutManager(manager);
return view;
}
}结果展示:
核心技术
1,监听
监听器就是一旦按钮或者其他组件被用例如鼠标点击,就会产生一个事件出来,这个事件就需要我们去监听他,监听后并把需要执行的代码给予这个点击事件,首先在XML文件里面需要把组件建立一个唯一的名字,然后在java的MainActivity中编写代码,让页面MainActivity的onCreate方法能够找到这个组件并进行监听,实现方法就是通过匿名内部类来实现点击触发。
2.layouts
LinearLayout
线性布局要灵活一些,在实际应用上也是最最最广泛的。有layout_width,
layout_height等基本属性,可以对其进行设置,取值有两种:vertical(垂直)和 horizontal(水平),android:orientation=“horizontal” 决定了容器里面的所有组件都绝对是水平排列的。
ConstraintLayout可以按照比例约束控件位置和尺寸,能够更好地适配屏幕大小不同的机型。
3、fragment
我们可以把Fragment看成一个小型的Activity,又称Activity片段!如果一个很大的界面,我们就一个布局,写起界面来麻烦,而且如果组件多的话是管理起来也很麻烦!而使用Fragment 我们可以把屏幕划分成几块,然后进行分组,进行一个模块化的管理!从而可以更加方便的在 运行过程中动态地更新Activity的用户界面!另外Fragment并不能单独使用,他需要嵌套在Activity 中使用,尽管他拥有自己的生命周期,但是还是会受到宿主Activity的生命周期的影响,比如Activity 被destory销毁了,他也会跟着销毁。
4.RecyclerView
RecyclerView可以呈现一系列数据,呈现方式可以根据给的LayoutManager确定。
(1)创建布局:添加 RecyclerView和每个list布局
(2)创建适配器:
创建一个Adapter类;
继承RecyclerView的Adapter;
泛型定义为Adapter的内部类MyHolder;
(3)绑定适配器:
在Activity那边加一个方法,或者直接在onCreate里绑定RecyclerView();
(4)适配器调整
总结
在完成本次类微信的界面设计以及在任一tab页中实现列表效果的作业中,我掌握了AS基本的代码编写部分和xml文件进行界面设计,学会了recyclerview的编写和使用,掌握了adapter适配器的使用。在实验中也遇到了一些问题,有时由于控件id弄错而导致程序出错,需要仔细检查。在运行时遇到过一些闪退或者结果不对的情况,然后我通过查看Logcat的报错信息,并通过上网查询来改正错误,最后成功运行了。
源码仓库地址:

鸿蒙生态一站式服务平台。
更多推荐
 1
1 0
0- 0


 已为社区贡献1条内容

所有评论(0)