uni-app使用自定义导航,获取顶部距离,兼容各个手机型号
uni-app使用自定义导航,获取顶部距离,兼容各个手机型号
·
提示:uni-app使用自定义导航,获取顶部距离,兼容各个手机型号
前言
uni-app使用自定义导航,获取顶部距离,兼容各个手机型号
一、使用uni-app自带导航栏
只需在pages.json文件里面配置即可;
代码如下:
{
      "path": "pages/my/Mybrand",
      "style": {
        "navigationBarTitleText": "品牌合作",
        "app-plus": {
        //只需将titleNView改为true即可,即可使用原生导航栏
          "titleNView": true
        }
      }
    },
二、使用自定义导航栏
1.使用原因?
原生导航栏往往不能满足需求,故需要使用自定义导航栏;
例如:跳转传递参数,和返回时需要写相应的逻辑,都无法满足我们的需求;
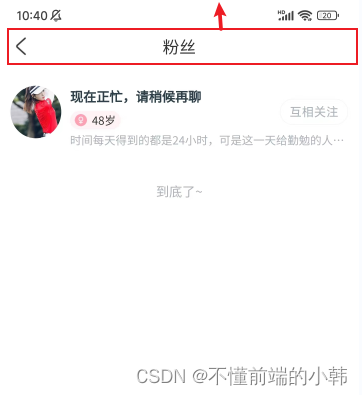
2.效果展示?

3.如何使用?
代码如下(示例):
<template>
  <view class="allheaders">
    //获取顶部高度
    <view :style="{ height: statusBarHeight + 'px' }"></view>

    <view class="details-nav">
      <view class="back-info">
        <image @click="goBack()" class="back-image" src="../../../static/images/index/back@2x.png" mode=""></image>
      </view>
      <view class="details-nav-right"> 粉丝 </view>
    </view>
  </view>
</template>

<script>
export default {
  data() {
    return {
      statusBarHeight: 0,
    }
  },

	  mounted() {
	   //必须放在mounted钩子函数最前面,不能放在调用其它方法后面,否则无效
	    let that = this
	    //获取手机系统信息
	    const info = uni.getSystemInfoSync()
	    //设置状态栏高度
	    that.statusBarHeight = info.statusBarHeight
	    that.getPersoanalInfo()
        that.initSortable()
	  },
	  methods: {
	  },
	},
 }
</script>


<style scoped lang="scss">
.details-nav {
  width: 100%;
  height: 88rpx;
  background-color: #fff;
  position: relative;
  z-index: 999;
  .back-info {
    width: 44rpx;
    height: 44rpx;
    position: absolute;
    left: 24rpx;
    top: 22rpx;
    z-index: 99;
    .back-image {
      width: 100%;
      height: 100%;
    }
  }
  .details-nav-right {
    width: 100%;
    font-size: 36rpx;
    font-weight: 500;
    text-align: center;
    line-height: 88rpx;
    color: #333333;
  }
}
</style>

为开发者提供学习成长、分享交流、生态实践、资源工具等服务,帮助开发者快速成长。
更多推荐


 4
4 0
0- 0


 已为社区贡献3条内容

所有评论(0)