在vue、element-ui中实现图片的上传upload
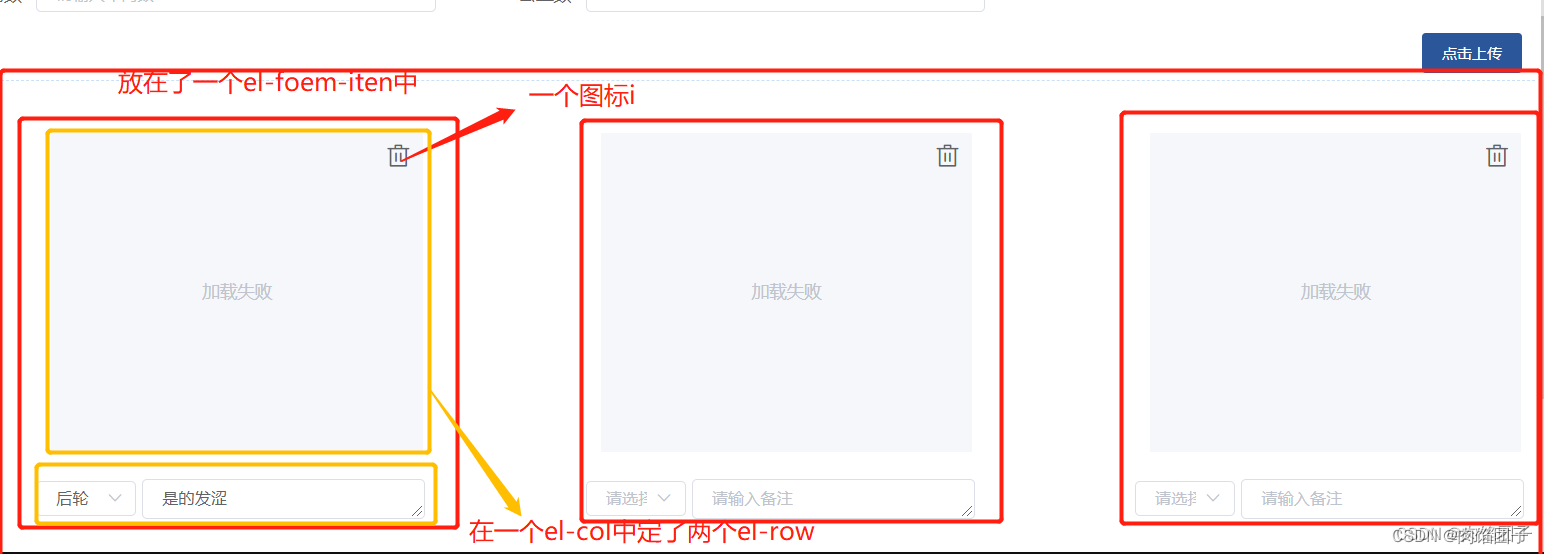
实现效果:点击上传按钮,实现图片与下边下拉框和文字框的添加。因为在我的文章中是一行显示3列,所以使用了el-row和el-col的写法,此文章可作为借鉴,摘抄出你所需要的功能即可使用了element-ui中的upload写法
·
实现效果:
点击上传按钮,实现图片与下边下拉框和文字框的添加
因为在我的文章中是一行显示3列,所以使用了el-row和el-col的写法
此文章可作为借鉴,摘抄出你所需要的功能即可
使用了element-ui中的upload写法

值得注意的是:在el-upload中

<el-upload class="check-item-atta-upload"
                  :action="uploadUrl"
                  :headers="myHeader"
                  :data="uploadParams"
                  accept=".jpeg, .jpg, .gif, .png"
                  :on-success="uploadSuccess"
                  multiple>
                  <el-button size="small" type="primary">上传图片</el-button>
                </el-upload>
在data中引入:

之后就是你上传后的图片,和删除图标,在这我的删除图标是引入的,你可以在阿里巴巴矢量图中下载一个图标放进去;
 <el-form-item>
      <i  class="el-icon-delete" @click="imfError(index)"></i>
       <el-image :src="item.attaUrl" class="uploadFile"></el-image>
 </el-form-item>
调用上传接口成功后,从接口中push到图片的附件信息,即图片的地址,attUrl,图片携带的id --atta,push到checkBaseForm.vehiCheckDetails,即遍历的数据中

因为我的图片是要通过on-success函数调用成功后,把图片的附件信息返回来,所以在下边有一个下拉框和文字描述框,是通过v-for进行遍历得到的
<el-col :span="8" v-for="(item, index) in checkBaseForm.vehiCheckDetails" :key="item.id">在下拉框和文字描述中

checkItemList调用接口获取下拉框的数据

  checkItemChange(index, val){
            this.checkItemList.forEach(item => {
                if(item.code === val){
                    this.checkBaseForm.vehiCheckDetails[index].code = item.code;
                    this.checkBaseForm.vehiCheckDetails[index].name = item.cnName;
                    this.checkBaseForm.vehiCheckDetails[index].type = item.type;
                }
            })
}更多推荐
 已为社区贡献2条内容


所有评论(0)