
RuoYi-Vue前后端分离版学习笔记
RuoYi-Vue前后端分离版 源码分析笔记
·
一、前期准备
环境要求:JDK1.8+、 MySQL、Redis、 Maven、 Vue
下载官网:RuoYi-Vue前后端分离版

复制链接 https://gitee.com/y_project/RuoYi-Vue.git 直接 IDEA 克隆导入
创建数据库,导入sql文件
修改配置文件:
MYSQL配置在 ruoyi-admin/src/main/resources/application-druid.yml 中修改
Redis配置在 ruoyi-admin/src/main/resources/application.yml 中修改
二、学习笔记
2.1 验证码
验证码作为登录校验的一个重要手段,可以有效的防止机器冒充人类做暴力破解、大规模在线注册滥用服务、自动发布等操作。实际上用验证码是现在很多网站通行的方式。
接下来我们开始一步步的分析若依的验证码处理流程。分析顺序都是先定位到前端代码在通过请求的URL地址定位到后端的接口,接着分析后端的逻辑处理。
前端代码:
	<!-- html部分 -->
	<!-- 这里的v-if="captchaEnabled"可以控制验证码模块的显示与隐藏,captchaEnabled默认值为true即显示 -->
   <el-form-item prop="code" v-if="captchaEnabled">
     <el-input
       v-model="loginForm.code"
       auto-complete="off"
       placeholder="验证码"
       style="width: 63%"
       @keyup.enter.native="handleLogin"
     >
       <svg-icon slot="prefix" icon-class="validCode" class="el-input__icon input-icon" />
     </el-input>
     <div class="login-code">
     	<!-- 每次点击验证码图片的时候,都会刷新验证码,所以这里绑定的getCode()点击事件是用来向后端请求生成验证码  -->
     	<!-- 这里的图片绑定的codeUrl就是动态生成的图片地址 -->
       <img :src="codeUrl" @click="getCode" class="login-code-img"/>
     </div>
   </el-form-item>
  // javascript部分
import { getCodeImg } from "@/api/login";

  getCode() {
    getCodeImg().then(res => {
      this.captchaEnabled = res.captchaEnabled === undefined ? true : res.captchaEnabled;
      if (this.captchaEnabled) {
        this.codeUrl = "data:image/gif;base64," + res.img;
        this.loginForm.uuid = res.uuid;
      }
    });
  }

// 这里的getCodeImg()方法被封装在了api/login.js下
export function getCodeImg() {
  // 这里的request对axios做了进一步的封装,下面详细介绍
  return request({
  	// 可以看到验证码刷新和获取调用了后端的captchaImage接口,类型是get
    url: '/captchaImage',
    headers: {
      isToken: false
    },
    method: 'get',
    timeout: 20000
  })
}
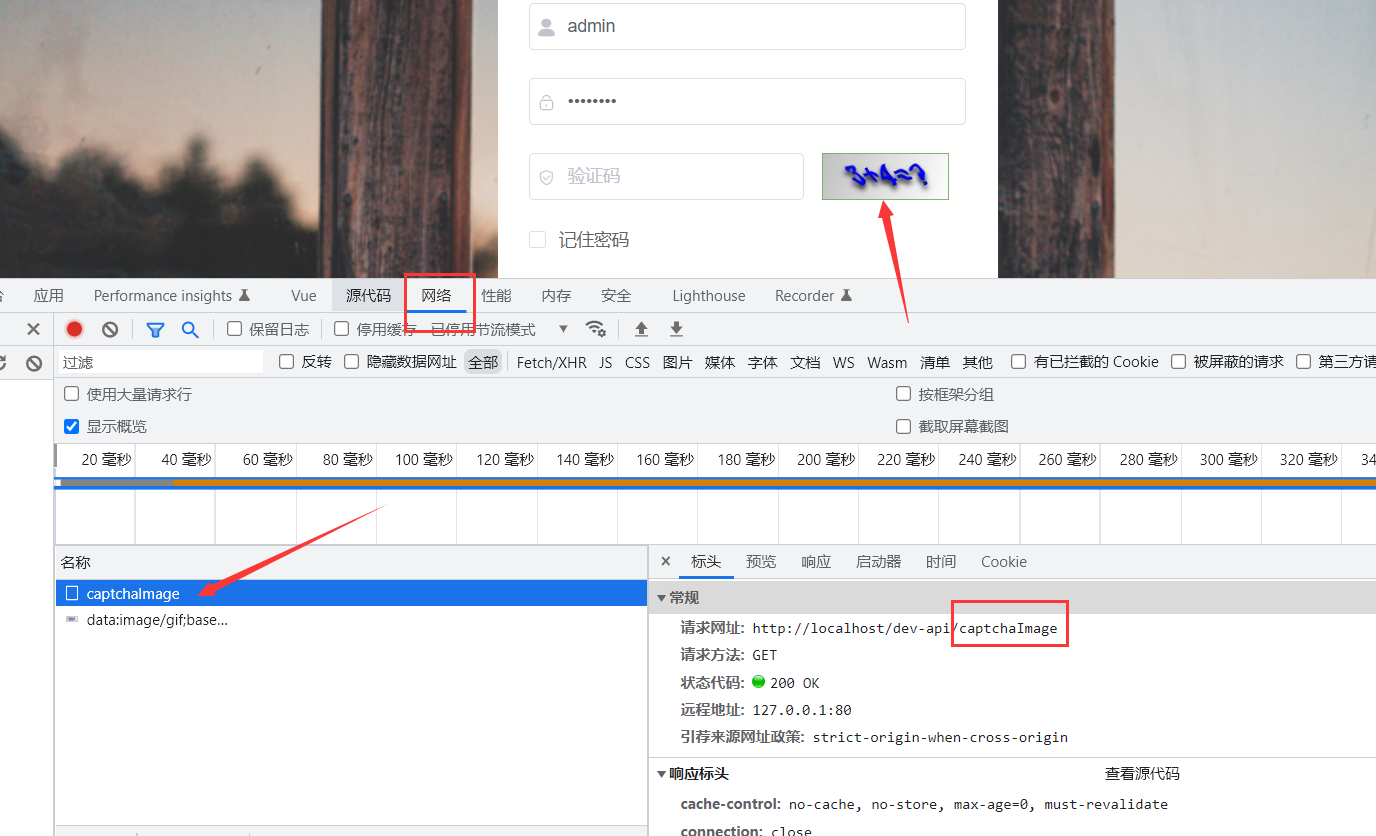
根据请求的 /captchaImage URL地址定位后端接口代码。(双击shift快捷键搜索)
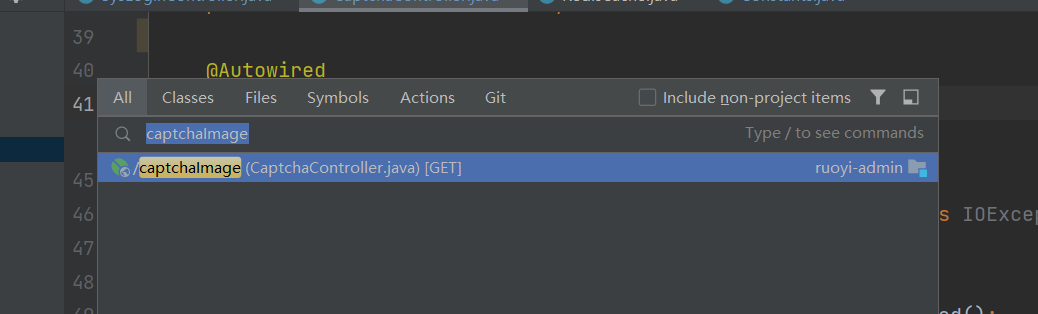
@GetMapping("/captchaImage")
    public AjaxResult getCode(HttpServletResponse response) throws IOException
    {
        AjaxResult ajax = AjaxResult.success();
        // 从redis中读取缓存的配置,是否开启验证码
        boolean captchaEnabled = configService.selectCaptchaEnabled();
        ajax.put("captchaEnabled", captchaEnabled);
        if (!captchaEnabled)
        {
            // 不开启直接返回
            return ajax;
        }

        // 保存验证码信息,存入redis中的Key值
        String uuid = IdUtils.simpleUUID();
        String verifyKey = CacheConstants.CAPTCHA_CODE_KEY + uuid;

        String capStr = null, code = null;
        BufferedImage image = null;

        // 生成验证码,读取yml配置文件中的验证码类型:math
        String captchaType = RuoYiConfig.getCaptchaType();
        if ("math".equals(captchaType))
        {
            // 核心方法 --> 返回一个数学表达式类似于: 5-1=?@4
            // 这里的验证码生成使用了google kaptcha的验证码组件,没有重复造轮子,具体的生成逻辑作者重写了
            // 这里生成表达式的方法(重写)在 com.ruoyi.framework.config包下的KaptchaTextCreator验证码文本生成器类
            String capText = captchaProducerMath.createText();

			// 截取转化为图片的字符,比如:5-1=?
            capStr = capText.substring(0, capText.lastIndexOf("@"));

            // 截取生成的数学表达式结果
            code = capText.substring(capText.lastIndexOf("@") + 1);

			// 将截取的表达式转为图片
            image = captchaProducerMath.createImage(capStr);
        }

		// 如果是yml配置文件中的验证码类型为char,则生成的验证码类似于:4nm7
        else if ("char".equals(captchaType))
        {
            capStr = code = captchaProducer.createText();
            image = captchaProducer.createImage(capStr);
        }

        // 将结果存入Redis中存入形式:  verifyKey : code (KV形式)
        redisCache.setCacheObject(verifyKey, code, Constants.CAPTCHA_EXPIRATION, TimeUnit.MINUTES);
        // 转换流信息写出
        FastByteArrayOutputStream os = new FastByteArrayOutputStream();
        try
        {
            ImageIO.write(image, "jpg", os);
        }
        catch (IOException e)
        {
            return AjaxResult.error(e.getMessage());
        }

		// 将UUID返回前端,当用户提交登录时,便可带上这个UUID与后端进行验证码校验
        ajax.put("uuid", uuid);

		// 以Base64的方式返回给前端
        ajax.put("img", Base64.encode(os.toByteArray()));
        return ajax;
    }

快速构建 Web 应用程序
更多推荐
 0
0 0
0- 0


 已为社区贡献1条内容

所有评论(0)