

Unit testing aims to validate that a given part of software works exactly as designed, independently from all the other parts. This part is the smallest testable, and in procedural programming can be a function, in Object Oriented Programming, a method. Unit testing used in all the other languages, but in this article, we’re going to see how to create unit tests for an Android app. You find the full project on github here.
单元测试旨在验证软件的给定部分独立于所有其他部分而完全按照设计工作。 这部分是最小的可测试对象,在过程编程中可以是函数,而在面向对象编程中则可以是方法。 其他所有语言都使用了单元测试,但是在本文中,我们将了解如何为Android应用程序创建单元测试。 您在github整个项目在这里 。
This app takes as input user’s height and weight, calculate their BMI (Body Mass Index) and outputs a tip accordingly (Depending on BMI, the app determines whether the user’s given weight is normal, underweight, overweight, or obese, and a tip is output as a result).
此应用将用户的身高和体重作为输入,计算其BMI(身体质量指数)并相应地输出提示(根据BMI,该应用将确定用户的给定体重是正常,体重不足,超重还是肥胖,而提示是结果输出)。
Before we start, I want you to know that there are two ways to perform unit testing in Android. The first one is unit tests that run on JVM, and are called local tests. As for the second, it is called instumented unit tests which run on Android system. In this example, We’re going to tackle only local tests, so let’s get started!
在开始之前,我希望您知道有两种方法可以在Android中执行单元测试。 第一个是在JVM上运行的单元测试,称为本地测试。 至于第二个,它称为在Android系统上运行的仪器化单元测试 。 在此示例中,我们将仅处理本地测试,因此让我们开始吧!
After creating the android project, we need to add a dependency that allows to perform the unit tests. In gradle dependecies, add the following line:
创建android项目后,我们需要添加一个依赖项,以执行单元测试。 在gradle依赖中,添加以下行:
testImplementation 'junit:junit:4.12'junit is a java library for unit tests and it is based on annotations.
junit是一个用于单元测试的Java库,它基于注释。
After adding the dependency, let’s create now, in the app package, a java class “BMI”
添加依赖关系后,让我们现在在应用程序包中创建一个Java类“ BMI”
public class BMI {private float weight;private float height;public BMI(float weight, float height){this.weight = weight;this.height = height;
    }//This function calculates BMI using the formula kg/m²public float calculateBMI(){return (weight/(height*height));
    }
}
The “BMI” class has a method “calculateBMI ()”, that we are going to test in the first part of this tutorial.
“ BMI”类具有方法“ calculateBMI()” ,我们将在本教程的第一部分中对其进行测试。
Now, if you have noticed, under the java directory, there are three packages: the first package contains “BMI” class and other activities, the second is written next to it, “AndroidTest”, which contains the classes that are used for instrumented unit test, and the third package, which is written next to it “Test”, should contain the test classes that are used for local tests, that run on JVM. In this package, we create a java class named “BMITest” that will perform the unit test of the “BMI” class, and then add the following code:
现在,如果您已经注意到,在java目录下,有三个软件包:第一个软件包包含“ BMI”类和其他活动,第二个软件包旁边写有“ AndroidTest” ,其中包含用于检测的类单元测试,并在其旁边写有“ Test”的第三个包应包含在JVM上运行的用于本地测试的测试类。 在此程序包中,我们创建一个名为“ BMITest”的Java类,它将执行“ BMI”类的单元测试,然后添加以下代码:
public class BMITest {private BMI bmi;//To initialize bmi before starting the test@Beforepublic void init(){bmi = new BMI( 68, 1.67f );
    }
    @Testpublic void testCalculateBMI(){float expectedValue = 24.38f;assertEquals("BMI calculating is correct ", expectedValue, bmi.calculateBMI(), 0.01);
    }
}
In this class, there two annotations:
在该类中,有两个注释:
Test: To refer to the method that runs the test
测试:指运行测试的方法
Before: to indicate that the method under this annotation, should run before starting the unit test.
之前:指示此注释下的方法应在开始单元测试之前运行。
So, before starting the test, we first initialize “bmi”, then we run the test. The method “testCalculateBMI()”, is calling a method “assertEquals()”, that has as first parameter, a comment, the expected value that the “BMI” method “calculateBMI()” should return, as a third arguement, we have the actual value of the method being tested (“calculateBMI()”), as for the last arguement, we used it because we’re dealing with floats, just to guarantee some precision and so that the unit test works properly. What “assertEquals()” does, is that it forces the returned value by the tested method to be equal to the expected value so that the test succeeds, or it fails if the tested method returns a value other than the expected method.
因此,在开始测试之前,我们首先初始化“ bmi”,然后运行测试。 方法“ testCalculateBMI() ”正在调用方法“ assertEquals()” ,该方法具有第一个参数,即注释,“ BMI”方法“ calculateBMI() ” 应返回的期望值,作为第三点论证,我们具有被测试方法的实际值( “ calculateBMI()” ),至于最后一个论点,我们之所以使用它,是因为我们正在处理浮点数,只是为了保证一定的精度,以便单元测试能够正常工作。 “ assertEquals()”的作用是,它迫使测试方法返回的值等于期望值,以使测试成功,否则,如果测试方法返回的值不是期望方法,则测试失败。
To run the test in android studio, go to the upper menu, where you usually run your app, then select the test class from the highlited arrow in the screenshot below:
要在android studio中运行测试,请转到上方菜单,您通常会在其中运行应用程序,然后从下面的屏幕截图的高亮箭头中选择测试类别:
Once you run your test, you should have the following result:
一旦运行测试,您将获得以下结果:
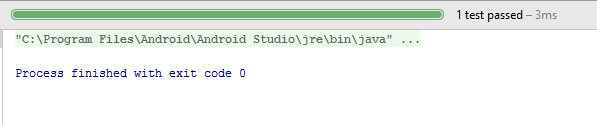
A green progressbar indicates that thee test was successful, and it is red in case test fails for some reason.
绿色进度条表示您的测试成功,如果由于某种原因测试失败,则红色。
Now we’re done with the first part, congratulations!
现在我们完成了第一部分,恭喜!
If you have noticed that we run a test on a method that has no dependency on any other class. However, in real cases, it is not the case, we run unit tests on methods that have many dependencies, and that’s what we’re going to see now.
如果您注意到我们在不依赖于任何其他类的方法上运行测试。 但是,在实际情况下并非如此,我们对具有许多依赖关系的方法运行单元测试,这就是我们现在要看到的。
Remember that the point of unit test is to validate that a given part performs the function it was designed for, independly of all the other dependecies this part has, so how can we do that? In order to do so, we’re going to use a mock framework, it is called so because it fakes the interactions of the tested part with the other parts. For instance, we want to run unit test on a method that depends on some other method, a mock framework will fake the external communication between the tested method and the method inside it, without caring if the internal methods works properly or not, it just makes sure the external communications works. We’re going to use the mockito framwork. So again, in the gradle file, add the following dependency:
请记住,单元测试的重点是验证给定部件是否独立于该部件具有的所有其他依赖条件而执行其设计的功能,那么我们该怎么做呢? 为了做到这一点,我们将使用一个模拟框架,之所以这样称呼,是因为它伪造了测试部分与其他部分的交互。 例如,我们要在依赖于其他方法的方法上运行单元测试,一个模拟框架将伪造被测试方法与其内部方法之间的外部通信 ,而无需关心内部方法是否正常工作,它只是确保外部通讯正常。 我们将使用mockito框架。 再次在gradle文件中添加以下依赖项:
testImplementation 'org.mockito:mockito-core:1.10.19'Now, let’s create another class that depends on the “BMI” class, and it is as follow:
现在,让我们创建另一个依赖于“ BMI”类的类,如下所示:
public class WeightTips {private BMI bmi;public WeightTips(BMI bmi){this.bmi = bmi;
    }public int getTipAboutYourWeight(){int i = 0;float bmiValue = bmi.calculateBMI();if(bmiValue<18.5){//"under weight";i= -1;
        }else if(bmiValue >= 18.5 && bmiValue <= 24.9){//"Normal";i = 0;
        }else if(bmiValue >= 25 && bmiValue <= 29.9) {//"Overwheight";i = 1;
        }else{//Obesei = 2;
        }return i;
    }
This class has a dependency with the “BMI” class, as it uses the method “calculateBMI()” in order to return tips according to the BMI value.
此类与“ BMI”类具有依赖关系,因为它使用方法“ calculateBMI()”以便根据BMI值返回提示。
Now in the same package where we created our first unit test class, let’s create another test class for this new class in which we’ll test “getTipAboutYourWeight()”:
现在在创建第一个单元测试类的同一个包中,让我们为这个新类创建另一个测试类,在其中测试“ getTipAboutYourWeight()” :
@RunWith(MockitoJUnitRunner.class)public class WeightTipsTest {
    @Mock
    BMI bmi;
    WeightTips weightTips;
    @Beforepublic void init(){weightTips = new WeightTips( bmi );
    }//Testing the normal state@Testpublic void getWeightTipNormalTest(){when(bmi.calculateBMI()).thenReturn( 19.01f );assertEquals( "normal weight",0,weightTips.getTipAboutYourWeight() );// Read personal information from}//Testing the underweight state@Testpublic void getWeightTipUnderWeightTest(){when(bmi.calculateBMI()).thenReturn( 16.1f );assertEquals( "underweight",-1,weightTips.getTipAboutYourWeight() );// Read personal information from}//Testing the overweight state@Testpublic void getWeightTipOverWeightTest(){when(bmi.calculateBMI()).thenReturn( 26.36f );assertEquals( "overweight",1,weightTips.getTipAboutYourWeight() );// Read personal information from}//Testing the obese state@Testpublic void getWeightTipObeseTest(){when(bmi.calculateBMI()).thenReturn( 32.36f );assertEquals( "obese",2,weightTips.getTipAboutYourWeight() );// Read personal information from}
}
Now you notice that this class is proceeded by this annotation
现在您注意到该类由该注释进行
@RunWith(MockitoJUnitRunner.class)It allows to automatically initialize the mock objects.
它允许自动初始化模拟对象。
In this test class, we want to make sure that “getTipAboutYourWeight()” returns the right value. The tested method can retun one of four possible values: -1 to indicate underweight, 0 to refer to a normal weight, 1 to refer to overweight, and 2 to refer to obese. We created a test method for each case. Let’s take one for example and explain it, as the same rule applies to the other cases.
在此测试类中,我们要确保“ getTipAboutYourWeight()”返回正确的值。 所测试的方法可以调整以下四个可能值之一:-1表示体重过轻; 0表示正常体重; 1表示超重; 2表示肥胖。 我们为每种情况创建了一种测试方法。 让我们以一个例子为例进行说明,因为其他情况也适用相同的规则。
//Testing the normal state@Testpublic void getWeightTipNormalTest(){when(bmi.calculateBMI()).thenReturn( 19.01f );assertEquals( "normal weight",0,weightTips.getTipAboutYourWeight() );// Read personal information from}Here, we’re testing the case of normal weight. We used “when().thenReturn()”, in order to force “bmi.calculateBMI()” return a specified value, we’re faking ““bmi.calculateBMI()” behavior, and thus, we really don’t care if the latter works right or not as we’re focusing on testing “weightTips.getTipAboutYourWeight()” behavior. Once the “bmi.calculateBMI()” returns the value that is supposed to, now we can make sure that “weightTips.getTipAboutYourWeight()” works properly. So we call again “assertEquals” in order to make the test only succeeds if the test method returns 0 (0 indicates that the user’s weight is normal). The same thing applies to the rest cases.
在这里,我们正在测试正常体重的情况。 我们使用“ when()。thenReturn()”来强制“ bmi.calculateBMI()”返回指定值,我们在伪造 “ bmi.calculateBMI()”行为,因此,我们实际上不这样做请注意后者是否正确,因为我们将重点放在测试“ weightTips.getTipAboutYourWeight()”行为上。 一旦“ bmi.calculateBMI() ”返回了应该的值,现在我们可以确保“ weightTips.getTipAboutYourWeight()”正常工作。 因此,我们再次调用“ assertEquals”以使测试仅在测试方法返回0(0表示用户的体重正常)时才成功。 其余情况也一样。
Hope you enjoyed this article, can’t wait to read your feedbacks.
希望您喜欢这篇文章,迫不及待想阅读您的反馈。


 已为社区贡献11条内容

所有评论(0)