ios中自定义相机
We’ve all seen custom cameras in one form or another in iOS, but how can we make one ourselves?
我们都曾经在iOS中以一种或另一种形式看到过自定义相机,但是我们如何自己制作一个?
This tutorial is going to cover the basics, while at the same time talk about more advanced implementations and options. As you will soon see, options are plenty when it comes to audio/visual hardware interactions on iOS devices! As always, I aim to develop an intuition behind what we are doing rather than just provide code to copy-paste.
本教程将介绍基础知识,同时讨论更高级的实现和选项。 您将很快看到,在iOS设备上进行音频/视频硬件交互时,有很多选择! 与往常一样,我的目标是在我们正在做的事情后面发展一种直觉,而不仅仅是提供复制粘贴的代码。
Already know how to make a camera app in iOS? Looking for more of a challenge? Checkout my more advanced tutorial on implementing filters.
已经知道如何在iOS中制作相机应用程序? 寻找更多挑战吗? 查看我关于实现过滤器的更高级的教程。
入门代码 (Starter Code)
The starter code can be found on my GitHub:
入门代码可以在我的GitHub上找到:
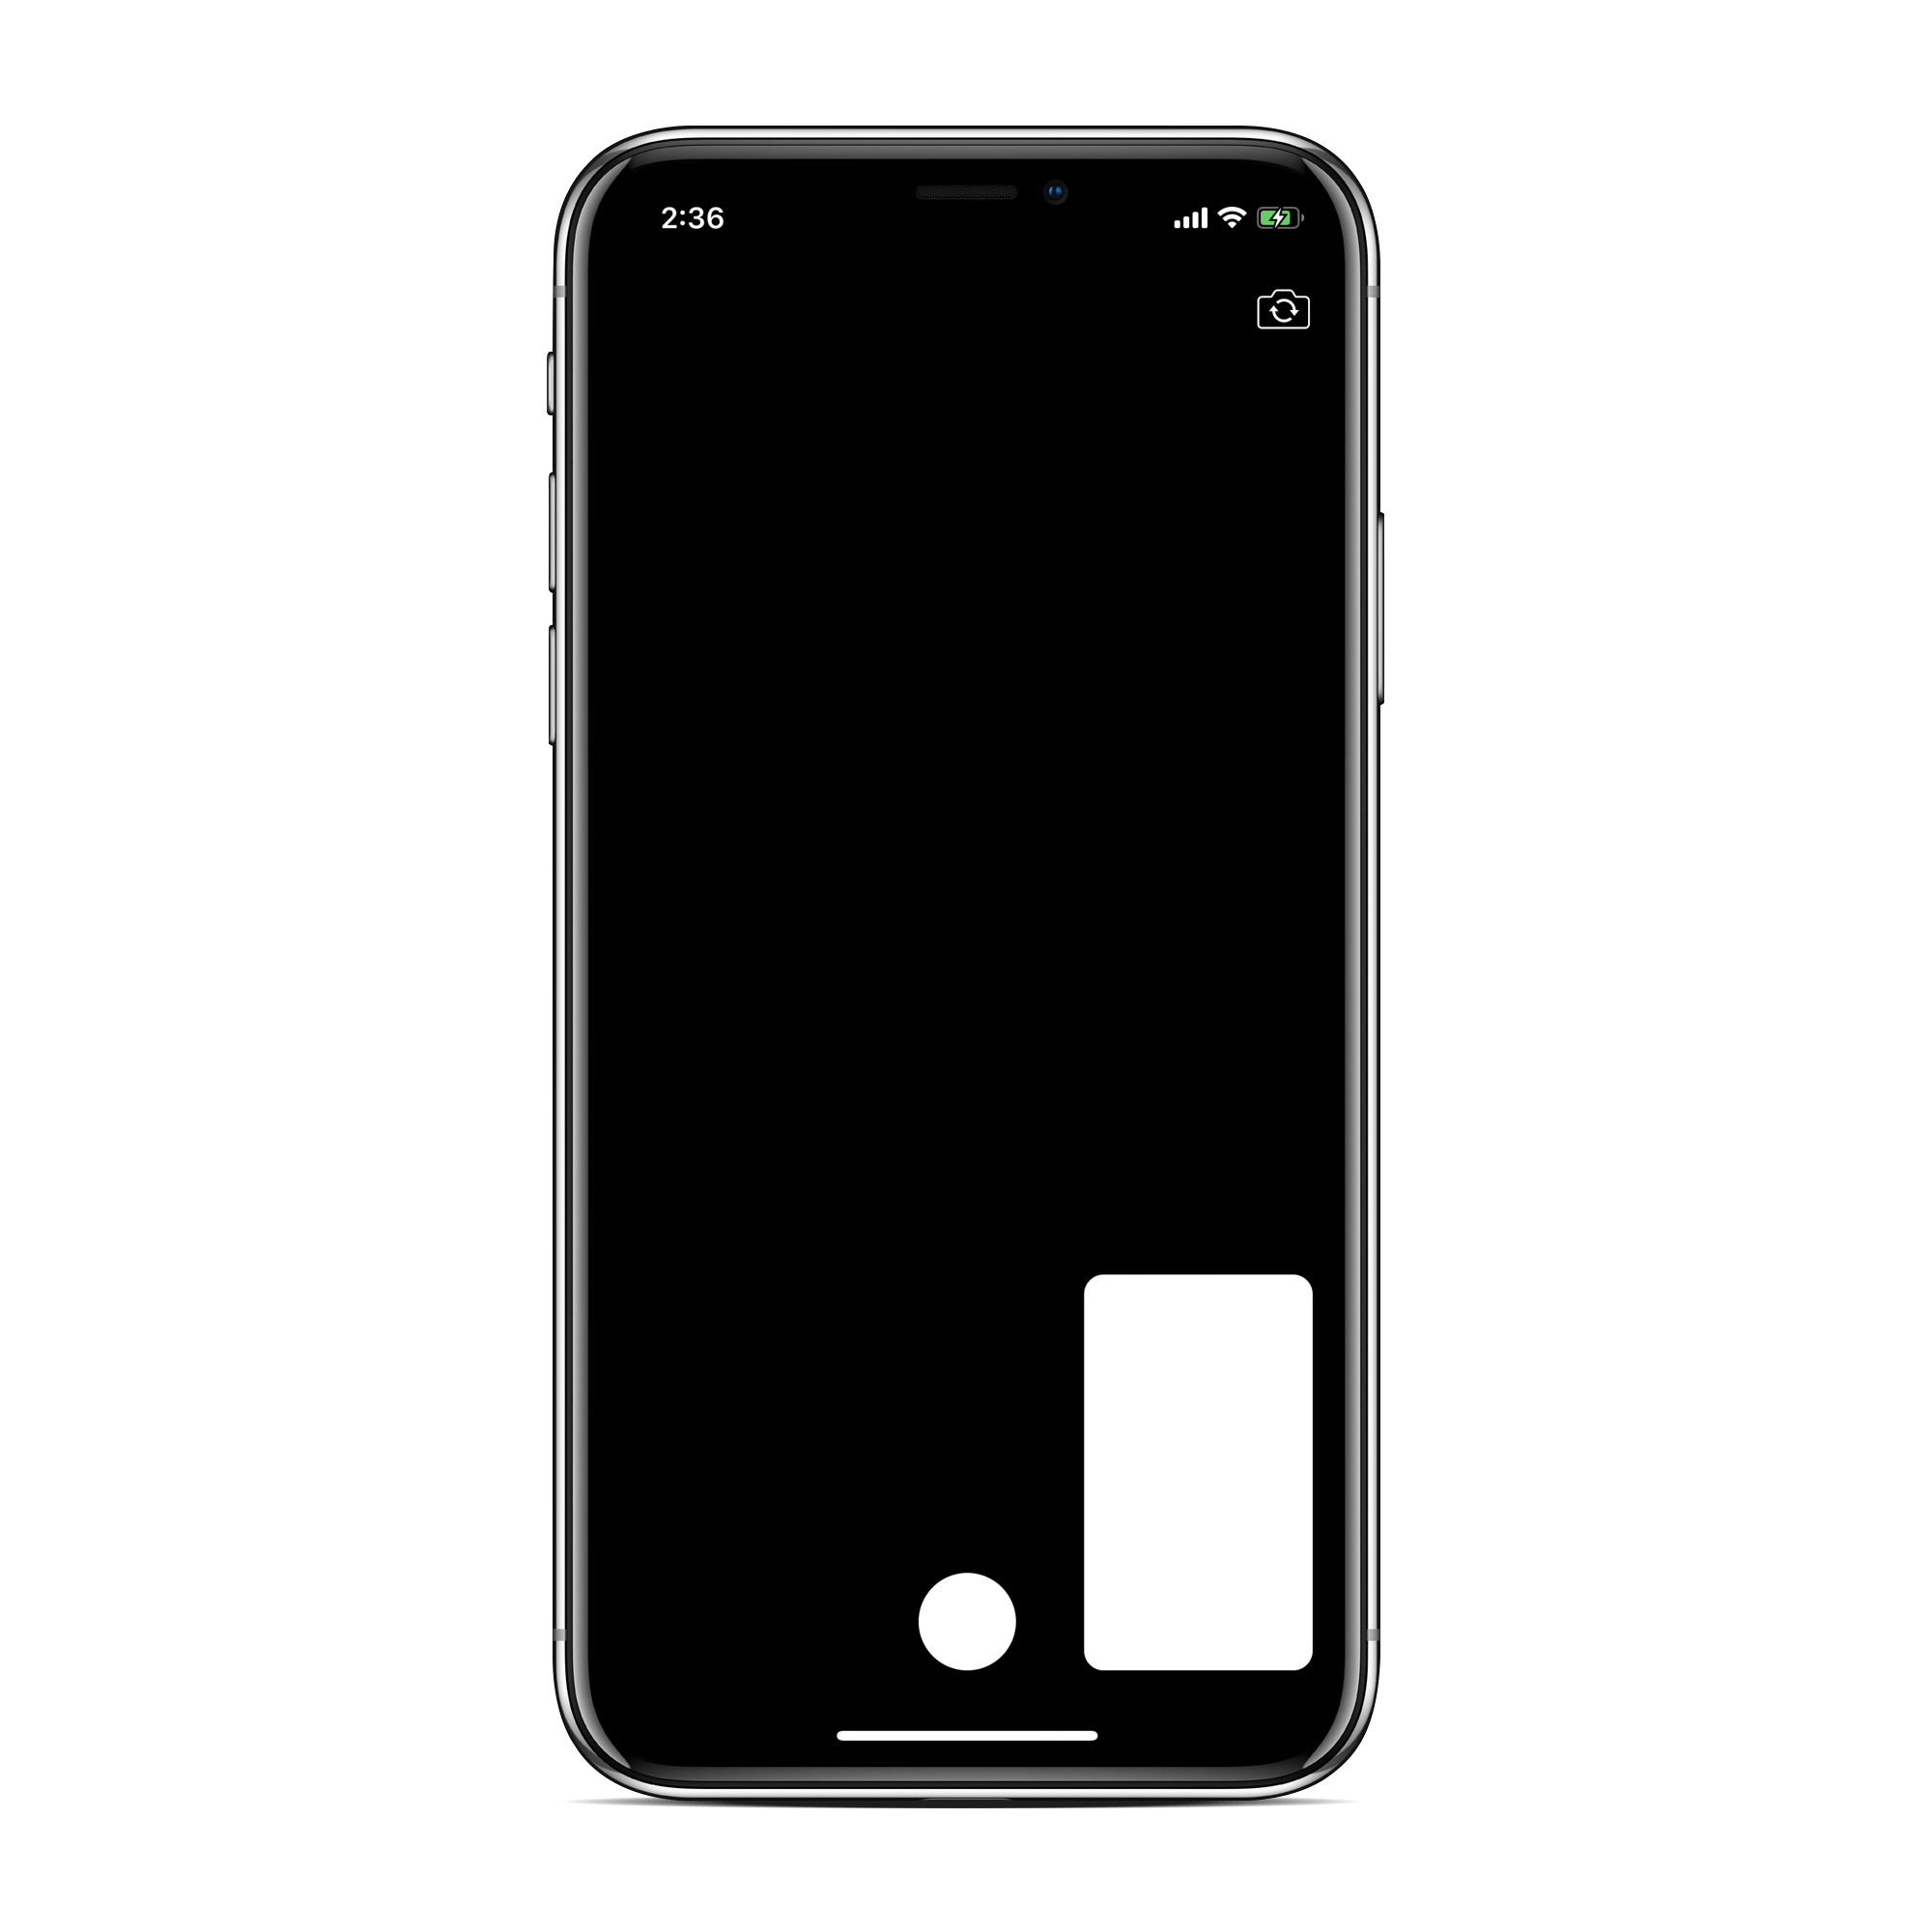
If you run it you’ll see there’s very little going on. All of our logic will take place in ViewController.swift.We just have a capture button, a switch camera button, and a view to hold our last taken picture. I’ve also included the request to access the camera, if you deny it, the app will abort 😁. The view setup and authorization checking is under a class extension in a seperate file ViewController+Extras.swift as to not pollute our working space with less relevant code.
如果您运行它,将会发现几乎没有发生任何事情。 我们所有的逻辑都将在ViewController.swift我们只有一个捕获按钮,一个切换摄像头按钮以及一个用于保存最后一张拍摄图片的视图。 我还包括了访问相机的请求,如果您拒绝它,则该应用程序将中止😁。 视图设置和授权检查在单独的文件ViewController+Extras.swift的类扩展下,以便不使用不太相关的代码来污染我们的工作空间。
设置标准自定义相机 (Setting Up A Standard Custom Camera)
We will now look into how we can use the AVFoundation framework to both capture and display camera feed, allowing our users to take pictures from within our app without using a UIImagePickerViewController (the easy, barebones way, for accessing the camera from within an app).
现在,我们将研究如何使用AVFoundation框架捕获和显示相机供稿,从而使用户无需使用UIImagePickerViewController就可以从我们的应用程序内拍摄照片(简便,准系统的方式,可以从应用程序内访问相机) 。
Let’s get started!
让我们开始吧!

AVFoundation is the highest level framework for all things audio/visual in iOS. But don’t underestimate it, it is very powerful and gives you all the flexibility you could possibility want (within reason of course).
AVFoundation是iOS中所有视听事物的最高级别框架。 但是请不要小看它,它非常强大,并且可以为您提供所有可能的灵活性(当然是在一定原因内)。
What we’re interested in is Camera and Media Capture.
我们感兴趣的是Camera and Media Capture 。
The AVFoundation Capture subsystem provides a common high-level architecture for video, photo, and audio capture services in iOS and macOS. Use this system if you want to:
AVFoundation Capture子系统为iOS和macOS中的视频,照片和音频捕获服务提供了通用的高级体系结构。 如果要执行以下操作,请使用此系统:
Build a custom camera UI to integrate shooting photos or videos into your app’s user experience.
构建自定义的相机UI,以将拍摄的照片或视频集成到应用程序的用户体验中。
Give users more direct control over photo and video capture, such as focus, exposure, and stabilization options.
为用户提供对照片和视频捕获的更直接控制,例如焦点,曝光和稳定选项。
Produce different results than the system camera UI, such as RAW format photos, depth maps, or videos with custom timed metadata.
与系统相机UI产生不同的结果,例如RAW格式的照片,深度图或具有自定义定时元数据的视频。
Get live access to pixel or audio data streaming directly from a capture device.
直接从捕获设备实时访问流式传输的像素或音频数据。
In this part we’ll be accomplishing the first point.
在这一部分中,我们将完成第一点。

So what is this “Capture subsystem” and how does it work? You can think of it as a pipeline from hardware to software. You have a central AVCaptureSession that has inputs and outputs. It mediates the data between the two. Your inputs come from AVCaptureDevices which are software representations of the different audio/visual hardware components of an iOS device. The AVCaptureOutputs are objects, or rather ways, to extract data out from whatever is feeding into the the capture session.
那么,这个“捕获子系统”又是什么呢? 您可以将其视为从硬件到软件的管道。 您有一个具有输入和输出的中央AVCaptureSession 。 它在两者之间调解数据。 您的输入来自AVCaptureDevices ,它们是iOS设备不同音频/视频硬件组件的软件表示。 AVCaptureOutputs是对象,或者更确切地说,是从提供给捕获会话的任何内容中提取数据的对象。
第1节:设置AVCaptureSession (Section 1: Setting Up The AVCaptureSession)
The first thing we need to do is import the AVFoundation framework into our file. After, we can create the session, and store a reference to it. But for the session to do anything, we should to tell it to start a configuration and then commit those changes using beginConfiguration() and commitConfiguration() respectively. Why do we do this? Because it’s good practice! This way, anything you do to the capture session will be applied atomically, meaning all of them happen at once. Why do we want this? Well, while it’s not necessary for the initial setup, when we switch the camera, if we queue up the changes (removing one input, adding another), it will lead to a smoother transition for the end user. After making all our configurations, we want to start the session.
我们需要做的第一件事是将AVFoundation框架导入到我们的文件中。 之后,我们可以创建会话,并存储对它的引用。 但是, beginConfiguration()会话执行任何操作,我们应该告诉它开始配置,然后分别使用beginConfiguration()和commitConfiguration()提交那些更改。 我们为什么要做这个? 因为这是一个好习惯! 这样,您对捕获会话所做的任何操作都将被自动应用,这意味着所有这些都立即发生。 我们为什么要这个? 好吧,尽管没有必要进行初始设置,但是当我们切换相机时,如果我们将更改排队(删除一个输入,添加另一个输入),它将为最终用户带来更平滑的过渡。 完成所有配置后,我们要开始会话。
This is all simple enough, but why do we execute the body of setupAndStartCaptureSession() on a background thread? This is because startRunning() is a blocking call, meaning that the execution of your app stops at that line until the capture session actually starts, or until it fails. How do you know it failed? Well you can subscribe to this NSNotification.
这一切都非常简单,但是为什么我们要在后台线程上执行setupAndStartCaptureSession()的主体? 这是因为startRunning()是一个阻塞调用,这意味着您的应用程序的执行将在该行停止,直到捕获会话实际开始或失败为止。 您怎么知道它失败了? 好吧,您可以订阅此 NSNotification。
Now how do we actually configure the session and what does that mean? As you’re probably thinking, adding the inputs and outputs is definitely part of it but you can do more than that.
现在我们如何实际配置会话,这意味着什么? 正如您可能在想的那样,添加输入和输出绝对是其中的一部分,但是您可以做更多的事情。
If you look through the documentation for AVCaptureSession there exist multiple things you can do. While all of them are important I’ll only mention the ones you really need in a barebones case.
如果您查看AVCaptureSession的文档,则可以做很多事情。 尽管所有这些都很重要,但我只会在准系统中提及您真正需要的那些。
- Manage Inputs And Outputs — We’ll get to this in the following sections 管理输入和输出-我们将在以下各节中进行介绍
- Manage Running State — Important for applications going into production, you want to be able to keep track of what’s going on with the capture session. 管理运行状态-对于投入生产的应用程序很重要,您希望能够跟踪捕获会话的情况。
Manage Connections — This is offers more fine tuning to the data pipeline. When you connect inputs and outputs to the capture session, they’re either implicitly or explicitly through a
AVCaptureConnectionobject. We will cover this later on.管理连接-这可以更精细地调整数据管道。 将输入和输出连接到捕获会话时,它们将通过
AVCaptureConnection对象隐式或显式地连接。 我们将在稍后介绍。Manage Color Spaces — This offers you the ability to use a wider color gamut (if possible), iPhone 7s and up can take advantage of this as they have P3 color gamuts whereas older devices only have sRGB.
管理色彩空间-这使您能够使用更大的色域 (如果可能),iPhone 7s及更高版本可以利用此功能,因为它们具有P3色域,而较旧的设备仅具有sRGB。
In this section, we care about presets, that is the quality level of the output. Since the capture session is a mediator between the inputs and outputs, it has the ability to control some of these things. AVCaptureSession.Presets provide a higher level way to fine tune the quality coming out of the devices. Although as we will see in the next section, we can go into much more depth at the device level. Since we’re making a camera, the photo preset makes the most sense. This preset will tell the devices (cameras) connected to it to use a configuration that returns the highest quality images.
在本节中,我们关注预设,即输出的质量级别。 由于捕获会话是输入和输出之间的中介,因此它具有控制其中某些功能的能力。 AVCaptureSession.Presets提供了更高级别的方法来微调来自设备的质量。 尽管我们将在下一节中看到,但是我们可以在设备级别上更深入地了解。 由于我们要制造相机,因此photo预设最有意义。 该预设将告诉与其连接的设备(相机)使用返回最高质量图像的配置。
Since we care about the quality, if we have access to a wider color gamut, we should use it by enabling the wider color space.
由于我们关心质量,因此,如果我们可以使用更宽的色域,则应通过启用更宽的色空间来使用它。
We’re now ready to setup our inputs ☺️.
现在我们准备设置输入☺️。
第2节:设置输入 (Section 2: Setting Up Inputs)
A device that provides input (such as audio or video) for capture sessions and offers controls for hardware-specific capture features.
一种为捕获会话提供输入(例如音频或视频)并提供针对特定于硬件的捕获功能的控件的设备。
So what’s the run down on this? This object represents a “capture device”. A capture device is a piece of hardware such as a camera or a microphone. You attach it to your capture session so it can feed its data into it.
那么,这有什么失败呢? 该对象表示“捕获设备”。 捕获设备是硬件,例如照相机或麦克风。 您将其附加到捕获会话,以便可以将其数据馈入捕获会话。
For our purposes we need two devices; a front camera and a back camera.
为了我们的目的,我们需要两个设备。 前置摄像头和后置摄像头。
Option 1:
选项1:
func default(for mediaType: AVMediaType) -> AVCaptureDevice?This takes in an AVMediaType , and there are a lot of types… 🥴
这需要一个AVMediaType ,并且有很多类型……🥴
- audio 音讯
- closedCaption 隐藏式字幕
- depthData depthData
- metadata 元数据
- metadataObject metadataObject
- muxed 混合
- subtitle 字幕
- text 文本
- timecode 时间码
- video 视频
As you can see, this struct isn’t just for AVCaptureDevices, it includes stuff like subtitles and text. For reference, the one we care about is video, but we will not be going forward with this option because we have no way of specifying if we want the front camera or the back camera.
如您所见,此结构不仅适用于AVCaptureDevices ,还包括字幕和文本。 作为参考,我们关心的是视频,但是我们不会继续使用此选项,因为我们无法指定是需要前置摄像头还是后置摄像头。
I said we care about video, but why video? Why is there no photo option? Well the camera (and digital cameras in general) don’t turn on when you try and take a photo, they turn on well before that. While you’re not taking pictures with them they’re acting as video capturing devices, taking a picture is actually just taking a frame from the video it’s already producing.
我说过我们关心视频,但是为什么要视频呢? 为什么没有照片选项? 嗯,当您尝试拍照时,相机(通常是数码相机)没有打开,它们在开启之前就已打开。 当您不与它们拍照时,它们充当视频捕获设备,而拍照实际上只是从已经产生的视频中获取一帧。
Option 2:
选项2:
func default(_ deviceType: AVCaptureDevice.DeviceType,
            for mediaType: AVMediaType?,
                 position: AVCaptureDevice.Position
            ) -> AVCaptureDevice?
This method introduces 2 new parameters, a position (front, back or unspecified) and a device type.
此方法引入了2个新参数,位置(前,后或未指定)和设备类型。
If we look under AVCaptureDevice.DeviceType, you may be surprised at the amount of options:
如果我们在AVCaptureDevice.DeviceType下查看,您可能会对选项的数量感到惊讶:
- builtInDualCamera BuiltInDualCamera
- builtInDualWideCamera BuiltInDualWideCamera
- buildInTripleCamera buildInTripleCamera
- builtInWideAngleCamera BuiltInWideAngleCamera
- builtInUltraWideCamera BuiltInUltraWideCamera
- builtInTelephotoCamera BuiltInTelephotoCamera
- builtInTrueDepthCamera BuiltInTrueDepthCamera
- builtInMicrophone 内置麦克风
- externalUnkown 外部未知
Want a microphone? Great there’s only one representation for it. Want a camera? Pull out Google because you’re going to have to figure out which devices support what.
需要麦克风吗? 太好了,只有一个代表。 需要相机吗? 退出Google,因为您将不得不确定哪些设备支持哪些功能。
Luckily, all devices have a builtInWideAngleCamera for both front and back. You’ll have no problem sticking with this camera type and it is what we’ll be moving forward with for simplicity. In a real world application, you may want to take advantage of the other, better, camera options that the user’s device may have.
幸运的是,所有设备的正面和背面都有一个builtInWideAngleCamera。 坚持使用这种相机类型不会有任何问题,为简单起见,我们将继续前进。 在实际的应用程序中,您可能想利用用户设备可能具有的其他更好的相机选项。
Now that we know what we’re looking for let’s get both of them and connect the back camera to the capture session (since usually camera apps open up to the back camera).
现在我们知道了要查找的内容,让我们将它们都获取并将后置摄像头连接到捕获会话(因为通常相机应用程序会打开后置摄像头)。
We call setupInputs() from within our setupAndStartCaptureSession() function. We now have our inputs 😁. Now earlier I said you connect a device to the capture session, while that is true, the way it’s connected is by turning it into an input object, AVCaptureInput .
我们从setupAndStartCaptureSession()函数中调用setupInputs() 。 现在我们有了输入inputs。 之前,我说过将设备连接到捕获会话,这是事实,但连接设备的方法是将其变成输入对象AVCaptureInput 。
The abstract superclass for objects that provide input data to a capture session
为捕获会话提供输入数据的对象的抽象超类
These are useful for when you want to dive into ports for devices that carry multiple streams of data. You can get a better idea behind their utility here in the discussion section.
当您想要进入承载多个数据流的设备的端口时,这些功能很有用。 你可以得到一个更好的主意,他们的效用落后这里讨论部分。
Configuring AVCaptureDevices
配置AVCaptureDevices
In the previous section, we discussed configuring capture sessions with some basic options and I mentioned you can get much more detailed with capture devices. Well here are your options:
在上一节中,我们讨论了使用一些基本选项配置捕获会话的过程,我提到您可以使用捕获设备获得更多详细信息。 好,这是您的选择:
- Formats — things like resolution, aspect ratio, refresh rate 格式-分辨率,宽高比,刷新率之类的内容
- Image Exposure 影像曝光
- Depth data 深度数据
- Zoom 放大
- Focus 焦点
- Flash 闪
- Torch — essentially a flashlight mode 手电筒-本质上是手电筒模式
- Framerate 帧率
- Transport — things like playback speed 传输-播放速度之类的东西
- Lens position 镜头位置
- White balance 白平衡
- ISO — sensitivity of image sensor ISO —图像传感器的感光度
- HDR 高动态范围
- Color spaces 色彩空间
- Geometric distortion correction 几何变形校正
- Device calibration 设备校准
- Tone Mapping 色调映射
And most of these come with some sort of function to check if the configuration options are available. Different “cameras” have different configuration options. And remember, a “camera” is not one monolithic object such as “the back camera on my iPhone 11 Pro”. iOS devices, especially the newer ones, have multiple camera representations for their camera unit each with different capabilities.
而且其中大多数功能都具有某种功能,可以检查配置选项是否可用。 不同的“相机”具有不同的配置选项。 请记住,“相机”不是一个整体对象,例如“ iPhone 11 Pro的后置相机”。 iOS设备,尤其是较新的iOS设备,其摄像头单元具有多个摄像头表示,每个摄像头都有不同的功能。
Needless to say, once you start combining the different camera types with all the options mentioned above, your options become exponential.
不用说,一旦您开始将不同的摄像机类型与上述所有选项组合在一起,您的选项就会成倍增加。
It’s also worth mentioning that you have to check that you’re not stepping over your own toes when you try configuring AVCaptureDevices. Turning on some options will disable other options. A notable example is that if you change an device’s activeFormat , it will disable any preset you set on your capture session. Configurations made closer to the hardware, meaning lower in the data pipeline, will override configurations made up higher in the pipeline.
还值得一提的是,在尝试配置AVCaptureDevices时,您必须检查自己是否没有踩到自己的脚趾。 打开某些选项将禁用其他选项。 一个著名的例子是,如果您更改设备的activeFormat ,它将禁用您在捕获会话上设置的任何预设。 靠近硬件的配置(即数据管道中较低的配置)将覆盖管线中较高的配置。
While these options are most certainly useful, this tutorial won’t cover them. But don’t worry, it’s not hard to configure them, Apple gives a good example in their documentation here.
尽管这些选项无疑是很有用的,但本教程将不介绍它们。 但是不用担心,配置它们并不难,Apple在此处的文档中提供了一个很好的示例。
第3节:显示摄像机供稿 (Section 3: Displaying The Camera Feed)
We have our inputs, meaning that the capture session is currently receiving the video streams from the camera, but we can’t see anything!
我们有输入,这意味着捕获会话当前正在接收来自摄像机的视频流,但看不到任何东西!
The AVFoundation Framework, thankfully, provides us with an extremely simple way to display the video feed:
幸好,AVFoundation框架为我们提供了一种非常简单的方式来显示视频供稿:
This is very simple, the preview layer is just a CALayer you can create from a capture session, and add it as a sublayer into your view. All it does is present to you the video that is running through the capture session.
这非常简单 ,预览层只是您可以在捕获会话中创建的CALayer,并将其作为子层添加到视图中。 通过捕获会话运行的视频将呈现给您。
You can finally run your app and see something!
您终于可以运行您的应用了,看到了一些东西!
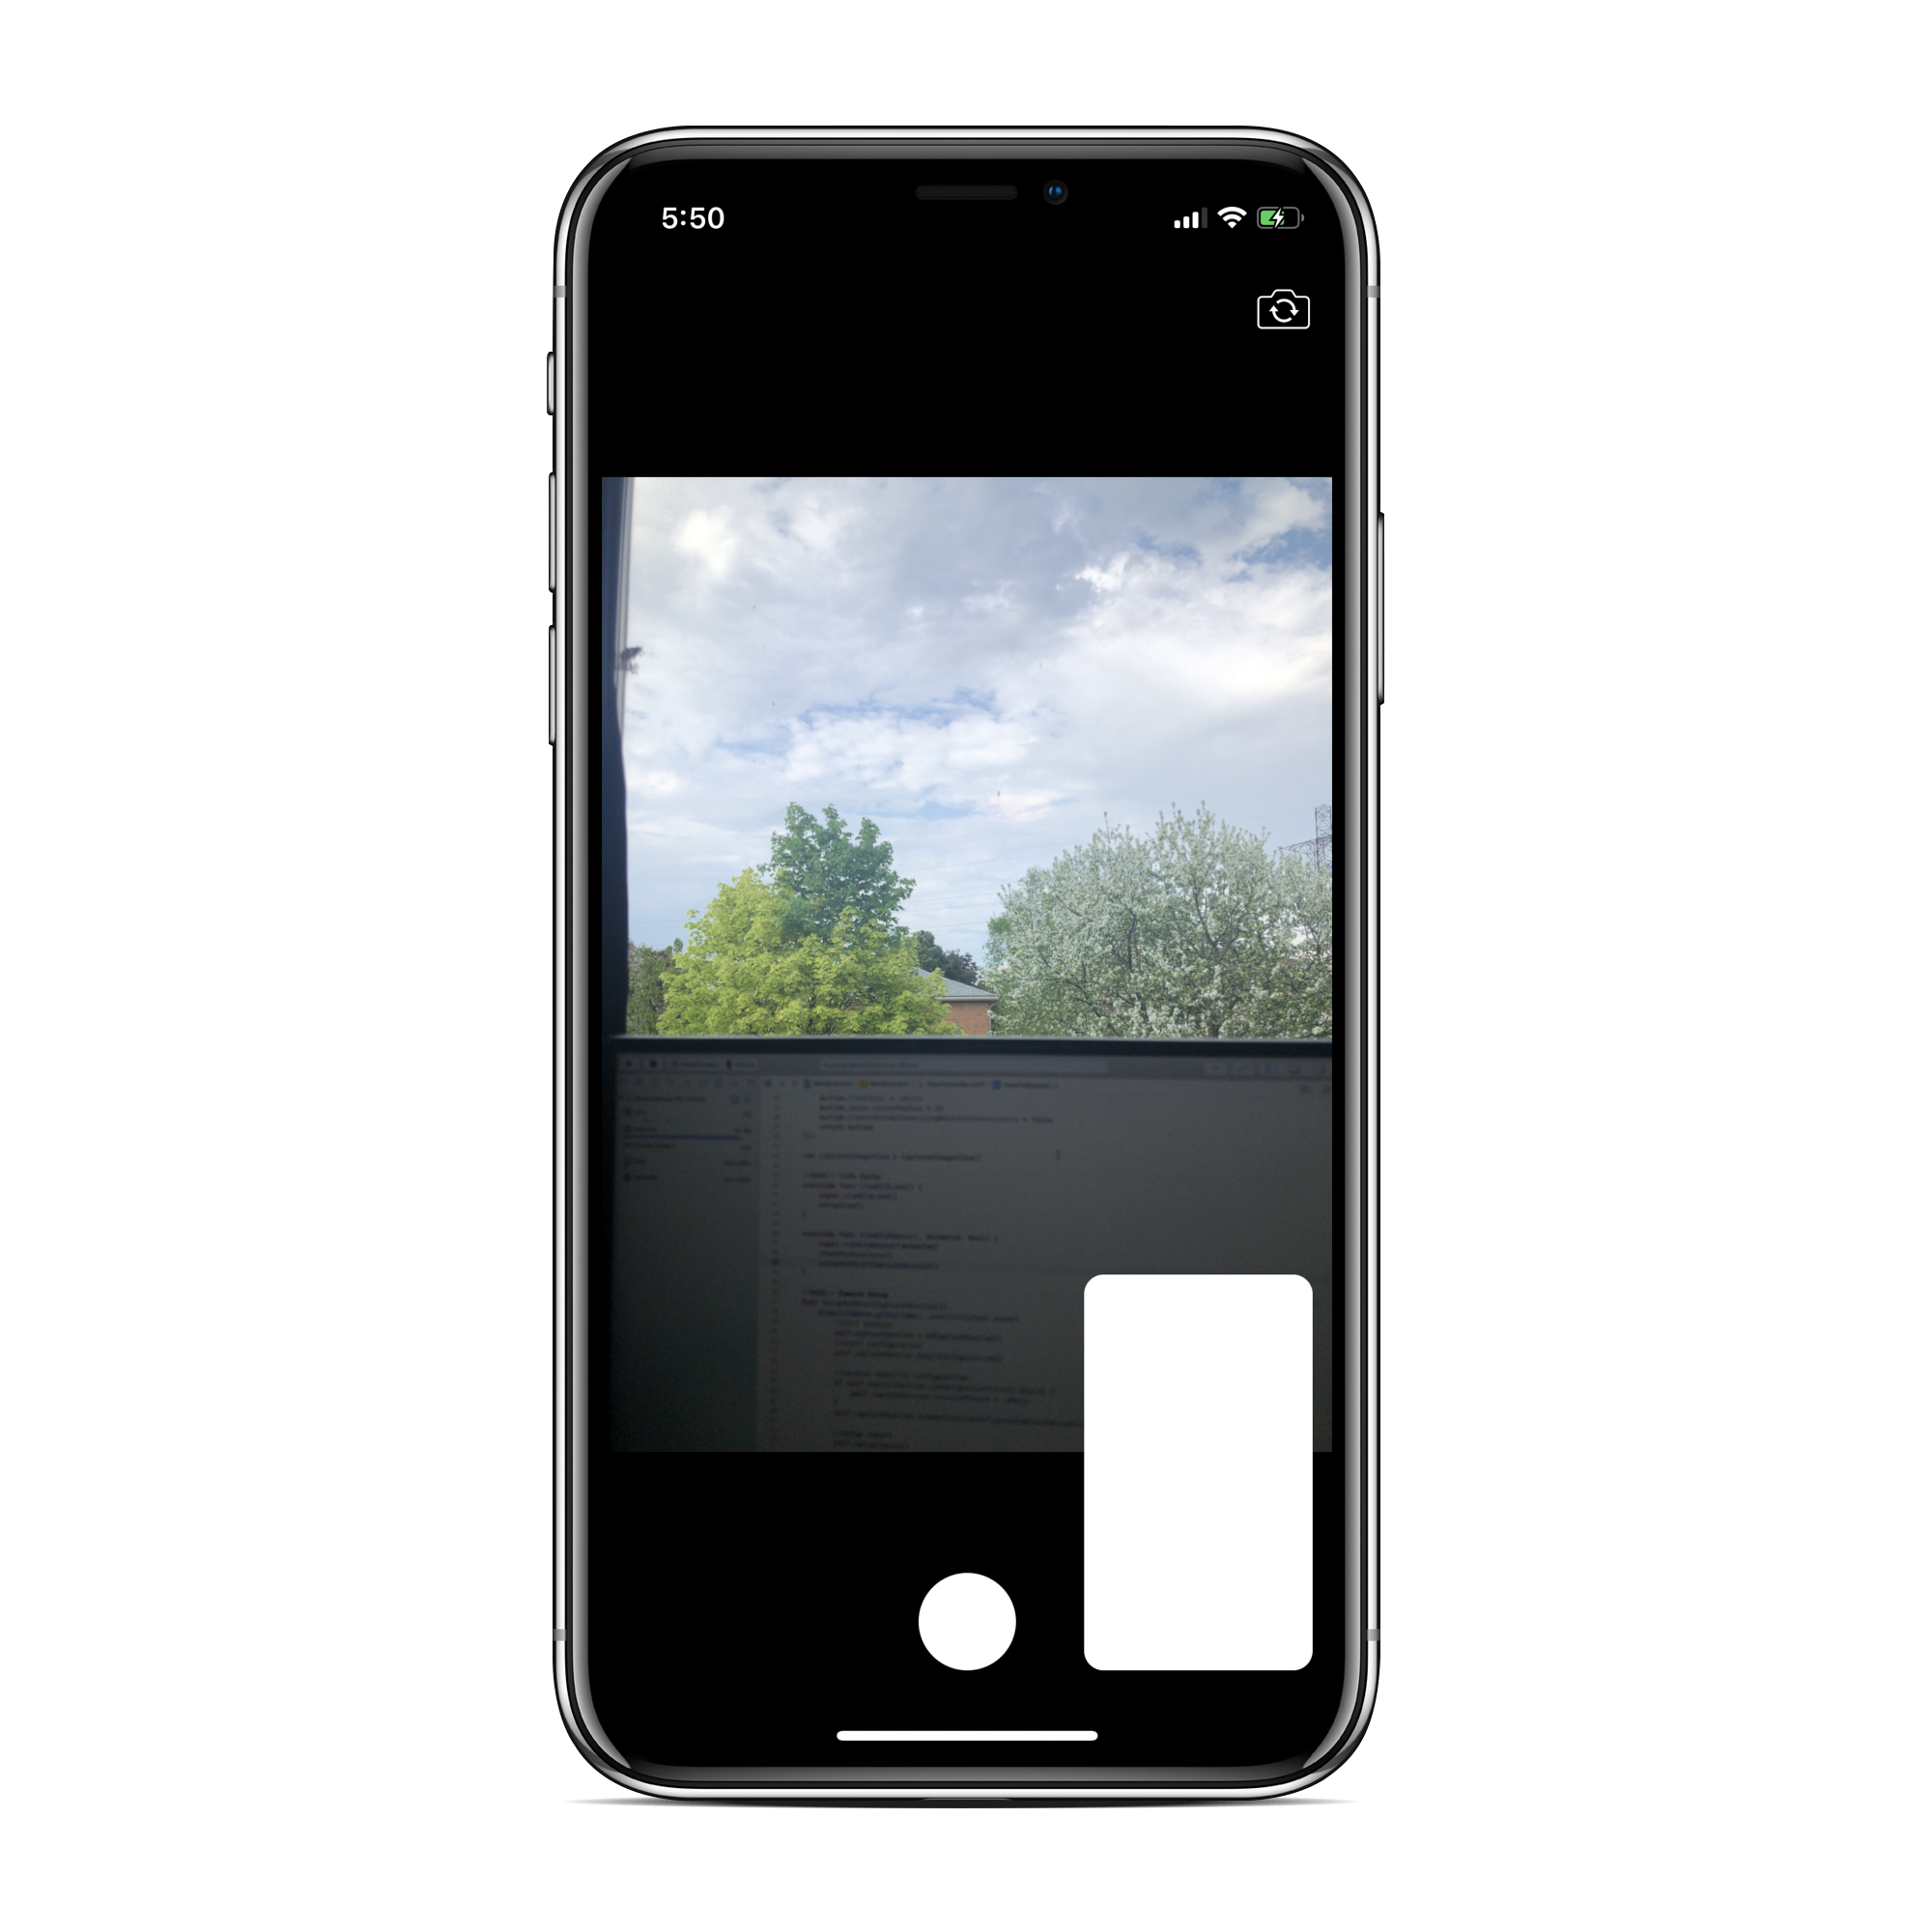
We now get to the discussion of sizing and aspect ratios. Different configurations will give you different dimensions. For example if I’m running the code on my iPhone X with the photo capture session preset, my back camera’s active format’s dimensions are 4032x3024. This changes depending on the configuration options. For example if you had chosen to use the max frame-rate option for the back camera on an iPhone X, you’d get 240FPS but with a much less impressive 1280x720 resolution.
现在我们来讨论大小和宽高比。 不同的配置将为您提供不同的尺寸。 例如,如果我在iPhone X上运行带有预设照片捕获会话的代码,则后置摄像头的活动格式尺寸为4032x3024。 这根据配置选项而变化。 例如,如果您选择对iPhone X的后置摄像头使用“最大帧速率”选项,则将获得240FPS的分辨率,而1280x720的分辨率要差得多。
The front facing camera, as you will soon see can also have different dimensions. For example if you’re running on an iPhone X with the photo capture session preset, your front resolution will be 3088x2320. That is almost the same aspect ratio as the back camera, meaning that the user won’t notice the change in size. Depending on your configurations, your aspect ratios can be all over the place. Your UI should work with all the aspect ratios the resultant preview might give.
如您将很快看到的,前置摄像头也可以具有不同的尺寸。 例如,如果您在预先设置了照片捕获会话的iPhone X上运行,则您的前端分辨率为3088x2320。 这几乎与后置摄像头的纵横比相同,这意味着用户不会注意到尺寸的变化。 根据您的配置,纵横比可以随处可见。 您的UI应该可以使用最终预览可能给出的所有宽高比。
If you want to play around with how the frames fill the preview layer, you can look into the videoGravity property.
如果要尝试使用帧填充预览层的方式,可以查看videoGravity属性。
第4节:设置输出并拍照 (Section 4: Setting Up The Output & Taking A Picture)
What is an output again? It’s what we attach to the capture session to be able to get the data out of it. In the previous section we explored the built in preview layer. That object, by definition, is also an output.
再次输出什么? 这是我们附加到捕获会话的功能,以便能够从中获取数据。 在上一节中,我们探讨了内置的预览层。 根据定义,该对象也是输出。
We have 2 options here, both are AVCaptureOutputs
我们这里有2个选项,都是AVCaptureOutputs
objects that output the media recorded in a capture session.
用于输出捕获会话中记录的媒体的对象。
That is they provide us with the data that the capture session mediates from its input devices.
也就是说,它们为我们提供了捕获会话从其输入设备中介的数据。
Option 1:
选项1:
This is a super simple option called AVCapturePhotoOutput . All you have to do is create the object, attach it to the session, and when the user presses the capture button you call capturePhoto(with:delegate:) on it and you will receive back a photo object which you can manipulate/save with ease. Now don’t get me wrong, this is a powerful class, you can take Live Photos, define a ton of options for taking the photo itself and the representation you want it in. If you are looking to just add your own UI to a regular camera to fit your app, this class is perfect.
这是一个称为AVCapturePhotoOutput的超简单选项。 您要做的就是创建对象,将其附加到会话上,然后当用户按下捕获按钮时,您在其上调用capturePhoto(with:delegate:) ,您将收到一个可以处理/保存的照片对象。缓解。 现在不要误会我的意思,这是一个功能强大的类,您可以拍摄Live Photos,定义大量选项来拍摄照片本身和想要的表示形式。如果您只是想将自己的UI添加到普通相机以适合您的应用,这是完美的课程。
Option 2:
选项2:
This is options returns back raw video frames. This is just as easy to implement but you can take your custom camera in all sorts of directions with this option, so we will be moving forward with this.
此选项返回原始视频帧。 这很容易实现,但是您可以使用此选项从各个方向拍摄自定义相机,因此我们将继续前进。
A capture output that records video and provides access to video frames for processing.
捕获输出,用于记录视频并提供对视频帧的访问以进行处理。
If you pay attention to the object name, you’ll notice this one references video rather than photo like the previous option. This is because you get every single frame from the camera. You can decide what to do with those frames. That means that when a user presses the camera button, all you have to do is pluck the next frame that comes in. It also means that you can ditch the preview layer we’re using, but that’s in my next tutorial 😉.
如果您注意对象名称,您会注意到该对象引用视频而不是像上一个选项那样显示照片。 这是因为您从相机获得了每一帧。 您可以决定如何处理这些框架。 这意味着,当用户按下“照相机”按钮时,您要做的就是拔出下一帧。这也意味着您可以抛弃我们正在使用的预览层,但这就是我的下一篇教程😉。
As always, there are a bunch of configuration options for this output object, but we’re not concerned with them in this tutorial. Our method of interest is:
与往常一样,此输出对象有很多配置选项,但是在本教程中我们并不关心它们。 我们感兴趣的方法是:
func setSampleBufferDelegate(_ sampleBufferDelegate:          AVCaptureVideoDataOutputSampleBufferDelegate?,
                    queue sampleBufferCallbackQueue: DispatchQueue?)
First parameter is the delegate, on which it will callback with the frames and the second parameter is a queue, on which the callbacks will be invoked. It will be invoked at the frame-rate of the camera (if the queue is not busy) and it’s expected that you will process that callback data so it’s important for usability that it does not take place on the main (UI) thread.
第一个参数是委托,它将在其上回调帧,第二个参数是队列,在其上将调用回调。 将以摄像机的帧速率(如果队列不忙)调用它,并且期望您将处理该回调数据,因此对于可用性而言重要的是,它不会在主(UI)线程上发生。
If the queue it’s running on is busy when a new frame is available, it will drop the frame as it is “late” according to the alwaysDiscardsLateVideoFrames property.
如果有新帧可用时,如果正在运行的队列繁忙,则会根据alwaysDiscardsLateVideoFrames属性将帧“延迟” alwaysDiscardsLateVideoFrames 。
As you can see, setting up the output was rather easy. We now focus in on the delegate function captureOutput and its 3 parameters.
如您所见,设置输出相当容易。 现在,我们集中讨论委托函数captureOutput及其3个参数。
The output specifies which output device this came from (incase you are mediating multiple AVCaptureOutput objects with the same delegate). The sample buffer houses our video frame data. The connection specifies which connection object the data came over. We haven’t touched connections yet and we only have one output object so the only thing we care about is the sample buffer.
输出指定了它来自哪个输出设备(如果您要使用同一个AVCaptureOutput来中介多个AVCaptureOutput对象)。 样本缓冲区包含我们的视频帧数据。 该连接指定数据通过哪个连接对象。 我们还没有接触过连接,我们只有一个输出对象,因此我们唯一关心的就是样本缓冲区。
object containing zero or more compressed (or uncompressed) samples of a particular media type (audio, video, muxed, etc), that are used to move media sample data through the media pipeline
包含零个或多个特定媒体类型(音频,视频,多路复用等)的压缩(或未压缩)样本的对象,该样本用于通过媒体管道移动媒体样本数据
The full extent of this object gets rather complicated. What we care about is getting this into an image representation. How do we represent images in cocoa applications? Well there are 3 main distinct types, each part of a different framework representing different levels of an image
该对象的全部范围变得相当复杂。 我们关心的是将其转换为图像表示形式。 我们如何在可可应用中表示图像? 好吧,这里有3种主要的不同类型,不同框架的每个部分代表不同级别的图像
UIImage(UIKit) — highest level image container, you can create a UIImage out of a lot of different image representations and it’s the one we’re all familiar withUIImage( UIKit )—最高级别的图像容器,您可以从许多不同的图像表示形式中创建UIImage,这是我们都熟悉的一种CGImage(Core Graphics) — bitmap representation of an imageCIImage(Core Image) — a recipe for an image, on which you can process it efficiently using the Core Image framework.CIImage( Core Image )—图像的配方,您可以使用Core Image框架在其上有效地对其进行处理。
Back to the CMSampleBuffer. Essentially it can contain a whole array of different data types, what we expect/want is an image buffer. Since it can represent many different things, the Core Media framework provides many functions to try and retrieve different representations out of it. The one we’re interested in is CMSampleBufferGetImageBuffer(). This once again returns another unusual type, a CVImageBuffer . Now from this image buffer, we can get a CIImage out of it, and since a CIImage is just a recipe for an image, we can create a UIImage out of it.
返回到CMSampleBuffer 。 本质上,它可以包含不同数据类型的整个数组,我们期望/想要的是图像缓冲区。 由于它可以表示许多不同的事物,因此Core Media框架提供了许多功能来尝试从中检索不同的表示形式。 我们感兴趣的是CMSampleBufferGetImageBuffer() 。 这再次返回另一个异常类型,即CVImageBuffer 。 现在,从该图像缓冲区中,我们可以从中获取CIImage ,并且由于CIImage只是图像的配方,因此可以从中创建UIImage 。
As you can see we’ve added a boolean flag to determine wether or not we need to use the sample buffer that came back. If we run it, we’ll get back our first picture 🎉.
如您所见,我们添加了一个布尔标志来确定是否需要使用返回的样本缓冲区。 如果运行它,我们将获得第一张照片🎉。
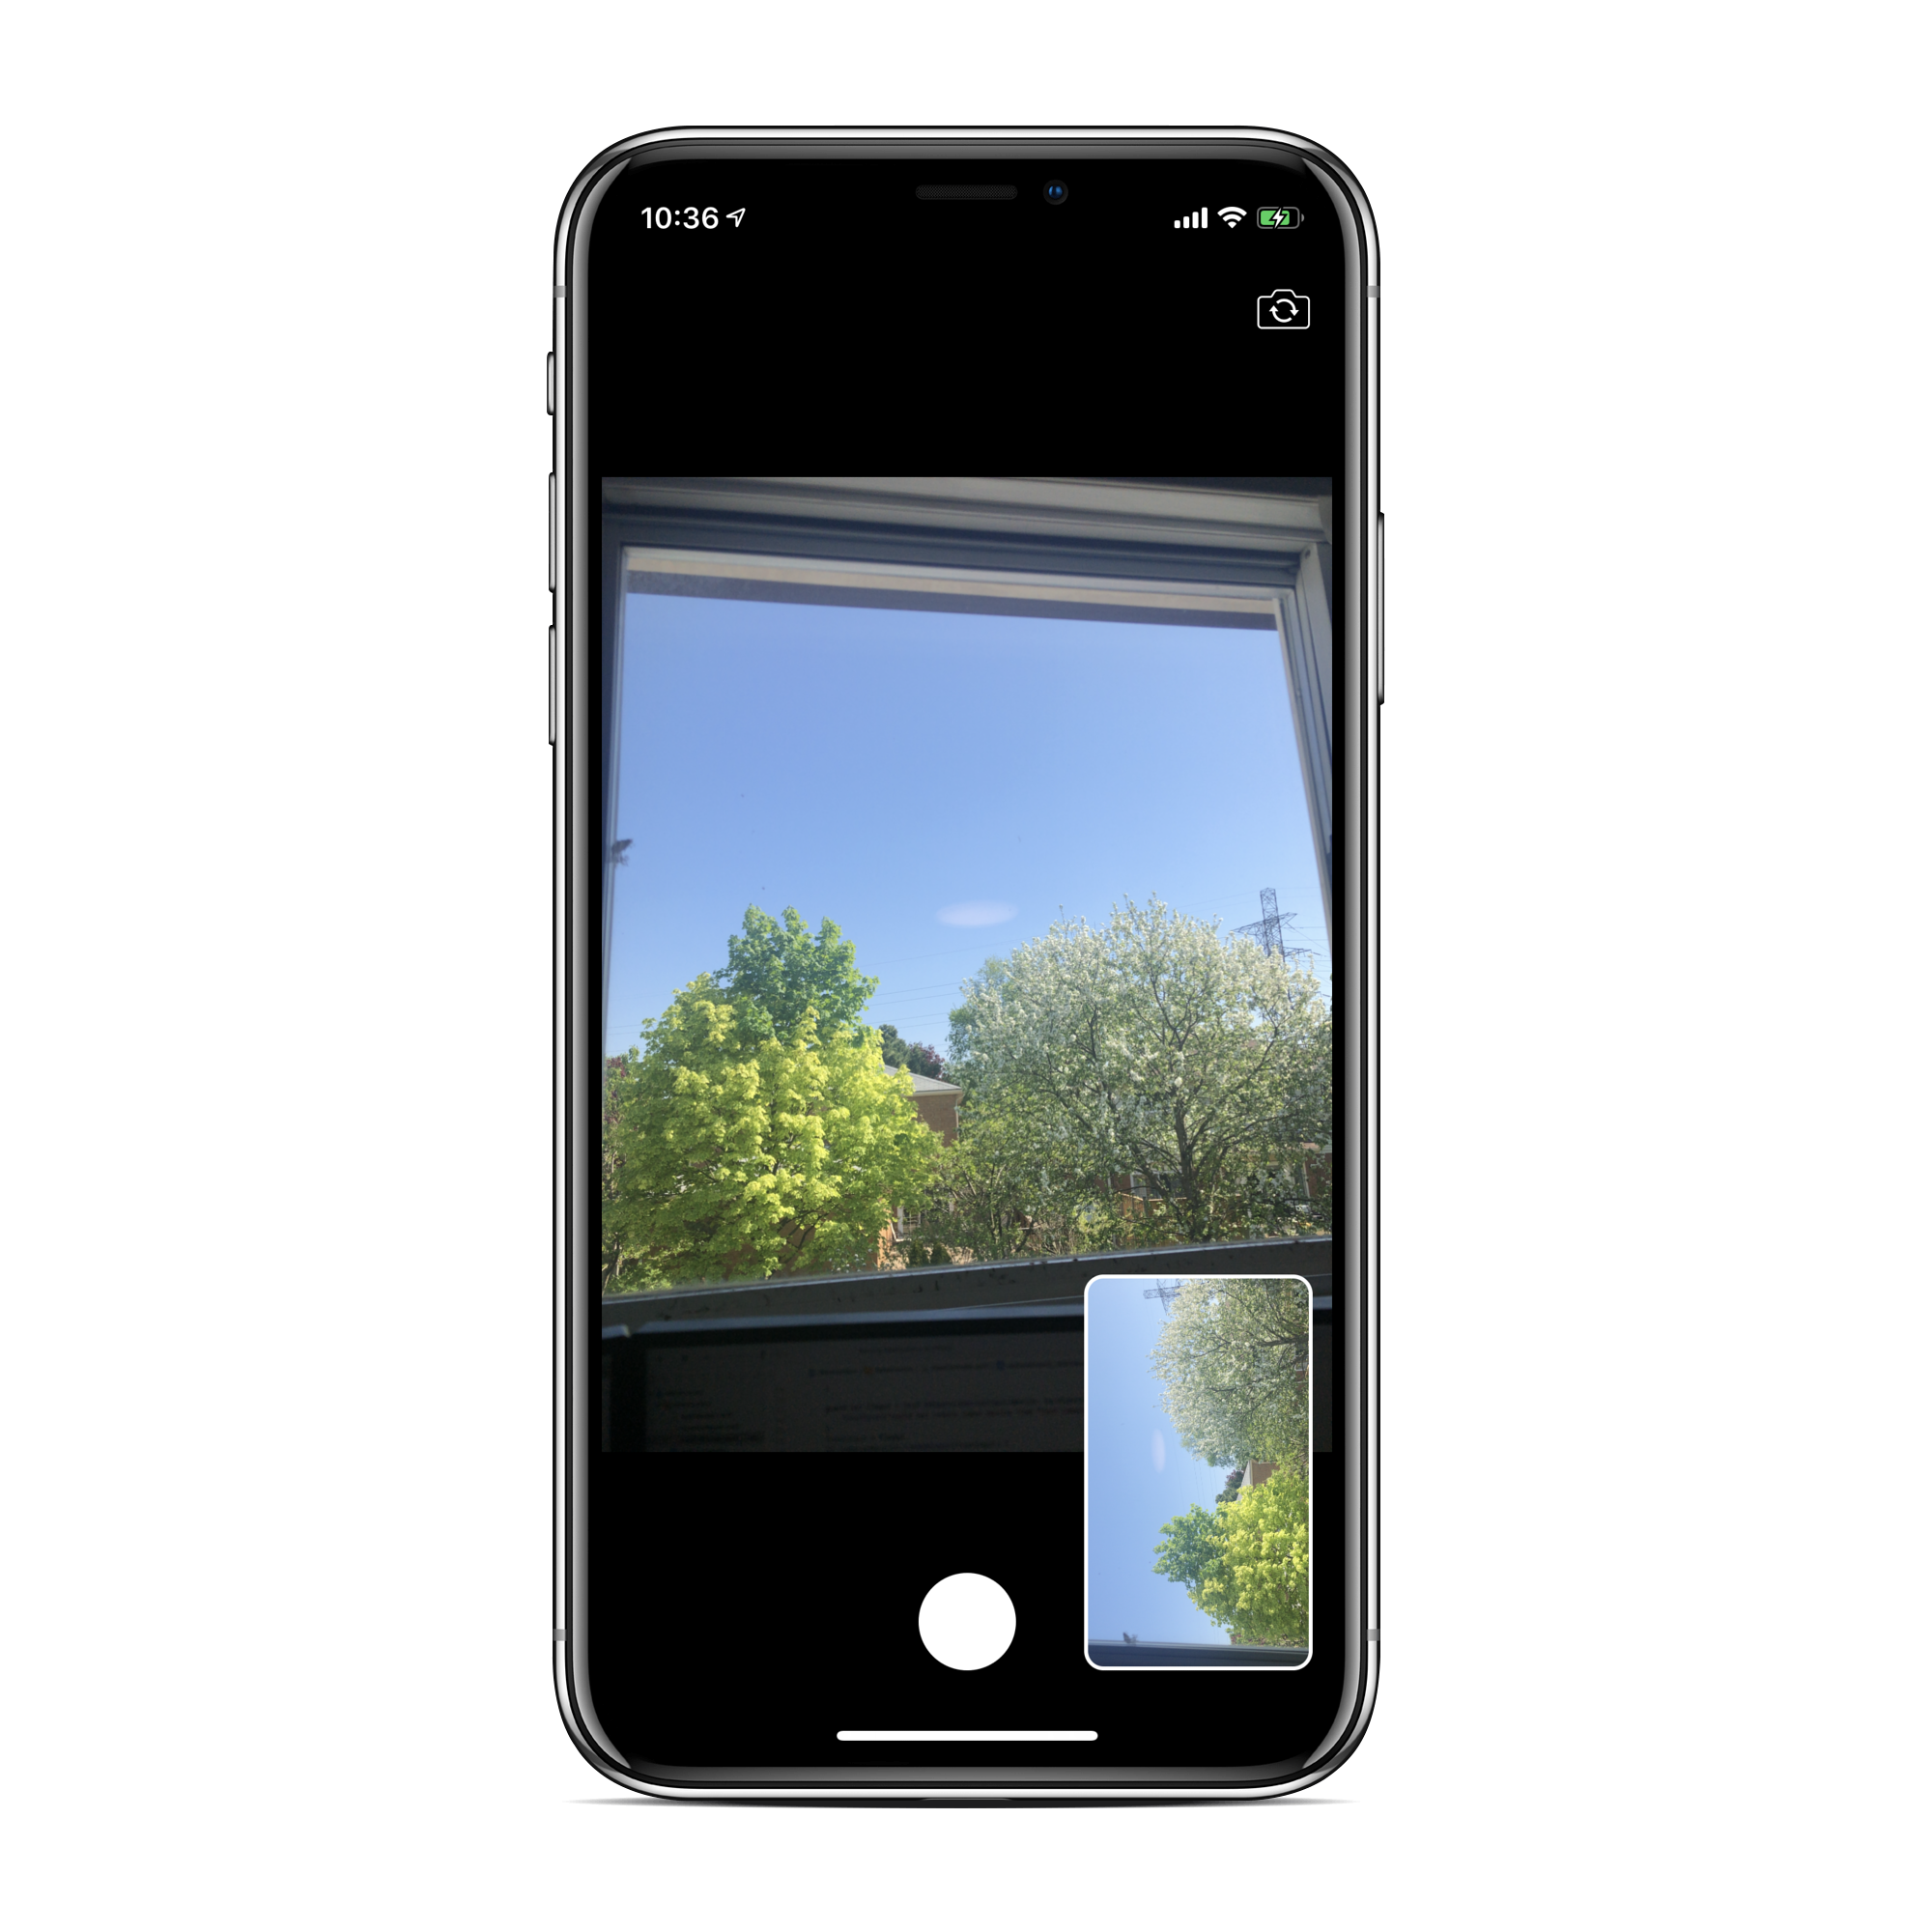
Unfortunately the orientation is incorrect. While the video preview layer automatically displays the correct orientation, the data coming through the AVCaptureVideoDataOutput object does not. We can fix this in 2 places, on the connection itself (that is the connection between the output object and the session) or when we create the UIImage from the CIImage. We will change this on the connection itself.
不幸的是方向不正确。 虽然视频预览层会自动显示正确的方向,但通过AVCaptureVideoDataOutput对象AVCaptureVideoDataOutput的数据却不会。 我们可以在连接本身(即输出对象和会话之间的连接)上或从CIImage创建UIImage时,在2个位置修复此问题。 我们将在连接本身上对此进行更改。
A connection between a specific pair of capture input and capture output objects in a capture session.
捕获会话中一对特定的捕获输入和捕获输出对象之间的连接。
Earlier I mentioned that connections are formed through the capture session when you attach inputs and outputs. Well those connections are objects themselves, we’ve implicitly created them through addInput() and addOutput() on the capture session. The connection objects can be accessed anywhere throughout the data pipeline (the inputs, the capture session, and the outputs). Under Managing Video Configurations in the documentation, we have the option to set a videoOrientation on our output connection.
前面我提到,当您附加输入和输出时,连接是通过捕获会话形成的。 这些连接本身就是对象,我们已经在捕获会话中通过addInput()和addOutput()隐式创建了它们。 可以在整个数据管道中的任何位置(输入,捕获会话和输出)访问连接对象。 在文档中的“ 管理视频配置 ”下,我们可以选择在输出连接上设置videoOrientation 。
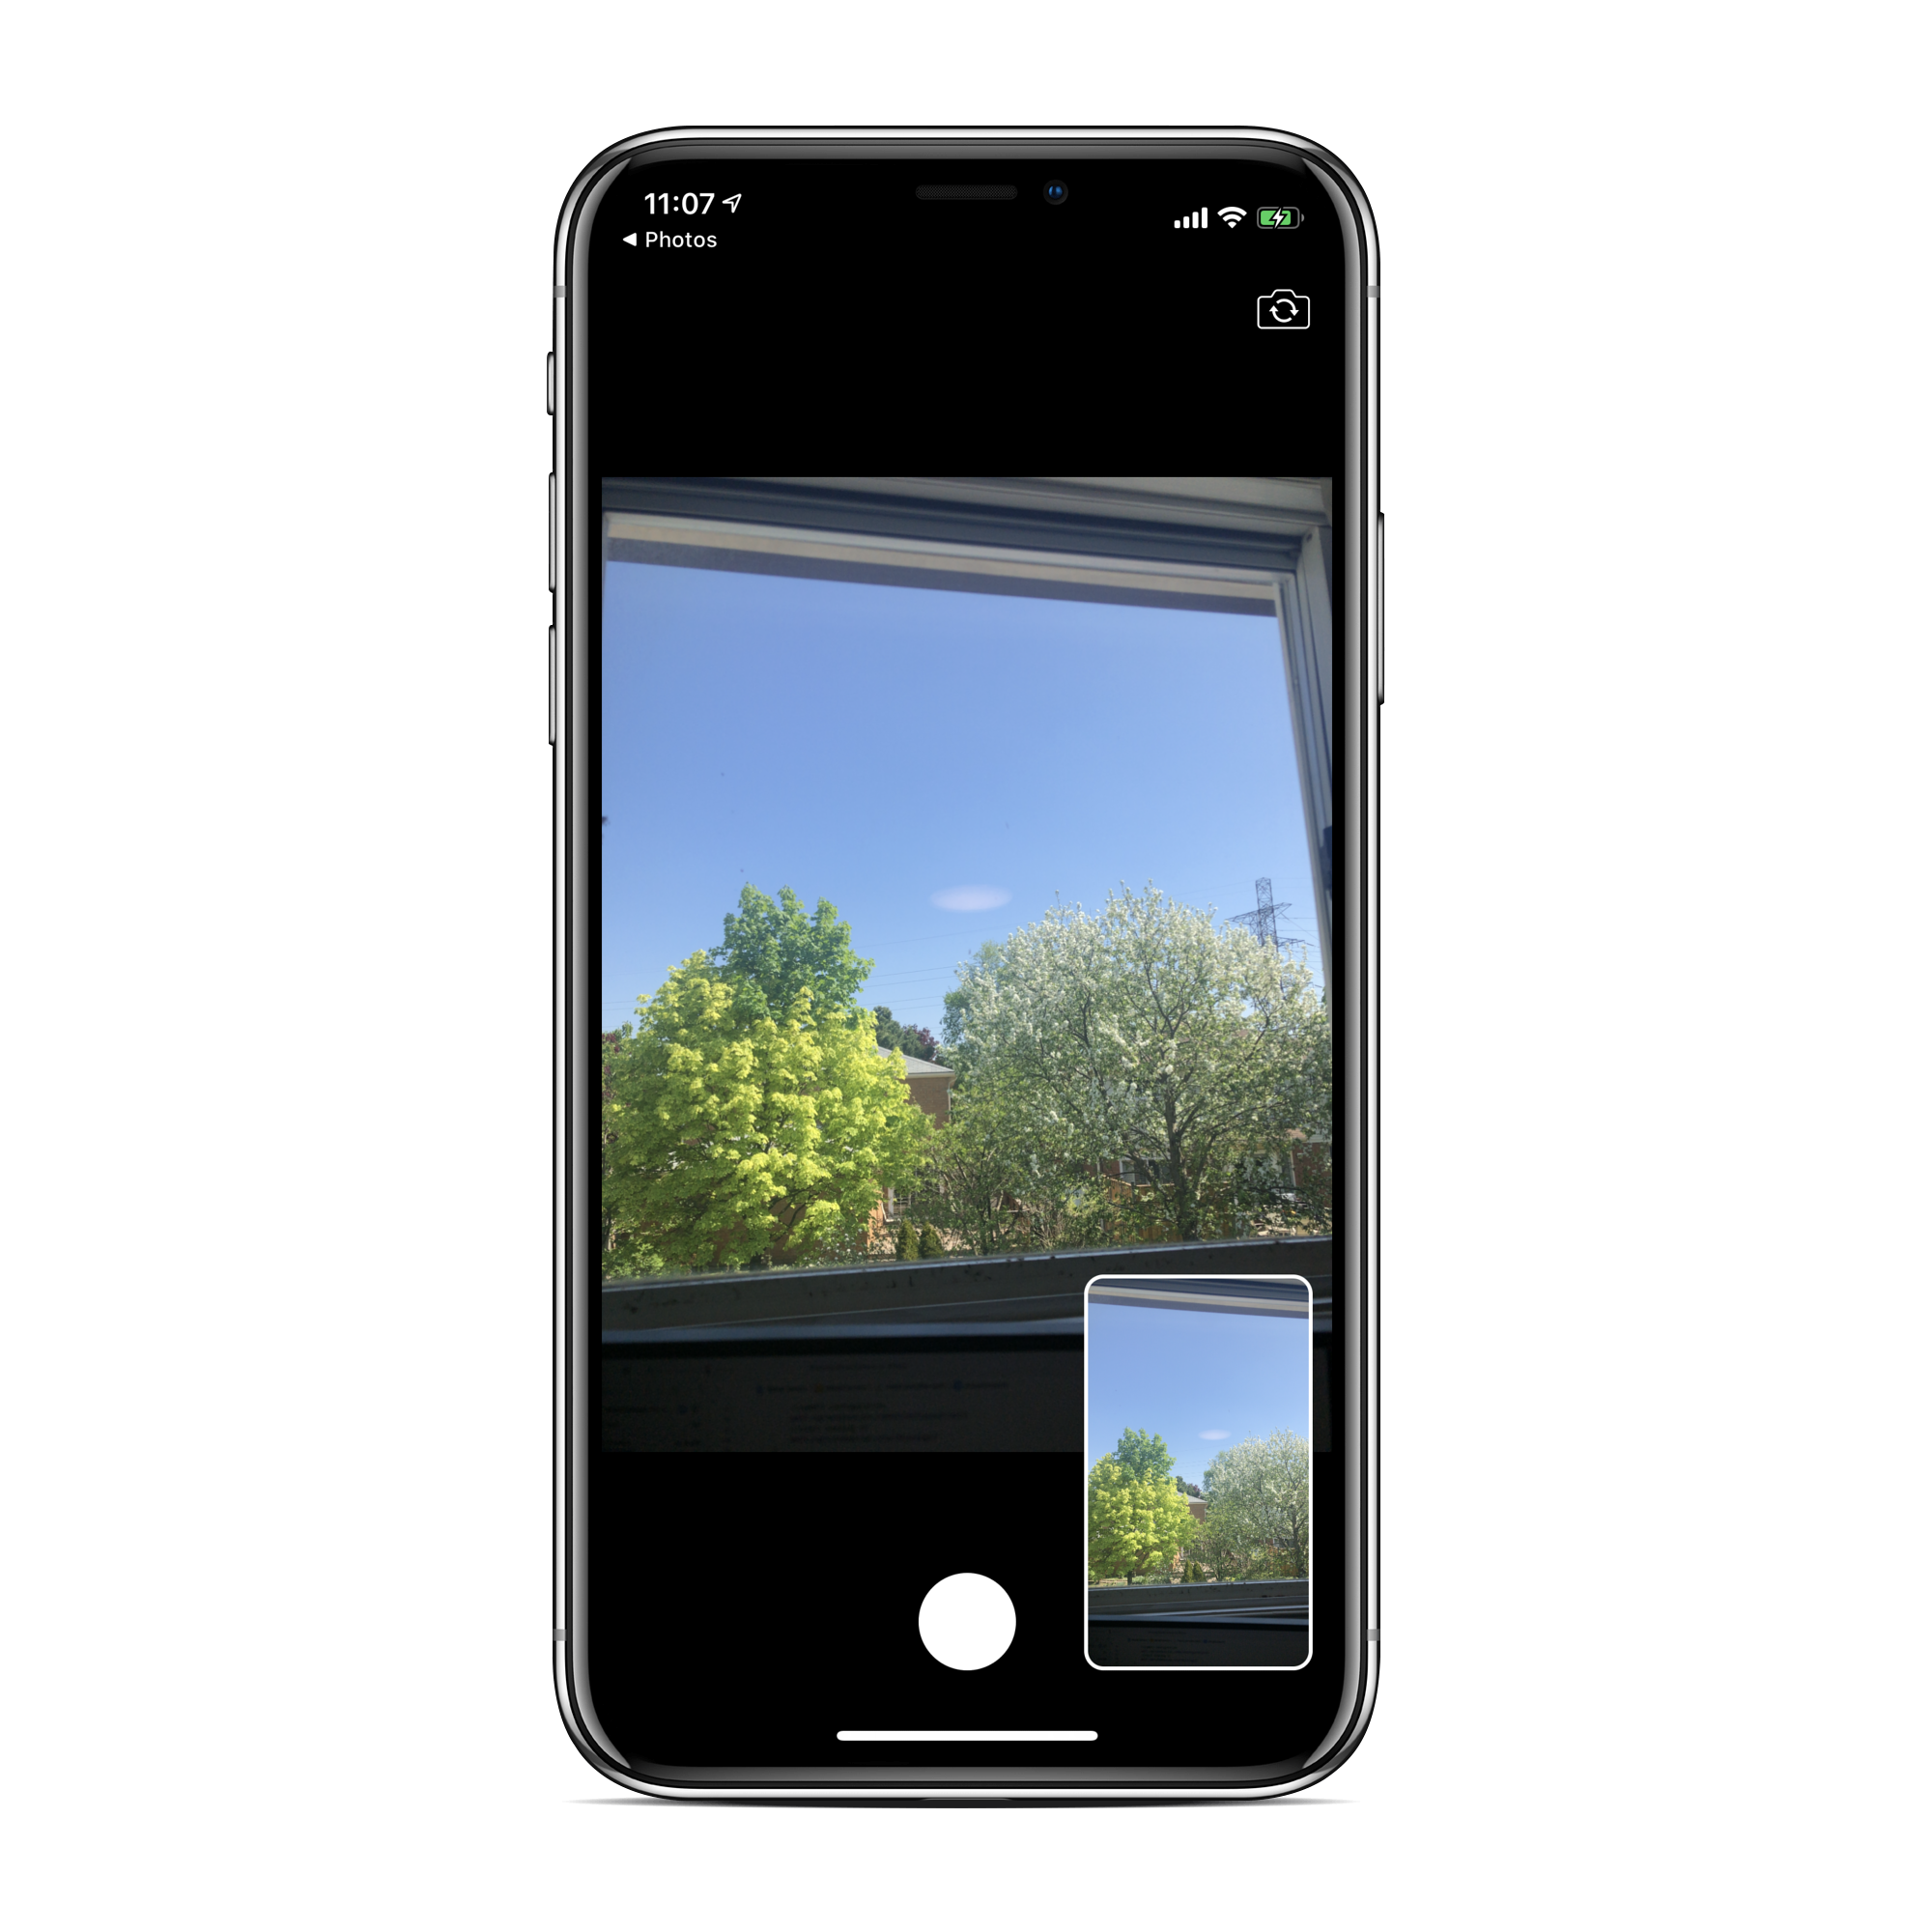
We now have the correct video orientation for when we take a picture.
现在,当我们拍照时,我们具有正确的视频方向。
第5节:切换相机 (Section 5: Switching Cameras)
Okay, so we’ve established the whole capture pipeline enabling us to both display and take images, but how do we change the camera?
好的,我们已经建立了完整的拍摄管道,使我们能够显示和拍摄图像,但是如何更换相机呢?
If you recall, the capture session mediates inputs to outputs. We’ve just covered outputs (for taking the picture) and before that we got the input devices and formed the input objects for them. Since we’ve stored 2 references, to both the back and the front camera, all we need to do is reconfigure the session object.
如果您还记得的话,捕获会话会介导输入到输出。 我们刚刚介绍了输出(用于拍照),在此之前,我们获得了输入设备并为它们形成了输入对象。 由于我们已经为后置和前置摄像头存储了2个引用,因此我们要做的就是重新配置会话对象。
The only caveat here is that since we’ve change the inputs, the connection objects have changed so we need to reset the video’s output connection’s video orientation back to portrait.
唯一需要注意的是,由于我们已经更改了输入,因此连接对象也已更改,因此我们需要将视频的输出连接的视频方向重置为纵向。
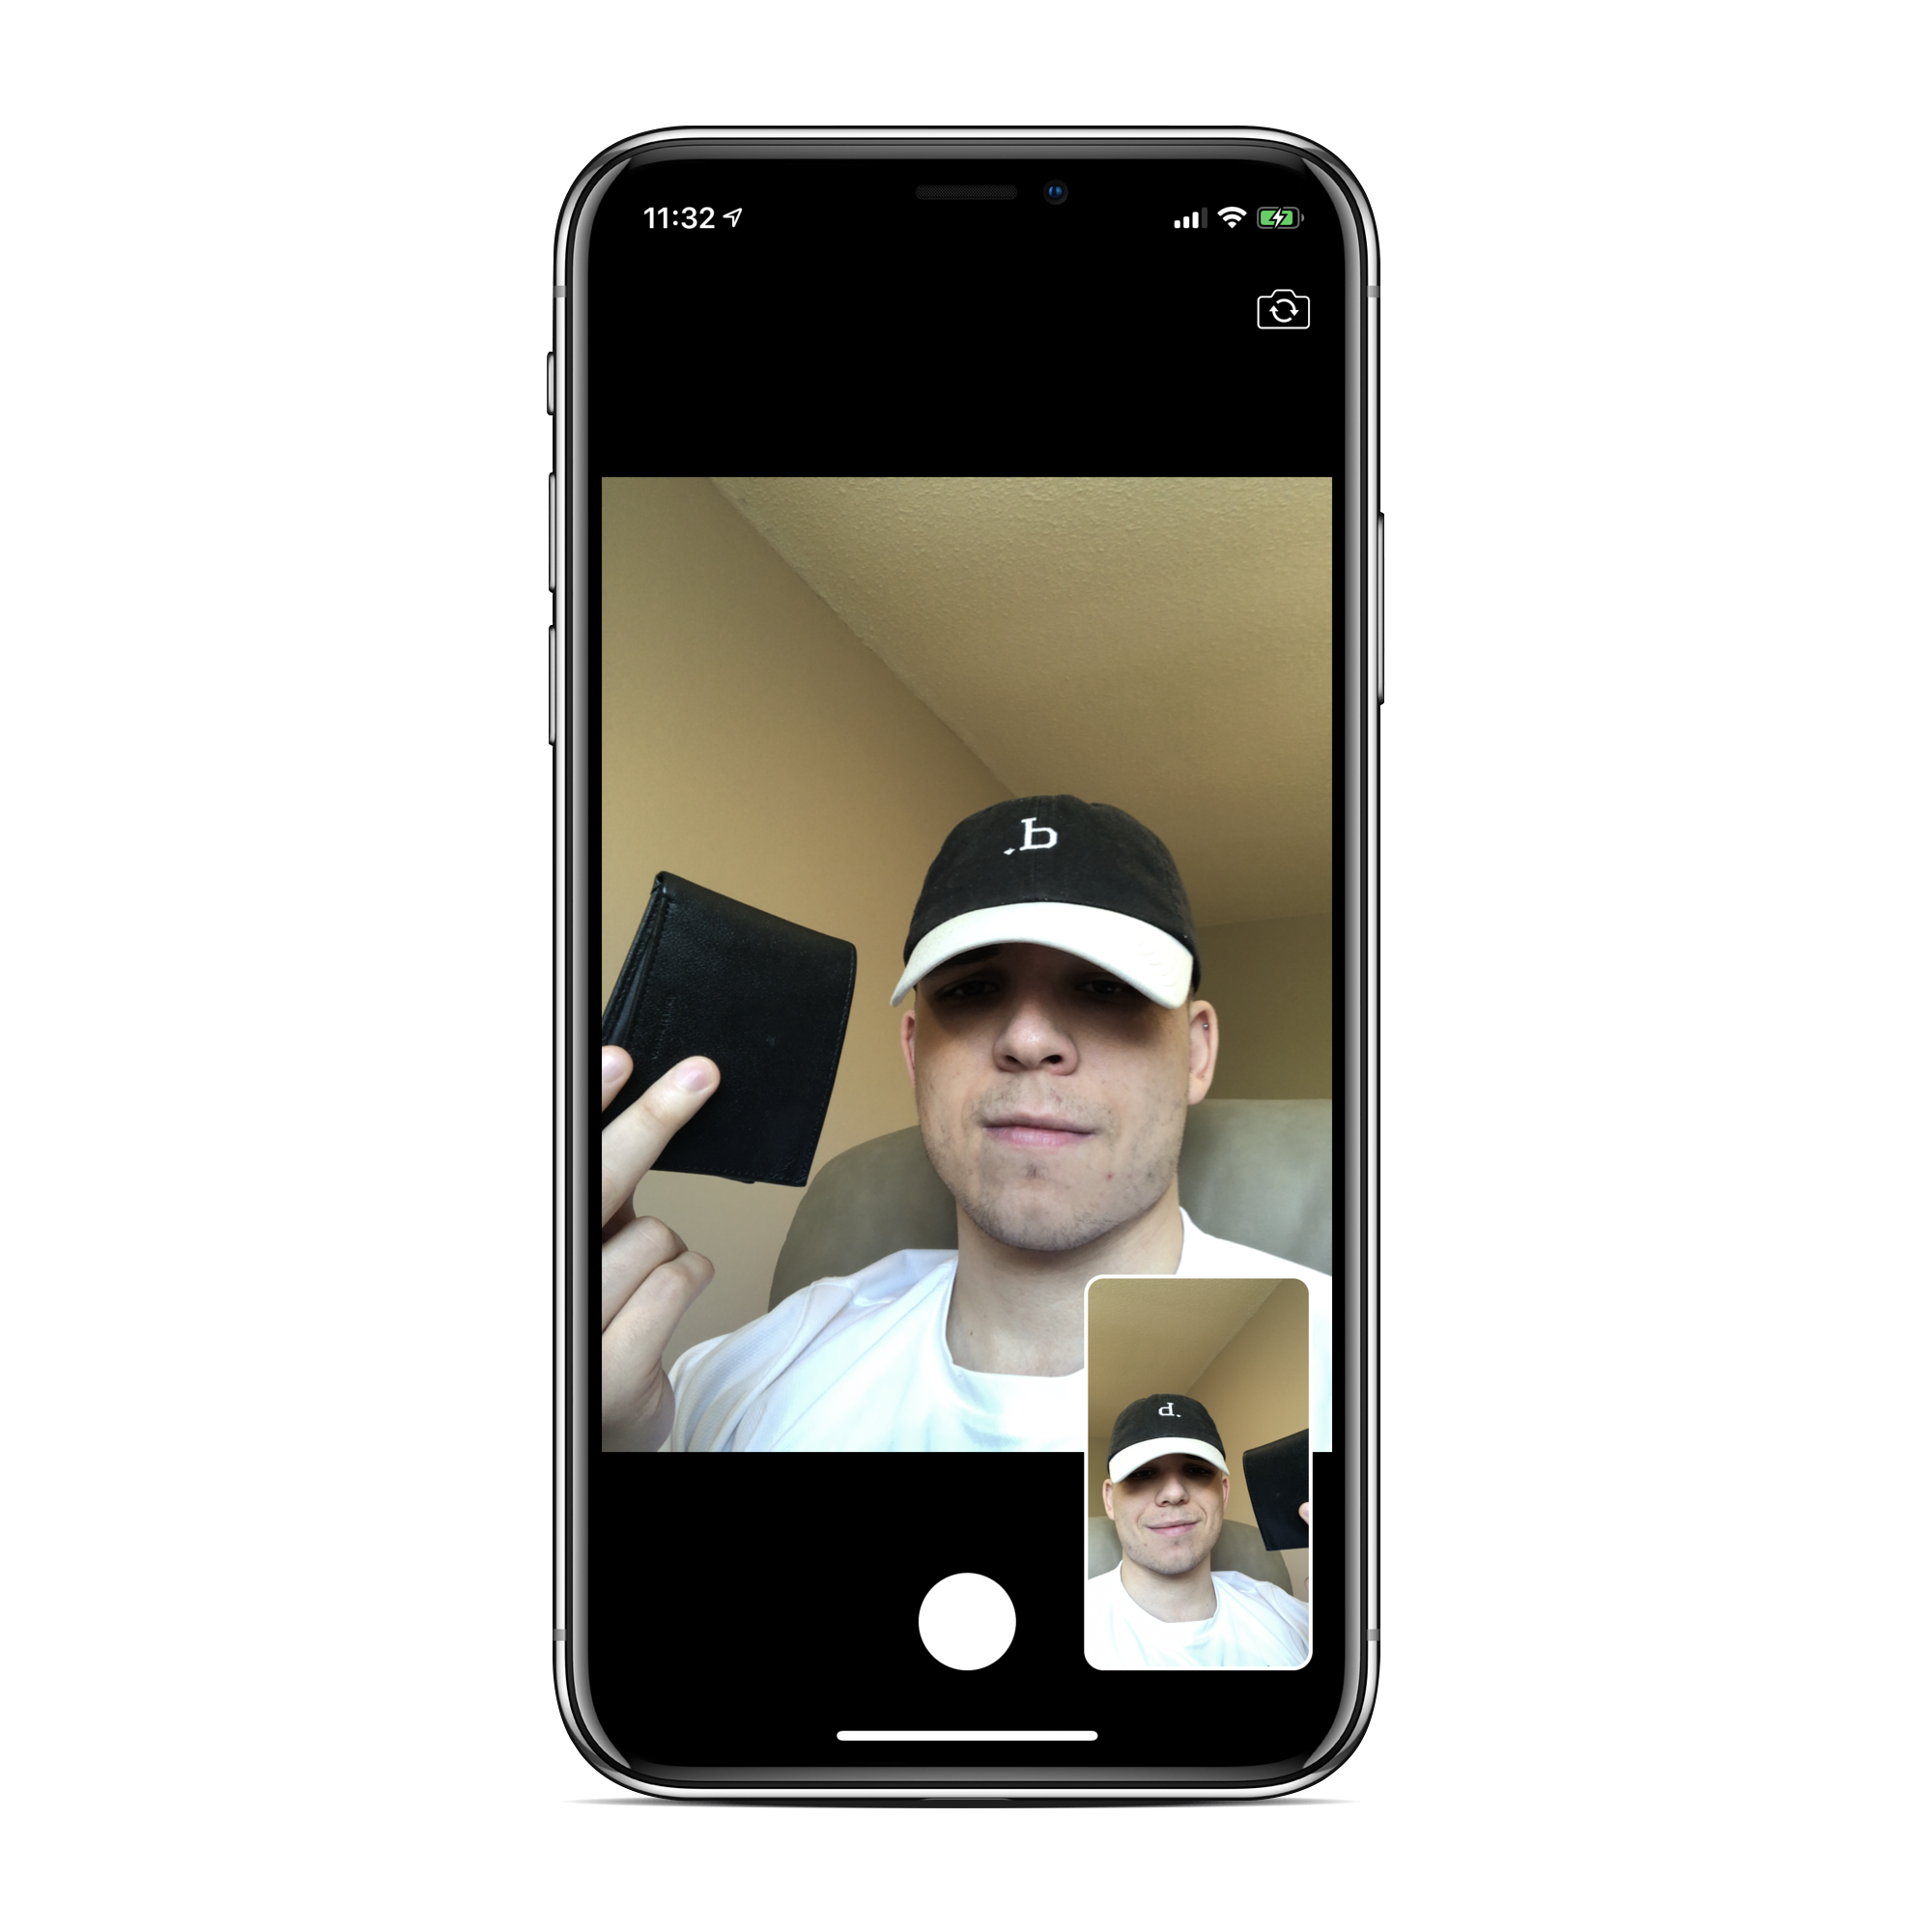
If you run it and take a picture, you might notice that the preview layer we use shows the video from the front facing camera mirrored while our output object does not return a mirrored video. This is the same case as the orientation. The preview layer automatically handles it since it is a “higher level object” whereas it is not handled in our “lower level” output object. To fix this, you can set the isVideoMirrored property on the connection based upon which camera is currently showing.
如果运行它并拍照,您可能会注意到,我们使用的预览层显示了来自前置摄像头的视频,而我们的输出对象没有返回镜像的视频。 这与定向相同。 预览层会自动处理它,因为它是“较高级别的对象”,而在我们的“较低级别”的输出对象中则不会处理。 要解决此问题,您可以根据当前显示的摄像机在连接上设置isVideoMirrored属性。
Let’s fix that up really quickly, just how we fixed the video orientation earlier.
让我们很快地修复它,就像我们之前修复视频方向的方法一样。
And we’re now done 🎉. We have a template for taking pictures using a custom camera which allows us to fit it inside whatever type of UI we want.
现在我们完成了。 我们有一个用于使用自定义相机拍照的模板,该模板使我们可以将其放入所需的任何类型的UI中。
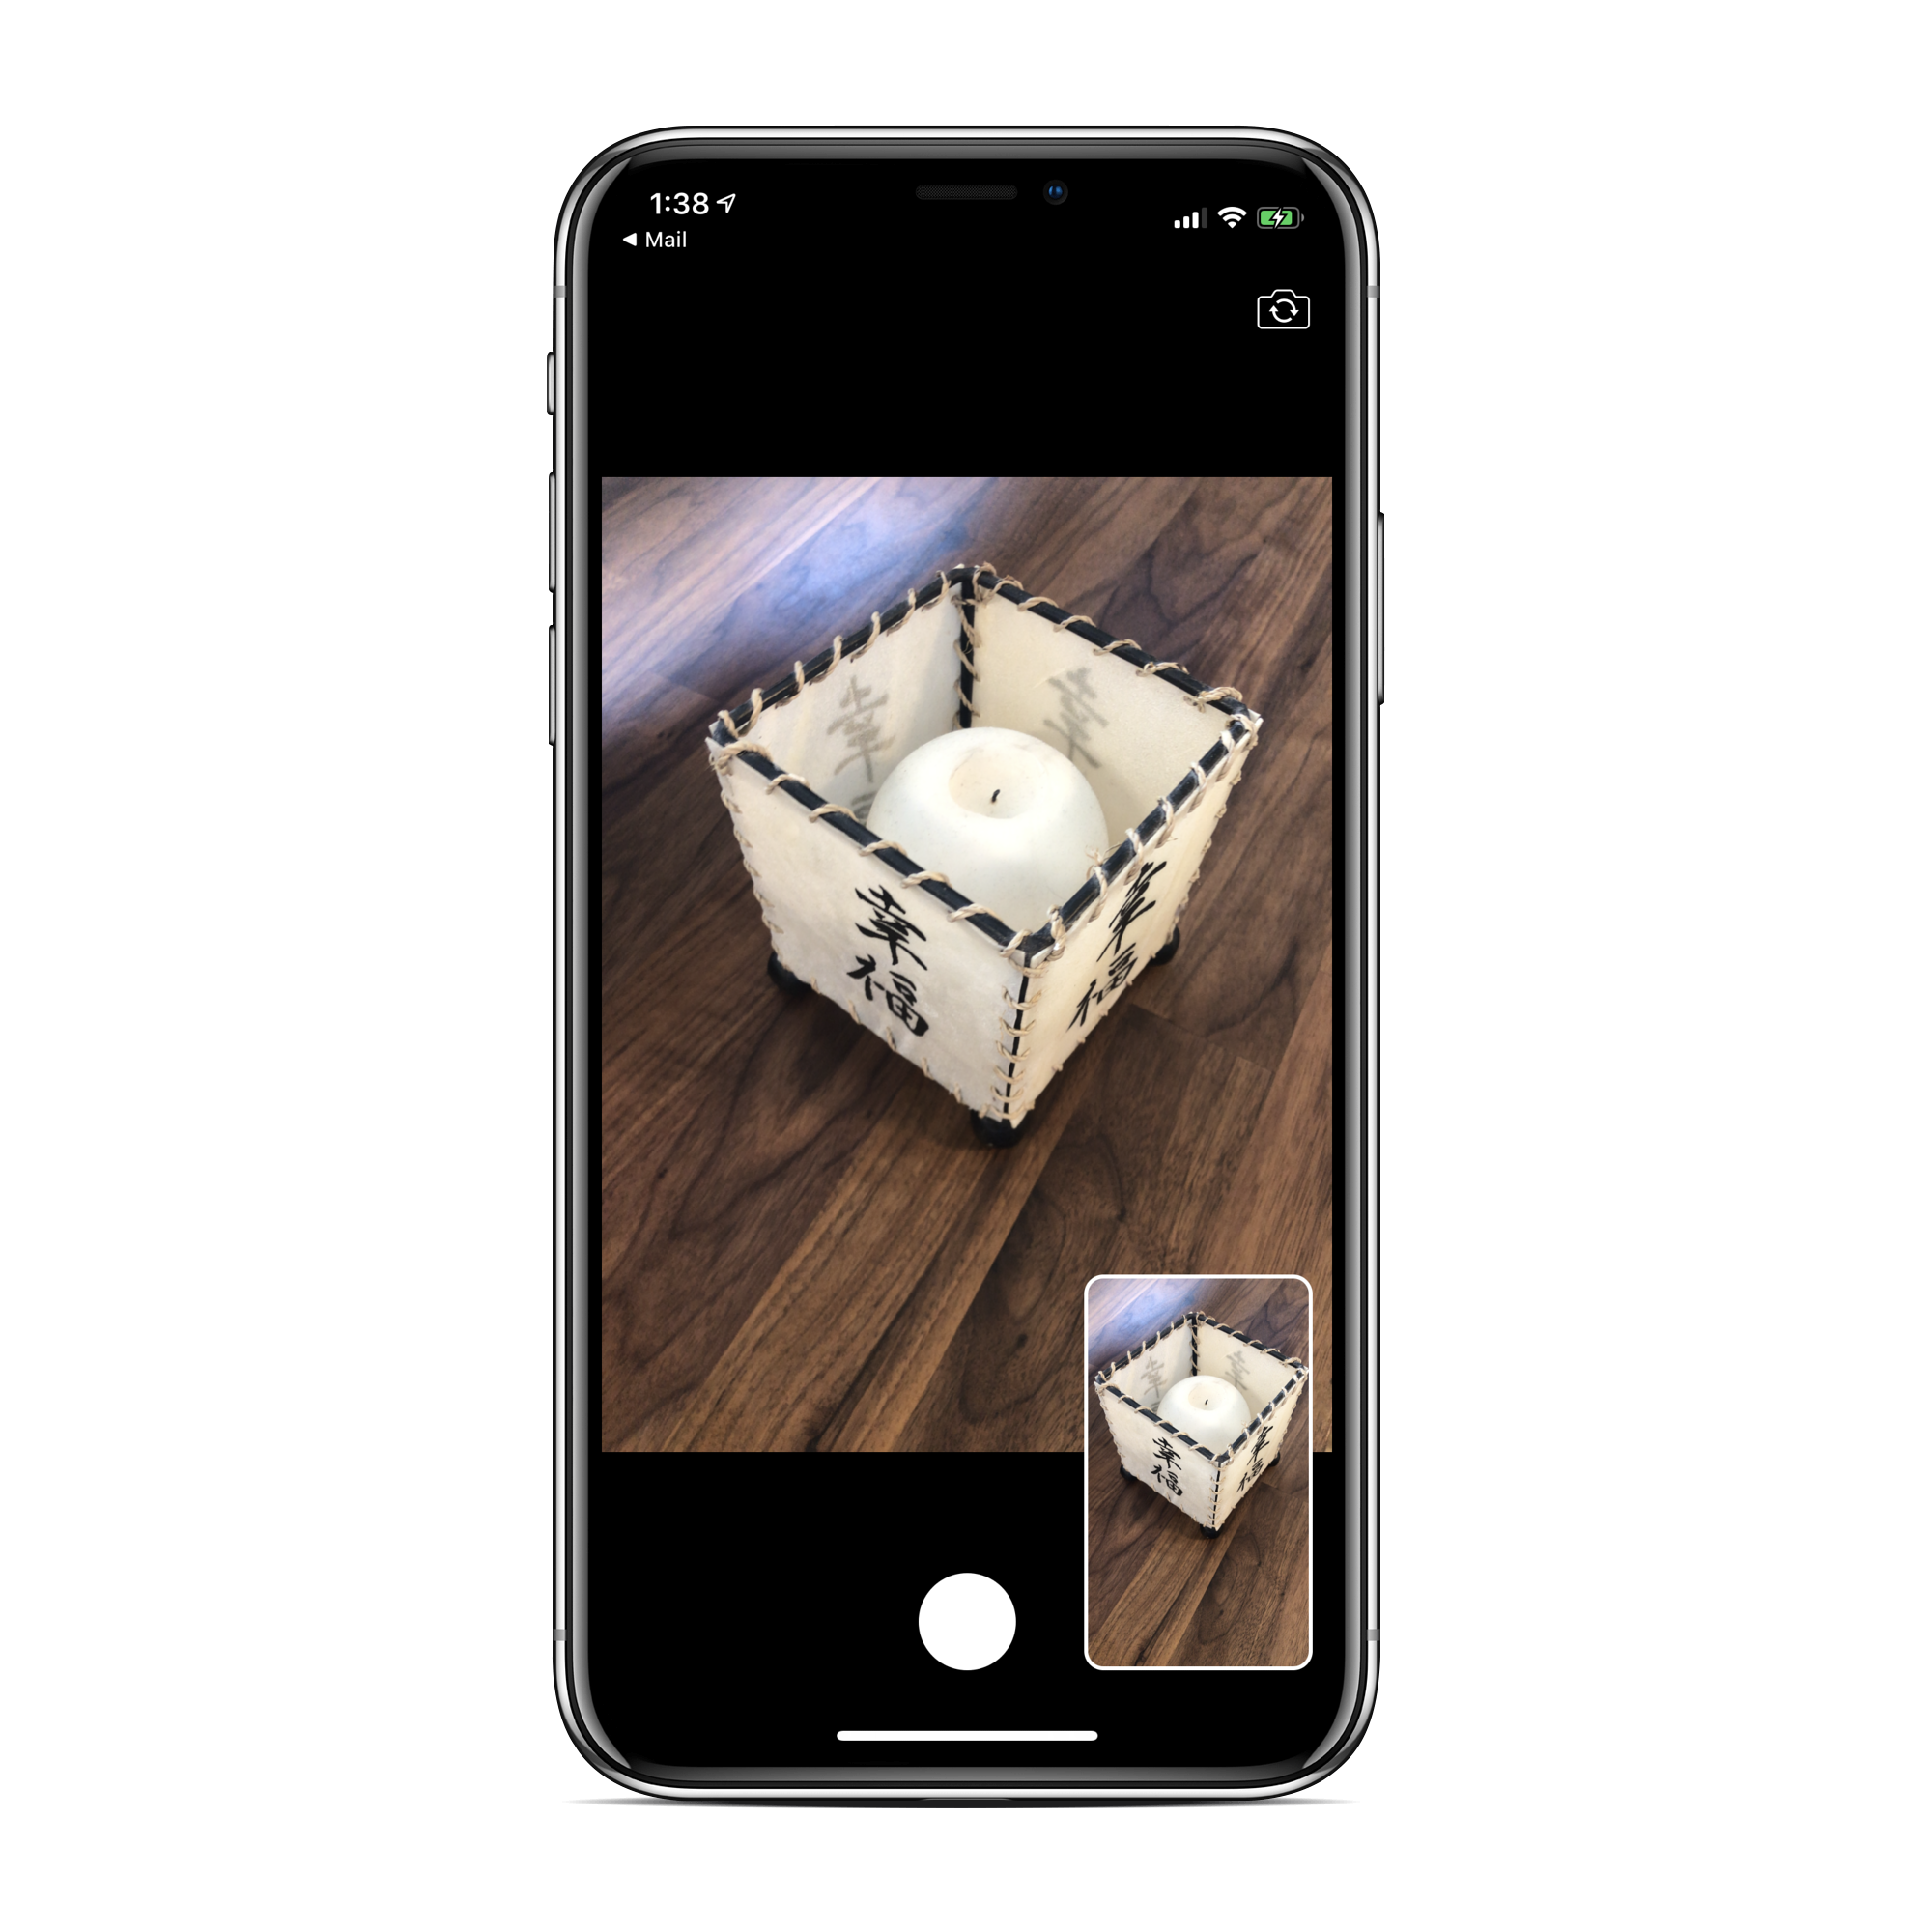
The complete part 1 can be found on my GitHub:
完整的第1部分可以在我的GitHub上找到:
下一步 (Next Steps)
- Explore more camera features. Remember the “Configuring Capture Device” section? Well it wasn’t just there to overwhelm you, you can use those to expand your camera’s functionality. 探索更多相机功能。 还记得“配置捕获设备”部分吗? 好吧,这不只是让您不知所措,还可以使用它们来扩展相机的功能。
- Videos! We only use the frames we get from our output object when the user wants to take a picture. The rest of the time, those frames are going unused! Capturing video, while not trivial, is not too difficult either. All it implies is that you bundle together the video frames into a file. This is also a great opportunity to explore using audio devices in iOS. 影片! 当用户想要拍照时,我们仅使用从输出对象获得的帧。 其余时间,这些帧将不使用! 捕捉视频虽然不容易,但也不太困难。 这意味着将视频帧捆绑在一起成为一个文件。 这也是探索在iOS中使用音频设备的绝佳机会。
Implement filters into your camera! This cough cough is a plug for my follow-up tutorial.
在相机中安装滤镜! 咳嗽是我后续教程的插件。
结论 (Conclusion)
If you’ve enjoyed this tutorial and would like to take your camera to the next level check-out my tutorial for applying filters!
如果您喜欢本教程,并且想将您的相机带到一个新的水平,请查看我的教程以应用滤镜!
Interested in learning about graphics on iOS? Checkout my introduction to using Metal Shaders.
有兴趣了解iOS上的图形吗? 查看有关使用金属着色器的介绍。
Already familiar with Metal, but want to see how you can leverage it to do some cool things? Check out my tutorial on audio visualization.
已经熟悉Metal,但想了解如何利用它来完成一些很酷的事情? 查看我有关音频可视化的教程。
As always, if you have any question or comments, feel free to leave them below ☺️.
与往常一样,如果您有任何问题或意见,请随时将其保留在☺️以下。
翻译自: https://medium.com/@barbulescualex/making-a-custom-camera-in-ios-ea44e3087563
ios中自定义相机


 已为社区贡献16条内容

所有评论(0)