
face.evoLVe 人脸比对测试
face.evoLVe和facenet相比经过测试前者要好,网上能找到的很多开源的资料都是关于facenet的,所以写一篇关于face.evoLVe的使用。想看源码的可以直接到github上看。1. 代码下载过程省略把模型下载下来2. 修改测试代码代码和模型都准备好了需要修改一下代码进行人脸的特征提取打开文件extract_feature_v2.py修改成一下代码,添加一个...
·
face.evoLVe和facenet相比经过测试前者要好,网上能找到的很多开源的资料都是关于facenet的,所以写一篇关于face.evoLVe的使用。想看源码的可以直接到github上看。
1. 代码下载
过程省略
把模型下载下来

2. 修改测试代码
代码和模型都准备好了需要修改一下代码进行人脸的特征提取
打开文件extract_feature_v2.py
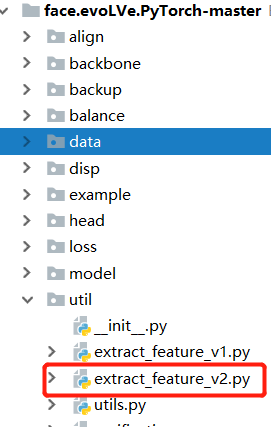
修改成一下代码,添加一个main 函数进行测试
图片为人脸检测后得到的图片,人脸检测可以使用mtcnn,如果不是人脸图片情况请看3
if __name__=="__main__":
    backbone = Backbone([112, 112], 50)
    #模型路径
    model_root = "face.evoLVe.PyTorch-master/model/ms1m/backbone_ir50_ms1m_epoch120.pth"
    #图片路径
    image = "f0aee866-170b-11ea-ab95-001cbff69c70.jpg"
    image2 = "01f3ff5e-170c-11ea-975c-001cbff69c70.jpg"
    #提取特征
    emb = extract_feature(img1,backbone,model_root)
    emb2 = extract_feature(img2,backbone,model_root)
    #计算相似度
    diff = np.subtract(emb, emb2)
    dist = np.sum(np.square(diff).numpy(), 1)
    #输出结果
    print("dist", dist)
3. 人脸检测和人脸矫正

修改后的代码
def detect_face_align(image_path):
  """
  传入路径
  返回人脸
  """
   crop_size = 112
   scale = crop_size / 112.
   reference = get_reference_facial_points(default_square=True) * scale

   img = Image.open(os.path.join(image_path))
   landmarks = []
   try:
       _, landmarks = detect_faces(img)
   except Exception as e:
       print(e)
   if len(landmarks) == 0:  # If the landmarks cannot be detected, the img will be discarded
       return None
   facial5points = [[landmarks[0][j], landmarks[0][j + 5]] for j in range(5)]
   warped_face = warp_and_crop_face(np.array(img), facial5points, reference, crop_size=(crop_size, crop_size))
   img_warped = Image.fromarray(warped_face)
   # img_warped.save("test.jpg")
   # img_warped.show()
   return img_warped
参考文献

鸿蒙生态一站式服务平台。
更多推荐
 2
2 0
0- 0


 已为社区贡献1条内容

所有评论(0)