

源代码目录介绍:

模块分解:
Director.js 
DataStore.js 
ResoureLoader.js
Resources.js 
Sprite.js 
background.js 
总结 : Sprite 精灵类是小游戏核心的概念。可以进行旋转 、变换 、缩放,可以处理很多动作,包含很多内部逻辑,创建一个父类,让所有元素都继承住它。 Director :逻辑的变化,场景的切换。 ResoureLoader :如果没加载好就循环,画面会是一张白布。
map语法
this.map = new Map(Resources)//初始化资源
将  初始化成===>
未踩的坑:
weapp-adapter.js 因为适配器文件已经  创建了canvas 所以你自己再去创建的话没有效果,也实现不了任何的动作。
踩到的坑:
1.  这是因为没有给script 添加type='module'(ES6)
2. 这是因为文件导入的时候没有加.js完整后缀名。然而在微信开发者工具里 不加后缀名是对的。
3. 没有提供一个名为Resources的导出 跑过去一看 ..............
 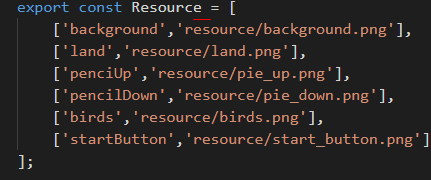 Resources少了个s...
extends基于Sprite.js 的构造器是不能使用this的 只能使用super
4.地板不动怎么办:
 //requestAnimationFrame() 告诉浏览器——你希望执行一个动画,并且要求浏览器在下次重绘之前调用指定的回调函数更新动画。该方法需要传入一个回调函数作为参数,该回调函数会在浏览器下一次重绘之前执行
        requestAnimationFrame(()=>{this.run()})
5.手机调试报错: 见区别 3、4
与H5区别:
//直接报错
底层封装:
1.wx.setPreferredFramesPerSecond(number fps) 可以修改渲染帧率。默认渲染帧率为 60 帧每秒。修改后,requestAnimationFrame 的回调频率会发生改变。 低于60帧肉眼可以看见
可以修改原生 number requestAnimationFrame(function callback) 在下次进行重绘时执行
ES6: 外部文件想要引用类Class或者是类中的方法乃至变量的话,我们一定要在前面加上export关键字
要注意的地方:
1.extends中的 constructor中的super 方法
constructor 中必须调用 super 方法,因为子类没有自己的 this 对象,而是继承父类的 this 对象,然后对其进行加工,而 super 就代表了父类的构造函数。super 虽然代表了父类 A 的构造函数,但是返回的是子类 B 的实例,即 super 内部的 this 指的是 B,因此 super() 在这里相当于 ```A.prototype.constructor.call(this, props)``
3. 计分器: HTML5 canvas fillText() 方法


import { Sprite } from "../base/Sprite.js";
//循环渲染三只小鸟,其实是    循环渲染图片的三个部分(canvas特性) 不用精灵图(可以省去resource 和resourceloader)是为了提高开发效率
export class Birds extends Sprite{
    constructor() {
        const image = Sprite.getImage('birds');
        super(image,
            0, 0,
            image.width, image.height,
            0, 0,
            image.width, image.height);
        //小鸟上下边距 左右边距是9 宽34 高24
        this.clippingX = [
            9,
            9 + 34 + 18,
            9 + 34 + 18 + 34 + 18];//没有第三个是翅膀
        this.clippingY = [10, 10, 10];
        this.clippingWidth = [34, 34, 34];
        this.clippingHeight = [24, 24, 24];
        //const 对外不可见
        const birdX = window.innerWidth / 4;//单只小鸟初始X坐标
        this.birdsX = [birdX, birdX, birdX];//三只小鸟初始X坐标
        this.birdY = window.innerHeight / 2;//初始Y坐标
        this.birdsY = [this.birdY, this.birdY, this.birdY];
        this.y = [this.birdY, this.birdY, this.birdY];//每只小鸟的Y坐标
        //判断小鸟属于第几只
        this.index = 0;
        this.count = 0; //循环小鸟个数 小鸟从0位=> 1位 => 2位 => 0位
        this.time = 0;//自由落体公式会涉及到时间.
    }
    draw() {
        //切换三只小鸟的速度
        const speed = 0.2;
        this.count = this.count + speed;
        if (this.index >= 2) {
            this.count = 0;
        }
        //减速器的作用 向下取整
        this.index = Math.floor(this.count);
        //受重力作用
        const offsetUp = 30;
        const g = 0.98 / 2.5;
        const offsetY = (g * this.time * (this.time - offsetUp) ) / 2;
        for (let i = 0; i <= 2; i++){
            this.birdsY[i] = this.y[i] + offsetY;
        }
        this.time++;
        console.log('test====',this.y[0],this.birdsY[0]);
        //渲染小鸟
        super.draw(
            this.img,
            this.clippingX[this.index], this.clippingY[this.index],
            this.clippingWidth[this.index], this.clippingHeight[this.index],
            this.birdsX[this.index], this.birdsY[this.index],
            this.clippingWidth[this.index], this.clippingHeight[this.index]);
    }
}
// 精灵的基类,负责初始化精灵加载的资源的大小以及位置.
import { DataStore } from './DataStore.js'
export class Sprite{
    constructor(img = null,//默认值
                srcX = 0,//
                srcY = 0,//
                srcW = 0,//
                srcH = 0,//
                x = 0, y = 0,//
                width = 0 , height = 0) {//
        this.dataStore = DataStore.getInstance()
        this.ctx = this.dataStore.ctx;
        this.img = img;//要绘制的图片对象
        this.srcX = srcX;// 剪裁的X坐标
        this.srcY = srcY;// 剪裁的Y坐标
        this.srcW = srcW;// 剪裁的宽度
        this.srcH = srcH;// 剪裁的高度
        this.x = x;
        this.y = y;//资源在canvas上的摆放位置
        this.width = width;
        this.height = height;
    }

    /**
     * img 传入Image对象
     * srcX 要剪裁的起始X坐标
     * srcY 要剪裁的起始Y坐标
     * srcW 剪裁的宽度
     * srcH 剪裁的高度
     * x 放置的x坐标
     * y 放置的y坐标
     * width 要使用的宽度
     * height 要使用的高度
     */
    //让Sprite获取Image 静态方法直接获取实例 不需要this了
    static getImage(key) {
        return DataStore.getInstance().res.get(key);
    }
//动画循环 每秒60帧 60次
    draw(img = this.img,
        srcX = this.srcX,
        srcY = this.srcY,
        srcW = this.srcW,
        srcH = this.srcH,
        x = this.x,
        y = this.y,
        width = this.width,
        height = this.height) {
        this.ctx.drawImage(
           img,
           srcX,
           srcY,
           srcW,
           srcH,
           x,
           y,
           width,
           height
        )
    }
}
// let image = new Image();
// image.src = '../resource/background.png';
// image.onload = () => {
//     this.ctx.drawImage(
//         image,
//         0,//起始位置
//         0,//起始位置
//         image.width,//裁剪的大小
//         image.height,//裁剪的大小
//         0,//放置在画布上的位置
//         0,//放置在画布上的位置
//         image.width,//使用的图片大小
//         image.height,//使用的图片大小
//     );
// }
.


 已为社区贡献1条内容

所有评论(0)