

Using Windows Terminal, enabling clipboard and browser interaction
Intro
Microsoft have come a long way with their Windows Subsystem for Linux. This tutorial will set you up running Ubuntu 20.04 inside Windows Terminal. The additional steps of enabling xclip (copying your linux console outputs to your windows clipboard) and displays (opening up a browser window from inside your linux console) will make you feel at home with WSL2.
Part 1 — Installation
About 20 minutes (with a couple of system restarts)
1.1 Install Ubuntu
You will need to download the Ubuntu linux distribution from the Microsoft Store. Use version 20.04, as this is supported until 2025.
1.2 Install WSL2
Now install WSL2 — if you are yet to do so please install WSL2 from the WSL Home page. Follow the prompts for installation. You may need to restart your computer after this step. To confirm the installation open up PowerShell and run the following command: wsl.exe --list --all --verbose
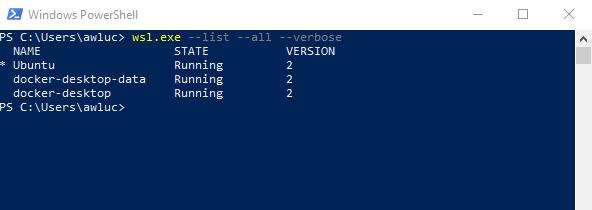
We should expect to see one row for Ubuntu with the WSL2 Version set to 2
1.3 Install Windows Terminal
We can then install Windows Terminal (much nicer than the ancient command prompt). Again head to Microsoft to download Windows Terminal.
Open up windows terminal. We should see Ubuntu available in the dropdown menu!
1.3 Configure Windows Terminal
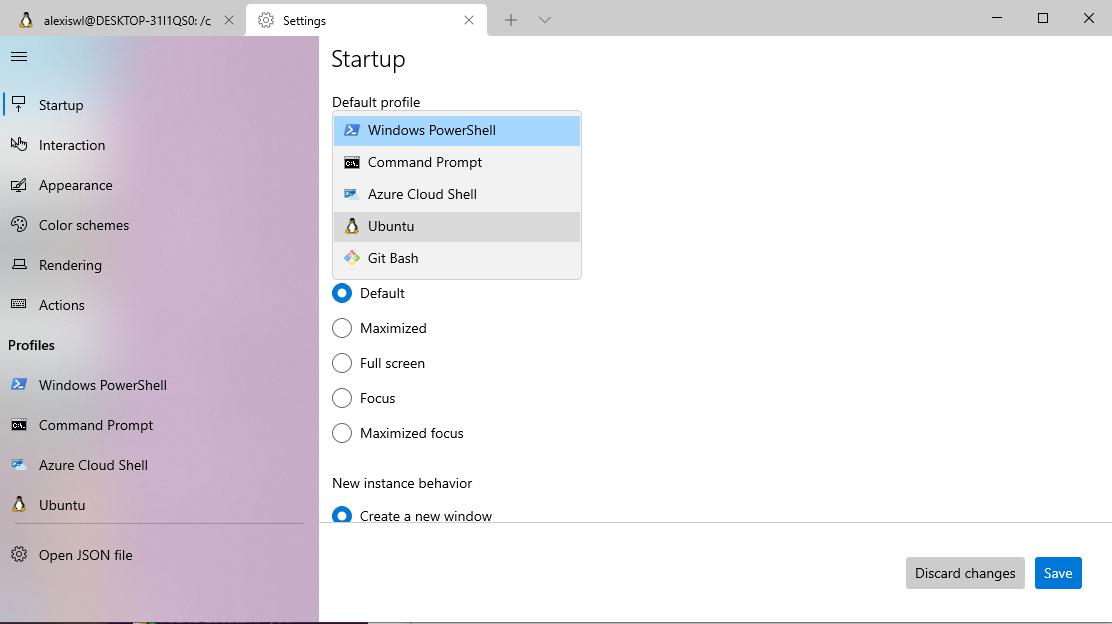
Let’s quickly make sure that Ubuntu is our default terminal.
Open up Windows Terminal and head to the settings section
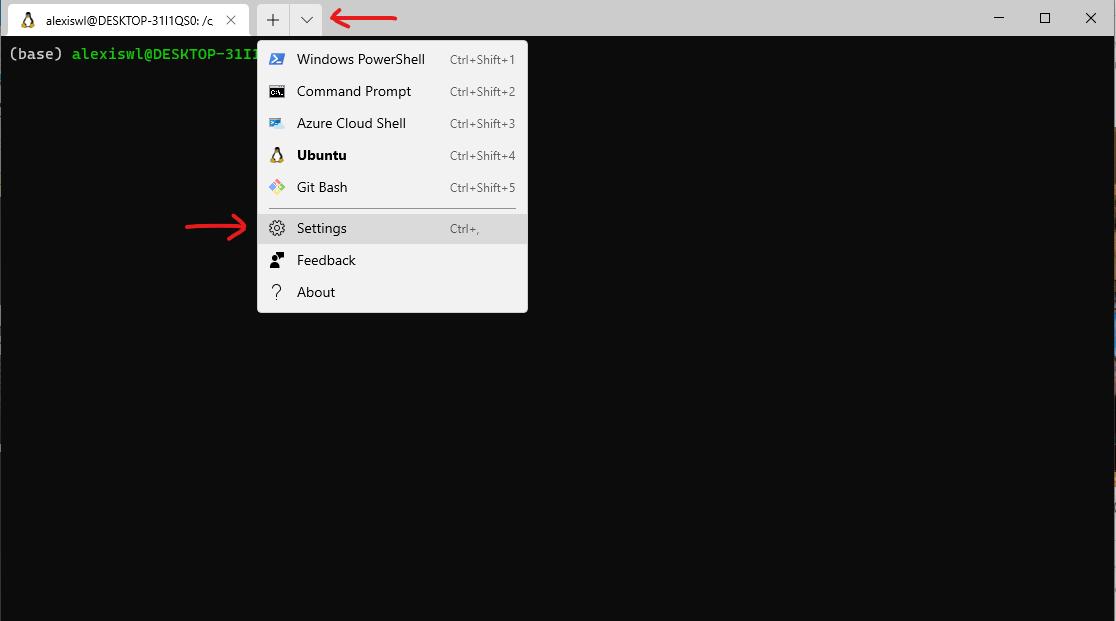
Then select Ubuntu as the default profile.
Open up a new terminal and we should see Ubuntu prompt.
Well done! You’ve passed Part 1!!
Open up a Ubuntu tab in Windows Terminal and runsudo apt-get update and sudo apt-get upgrade before continuing to ensure your new linux system is installed with the latest security features.
Part 2: Setting the root directory mount
About 5 minutes
You may notice that your C drive is mounted at /mnt/c . This can cause some problems and it’s likely that you wish this to just be mounted at /c .
We can update the directory mount to /c with the following updates to /etc/wsl.conf
[automount]
enabled = true
root = /
Remember to use sudo to update an admin file. The following command may help you: sudo vim /etc/wsl.conf
In order for the effects to be present you must first restart wsl . Open up PowerShell again and run the following command wsl.exe --shutdown . This will restart the wsl virtual env. Open up Windows Terminal and WSL2 will start up automatically.
Part 3: Enabling the clipboard
About 30 minutes
Copying from the console is something Linux and MacOS users have had for sometime. This is the longest part of this tutorial and has a few steps
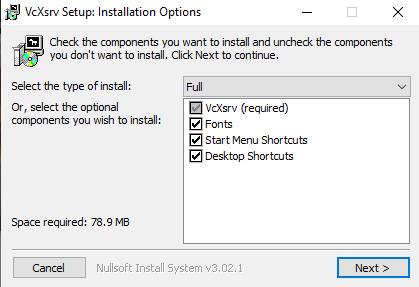
3.1 Installing VcXsrv
You can download VcXsrv through SourceForge. Choose to install all items
3.2 Installing the Ubuntu X11 Apps and xclip
Open up an Ubuntu console (through Windows Terminal) and run
sudo apt install x11-apps xclip xdg-utils
3.3 Setting the DISPLAY environment variable
It’s important that we set the DISPLAY environment variable to XXX.XX.XX.X:0 where XXX...X is the local IPv4 address of the computer (rather than the Virtual Machine itself). The 0 is the default sequence number (see here for more info).
Since our IPv4 address can change from time to time, it’s important that this is set dynamically. Open up your ubuntu terminal and open the file ~/.bashrc and add the following line:
export DISPLAY="$(grep '^nameserver ' /etc/resolv.conf | cut -d' ' -f2):0"
This way our DISPLAY variable is correct regardless of if our IPv4 address changes!
To confirm this has worked, open up a new Ubuntu Terminal tab and run the following:
echo "$DISPLAY"
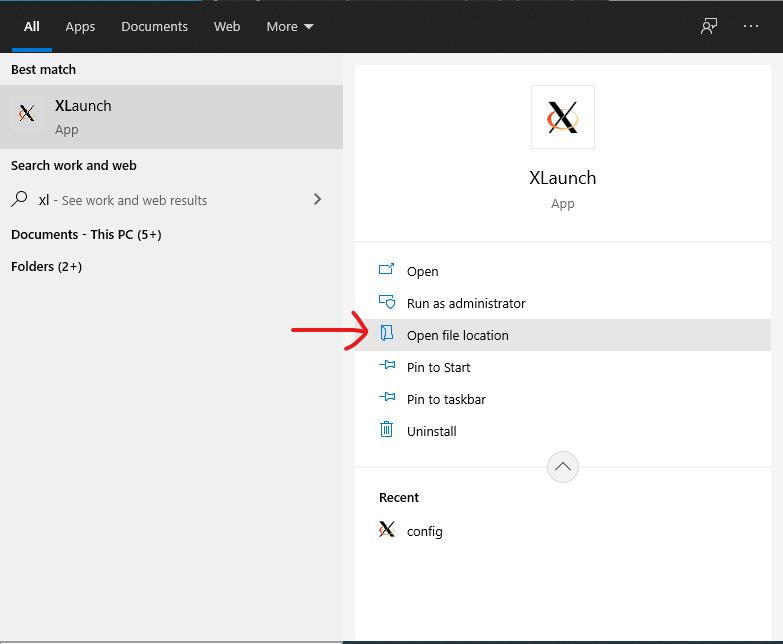
3.4 ‘Hacking’ Xlaunch
Much credit goes to Bhupathy’s WSL1 tutorial for this step. XLaunch is a shortcut to VcXsrv, we are going to update the shortcut to include the desired parameters. We will then add XLaunch to the startup apps in the next step
Head to the ‘File Location’ for XLaunch (the image below may assist you).
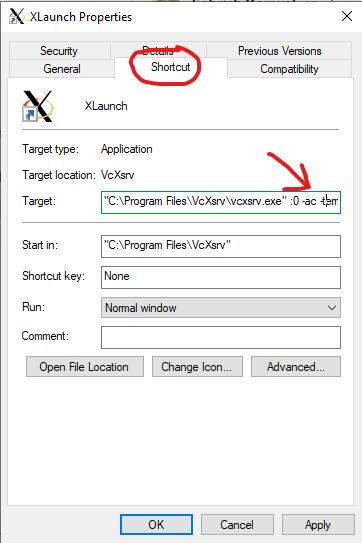
Right click on ‘Properties’ and under the ‘Shortcut’ menu update the ‘Target’ to the following
"C:\Program Files\VcXsrv\vcxsrv.exe" :0 -ac -terminate -lesspointer -multiwindow -clipboard -wgl -dpi auto
3.5 Adding XLaunch to the start up apps
Open up the file location for the XLaunch shortcut (as shown in the step above).
Meanwhile, open up the Run console with Win + R, and type shell:startup. This should open up another folder at:%APPDATA%\Microsoft\Windows\Start Menu\Programs\Startup
Copy the XLaunch shortcut into the Start up folder.
When the computer is restarted, XLaunch will automatically be started. For now, click on the XLaunch shortcut to start it up.
In a new Ubuntu terminal console type echo foo | xclip . You should see ‘foo’ has been added to your clipboard. Try Ctrl+V to paste this into a new text document or search bar?
3.6 Troubleshooting
If this isn’t working for you and you’ve triple checked that XLaunch is running, and your DISPLAY variable is set correctly, it could possibly be a firewall issue.
You may also find that everything works fine at home and then xclip hangs when you’re in your local library.
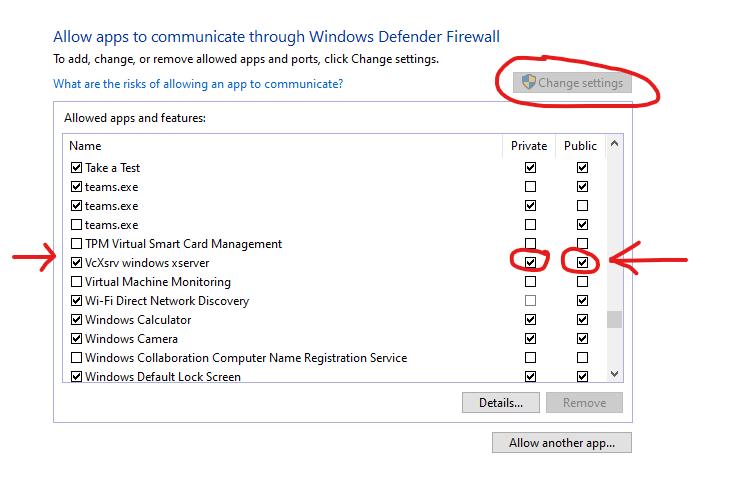
To fix this, open up your Firewall settings page and click ‘Allow an app through firewall’.
Search for VcXsrv windows server and make sure that both Private and Public are enabled.
Part 4: Setting the browser variable
About 4 minutes
This is quite important if you have any linux applications that require SSO through a web browser (i.e the AWS cli).
We can add the following line to our ~/.bashrc to make sure that WSL can launch a browser if it needs to.
export BROWSER="wslview"
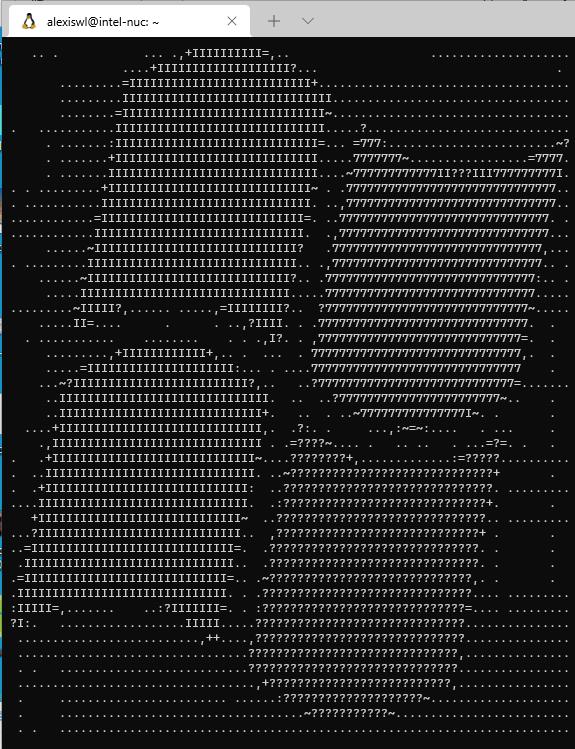
Open up a new terminal and type:
xdg-open "https://www.google.com"
You should see a new tab open up in your web browser
Conclusion:
If you’ve made it so far, thank you so much for all of your patience and persistence. Please let me know if you had any issues in any of the steps. All feedback welcome!
Alexis out.


 已为社区贡献1125条内容

所有评论(0)