Fullstack Serverless app with Flutter, Serverless Framework and Upstash(REDIS)(PART 2)
嘿!
怎么样了?
欢迎来到本教程系列的第 2 部分。在第一部分中,我们了解了如何使用 Upstash、无服务器框架和 Redis 构建 REST API。
在这一部分中,我们将使用 Flutter 构建一个移动应用程序,以使用我们的 REST API 端点。
让我们开始吧🙃
首先,您需要在您的计算机上安装并运行 Flutter
- 颤振
在您的 IDE 中创建一个新的 Flutter 项目并为其命名。
打开你flutter项目根目录下的pubspec.yaml文件,在dev_dependencies下添加这些依赖
  timeago: ^3.1.0
  shared_preferences: ^2.0.6
  http: ^0.13.4
所以它最终应该看起来像这样
dev_dependencies:
  flutter_test:
    sdk: flutter

  timeago: ^3.1.0
  shared_preferences: ^2.0.6
  http: ^0.13.4
timeago库正在将 Unix 时间戳 (1636824843) 转换为人类可读的格式,如a minute ago、5 mins ago等。
Once we create a user account, we want to keep track of theiruserIdand other minor details. We'll useshared_preferencesfor that. <br> Then we'll use thehttp` 库,用于进行 HTTP 调用。
让我们开始吧...
创建用户
我们将构建的第一个屏幕是创建用户屏幕,它将使用创建用户端点。
这是屏幕的样子
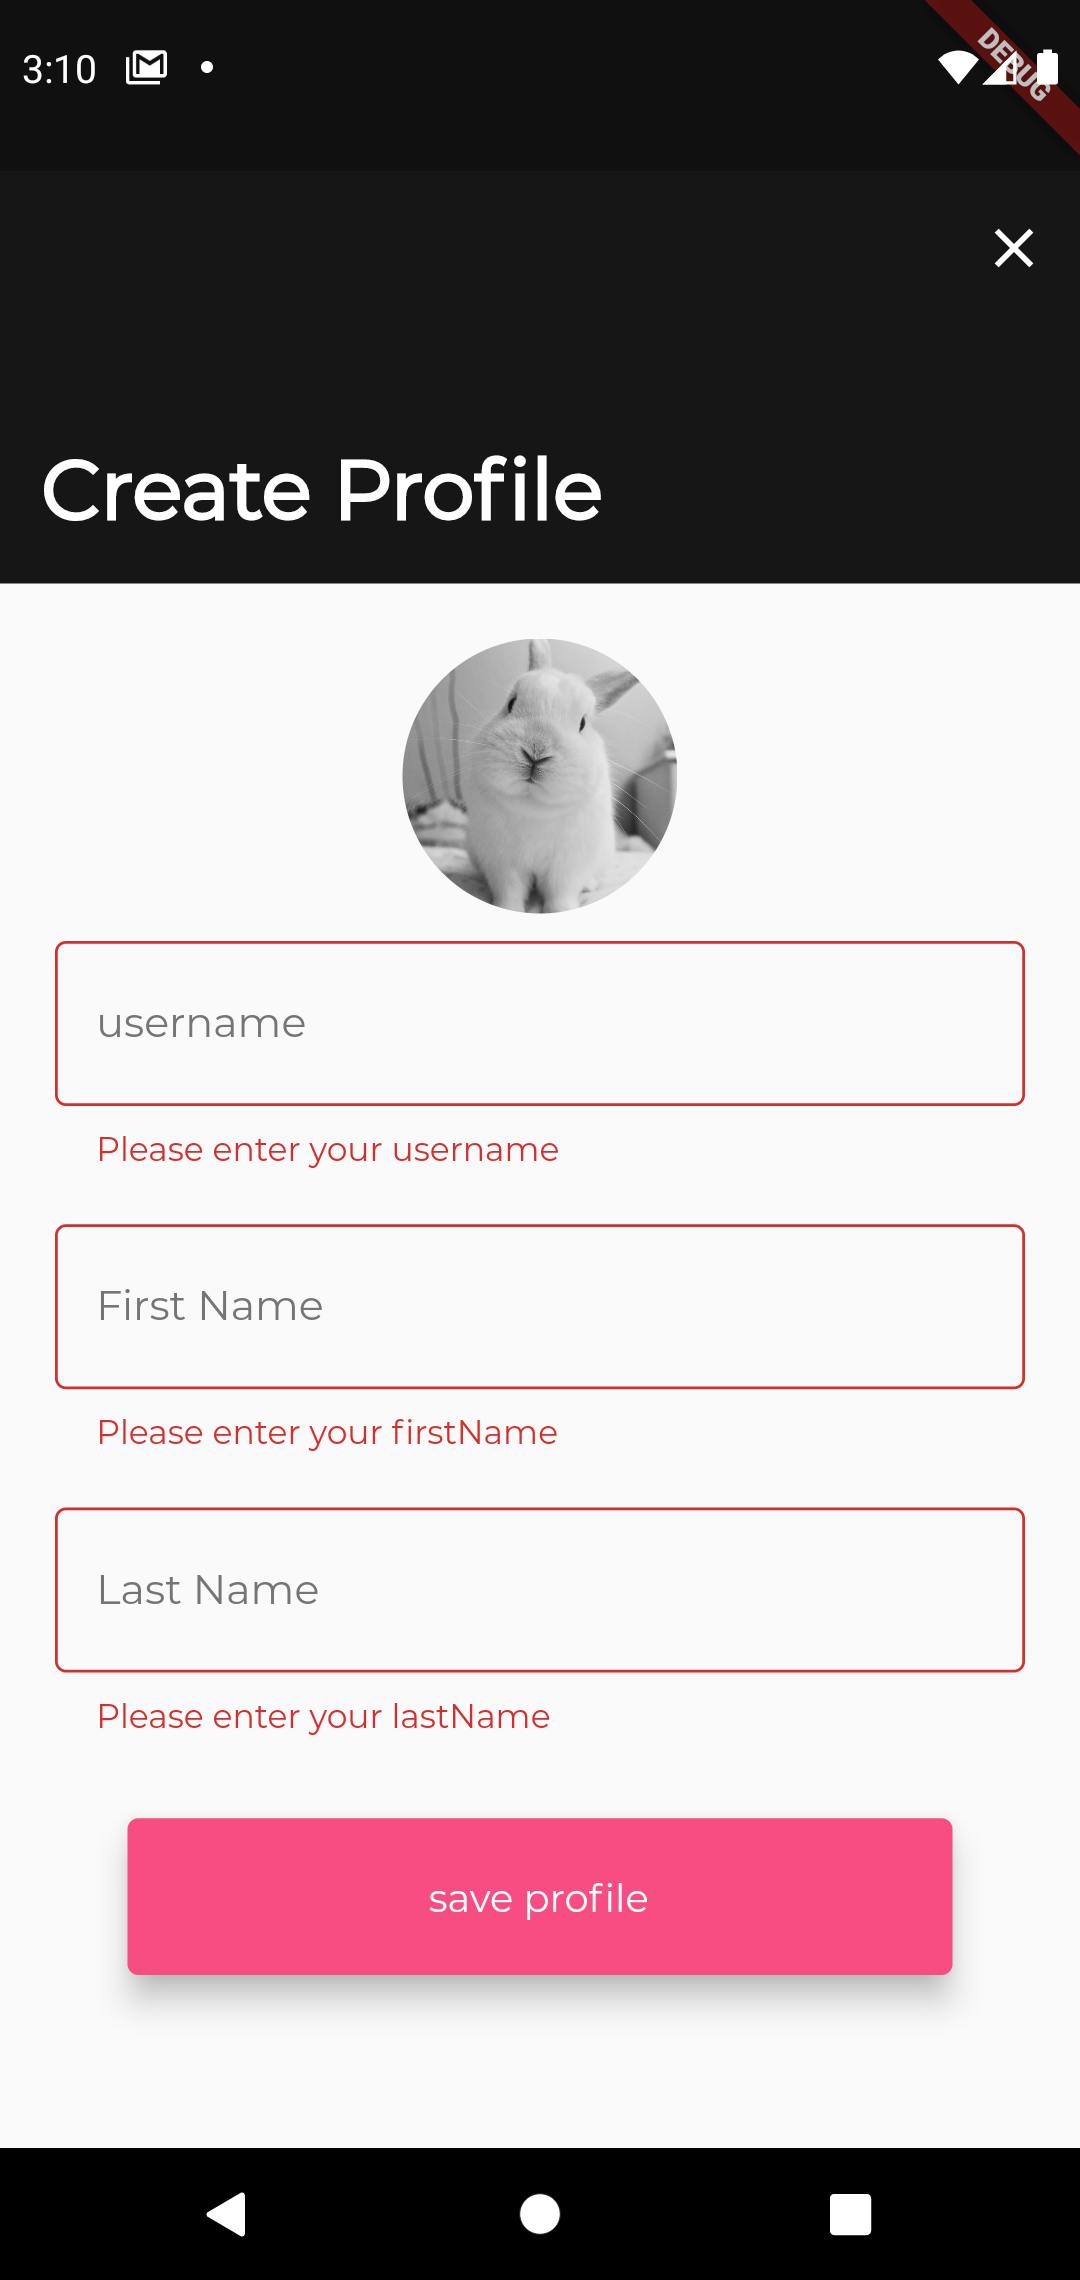 不要担心兔子照片。只是图像视图的占位符。
在lib文件夹内创建一个名为account的文件夹,然后在account文件夹内创建一个名为create_profile_screen.dart的新文件。
这是我最终的lib文件夹结构的样子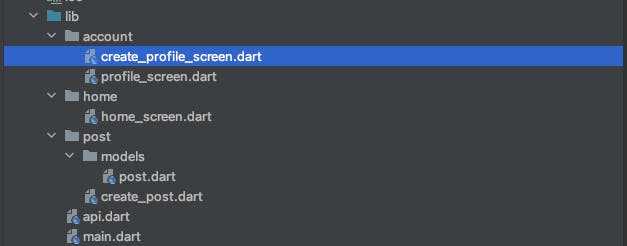 为了创建一个新用户,我们需要一个
-
个人资料图片网址
-
名字
-
姓氏
-
用户名
-
端点
让我们看一下代码
static const String  CREATE_USER_PROFILE_URL = "https://5vafvrk8kj.execute-api.us-east-1.amazonaws.com/dev/user";
  bool _loading = false;

 Future<void>createUserProfile() async{
    setState(() {
      _loading = true;
    });
  print(usernameController.text);
  print(firstNameController.text);
  print(lastNameController.text);
  print(profilePicUrl);
    await http.post(Uri.parse(CREATE_USER_PROFILE_URL),
        body: convert.jsonEncode({'username': usernameController.text,
          "firstName":firstNameController.text,"lastName":lastNameController.text,
          "profilePic":profilePicUrl})).then((response) async {

      var jsonResponse =
      convert.jsonDecode(response.body) as Map<String, dynamic>;

      setState(() {
        _loading = false;
      });
      if(response.statusCode == 400){

       ScaffoldMessenger.of(context).showSnackBar(SnackBar(padding:EdgeInsets.all(10),backgroundColor: Colors.red,content: Text(jsonResponse['message'])));
      }else if(response.statusCode == 200) {

        print('user id is :' +jsonResponse['userId']);
        await saveUserId(jsonResponse['userId']);
        Navigator.push(context, MaterialPageRoute(builder: (context){
          return HomeScreen();
        }));
      }
    });


  }
Future是用于处理异步操作的核心 Dart 类。 Future 对象表示将来某个时间可用的潜在值或错误。
http.Response 类包含从成功的 http 调用接收到的数据。
上述代码使用http post方法向create user endpoint发送 post 请求,然后等待响应。
如果响应状态码为 200,则请求成功,我们将创建的 UserId 保存在共享首选项中,然后我们移动到主屏幕。
这是此屏幕创建配置文件屏幕的完整源代码的链接。
创建一个帖子
我们的一个端点允许用户创建帖子。这是屏幕的样子
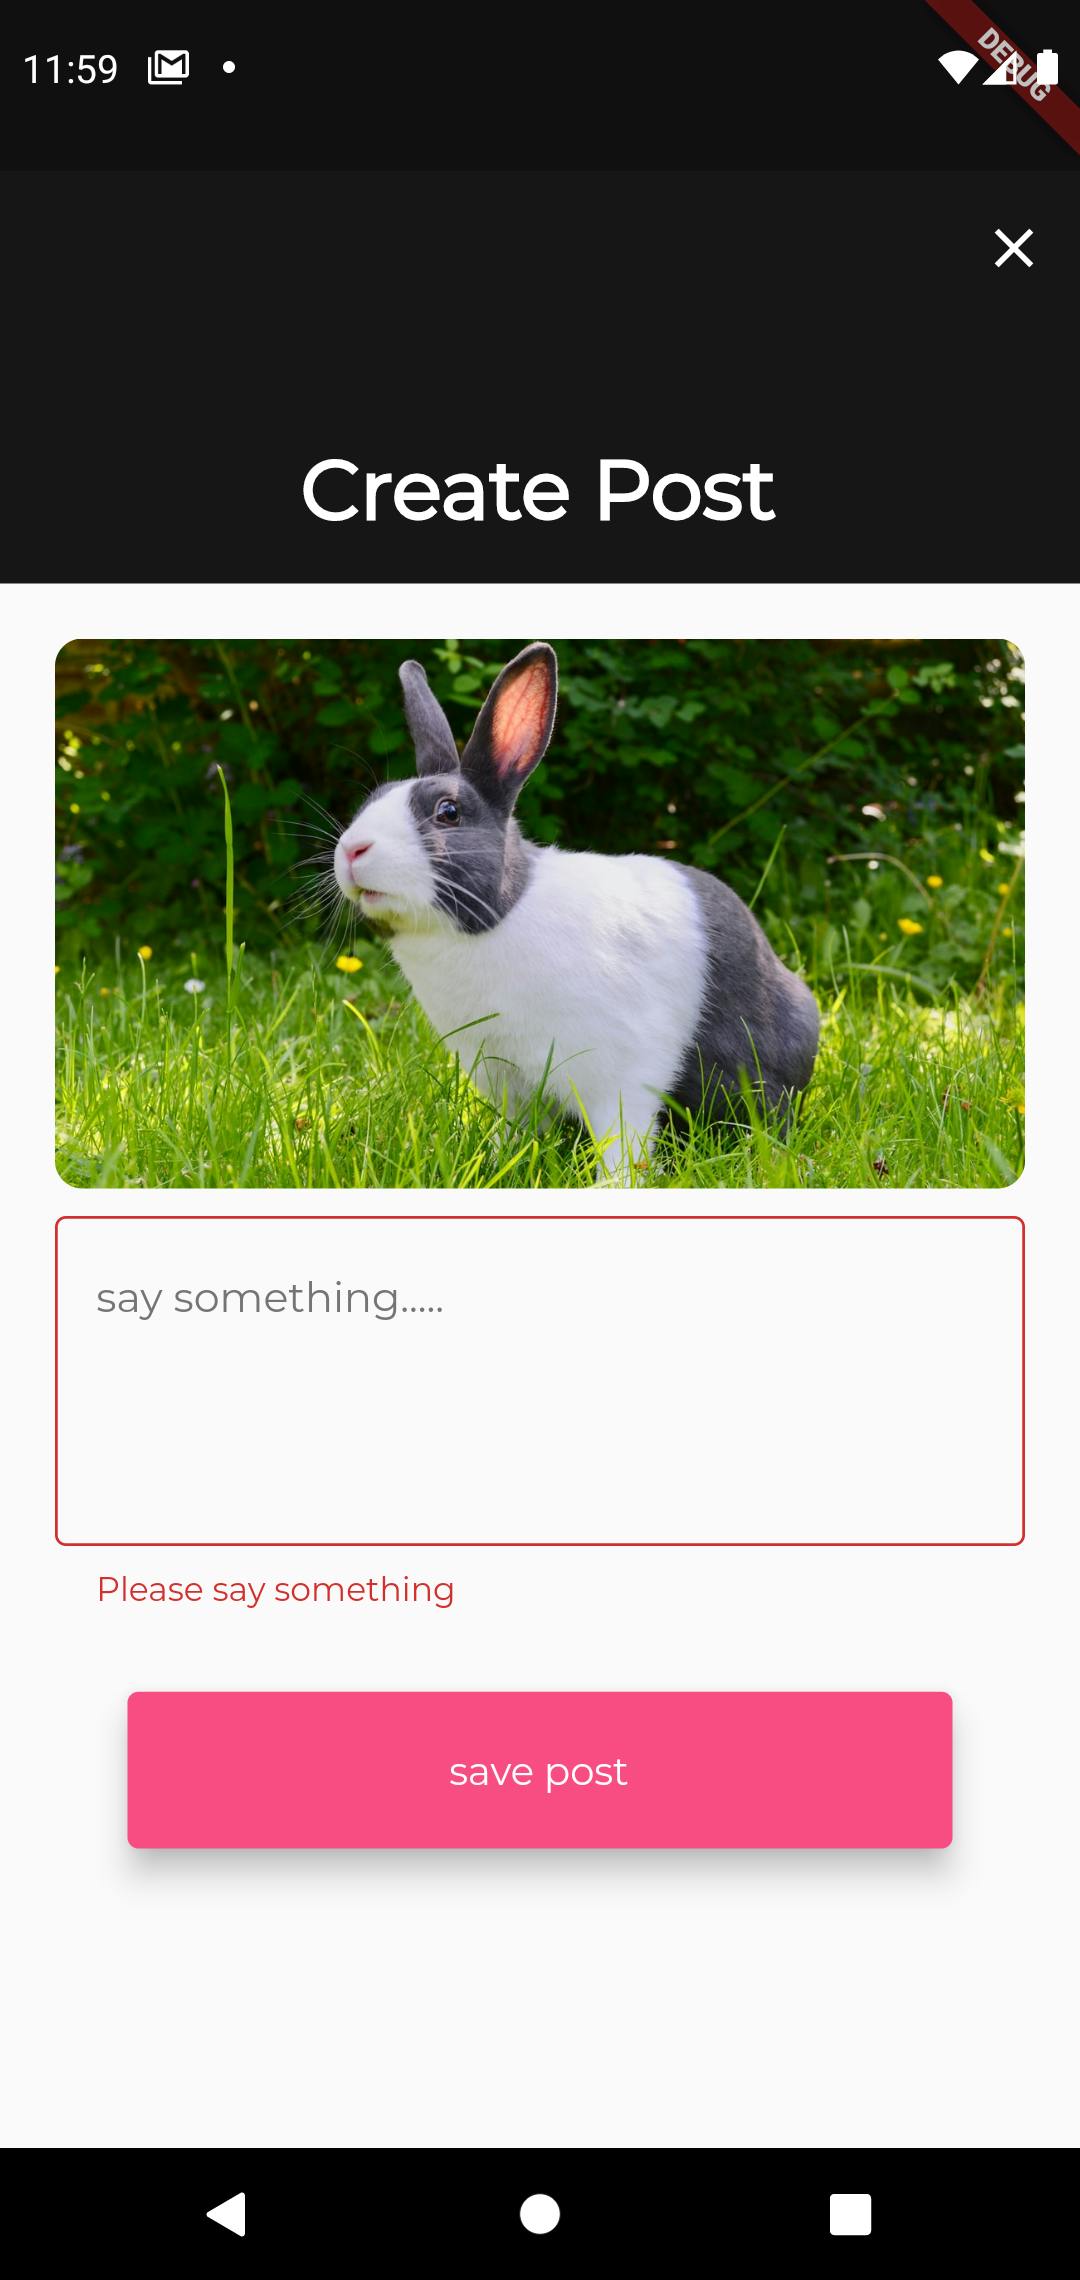
为了创建帖子,用户需要
-
一个用户ID
-
文本
-
图像网址
请记住,出于演示目的,我们使用的是现成的 imageUrl。在一个真实的应用程序中,您必须允许用户选择他们的图像,将其上传到服务器,获取图像 Url,然后使用它来创建帖子。
CreatePost方法看起来类似于CreateUser方法。
 Future<void> createPost(String userId) async {
    await http
        .post(Uri.parse(CREATE_USER_POST_URL),
            body: convert.jsonEncode({
              'userId': userId,
              "postText": postTextController.text,
              "postImage": _postPicUrl[i]
            }))
        .then((response) async {
      var jsonResponse =
          convert.jsonDecode(response.body) as Map<String, dynamic>;

      setState(() {
        _loading = false;
      });
      if (response.statusCode == 400) {
        ScaffoldMessenger.of(context).showSnackBar(SnackBar(
            padding: EdgeInsets.all(10),
            backgroundColor: Colors.red,
            content: Text(jsonResponse['message'])));
      } else if (response.statusCode == 200) {
        print('post id is :' + jsonResponse['id']);
        Navigator.of(context).pop();
      }
    });
  }
列出所有帖子
我们应用程序的主屏幕将显示所有已创建帖子的列表。
像这样的东西
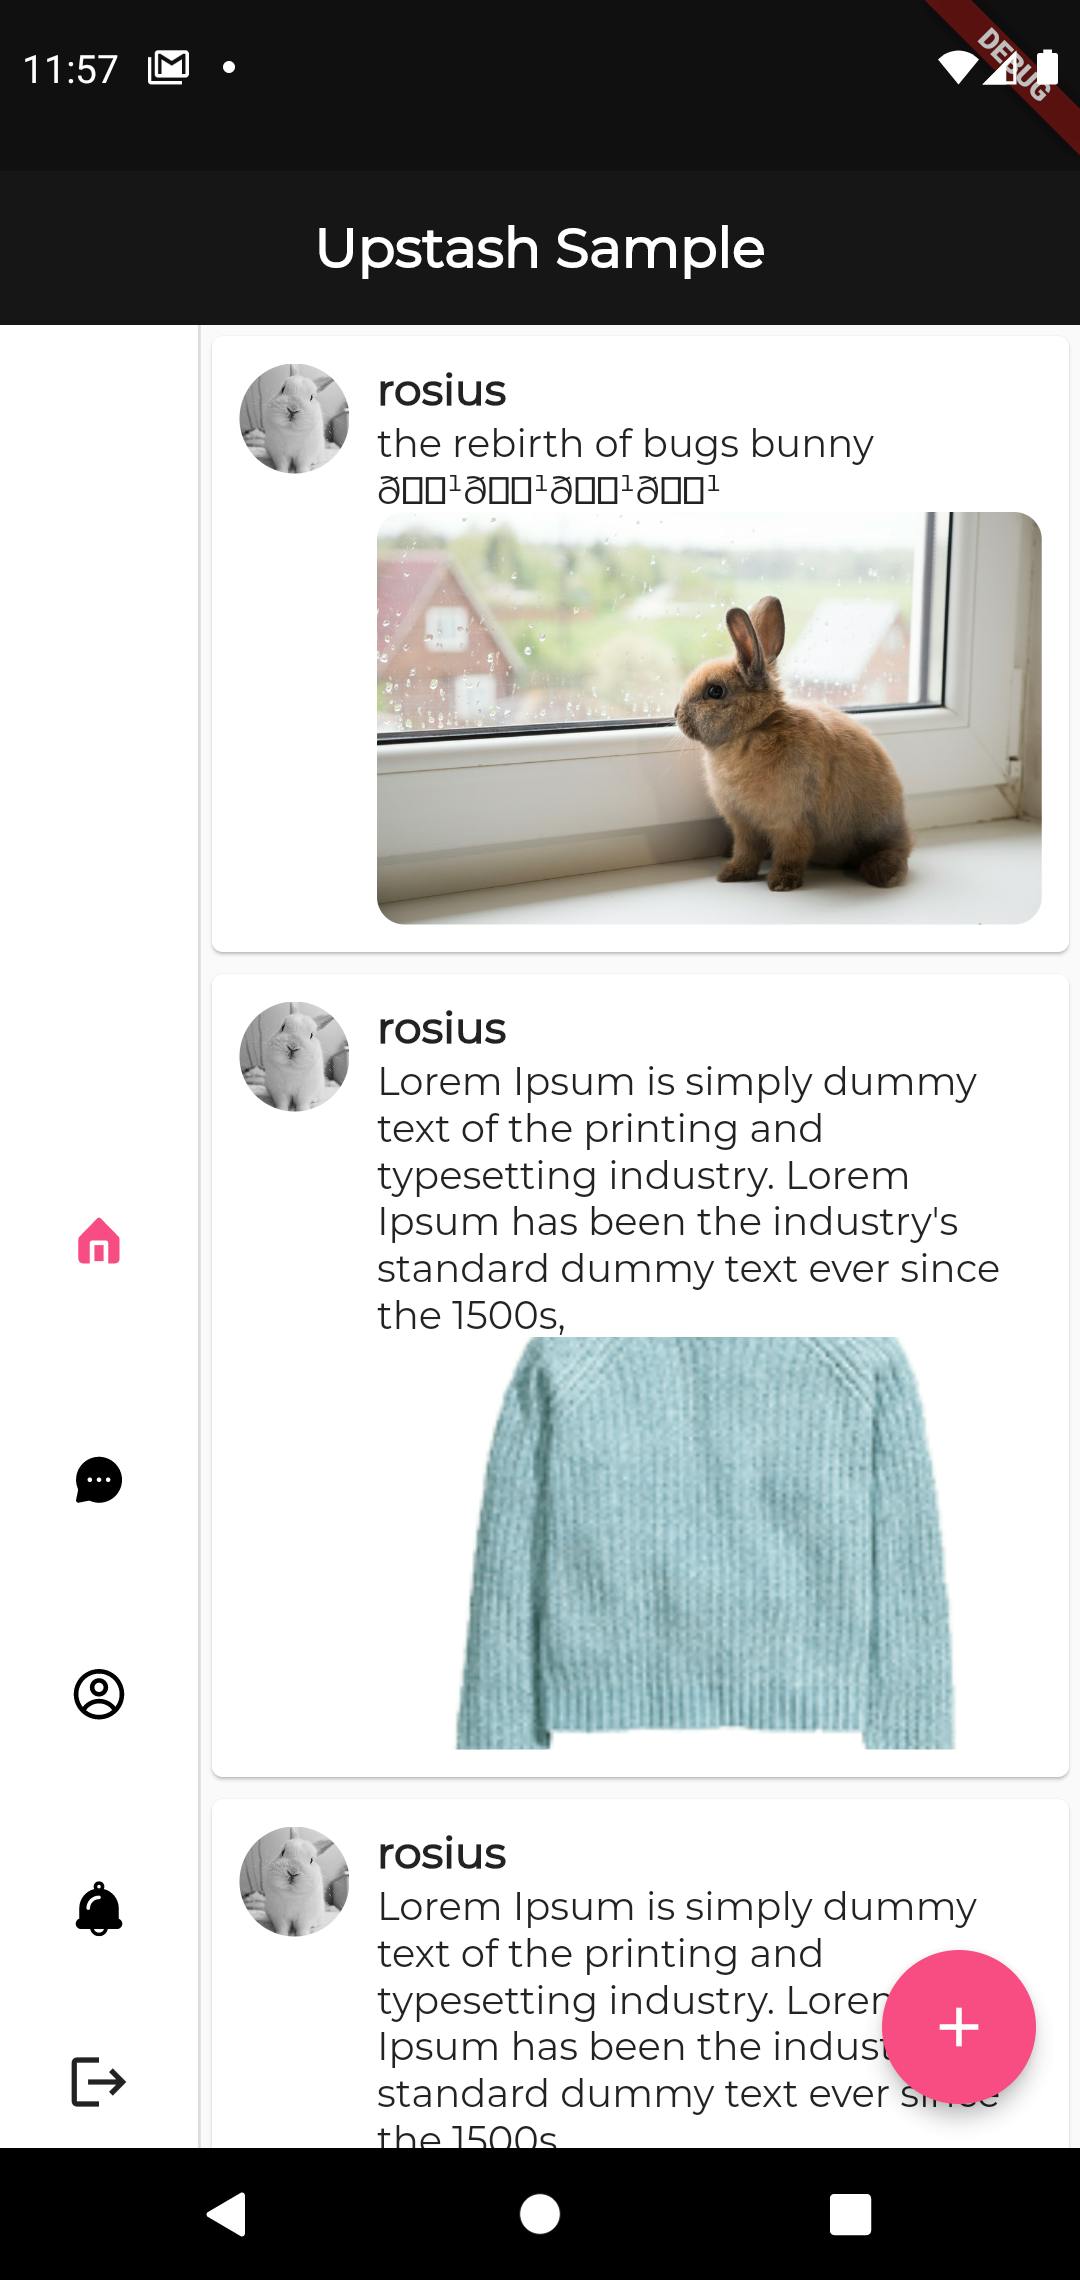 为了以无压力的方式检索所有帖子,我们首先需要创建一个代表单个帖子的自定义 dart 对象。
class Post {
  String? postText;
  String? userId;
  String? createdOn;
  String? id;
  String? postImage;
  PostAdmin? postAdmin;

  Post(
      {this.postText,
      this.userId,
      this.createdOn,
      this.id,
      this.postImage,
      this.postAdmin});

  Post.fromJson(Map<String, dynamic> json) {
    postText = json['postText'];
    userId = json['userId'];
    createdOn = json['createdOn'];
    id = json['id'];
    postImage = json['postImage'];
    postAdmin = json['postAdmin'] != null
        ? PostAdmin.fromJson(json['postAdmin'])
        : null;
  }

  Map<String, dynamic> toJson() {
    final Map<String, dynamic> data = new Map<String, dynamic>();
    data['postText'] = this.postText;
    data['userId'] = this.userId;
    data['createdOn'] = this.createdOn;
    data['id'] = this.id;
    data['postImage'] = this.postImage;
    if (this.postAdmin != null) {
      data['postAdmin'] = this.postAdmin!.toJson();
    }
    return data;
  }
}

class PostAdmin {
  String? timestamp;
  String? userId;
  String? username;
  String? firstName;
  String? lastName;
  String? profilePic;

  PostAdmin(
      {this.timestamp,
      this.userId,
      this.username,
      this.firstName,
      this.lastName,
      this.profilePic});

  PostAdmin.fromJson(Map<String, dynamic> json) {
    timestamp = json['timestamp'];
    userId = json['userId'];
    username = json['username'];
    firstName = json['firstName'];
    lastName = json['lastName'];
    profilePic = json['profilePic'];
  }

  Map<String, dynamic> toJson() {
    final Map<String, dynamic> data = new Map<String, dynamic>();
    data['timestamp'] = this.timestamp;
    data['userId'] = this.userId;
    data['username'] = this.username;
    data['firstName'] = this.firstName;
    data['lastName'] = this.lastName;
    data['profilePic'] = this.profilePic;
    return data;
  }
}
然后,我们将http.Response转换为该自定义 Dart 对象。
List<Post> parsePosts(String responseBody) {
  final parsed = jsonDecode(responseBody).cast<Map<String, dynamic>>();

  return parsed.map<Post>((json) => Post.fromJson(json)).toList();
}

Future<List<Post>> fetchPosts(http.Client client) async {
  final response = await client
      .get(Uri.parse(GET_POSTS));

  return compute(parsePosts,response.body);
}
fetchPosts方法的返回类型是 Future>。
如果您在较慢的设备上运行 fetchPosts() 函数,您可能会注意到应用程序在解析和转换 JSON 时会短暂冻结。这是 jank,你想摆脱它。
我们通过使用compute函数将解析和转换移至后台来消除卡顿
compute(parsePosts,response.body);
compute() 函数在后台隔离中运行昂贵的函数并返回结果
在主屏幕文件中,我们将使用 FutureBuilder 小部件从数据库中异步抓取所有帖子作为列表。
我们必须提供两个参数:
- 你想合作的未来。在这种情况下,future 从 fetchPosts() 函数返回。
一个构建器函数,它根据 Future 的状态告诉 Flutter 要渲染什么:加载、成功或错误。
请注意,snapshot.hasData 仅在快照包含非空数据值时返回 true。
因为 fetchPosts 只能返回非空值,所以即使在“404 Not Found”服务器响应的情况下,该函数也应该抛出异常。抛出异常会将 snapshot.hasError 设置为 true,这可用于显示错误消息。
否则,将显示微调器。
Expanded(child: FutureBuilder<List<Post>>(
              future: _posts,
              builder: (context, snapshot) {
                if (snapshot.hasData) {
                  List<Post>? posts = snapshot.data;
                  if(posts != null){
                    return ListView.builder(itemBuilder: (context,index){
                      return  Card(
                        child: Container(
                          padding: EdgeInsets.all(10),
                          child: Row(
                           crossAxisAlignment: CrossAxisAlignment.start,
                            children: [
                          ClipRRect(
                          borderRadius: BorderRadius.circular(1000),
                          child: Image.network(
                            posts[index].postAdmin!.profilePic!,
                            fit: BoxFit.cover,
                            height: 40,
                            width: 40,
                          ),
                      ),
                          Expanded(
                            child: Container(
                              padding: EdgeInsets.only(left: 10),
                              child: Column(
                               mainAxisAlignment: MainAxisAlignment.start,
                               crossAxisAlignment: CrossAxisAlignment.start,
                                children: [
                              Text(posts[index].postAdmin!.username!,style: TextStyle(fontWeight: FontWeight.bold,fontSize: 16),),
                              Text(posts[index].postText!),
                                  ClipRRect(
                                    borderRadius: BorderRadius.circular(10),
                                    child: Image.network(
                                      posts[index].postImage!,
                                      fit: BoxFit.cover,
                                      height: 150,
                                      width: size.width,
                                    ),
                                  ),
                                ],
                              ),
                            ),
                          )
                            ],
                          ),
                        ),
                      );
                    },itemCount: posts.length,);
                  }

                } else if (snapshot.hasError) {
                  return Text("${snapshot.error}");
                }

                // By default, show a loading spinner.
                return Container(
                    height: 40,
                    width: 40,

                    child: Center(child: CircularProgressIndicator(valueColor: AlwaysStoppedAnimation<Color>(Theme.of(context).colorScheme.secondary))));
              },
            ))
在 initState 方法中,我们调用 fetchPosts
late Future<List<Post>> _posts;


  @override
  void initState() {
    // TODO: implement initState
    super.initState();
    _posts = fetchPosts(http.Client());

  }
我们之所以在 initState 中调用 fetchPosts 而不是 build 方法,是因为 Flutter 每次需要更改视图中的任何内容时都会调用 build() 方法,而且这种情况经常发生。在您的 build() 方法中保留 fetch 调用会使 API 充满不必要的调用并减慢您的应用程序的速度。
随意浏览完整源代码
仍然有几个端点可以为其创建接口,但是什么是好的教程,没有练习😂
结论
在本系列文章中,我们研究了如何使用Upstash构建无服务器的 rest API,同时通过移动应用程序使用它们。
我很想看看您接下来使用 Upstash 构建什么,或者您如何增强本教程以适合您的用例。
如果您觉得这篇文章有帮助,请在您的社交媒体页面上分享。
有问题吗?发表评论。
如果您发现错误,您知道该怎么做。发表评论,我会尽快处理。
快乐编码✌🏿
参考
-
Upstash 文档
-
雷迪斯
-
颤振
-
从互联网获取数据

Redis社区为您提供最前沿的新闻资讯和知识内容
更多推荐
 0
0 0
0- 0



 已为社区贡献422条内容

所有评论(0)