


WordPress as We know is one of popular Content Management System (CMS). One of the feature that commonly used is used as platform to host blog. Actually WordPress provide their Software as a Service (SaaS) but maybe in some cases or users, We need to use Self Managed WordPress. Maybe because subscription/pricing, company compliance, etc.
In this blogpost, I will discuss how to provision and configure WordPress self managed on Amazon Lightsail. Configuration or provision of AWS resources is using Terraform with backend remote (Terraform Cloud).
Configuration Summary
In this article, the file structure used by Terraform codes is described below:
modules/
├─ lighstail/
│  ├─ lighstail-apse1/
│  │  ├─ wordpress/
│  │  │  ├─ instance.tf
│  │  │  ├─ variables.tf
│  │  │  ├─ outputs.tf
lightsail/
├─ lightsail-apse1/
│  ├─ main.tf
│  ├─ variables.tf
│  ├─ outputs.tf
│  ├─ instance.tf
Lightsail resources will be provisioned based on the self-managed module that I created. In this module resided Lightsail WordPress configuration template and some other parameters.
Configuration Steps
- I started the configuration by creating a self-managed module in directory modules/lightsail/lightsail-apse1/wordpress. The first file that I want to discuss is modules/lightsail/lightsail-apse1/wordpress/instance.tf. In this file, I create template for pre-configured Lightsail wordpress instance using wordpress blueprint provided by Amazon Lightsail. Value of Terraform arguments I referred from variables that are defined in file modules/lightsail/lightsail-apse1/wordpress/variables.tf and will be explained later.
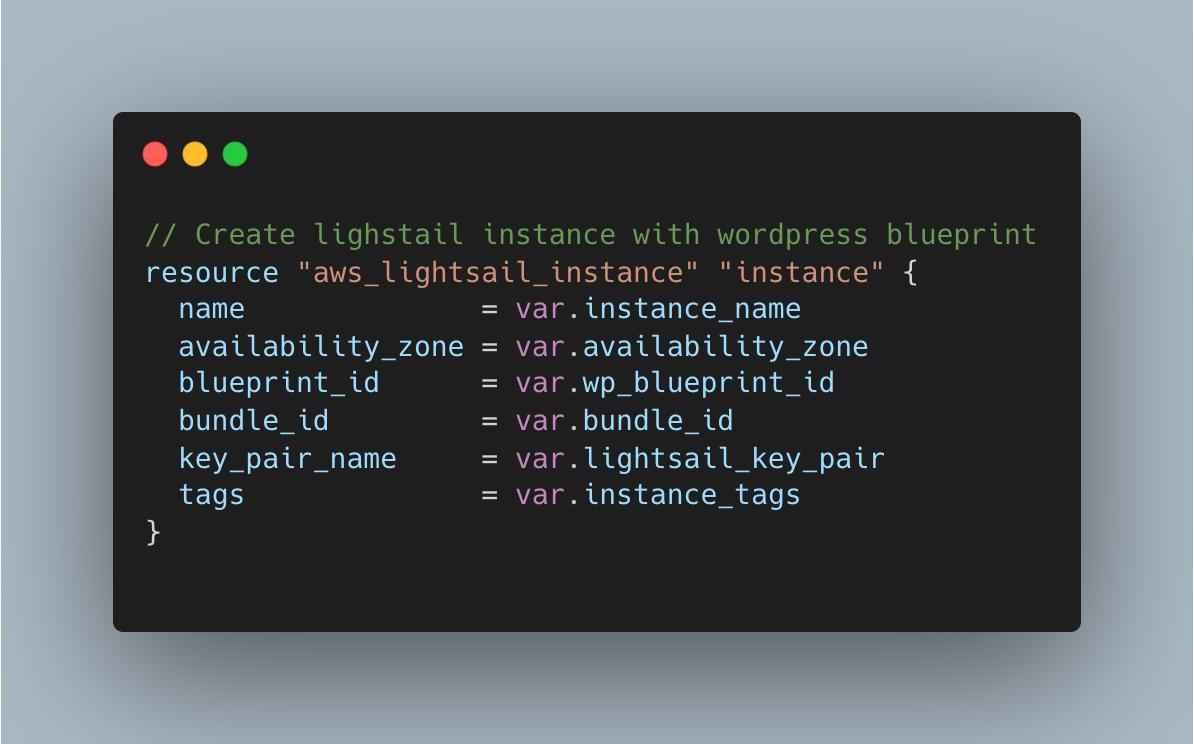
# Create lighstail instance with wordpress blueprint
resource "aws_lightsail_instance" "instance" {
  name              = var.instance_name
  availability_zone = var.availability_zone
  blueprint_id      = var.wp_blueprint_id
  bundle_id         = var.bundle_id
  key_pair_name     = var.lightsail_key_pair
  tags              = var.instance_tags
}
2. Next in file modules/lightsail/lightsail-apse1/wordpress/variables.tf, I defined variables mentioned in step 1. I defined default value in some variables, such as blueprint_id, bundle_id and key pair.
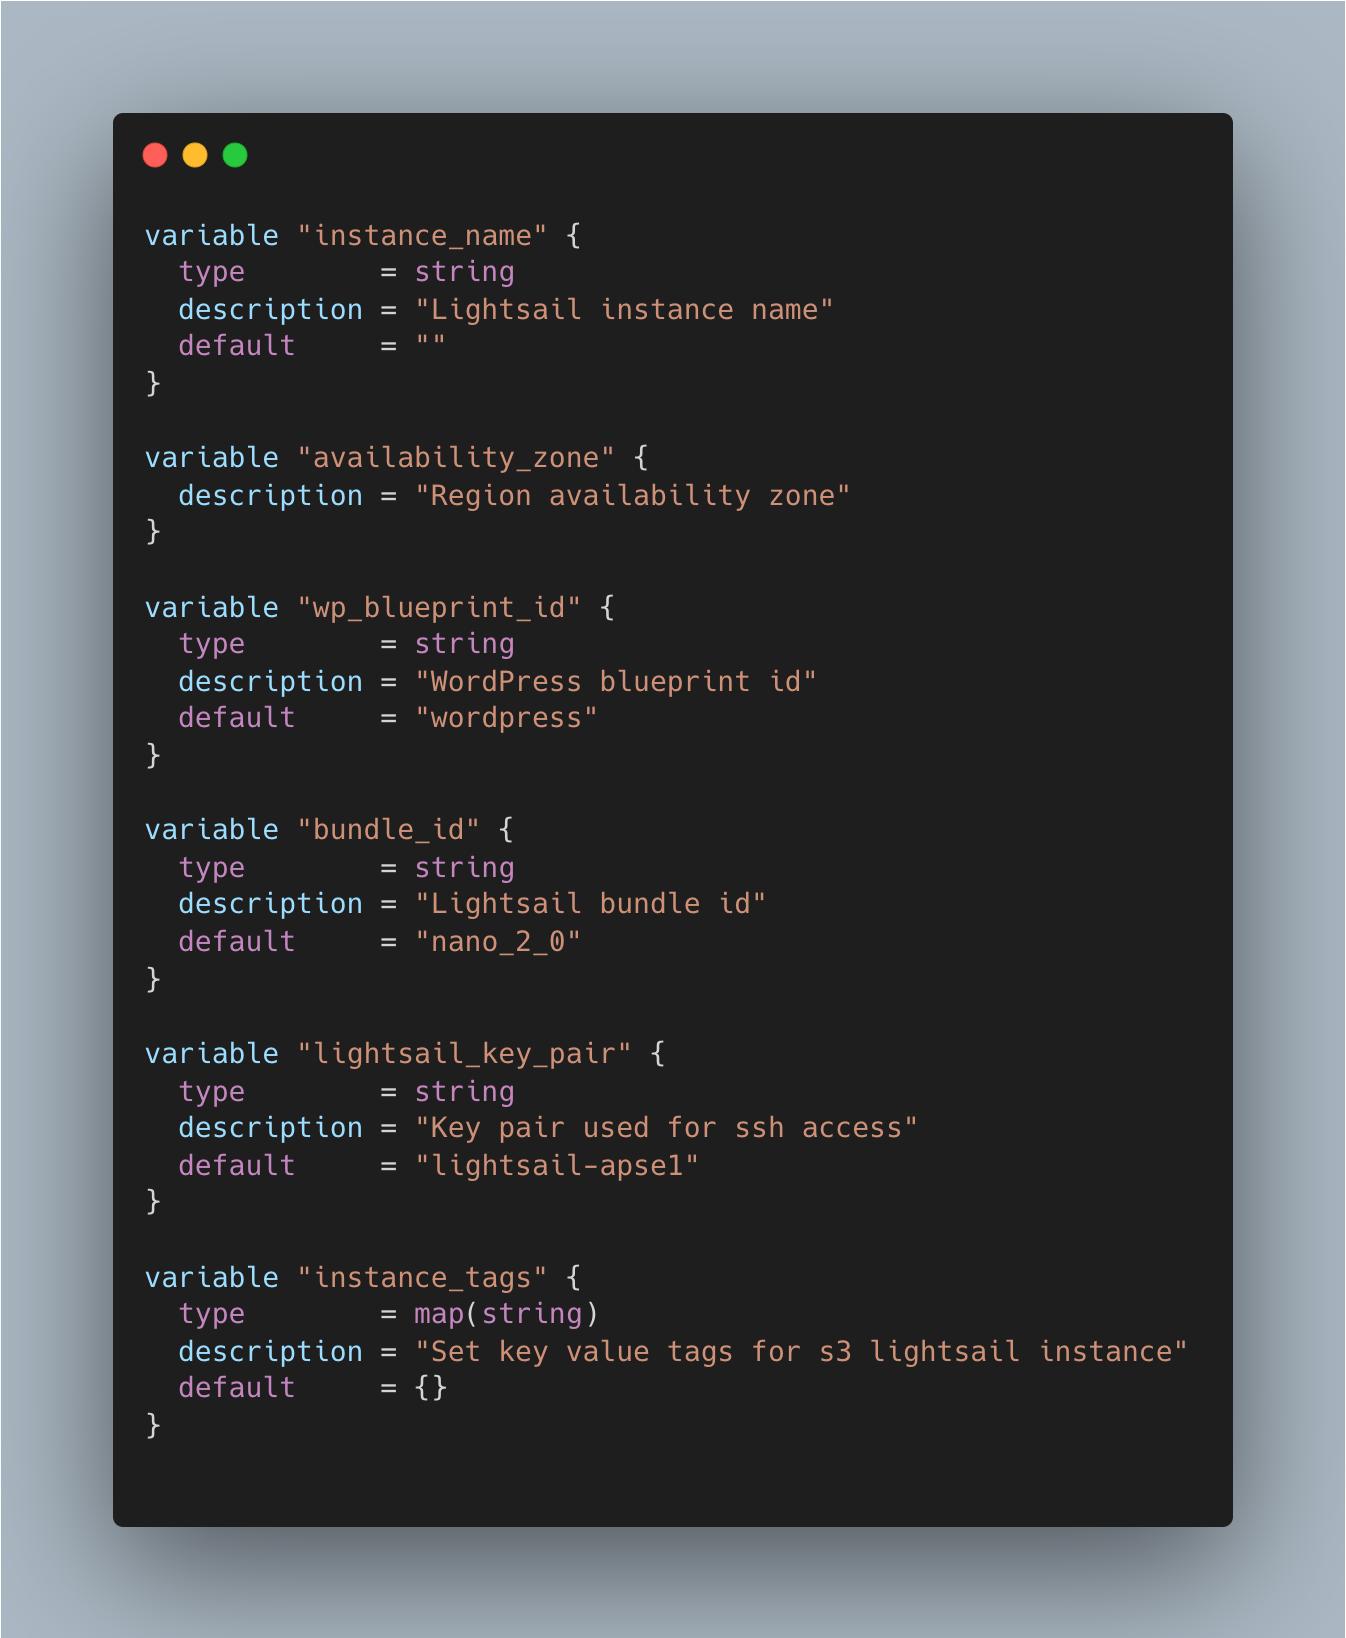
variable "instance_name" {
  type        = string
  description = "Lightsail instance name"
  default     = ""
}

variable "availability_zone" {
  description = "Region availability zone"
}

variable "wp_blueprint_id" {
  type        = string
  description = "WordPress blueprint id"
  default     = "wordpress"
}

variable "bundle_id" {
  type        = string
  description = "Lightsail bundle id"
  default     = "nano_2_0"
}

variable "lightsail_key_pair" {
  type        = string
  description = "Key pair used for ssh access"
  default     = "lightsail-apse1"
}

variable "instance_tags" {
  type        = map(string)
  description = "Set key value tags for lightsail instance"
  default     = {}
}
3. Next in file modules/lightsail/lightsail-apse1/wordpress/outputs.tf, I declared outputs that can be called later in the root module. Output is Lightsail instance id.
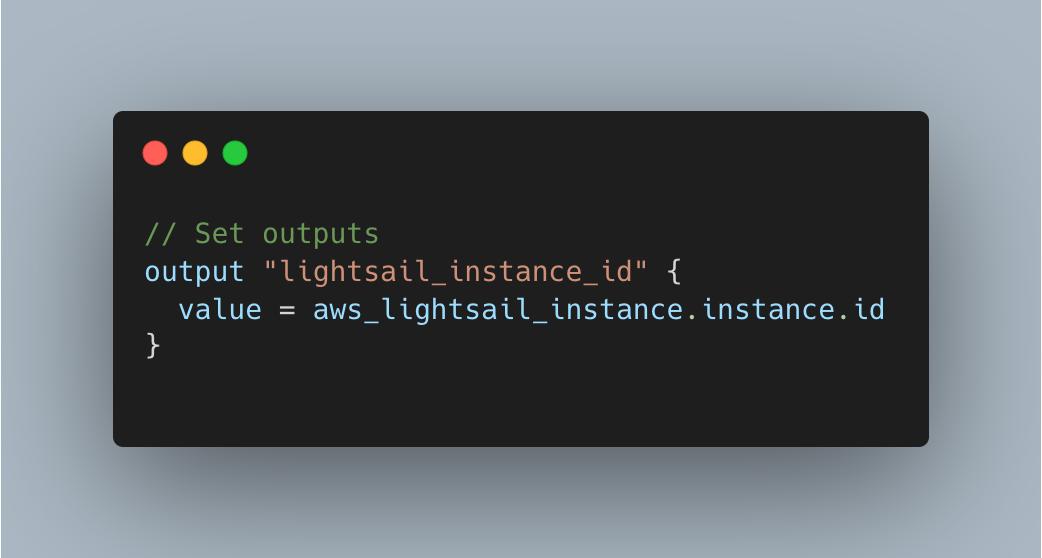
# Set outputs
output "lightsail_instance_id" {
  value = aws_lightsail_instance.instance.id
}
4. After creating the child module that is used for template Lightsail wordpress instance, the next step is to configure the Lightsail root module. I started by discussing file lightsail/lightsail-apse1/main.tf. In this file, I declared terraform configuration that refers to terraform cloud (app.terraform.io) as a remote backend. I also declared the organization and workspace used by Terraform code. Next in this file, I declared the provider used by Terraform code which is Hashicorp/AWS, and versions related to it. Last, I declared the AWS region used by Terraform code to refer to the variable aws_region that is configured in lightsail/lightsail-apse1/variables.tf which I will explain later.
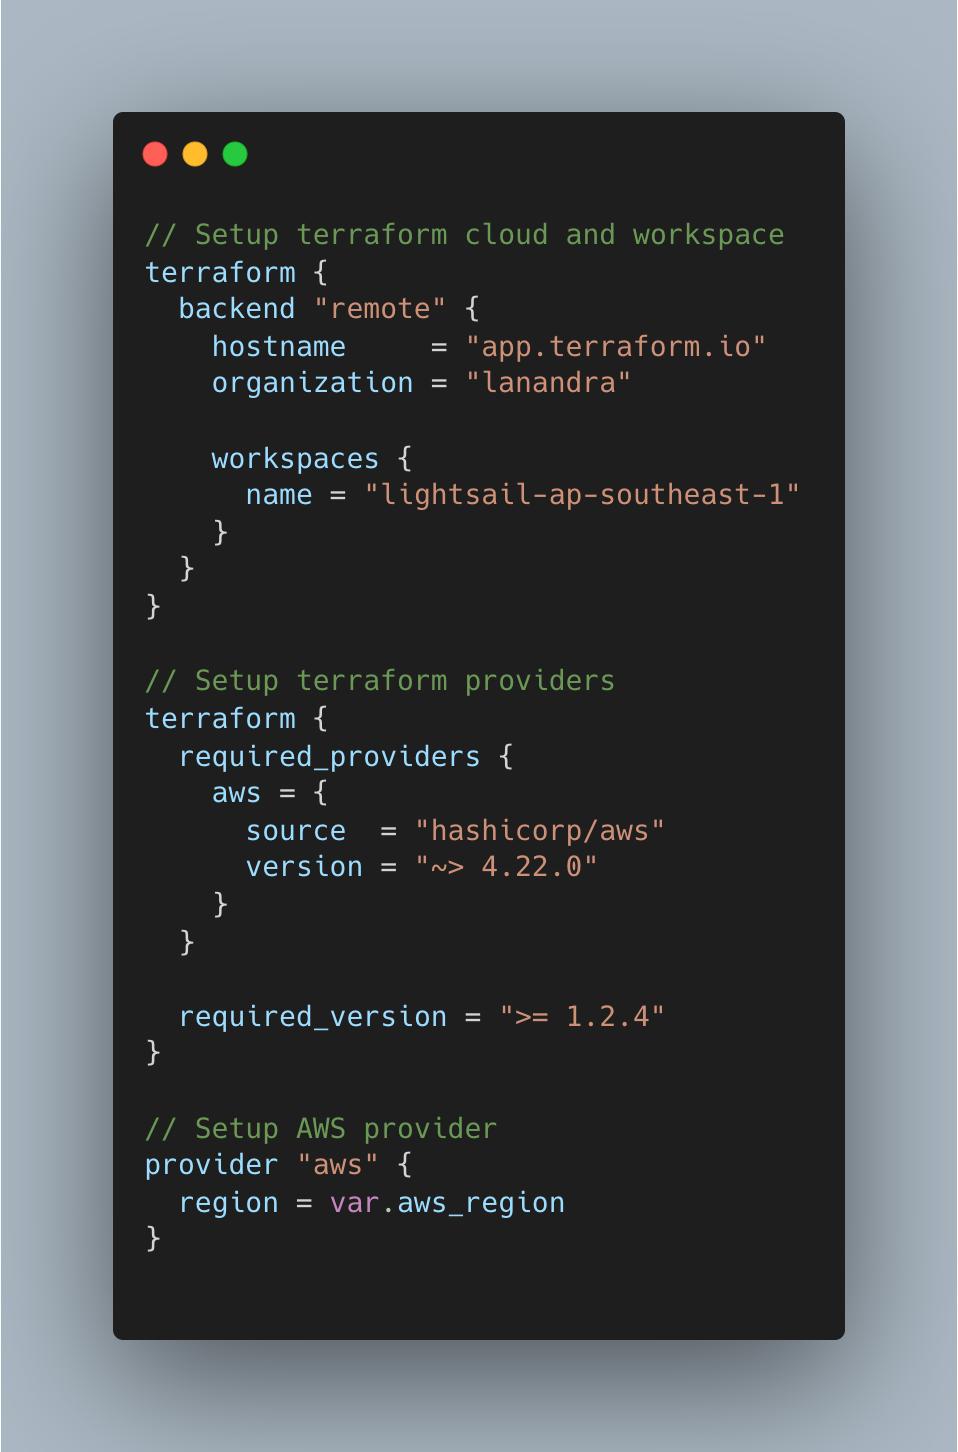
# Setup terraform cloud and workspace
terraform {
  backend "remote" {
    hostname     = "app.terraform.io"
    organization = "lanandra"

    workspaces {
      name = "lightsail-ap-southeast-1"
    }
  }
}

# Setup terraform providers
terraform {
  required_providers {
    aws = {
      source  = "hashicorp/aws"
      version = "~> 4.22.0"
    }
  }

  required_version = ">= 1.2.4"
}

# Setup AWS provider
provider "aws" {
  region = var.aws_region
}
5. Next, I defined variables used by the Lightsail root module in file lightsail/lightsail-apse1/variables.tf.
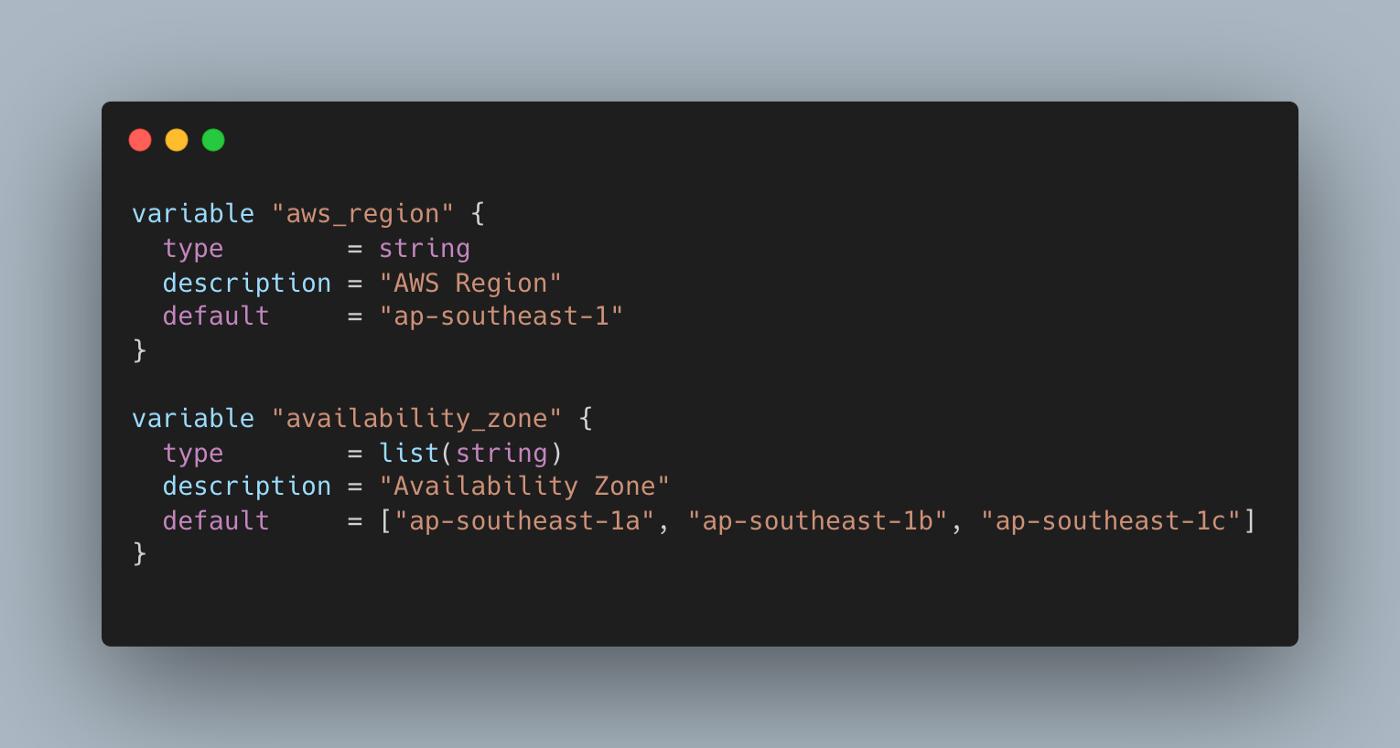
variable "aws_region" {
  type        = string
  description = "AWS Region"
  default     = "ap-southeast-1"
}

variable "availability_zone" {
  type        = list(string)
  description = "Availability Zone"
  default     = ["ap-southeast-1a", "ap-southeast-1b", "ap-southeast-1c"]
}
6. Next in file lightsail/lightsail-apse1/instance.tf, I created Lightsail instance with reference from wordpress bundled instance child module that I created before. In this root module configuration, I declared instance name, availability zone used by instance and instance tags. Beside that, I created and associated static IP address to that wordpress bundled instance.
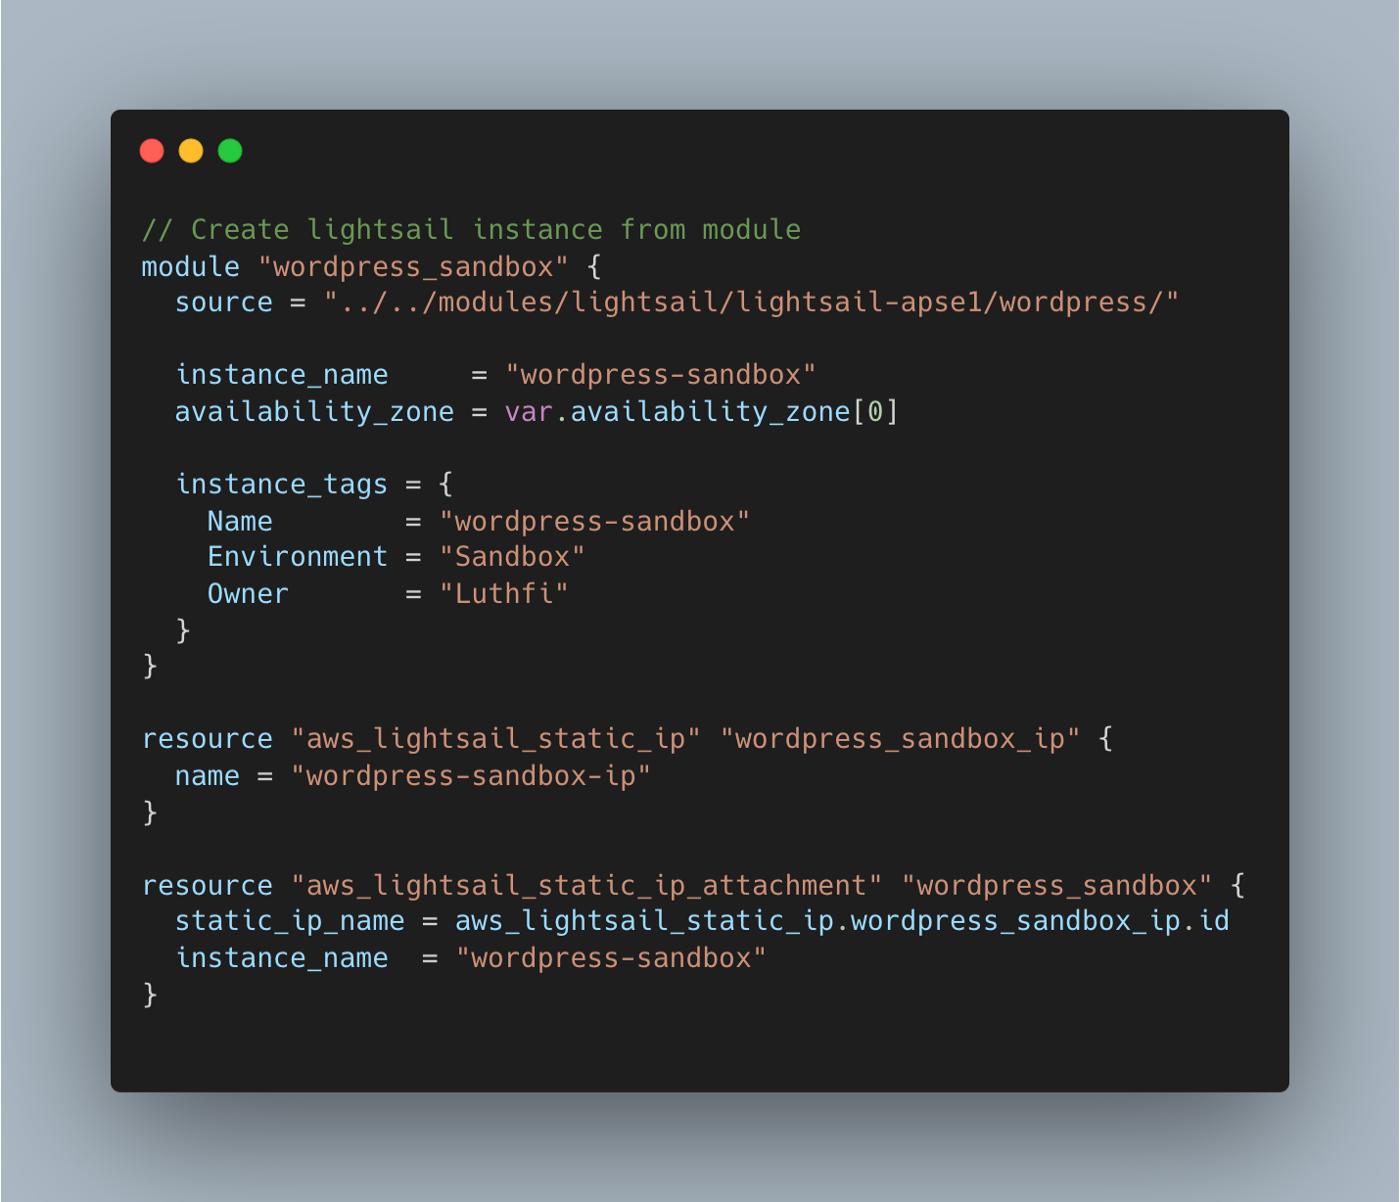
# Create lightsail instance from module
module "wordpress_sandbox" {
  source = "../../modules/lightsail/lightsail-apse1/wordpress/"

  instance_name     = "wordpress-sandbox"
  availability_zone = var.availability_zone[0]

  instance_tags = {
    Name        = "wordpress-sandbox"
    Environment = "Sandbox"
    Owner       = "Luthfi"
  }
}

resource "aws_lightsail_static_ip" "wordpress_sandbox_ip" {
  name = "wordpress-sandbox-ip"
}

resource "aws_lightsail_static_ip_attachment" "wordpress_sandbox" {
  static_ip_name = aws_lightsail_static_ip.wordpress_sandbox_ip.id
  instance_name  = "wordpress-sandbox"
}
7. Next in file lightsail/lightsail-apse1/outputs.tf, I forwarded the value of outputs that have been declared in the child module such as instance name. This output value is used for reference instance name in “aws_lightsail_static_ip_attachment”.

# Set outputs
output "wordpress_sandbox_instance_id" {
  value = module.wordpress_sandbox.lightsail_instance_id
}
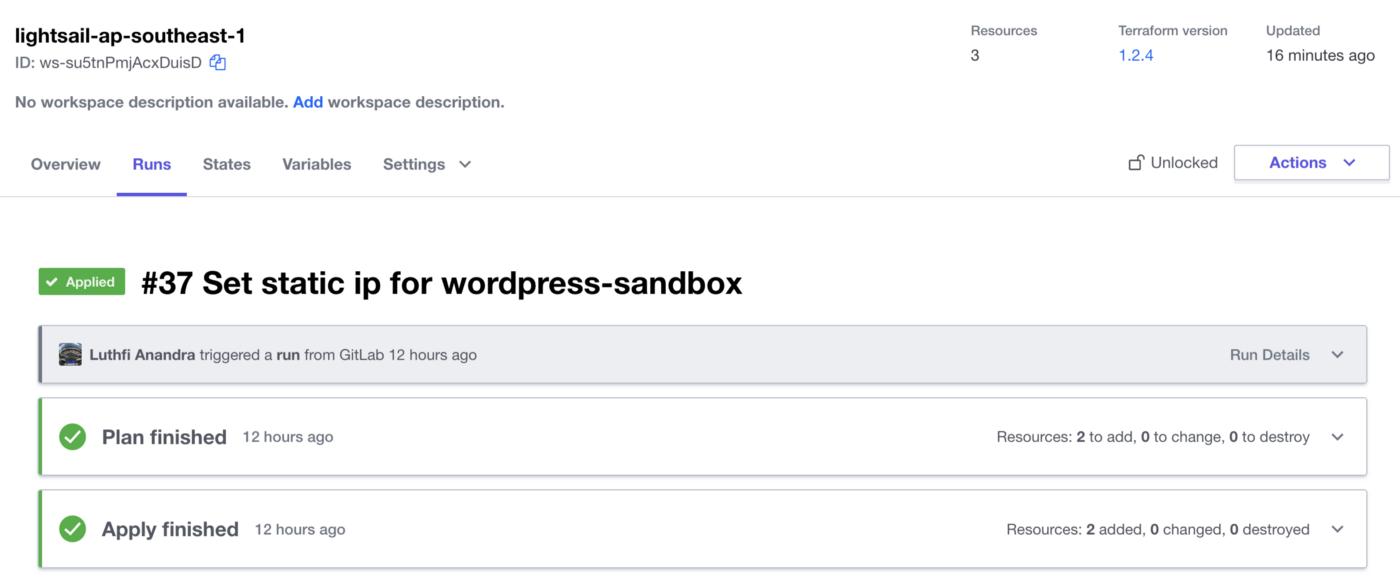
8. Next commit and push terraform codes to the repository. After that run Terraform plan and Terraform apply from Terraform Cloud workspace so that infrastructures or resources can be provisioned. This activity will not be explained in detail and I will only show the simulation. If you are interested in how to configure Terraform Cloud workspace and how to run Terraform plans and apply for the provision of AWS resources, please check out my other blog post here.
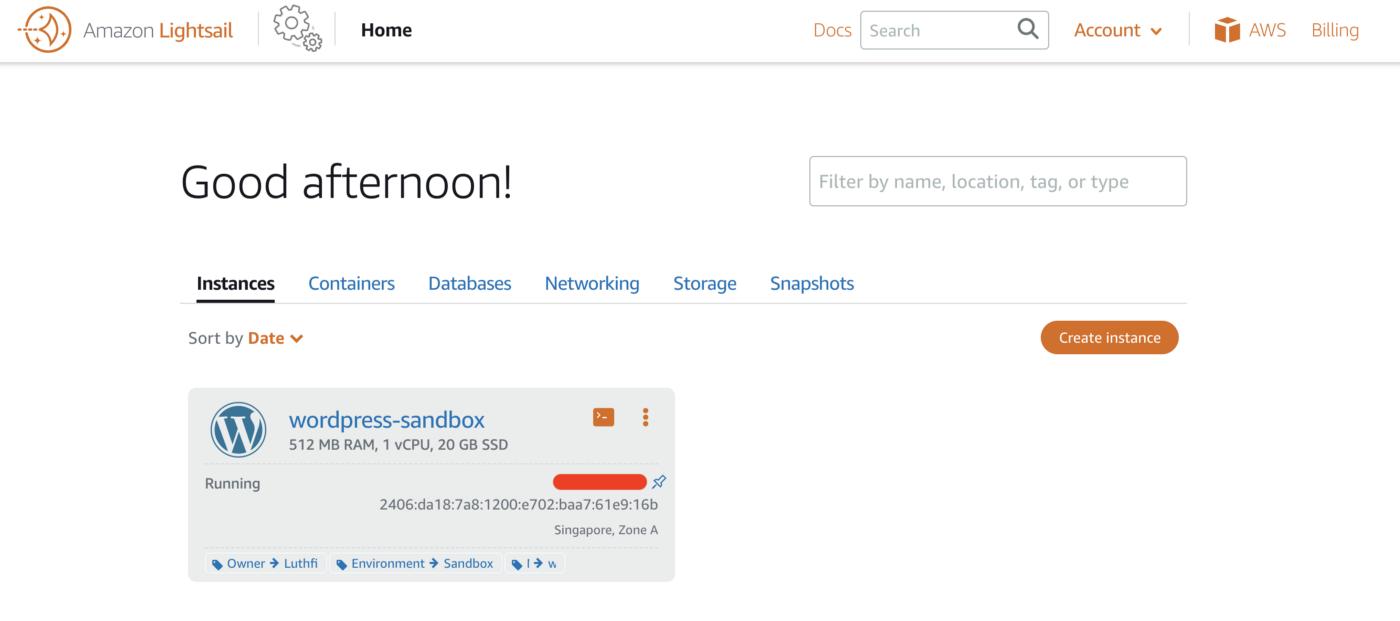
9. After resource provisioning via terraform has been finished, then we can verify resources have been successfully created via the AWS web console. The first resource will be Lightsail instance. Go to Lighstail service page, then choose Instances. Verify wordpress bundled instance that declared in Terraform has been created.
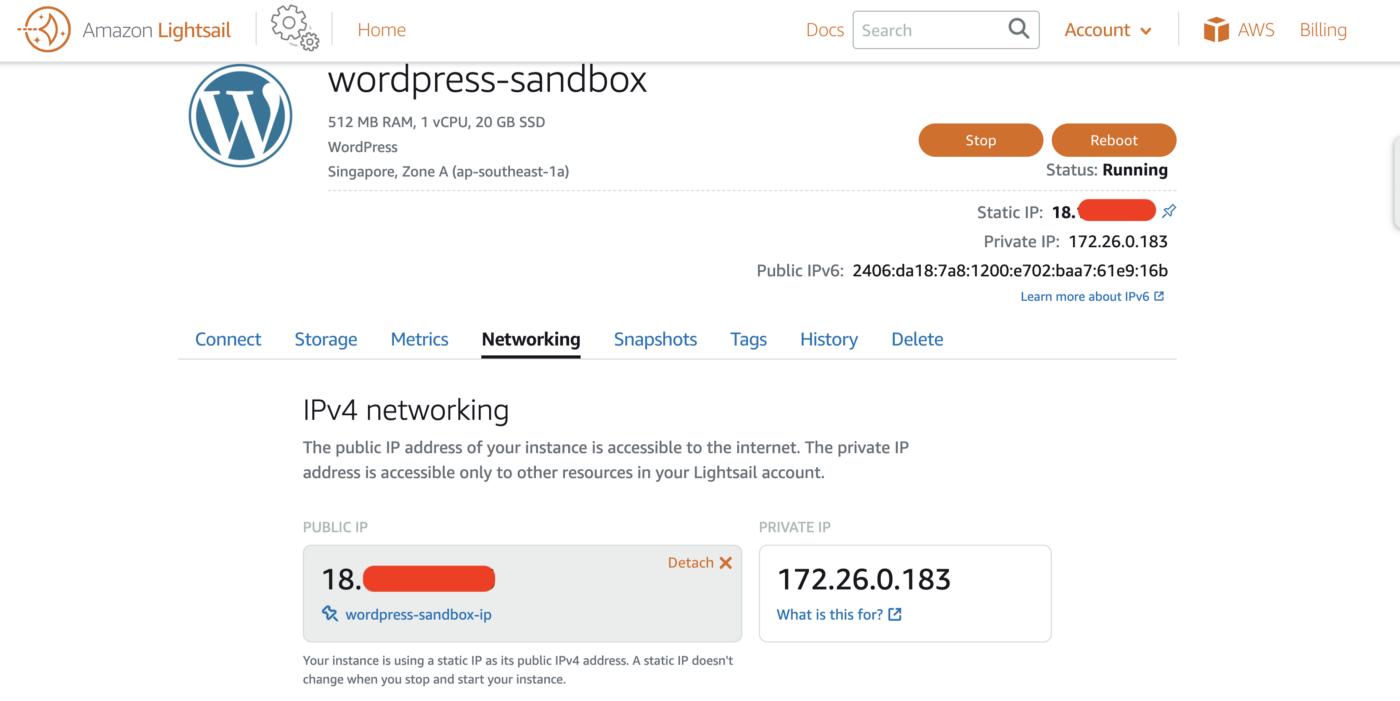
10. As explained before, there will be static IP address associated with that wordpress bundled instance. Go to instance detail by clicking its name. Go to menu Networking. Verify static IP address has been associated with instance.
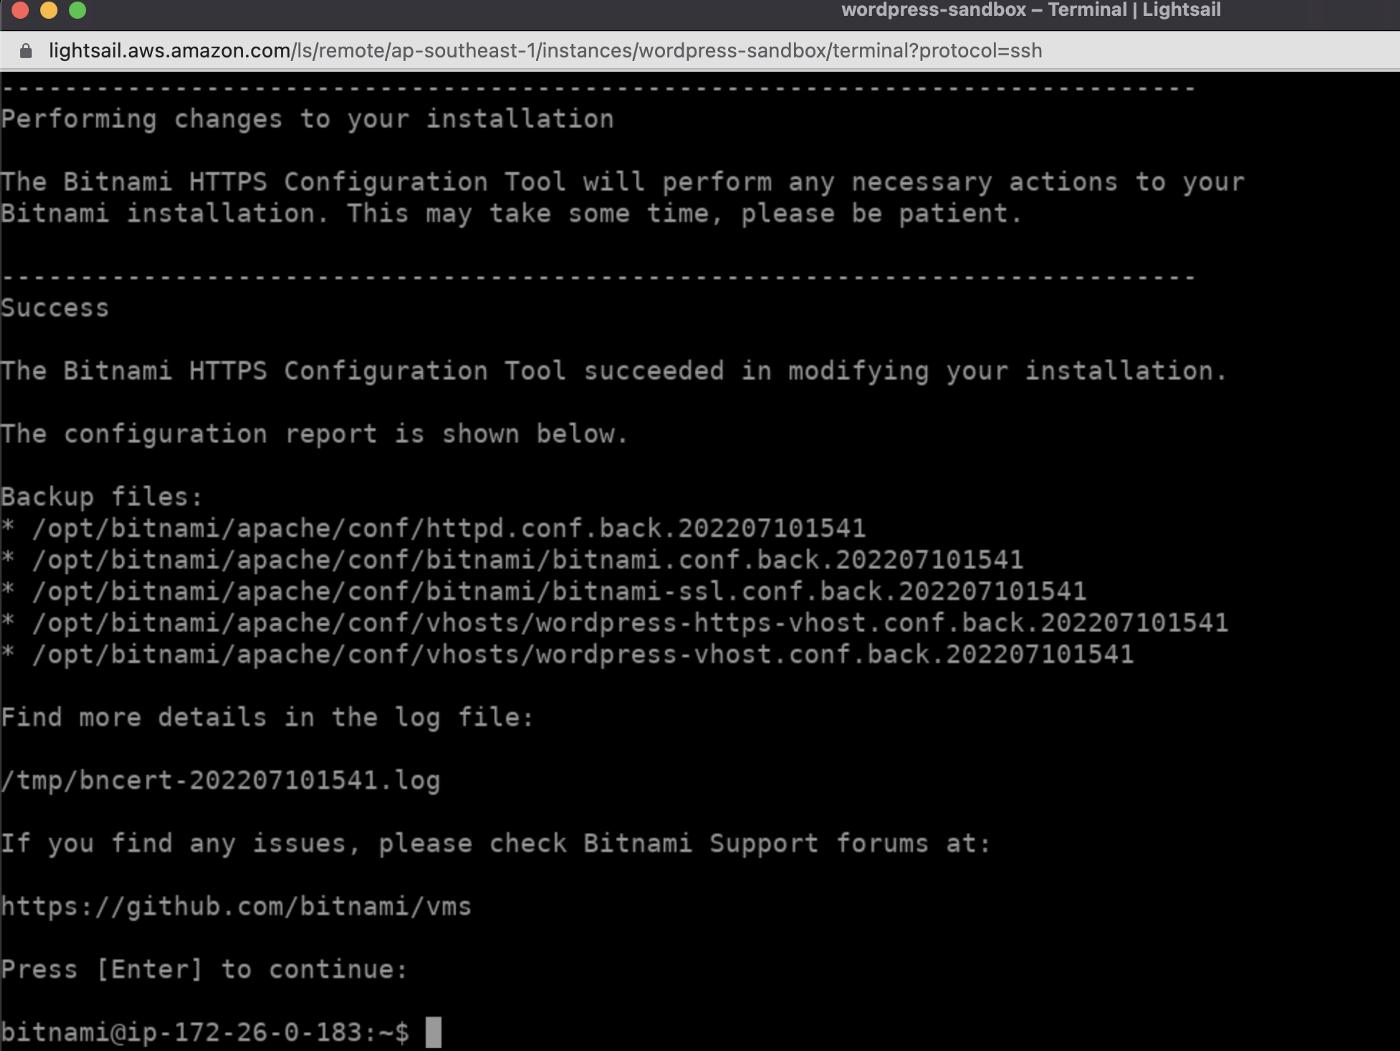
11. By default, wordpress run using http protocol. We can configure wordpress as secure website using https protocol with help from Bitnami HTTPS configuration tool (bncert). Please check the configuration details on this Enabling HTTPS on your WordPress instance in Amazon Lightsail documentation. I also have configured domain name used for this wordpress on my DNS server. Domain name that will be used is blog-sandbox.ludesdeveloper.com and www.blog-sandbox.ludesdeveloper.com. Domain name with www is needed by bncert configuration. Verify all instructions explained in documentation has been executed successfully.
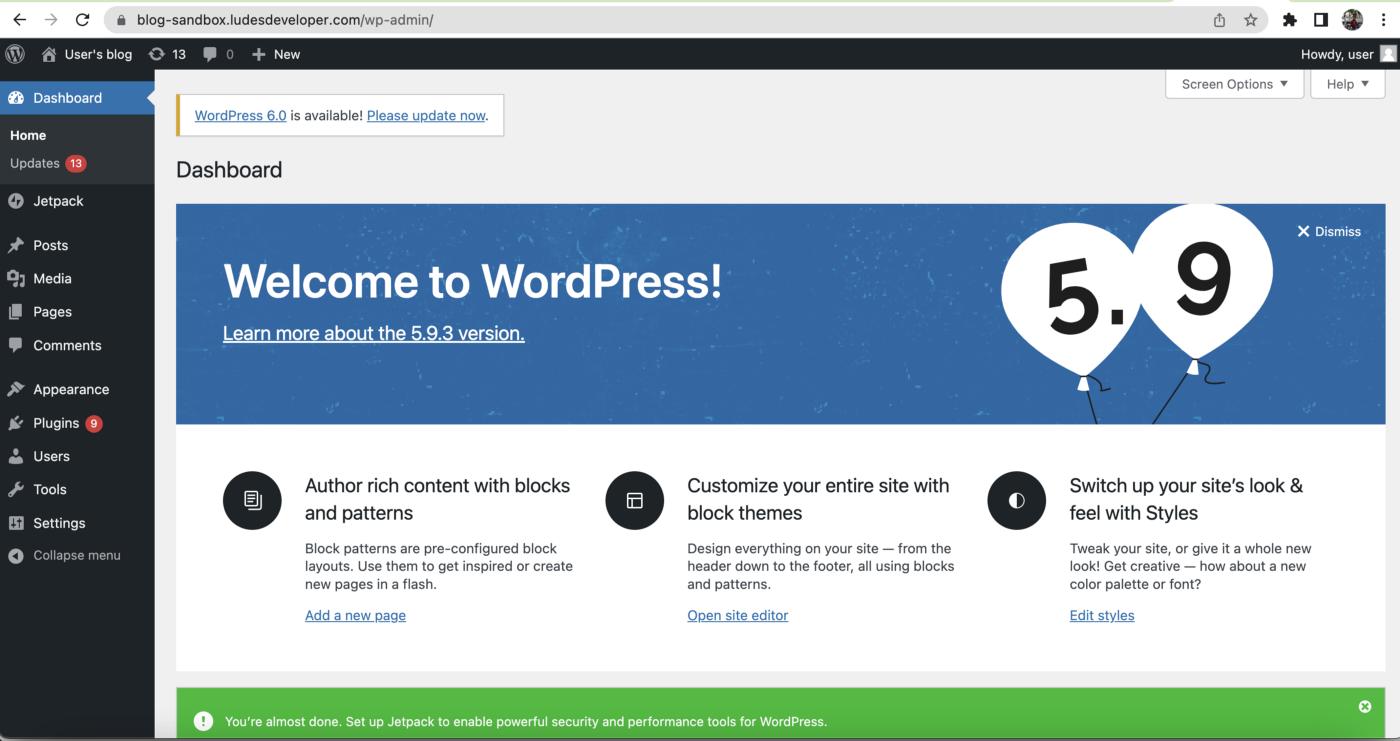
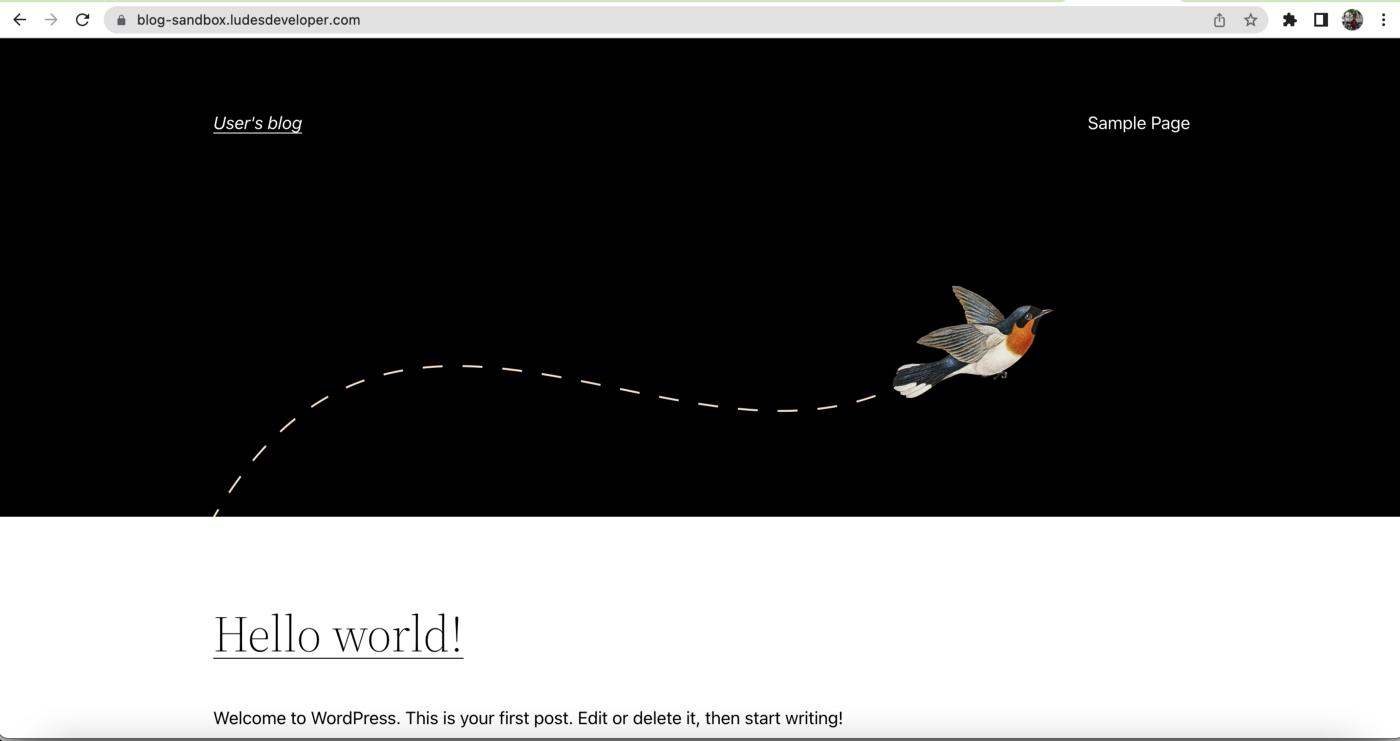
13. Next verify wordpress admin page or blog/wordpress website can be accessed.
Conclusion
So We have reached the last section of this article. There are some key takeaways that I want to point out:
- Amazon Lightsail provided Virtual Private Server (VPS) with pre-configured WordPress image
- Lightsail configuration can be declared using the Infrastructure as Code (IaC) method. So that We can have a state file of infrastructure that has been created
Please check my GitHub repo to see the source codes used in this article. The child module for template wordpress instance can be found in Lightsail WordPress module directory. Configuration for Lightsail root module can be found in Lightsail directory.
Please comment if you have any suggestions, critiques, or thoughts.
Hope this article will benefit you. Thank you.
More content at PlainEnglish.io. Sign up for our free weekly newsletter. Follow us on Twitter and LinkedIn. Check out our Community Discord and join our Talent Collective.


 已为社区贡献20534条内容

所有评论(0)