
在 Strapi V3 for Next.js 中创建预览按钮
有抱负的技术作家、软件程序员 Quadri Sheriff 和热爱尖端技术挑战的全栈工程师 Amir Tadrisi 撰写了精彩的文章;使用 Strapi 后端使用 Next 应用程序实现预览和如何在 Nextjs 中使用图像和预览 - Strapi 博客关于在 Strapi 中使用 Next.js 的预览系统。 我借此机会感谢他们,因为这个用例非常受欢迎,他们的文章回答了很多问题。我想强调这种类
有抱负的技术作家、软件程序员 Quadri Sheriff 和热爱尖端技术挑战的全栈工程师 Amir Tadrisi 撰写了精彩的文章;使用 Strapi 后端使用 Next 应用程序实现预览和如何在 Nextjs 中使用图像和预览 - Strapi 博客关于在 Strapi 中使用 Next.js 的预览系统。
我借此机会感谢他们,因为这个用例非常受欢迎,他们的文章回答了很多问题。我想强调这种类型的贡献对 Strapi 社区非常重要,如果您想成为其中的一员,我邀请您加入我们的社区计划写。
这篇(非常)简短的文章将是对 Quadri 和 Amir 所写内容的补充。您将看到如何直接在 Strapi 管理中实现预览按钮。很棒不是吗?

定制
你肯定知道,Strapi 是完全开源的。如果您想在内容管理器中包含一个生成随机 GIF 的按钮,请知道这是绝对可能的。只需创建您的组件并将其注入管理员即可。
注入一个组件正是我们在这里要做的。
注意,本教程基于Strapi v3。本教程的 v4 版本将在可用时在页面顶部提及。
如前所述,我将假设您已经在自己喜欢的前端框架上拥有一个预览系统,例如Next.js,它需要一个特定的预览 URL,如下所示:
http://localhost:3000/api/preview?secret=fdsfasdmgrNPQXtfdsfMswfdsfdsfasdkjfow&slug=pricing](http://localhost:3000/api/preview?secret=fdsfasdmgrNPQXtfdsfMswfdsfdsfasdkjfow&slug=pricing&lang=en&type=page
进入全屏模式 退出全屏模式
我们将简单地在 Content-Manager 中创建一个按钮,该按钮将根据您的集合类型构建此 URL。

分机
/extensions文件夹包含所有插件自定义文件。在专用文档页面上查找更多信息。
您应该有一个content-manager文件夹,如下所示:

- 创建一个包含以下内容的
./extensions/content-manager/admin/src/index.js文件:
import pluginPkg from '../../package.json';
import pluginId from './pluginId';
import pluginLogo from './assets/images/logo.svg';
import App from './containers/Main';
import ExternalLink from './InjectedComponents/ExternalLink';
import ConfigureViewButton from './InjectedComponents/ContentTypeBuilder/ConfigureViewButton';
import lifecycles from './lifecycles';
import reducers from './reducers';
import trads from './translations';
export default (strapi) => {
const pluginDescription = pluginPkg.strapi.description || pluginPkg.description;
const plugin = {
blockerComponent: null,
blockerComponentProps: {},
description: pluginDescription,
icon: pluginPkg.strapi.icon,
id: pluginId,
initializer: null,
injectedComponents: [
{
plugin: 'content-type-builder.listView',
area: 'list.link',
component: ConfigureViewButton,
key: 'content-manager.link',
},
// This is the injection zone
{
plugin: 'content-manager.editView',
area: 'right.links',
component: ExternalLink,
key: 'content-manager.preview-link',
},
],
injectionZones: {
editView: { informations: [] },
listView: { actions: [], deleteModalAdditionalInfos: [] },
},
isReady: true,
isRequired: pluginPkg.strapi.required || false,
layout: null,
lifecycles,
mainComponent: App,
name: pluginPkg.strapi.name,
pluginLogo,
preventComponentRendering: false,
reducers,
trads,
};
return strapi.registerPlugin(plugin);
};
进入全屏模式 退出全屏模式
该文件将仅允许您注入您将在之后创建的自定义组件。这个组件,您已经在导入它:
import ExternalLink from './InjectedComponents/ExternalLink';
进入全屏模式 退出全屏模式
然后你注入它:
injectedComponents: [
{
plugin: 'content-type-builder.listView',
area: 'list.link',
component: ConfigureViewButton,
key: 'content-manager.link',
},
// This is the injection zone
{
plugin: 'content-manager.editView',
area: 'right.links',
component: ExternalLink,
key: 'content-manager.preview-link',
},
],
进入全屏模式 退出全屏模式
在我们的文档中找到有关它的更多信息。
- 创建一个包含以下内容的
./extensions/content-manager/admin/src/InjectedComponents/ExternalLink/index.js文件:
import React from 'react';
import styled from 'styled-components';
import { useContentManagerEditViewDataManager } from 'strapi-helper-plugin';
import EyeIcon from './view.svg';
const StyledExternalLink = styled.a`
display: block;
color: #333740;
width: 100%;
text-decoration: none;
span,
i,
svg {
color: #333740;
width: 13px;
height: 12px;
margin-right: 10px;
vertical-align: 0;
}
span {
font-size: 13px;
}
i {
display: inline-block;
background-image: url(${EyeIcon});
background-size: contain;
}
&:hover {
text-decoration: none;
span,
i,
svg {
color: #007eff;
}
}
`;
const ExternalLink = () => {
const { modifiedData, layout } = useContentManagerEditViewDataManager();
if (modifiedData.published_at) {
return null;
}
if (!modifiedData.slug) {
return null;
}
if (!CLIENT_URL || !CLIENT_PREVIEW_SECRET) {
return null;
}
return (
<li>
<StyledExternalLink
href={`${CLIENT_URL}/api/preview?secret=${CLIENT_PREVIEW_SECRET}&slug=${modifiedData.slug}&locale=${modifiedData.locale}&apiID=${layout.apiID}&kind=${layout.kind}`}
target="_blank"
rel="noopener noreferrer"
title="page preview"
>
<i />
Preview
</StyledExternalLink>
</li>
);
};
export default ExternalLink;
进入全屏模式 退出全屏模式
这里有很多东西要解释。第一个是为按钮导入 SVG 眼睛图标。
- 创建一个包含以下内容的
./extensions/content-manager/admin/src/InjectedComponents/ExternalLink/view.svg文件:
<svg xmlns="http://www.w3.org/2000/svg" height="24" viewBox="0 0 24 24" width="24"><path d="M0 0h24v24H0z" fill="none"/><path d="M12 4.5C7 4.5 2.73 7.61 1 12c1.73 4.39 6 7.5 11 7.5s9.27-3.11 11-7.5c-1.73-4.39-6-7.5-11-7.5zM12 17c-2.76 0-5-2.24-5-5s2.24-5 5-5 5 2.24 5 5-2.24 5-5 5zm0-8c-1.66 0-3 1.34-3 3s1.34 3 3 3 3-1.34 3-3-1.34-3-3-3z"/></svg>
进入全屏模式 退出全屏模式
现在让我们专注于这一点:
const ExternalLink = () => {
const { modifiedData, layout } = useContentManagerEditViewDataManager();
if (modifiedData.published_at) {
return null;
}
if (!modifiedData.slug) {
return null;
}
if (!CLIENT_URL || !CLIENT_PREVIEW_SECRET) {
return null;
}
return (
<li>
<StyledExternalLink
href={`${CLIENT_URL}/api/preview?secret=${CLIENT_PREVIEW_SECRET}&slug=${modifiedData.slug}&locale=${modifiedData.locale}&apiID=${layout.apiID}&kind=${layout.kind}`}
target="_blank"
rel="noopener noreferrer"
title="page preview"
>
<i />
Preview
</StyledExternalLink>
</li>
);
};
进入全屏模式 退出全屏模式
这是在FoodAdvisor上实现的代码,我们的现场演示有一个 Next.js 前端。首先我们从useContentManagerEditViewDataManager钩子中得到modifiedData和layout。第一个是包含您的条目数据的对象,第二个包含有关您的条目的更多有趣信息(apiID、内容类型的种类、元数据等......)
如果内容已经发布,如果没有slug字段或者必要的环境变量不存在,我们什么都不做。实际上,我们只想在内容尚未发布时显示预览按钮。此外,如果它不包含 slug 或必要的环境变量,则意味着您将无法在前端预览它。
if (modifiedData.published_at) {
return null;
}
if (!modifiedData.slug) {
return null;
}
if (!CLIENT_URL || !CLIENT_PREVIEW_SECRET) {
return null;
}
进入全屏模式 退出全屏模式
然后,如果没有问题,我们只需在您的内容管理器的编辑视图中呈现按钮:
return (
<li>
<StyledExternalLink
href={`${CLIENT_URL}/api/preview?secret=${CLIENT_PREVIEW_SECRET}&slug=${modifiedData.slug}&locale=${modifiedData.locale}&apiID=${layout.apiID}&kind=${layout.kind}`}
target="_blank"
rel="noopener noreferrer"
title="page preview"
>
<i />
Preview
</StyledExternalLink>
</li>
);
进入全屏模式 退出全屏模式
请花点时间看看 url 是如何构建的:
`${CLIENT_URL}/api/preview?secret=${CLIENT_PREVIEW_SECRET}&slug=${modifiedData.slug}`
进入全屏模式 退出全屏模式
这里没什么复杂的,我只是获取您的客户端应用程序的 url 并附加正确的路径(此处为 Next.js):/api/preview?secret=xxx&slug=xxx
您可能已经在 Next.js 应用程序中拥有处理此调用的文件。为了给您一个想法,这就是我们在 FoodAdvisor 上所做的:
// ./pages/api/preview.js
import { getData } from '../../utils';
export default async (req, res) => {
if (
req.query.secret !== process.env.PREVIEW_SECRET ||
(req.query.slug != '' && !req.query.slug)
) {
return res.status(401).json({ message: 'Invalid token' });
}
const previewData = await getData(
req.query.slug,
req.query.locale,
req.query.apiID,
req.query.kind,
null
);
if (!previewData.data) {
return res.status(401).json({ message: 'Invalid slug' });
}
res.setPreviewData({});
res.writeHead(307, {
Location: previewData.slug,
});
res.end();
};
进入全屏模式 退出全屏模式
对于我们的演示,我需要了解更多关于我想要预览的数据的信息,以便获得更大的灵活性,例如语言环境、apiID 和内容类型的种类。我可以通过简单地向我的网址添加更多参数来做到这一点:
`${CLIENT_URL}/api/preview?secret=${CLIENT_PREVIEW_SECRET}&slug=${modifiedData.slug}&locale=${modifiedData.locale}&apiID=${layout.apiID}&kind=${layout.kind}`
进入全屏模式 退出全屏模式
这就是为什么我需要布局对象但如果你不需要它可以删除它。我不会在本文中详细说明为什么需要这些字段,但请随时查看 FoodAdvisor 的源代码以更好地理解我的方法:
-
./pages/api
-
./utils/index.js
好吧,没有别的事可做!您可以构建您的管理员,运行您的服务器并预览您的内容!
- 使用以下命令构建您的管理员:
yarn build --clean
进入全屏模式 退出全屏模式
- 重启你的服务器
yarn develop
进入全屏模式 退出全屏模式
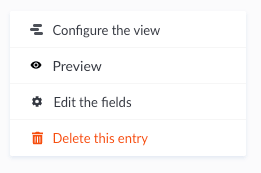
现在,在创建条目或仅填写 slug 字段后,您可以在内容管理器的右侧看到一个预览按钮。
[ ](https://res.cloudinary.com/practicaldev/image/fetch/s--xUgGY8rz--/c_progressiveCf_auto%2 %2Cq_auto%2Cw_880/https://d2zv2ciw0ln4h1.cloudfront.net/uploads/Capture_decran_2021_07_27_a_08_46_29_8cc8ac903e.png)
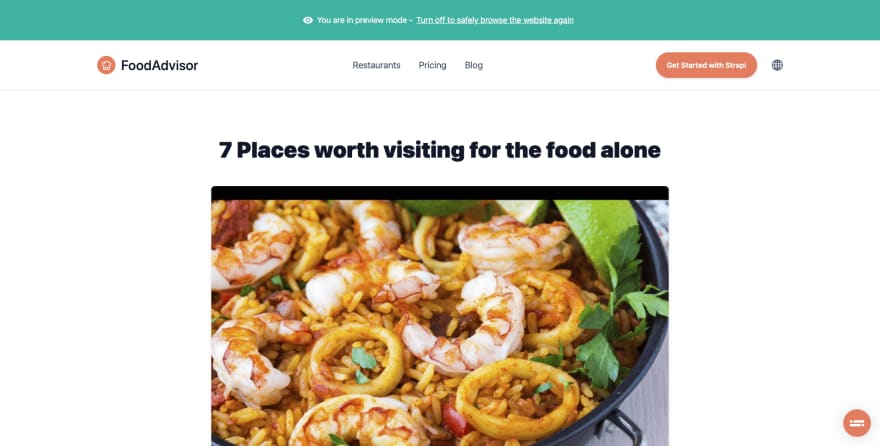
这是 FoodAdvisor 前端的样子:
[ ](https://res.cloudinary.com/practicaldev/image/fetch/s_progressive%2gGtne%V--cflc %2Cq_auto%2Cw_880/https://d2zv2ciw0ln4h1.cloudfront.net/uploads/Capture_decran_2021_07_27_a_08_58_40_1_2a10682931.png)
结论
自定义 Strapi 非常容易。我们在这里只创建了 3 个文件,其中一个是 .svg!
Strapi 不提供原生预览功能,因为它是一个无头 CMS,但由于它是开源的,它为您提供了自由和灵活性来适应您的前端应用程序的需求。
这可能是您可以在管理员中执行的最简单的预览实现。我通过创建一个组件来挑战您走得更远,该组件将直接在内容管理器中显示前端应用程序预览!
下一篇文章见!

更多推荐
 0
0 0
0- 0


 已为社区贡献20537条内容

所有评论(0)