使用 AWS Amplify 和 Next JS 在 9 分钟内构建一个聊天应用程序
你好朋友! 👋
我的名字是Jarrod Watts,我想与您分享 Next JS 和 AWS Amplify 的神奇之处!
我们将介绍如何使用 AWS Amplify 和 Next JS 在 7 分钟内构建一个实时聊天应用程序。
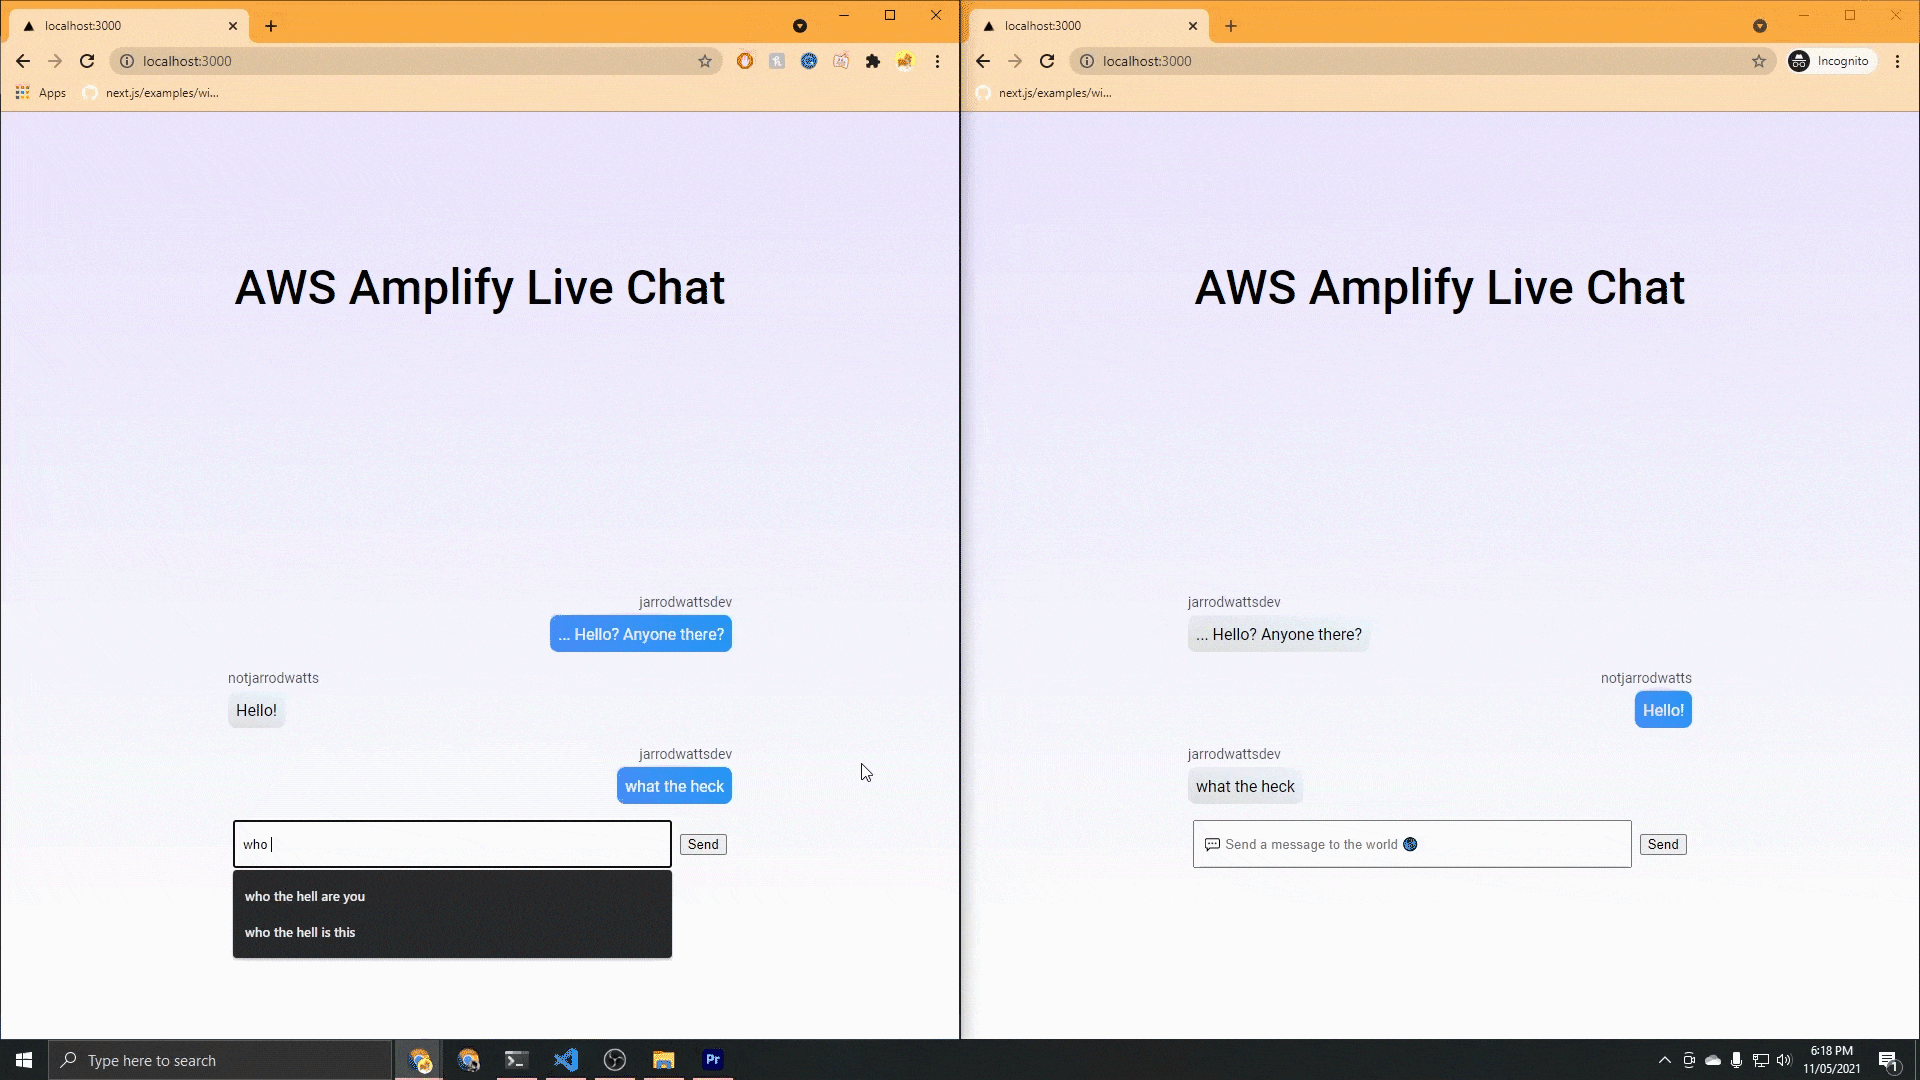
这是我们将要构建的内容的快速预览:
-
AWS Amplify 的用户身份验证用于注册和登录用户。 🥳
-
使用 Next.JS 验证请求和服务器端渲染。 🤠
-
使用 AWS Amplify 订阅的实时更新。 🤯
如果这听起来对您来说很有趣,请继续! 👇
对于那些喜欢消费视频内容的人,我还制作了一个 YouTube 视频来指导你如何创建这个应用程序。如果您来自 Hashnode,请打个招呼! 👋
https://youtu.be/g2kMOr3d084
如果您想浏览源代码,也可以随时在此处查看:
https://github.com/jarrodwatts/amplify-live-chat
设置
为了开始,您需要两个先决条件。
-
AWS 账户
-
AWS Amplify CLI 已安装。
如果你已经有了这些,你很高兴去!如果没有,不用担心!去创建一个 AWS 账户,然后回到这里 :-)
安装 AWS Amplify CLI
如果您还没有这样做,您可以通过运行以下命令安装 AWS Amplify CLI:
npm install -g @aws-amplify/cli
并将其链接到您的 AWS 账户:
amplify configure
凉爽的。让我们进入指南😎。计时器现在开始! 🕒
创建项目
要创建并打开一个新的 Next JS 项目(在 Visual Studio Code 中),请运行:
npx create-next-app live-chat
cd live-chat
code .
清理启动代码
对于我们的应用程序,我们不需要Next JS 的 API 路由因此我们可以继续删除 /api 文件夹及其内容。
然后我们也可以进入index.js,把return全部替换掉就可以了:
return (
      <div>Hello world!</div>
)
款式
由于本指南的重点是 AWS Amplify 和 Next JS,所以我不会解释我们代码的 CSS。我建议您使用我在下面提供的内容(在styles文件夹中)创建这三个文件:
-
globals.css -
Home.module.css -
Message.module.css
我们在这个项目中使用的是 Next JS 内置的全局样式表和 CSS 模块,但在实际项目中,你可以使用任何你喜欢的东西!
zoz100037:
html,
body {
  padding: 0;
  margin: 0;
  font-family: -apple-system, BlinkMacSystemFont, Segoe UI, Roboto, Oxygen,
    Ubuntu, Cantarell, Fira Sans, Droid Sans, Helvetica Neue, sans-serif;
}

a {
  color: inherit;
  text-decoration: none;
}

* {
  box-sizing: border-box;
  margin: 0;
}
styles/Home.module.css:
.background {
  max-height: 100%;
  height: 98vh;
  background: linear-gradient(0deg, #fff, #eae6ff 100%);
  display: flex;
  justify-content: center;
}

.container {
  display: flex;
  height: 100%;
  width: 100%;
  flex-direction: column;
  align-items: center;
  justify-content: center;
  text-align: center;
  max-width: 520px;
}

.title {
  font-size: 3rem;
  line-height: 1.25;
  margin-bottom: 1rem;
  font-family: roboto;
  font-weight: 500;
}

.chatbox {
  min-width: 100%;
  height: 480px;
  display: flex;
  overflow-y: auto;
  flex-direction: column-reverse;
  text-align: center;
}

.formContainer {
  width: 98%;
  min-height: 48px;
}

.formBase {
  display: flex;
  flex-direction: row;
  justify-content: space-between;
  align-items: center;
  margin-top: "16px";
  height: 100%;
  width: 100%;
  padding: 8px;
}

.textBox {
  min-height: 48px;
  width: 100%;
  padding-left: 8px;
  padding-right: 8px;
}
Message.module.css
.sentMessageContainer {
  display: flex;
  flex-direction: column;
  float: right;
  align-items: flex-end;
  justify-content: flex-end;
  margin: 8px;
}

.sentMessage {
  text-align: left;
  padding: 8px;
  font-family: "roboto";
  color: #fff;
  background: linear-gradient(243deg, #2397f5, #498efc 100%);
  border-radius: 8px;
}

.receivedMessageContainer {
  display: flex;
  flex-direction: column;
  float: right;
  align-items: flex-start;
  justify-content: flex-start;
  margin: 8px;
}

.receivedMessage {
  text-align: left;
  padding: 8px;
  font-family: "roboto";
  color: #000;
  background: linear-gradient(
    193deg,
    rgba(237, 247, 255, 1) 0%,
    rgba(223, 223, 223, 1) 100%
  );
  border-radius: 8px;
}

.senderText {
  font-family: "roboto";
  font-size: 14px;
  color: rgba(0, 0, 0, 0.7);
  margin-bottom: 4px;
}
AWS Amplify 入门
要使用 AWS Amplify,我们需要两个包:
-
aws-amplify
-
@aws-amplify/ui-react
我们可以通过运行来安装这些包:
npm install aws-amplify @aws-amplify/ui-react
现在运行:
amplify init
此命令将在您的目录中启动一个新的 Amplify 项目,继续进行如下配置:
? Enter a name for the project: livechat
? Initialize the project with the above configuration: No
? Enter a name for the environment: dev
? Choose your default editor: Visual Studio Code
? Choose the type of app that you're building: javascript
? What javascript framework are you using: react
? Source Directory Path:  .
? Distribution Directory Path: build
? Build Command:  npm run build
? Start Command: npm run start
? Select the authentication method you want to use: AWS profile
伟大的!现在我们已准备好向我们的应用程序添加一些 Amplify 功能。
我们将使用 AWS Amplify 的身份验证和GraphQL API。
由于我们将使用身份验证向我们的 GraphQL API 发出经过验证的请求,因此我们将通过运行以下命令同时配置它们:
amplify add api
遵循以下配置设置:
? Please select from one of the below mentioned services: GraphQL
? Provide API name: livechat
? Choose the default authorization type for the API: Amazon Cognito User Pool
Using service: Cognito, provided by: awscloudformation

 The current configured provider is Amazon Cognito.

 Do you want to use the default authentication and security configuration: Default configuration
 Warning: you will not be able to edit these selections.
 How do you want users to be able to sign in? Username
 Do you want to configure advanced settings? No, I am done.

? Do you want to configure advanced settings for the GraphQL API No, I am done.
? Do you have an annotated GraphQL schema: No
? Choose a schema template: Single object with fields (e.g., “Todo” with ID, name, description)
? Do you want to edit the schema now: Yes
这是我们刚刚完成的: (一旦我们部署了它)
-
配置了托管在 AWS AppSync 上的 GraphQL API。
-
设置 Amazon Cognito 以允许用户创建和登录账户,以及向我们的 GraphQL API 发出经过身份验证的请求。
-
创建了一个虚拟的 Todo GraphQL Schema,我们可以对其进行编辑并上传到 AWS Amplify。
完成此操作后,Amplify 应该会在您的文本编辑器中打开schema.graphql。让我们编辑它以匹配我们的实时聊天应用程序的架构。
由于这是一个非常简单的应用程序,因此它是一个非常简单的模式。只有一个模型;一个Message。将您的schema.graphql设置为:
type Message
  @model
  @auth(
    rules: [
      # Allow signed in users to perform all actions
      { allow: private }
    ]
  ) {
  id: ID!
  owner: String!
  message: String!
}
通过设置@model,我们告诉 AWS Amplify 在新的 DynamoDB 数据库中为消息创建一个表。我们还告诉 AWS Amplify,我们希望 Messages 表中存在的每个Message都有一个条目。
通过设置@auth和定义{allow: private},我们是说 ONLY 可以访问这些消息的人是登录到我们应用程序的人。这也意味着登录用户可以对消息执行_any_ 操作:(创建、读取、更新、删除)。
理想情况下,我们将有多个身份验证规则,_(即只有消息的所有者应该能够编辑他们的自己的消息,但 AWS Amplify 尚不支持订阅上的多个授权规则 _
要将所有这些基础架构部署到云中,请运行:
amplify push
使用这些设置从我们的 GraphQL API 生成所有可能的查询、突变和订阅。
? Are you sure you want to continue: Yes
? Do you want to generate code for your newly created GraphQL API: Yes
? Choose the code generation language target: javascript
? Enter the file name pattern of graphql queries, mutations and subscriptions: src\graphql\**\*.js
? Do you want to generate/update all possible GraphQL operations - queries, mutations and subscriptions: Yes
? Enter maximum statement depth [increase from default if your schema is deeply nested]: 1
我个人喜欢将subscriptions.js、mutations.js和queries.js移动到rootgraphql文件夹,并删除现在空的src/graphql和src/文件夹。
连接我们的前端
Next JS 自定义 App
我们将在_app.js中使用Next JS 的自定义应用程序来配置我们的全局 CSS,并在我们的应用程序中的任何位置配置 AWS Amplify。
您可以将_app.js视为每个页面的包装器。因此,通过下面的设置,Amplify 将被初始化并配置为在我们应用程序的每个页面上启用ssr支持。
让我们将_app.js设置为如下所示:
import "../styles/globals.css";
import Amplify from "aws-amplify";
import awsconfig from "../aws-exports";
Amplify.configure({ ...awsconfig, ssr: true });

function MyApp({ Component, pageProps }) {
  return <Component {...pageProps} />;
}

export default MyApp;
主页 (index.js)
身份验证 - 注册和登录
让我们通过创建一个表单让用户注册和登录来开始连接我们的前端。为此,我们可以使用@aws-amplify/ui-react的高阶组件withAuthenticator。
1.导入withAuthenticator
从“@aws-amplify/ui-react”导入 { withAuthenticator };
2.将我们的export default function Home()改为function Home()
- 在文件的最底部,添加:
使用Authenticator(Home)导出默认值;
现在运行我们的应用程序,运行:npm run dev并访问 localhost:3000/
您应该面对来自 AWS Amplify 的注册/登录预构建 UI。 通过此表格创建并验证您的帐户。
完成后返回到我们的 index.js 文件!
设置聊天框
下一步,我们将创建一个将 mutations 发送到我们的 GraphQL API 的表单。
我把我的代码放在下面,因为我们不是在这里学习如何编写 HTML / CSS,请随意复制和粘贴我们目前所拥有的。之后我们将深入了解更多 AWS Amplify。
index.js
import React, { useEffect, useState } from "react";
import styles from "../styles/Home.module.css";
import { withAuthenticator } from "@aws-amplify/ui-react";
import { listMessages } from "../graphql/queries";
import { createMessage } from "../graphql/mutations";
import { onCreateMessage } from "../graphql/subscriptions";

function Home() {

  const handleSubmit = (event) => {
    event.preventDefault();
    console.log(event.target[0].value);
  };

  return (
    <div className={styles.background}>
      <div className={styles.container}>
        <h1 className={styles.title}> AWS Amplify Live Chat</h1>

        <div className={styles.chatbox}>
          <div className={styles.formContainer}>
            <form onSubmit={handleSubmit} className={styles.formBase}>
              <input
                type="text"
                id="message"
                name="message"
                autoFocus
                required
                placeholder="💬 Send a message to the world 🌎"
                className={styles.textBox}
              />
              <button style={{ marginLeft: "8px" }}>Send</button>
            </form>
          </div>
        </div>
      </div>
    </div>
  );
}

export default withAuthenticator(Home);
现在我们有一个过度设计的表单,当我们点击提交时,console.logs 无论我们输入什么!我们很快就会回来并为此表单添加一些功能。
获取服务器端现有消息
我们将使用Next JS 的getServerSideProps来:
-
为现有消息列表在服务器端发出经过身份验证的 GraphQL 请求。
-
将消息列表作为 props 传递给我们的主组件
getServersideProps函数与我们的Home函数位于同一文件中,在index.js中
要向我们的 GraphQL API 发出经过身份验证的(代表登录用户)服务器端请求,我们可以使用以下代码:
export async function getServerSideProps({ req }) {
  // wrap the request in a withSSRContext to use Amplify functionality serverside.
  const SSR = withSSRContext({ req });

  try {
    // currentAuthenticatedUser() will throw an error if the user is not signed in.
    const user = await SSR.Auth.currentAuthenticatedUser();

    // If we make it passed the above line, that means the user is signed in.
    const response = await SSR.API.graphql({
      query: listMessages,
      // use authMode: AMAZON_COGNITO_USER_POOLS to make a request on the current user's behalf
      authMode: "AMAZON_COGNITO_USER_POOLS",
    });

    // return all the messages from the dynamoDB
    return {
      props: {
        messages: response.data.listMessages.items,
      },
    };
  } catch (error) {
    // We will end up here if there is no user signed in.
    // We'll just return a list of empty messages.
    return {
      props: {
        messages: [],
      },
    };
  }
}
上面的代码:
-
尝试返回从 GraphQL API 检索到的消息列表
-
如果当前没有登录用户,该函数只返回一个空
[]
要在我们的Home函数中读取getServersideProps的结果,我们需要从我们返回的props中解构messages。
修改 Home 函数如下所示:
function Home({ messages }) {
让我们在页面首次加载时检查用户,并将用户存储在状态中:
// this code goes right beneath the line written just above ^^
const [user, setUser] = useState(null);

  useEffect(() => {
    const fetchUser = async () => {
      try {
        const amplifyUser = await Auth.currentAuthenticatedUser();
        setUser(amplifyUser);
      } catch (err) {
        setUser(null);
      }
    };

    fetchUser();
}, [])
让我们还将从getServersideProps通过 props 传递的消息存储在 state 中,因为我们很快将使用 Amplify Subscriptions 实时更新它们。
// Sets the stateMessages value to be initialized with whatever messages we
// returned from getServersideProps
const [stateMessages, setStateMessages] = useState([...messages]);
我们还需要导入一些我们刚刚使用的东西:
import React, { useEffect, useState } from "react";
import styles from "../styles/Home.module.css";
import { withAuthenticator } from "@aws-amplify/ui-react";
import { API, Auth, withSSRContext, graphqlOperation } from "aws-amplify";
import { listMessages } from "../graphql/queries";
import { createMessage } from "../graphql/mutations";
import { onCreateMessage } from "../graphql/subscriptions";
创建新消息
要在每次用户通过我们的表单提交消息时在我们的数据库中创建一条新消息,我们需要在表单的onSubmit中添加一些逻辑。
首先,我们将存储用户在状态中输入的任何内容。
const [messageText, setMessageText] = useState("");
然后我们将我们的form修改为如下所示,所以
-
onChange我们的输入会在每次用户更改他们的消息时更新状态。 -
onSubmit触发我们将要创建的函数handleSubmit
<form onSubmit={handleSubmit} className={styles.formBase}>
  <input
    type="text"
    id="message"
    name="message"
    autoFocus
    required
    value={messageText}
    onChange={(e) => setMessageText(e.target.value)}
    placeholder="💬 Send a message to the world 🌎"
    className={styles.textBox}
  />
  <button style={{ marginLeft: "8px" }}>Send</button>
</form>
现在让我们创建handleSubmit函数_(这可以在 Home 函数中的任何位置)_
const handleSubmit = async (event) => {
    // Prevent the page from reloading
    event.preventDefault();

    // clear the textbox
    setMessageText("");

    const input = {
      // id is auto populated by AWS Amplify
      message: messageText, // the message content the user submitted (from state)
      owner: user.username, // this is the username of the current user
    };

    // Try make the mutation to graphql API
    try {
      await API.graphql({
        authMode: "AMAZON_COGNITO_USER_POOLS",
        query: createMessage,
        variables: {
          input: input,
        },
      });
    } catch (err) {
      console.error(err);
    }
  };
显示我们的消息
我们需要在聊天框中显示我们所有的消息,所以让我们:
-
映射每条消息(按日期排序)
-
为每条消息创建一个新的
Message组件。
修改我们的 index.jsreturn看起来像这样:
if (user) {
    return (
      <div className={styles.background}>
        <div className={styles.container}>
          <h1 className={styles.title}> AWS Amplify Live Chat</h1>
          <div className={styles.chatbox}>
            {stateMessages
              // sort messages oldest to newest client-side
              .sort((a, b) => b.createdAt.localeCompare(a.createdAt))
              .map((message) => (
                // map each message into the message component with message as props
                <Message
                  message={message}
                  user={user}
                  isMe={user.username === message.owner}
                  key={message.id}
                />
              ))}
          </div>
          <div className={styles.formContainer}>
            <form onSubmit={handleSubmit} className={styles.formBase}>
              <input
                type="text"
                id="message"
                name="message"
                autoFocus
                required
                value={messageText}
                onChange={(e) => setMessageText(e.target.value)}
                placeholder="💬 Send a message to the world 🌎"
                className={styles.textBox}
              />
              <button style={{ marginLeft: "8px" }}>Send</button>
            </form>
          </div>
        </div>
      </div>
    );
  } else {
    return <p>Loading...</p>;
  }
在上面的代码中,我们在每条消息上添加了一个映射以返回一个Message组件。我们还没有做到这一点,所以让我们现在就做到。
在项目的根目录下创建一个名为components的新文件夹。在components文件夹中,创建一个名为message.js的新文件。
设置message.js的代码为:
import React from "react";
import styles from "../styles/Message.module.css";

export default function Message({ message, isMe }) {
  if (user) {
    return (
      <div
        className={
          isMe ? styles.sentMessageContainer : styles.receivedMessageContainer
        }
      >
        <p className={styles.senderText}>{message.owner}</p>
        <div className={isMe ? styles.sentMessage : styles.receivedMessage}>
          <p>{message.message}</p>
        </div>
      </div>
    );
  } else {
    return <p>Loading...</p>;
  }
}
在index.js中,我们需要导入我们的新组件:
import Message from "../components/message";
这个组件有两个 props:
-
message:从我们的 GraphQL API 返回的消息项
-
isMe:一个布尔值(true/false),表示消息所有者是否等于我们(当前登录用户)的 id。基本上,一个标志表明这是我们的信息还是其他人的信息。
我们只是返回一个具有不同样式的 div,具体取决于我们是否是消息的创建者。然后,我们使用该消息的实际_contents_ 填充消息的文本字段。
订阅实时更新
现在是真正令人兴奋的部分!
我们可以使用自动生成的 graphQL 订阅来收听 DynamoDB 数据库中消息表的实时更新。
让我们回到index.js并添加一些小改动。
首先让我们修改我们创建的现有useEffect。
我们将在此处添加 AWS Amplify 订阅代码。
现在它应该是这样的:
  useEffect(() => {
    const fetchUser = async () => {
      try {
        const amplifyUser = await Auth.currentAuthenticatedUser();
        setUser(amplifyUser);
      } catch (err) {
        setUser(null);
      }
    };

    fetchUser();

    // Subscribe to creation of message
    const subscription = API.graphql(
      graphqlOperation(onCreateMessage)
    ).subscribe({
      next: ({ provider, value }) => {
        setStateMessages((stateMessages) => [
          ...stateMessages,
          value.data.onCreateMessage,
        ]);
      },
      error: (error) => console.warn(error),
    });
  }, []);
发生了什么?
-
我们创建了一个
subscription变量来监听我们的onCreateMessage事件。 -
每次检测到
createMessage事件(当我们通过表单创建消息时),都会调用next:代码。 -
next:代码将新创建的消息的值传递到value变量中。 -
在
setStateMessages调用中,我们将新消息添加到状态中的现有消息中。
还有一个小问题!
由于我们仅在用户在我们的getServersideProps期间登录时才返回现有消息,因此新用户将看不到任何现有消息。
因此,在我们上面的useEffect正下方,我们将添加一个小代码块来在user变量发生更改时获取现有消息。又名当用户从访客变为用户时。
  useEffect(() => {
    async function getMessages() {
      try {
        const messagesReq = await API.graphql({
          query: listMessages,
          authMode: "AMAZON_COGNITO_USER_POOLS",
        });
        setStateMessages([...messagesReq.data.listMessages.items]);
      } catch (error) {
        console.error(error);
      }
    }
    getMessages();
  }, [user]);
结论
而已!我们有一个实时聊天应用程序🥳。
这种在服务器上预渲染内容,然后监听数据客户端更新的模式是我最近经常使用的。
不仅如此,身份验证是在服务器端处理的,所需的工作量很小。这意味着数据仅对有权访问它的人可用。
它非常强大,我希望你和我一样兴奋!
如果您像我一样喜欢无服务器技术,我会鼓励您关注我以了解更多信息。
谢谢阅读!
找我:
给我买杯咖啡☕
YouTube:youtube.com/channel/UCJae_agpt9S3qwWNED0KHcQ
推特:twitter.com/JarrodWattsDev
GitHub:github.com/jarrodwatts
领英:linkedin.com/in/jarrodwatts
网址:jarrodwatts.com

云原生社区为您提供最前沿的新闻资讯和知识内容
更多推荐
 0
0 0
0- 0


 已为社区贡献35528条内容

所有评论(0)