
0002机器学习虚拟环境的安装
·
0002机器学习虚拟环境的安装
演示电脑:windows10专业版
提前安装好Anaconda
一、打开Anaconda
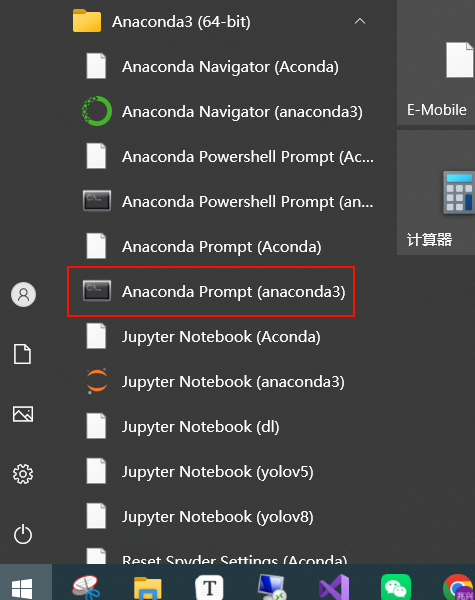
二、新建一个ml(mochine learning)机器学习环境
conda create -n ml python=3.9 -y
新建一个名字为ml,python 版本为3.9的环境

三、查看ml环境是否安装成功
conda env list
看到ml环境新建成功以及对应的安装路径
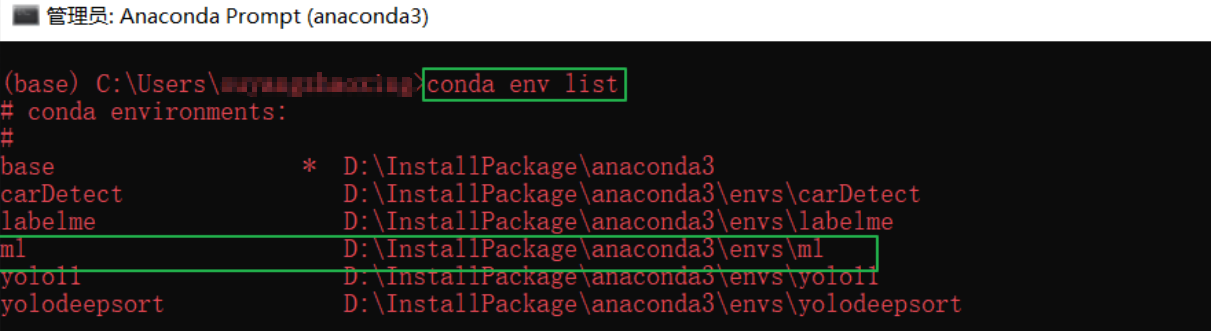
注:conda remove -n ml --all 命令可以删除ml环境
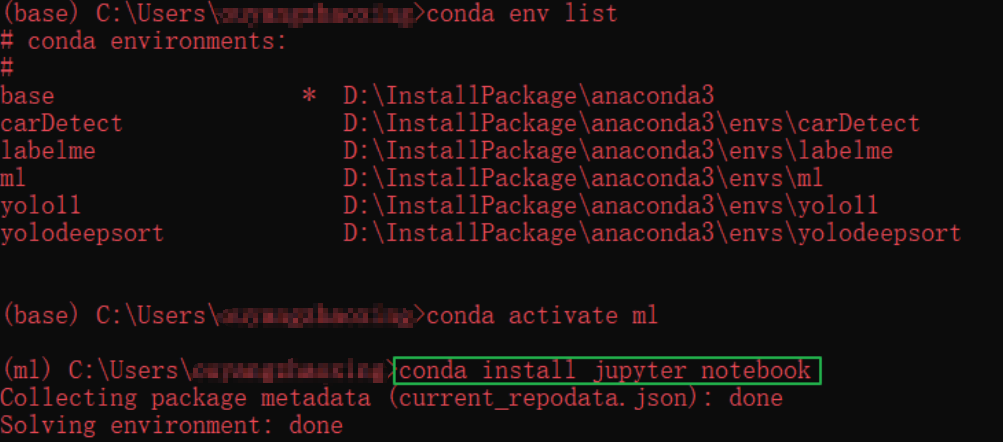
四、激活ml环境
conda activate ml

五、在ml环境下安装jupyter notebook
conda install jupyter notebook
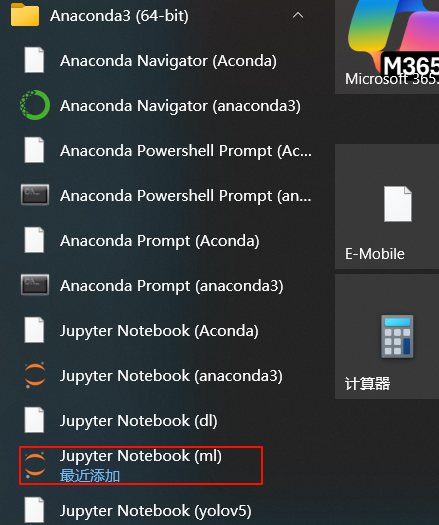
六、打开jupyter notebook
七、查看jupyter notebook 打开后对应的本地电脑存储文件
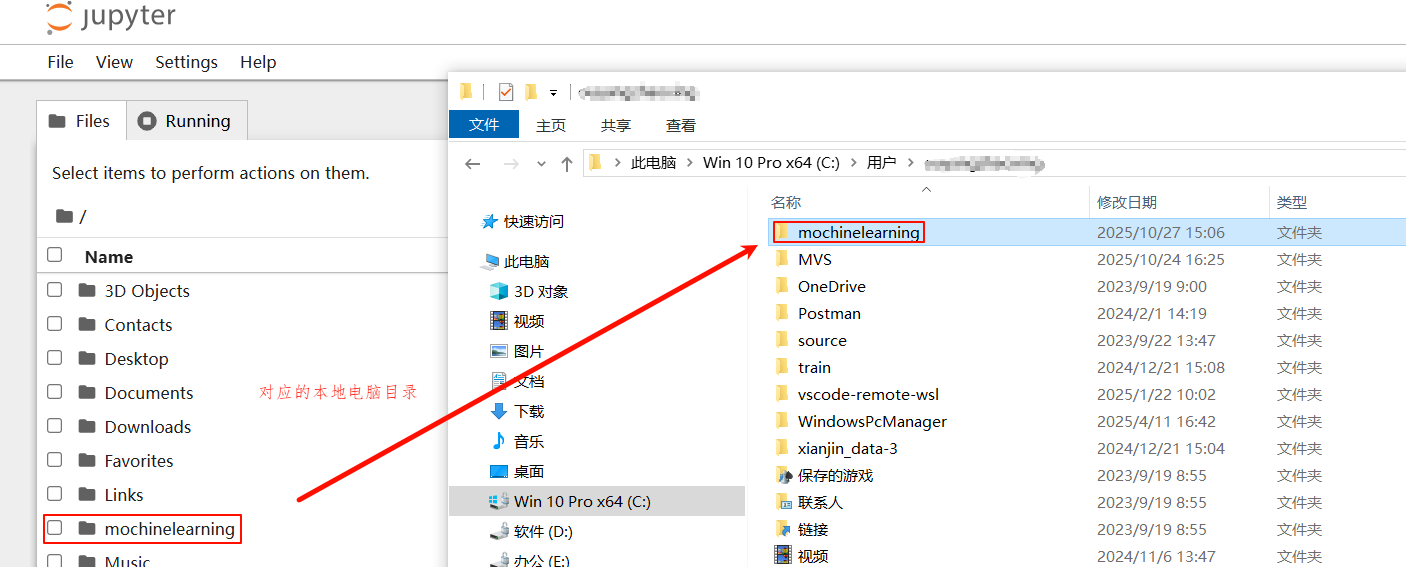
八、新建.ipynb文件
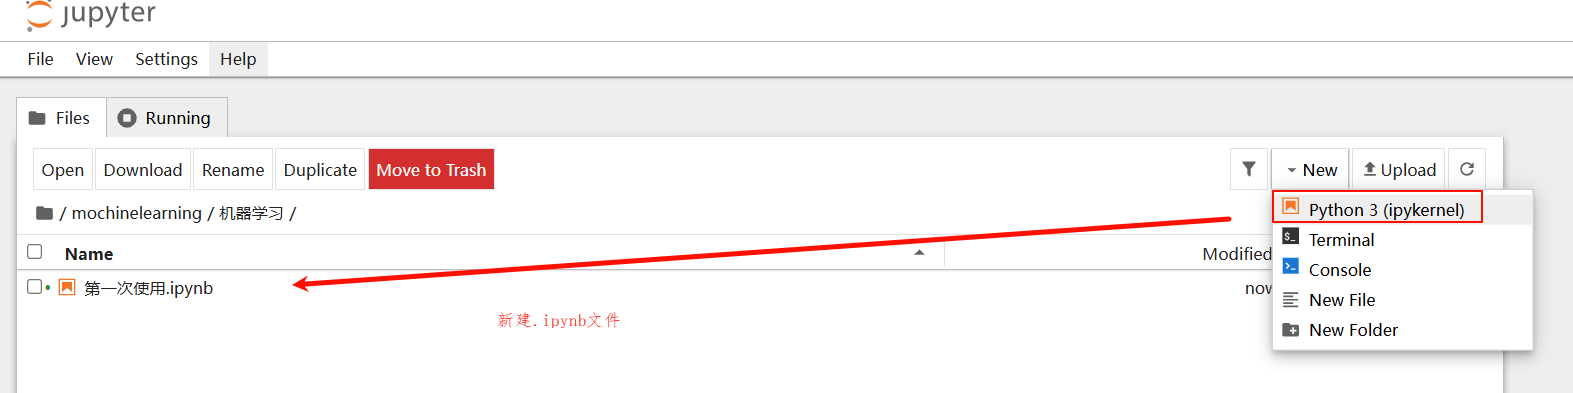
九、安装相关包
在Anaconda窗口ml环境下执行:
pip install numpy -i https://pypi.tuna.tsinghua.edu.cn/simple/
pip install pandas -i https://pypi.tuna.tsinghua.edu.cn/simple/
pip install matplotlib -i https://pypi.tuna.tsinghua.edu.cn/simple/
pip install scikit-learn -i https://pypi.tuna.tsinghua.edu.cn/simple/(机器学习库)
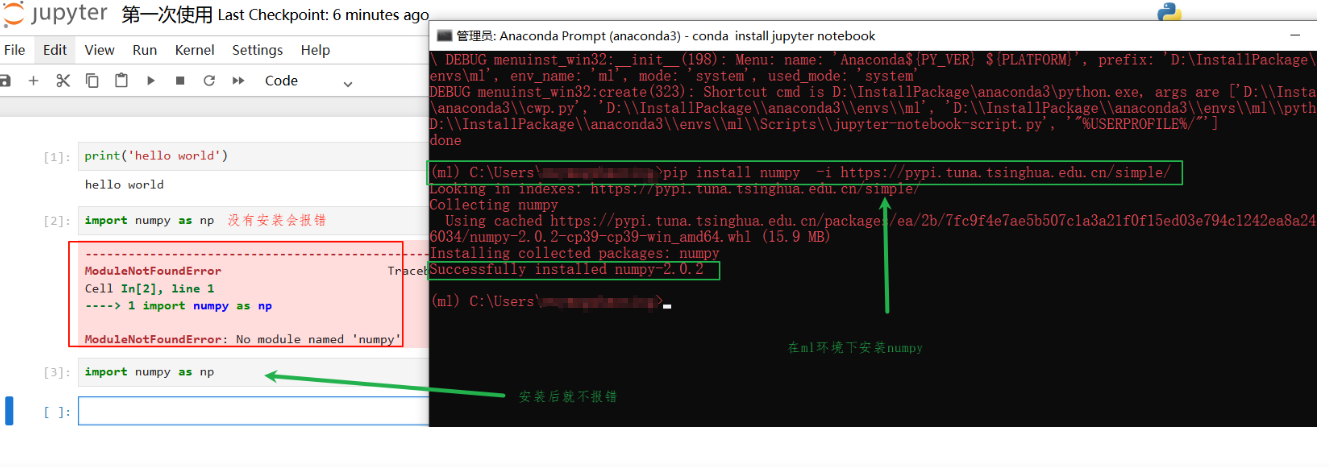
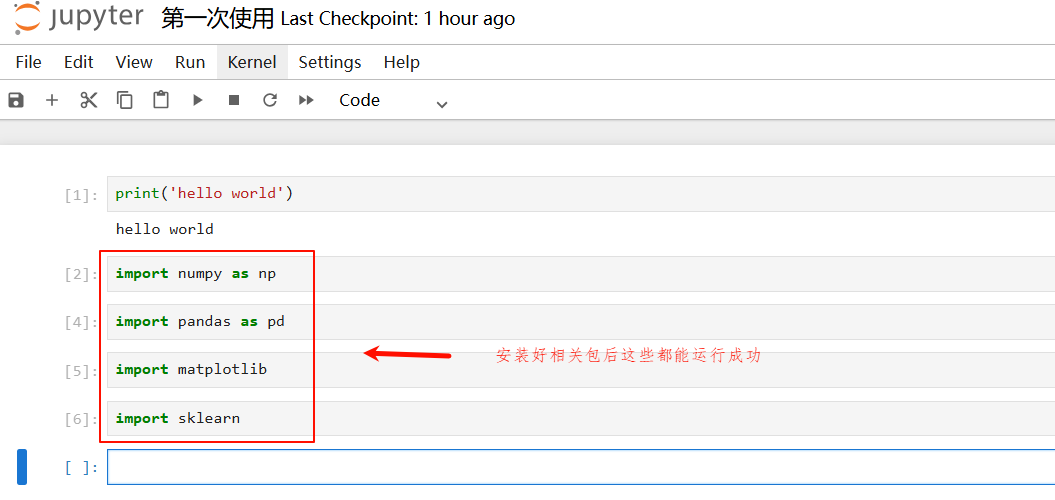
十、vscode中python解释器也要选择对应的环境
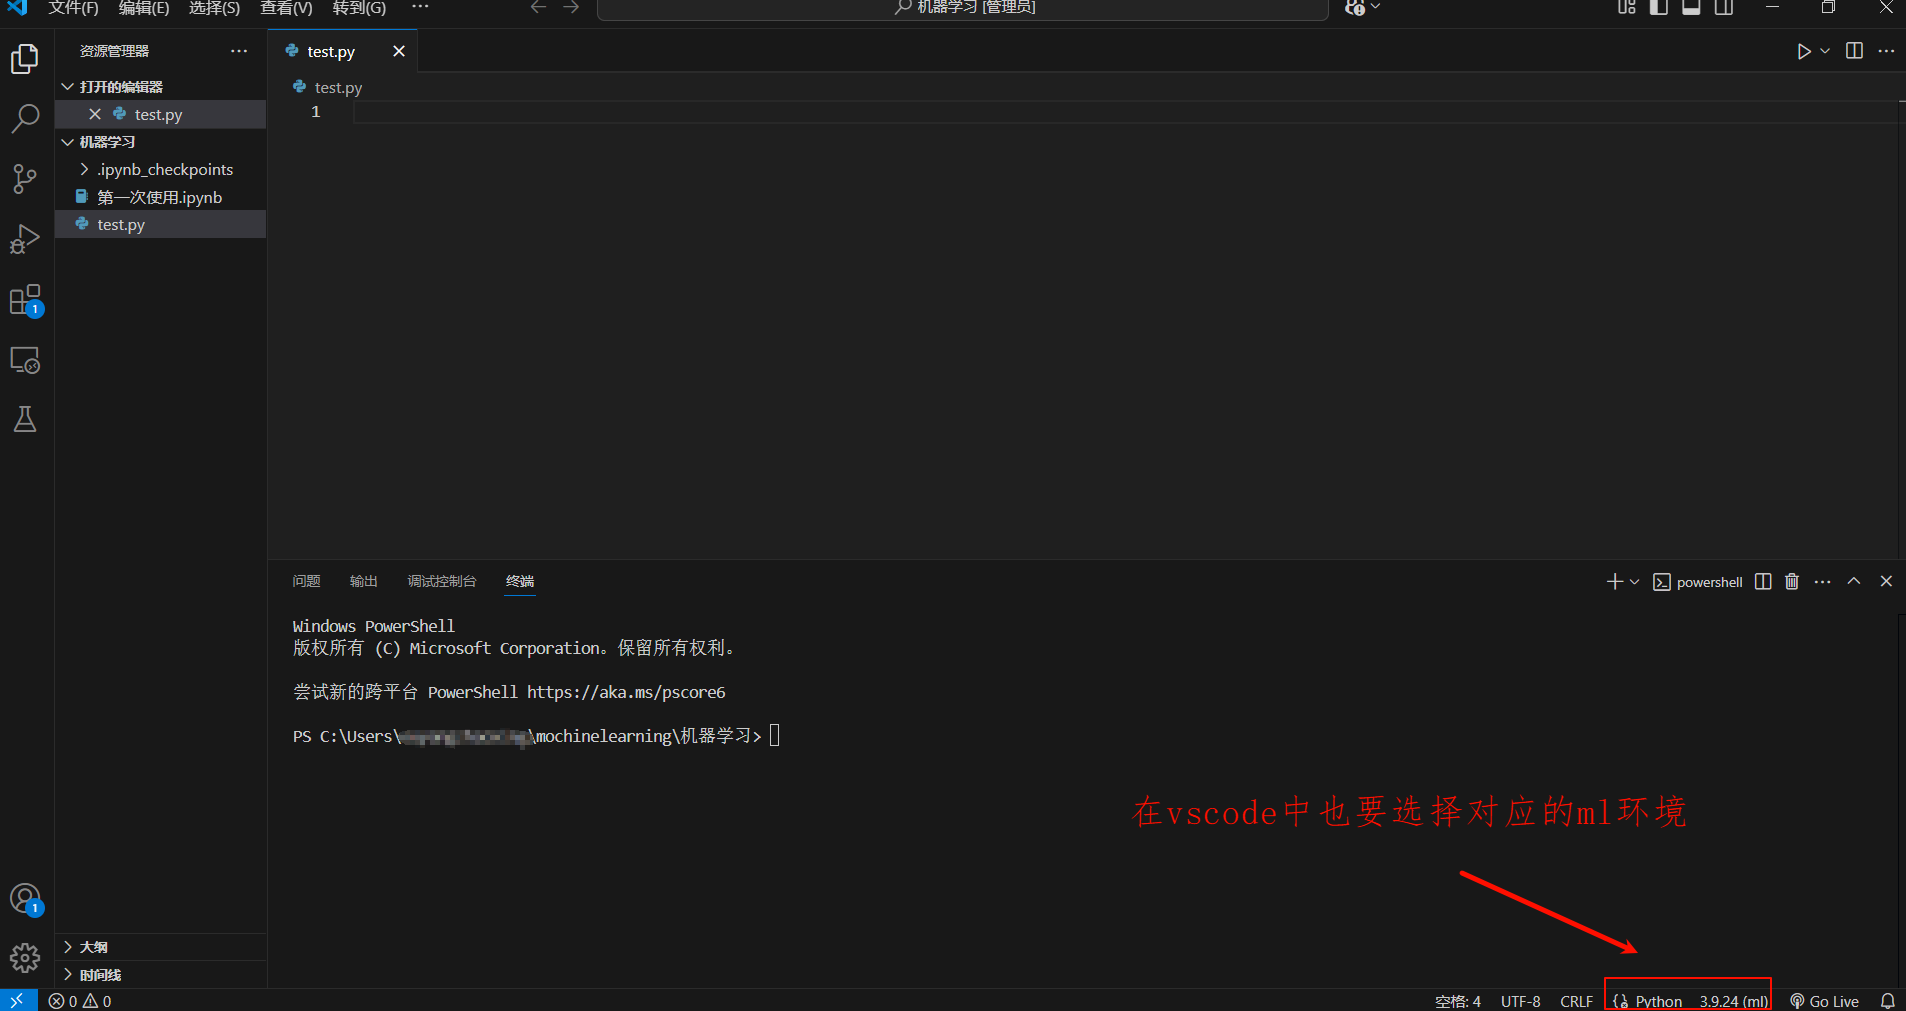
至此环境搭建完毕!!!
更多推荐

 8
8 0
0- 0


 已为社区贡献7条内容

所有评论(0)