
查看docker镜像id
目录前提条件新建Spring Boot项目并编写一个接口新建Maven工程导入 Spring Boot 相关的依赖启动项目编写Controller测试接口构建镜像打jar包新建Dockerfile文件Linux目录准备上传Dockerfile和target目录到Linux制作镜像查看镜像测试镜像上传镜像准备yaml文件创建deployment应用springbootdemo.yaml创建deployment查看deployment查看deployment详情查看pod访问测试扩容deployment pod公布应用程序对外暴露应用查看服务访问测试* * ### 前提条件 拥有Kubernetes集群环境,可参考:Kubernetes集群搭建* 掌握Docker镜像知识,可参考:Docker镜像的使用* 理解Kubernetes基本部署知识,可参考:使用Kubernetes部署第一个应用* 有一定的Java、Spring Boot编程基础### 新建Spring Boot项目并编写一个接口新建Spring Boot项目及编写相关功能,这里编写一个Hello World接口。环境说明:jdk8+, maven3+, IDEA2022#### 新建Maven工程打开IDEA,File–>New,新建Maven项目,项目名称例如springbootdemo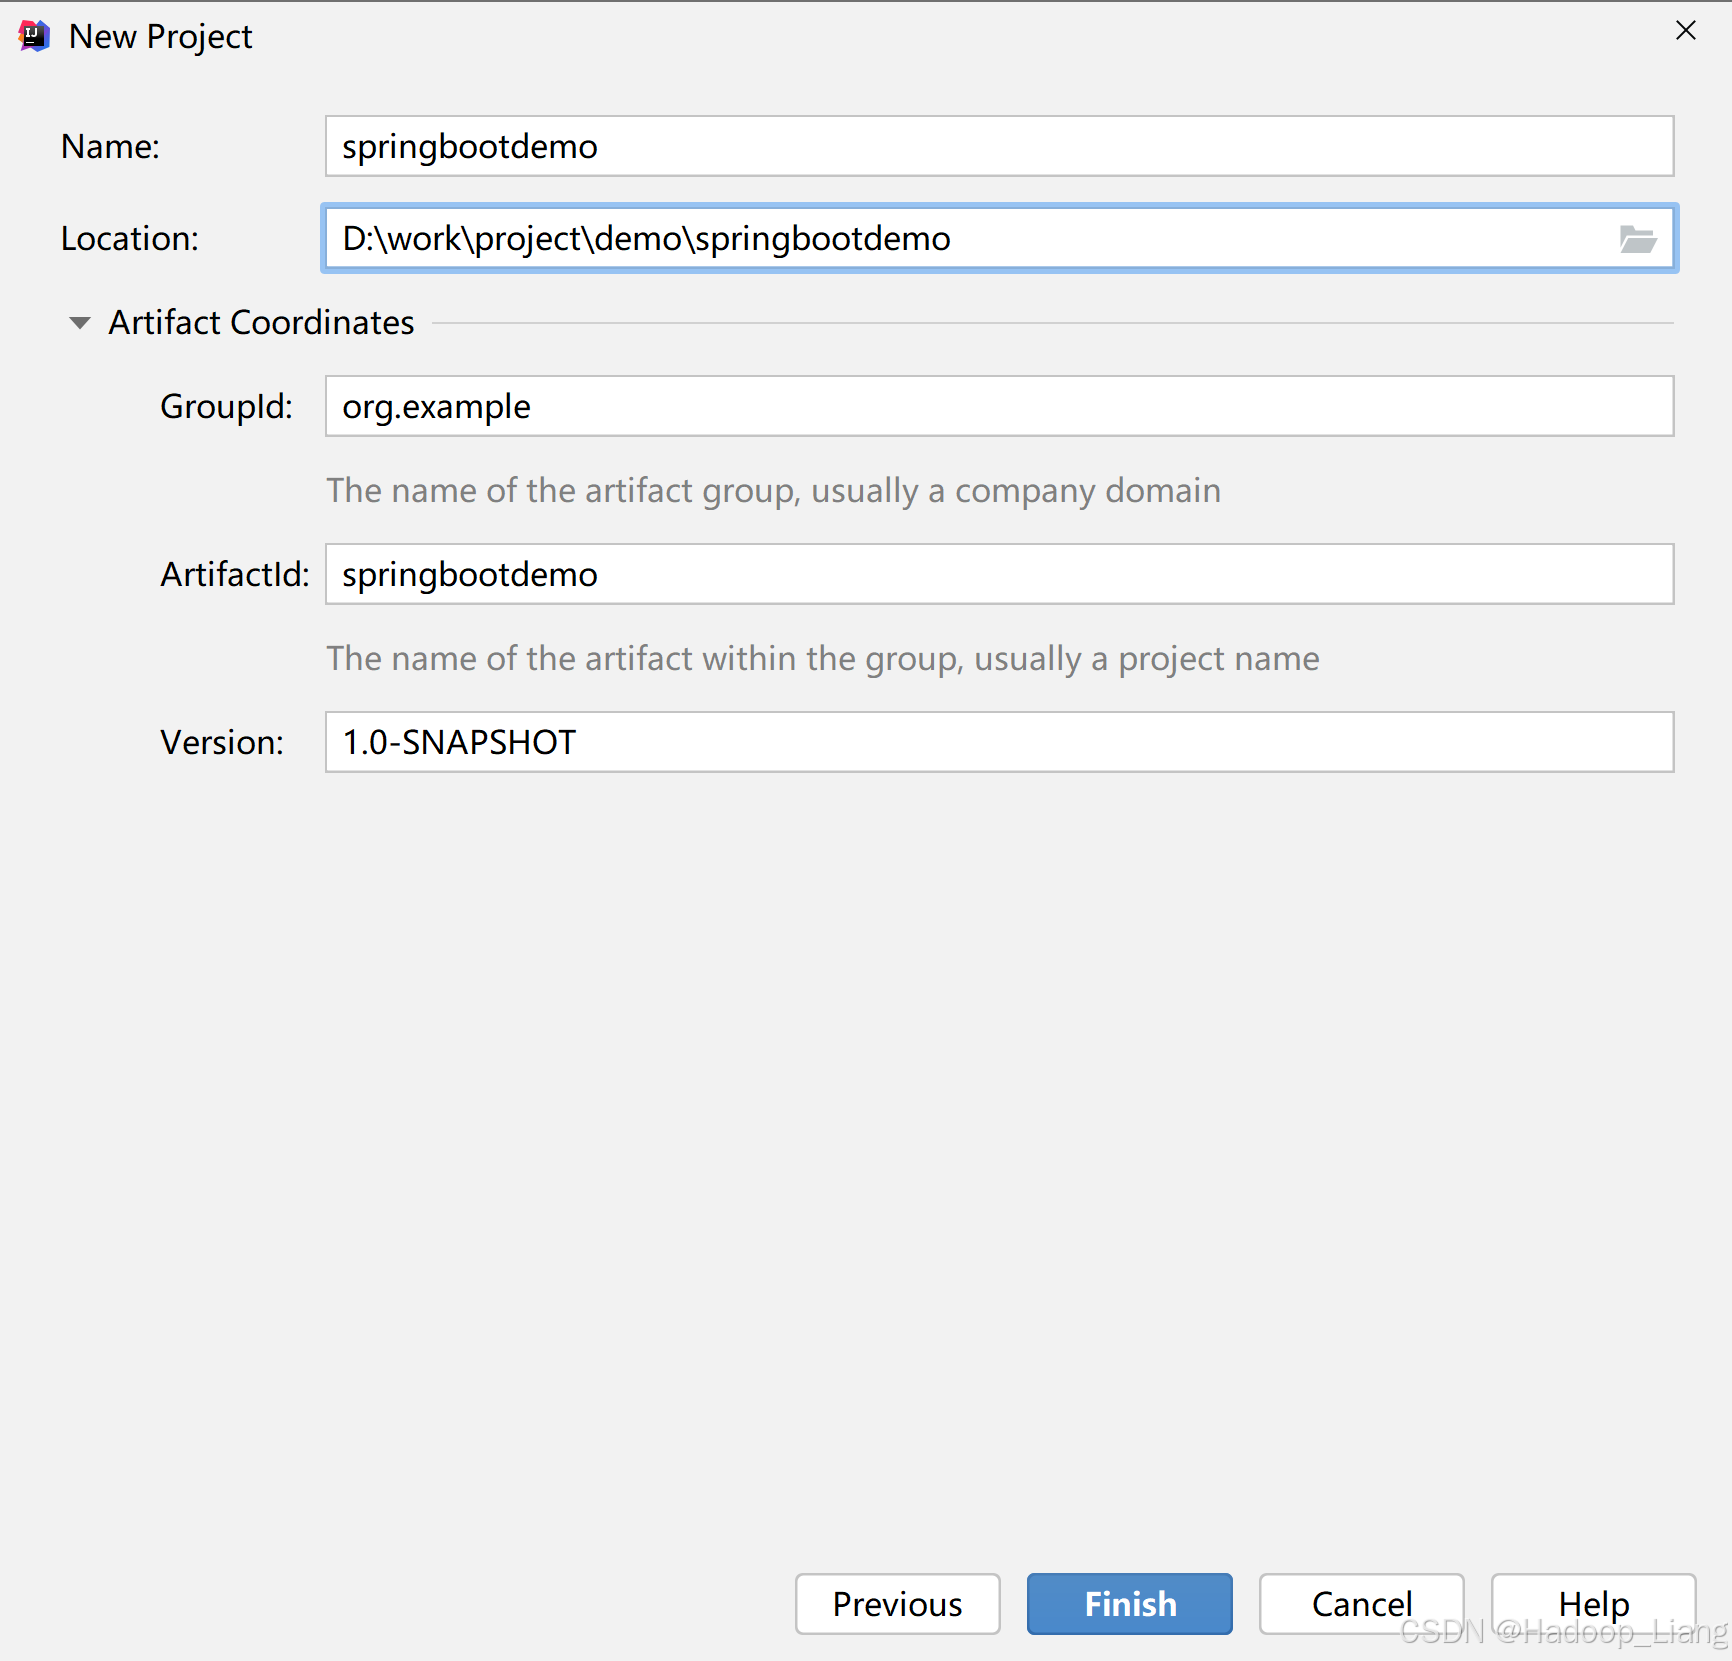 #### 导入 Spring Boot 相关的依赖在该 Maven 项目的 pom.xml 中添加以下配置,在 一行之前添加Spring Boot 相关的依赖及打包插件。 jar org.springframework.boot spring-boot-starter-parent 2.4.5 org.springframework.boot spring-boot-starter-web org.springframework.boot spring-boot-starter-test test org.springframework.boot spring-boot-maven-plugin true JAR repackage false 刷新依赖
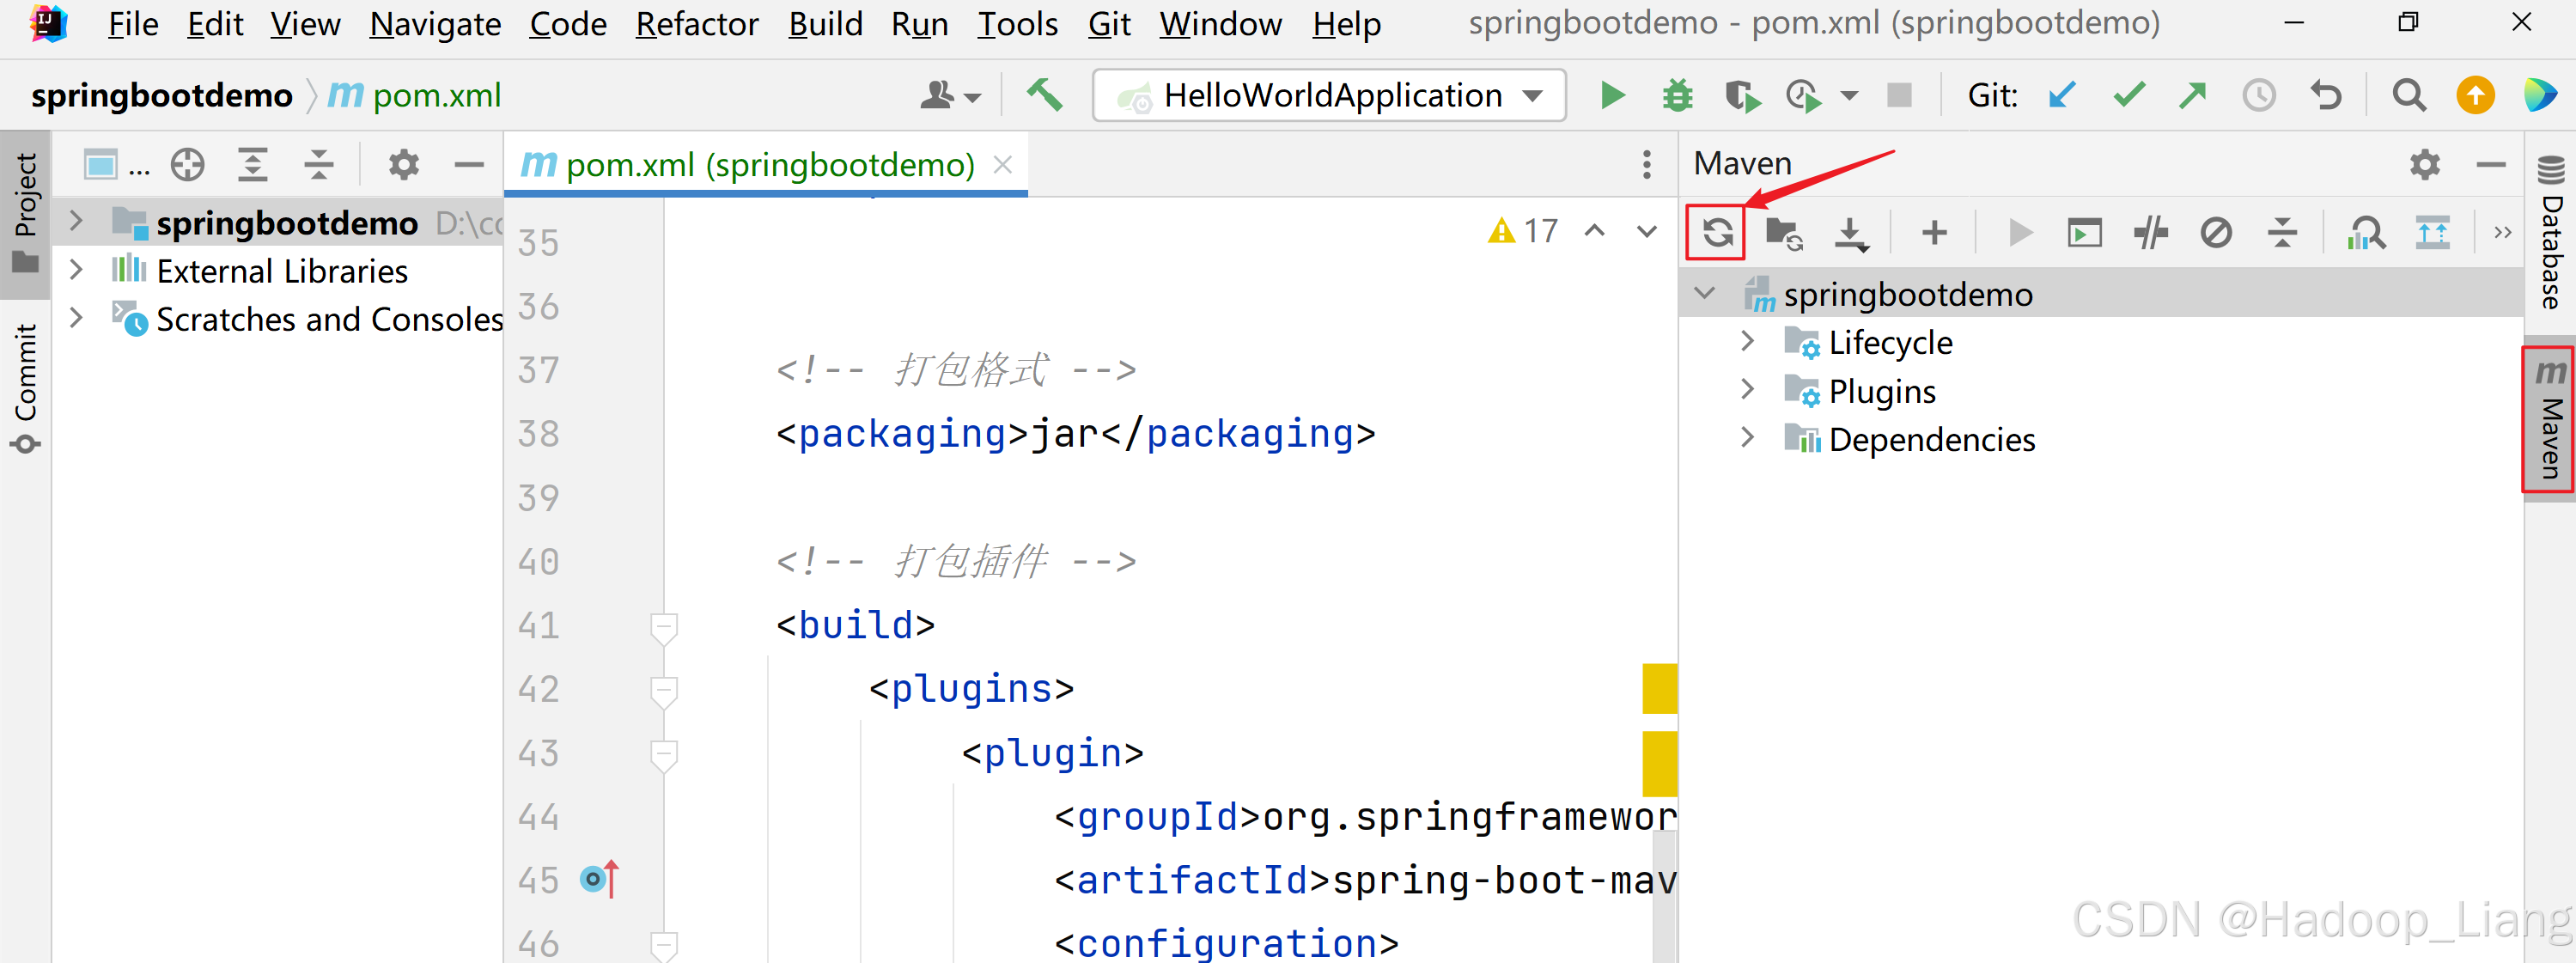 在src/main/java目录下,新建包
org.example在org.example包下新建启动类HelloWorldApplication package org.example; import org.springframework.boot.SpringApplication; import org.springframework.boot.autoconfigure.SpringBootApplication; @SpringBootApplication public class HelloWorldApplication { public static void main(String[] args) { SpringApplication.run(HelloWorldApplication.class, args); } }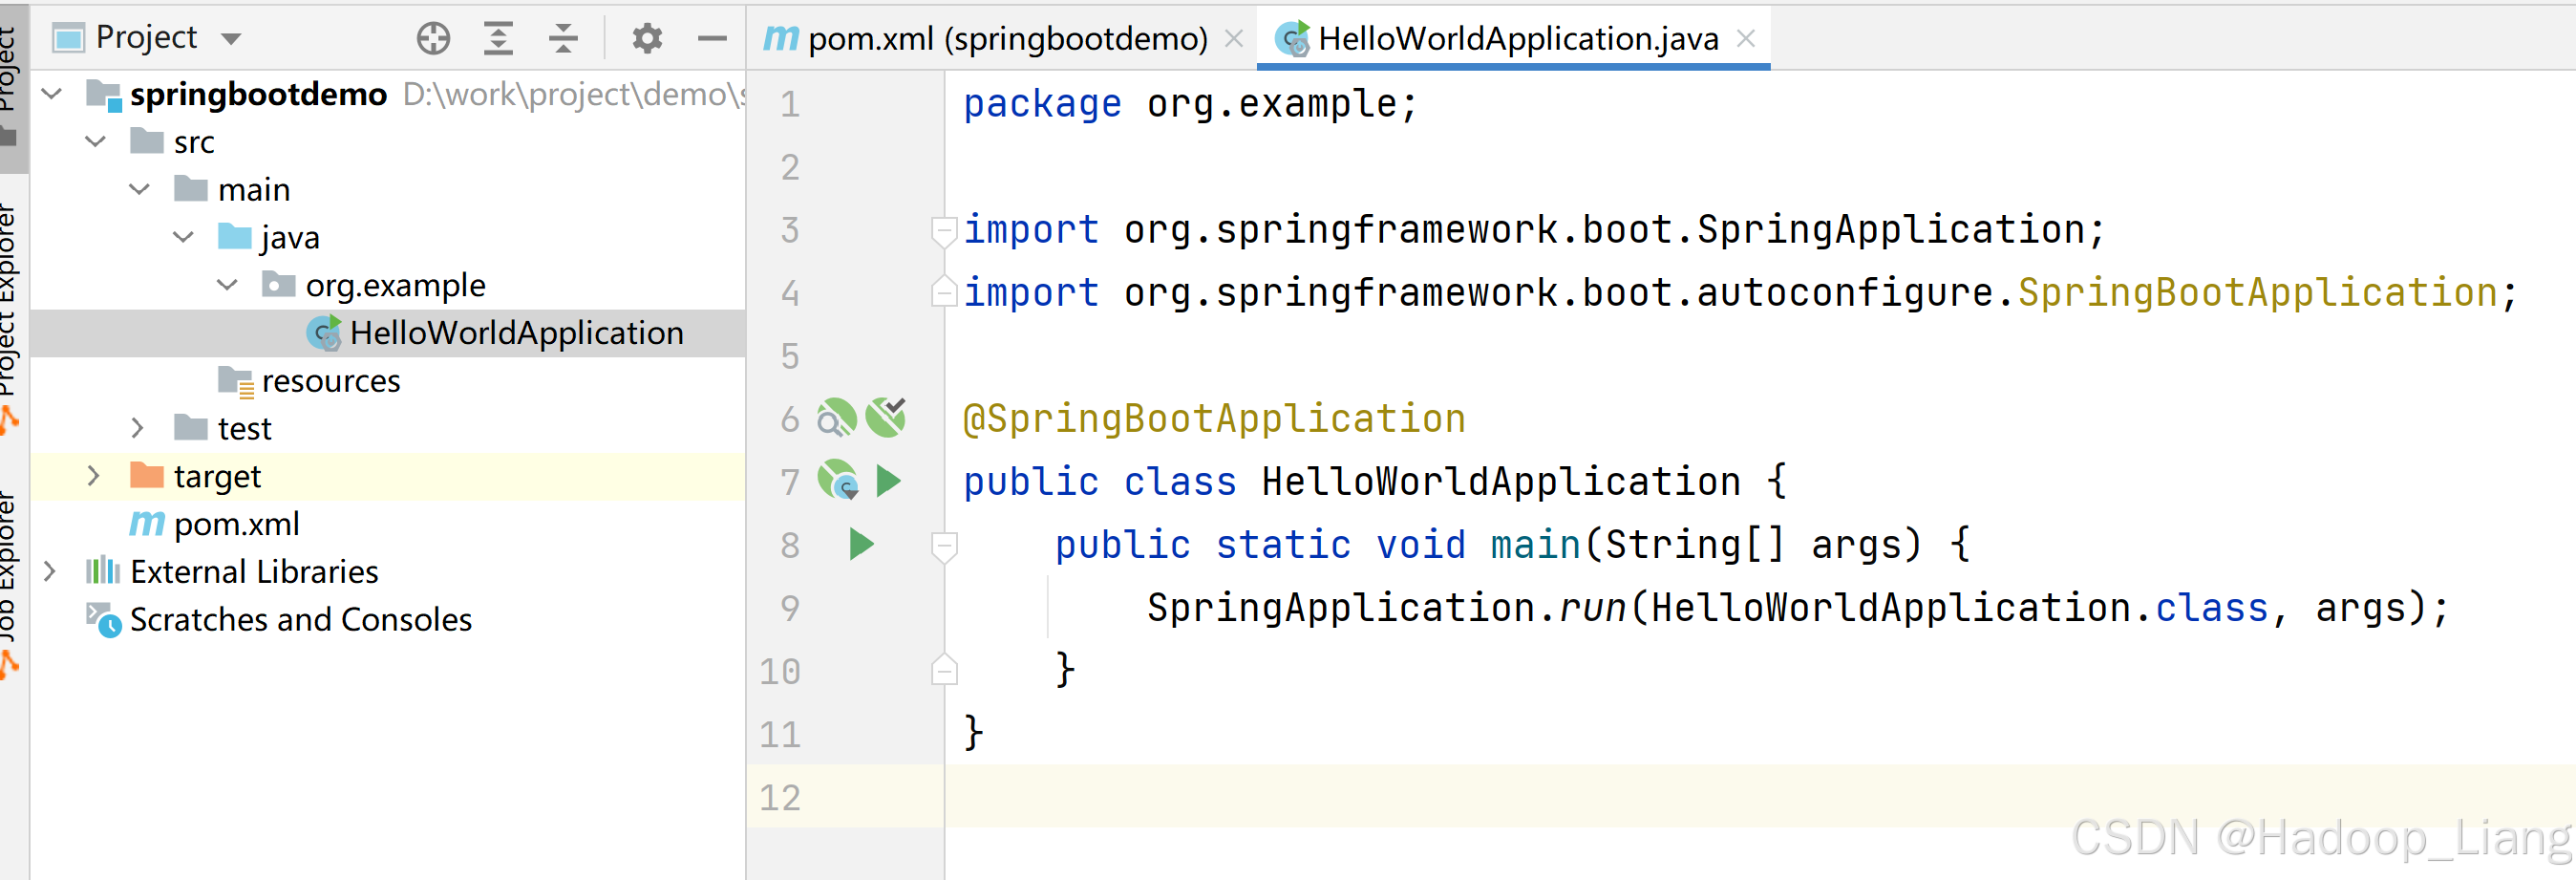 #### 启动项目点击HelloWorldApplication.java第7行或第8行的绿色三角形启动项目
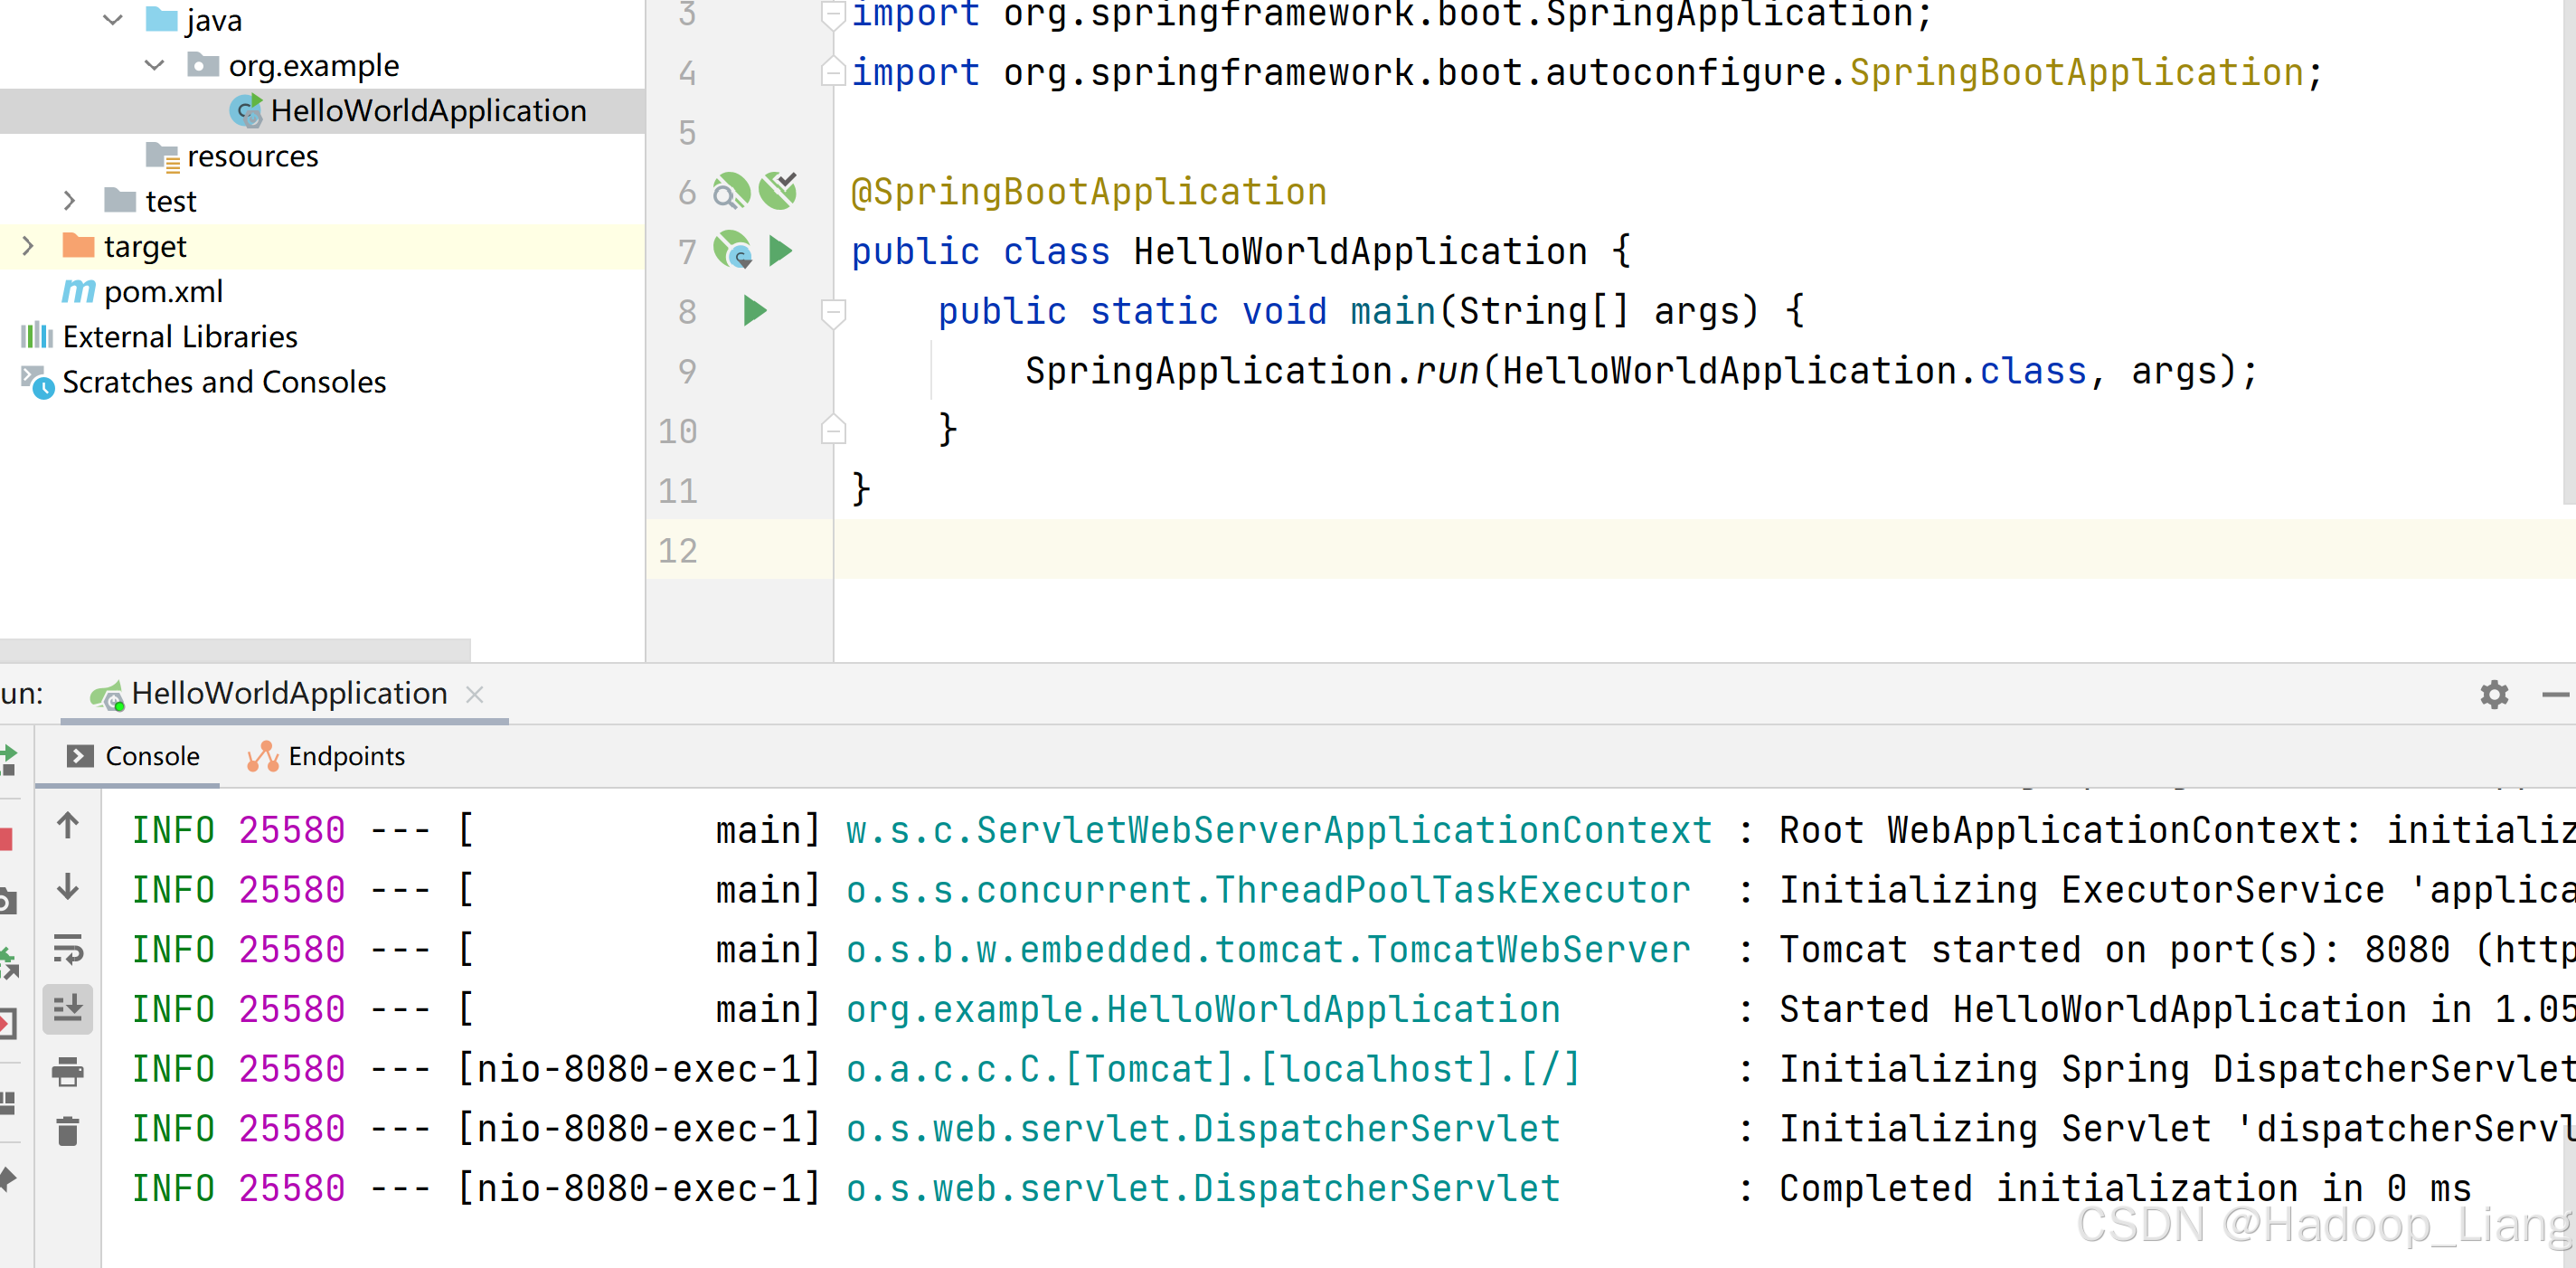 或者命令方式运行如下:MacOS/Linux:./mvnw spring-boot:run**Windows:*mvnw spring-boot:run#### 编写Controller为了看到效果,在
org.example下新建controller包,然后新建一个控制类HelloController package org.example.controller; import org.springframework.stereotype.Controller; import org.springframework.web.bind.annotation.RequestMapping; import org.springframework.web.bind.annotation.ResponseBody; @Controller public class HelloController { @ResponseBody @RequestMapping(“/hello”) public String hello(){ return “Hello World”; } }#### 测试接口重新运行项目浏览器访问http://localhost:8080/hello效果如下: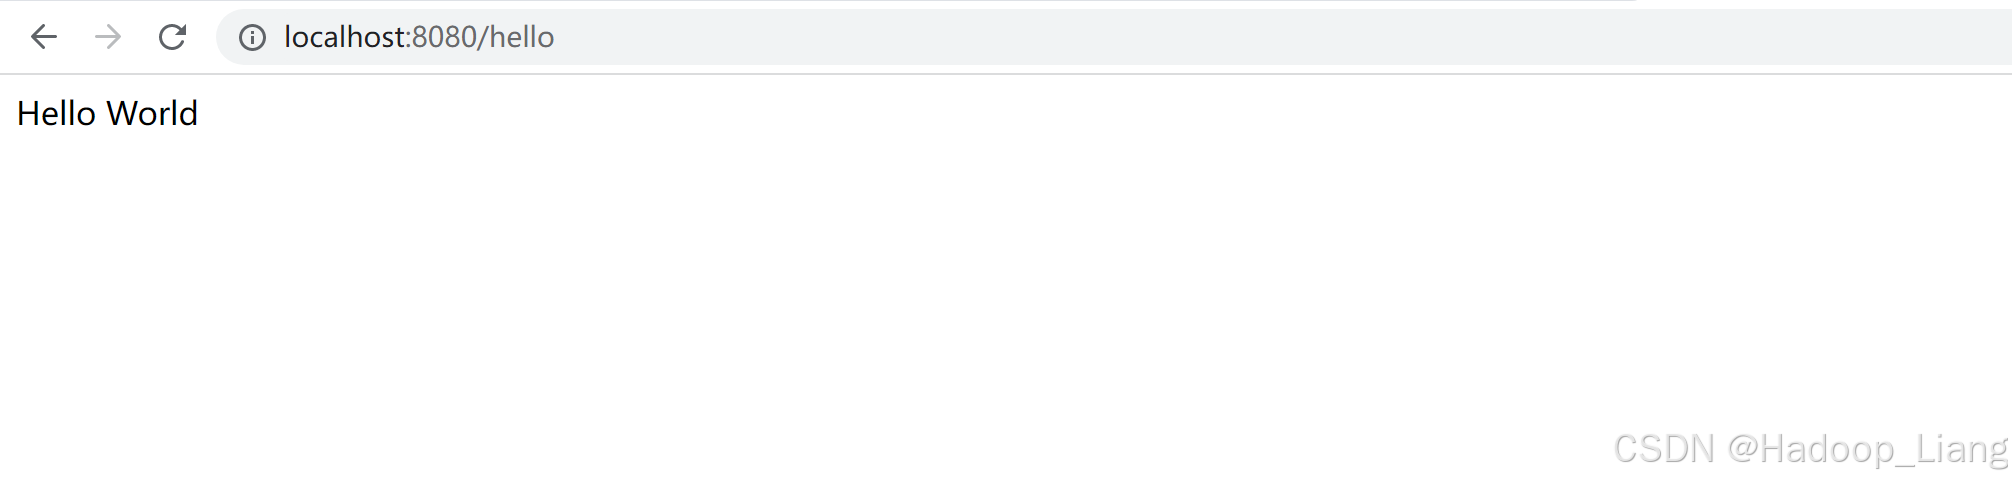 看到Hello World,说明接口正常。停止运行项目。
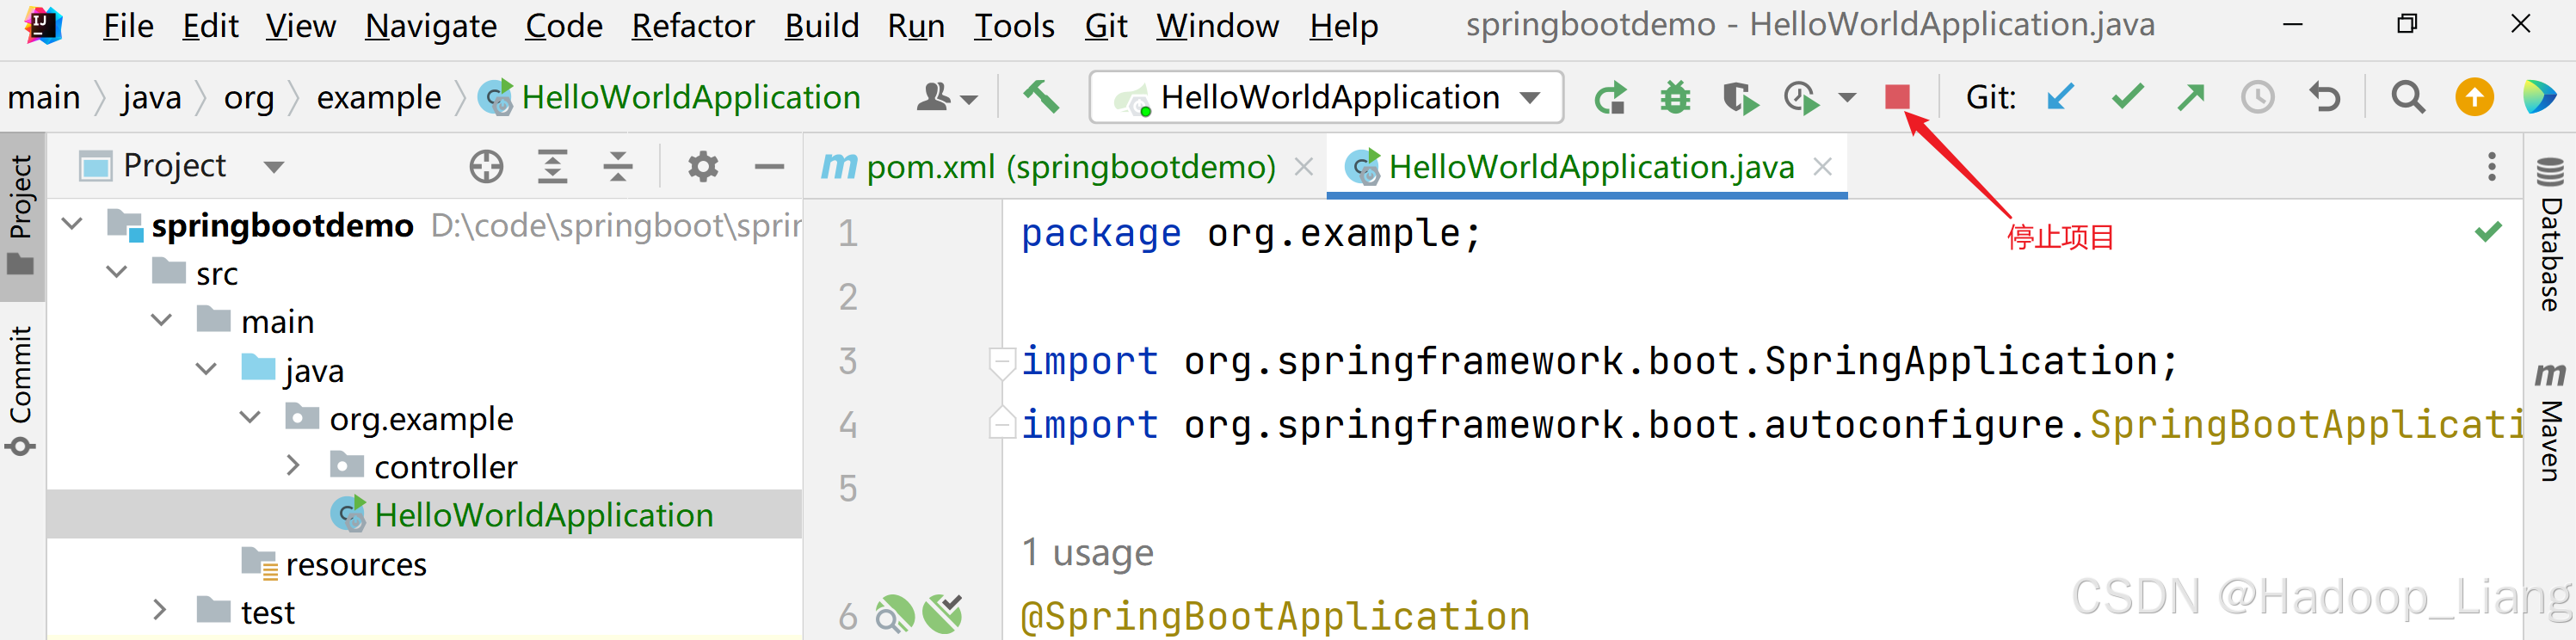 ### 构建镜像#### 打jar包
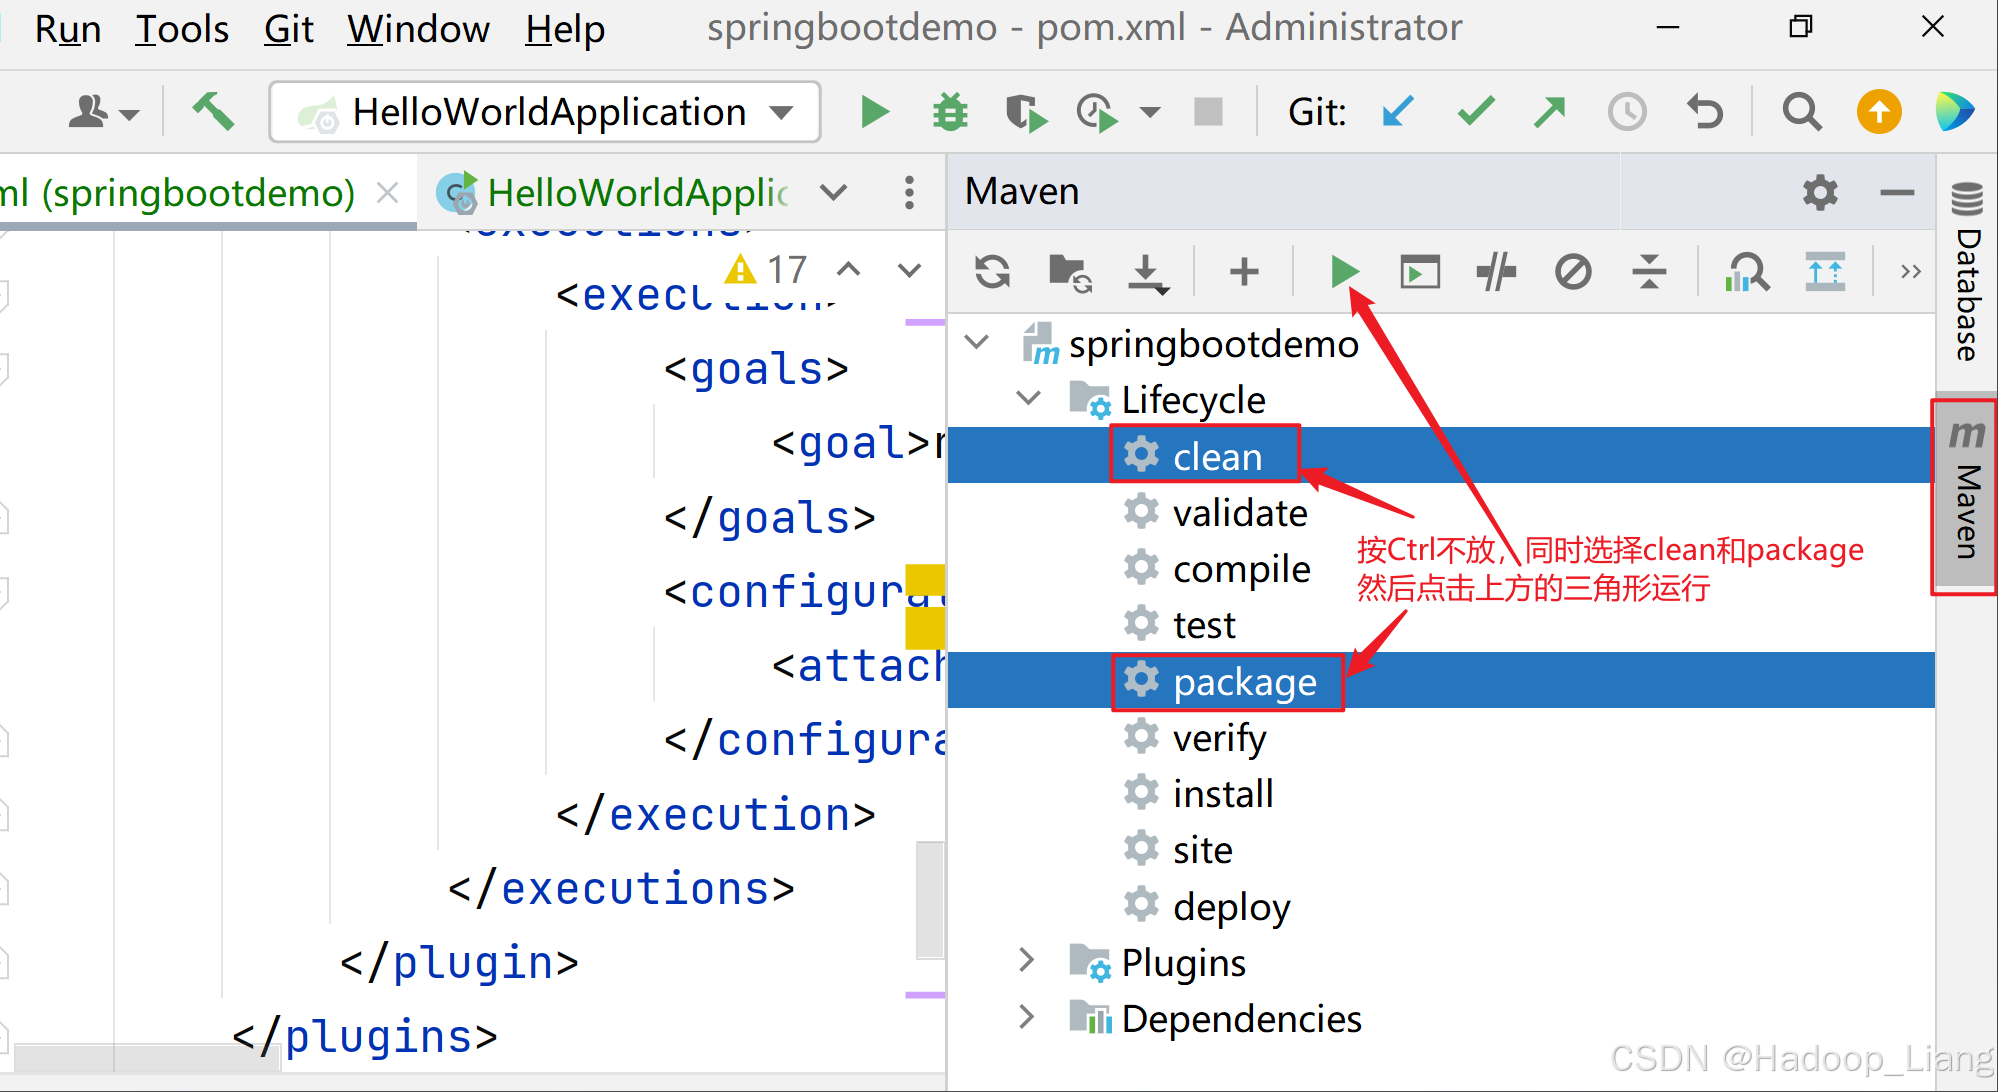 在项目的target目录下看到jar包如下
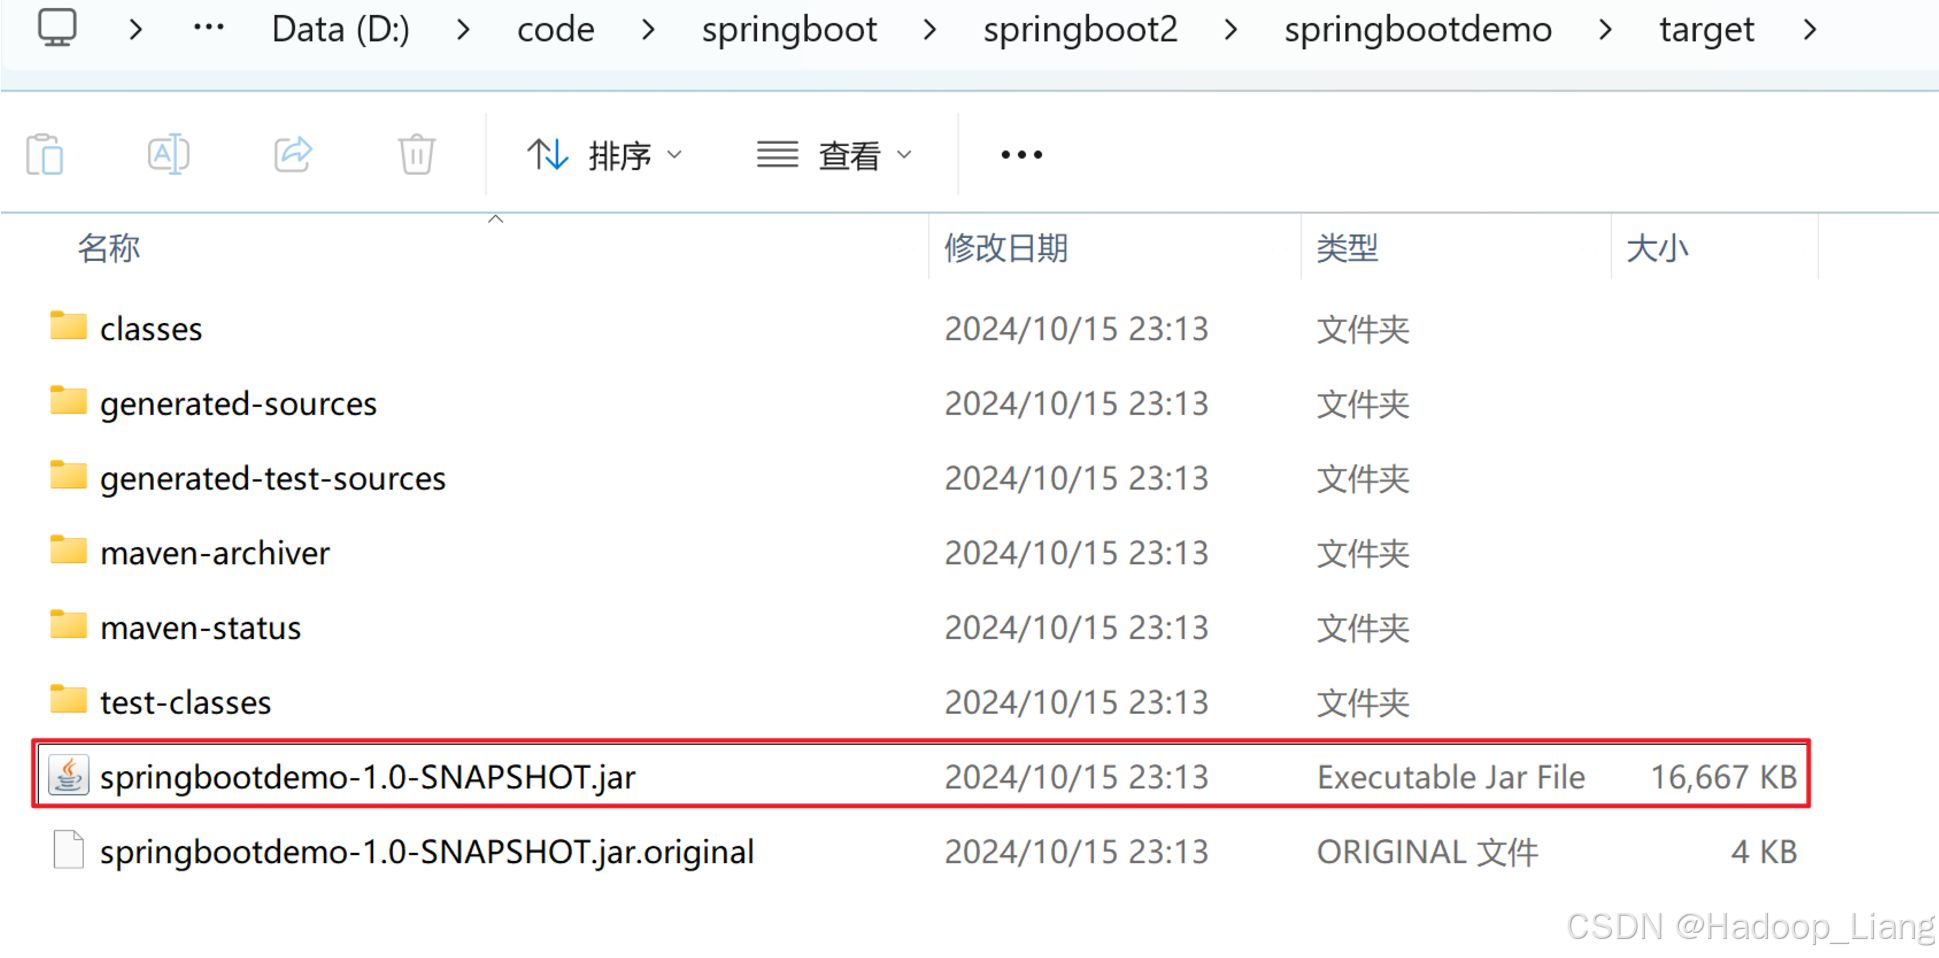 本地命令行运行jar包cmd进入jar包所在目录,执行如下命令D:codespringbootspringboot2springbootdemo arget>java -jar springbootdemo-1.0-SNAPSHOT.jar
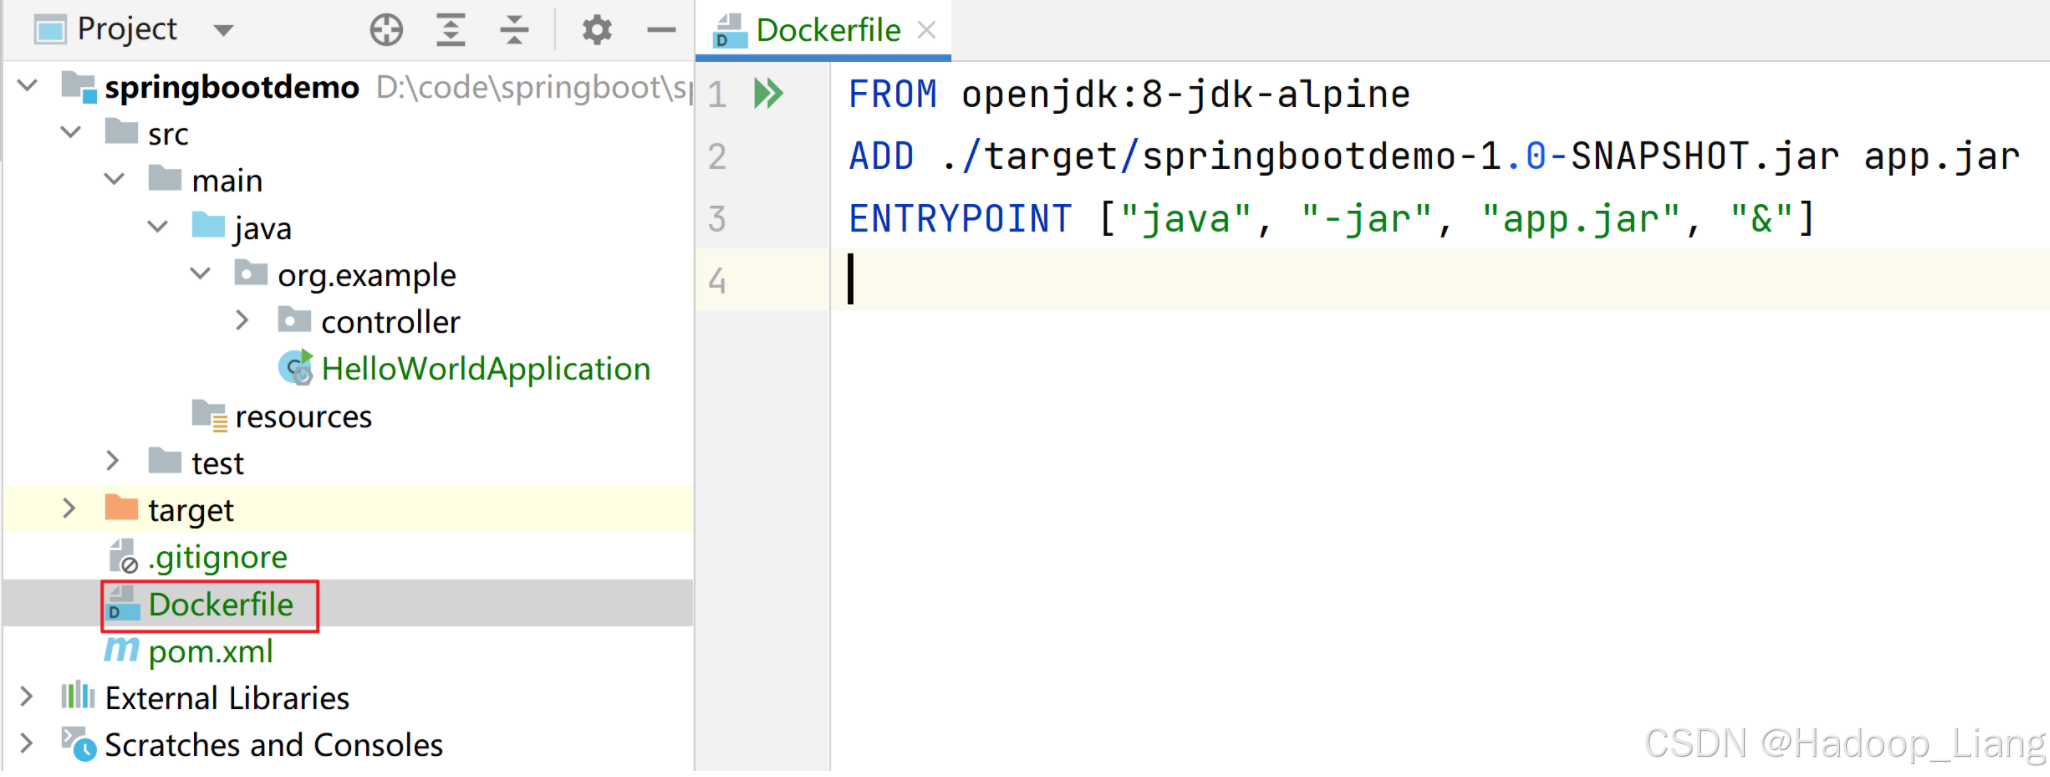
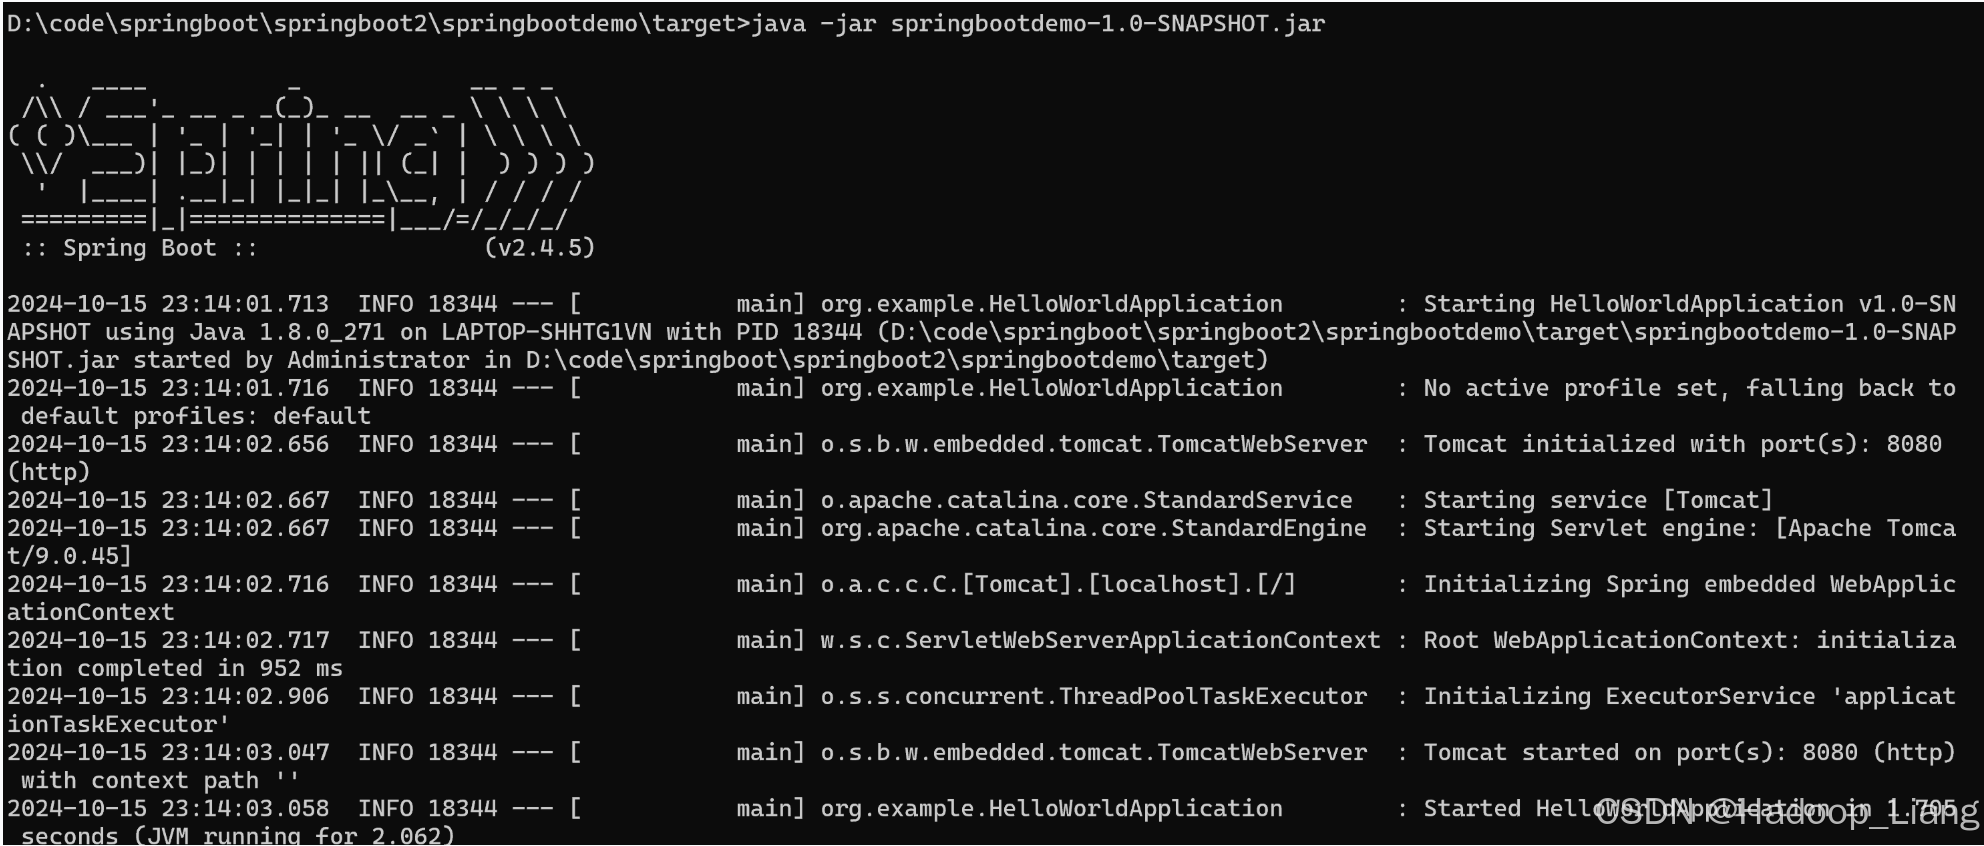 浏览器访问http://localhost:8080/hello返回数据正常,说明jar包可用。在cmd命令行按Ctrl+c停止项目,或者直接关闭cmd命令窗口。#### 新建Dockerfile文件在工程目录下,新建Dockerfile文件,文件内容如下 FROM openjdk:8-jdk-alpine ADD ./target/springbootdemo-1.0-SNAPSHOT.jar app.jar ENTRYPOINT [“java”, “-jar”, “app.jar”, “&”]
 Docker在Linux下,需要把Dockerfile和target的jar包上传到Linux,再构建镜像。#### Linux目录准备在Linux下创建工作目录[root@k8s-master01 ~]# mkdir -p test/springbootapp[root@k8s-master01 ~]# cd test/springbootapp[root@k8s-master01 test]# #### 上传Dockerfile和target目录到Linux上传Dockerfile和target目录到Linux的/test/springbootapp目录[root@k8s-master01 springbootapp]# lsDockerfile target[root@k8s-master01 springbootapp]# ls target/classes generated-test-sources maven-status springbootdemo-1.0-SNAPSHOT.jar.originalgenerated-sources maven-archiver springbootdemo-1.0-SNAPSHOT.jar test-classes[root@k8s-master01 springbootapp]# #### 制作镜像docker build -t springbootdemo:v1 .操作过程[root@k8s-master01 springbootapp]# docker build -t springbootdemo:v1 .[+] Building 579.2s (7/7) FINISHED docker:default => [internal] load build definition from Dockerfile 0.0s => => transferring dockerfile: 163B 0.0s => [internal] load metadata for docker.io/library/openjdk:8-jdk-alpine 169.8s => [internal] load .dockerignore 0.0s => => transferring context: 2B 0.0s => [internal] load build context 0.1s => => transferring context: 17.07MB 0.1s => [1/2] FROM docker.io/library/openjdk:8-jdk-alpine@sha256:94792824df2df33402f201713f932b58cb9de94a0cd524164a0f228334 407.7s => => resolve docker.io/library/openjdk:8-jdk-alpine@sha256:94792824df2df33402f201713f932b58cb9de94a0cd524164a0f22833435 0.0s => => sha256:f910a506b6cb1dbec766725d70356f695ae2bf2bea6224dbe8c7c6ad4f3664a2 238B / 238B 38.2s => => sha256:c2274a1a0e2786ee9101b08f76111f9ab8019e368dce1e325d3c284a0ca33397 70.73MB / 70.73MB 402.1s => => sha256:94792824df2df33402f201713f932b58cb9de94a0cd524164a0f2283343547b3 1.64kB / 1.64kB 0.0s => => sha256:44b3cea369c947527e266275cee85c71a81f20fc5076f6ebb5a13f19015dce71 947B / 947B 0.0s => => sha256:a3562aa0b991a80cfe8172847c8be6dbf6e46340b759c2b782f8b8be45342717 3.40kB / 3.40kB 0.0s => => sha256:e7c96db7181be991f19a9fb6975cdbbd73c65f4a2681348e63a141a2192a5f10 2.76MB / 2.76MB 42.6s => => extracting sha256:e7c96db7181be991f19a9fb6975cdbbd73c65f4a2681348e63a141a2192a5f10 0.4s => => extracting sha256:f910a506b6cb1dbec766725d70356f695ae2bf2bea6224dbe8c7c6ad4f3664a2 0.0s => => extracting sha256:c2274a1a0e2786ee9101b08f76111f9ab8019e368dce1e325d3c284a0ca33397 4.6s => [2/2] ADD ./target/springbootdemo-1.0-SNAPSHOT.jar app.jar 1.4s => exporting to image 0.2s => => exporting layers 0.2s => => writing image sha256:00bb52a626f8e486a884f956ff944bcbecedb39329476a41fa7f5dbb1587dd5f 0.0s => => naming to docker.io/library/springbootdemo:v1 0.0s[root@k8s-master01 springbootapp]# #### 查看镜像[root@k8s-master01 springbootapp]# docker imagesREPOSITORY TAG IMAGE ID CREATED SIZEspringbootdemo v1 00bb52a626f8 About a minute ago 122MBregistry.aliyuncs.com/google_containers/kube-apiserver v1.31.1 6bab7719df10 2 months ago 94.2MBregistry.aliyuncs.com/google_containers/kube-controller-manager v1.31.1 175ffd71cce3 2 months ago 88.4MBregistry.aliyuncs.com/google_containers/kube-scheduler v1.31.1 9aa1fad94157 2 months ago 67.4MBregistry.aliyuncs.com/google_containers/kube-proxy v1.31.1 60c005f310ff 2 months ago 91.5MBcalico/typha v3.28.1 a19ab150aded 3 months ago 71.3MBcalico/kube-controllers v3.28.1 9d19dff735fa 3 months ago 79.3MBcalico/cni v3.28.1 f6d76a1259a8 3 months ago 209MBcalico/node v3.28.1 8bbeb9e1ee32 3 months ago 365MBregistry.aliyuncs.com/google_containers/coredns v1.11.3 c69fa2e9cbf5 3 months ago 61.8MBregistry.aliyuncs.com/google_containers/etcd 3.5.15-0 2e96e5913fc0 3 months ago 148MBregistry.aliyuncs.com/google_containers/pause 3.10 873ed7510279 5 months ago 736kBhello-world latest d2c94e258dcb 18 months ago 13.3kBregistry.aliyuncs.com/google_containers/pause 3.8 4873874c08ef 2 years ago 711kB能看到
springbootdemo:v1镜像。#### 测试镜像使用Docker命令测试运行镜像docker run -d -p 8080:8080 --name springbootdemo springbootdemo:v1命令行访问[root@k8s-master01 springbootapp]# curl localhost:8080/helloHello World[root@k8s-master01 springbootapp]# 浏览器访问虚拟机ip:8080/hellohttp://192.168.204.101:8080/hello 能访问,说明镜像正常。删除容器[root@k8s-master01 springbootapp]# docker rm -f springbootdemo### 上传镜像上传镜像到镜像仓库,这里使用阿里云镜像仓库为例。登录阿里云,进入控制台,找到容器镜像服务,创建命名空间,创建创库名称,根据操作指南进行操作,详细步骤可参考:Docker镜像的使用上传镜像命令$ docker login --username= registry.cn-shenzhen.aliyuncs.com$ docker tag [ImageId] registry.cn-shenzhen.aliyuncs.com/mytest_ns/springbootdemo:[镜像版本号]$ docker push registry.cn-shenzhen.aliyuncs.com/mytest_ns/springbootdemo:[镜像版本号]注意:需要换成自己的账号名称操作# 登录阿里云[root@k8s-master01 springbootapp]# docker login --username= registry.cn-shenzhen.aliyuncs.comPassword: WARNING! Your password will be stored unencrypted in /root/.docker/config.json.Configure a credential helper to remove this warning. Seehttps://docs.docker.com/engine/reference/commandline/login/#credential-storesLogin Succeeded# 查看docker镜像id[root@k8s-master01 springbootapp]# docker imagesREPOSITORY TAG IMAGE ID CREATED SIZEspringbootdemo v1 00bb52a626f8 15 minutes ago 122MBregistry.aliyuncs.com/google_containers/kube-apiserver v1.31.1 6bab7719df10 2 months ago 94.2MBregistry.aliyuncs.com/google_containers/kube-scheduler v1.31.1 9aa1fad94157 2 months ago 67.4MBregistry.aliyuncs.com/google_containers/kube-controller-manager v1.31.1 175ffd71cce3 2 months ago 88.4MBregistry.aliyuncs.com/google_containers/kube-proxy v1.31.1 60c005f310ff 2 months ago 91.5MBcalico/typha v3.28.1 a19ab150aded 3 months ago 71.3MBcalico/kube-controllers v3.28.1 9d19dff735fa 3 months ago 79.3MBcalico/cni v3.28.1 f6d76a1259a8 3 months ago 209MBcalico/node v3.28.1 8bbeb9e1ee32 3 months ago 365MBregistry.aliyuncs.com/google_containers/coredns v1.11.3 c69fa2e9cbf5 3 months ago 61.8MBregistry.aliyuncs.com/google_containers/etcd 3.5.15-0 2e96e5913fc0 3 months ago 148MBregistry.aliyuncs.com/google_containers/pause 3.10 873ed7510279 5 months ago 736kBhello-world latest d2c94e258dcb 18 months ago 13.3kBregistry.aliyuncs.com/google_containers/pause 3.8 4873874c08ef 2 years ago 711kB# 对镜像打标签[root@k8s-master01 springbootapp]# docker tag 00bb52a626f8 registry.cn-shenzhen.aliyuncs.com/mytest_ns/springbootdemo:v1[root@k8s-master01 springbootapp]# docker imagesREPOSITORY TAG IMAGE ID CREATED SIZEregistry.cn-shenzhen.aliyuncs.com/mytest_ns/springbootdemo v1 00bb52a626f8 16 minutes ago 122MBspringbootdemo v1 00bb52a626f8 16 minutes ago 122MBregistry.aliyuncs.com/google_containers/kube-apiserver v1.31.1 6bab7719df10 2 months ago 94.2MBregistry.aliyuncs.com/google_containers/kube-scheduler v1.31.1 9aa1fad94157 2 months ago 67.4MBregistry.aliyuncs.com/google_containers/kube-controller-manager v1.31.1 175ffd71cce3 2 months ago 88.4MBregistry.aliyuncs.com/google_containers/kube-proxy v1.31.1 60c005f310ff 2 months ago 91.5MBcalico/typha v3.28.1 a19ab150aded 3 months ago 71.3MBcalico/kube-controllers v3.28.1 9d19dff735fa 3 months ago 79.3MBcalico/cni v3.28.1 f6d76a1259a8 3 months ago 209MBcalico/node v3.28.1 8bbeb9e1ee32 3 months ago 365MBregistry.aliyuncs.com/google_containers/coredns v1.11.3 c69fa2e9cbf5 3 months ago 61.8MBregistry.aliyuncs.com/google_containers/etcd 3.5.15-0 2e96e5913fc0 3 months ago 148MBregistry.aliyuncs.com/google_containers/pause 3.10 873ed7510279 5 months ago 736kBhello-world latest d2c94e258dcb 18 months ago 13.3kBregistry.aliyuncs.com/google_containers/pause 3.8 4873874c08ef 2 years ago 711kB# 上传镜像[root@k8s-master01 springbootapp]# docker push registry.cn-shenzhen.aliyuncs.com/mytest_ns/springbootdemo:v1The push refers to repository [registry.cn-shenzhen.aliyuncs.com/mytest_ns/springbootdemo]7217cf1a65b2: Pushed ceaf9e1ebef5: Pushed 9b9b7f3d56a0: Pushed f1b5933fe4b5: Pushed v1: digest: sha256:360f8ce8a2358fca237f6fd884cf58a3f9184c3fa08f9b475a35fe0bc2bb93bc size: 1159[root@k8s-master01 springbootapp]# 查看上传成功的镜像
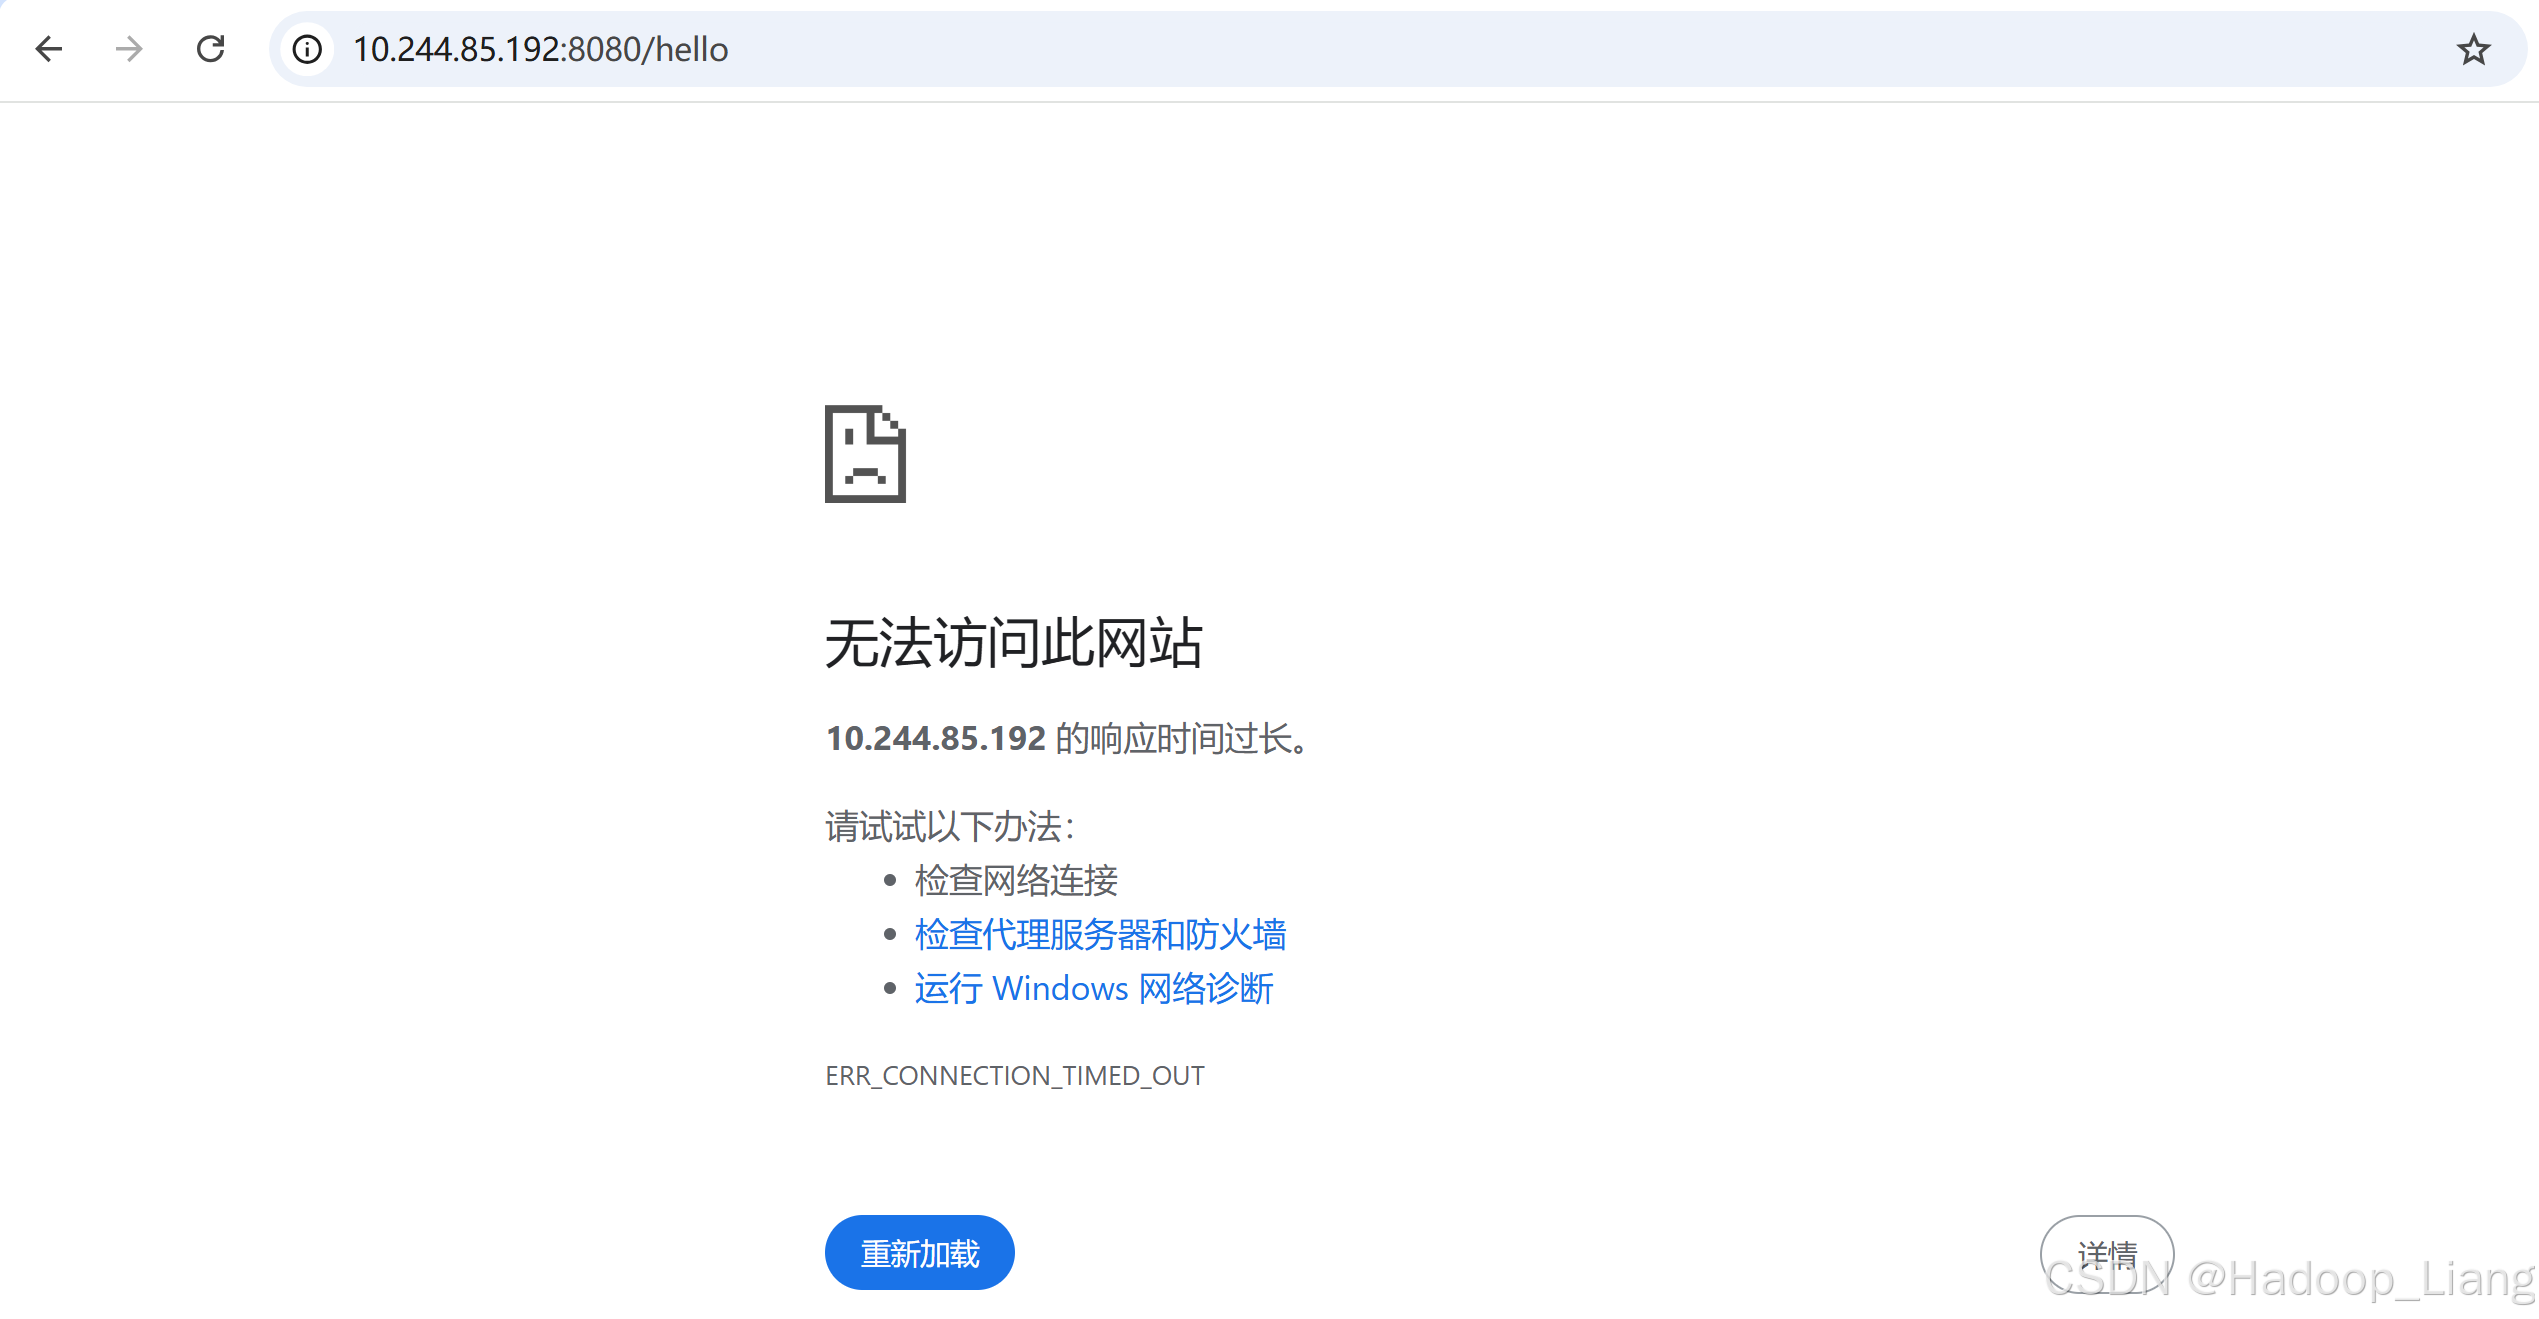
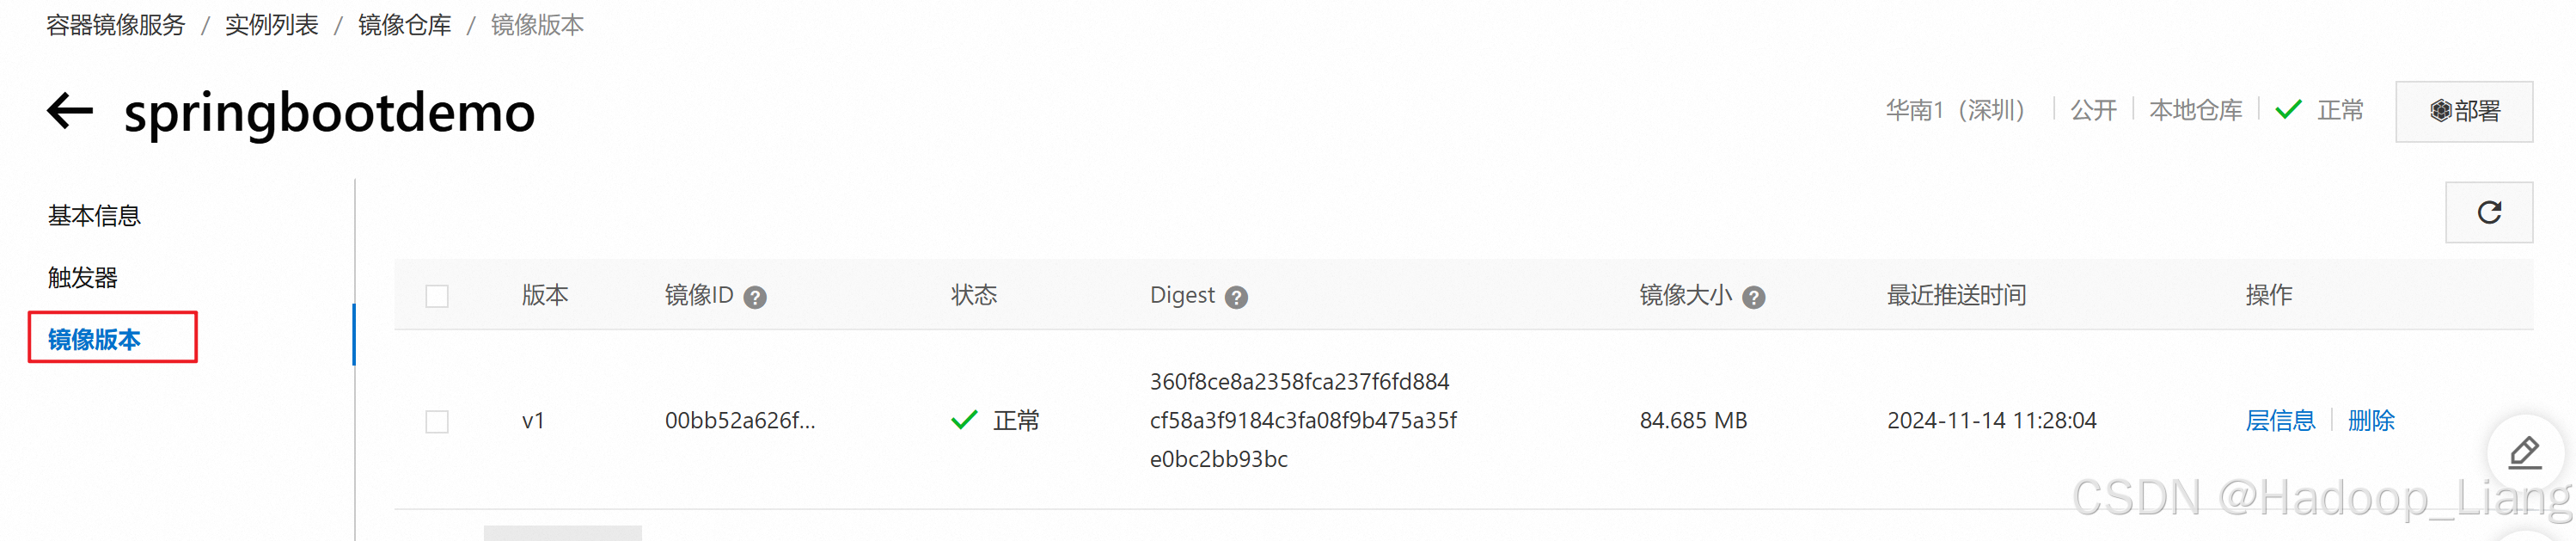 镜像大小是压缩过后的大小。### 准备yaml文件 # 生成springbootdemo.yaml [root@k8s-master01 ~]# kubectl create deployment springboothello --image=registry.cn-shenzhen.aliyuncs.com/mytest_ns/springbootdemo:v1 --dry-run=client -o yaml > springbootdemo.yaml # 查看yaml文件 [root@k8s-master01 ~]# ls … springbootdemo.yaml … # 查看springbootdemo.yaml内容 [root@k8s-master01 ~]# cat springbootdemo.yaml apiVersion: apps/v1 kind: Deployment metadata: creationTimestamp: null labels: app: springboothello name: springboothello spec: replicas: 1 selector: matchLabels: app: springboothello strategy: {} template: metadata: creationTimestamp: null labels: app: springboothello spec: containers: - image: registry.cn-shenzhen.aliyuncs.com/mytest_ns/springbootdemo:v1 name: springbootdemo resources: {} status: {}### 创建deployment#### 应用springbootdemo.yaml创建deployment[root@k8s-master01 ~]# kubectl apply -f springbootdemo.yaml deployment.apps/springboothello created#### 查看deployment[root@k8s-master01 ~]# kubectl get deploymentNAME READY UP-TO-DATE AVAILABLE AGEspringboothello 0/1 1 0 12s#### 查看deployment详情[root@k8s-master01 ~]# kubectl describe deployment springboothelloName: springboothelloNamespace: defaultCreationTimestamp: Thu, 14 Nov 2024 12:28:11 +0800Labels: app=springboothelloAnnotations: deployment.kubernetes.io/revision: 1Selector: app=springboothelloReplicas: 1 desired | 1 updated | 1 total | 1 available | 0 unavailableStrategyType: RollingUpdateMinReadySeconds: 0RollingUpdateStrategy: 25% max unavailable, 25% max surgePod Template: Labels: app=springboothello Containers: springbootdemo: Image: registry.cn-shenzhen.aliyuncs.com/mytest_ns/springbootdemo:v1 Port: Host Port: Environment: Mounts: Volumes: Node-Selectors: Tolerations: Conditions: Type Status Reason ---- ------ ------ Available True MinimumReplicasAvailable Progressing True NewReplicaSetAvailableOldReplicaSets: NewReplicaSet: springboothello-747b759b88 (1/1 replicas created)Events: Type Reason Age From Message ---- ------ ---- ---- ------- Normal ScalingReplicaSet 103s deployment-controller Scaled up replica set springboothello-747b759b88 to 1#### 查看pod[root@k8s-master01 ~]# kubectl get podsNAME READY STATUS RESTARTS AGEspringboothello-747b759b88-v8t54 1/1 Running 0 2m59s[root@k8s-master01 ~]# kubectl get pods -o wideNAME READY STATUS RESTARTS AGE IP NODE NOMINATED NODE READINESS GATESspringboothello-747b759b88-v8t54 1/1 Running 0 3m52s 10.244.85.192 k8s-node01 [root@k8s-master01 ~]# #### 访问测试集群内,命令访问[root@k8s-master01 ~]# curl 10.244.85.192:8080/helloHello World[root@k8s-master01 ~]# [root@k8s-node01 ~]# curl 10.244.85.192:8080/helloHello World[root@k8s-node01 ~]# [root@k8s-node02 ~]# curl 10.244.85.192:8080/helloHello World[root@k8s-node02 ~]# 注意:此时只能在集群内部使用。如果用集群外的浏览器访问,访问不了
 ### 扩容deployment pod# pod扩容为3[root@k8s-makubectl scale deployment springboothello --replicas=3deployment.apps/springboothello scaled# 查看pods,还有容器正在创建[root@k8s-master01 ~]# kubectl get pods -o wideNAME READY STATUS RESTARTS AGE IP NODE NOMINATED NODE READINESS GATESspringboothello-747b759b88-cs9dv 1/1 Running 0 6s 10.244.85.196 k8s-node01 springboothello-747b759b88-jzlpm 0/1 ContainerCreating 0 6s k8s-node02 springboothello-747b759b88-v8t54 1/1 Running 0 112m 10.244.85.192 k8s-node01 # 查看pods,成功如下[root@k8s-master01 ~]# kubectl get pods -o wideNAME READY STATUS RESTARTS AGE IP NODE NOMINATED NODE READINESS GATESspringboothello-747b759b88-cs9dv 1/1 Running 0 3m8s 10.244.85.196 k8s-node01 springboothello-747b759b88-jzlpm 1/1 Running 0 3m8s 10.244.58.194 k8s-node02 springboothello-747b759b88-v8t54 1/1 Running 0 115m 10.244.85.192 k8s-node01 [root@k8s-master01 ~]# ### 公布应用程序#### 对外暴露应用# 对外暴露应用[root@k8s-master01 ~]# kubectl expose deployment springboothello --port=8080 --target-port=8080 --type=NodePort命令参数说明
 expose:这是 kubectl 的一个子命令,用于创建一个新的服务来暴露一个资源(如 Deployment、Pod 等)。 * deployment springboothello:指定要暴露的资源是名为 springboothello 的 Deployment。这意味着该服务会将流量路由到这个 Deployment 所管理的 Pod 集合上。 * --port=8080:定义了服务在集群内部监听的端口号为 8080。当其他服务或 Pod 在集群内部要访问这个服务时,会使用这个端口。 * --target-port=8080:指定了流量最终要被转发到后端 Pod 上的端口号也是 8080。也就是说,从服务的 8080 端口接收到的流量会被转发到对应的 Deployment 所管理的 Pod 的 8080 端口上。 * --type=NodePort:设置服务的类型为 NodePort。这种类型的服务会在集群中的每个节点(Node)上开放一个指定范围(通常是 30000 - 32767)内的随机端口,外部客户端可以通过访问集群中任意节点的该随机端口来访问到服务背后的应用(这里就是 springboothello Deployment 所管理的 Pod 运行的应用)。 #### 查看服务# 查看service[root@k8s-master01 ~]# kubectl get svcNAME TYPE CLUSTER-IP EXTERNAL-IP PORT(S) AGEkubernetes ClusterIP 10.0.0.1 443/TCP 60dspringboothello NodePort 10.1.199.196 8080:30582/TCP 8s[root@k8s-master01 ~]# 从service中,可以看到springboothello的Service CLUSTER-IP为10.1.199.196,PORT8080映射为30582端口#### 访问测试命令访问ServiceCLUSTER-IP:8080/hello[root@k8s-master01 ~]# curl 10.1.199.196:8080/helloHello World[root@k8s-master01 ~]# 命令访问K8S机器IP:30582[root@k8s-master01 ~]# curl 192.168.204.101:30582/helloHello World[root@k8s-master01 ~]# [root@k8s-master01 ~]# curl 192.168.204.102:30582/helloHello World[root@k8s-master01 ~]# [root@k8s-master01 ~]# curl 192.168.204.103:30582/helloHello World[root@k8s-master01 ~]# 浏览器访问192.168.204.101:30582/hello192.168.204.102:30582/hello192.168.204.103:30582/hello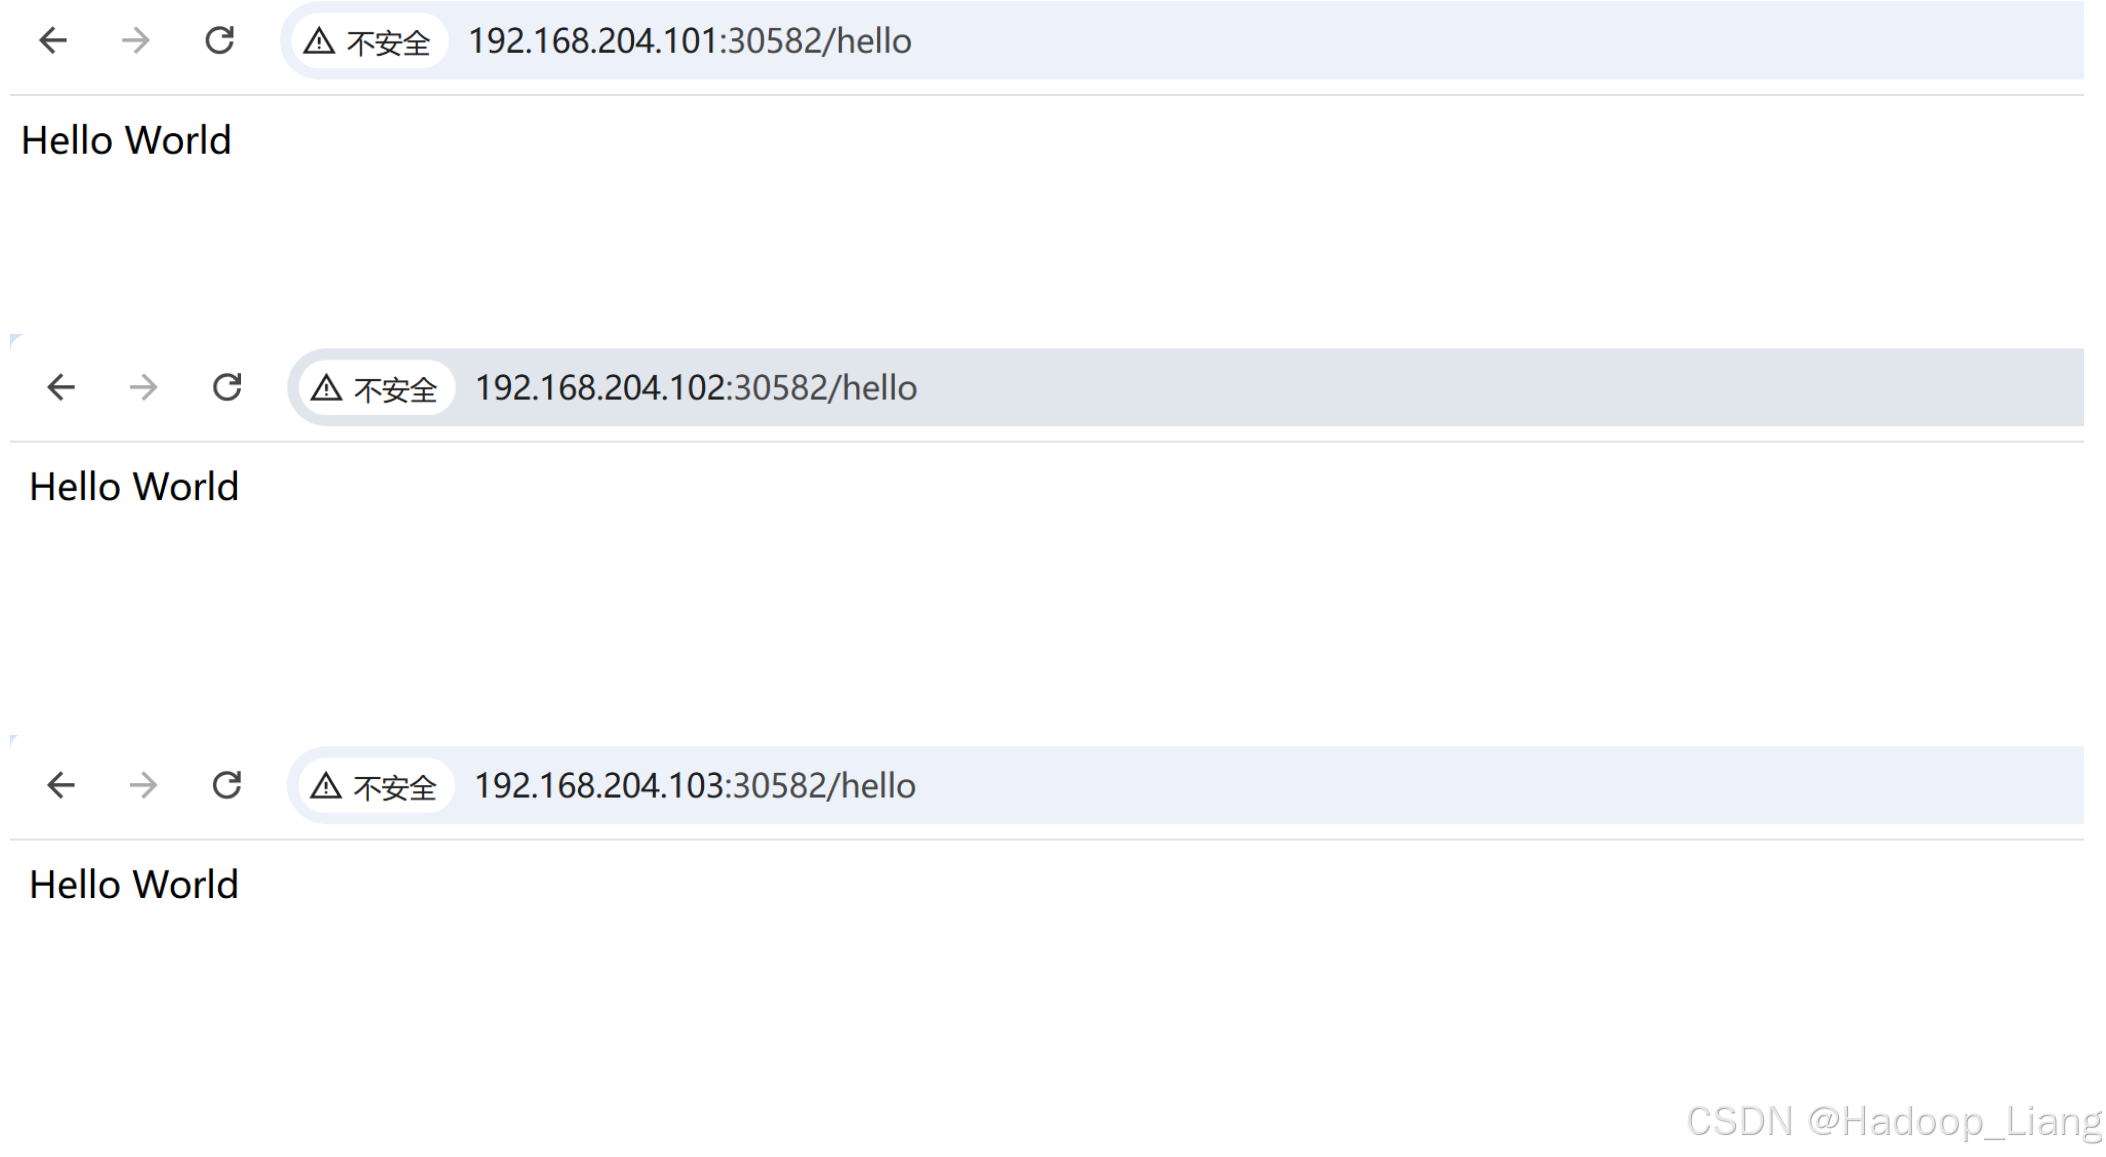 看到能正常返回数据,说明公布应用程序成功。至此,已成功使用Kubernetes部署Spring Boot项目。完成! enjoy it!
更多推荐
 3
3 0
0- 0


 已为社区贡献1条内容

所有评论(0)