
SpringBoot+Layui构建医院信息管理系统实战

简介:本项目基于SpringBoot后端框架与Layui前端组件库开发,旨在构建一个功能完善的医院信息管理系统。系统涵盖用户管理、患者管理、预约管理、科室与医生管理、药品库存管理及费用结算等核心模块。SpringBoot简化了后端配置与数据访问,集成MyBatis或Spring Data JPA,提升开发效率;Layui则提供了响应式、易用的前端界面。项目还涉及安全控制(如Spring Security)、事务管理、缓存优化(如Redis)等关键技术,适用于医疗行业的信息管理需求,并具备良好的扩展性与定制化能力。 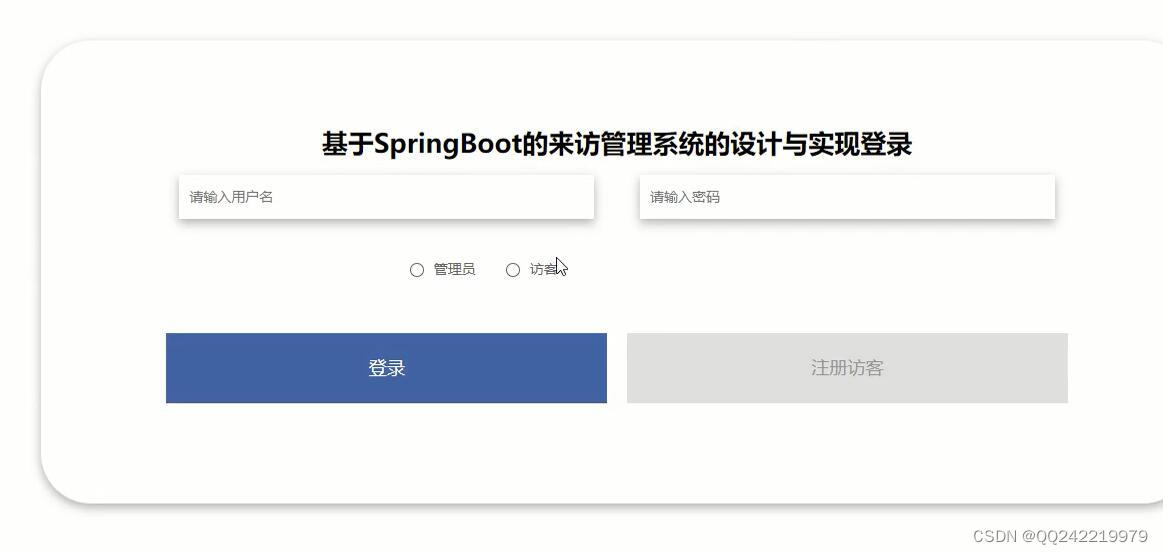
1. SpringBoot框架与Layui技术概览
在现代医院信息系统的开发中,SpringBoot 与 Layui 作为后端与前端的主流技术组合,已成为提升开发效率与系统可维护性的关键工具。SpringBoot 通过自动配置机制与起步依赖,极大地简化了传统 Spring 应用的复杂配置,使开发者能够更专注于业务逻辑实现。Layui 则以其轻量级、模块化与易用性著称,适用于快速构建美观、响应式的后台界面。
本章将从技术原理入手,逐步解析 SpringBoot 与 Layui 的核心优势,并结合医院信息管理系统的典型应用场景,说明其在实际项目中的协同作用与开发价值。
2. SpringBoot项目搭建与Layui前端布局实践
在医院信息管理系统的开发过程中,构建一个稳定、高效的开发环境是首要任务。本章将围绕 SpringBoot 项目的初始化搭建与 Layui 前端框架的布局实践展开,详细介绍如何快速搭建一个 SpringBoot 后端服务,并结合 Layui 实现响应式、模块化的前端页面布局。同时,还将探讨前后端分离架构下的接口对接方式,确保系统具备良好的可维护性与扩展性。
2.1 SpringBoot项目的初始化与配置
SpringBoot 是一个基于 Spring 框架的快速开发工具,其“开箱即用”的特性大大降低了 Spring 应用的搭建和配置成本。在本节中,我们将从项目初始化、配置文件设置到内嵌服务器的整合,全面介绍 SpringBoot 项目的搭建流程。
2.1.1 使用 Spring Initializr 创建项目结构
Spring Initializr 是 Spring 官方提供的项目初始化工具,支持快速生成 SpringBoot 项目骨架。其操作流程如下:
- 访问 https://start.spring.io ;
- 配置项目信息:
- Project : Maven(默认)
- Language : Java
- Spring Boot Version : 推荐使用 2.7.x 或 3.x(根据 JDK 版本)
- Group : com.example
- Artifact : hospital-system
- Name : hospital-system
- Description : 医院信息管理系统
- Package Name : com.example.hospitalsystem - 选择依赖:
- Spring Web(用于构建 Web 应用)
- Spring Data JPA(数据库操作)
- Spring Security(权限控制)
- Thymeleaf(前端模板引擎,可选) - 点击“Generate”按钮下载项目压缩包。
解压后项目结构如下:
hospital-system/
├── pom.xml
├── src/
│   ├── main/
│   │   ├── java/
│   │   │   └── com/example/hospitalsystem/
│   │   │       ├── HospitalSystemApplication.java
│   │   │       └── controller/
│   │   │       └── model/
│   │   │       └── repository/
│   │   │       └── service/
│   │   ├── resources/
│   │   │   ├── application.properties
│   │   │   └── static/
│   │   └── resources/
│   └── test/
└── ...
代码解析:
HospitalSystemApplication.java 是 SpringBoot 的启动类,其内容如下:
package com.example.hospitalsystem;

import org.springframework.boot.SpringApplication;
import org.springframework.boot.autoconfigure.SpringBootApplication;

@SpringBootApplication
public class HospitalSystemApplication {
    public static void main(String[] args) {
        SpringApplication.run(HospitalSystemApplication.class, args);
    }
}
@SpringBootApplication:组合了@Configuration、@EnableAutoConfiguration和@ComponentScan,是 SpringBoot 的核心注解。SpringApplication.run():启动 Spring 容器,加载所有配置类和 Bean。
2.1.2 配置 application.yml 与多环境支持
SpringBoot 支持多种配置方式,推荐使用 application.yml 替代传统的 application.properties ,因其结构更清晰。
配置示例:
server:
  port: 8080
spring:
  datasource:
    url: jdbc:mysql://localhost:3306/hospital_system?useSSL=false&serverTimezone=UTC
    username: root
    password: root
    driver-class-name: com.mysql.cj.jdbc.Driver
  jpa:
    hibernate:
      use-new-id-generator-mappings: false
    show-sql: true
    database-platform: org.hibernate.dialect.MySQL8Dialect
多环境配置:
在实际开发中,通常需要区分开发、测试、生产环境。SpringBoot 支持通过 application-{profile}.yml 的方式实现多环境配置:
application-dev.yml:开发环境application-test.yml:测试环境application-prod.yml:生产环境
激活方式:
spring:
  profiles:
    active: dev
2.1.3 整合 Tomcat 与内嵌服务器设置
SpringBoot 默认使用内嵌的 Tomcat 服务器,无需额外部署。我们可以在 application.yml 中调整其配置:
server:
  port: 8080
  tomcat:
    max-threads: 200
    min-spare-threads: 10
    max-http-form-post-size: 10MB
内嵌服务器原理简述:
SpringBoot 使用 spring-boot-starter-web 模块默认引入 Tomcat 作为 Web 容器。其启动流程如下:
graph TD
    A[SpringBoot启动] --> B[加载EmbeddedServletContainerAutoConfiguration]
    B --> C[创建TomcatEmbeddedServletContainerFactory]
    C --> D[启动Tomcat实例]
    D --> E[监听8080端口]
若需更换为 Jetty 或 Undertow,只需在 pom.xml 中替换依赖即可。
2.2 Layui 前端框架的引入与页面结构设计
Layui 是一款轻量级、模块化的前端 UI 框架,适用于快速构建 Web 页面。本节将介绍如何在项目中引入 Layui,并使用其组件构建响应式页面布局。
2.2.1 引入 Layui 并实现基础页面布局
- 下载 Layui:访问 https://www.layui.site/layui/ 下载最新版本;
- 解压后将
layui文件夹复制到项目resources/static目录; - 在 HTML 页面中引入 CSS 和 JS:
<!DOCTYPE html>
<html lang="zh-CN">
<head>
    <meta charset="UTF-8">
    <title>医院信息管理系统</title>
    <link rel="stylesheet" href="/layui/css/layui.css">
</head>
<body class="layui-layout-body">
<div class="layui-layout layui-layout-admin">
    <div class="layui-header">
        <div class="layui-logo">医院管理系统</div>
        <ul class="layui-nav layui-layout-right">
            <li class="layui-nav-item"><a href="">控制台</a></li>
            <li class="layui-nav-item"><a href="">退出</a></li>
        </ul>
    </div>

    <div class="layui-side layui-bg-black">
        <div class="layui-side-scroll">
            <!-- 左侧导航 -->
            <ul class="layui-nav layui-nav-tree" lay-filter="test">
                <li class="layui-nav-item"><a href="/patient">患者管理</a></li>
                <li class="layui-nav-item"><a href="/doctor">医生管理</a></li>
                <li class="layui-nav-item"><a href="/department">科室管理</a></li>
            </ul>
        </div>
    </div>

    <div class="layui-body">
        <!-- 主体内容 -->
        <div style="padding: 15px;">欢迎使用医院信息管理系统</div>
    </div>

    <div class="layui-footer">
        © 医院信息管理系统 - 2025
    </div>
</div>

<script src="/layui/layui.js"></script>
<script>
layui.use('element', function(){
    var element = layui.element;
});
</script>
</body>
</html>
代码说明:
- 使用了 Layui 的
layui-layout布局组件,构建了头部、左侧菜单和主体内容区; layui.use()加载模块,例如element用于导航栏交互;- 菜单项使用
<a>标签跳转,后续可结合 Vue 或 Thymeleaf 实现动态加载。
2.2.2 响应式布局与自适应设计
Layui 提供了响应式类名,如 layui-hide-xs 、 layui-show-lg 等,可用于不同设备的适配。
示例:响应式侧边栏
<ul class="layui-nav layui-nav-tree layui-hide-xs" lay-filter="mobile">
    <li class="layui-nav-item"><a href="/patient">患者管理</a></li>
    <li class="layui-nav-item"><a href="/doctor">医生管理</a></li>
</ul>
在移动端,可隐藏左侧菜单并添加一个按钮切换菜单显示:
layui.use('layer', function(){
    var layer = layui.layer;
    $('#menuToggle').on('click', function(){
        $('.layui-nav-tree').toggleClass('layui-show');
    });
});
2.2.3 利用 Layui 组件构建系统主界面
Layui 提供了丰富的组件,如表格、按钮、表单、弹窗等,适用于构建功能完善的后台系统。
示例:使用 Layui 表格展示患者信息
<table class="layui-table">
    <thead>
        <tr>
            <th>ID</th>
            <th>姓名</th>
            <th>性别</th>
            <th>年龄</th>
            <th>联系方式</th>
            <th>操作</th>
        </tr>
    </thead>
    <tbody id="patientList">
        <!-- 数据由 JS 动态填充 -->
    </tbody>
</table>
JavaScript 请求数据并渲染表格:
layui.use('table', function(){
    var table = layui.table;

    table.render({
        elem: '#patientList',
        url: '/api/patients',
        cols: [[
            {field: 'id', width: 80, title: 'ID'},
            {field: 'name', width: 120, title: '姓名'},
            {field: 'gender', width: 80, title: '性别'},
            {field: 'age', width: 80, title: '年龄'},
            {field: 'phone', width: 150, title: '联系方式'},
            {title: '操作', templet: '#patientBar'}
        ]],
        page: true
    });
});
参数说明:
elem:绑定表格容器;url:数据请求地址;cols:列定义;page:是否开启分页;templet:自定义模板列。
2.3 前后端分离模式下的接口对接实践
前后端分离架构已成为现代 Web 开发的主流模式。本节将介绍如何基于 RESTful API 设计接口、使用 Postman 测试通信,并处理前后端的数据交互。
2.3.1 RESTful API 规范与接口设计
RESTful 是一种基于 HTTP 协议的 API 设计风格,强调资源的统一访问方式。
设计规范:
| 功能 | HTTP方法 | URL路径 |
|---|---|---|
| 查询所有患者 | GET | /api/patients |
| 根据 ID 查询患者 | GET | /api/patients/{id} |
| 添加患者 | POST | /api/patients |
| 更新患者 | PUT | /api/patients/{id} |
| 删除患者 | DELETE | /api/patients/{id} |
SpringBoot 实现示例:
@RestController
@RequestMapping("/api/patients")
public class PatientController {

    @Autowired
    private PatientRepository patientRepository;

    @GetMapping
    public List<Patient> getAllPatients() {
        return patientRepository.findAll();
    }

    @GetMapping("/{id}")
    public ResponseEntity<Patient> getPatientById(@PathVariable Long id) {
        return patientRepository.findById(id)
                .map(ResponseEntity::ok)
                .orElseThrow(() -> new ResourceNotFoundException("患者不存在,ID: " + id));
    }

    @PostMapping
    public Patient createPatient(@RequestBody Patient patient) {
        return patientRepository.save(patient);
    }

    @PutMapping("/{id}")
    public ResponseEntity<Patient> updatePatient(@PathVariable Long id, @RequestBody Patient patientDetails) {
        return patientRepository.findById(id)
                .map(patient -> {
                    patient.setName(patientDetails.getName());
                    patient.setGender(patientDetails.getGender());
                    patient.setAge(patientDetails.getAge());
                    patient.setPhone(patientDetails.getPhone());
                    return ResponseEntity.ok(patientRepository.save(patient));
                })
                .orElseThrow(() -> new ResourceNotFoundException("患者不存在,ID: " + id));
    }

    @DeleteMapping("/{id}")
    public ResponseEntity<?> deletePatient(@PathVariable Long id) {
        if (!patientRepository.existsById(id)) {
            throw new ResourceNotFoundException("患者不存在,ID: " + id);
        }
        patientRepository.deleteById(id);
        return ResponseEntity.ok().build();
    }
}
2.3.2 使用 Postman 测试前后端通信
Postman 是常用的 API 测试工具,可模拟 HTTP 请求,验证接口是否正常工作。
测试步骤:
- 打开 Postman,选择请求方法(GET、POST 等);
- 输入请求地址,如
http://localhost:8080/api/patients; - 若为 POST/PUT 请求,点击
Body选择raw -> JSON,输入如下内容:
{
  "name": "张三",
  "gender": "男",
  "age": 30,
  "phone": "13800138000"
}
- 点击
Send发送请求,查看返回结果。
预期响应:
{
  "id": 1,
  "name": "张三",
  "gender": "男",
  "age": 30,
  "phone": "13800138000"
}
2.3.3 JSON 数据格式的处理与封装
SpringBoot 默认使用 Jackson 处理 JSON 数据。可通过自定义响应结构提高前后端交互的一致性。
统一响应封装类:
public class ApiResponse<T> {
    private int code;
    private String message;
    private T data;

    // 构造方法、getters 和 setters 略
}
使用示例:
@GetMapping("/{id}")
public ResponseEntity<ApiResponse<Patient>> getPatientById(@PathVariable Long id) {
    Optional<Patient> optionalPatient = patientRepository.findById(id);
    if (optionalPatient.isPresent()) {
        return ResponseEntity.ok(new ApiResponse<>(200, "成功", optionalPatient.get()));
    } else {
        return ResponseEntity.status(404).body(new ApiResponse<>(404, "患者不存在", null));
    }
}
返回示例:
{
  "code": 200,
  "message": "成功",
  "data": {
    "id": 1,
    "name": "张三",
    "gender": "男",
    "age": 30,
    "phone": "13800138000"
  }
}
3. 用户权限管理模块的设计与实现
在医院信息管理系统中,用户权限管理模块是整个系统安全性的核心组成部分。该模块不仅决定了用户能否访问特定功能,还直接影响系统的稳定性和数据的保密性。通过合理设计权限模型与实现安全控制机制,可以有效防止越权操作和数据泄露。本章将深入探讨用户权限模块的设计思路与实现方式,包括权限模型的设计、Spring Security 的认证与授权实现、以及前端基于角色的动态菜单渲染逻辑。
3.1 系统权限模型设计
3.1.1 用户角色与权限分配机制
在权限管理系统中,最核心的概念是“角色”和“权限”的划分。角色(Role)是系统中对用户权限的抽象,例如“系统管理员”、“医生”、“护士”、“挂号员”等;权限(Permission)则是具体的操作能力,如“查看患者信息”、“添加医生信息”、“修改药品库存”等。
权限分配机制通常采用 基于角色的访问控制(RBAC, Role-Based Access Control) 模型,其核心思想是通过角色来绑定权限,用户通过角色获取权限。这种方式可以极大地简化权限管理的复杂度,提高系统的可维护性。
RBAC 模型中包含以下几个核心实体:
- User(用户) :系统中的操作者。
- Role(角色) :用户所拥有的权限集合。
- Permission(权限) :系统中的具体操作或资源访问能力。
- UserRole(用户-角色关系) :表示用户与角色之间的多对多关系。
- RolePermission(角色-权限关系) :表示角色与权限之间的多对多关系。
这种模型结构清晰,便于扩展和维护,适合医院信息系统的权限管理需求。
3.1.2 RBAC模型的数据库设计
为了支持 RBAC 模型,数据库中需要设计多个表来存储用户、角色、权限及其之间的关系。以下是一个典型的 RBAC 数据库结构设计:
| 表名 | 字段说明 |
|---|---|
| user | id, username, password, real_name, created_at |
| role | id, role_name, description |
| permission | id, perm_name, perm_code, description |
| user_role | user_id, role_id |
| role_permission | role_id, perm_id |
字段说明:
user表存储用户的基本信息,其中username和password用于登录验证。role表定义系统中所有的角色,如“管理员”、“医生”等。permission表定义系统中所有的权限,perm_code是用于程序中识别权限的唯一标识。user_role表记录用户与角色的多对多关系。role_permission表记录角色与权限的多对多关系。
通过这种设计,可以灵活地为用户分配角色,并为角色绑定权限,从而实现细粒度的权限控制。
3.1.3 权限控制流程图与逻辑分析
权限控制的流程通常包括以下几个步骤:
- 用户登录 :输入用户名和密码进行认证。
- 角色获取 :根据用户ID查询其拥有的角色。
- 权限获取 :根据角色查询其拥有的权限列表。
- 权限验证 :在用户请求某个接口或页面时,判断其是否拥有相应权限。
- 返回结果或拒绝访问 :如果拥有权限则允许访问,否则返回 403 或跳转到无权限页面。
使用 Mermaid 绘制的权限控制流程图如下:
graph TD
    A[用户登录] --> B{验证成功?}
    B -- 是 --> C[获取用户角色]
    C --> D[根据角色获取权限]
    D --> E[保存用户权限至SecurityContext]
    E --> F[用户访问页面/接口]
    F --> G{是否有权限?}
    G -- 是 --> H[允许访问]
    G -- 否 --> I[返回403或无权限提示]
    B -- 否 --> J[返回登录失败]
逻辑分析:
- 认证阶段 :用户输入用户名和密码后,系统会调用数据库验证信息是否正确。
- 授权阶段 :用户登录成功后,系统会根据其角色加载对应的权限信息,保存在
SecurityContext中。 - 访问控制 :每次请求到来时,系统会根据当前请求的资源路径或操作标识,检查用户是否具有访问权限。
- 异常处理 :如果权限不足,则返回 403 错误或跳转至无权限页面。
这种流程设计不仅结构清晰,而且易于扩展,例如可以集成 JWT 或 OAuth2 等更高级的认证方式。
3.2 Spring Security实现用户认证
3.2.1 配置Security安全配置类
Spring Security 是 Spring 提供的一套安全框架,用于实现认证(Authentication)和授权(Authorization)功能。在医院信息系统中,我们可以使用 Spring Security 来实现用户的登录认证和权限控制。
以下是一个基础的 Spring Security 配置类示例:
@Configuration
@EnableWebSecurity
public class SecurityConfig {

    @Autowired
    private UserDetailsService userDetailsService;

    @Bean
    public SecurityFilterChain filterChain(HttpSecurity http) throws Exception {
        http
            .authorizeHttpRequests(auth -> auth
                .requestMatchers("/login", "/css/**", "/js/**").permitAll()
                .anyRequest().authenticated()
            )
            .formLogin(form -> form
                .loginPage("/login")
                .loginProcessingUrl("/doLogin")
                .defaultSuccessUrl("/index")
                .failureUrl("/login?error")
                .permitAll()
            )
            .logout(logout -> logout
                .logoutUrl("/logout")
                .logoutSuccessUrl("/login")
                .permitAll()
            )
            .csrf().disable();
        return filterChain.build();
    }

    @Bean
    public PasswordEncoder passwordEncoder() {
        return new BCryptPasswordEncoder();
    }

    @Bean
    public UserDetailsService userDetailsService() {
        return new UserDetailsServiceImpl();
    }
}
代码分析:
@EnableWebSecurity:启用 Spring Security 的 Web 安全支持。authorizeHttpRequests():配置请求的访问权限。permitAll():表示该路径无需认证即可访问。authenticated():表示所有请求必须经过认证。formLogin():配置表单登录。loginPage():自定义登录页面。loginProcessingUrl():处理登录请求的 URL。defaultSuccessUrl():登录成功后的跳转地址。failureUrl():登录失败后的跳转地址。logout():配置登出行为。csrf().disable():禁用 CSRF 保护(适用于前后端分离项目)。passwordEncoder():使用 BCrypt 加密用户密码。userDetailsService():自定义用户详情服务,从数据库加载用户信息。
3.2.2 实现登录验证与权限拦截
在 Spring Security 中,用户登录的核心在于 UserDetailsService 的实现。我们需要自定义 UserDetailsService 接口的实现类,从数据库中读取用户信息及其权限。
@Service
public class UserDetailsServiceImpl implements UserDetailsService {

    @Autowired
    private UserService userService;

    @Override
    public UserDetails loadUserByUsername(String username) throws UsernameNotFoundException {
        User user = userService.findByUsername(username);
        if (user == null) {
            throw new UsernameNotFoundException("用户不存在");
        }

        List<GrantedAuthority> authorities = new ArrayList<>();
        List<Role> roles = userService.findRolesByUserId(user.getId());
        for (Role role : roles) {
            authorities.add(new SimpleGrantedAuthority(role.getRoleName()));
            List<Permission> perms = userService.findPermsByRoleId(role.getId());
            for (Permission perm : perms) {
                authorities.add(new SimpleGrantedAuthority(perm.getPermCode()));
            }
        }

        return new org.springframework.security.core.userdetails.User(
            user.getUsername(),
            user.getPassword(),
            authorities
        );
    }
}
代码逻辑说明:
loadUserByUsername():根据用户名从数据库中查询用户信息。findRolesByUserId():获取用户所拥有的角色。findPermsByRoleId():根据角色获取对应的权限。GrantedAuthority:表示用户拥有的权限,包括角色和具体权限。- 最终返回的
User对象会被 Spring Security 用于后续的权限验证。
3.2.3 自定义登录页与错误处理机制
在实际项目中,通常需要自定义登录页面以满足 UI 风格和交互需求。我们可以通过 loginPage() 方法指定自定义登录页面的路径。
例如,创建 login.html 页面作为登录界面:
<!DOCTYPE html>
<html xmlns:th="http://www.thymeleaf.org">
<head>
    <meta charset="UTF-8">
    <title>登录</title>
    <link rel="stylesheet" th:href="@{/layui/css/layui.css}">
</head>
<body>
<div class="layui-container" style="margin-top: 100px;">
    <div class="layui-row">
        <div class="layui-col-md4 layui-col-md-offset4">
            <form class="layui-form" method="post" th:action="@{/doLogin}">
                <div class="layui-form-item">
                    <label class="layui-form-label">用户名</label>
                    <div class="layui-input-block">
                        <input type="text" name="username" required lay-verify="required" placeholder="请输入用户名" class="layui-input">
                    </div>
                </div>
                <div class="layui-form-item">
                    <label class="layui-form-label">密码</label>
                    <div class="layui-input-block">
                        <input type="password" name="password" required lay-verify="required" placeholder="请输入密码" class="layui-input">
                    </div>
                </div>
                <div class="layui-form-item">
                    <div class="layui-input-block">
                        <button class="layui-btn" lay-submit lay-filter="formDemo">登录</button>
                    </div>
                </div>
            </form>
        </div>
    </div>
</div>
<script th:src="@{/layui/layui.js}"></script>
<script>
layui.use('form', function(){
    var form = layui.form;
});
</script>
</body>
</html>
说明:
- 使用 Thymeleaf 模板引擎构建页面。
- 登录表单提交至
/doLogin路径。 - 页面中使用 Layui 构建美观的表单控件。
错误处理:
在登录失败时,可以通过 failureUrl("/login?error") 指定跳转路径,并在登录页面中显示错误信息:
<div th:if="${param.error}" class="layui-alert layui-alert-danger">
    用户名或密码错误
</div>
3.3 前端权限控制与菜单动态渲染
3.3.1 基于角色的菜单显示逻辑
前端权限控制的核心在于根据用户的角色动态显示菜单和按钮。在 Layui 框架中,可以通过后端返回的权限信息动态生成菜单结构。
后端接口示例:
@RestController
@RequestMapping("/menu")
public class MenuController {

    @Autowired
    private MenuService menuService;

    @GetMapping("/list")
    public List<MenuVO> getMenuList(@AuthenticationPrincipal UserDetails userDetails) {
        String username = userDetails.getUsername();
        return menuService.getMenuListByUsername(username);
    }
}
说明:
@AuthenticationPrincipal:获取当前登录用户的信息。menuService.getMenuListByUsername():根据用户名查询其拥有的菜单权限。
3.3.2 使用Layui动态生成侧边栏
在前端页面中,我们可以使用 AJAX 请求获取菜单数据,并动态渲染 Layui 的左侧导航栏。
Layui 侧边栏结构示例:
<ul class="layui-nav layui-nav-tree" lay-filter="test" id="side-menu">
    <!-- 菜单项动态插入 -->
</ul>
JavaScript 动态渲染菜单:
layui.use(['element', 'jquery'], function() {
    var element = layui.element;
    var $ = layui.jquery;

    $.get('/menu/list', function(res) {
        var html = '';
        $.each(res, function(i, menu) {
            html += '<li class="layui-nav-item">';
            html += '<a href="javascript:;">' + menu.title + '</a>';
            if (menu.children && menu.children.length > 0) {
                html += '<dl class="layui-nav-child">';
                $.each(menu.children, function(j, child) {
                    html += '<dd><a href="' + child.url + '">' + child.title + '</a></dd>';
                });
                html += '</dl>';
            }
            html += '</li>';
        });
        $('#side-menu').html(html);
        element.init(); // 重新渲染导航栏
    });
});
说明:
- 使用 jQuery 的
$.get()方法请求菜单数据。 - 动态拼接 HTML 结构,支持多级菜单。
- 使用
element.init()重新初始化 Layui 导航组件。
3.3.3 权限按钮的显示与操作控制
除了菜单控制,系统中还存在按钮级别的权限控制。例如,只有管理员可以点击“删除”按钮,而普通用户只能查看。
实现方式:
- 后端返回权限标识 :在接口中返回当前用户拥有的权限标识,如
["user:delete", "doctor:add"]。 - 前端根据权限标识控制按钮显示 :
<button class="layui-btn" id="deleteBtn">删除</button>
var userPerms = ['user:delete', 'user:update']; // 从接口获取

if (!userPerms.includes('user:delete')) {
    $('#deleteBtn').hide();
}
- 结合 Vue 或 Thymeleaf 动态渲染 :
<button class="layui-btn" th:if="${#arrays.contains(userPerms, 'user:delete')}">删除</button>
说明:
th:if是 Thymeleaf 的条件判断语法。#arrays.contains()判断数组中是否包含某权限标识。
通过这种方式,可以精细控制页面中每个操作按钮的显示与隐藏,提升系统的安全性和用户体验。
本章内容完整展示了医院信息系统中用户权限管理模块的设计与实现全过程,从权限模型设计到 Spring Security 的认证授权机制,再到前端 Layui 的菜单动态渲染与按钮权限控制,形成了一套完整的权限管理体系。
4. 核心业务模块开发——患者信息与科室医生管理
在医院信息管理系统中,患者信息与科室医生管理是核心模块之一。该模块不仅涉及大量的数据交互,还直接关系到医院的日常运营与患者服务质量。为了实现高效、稳定的数据管理,我们采用SpringBoot作为后端框架,Layui作为前端UI组件库,构建出一个具备CRUD操作、分页查询、动态表格展示等完整功能的系统模块。
本章将围绕两个核心模块展开: 患者信息管理 和 科室与医生信息管理 。我们将从数据库设计入手,逐步实现数据的增删改查、多条件查询、数据联动、前端展示等功能,并结合Layui进行页面渲染与交互设计。
4.1 患者信息管理模块开发
4.1.1 数据库设计与实体类映射
数据库表结构设计
患者信息管理模块的数据库设计应包含以下字段:
| 字段名 | 类型 | 描述 |
|---|---|---|
| id | BIGINT | 主键,自增 |
| name | VARCHAR(50) | 姓名 |
| gender | VARCHAR(10) | 性别 |
| birthdate | DATE | 出生日期 |
| id_card | VARCHAR(18) | 身份证号 |
| phone | VARCHAR(20) | 手机号 |
| address | TEXT | 家庭住址 |
| create_time | DATETIME | 创建时间 |
| update_time | DATETIME | 更新时间 |
使用MySQL语句创建表:
CREATE TABLE patient_info (
    id BIGINT PRIMARY KEY AUTO_INCREMENT,
    name VARCHAR(50) NOT NULL,
    gender VARCHAR(10),
    birthdate DATE,
    id_card VARCHAR(18) UNIQUE,
    phone VARCHAR(20),
    address TEXT,
    create_time DATETIME DEFAULT CURRENT_TIMESTAMP,
    update_time DATETIME DEFAULT CURRENT_TIMESTAMP ON UPDATE CURRENT_TIMESTAMP
);
实体类映射(Entity)
创建 Patient 实体类,与数据库表进行映射:
@Entity
@Table(name = "patient_info")
public class Patient {

    @Id
    @GeneratedValue(strategy = GenerationType.IDENTITY)
    private Long id;

    private String name;
    private String gender;
    private LocalDate birthdate;
    private String idCard;
    private String phone;
    private String address;

    @Column(updatable = false, insertable = false)
    private LocalDateTime createTime;

    private LocalDateTime updateTime;

    // Getters and Setters
}
说明:
-@Entity表示这是一个实体类;
-@Table注解指定对应的数据库表名;
-@Id和@GeneratedValue表示主键为自增;
- 使用@Column控制字段的插入和更新行为;
-LocalDate和LocalDateTime是Java 8引入的时间API,推荐使用以避免日期处理问题。
4.1.2 CRUD操作实现与分页查询
Repository层接口
使用Spring Data JPA简化数据库操作:
public interface PatientRepository extends JpaRepository<Patient, Long> {
    Page<Patient> findByNameContaining(String name, Pageable pageable);
}
说明:
-JpaRepository提供了基础的CRUD方法;
-findByNameContaining方法用于模糊查询;
-Pageable用于分页控制。
Service层实现
@Service
public class PatientService {

    @Autowired
    private PatientRepository patientRepository;

    public Page<Patient> getAllPatients(int page, int size, String keyword) {
        Pageable pageable = PageRequest.of(page, size);
        return patientRepository.findByNameContaining(keyword, pageable);
    }

    public Optional<Patient> getPatientById(Long id) {
        return patientRepository.findById(id);
    }

    public Patient savePatient(Patient patient) {
        return patientRepository.save(patient);
    }

    public void deletePatientById(Long id) {
        patientRepository.deleteById(id);
    }
}
说明:
-PageRequest.of(page, size)构造分页参数;
-Optional用于安全获取数据;
-save方法可同时用于新增与更新;
-deleteById删除指定ID的记录。
Controller层接口
@RestController
@RequestMapping("/api/patients")
public class PatientController {

    @Autowired
    private PatientService patientService;

    @GetMapping
    public ResponseEntity<Page<Patient>> getAllPatients(
            @RequestParam(defaultValue = "0") int page,
            @RequestParam(defaultValue = "10") int size,
            @RequestParam(defaultValue = "") String keyword) {
        return ResponseEntity.ok(patientService.getAllPatients(page, size, keyword));
    }

    @GetMapping("/{id}")
    public ResponseEntity<Patient> getPatientById(@PathVariable Long id) {
        return patientService.getPatientById(id)
                .map(ResponseEntity::ok)
                .orElseThrow(() -> new ResourceNotFoundException("Patient not found"));
    }

    @PostMapping
    public ResponseEntity<Patient> createPatient(@RequestBody Patient patient) {
        return ResponseEntity.status(HttpStatus.CREATED).body(patientService.savePatient(patient));
    }

    @PutMapping("/{id}")
    public ResponseEntity<Patient> updatePatient(@PathVariable Long id, @RequestBody Patient updatedPatient) {
        return patientService.getPatientById(id)
                .map(patient -> {
                    updatedPatient.setId(id);
                    return ResponseEntity.ok(patientService.savePatient(updatedPatient));
                })
                .orElseThrow(() -> new ResourceNotFoundException("Patient not found"));
    }

    @DeleteMapping("/{id}")
    public ResponseEntity<Void> deletePatient(@PathVariable Long id) {
        patientService.deletePatientById(id);
        return ResponseEntity.noContent().build();
    }
}
说明:
- 使用@RestController返回JSON数据;
-@GetMapping,@PostMapping等用于定义RESTful接口;
-ResponseEntity用于封装HTTP响应;
- 使用@PathVariable获取路径参数;
- 使用@RequestBody接收JSON请求体。
4.1.3 使用Layui表格展示与编辑功能
Layui表格初始化
在前端页面中,使用Layui的 table 组件加载患者信息:
<table class="layui-hide" id="patientTable"></table>

<script>
layui.use('table', function(){
  var table = layui.table;
  table.render({
    elem: '#patientTable',
    url:'/api/patients',
    method: 'get',
    page: true,
    cols: [[
      {field:'id', title:'ID', width:80},
      {field:'name', title:'姓名', width:120},
      {field:'gender', title:'性别', width:100},
      {field:'birthdate', title:'出生日期', width:150},
      {field:'phone', title:'联系电话', width:150},
      {field:'address', title:'地址', width:200},
      {fixed: 'right', title:'操作', width:150, align:'center', toolbar: '#patientBar'}
    ]]
  });
});
</script>
说明:
-elem指定表格的容器;
-url设置数据接口;
-cols定义表格列,支持固定列、工具栏等;
-toolbar引用模板实现编辑、删除等操作。
工具栏模板
<script type="text/html" id="patientBar">
  <a class="layui-btn layui-btn-xs" lay-event="edit">编辑</a>
  <a class="layui-btn layui-btn-danger layui-btn-xs" lay-event="del">删除</a>
</script>
操作事件绑定
table.on('tool(patientTable)', function(obj){
  var data = obj.data;
  if(obj.event === 'del'){
    layer.confirm('确定删除该患者信息?', function(index){
      $.ajax({
        url: '/api/patients/' + data.id,
        type: 'DELETE',
        success: function() {
          obj.del();
          layer.close(index);
        }
      });
    });
  } else if(obj.event === 'edit'){
    // 打开编辑弹窗,加载数据
    layer.open({
      type: 2,
      title: '编辑患者信息',
      content: '/patient/edit/' + data.id,
      area: ['600px', '500px']
    });
  }
});
说明:
- 使用layer.confirm弹窗确认删除;
-$.ajax发送DELETE请求;
- 使用layer.open打开弹窗进行编辑。
4.2 科室与医生信息管理模块实现
4.2.1 科室分类与医生信息的关联设计
数据库设计
科室表:
| 字段名 | 类型 | 描述 |
|---|---|---|
| id | BIGINT | 主键 |
| dept_name | VARCHAR(50) | 科室名称 |
| create_time | DATETIME | 创建时间 |
医生表:
| 字段名 | 类型 | 描述 |
|---|---|---|
| id | BIGINT | 主键 |
| name | VARCHAR(50) | 姓名 |
| gender | VARCHAR(10) | 性别 |
| dept_id | BIGINT | 所属科室ID |
| phone | VARCHAR(20) | 联系电话 |
| create_time | DATETIME | 创建时间 |
SQL语句:
CREATE TABLE department (
    id BIGINT PRIMARY KEY AUTO_INCREMENT,
    dept_name VARCHAR(50),
    create_time DATETIME DEFAULT CURRENT_TIMESTAMP
);

CREATE TABLE doctor (
    id BIGINT PRIMARY KEY AUTO_INCREMENT,
    name VARCHAR(50),
    gender VARCHAR(10),
    dept_id BIGINT,
    phone VARCHAR(20),
    create_time DATETIME DEFAULT CURRENT_TIMESTAMP,
    FOREIGN KEY (dept_id) REFERENCES department(id)
);
实体类设计
@Entity
@Table(name = "department")
public class Department {
    @Id
    @GeneratedValue(strategy = GenerationType.IDENTITY)
    private Long id;
    private String deptName;
    private LocalDateTime createTime;

    // Getters and Setters
}

@Entity
@Table(name = "doctor")
public class Doctor {
    @Id
    @GeneratedValue(strategy = GenerationType.IDENTITY)
    private Long id;
    private String name;
    private String gender;
    private String phone;

    @ManyToOne
    @JoinColumn(name = "dept_id")
    private Department department;

    private LocalDateTime createTime;

    // Getters and Setters
}
说明:
-@ManyToOne表示医生与科室之间的多对一关系;
-@JoinColumn明确外键字段。
4.2.2 多条件查询与数据联动展示
查询接口设计
public interface DoctorRepository extends JpaRepository<Doctor, Long> {
    Page<Doctor> findByDepartmentIdAndNameContaining(Long deptId, String name, Pageable pageable);
}
Service实现
public Page<Doctor> searchDoctors(int page, int size, Long deptId, String keyword) {
    Pageable pageable = PageRequest.of(page, size);
    return doctorRepository.findByDepartmentIdAndNameContaining(deptId, keyword, pageable);
}
Controller层
@GetMapping("/doctors")
public ResponseEntity<Page<Doctor>> getDoctors(
        @RequestParam(required = false) Long deptId,
        @RequestParam(defaultValue = "") String keyword,
        @RequestParam(defaultValue = "0") int page,
        @RequestParam(defaultValue = "10") int size) {
    return ResponseEntity.ok(doctorService.searchDoctors(page, size, deptId, keyword));
}
Layui联动查询
<select id="deptSelect" lay-filter="deptFilter"></select>

<script>
layui.use(['form', 'table'], function(){
  var form = layui.form;
  var table = layui.table;

  // 加载科室下拉框
  $.get('/api/departments', function(res) {
    var html = '<option value="">全部科室</option>';
    res.forEach(function(dept) {
      html += `<option value="${dept.id}">${dept.deptName}</option>`;
    });
    $('#deptSelect').html(html);
    form.render('select');
  });

  // 监听下拉框变化,刷新表格
  form.on('select(deptFilter)', function(data){
    var deptId = data.value;
    var keyword = $('#keywordInput').val();
    table.reload('doctorTable', {
      where: { deptId: deptId, keyword: keyword }
    });
  });
});
</script>
说明:
- 使用$.get请求科室数据;
-form.on('select')监听科室变化;
-table.reload重新加载表格并传递查询参数。
4.2.3 医生排班信息的管理与展示
数据库设计
排班表:
| 字段名 | 类型 | 描述 |
|---|---|---|
| id | BIGINT | 主键 |
| doctor_id | BIGINT | 医生ID |
| schedule_date | DATE | 排班日期 |
| shift | VARCHAR(20) | 班次(早/晚) |
| status | VARCHAR(20) | 状态(可预约/已满) |
CREATE TABLE doctor_schedule (
    id BIGINT PRIMARY KEY AUTO_INCREMENT,
    doctor_id BIGINT,
    schedule_date DATE,
    shift VARCHAR(20),
    status VARCHAR(20),
    FOREIGN KEY (doctor_id) REFERENCES doctor(id)
);
前端展示排班信息
<div class="layui-row">
  <div class="layui-col-md12">
    <table class="layui-table">
      <thead>
        <tr>
          <th>医生姓名</th><th>排班日期</th><th>班次</th><th>状态</th>
        </tr>
      </thead>
      <tbody id="scheduleList"></tbody>
    </table>
  </div>
</div>

<script>
$.get('/api/schedules', function(data){
  var html = '';
  data.forEach(function(s){
    html += `<tr>
      <td>${s.doctor.name}</td>
      <td>${s.scheduleDate}</td>
      <td>${s.shift}</td>
      <td>${s.status}</td>
    </tr>`;
  });
  $('#scheduleList').html(html);
});
</script>
说明:
- 使用简单表格展示排班信息;
- 后续可扩展为日历视图、预约功能等。
本章通过完整的数据库设计、SpringBoot接口实现与Layui前端展示,构建了医院信息管理系统中的核心业务模块——患者信息管理与科室医生管理。下一章将继续深入探讨预约挂号与费用结算系统的设计与实现。
5. 预约挂号与费用结算系统设计与实现
在现代医院信息系统中,预约挂号和费用结算是患者就诊流程中最为关键的两个环节。随着医院业务规模的扩大和信息化程度的提升,传统的手工挂号与结算方式已经难以满足高并发、实时性、准确性等需求。本章将围绕预约挂号系统与费用结算模块的架构设计与开发实践,重点探讨其数据模型、流程逻辑、并发处理以及缓存优化策略,帮助读者掌握医院信息系统中核心业务模块的构建方法。
5.1 预约挂号系统架构设计
预约挂号是患者与医院之间建立就诊联系的起点。一个高效的挂号系统需要支持时间段预约、医生排班、冲突检测、号源管理、并发处理等核心功能。
5.1.1 预约流程与数据模型设计
挂号系统的核心在于“号源”的管理和调度。一个完整的挂号流程通常包括以下几个步骤:
- 选择科室与医生
- 选择就诊日期与时间段
- 确认号源并提交预约
- 生成挂号单并返回预约信息
数据库模型设计
| 表名 | 说明 |
|---|---|
doctor |
医生信息表,包含医生ID、姓名、科室、排班信息等 |
schedule |
排班表,记录医生每日的接诊时间段、最大挂号数 |
appointment |
挂号记录表,记录患者ID、医生ID、预约时间、状态等 |
CREATE TABLE `schedule` (
  `id` BIGINT PRIMARY KEY AUTO_INCREMENT,
  `doctor_id` BIGINT NOT NULL,
  `date` DATE NOT NULL,
  `time_slot` VARCHAR(20) NOT NULL, -- 例如:"08:00-09:00"
  `max_appointments` INT DEFAULT 10,
  `current_appointments` INT DEFAULT 0
);

CREATE TABLE `appointment` (
  `id` BIGINT PRIMARY KEY AUTO_INCREMENT,
  `patient_id` BIGINT NOT NULL,
  `schedule_id` BIGINT NOT NULL,
  `status` VARCHAR(20) DEFAULT 'PENDING',
  `created_at` DATETIME DEFAULT CURRENT_TIMESTAMP
);
逻辑分析
schedule表记录医生每天的可预约时间段,并维护当前已预约人数。appointment表用于记录实际的挂号信息,包括状态(待支付、已支付、已就诊等)。- 每次挂号时需判断
current_appointments < max_appointments,否则拒绝预约。
5.1.2 时间段预约与冲突检测机制
在挂号系统中,防止同一时间段的重复预约是关键。以下是冲突检测的基本逻辑:
@Transactional
public boolean bookAppointment(Long scheduleId, Long patientId) {
    Schedule schedule = scheduleRepository.findById(scheduleId).orElseThrow();
    if (schedule.getCurrentAppointments() >= schedule.getMaxAppointments()) {
        return false; // 号源已满
    }
    schedule.setCurrentAppointments(schedule.getCurrentAppointments() + 1);
    scheduleRepository.save(schedule);

    Appointment appointment = new Appointment();
    appointment.setPatientId(patientId);
    appointment.setScheduleId(scheduleId);
    appointment.setStatus("PENDING");
    appointmentRepository.save(appointment);

    return true;
}
参数说明
@Transactional:保证挂号操作的事务性,防止并发问题。scheduleId:表示预约的具体时间段。scheduleRepository:用于访问排班表。appointmentRepository:用于保存挂号记录。
并发冲突问题
在高并发场景下,多个用户同时预约同一时间段可能导致 current_appointments 超出限制。解决方式包括:
- 使用数据库乐观锁:在更新时检查版本号。
- 使用 Redis 分布式锁:控制同一时间段只能一个线程执行挂号操作。
- 使用数据库行锁:通过
SELECT ... FOR UPDATE保证原子性。
5.1.3 使用Redis缓存优化预约并发处理
为提高挂号系统的并发性能,可以将号源信息缓存至 Redis 中,减少数据库压力。
public boolean bookAppointmentWithRedis(Long scheduleId, Long patientId) {
    String key = "schedule:" + scheduleId + ":current";
    Long current = redisTemplate.opsForValue().increment(key);
    if (current == null) {
        // 初始化缓存
        Schedule schedule = scheduleRepository.findById(scheduleId).orElseThrow();
        redisTemplate.opsForValue().set(key, schedule.getCurrentAppointments() + 1L);
        redisTemplate.expire(key, 1, TimeUnit.DAYS);
    } else if (current > getMaxAppointments(scheduleId)) {
        redisTemplate.opsForValue().decrement(key); // 回滚
        return false;
    }

    // 持久化到数据库
    // ...

    return true;
}
流程图(mermaid)
graph TD
    A[开始挂号] --> B{缓存是否存在}
    B -->|是| C[读取缓存号源]
    B -->|否| D[初始化缓存]
    C --> E{号源是否充足}
    E -->|是| F[执行挂号并更新缓存]
    E -->|否| G[提示号源不足]
    F --> H[异步持久化到数据库]
    G --> I[结束]
    H --> J[结束]
5.2 医疗费用结算模块开发
费用结算是医院信息系统中最为敏感和关键的模块之一,必须确保计算准确、账单清晰、支付安全。
5.2.1 费用结算流程与数据计算逻辑
费用结算通常包括以下几个环节:
- 获取就诊记录与费用项
- 自动计算挂号费、诊查费、药品费等
- 应用医保报销规则
- 生成账单并支付
数据结构设计
| 表名 | 说明 |
|---|---|
bill |
账单表,包含总金额、支付状态、生成时间等 |
charge_item |
收费项目表,如挂号费、诊查费、药品费等 |
bill_detail |
账单明细表,记录每项费用及金额 |
示例代码:费用计算逻辑
public Bill generateBill(Long visitId) {
    Visit visit = visitRepository.findById(visitId).orElseThrow();
    List<ChargeItem> items = chargeService.calculateItems(visit);

    BigDecimal totalAmount = items.stream()
        .map(ChargeItem::getAmount)
        .reduce(BigDecimal.ZERO, BigDecimal::add);

    Bill bill = new Bill();
    bill.setVisitId(visitId);
    bill.setTotalAmount(totalAmount);
    bill.setStatus("UNPAID");
    bill.setCreatedAt(LocalDateTime.now());

    billRepository.save(bill);

    for (ChargeItem item : items) {
        BillDetail detail = new BillDetail();
        detail.setBillId(bill.getId());
        detail.setItemName(item.getName());
        detail.setAmount(item.getAmount());
        billDetailRepository.save(detail);
    }

    return bill;
}
参数说明
visitId:就诊记录ID。chargeService:费用项计算服务。billRepository:账单主表操作。billDetailRepository:账单明细操作。
5.2.2 支付方式集成与账单生成
系统需支持多种支付方式,如医保、支付宝、微信、现金等。
支付方式枚举
public enum PaymentMethod {
    INSURANCE("医保"),
    ALIPAY("支付宝"),
    WECHAT("微信"),
    CASH("现金");

    private final String desc;

    PaymentMethod(String desc) {
        this.desc = desc;
    }

    public String getDesc() {
        return desc;
    }
}
支付接口调用示例(微信支付)
public String processWeChatPayment(Bill bill) {
    String url = "https://api.mch.weixin.qq.com/pay/unifiedorder";
    Map<String, String> params = new HashMap<>();
    params.put("appid", "your_appid");
    params.put("mch_id", "your_mch_id");
    params.put("nonce_str", UUID.randomUUID().toString());
    params.put("body", "医院挂号结算");
    params.put("out_trade_no", bill.getId().toString());
    params.put("total_fee", bill.getTotalAmount().multiply(new BigDecimal(100)).intValue() + "");
    params.put("spbill_create_ip", "127.0.0.1");
    params.put("notify_url", "http://yourdomain.com/notify");
    params.put("trade_type", "NATIVE");

    String sign = WeChatSignUtil.generateSign(params, "your_api_key");
    params.put("sign", sign);

    String xml = XmlUtil.mapToXml(params);
    String response = HttpUtil.post(url, xml);

    return response;
}
逻辑说明
- 构建微信统一下单接口参数。
- 生成签名
sign,保证请求安全。 - 调用微信接口生成二维码或返回支付链接。
- 异步回调处理支付结果。
5.2.3 结算记录查询与导出功能
结算记录的查询与导出功能是医院管理的重要组成部分。
查询接口示例
@GetMapping("/bills")
public List<Bill> getBillsByDateRange(@RequestParam String startDate, @RequestParam String endDate) {
    return billRepository.findByCreatedAtBetween(
        LocalDate.parse(startDate).atStartOfDay(),
        LocalDate.parse(endDate).atTime(LocalTime.MAX)
    );
}
导出Excel功能(使用Apache POI)
public void exportBillsToExcel(List<Bill> bills, HttpServletResponse response) throws IOException {
    Workbook workbook = new XSSFWorkbook();
    Sheet sheet = workbook.createSheet("结算记录");

    int rowNum = 0;
    Row headerRow = sheet.createRow(rowNum++);
    headerRow.createCell(0).setCellValue("账单ID");
    headerRow.createCell(1).setCellValue("总金额");
    headerRow.createCell(2).setCellValue("支付状态");
    headerRow.createCell(3).setCellValue("创建时间");

    for (Bill bill : bills) {
        Row row = sheet.createRow(rowNum++);
        row.createCell(0).setCellValue(bill.getId());
        row.createCell(1).setCellValue(bill.getTotalAmount().doubleValue());
        row.createCell(2).setCellValue(bill.getStatus());
        row.createCell(3).setCellValue(bill.getCreatedAt().toString());
    }

    response.setContentType("application/vnd.openxmlformats-officedocument.spreadsheetml.sheet");
    response.setHeader("Content-Disposition", "attachment; filename=bills.xlsx");
    workbook.write(response.getOutputStream());
}
参数说明
bills:结算记录集合。workbook:Excel工作簿对象。sheet:工作表。response:响应输出流,用于浏览器下载。
通过本章的详细讲解,读者应能掌握预约挂号与费用结算系统的架构设计与实现方法,理解并发处理、缓存优化、支付集成等关键技术点,并具备在实际项目中落地开发的能力。
6. 药品库存管理与事务一致性保障
在医院信息系统中,药品库存管理模块是至关重要的核心业务模块之一。它不仅负责药品的入库、出库、盘点等基本操作,还需要保障在多用户并发操作下的数据一致性与事务完整性。本章将围绕药品库存管理的业务逻辑设计、Layui前端展示实现,以及Spring事务管理机制与分布式事务处理策略,深入剖析如何在医院信息系统中构建一个稳定、高效的药品库存管理系统。
6.1 药品库存管理系统开发
药品库存管理系统的开发需要从数据库设计、业务逻辑实现以及前端界面展示三个方面入手,确保系统的完整性、可维护性与用户友好性。本节将从药品信息管理、库存变更逻辑、入库出库与盘点功能实现,以及基于Layui构建的库存看板界面进行详细分析。
6.1.1 药品信息管理与库存变更逻辑
药品库存管理的基础是药品信息的结构化管理。通常,药品信息应包括药品名称、规格、单位、分类、有效期、供应商、库存数量等字段。
数据库表设计示例
CREATE TABLE drug_info (
    id BIGINT PRIMARY KEY AUTO_INCREMENT,
    drug_name VARCHAR(255) NOT NULL,
    specification VARCHAR(255),
    unit VARCHAR(50),
    category_id BIGINT,
    supplier_id BIGINT,
    expire_date DATE,
    stock_quantity INT DEFAULT 0,
    create_time DATETIME DEFAULT CURRENT_TIMESTAMP,
    update_time DATETIME DEFAULT CURRENT_TIMESTAMP ON UPDATE CURRENT_TIMESTAMP
);
库存变更逻辑说明
药品库存变更主要涉及以下操作:
- 入库 :增加药品库存数量。
- 出库 :减少药品库存数量,需判断库存是否足够。
- 盘点 :对库存进行核对,修正库存数量。
库存变更应通过事务控制,确保数据一致性。例如,在Spring Boot中使用 @Transactional 注解来管理事务:
@Transactional
public void updateStock(Long drugId, int changeAmount) {
    DrugInfo drug = drugInfoRepository.findById(drugId)
            .orElseThrow(() -> new RuntimeException("药品不存在"));
    int newStock = drug.getStockQuantity() + changeAmount;
    if (newStock < 0) {
        throw new RuntimeException("库存不足");
    }
    drug.setStockQuantity(newStock);
    drugInfoRepository.save(drug);
}
代码分析 :
@Transactional:确保整个方法在事务中执行,任何异常都会触发回滚。findById:查找药品实体。changeAmount:传入正数表示入库,负数表示出库。- 库存不足时抛出异常,防止负库存。
6.1.2 入库、出库与盘点功能实现
药品库存管理的三大核心操作分别是入库、出库和盘点。下面以入库操作为例,展示其完整实现流程。
入库接口设计(RESTful)
@RestController
@RequestMapping("/api/drugs")
public class DrugController {

    @PostMapping("/stock/in")
    public ResponseEntity<String> stockIn(@RequestBody StockChangeDTO dto) {
        drugService.updateStock(dto.getDrugId(), dto.getAmount());
        return ResponseEntity.ok("入库成功");
    }
}
DTO类定义
public class StockChangeDTO {
    private Long drugId;
    private int amount;

    // Getter and Setter
}
前端调用示例(Layui + Ajax)
layui.use('form', function(){
    var $ = layui.$;

    $('#stockInBtn').on('click', function(){
        var drugId = $('#drugId').val();
        var amount = $('#amount').val();

        $.ajax({
            url: '/api/drugs/stock/in',
            type: 'POST',
            contentType: 'application/json',
            data: JSON.stringify({ drugId: drugId, amount: amount }),
            success: function(res) {
                layer.msg('入库成功');
                location.reload();
            },
            error: function(xhr) {
                layer.msg('入库失败: ' + xhr.responseText);
            }
        });
    });
});
代码分析 :
- 使用Layui的
form模块绑定点击事件。 - 通过Ajax向后端发送POST请求。
- 成功后刷新页面,失败则提示错误信息。
6.1.3 使用Layui构建药品库存看板
药品库存看板是前端展示药品库存状态的核心界面,通过Layui的数据表格组件可以实现动态加载与分页展示。
Layui表格展示药品库存
<table class="layui-hide" id="drugStockTable" lay-filter="drugStockTable"></table>

<script>
layui.use('table', function(){
  var table = layui.table;

  table.render({
    elem: '#drugStockTable'
    ,url:'/api/drugs/stock/list' // 数据接口
    ,page: true // 开启分页
    ,cols: [[ // 表头
      {field:'id', title:'药品ID', width:80}
      ,{field:'drugName', title:'药品名称', width:150}
      ,{field:'specification', title:'规格', width:120}
      ,{field:'unit', title:'单位', width:80}
      ,{field:'stockQuantity', title:'库存数量', width:100}
      ,{field:'expireDate', title:'有效期', width:100}
    ]]
  });
});
</script>
后端接口实现
@GetMapping("/stock/list")
public Page<DrugInfo> getStockList(@RequestParam int page, @RequestParam int limit) {
    Pageable pageable = PageRequest.of(page - 1, limit);
    return drugInfoRepository.findAll(pageable);
}
代码分析 :
- 使用Layui的
table.render方法初始化表格。 - 分页参数
page和limit传给后端,实现分页查询。 - 返回数据格式应为JSON,字段名需与前端
field对应。
6.2 事务管理与数据一致性保障
药品库存管理涉及多个数据表的变更操作,如药品库存表、操作日志表、供应商信息表等。为了保障数据一致性,必须引入事务管理机制。此外,在分布式系统中,还需要考虑分布式事务处理策略。
6.2.1 Spring事务管理机制详解
Spring框架提供了强大的事务管理机制,主要通过 @Transactional 注解实现声明式事务管理。事务具备ACID特性:
- A(原子性) :事务是一个不可分割的工作单位,事务中的操作要么全部成功,要么全部失败。
- C(一致性) :事务必须使数据库从一个一致性状态变换到另一个一致性状态。
- I(隔离性) :多个事务并发执行时,一个事务的执行不应影响其他事务。
- D(持久性) :事务一旦提交,它对数据库的修改应永久保存。
示例:多表操作事务控制
@Transactional
public void processDrugOrder(Long drugId, int quantity, Long supplierId) {
    // 1. 更新药品库存
    updateStock(drugId, -quantity);

    // 2. 插入采购订单
    PurchaseOrder order = new PurchaseOrder();
    order.setDrugId(drugId);
    order.setQuantity(quantity);
    order.setSupplierId(supplierId);
    purchaseOrderRepository.save(order);

    // 3. 更新供应商采购记录
    Supplier supplier = supplierRepository.findById(supplierId).orElseThrow();
    supplier.setTotalPurchase(supplier.getTotalPurchase() + quantity);
    supplierRepository.save(supplier);
}
逻辑分析 :
- 一个事务中涉及三个操作:库存减少、订单插入、供应商记录更新。
- 任意一步失败都会触发回滚,确保数据一致性。
6.2.2 多表操作的ACID保障
在实际开发中,事务操作往往涉及多个表的更新,例如:
| 操作类型 | 操作内容 | 涉及表 |
|---|---|---|
| 入库操作 | 增加库存、记录日志 | drug_info、stock_log |
| 出库操作 | 减少库存、生成出库单 | drug_info、out_stock_order |
| 盘点操作 | 校正库存、记录差异 | drug_info、inventory_log |
为了保障这些操作的ACID特性,Spring的事务管理器会将这些操作放在一个事务中执行。
示例:事务嵌套操作
@Transactional
public void inventoryCheck(Long drugId, int actualStock) {
    DrugInfo drug = drugInfoRepository.findById(drugId).orElseThrow();
    int diff = actualStock - drug.getStockQuantity();

    if (diff != 0) {
        // 调整库存
        drug.setStockQuantity(actualStock);
        drugInfoRepository.save(drug);

        // 记录差异日志
        InventoryLog log = new InventoryLog();
        log.setDrugId(drugId);
        log.setExpectedStock(drug.getStockQuantity());
        log.setActualStock(actualStock);
        inventoryLogRepository.save(log);
    }
}
逻辑分析 :
- 事务中包含库存更新与日志记录两个操作。
- 任一失败,事务整体回滚,防止脏数据。
6.2.3 分布式事务与异常回滚策略
随着系统规模扩大,药品库存管理可能涉及多个微服务,例如库存服务、订单服务、支付服务等。此时,本地事务已无法满足跨服务的一致性需求,必须引入分布式事务机制。
分布式事务解决方案
| 方案 | 特点 | 适用场景 |
|---|---|---|
| 两阶段提交(2PC) | 强一致性,性能低 | 金融交易、库存同步 |
| TCC(Try-Confirm-Cancel) | 最终一致性,业务侵入性强 | 电商、支付 |
| Saga模式 | 异步补偿机制,适合长事务 | 订单流程、库存变更 |
| 消息队列(如Kafka) | 异步最终一致,解耦性强 | 日志记录、通知 |
示例:使用TCC实现分布式事务
public class DrugTccService {

    @Try
    public boolean prepareStock(Long drugId, int quantity) {
        // 尝试锁定库存
        return drugService.lockStock(drugId, quantity);
    }

    @Confirm
    public void commitStock(Long drugId, int quantity) {
        // 提交库存减少
        drugService.reduceStock(drugId, quantity);
    }

    @Cancel
    public void cancelStock(Long drugId, int quantity) {
        // 释放锁定库存
        drugService.releaseStock(drugId, quantity);
    }
}
流程图:
graph TD
    A[发起请求] --> B{尝试锁定库存}
    B -->|成功| C[执行业务操作]
    C --> D[提交事务]
    D --> E[完成]
    B -->|失败| F[取消事务]
    F --> G[释放库存]
逻辑分析 :
- Try阶段 :预扣库存,防止并发操作。
- Confirm阶段 :业务处理完成后正式减少库存。
- Cancel阶段 :发生异常时释放锁定库存,保障系统一致性。
小结
本章围绕药品库存管理模块的开发与事务一致性保障机制,深入分析了药品信息管理、库存变更逻辑、入库出库盘点功能实现、Layui前端看板展示,以及Spring事务管理与分布式事务处理策略。通过本章的学习,开发者能够掌握构建医院信息系统中关键模块的技术要点,并在实际项目中应用事务控制和分布式事务解决方案,确保系统数据的准确性和一致性。
7. 系统性能优化与完整开发流程总结
本章将围绕医院信息管理系统的性能优化策略与开发流程进行深入探讨。通过数据库优化、Redis缓存机制、以及开发流程的总结,帮助开发者在项目交付阶段进一步提升系统响应速度与稳定性,保障医院业务的高效运行。
7.1 数据库优化与查询性能提升
在医院信息系统中,数据库是承载业务数据的核心,随着数据量的增长,查询性能将直接影响系统的响应速度与用户体验。因此,必须从多个维度对数据库进行优化。
7.1.1 索引设计与查询效率优化
合理的索引设计可以极大提升查询效率。以下是一些常见优化策略:
- 主键与唯一索引 :为每张表设置主键,并为需要唯一性的字段建立唯一索引。
- 复合索引 :对于经常联合查询的字段(如
patient_id + visit_date),可创建复合索引。 - 避免过度索引 :索引虽然能提升查询速度,但会影响插入和更新效率,需权衡使用。
示例:为患者信息表添加复合索引
ALTER TABLE patient_info
ADD INDEX idx_patient_name_gender (name, gender);
该索引适用于经常按姓名和性别联合查询的场景。
7.1.2 分页查询与大数据处理策略
在患者管理、药品库存等模块中,常常需要处理大量数据。此时应使用高效的分页查询方式,避免一次性加载所有数据。
示例:使用LIMIT和OFFSET实现分页查询
SELECT * FROM patient_info
ORDER BY create_time DESC
LIMIT 10 OFFSET 20;
该语句表示获取第3页(每页10条)的患者信息。为提升性能,建议:
- 在
ORDER BY字段上建立索引; - 避免使用
SELECT *,仅查询需要字段; - 对超大数据表考虑使用游标分页(Cursor-based Pagination)。
7.1.3 MyBatis性能优化与缓存机制
MyBatis作为持久层框架,在医院系统中广泛使用。可以通过以下方式提升性能:
- 使用二级缓存 :减少数据库访问,适用于不频繁变更的数据(如科室信息)。
<cache eviction="LRU" flushInterval="60000" size="512" readOnly="true"/>
-
延迟加载(Lazy Loading) :仅在需要时加载关联数据,如患者就诊记录。
-
SQL优化 :避免N+1查询问题,使用JOIN一次性获取关联数据。
7.2 Redis缓存与高并发处理
在医院信息系统中,诸如医生排班、预约挂号等模块,往往面临高并发请求。Redis作为高性能的内存数据库,可以有效缓解数据库压力。
7.2.1 Redis在医院系统中的典型应用
- 热点数据缓存 :如热门科室、常用药品信息。
- 预约并发控制 :用于限制同一时间段内的预约人数。
- 登录会话管理 :替代传统Session机制,实现分布式登录状态管理。
示例:使用Redis缓存医生排班信息
public Schedule getScheduleFromCache(Long doctorId) {
    String key = "schedule:doctor:" + doctorId;
    String json = redisTemplate.opsForValue().get(key);
    if (json != null) {
        return JSON.parseObject(json, Schedule.class);
    }
    // 若缓存中无数据,则从数据库查询并写入缓存
    Schedule schedule = scheduleService.findByDoctorId(doctorId);
    redisTemplate.opsForValue().set(key, JSON.toJSONString(schedule), 5, TimeUnit.MINUTES);
    return schedule;
}
7.2.2 缓存穿透与雪崩的预防策略
- 缓存穿透 :恶意查询不存在的数据,可使用布隆过滤器(Bloom Filter)拦截非法请求。
- 缓存雪崩 :大量缓存同时失效,可为缓存设置随机过期时间。
- 缓存击穿 :热点数据失效,可采用永不过期策略或互斥锁机制。
示例:使用Redisson实现互斥锁防止缓存击穿
RLock lock = redisson.getLock("lock:schedule:" + doctorId);
if (lock.tryLock()) {
    try {
        // 重新加载数据并写入缓存
    } finally {
        lock.unlock();
    }
}
7.2.3 使用Redis实现热点数据缓存
对于频繁访问的数据,如医院公告、常用药品目录等,可以使用Redis进行缓存,减少数据库压力。
7.3 医院信息系统开发流程总结
在完成系统功能开发后,开发流程的规范性和可维护性成为保障项目成功交付的重要因素。
7.3.1 项目开发周期与迭代流程
医院信息系统的开发通常采用敏捷开发(Agile)模式,遵循以下流程:
- 需求分析 :与医院管理人员沟通,明确业务流程;
- 原型设计与评审 :使用Axure等工具制作原型图;
- 开发与测试 :采用SpringBoot+Layui快速开发;
- 迭代上线 :根据反馈进行功能优化;
- 运维与维护 :持续监控系统运行状态。
7.3.2 代码管理与版本控制策略
- Git + GitLab/GitHub :统一代码仓库,分支管理(如
main、develop、feature/*); - Code Review :确保代码质量,避免低级错误;
- CI/CD流程 :集成Jenkins或GitLab CI实现自动化构建与部署。
示例:Git分支管理策略
git checkout -b feature/patient-info develop
# 开发完成后合并回develop
git checkout develop
git merge --no-ff feature/patient-info
7.3.3 测试部署与上线维护要点
- 单元测试 :使用JUnit对核心逻辑进行测试;
- 接口测试 :Postman或Swagger验证API;
- 集成测试 :确保模块间数据交互正确;
- 部署方式 :Docker容器化部署,结合Nginx做反向代理;
- 日志监控 :使用ELK(Elasticsearch + Logstash + Kibana)进行日志收集与分析;
- 灾备与回滚 :定期备份数据库,支持快速回滚至历史版本。
(本章完)
简介:本项目基于SpringBoot后端框架与Layui前端组件库开发,旨在构建一个功能完善的医院信息管理系统。系统涵盖用户管理、患者管理、预约管理、科室与医生管理、药品库存管理及费用结算等核心模块。SpringBoot简化了后端配置与数据访问,集成MyBatis或Spring Data JPA,提升开发效率;Layui则提供了响应式、易用的前端界面。项目还涉及安全控制(如Spring Security)、事务管理、缓存优化(如Redis)等关键技术,适用于医疗行业的信息管理需求,并具备良好的扩展性与定制化能力。
更多推荐

 27
27 0
0- 0


 已为社区贡献22条内容

所有评论(0)