
【python】windows环境中搭建独立的python环境(yolo为例)
·
概述
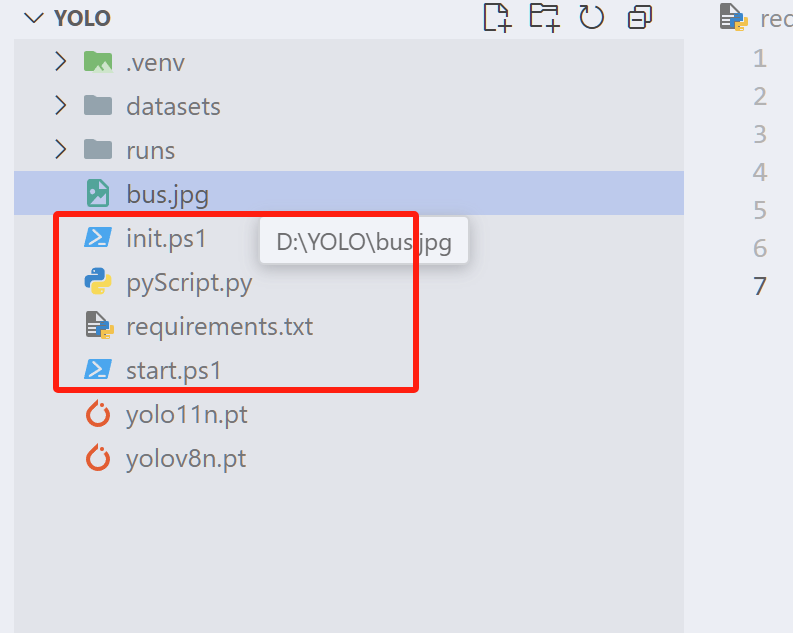
以YOLO的测试demo为例,如图所示分别用init.ps1创建环境、start.ps1启动项目、pyScript作为项目入口文件,requirements.txt作为依赖列表
创建环境
在项目目录中创建init.ps1
Set-Location $PSScriptRoot
# 检查是否已经存在虚拟环境
$venvDir = ".venv"
if (Test-Path $venvDir) {
    Write-Host ",venv exist: $venvDir" -ForegroundColor Yellow
}
else {
    Write-Host "创建虚拟环境 $venvDir..." -ForegroundColor Green
    python -m venv $venvDir
    if (Test-Path $venvDir) {
        Write-Host "虚拟环境创建成功: $venvDir" -ForegroundColor Green
    } else {
        Write-Host "虚拟环境创建失败。" -ForegroundColor Red
        exit 1
    }
}

# 激活虚拟环境
Write-Host ".venv start: $venvDir..." -ForegroundColor Green
$activateScript = Join-Path -Path $venvDir -ChildPath "Scripts\Activate.ps1"
if (Test-Path $activateScript) {
    . $activateScript
}
else {
    Write-Host "start failed" -ForegroundColor Red
    exit 1
}


# 检查并安装 requirements.txt 中的所有依赖
Write-Host " requirements.txt checking..." -ForegroundColor Green
if (Test-Path "requirements.txt") {
    pip install -r requirements.txt
    if ($LASTEXITCODE -eq 0) {
        Write-Host "requirements installed" -ForegroundColor Green
    } else {
        Write-Host "requirements install failed" -ForegroundColor Red
        # exit 1
    }
} else {
    Write-Host "requirements.txt not exist" -ForegroundColor Red
    # exit 1
}

pip list
pip install torch torchvision torchaudio --index-url https://download.pytorch.org/whl/cu124
pip list
# # 退出虚拟环境
Write-Host "exid init.ps1 $venvDir..." -ForegroundColor Green
deactivate

Read-Host | Out-Null ;
需求列表
requirement.txt
与python其他依赖文件格式相同的txt文本
numpy
scipy
opencv-python
imageio
scikit-image
realesrgan
ultralytics
启动项目脚本
创建该脚本以启动python虚拟环境并执行程序:start.ps1
# start.ps1 - 启动虚拟环境并运行 pyScript.py

# 检查是否已经存在虚拟环境
if (Test-Path "./.venv/Scripts/activate") {
    Write-Output "venv start"
}
else {
    Write-Output "need run  init.ps1"
}


.venv/Scripts/activate

python pyScript.py

Read-Host | Out-Null ;
python脚本
from ultralytics import YOLO

if __name__ == '__main__':
    # Create a new YOLO model from scratch
    model = YOLO("yolov8n.yaml")  # 注意:你代码里的 yolo11n 可能有误,一般是 yolov8n

    # Load a pretrained YOLO model (recommended for training)
    model = YOLO("yolov8n.pt")

    # Train the model using the 'coco8.yaml' dataset for 3 epochs
    results = model.train(data="coco8.yaml", epochs=3)

    # Evaluate the model's performance on the validation set
    results = model.val()

    # Perform object detection on an image using the model
    results = model("https://ultralytics.com/images/bus.jpg")

    # Export the model to ONNX format
    success = model.export(format="onnx")
执行
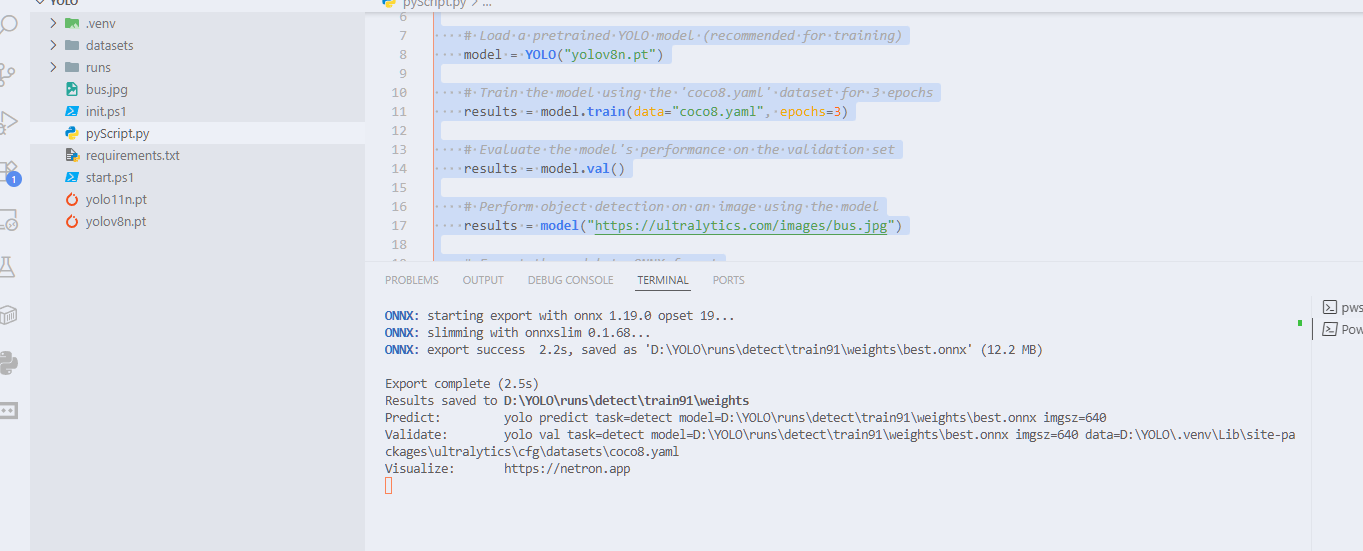
依次执行init start 然后获得以下结果:
Export complete (2.5s)
Results saved to D:\YOLO\runs\detect\train91\weights
Predict:         yolo predict task=detect model=D:\YOLO\runs\detect\train91\weights\best.onnx imgsz=640
Validate:        yolo val task=detect model=D:\YOLO\runs\detect\train91\weights\best.onnx imgsz=640 data=D:\YOLO\.venv\Lib\site-packages\ultralytics\cfg\datasets\coco8.yaml
Visualize:       https://netron.app
更多推荐

 4
4 0
0- 0


 已为社区贡献1条内容

所有评论(0)