
黑马SpringBoot3+Vue3(基础篇)学习记录 二(补):创建父工程并创建新的子模块
·
记录
父工程
- 教程的做法是新建一空项目,然后在空项目里面新建子项目,每个子项目完整且独立,空项目只是起到一个打包的作用
- 在实际开发中,尤其是中大型项目的标配一定会建立父工程
- **优点:**统一版本管理,杜绝依赖冲突、统一构建配置、一键构建所有模块、按需构建单个模块
- 主流做法:父工程继承 spring-boot-starter-parent,而不是完全自定义
1.从头开始创建父工程 新建空项目:选择Maven
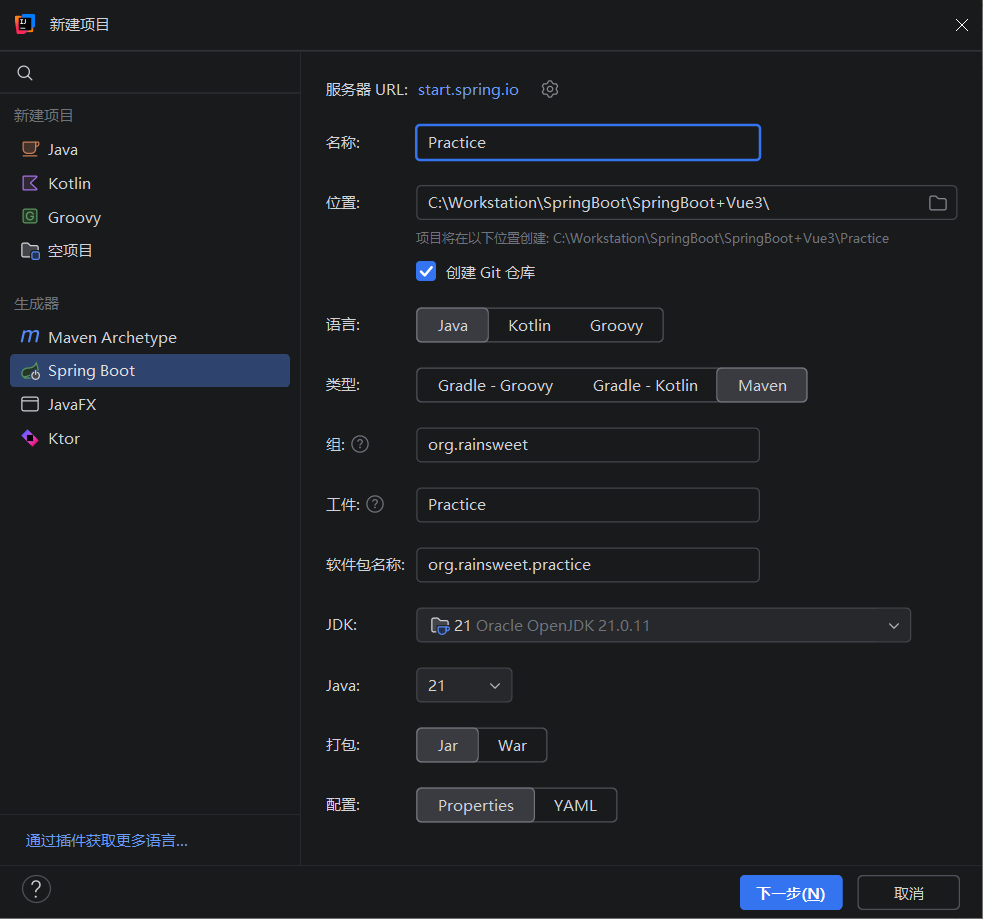
这里可能没有早起的SpringBoot,到时候去Maven的pom里面改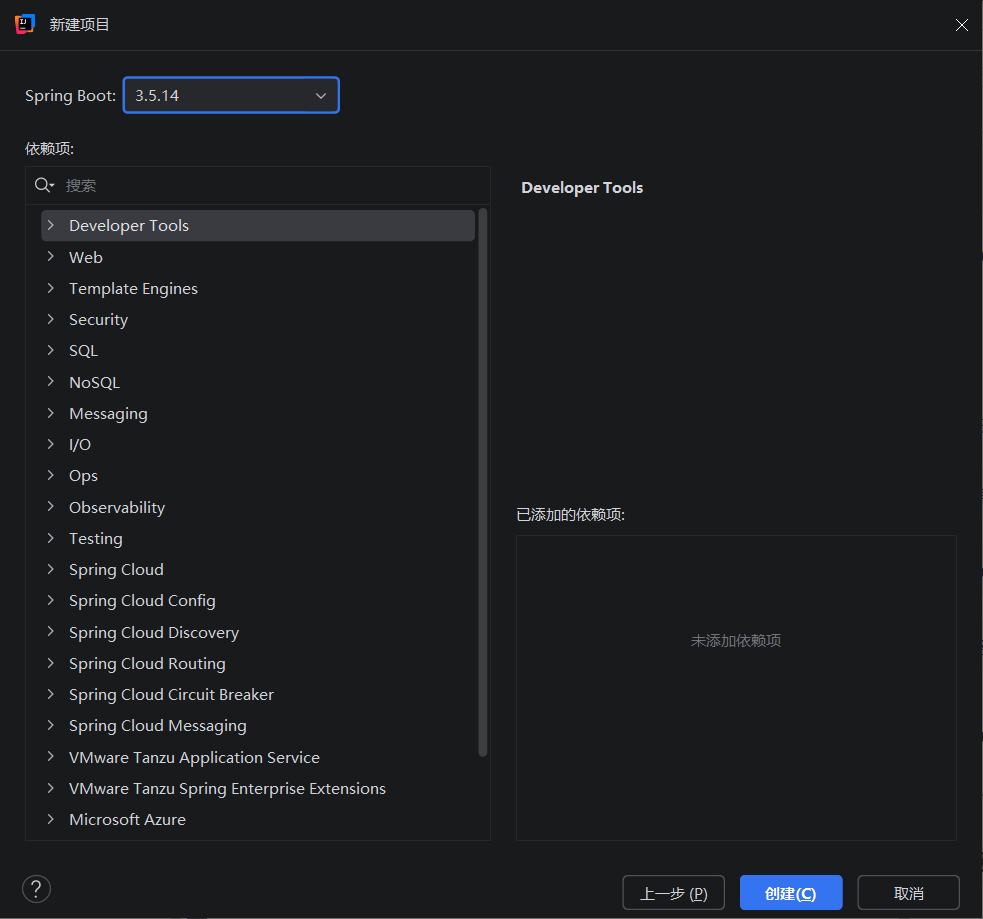
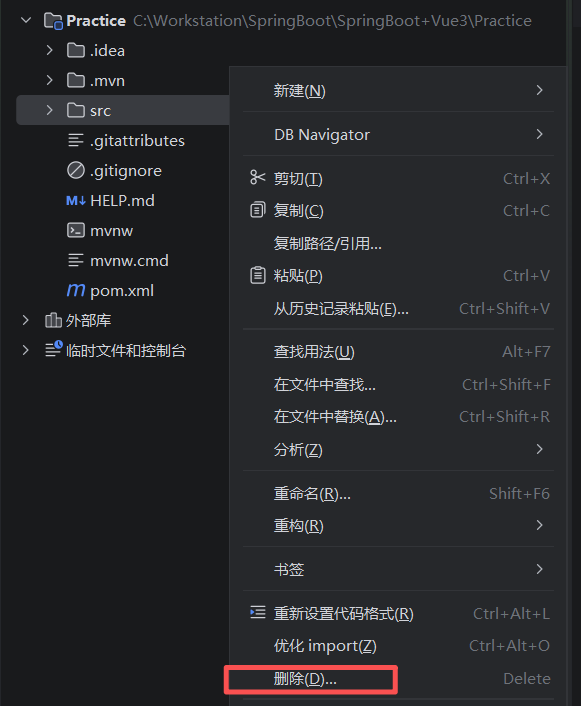
因为是父工程所以要删除 src 、.mvn、mvnw、mvnw.cmd 删除(保持项目清爽,非必须但推荐)。
修改parent版本号为3.1.2
    <parent>
        <groupId>org.springframework.boot</groupId>
        <artifactId>spring-boot-starter-parent</artifactId>
        <version>3.1.2</version>
        <relativePath/> <!-- lookup parent from repository -->
    </parent>
添加packaging,在description下
<packaging>pom</packaging>
删除bulid、dependecies标准的父工程父工程应该使用 来做“版本锁定”,而不是直接引包,否则底下所有的模块都会引入这些依赖,应该在子模块中引入这些依赖
    <build>
       <plugins>
           <plugin>
               <groupId>org.springframework.boot</groupId>
               <artifactId>spring-boot-maven-plugin</artifactId>
           </plugin>
       </plugins>
   </build>
       <dependencies>
       <dependency>
           <groupId>org.springframework.boot</groupId>
           <artifactId>spring-boot-starter</artifactId>
       </dependency>

       <dependency>
           <groupId>org.springframework.boot</groupId>
           <artifactId>spring-boot-starter-test</artifactId>
           <scope>test</scope>
       </dependency>
   </dependencies>
创建子模块-hello world
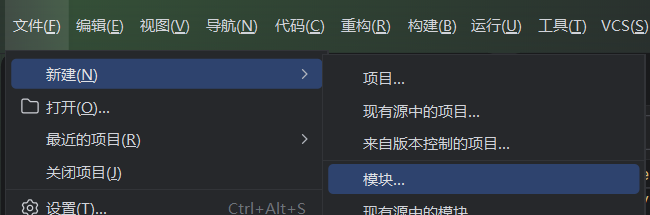
直接创建SpringBoot项目,然后修改pom
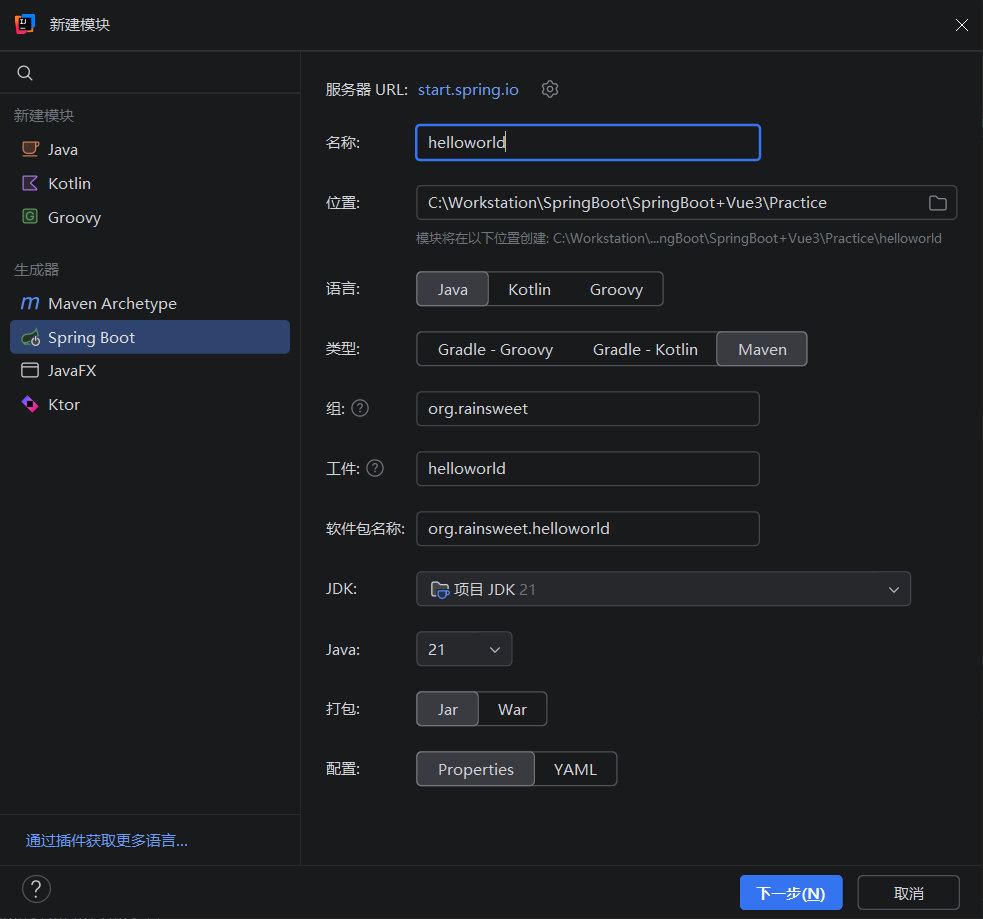
替换parent模块,
    <parent>
        <groupId>org.rainsweet</groupId>
        <artifactId>Practice</artifactId>
        <version>0.0.1-SNAPSHOT</version>
    </parent>
和之前不同,不要删除dependencies和build
- spring-boot-starter:不要删。它是核心,没有它 Spring 跑不起来。
- spring-boot-starter-test:不要删。你需要在这个模块写单元测试。
- 标签:这个模块最终要被打成一个可以执行的 .jar 文件部署到服务器上,必须靠这个 spring-boot-maven-plugin 插件来把所有依赖打包进去。
引入SpringBoot-web,然后刷新
    <dependency>
        <groupId>org.springframework.boot</groupId>
        <artifactId>spring-boot-starter-web</artifactId>
    </dependency>
在父模块中添加
    <modules>
        <module>helloworld</module>
    </modules>
在java/org/rainsweet/目录下新建软件包/Controller
在Controller下新建文件HelloController.java
注释-注释系统会自动补全import,如果没有就手动添加import:
import org.springframework.web.bind.annotation.RestController;
import org.springframework.web.bind.annotation.RequestMapping;

@RestController
public class HelloController() {

    @RequestMapping("hello")
    public String HelloController(){
        return "HelloWorld!";
    }

}
回到HelloworldApplication
添加注释@SpringBootApplication再点击运行
import org.springframework.boot.SpringApplication;
import org.springframework.boot.autoconfigure.SpringBootApplication;

@SpringBootApplication
public class HelloworldApplication {

    public static void main(String[] args) {
        SpringApplication.run(HelloworldApplication.class, args);
    }
}

网址输入127.0.0.1:8080/hello即可
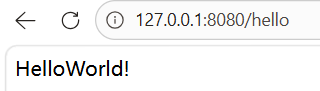
更多推荐
 5
5 0
0- 0


 已为社区贡献6条内容

所有评论(0)