
Qwen ASR+TTS 本地部署使用
目录
参考文档:
https://github.com/QwenLM/Qwen3-TTS
https://github.com/QwenLM/Qwen3-ASR/tree/main
Qwen3-TTS全面开源:支持超低延迟流式合成的多语言语音大模型-阿里云开发者社区
1 安装
1.1 创建conda环境
conda create -n qwen3-asr python=3.12 -y
conda activate qwen3-asr
1.2 安装架构依赖
支持transform架构和vLLM架构
1.2.1 transform架构
asr:
pip install -U qwen-asrtts:
pip install -U qwen-tts1.2.2 vLLM架构
asr:
pip install -U qwen-asr[vllm]tts:
pip install -U qwen-tts1.3 安装加速器
flash-attn 在mac电脑上好像装不上,就没安装
pip install -U flash-attn --no-build-isolation限制并行数量安装,适用于:多cpu或内存低<96G的本地设备
MAX_JOBS=4 pip install -U flash-attn --no-build-isolation1.4 安装大模型
安装摩卡下载器
pip install -U modelscope1.4.1 安装ASR
modelscope download --model Qwen/Qwen3-ASR-0.6B --local_dir ./Qwen3-ASR-0.6B1.4.2 安装TTS
千问的TTS依赖SOX,下载解压sox后并配置环境变量。
安装SOX:https://sourceforge.net/projects/sox/postdownload
modelscope download --model Qwen/Qwen3-TTS-12Hz-1.7B-Base --local_dir ./Qwen3-TTS-12Hz-1.7B-BaseTTS包含三种
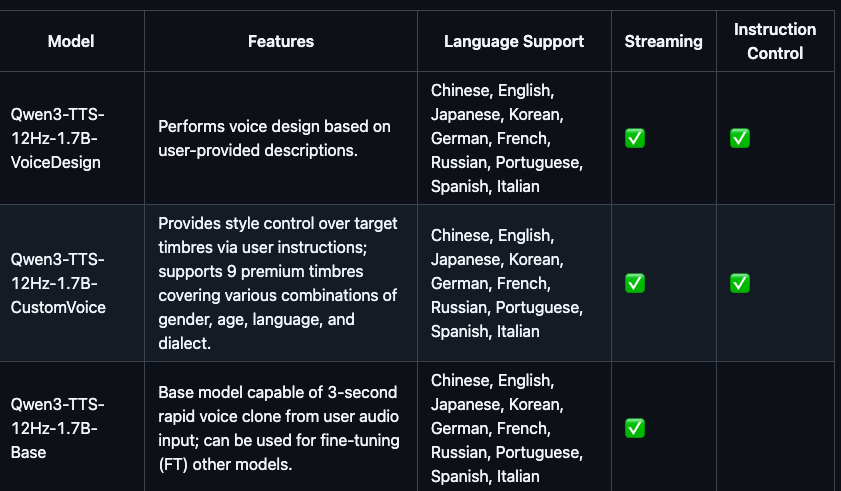
voicedesign:使用文本描述语音音色信息
customvoice:预设的9种音色
base:基座,可以克隆用户音色
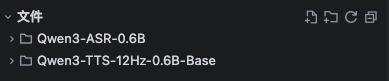
1.4.3 下载结果
2 基础demo
2.1 ASR Demo
mac电脑,不支持cuda,因此使用cpu运行
import torch
from qwen_asr import Qwen3ASRModel

model = Qwen3ASRModel.from_pretrained(
    "./Qwen3-ASR-0.6B",
    dtype=torch.bfloat16,
    device_map="cpu",
    # attn_implementation="flash_attention_2",
    max_inference_batch_size=32,
    max_new_tokens=256,
    # forced_aligner="./Qwen3-ASR-0.6B",
    # forced_aligner_kwargs=dict(
    #     dtype=torch.bfloat16,
    #     device_map="cpu",
    #     # attn_implementation="flash_attention_2",
    # ),
)

results = model.transcribe(
    audio=[
      "https://qianwen-res.oss-cn-beijing.aliyuncs.com/Qwen3-ASR-Repo/asr_zh.wav",
      "https://qianwen-res.oss-cn-beijing.aliyuncs.com/Qwen3-ASR-Repo/asr_en.wav",
    ],
    language=["Chinese", "English"], # can also be set to None for automatic language detection
    # return_time_stamps=True,
)

for r in results:
    print(r.language, r.text)
    # print(r.language, r.text, r.time_stamps[0])
2.2 TTS Demo
tts的内存占用率很高,处理时间更长
import torch
import soundfile as sf
from qwen_tts import Qwen3TTSModel

ref_audio = "https://qianwen-res.oss-cn-beijing.aliyuncs.com/Qwen3-TTS-Repo/clone.wav"
ref_text  = "Okay. Yeah. I resent you. I love you. I respect you. But you know what? You blew it! And thanks to you."


model = Qwen3TTSModel.from_pretrained(
    "./Qwen3-TTS-12Hz-0.6B-Base",
    device_map="cpu",
    dtype=torch.bfloat16,
    # attn_implementation="flash_attention_2",
)

wavs, sr = model.generate_voice_clone(
    text="I am solving the equation: x = [-b ± √(b²-4ac)] / 2a? Nobody can — it's a disaster (◍•͈⌔•͈◍), very sad!",
    language="English",
    ref_audio=ref_audio,
    ref_text=ref_text,
)
sf.write("output_voice_clone.wav", wavs[0], sr)
3 windows安装torch-cuda环境
cuda必须是N卡才可以
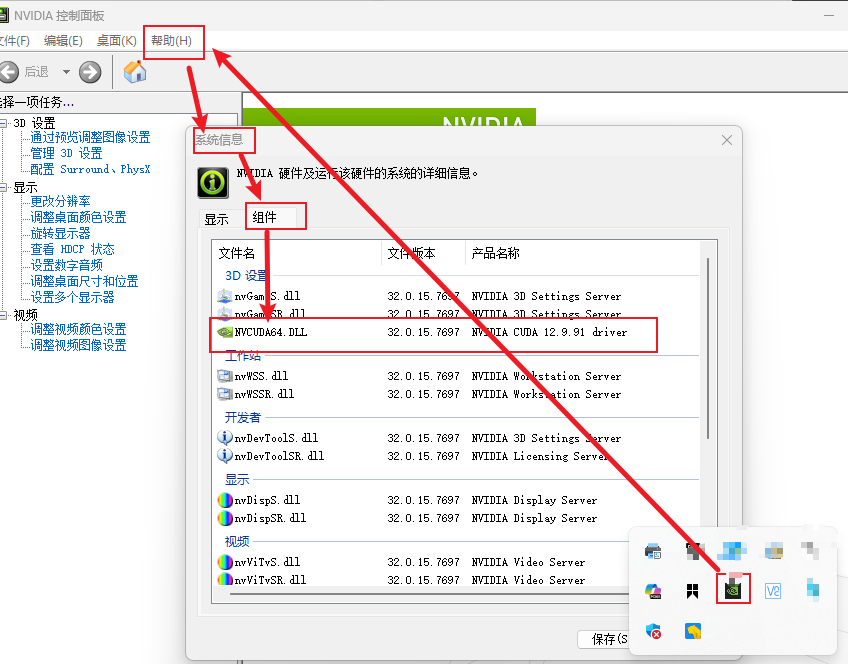
3.1 查看当前显卡安装的cuda版本
3.1.1 命令行方式
nvidia-smi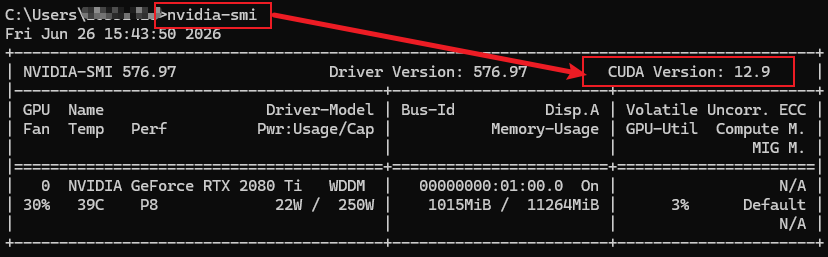
3.1.2 界面方式
3.2 卸载之前torch
pip uninstall torch torchvision torchaudio -y3.3 安装指定cuda版本的torch
命令行最后面的版本号,要和3.1查看的系统cuda版本相同,我的cuda版本为12.9,因此使用cu129
pip3 install torch torchvision torchaudio --index-url https://download.pytorch.org/whl/cu1294 安装加速器flash-atten报错及解决方案
4.0 坑:GPU架构必须要大于等于AMpere架构
因此你的GPU过于老旧,就不要考虑安装flash-atten了

4.1 文件路径过长
Maximum Path Length Limitation - Win32 apps | Microsoft Learn
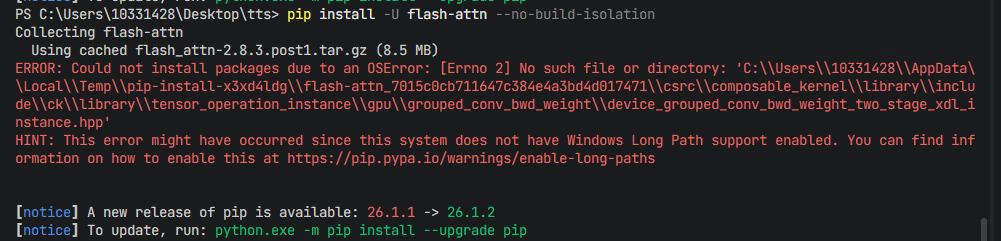
管理员运行power shell
New-ItemProperty -Path "HKLM:\SYSTEM\CurrentControlSet\Control\FileSystem" -Name "LongPathsEnabled" -Value 1 -PropertyType DWORD -Force4.2 cuda 开发toolkit未安装
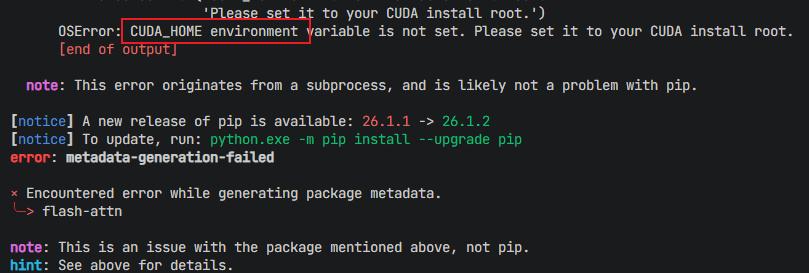
安装cuda工具包后,并配置环境变量:CUDA Toolkit 13.3 Downloads | NVIDIA Developer
4.3 编译工具未安装报错
4.3.1 报C++ Build tool未安装
安装viusualStudio 2022,不支持VS2026。同时安装C++桌面开发/C++游戏开发模块。
4.3.2 报找不到cl.exe
cl是MSVC的工具,在安装目录的以下部分(按照自己的安装目录进行查找):
D:\Program Files\Microsoft Visual Studio\2022\Professional\VC\Tools\MSVC\14.44.35207\bin\Hostx86\x64将该目录配置为环境变量即可
4.3.3 我使用的是源码编译
源码编译对编译流程可控性和依赖检查更清楚一点。在官网克隆版本后,安装好依赖环境后,执行:
python setup.py install更多推荐
 15
15 0
0- 0


 已为社区贡献3条内容

所有评论(0)