
OpenHarness 源码超详细解读:从零开始理解 11733 行代码的 AI Agent 框架
本文深入解析OpenHarness开源AI Agent框架的核心设计与实现。项目采用分层架构设计,核心包括QueryEngine引擎(管理对话循环)、工具系统(43+工具实现)、消息系统(数据结构与序列化)和权限控制机制。文章详细剖析了run_query执行流程、个人Agent系统ohmo的实现原理,以及会话管理与记忆系统的关键技术。框架遵循"模型即Agent,代码即Harness&qu
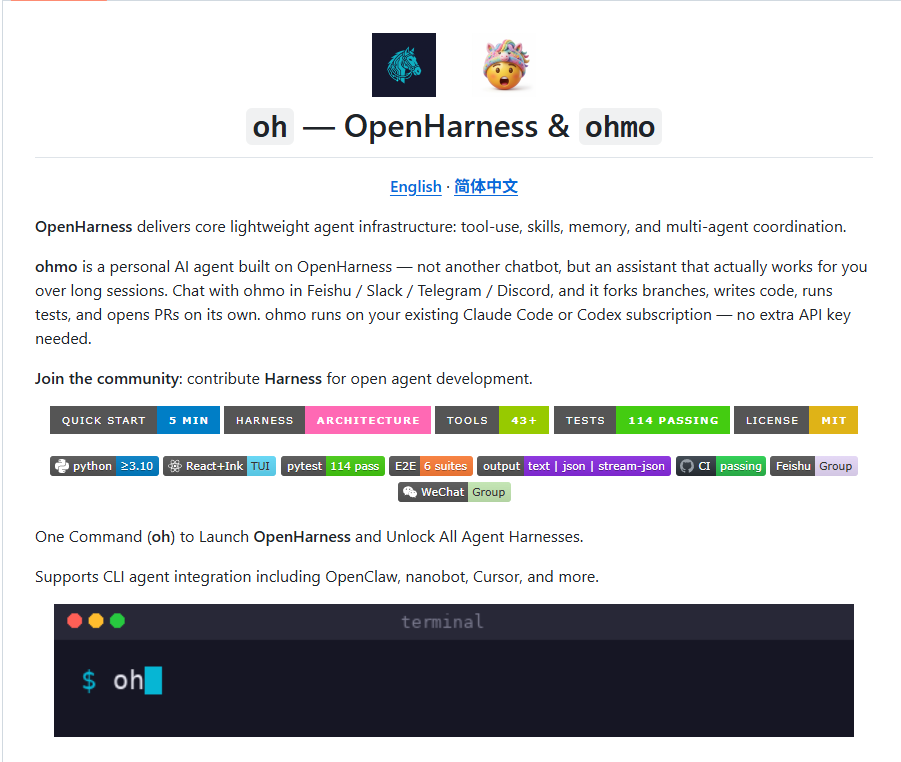
本文档是对 OpenHarness 开源项目的超详细代码解读,逐行分析核心实现,深入理解其架构设计思想。
项目地址:https://github.com/HKUDS/OpenHarness
目录
- 项目概述与架构设计
- 核心引擎详解:QueryEngine 与 Agent Loop
- 消息系统:从数据结构到序列化
- 工具系统:43+ 工具的实现原理
- 查询执行流程:run_query 深度剖析
- ohmo 个人 Agent 系统
- 会话管理与记忆系统
- 权限控制与安全机制
- CLI 与命令系统
- 架构设计哲学总结
第一章:项目概述与架构设计
1.1 项目背景
OpenHarness 是香港大学数据智能实验室(HKUDS)开源的轻量级 AI Agent 框架。项目的核心目标是:
用纯 Python 实现,仅 11,733 行代码,复刻 Claude Code 98% 的核心工具能力。
这个目标的实现依赖于一个核心设计理念:
“The model is the agent. The code is the harness.”
(模型是 Agent,代码是 Harness)
这意味着 OpenHarness 不追求自己实现 AI 模型,而是专注于构建一个高效、可扩展、可定制的 “装备”(Harness),让各种大语言模型都能在这个装备上发挥出最大能力。
1.2 整体架构概览
OpenHarness 采用分层解耦的架构设计,整体可以分为以下几个核心层次:

1.3 目录结构详解
OpenHarness/
├── ohmo/                          # 【个人 Agent 应用】
│   ├── cli.py                     # 24KB,ohmo 命令行入口(typer 实现)
│   ├── runtime.py                 # 运行时封装,连接后端和 UI
│   ├── workspace.py               # 工作空间管理(人格系统核心)
│   ├── session_storage.py         # 会话持久化实现
│   ├── memory.py                  # 记忆管理命令
│   ├── prompts.py                 # 系统提示词构建
│   └── gateway/                   # IM 网关目录
│       ├── service.py             # 网关生命周期管理(~200行)
│       ├── bridge.py              # 消息总线桥接
│       ├── runtime.py             # 运行时池管理
│       ├── config.py              # 网关配置管理
│       ├── models.py              # Pydantic 数据模型
│       └── router.py              # 消息路由逻辑
│
├── src/openharness/               # 【核心框架】
│   ├── cli.py                     # 主 CLI,2423行,包含所有命令
│   ├── engine/                    # 引擎核心目录
│   │   ├── query_engine.py        # QueryEngine 类(~214行)
│   │   ├── query.py               # run_query 核心循环(~1041行)
│   │   ├── messages.py            # 消息数据结构(~222行)
│   │   ├── stream_events.py       # 流式事件定义
│   │   └── cost_tracker.py        # Token 成本追踪
│   ├── tools/                     # 43+ 工具实现
│   │   ├── base.py                # 工具抽象基类(~81行)
│   │   ├── bash_tool.py           # 命令行执行(~219行)
│   │   ├── file_edit_tool.py      # 文件编辑
│   │   ├── agent_tool.py          # 子 Agent 调用
│   │   └── ...                    # 其他 40 个工具
│   ├── api/                       # API 客户端抽象
│   ├── auth/                      # 认证管理系统
│   ├── memory/                    # 记忆系统实现
│   ├── permissions/               # 权限控制系统
│   ├── skills/                    # Markdown 技能系统
│   ├── plugins/                   # 插件系统
│   ├── mcp/                       # MCP 协议支持
│   ├── ui/                        # 终端 UI 后端
│   └── swarm/                     # 多 Agent 协调
│
└── frontend/                      # React/Ink 终端 UI(前端)
1.4 核心设计原则
原则 1:Harness 分离
OpenHarness 遵循 “Harness 分离原则”,将 AI Agent 系统明确划分为两个层次:
- 模型层(Agent):提供理解和推理能力(由外部 LLM 提供)
- 装备层(Harness):提供工具执行、上下文管理、错误处理等基础设施
这种分离的好处是:
- 模型可替换:可以轻松切换不同的 LLM(Claude、GPT、Gemini、Kimi 等)
- 能力可扩展:通过插件和技能系统扩展能力,无需修改核心代码
- 行为可定制:通过配置和提示词工程定制 Agent 行为
原则 2:分层解耦
系统采用三层解耦架构:
Brain (大脑层) → Hands (双手层) → Session (记忆层)
- Brain 层:负责与模型 API 交互,管理对话流
- Hands 层:负责工具执行,与外部环境交互
- Session 层:负责状态持久化,支持会话恢复
每层都可以独立失败、独立恢复、独立扩展。
原则 3:配置即代码
OpenHarness 大量使用 Markdown 文件作为配置格式,包括:
SOUL.md:定义 Agent 人格user.md:记录用户画像MEMORY.md:持久化记忆SKILL.md:技能定义
这种设计的优势是:
- 可读性强:Markdown 是人类可读的
- 版本友好:方便用 Git 管理
- 易于编辑:任何文本编辑器都可以修改
第二章:核心引擎详解
2.1 QueryEngine 类解析
QueryEngine 是整个 OpenHarness 最核心的类,位于 src/openharness/engine/query_engine.py。它是 Agent 的 “大脑”,负责管理与 LLM 的对话循环。
2.1.1 类定义与初始化
class QueryEngine:
    """Owns conversation history and the tool-aware model loop."""

    def __init__(
        self,
        *,
        api_client: SupportsStreamingMessages,    # 模型 API 客户端
        tool_registry: ToolRegistry,              # 工具注册表
        permission_checker: PermissionChecker,    # 权限检查器
        cwd: str | Path,                          # 当前工作目录
        model: str,                              # 模型标识
        system_prompt: str,                       # 系统提示词
        max_tokens: int = 4096,                   # 最大输出 token
        context_window_tokens: int | None = None, # 上下文窗口大小
        auto_compact_threshold_tokens: int | None = None,  # 自动压缩阈值
        max_turns: int | None = 8,                # 最大轮数限制
        permission_prompt: PermissionPrompt | None = None,  # 权限确认回调
        ask_user_prompt: AskUserPrompt | None = None,       # 用户询问回调
        hook_executor: HookExecutor | None = None,          # 钩子执行器
        tool_metadata: dict[str, object] | None = None,     # 工具元数据
    ) -> None:
参数详解:
-
api_client: 实现了
SupportsStreamingMessages接口的 API 客户端,负责与 LLM 通信。这个抽象允许接入不同的模型提供商(Anthropic、OpenAI、Kimi 等)。 -
tool_registry:
ToolRegistry实例,管理所有可用工具。引擎通过它查找和执行工具。 -
permission_checker:
PermissionChecker实例,负责评估工具调用的权限。可以配置哪些工具可以在哪些路径上执行。 -
cwd: 当前工作目录,所有相对路径都基于此目录解析。
-
model: 模型标识字符串,如
"claude-3-5-sonnet-20241022"。 -
system_prompt: 系统提示词,定义 Agent 的行为准则和能力边界。
-
max_tokens: 每轮对话的最大输出 token 数,默认 4096。
-
context_window_tokens: 上下文窗口大小,用于自动压缩决策。
-
auto_compact_threshold_tokens: 自动压缩阈值,当对话超过此 token 数时触发压缩。
-
max_turns: 每轮用户输入的最大 Agent 回合数,防止无限循环,默认 8。
-
permission_prompt: 异步回调函数,当需要用户确认权限时调用。
-
ask_user_prompt: 异步回调函数,当 Agent 需要向用户提问时调用。
-
hook_executor: 钩子执行器,在关键生命周期节点执行自定义逻辑。
-
tool_metadata: 工具元数据字典,用于在工具调用之间传递状态。
初始化逻辑:
self._api_client = api_client
self._tool_registry = tool_registry
self._permission_checker = permission_checker
self._cwd = Path(cwd).resolve()
self._model = model
self._system_prompt = system_prompt
self._max_tokens = max_tokens
self._context_window_tokens = context_window_tokens
self._auto_compact_threshold_tokens = auto_compact_threshold_tokens
self._max_turns = max_turns
self._permission_prompt = permission_prompt
self._ask_user_prompt = ask_user_prompt
self._hook_executor = hook_executor
self._tool_metadata = tool_metadata or {}
self._messages: list[ConversationMessage] = []  # 对话历史
self._cost_tracker = CostTracker()              # 成本追踪器
这里的关键设计是 _messages 列表,它保存了完整的对话历史。每次用户输入、模型响应、工具结果都会被追加到这个列表中。
2.1.2 核心属性
@property
def messages(self) -> list[ConversationMessage]:
    """Return the current conversation history."""
    return list(self._messages)

@property
def max_turns(self) -> int | None:
    """Return the maximum number of agentic turns per user input, if capped."""
    return self._max_turns

@property
def api_client(self) -> SupportsStreamingMessages:
    """Return the active API client."""
    return self._api_client

@property
def model(self) -> str:
    """Return the active model identifier."""
    return self._model

@property
def system_prompt(self) -> str:
    """Return the active system prompt."""
    return self._system_prompt

@property
def tool_metadata(self) -> dict[str, object]:
    """Return the mutable tool metadata/carry-over state."""
    return self._tool_metadata

@property
def total_usage(self):
    """Return the total usage across all turns."""
    return self._cost_tracker.total
这些属性提供了对引擎状态的只读访问。total_usage 通过 CostTracker 追踪累计的 token 消耗和成本。
2.1.3 对话管理方法
def clear(self) -> None:
    """Clear the in-memory conversation history."""
    self._messages.clear()
    self._cost_tracker = CostTracker()
clear() 方法用于重置对话状态,通常在开始新会话时调用。
def set_system_prompt(self, prompt: str) -> None:
    """Update the active system prompt for future turns."""
    self._system_prompt = prompt

def set_model(self, model: str) -> None:
    """Update the active model for future turns."""
    self._model = model

def set_api_client(self, api_client: SupportsStreamingMessages) -> None:
    """Update the active API client for future turns."""
    self._api_client = api_client

def set_max_turns(self, max_turns: int | None) -> None:
    """Update the maximum number of agentic turns per user input."""
    self._max_turns = None if max_turns is None else max(1, int(max_turns))

def set_permission_checker(self, checker: PermissionChecker) -> None:
    """Update the active permission checker for future turns."""
    self._permission_checker = checker
这些 setter 方法允许在运行时动态修改引擎配置,无需重新创建实例。
2.1.4 核心方法:submit_message
async def submit_message(
    self, prompt: str | ConversationMessage
) -> AsyncIterator[StreamEvent]:
    """Append a user message and execute the query loop."""
    # 1. 构建用户消息
    user_message = (
        prompt
        if isinstance(prompt, ConversationMessage)
        else ConversationMessage.from_user_text(prompt)
    )

    # 2. 记录用户目标到元数据
    if user_message.text.strip():
        remember_user_goal(self._tool_metadata, user_message.text)

    # 3. 追加到对话历史
    self._messages.append(user_message)

    # 4. 执行钩子(如果有)
    if self._hook_executor is not None:
        await self._hook_executor.execute(
            HookEvent.USER_PROMPT_SUBMIT,
            {
                "event": HookEvent.USER_PROMPT_SUBMIT.value,
                "prompt": user_message.text,
            },
        )

    # 5. 构建查询上下文
    context = QueryContext(
        api_client=self._api_client,
        tool_registry=self._tool_registry,
        permission_checker=self._permission_checker,
        cwd=self._cwd,
        model=self._model,
        system_prompt=self._system_prompt,
        max_tokens=self._max_tokens,
        context_window_tokens=self._context_window_tokens,
        auto_compact_threshold_tokens=self._auto_compact_threshold_tokens,
        max_turns=self._max_turns,
        permission_prompt=self._permission_prompt,
        ask_user_prompt=self._ask_user_prompt,
        hook_executor=self._hook_executor,
        tool_metadata=self._tool_metadata,
    )

    # 6. 准备查询消息列表
    query_messages = list(self._messages)

    # 7. 添加协调器上下文(如果存在)
    coordinator_context = self._build_coordinator_context_message()
    if coordinator_context is not None:
        query_messages.append(coordinator_context)

    # 8. 执行查询循环,流式返回事件
    async for event, usage in run_query(context, query_messages):
        if isinstance(event, AssistantTurnComplete):
            # 更新对话历史
            self._messages = list(query_messages)
        if usage is not None:
            self._cost_tracker.add(usage)
        yield event
这个方法的工作流程:
- 消息构建:将输入转换为
ConversationMessage对象 - 目标记录:调用
remember_user_goal()记录用户意图 - 历史更新:将用户消息追加到
_messages - 钩子执行:触发
USER_PROMPT_SUBMIT钩子 - 上下文构建:创建
QueryContext对象传递所有依赖 - 消息准备:复制消息列表,避免修改原始历史
- 协调器上下文:添加多 Agent 协调所需的上下文
- 查询执行:调用
run_query()进入核心循环,流式返回事件
2.1.5 继续中断的对话:continue_pending
async def continue_pending(
    self, *, max_turns: int | None = None
) -> AsyncIterator[StreamEvent]:
    """Continue an interrupted tool loop without appending a new user message."""
    context = QueryContext(...)
    async for event, usage in run_query(context, self._messages):
        if usage is not None:
            self._cost_tracker.add(usage)
        yield event
这个方法用于恢复被中断的对话,比如用户中途取消了操作,或者发生了网络错误。它会从当前状态继续,而不是重新开始。
2.1.6 检查待处理的工具调用
def has_pending_continuation(self) -> bool:
    """Return True when the conversation ends with tool results awaiting a follow-up model turn."""
    if not self._messages:
        return False
    last = self._messages[-1]
    if last.role != "user":
        return False
    if not any(isinstance(block, ToolResultBlock) for block in last.content):
        return False
    for msg in reversed(self._messages[:-1]):
        if msg.role != "assistant":
            continue
        return bool(msg.tool_uses)
    return False
这个方法检查对话是否处于 “待继续” 状态:
- 最后一条消息是用户角色
- 包含工具结果块
- 之前的助手消息包含工具调用
这种状态发生在:助手调用了工具,工具执行完成并返回结果,但助手还没有对这些结果做出响应。
第三章:消息系统详解
3.1 消息模型设计
src/openharness/engine/messages.py 定义了 OpenHarness 的消息系统。这个模块使用 Pydantic 来定义强类型的消息模型。
3.1.1 TextBlock:文本内容块
class TextBlock(BaseModel):
    """Plain text content."""
    type: Literal["text"] = "text"
    text: str
最简单的内容块,包含纯文本。Literal["text"] 类型用于在联合类型中进行区分。
3.1.2 ImageBlock:图像内容块
class ImageBlock(BaseModel):
    """Image content encoded inline for multimodal providers."""
    type: Literal["image"] = "image"
    media_type: str
    data: str  # base64 编码的图像数据
    source_path: str = ""

    @classmethod
    def from_path(cls, path: str | Path) -> "ImageBlock":
        """Load a local image file into a base64-backed content block."""
        resolved = Path(path).expanduser().resolve()
        media_type, _ = mimetypes.guess_type(str(resolved))
        if not media_type or not media_type.startswith("image/"):
            raise ValueError(f"Unsupported image attachment: {resolved}")
        payload = base64.b64encode(resolved.read_bytes()).decode("ascii")
        return cls(media_type=media_type, data=payload, source_path=str(resolved))
ImageBlock 支持多模态模型:
media_type: MIME 类型,如image/png、image/jpegdata: base64 编码的图像数据source_path: 原始文件路径(可选)
from_path 类方法方便从文件系统加载图像。
3.1.3 ToolUseBlock:工具调用块
class ToolUseBlock(BaseModel):
    """A request from the model to execute a named tool."""
    type: Literal["tool_use"] = "tool_use"
    id: str = Field(default_factory=lambda: f"toolu_{uuid4().hex}")
    name: str
    input: dict[str, Any] = Field(default_factory=dict)
当模型决定调用工具时,会生成 ToolUseBlock:
id: 唯一标识符,格式为toolu_<16位十六进制>name: 工具名称input: 工具参数,JSON 对象
3.1.4 ToolResultBlock:工具结果块
class ToolResultBlock(BaseModel):
    """Tool result content sent back to the model."""
    type: Literal["tool_result"] = "tool_result"
    tool_use_id: str  # 对应 ToolUseBlock 的 id
    content: str      # 工具输出(文本)
    is_error: bool = False  # 是否出错
工具执行完成后,生成 ToolResultBlock 返回给模型:
tool_use_id: 对应工具调用的 IDcontent: 工具输出内容is_error: 标记是否执行出错
3.1.5 ContentBlock 联合类型
ContentBlock = Annotated[
    TextBlock | ImageBlock | ToolUseBlock | ToolResultBlock,
    Field(discriminator="type"),
]
使用 Annotated 和 Field(discriminator="type") 定义联合类型,Pydantic 会根据 type 字段自动反序列化为正确的类型。
3.2 ConversationMessage 消息类
class ConversationMessage(BaseModel):
    """A single assistant or user message."""
    role: Literal["user", "assistant"]
    content: list[ContentBlock] = Field(default_factory=list)
ConversationMessage 是对话的基本单元:
role: 消息角色,只能是"user"或"assistant"content: 内容块列表,可以包含文本、图像、工具调用、工具结果
3.2.1 便利方法
@classmethod
def from_user_text(cls, text: str) -> "ConversationMessage":
    """Construct a user message from raw text."""
    return cls(role="user", content=[TextBlock(text=text)])

@classmethod
def from_user_content(cls, content: list[ContentBlock]) -> "ConversationMessage":
    """Construct a user message from explicit content blocks."""
    return cls(role="user", content=list(content))
工厂方法简化常见场景的创建。
3.2.2 属性访问器
@property
def text(self) -> str:
    """Return concatenated text blocks."""
    return "".join(
        block.text for block in self.content if isinstance(block, TextBlock)
    )

@property
def tool_uses(self) -> list[ToolUseBlock]:
    """Return all tool calls contained in the message."""
    return [block for block in self.content if isinstance(block, ToolUseBlock)]
text 属性方便获取消息中的所有文本内容(忽略图像、工具调用等)。
tool_uses 属性提取所有工具调用块,用于判断助手是否请求了工具执行。
3.2.3 API 参数转换
def to_api_param(self) -> dict[str, Any]:
    """Convert the message into Anthropic SDK message params."""
    return {
        "role": self.role,
        "content": [serialize_content_block(block) for block in self.content],
    }
转换为 Anthropic SDK 所需的格式。
3.2.4 空消息检测
def is_effectively_empty(self) -> bool:
    """Return True when the message carries no useful content."""
    if self.content:
        for block in self.content:
            if isinstance(block, TextBlock) and block.text.strip():
                return False
            if isinstance(block, (ImageBlock, ToolUseBlock, ToolResultBlock)):
                return False
    return True
检测消息是否 “实质为空”:
- 有非空文本块 → 不为空
- 有图像、工具调用、工具结果 → 不为空
- 只有空白文本或没有内容 → 为空
这个方法用于过滤掉模型偶尔返回的空消息。
3.3 消息序列化与清理
3.3.1 序列化函数
def serialize_content_block(block: ContentBlock) -> dict[str, Any]:
    """Convert a local content block into the provider wire format."""
    if isinstance(block, TextBlock):
        return {"type": "text", "text": block.text}

    if isinstance(block, ImageBlock):
        return {
            "type": "image",
            "source": {
                "type": "base64",
                "media_type": block.media_type,
                "data": block.data,
            },
        }

    if isinstance(block, ToolUseBlock):
        return {
            "type": "tool_use",
            "id": block.id,
            "name": block.name,
            "input": block.input,
        }

    return {
        "type": "tool_result",
        "tool_use_id": block.tool_use_id,
        "content": block.content,
        "is_error": block.is_error,
    }
将内部消息块转换为 API 所需的 JSON 格式。
3.3.2 消息清理函数
def sanitize_conversation_messages(
    messages: list[ConversationMessage]
) -> list[ConversationMessage]:
    """Normalize restored conversation history into a provider-safe sequence.

    This drops legacy empty assistant messages and trims malformed trailing tool
    turns, such as an assistant ``tool_use`` message that never received a
    matching user ``tool_result`` response.
    """
这个函数非常重要,用于清理从持久化存储恢复的消息历史:
- 删除空助手消息:模型有时会返回空消息,需要过滤掉
- 修复未完成的工具调用:如果助手调用了工具但会话中断,工具结果没有返回,需要删除未匹配的工具调用
这种清理确保恢复的消息序列可以被 API 正常处理。
第四章:工具系统详解
4.1 工具基类设计
src/openharness/tools/base.py 定义了工具系统的抽象基类。
4.1.1 工具执行上下文
@dataclass
class ToolExecutionContext:
    """Shared execution context for tool invocations."""
    cwd: Path                                    # 当前工作目录
    metadata: dict[str, Any] = field(default_factory=dict)  # 元数据
    hook_executor: HookExecutor | None = None   # 钩子执行器
ToolExecutionContext 封装了工具执行时的环境信息:
cwd: 所有文件操作的基础路径metadata: 工具间共享状态(如已读取的文件、激活的技能)hook_executor: 用于触发工具执行前后的钩子
4.1.2 工具结果
@dataclass(frozen=True)
class ToolResult:
    """Normalized tool execution result."""
    output: str                                 # 输出内容
    is_error: bool = False                      # 是否出错
    metadata: dict[str, Any] = field(default_factory=dict)  # 元数据
ToolResult 是标准化的工具输出:
output: 文本输出(即使出错也返回错误信息)is_error: 错误标记,模型会根据这个调整后续行为metadata: 额外信息(如返回码、文件路径等)
使用 frozen=True 使结果不可变,避免副作用。
4.1.3 工具基类
class BaseTool(ABC):
    """Base class for all OpenHarness tools."""
    name: str                                   # 工具名称
    description: str                            # 工具描述(给模型看的)
    input_model: type[BaseModel]               # Pydantic 输入模型

    @abstractmethod
    async def execute(
        self,
        arguments: BaseModel,
        context: ToolExecutionContext
    ) -> ToolResult:
        """Execute the tool."""

    def is_read_only(self, arguments: BaseModel) -> bool:
        """Return whether the invocation is read-only."""
        del arguments
        return False

    def to_api_schema(self) -> dict[str, Any]:
        """Return the tool schema expected by the Anthropic Messages API."""
        return {
            "name": self.name,
            "description": self.description,
            "input_schema": self.input_model.model_json_schema(),
        }
BaseTool 是所有工具的抽象基类:
类属性:
name: 工具的唯一标识,如"bash"、"read_file"description: 自然语言描述,告诉模型这个工具是做什么的、什么时候该用input_model: Pydantic 模型类,定义工具参数的结构和校验规则
抽象方法:
execute(): 实际的工具执行逻辑,子类必须实现
可选方法:
is_read_only(): 返回此调用是否为只读操作(用于权限控制)to_api_schema(): 转换为 API 所需的工具定义格式
4.2 工具注册表
class ToolRegistry:
    """Map tool names to implementations."""

    def __init__(self) -> None:
        self._tools: dict[str, BaseTool] = {}

    def register(self, tool: BaseTool) -> None:
        """Register a tool instance."""
        self._tools[tool.name] = tool

    def get(self, name: str) -> BaseTool | None:
        """Return a registered tool by name."""
        return self._tools.get(name)

    def list_tools(self) -> list[BaseTool]:
        """Return all registered tools."""
        return list(self._tools.values())

    def to_api_schema(self) -> list[dict[str, Any]]:
        """Return all tool schemas in API format."""
        return [tool.to_api_schema() for tool in self._tools.values()]
ToolRegistry 是简单的字典封装:
register(): 注册工具实例get(): 按名称查找工具list_tools(): 获取所有工具to_api_schema(): 批量转换为 API 格式
4.3 BashTool 实现详解
src/openharness/tools/bash_tool.py 实现了命令行执行工具,是 OpenHarness 最常用的工具之一。
4.3.1 输入模型
class BashToolInput(BaseModel):
    """Arguments for the bash tool."""
    command: str = Field(description="Shell command to execute")
    cwd: str | None = Field(default=None, description="Working directory override")
    timeout_seconds: int = Field(default=600, ge=1, le=600)
输入参数:
command: 要执行的命令(必需)cwd: 可选的工作目录覆盖timeout_seconds: 超时时间,默认 600 秒,范围 1-600
使用 Pydantic 的 Field 定义描述和校验规则。
4.3.2 工具类定义
class BashTool(BaseTool):
    """Execute a shell command with stdout/stderr capture."""
    name = "bash"
    description = "Run a shell command in the local repository."
    input_model = BashToolInput
基本信息:
- 名称:
"bash" - 描述:告诉模型这是一个在本地仓库执行 shell 命令的工具
- 输入模型:
BashToolInput
4.3.3 执行逻辑详解
async def execute(
    self,
    arguments: BashToolInput,
    context: ToolExecutionContext
) -> ToolResult:
    # 1. 确定工作目录
    cwd = Path(arguments.cwd).expanduser() if arguments.cwd else context.cwd

    # 2. 预检查交互式命令
    preflight_error = _preflight_interactive_command(arguments.command)
    if preflight_error is not None:
        return ToolResult(
            output=preflight_error,
            is_error=True,
            metadata={"interactive_required": True},
        )
步骤 1-2:前置检查
首先解析工作目录,然后检查命令是否可能是交互式的(如 npm create 会提示用户输入)。如果是,提前返回错误,避免挂起。
    # 3. 创建子进程
    process: asyncio.subprocess.Process | None = None
    try:
        process = await create_shell_subprocess(
            arguments.command,
            cwd=cwd,
            prefer_pty=True,  # 优先使用 PTY,支持颜色输出
            stdin=asyncio.subprocess.DEVNULL,  # 非交互式
            stdout=asyncio.subprocess.PIPE,
            stderr=asyncio.subprocess.STDOUT,  # 合并 stderr
        )
    except SandboxUnavailableError as exc:
        return ToolResult(output=str(exc), is_error=True)
    except asyncio.CancelledError:
        if process is not None:
            await _terminate_process(process, force=False)
        raise
步骤 3:创建子进程
使用 create_shell_subprocess 创建异步子进程:
prefer_pty=True: 请求伪终端,这样命令的输出会保留颜色stdin=DEVNULL: 非交互式,不接收输入stderr=STDOUT: 合并标准错误到标准输出
处理异常情况:
SandboxUnavailableError: 沙箱不可用(如果配置了沙箱)CancelledError: 任务被取消,优雅终止进程
    # 4. 等待进程完成或超时
    try:
        await asyncio.wait_for(process.wait(), timeout=arguments.timeout_seconds)
    except asyncio.TimeoutError:
        # 超时处理:读取部分输出,强制终止
        output_buffer = await _drain_available_output(process.stdout)
        await _terminate_process(process, force=True)
        output_buffer.extend(await _read_remaining_output(process))
        return ToolResult(
            output=_format_timeout_output(
                output_buffer,
                command=arguments.command,
                timeout_seconds=arguments.timeout_seconds,
            ),
            is_error=True,
            metadata={"returncode": process.returncode, "timed_out": True},
        )
    except asyncio.CancelledError:
        await _terminate_process(process, force=False)
        raise
步骤 4:超时处理
等待进程完成:
- 正常完成:继续执行
- 超时:读取已输出内容,强制终止,返回超时错误
- 取消:优雅终止,重新抛出异常
    # 5. 读取输出并格式化结果
    output_buffer = await _read_remaining_output(process)
    text = _format_output(output_buffer)
    return ToolResult(
        output=text,
        is_error=process.returncode != 0,
        metadata={"returncode": process.returncode},
    )
步骤 5:结果格式化
读取剩余输出,格式化,返回结果:
is_error: 根据返回码判断metadata: 包含返回码信息
4.3.4 进程终止函数
async def _terminate_process(
    process: asyncio.subprocess.Process,
    *,
    force: bool
) -> None:
    if process.returncode is not None:
        return  # 已经退出

    if force:
        process.kill()  # SIGKILL
        await process.wait()
        return

    process.terminate()  # SIGTERM
    try:
        await asyncio.wait_for(process.wait(), timeout=2.0)
    except asyncio.TimeoutError:
        process.kill()  # 优雅终止超时,强制杀死
        await process.wait()
终止逻辑:
- 检查进程是否已退出
- 如果
force=True,直接发送 SIGKILL - 否则先发送 SIGTERM,等待 2 秒
- 如果优雅终止超时,再发送 SIGKILL
4.3.5 输出读取函数
async def _read_remaining_output(
    process: asyncio.subprocess.Process
) -> bytearray:
    """读取进程的所有剩余输出。"""
    output_buffer = bytearray()
    if process.stdout is not None:
        try:
            remaining = await asyncio.wait_for(
                process.stdout.read(),
                timeout=_READ_REMAINING_OUTPUT_TIMEOUT_SECONDS,  # 2 秒
            )
        except asyncio.TimeoutError:
            remaining = b""
        output_buffer.extend(remaining)
    return output_buffer

async def _drain_available_output(
    stream: asyncio.StreamReader | None,
    *,
    read_timeout: float = 0.05,
) -> bytearray:
    """非阻塞式读取所有可用输出。"""
    output_buffer = bytearray()
    if stream is None:
        return output_buffer
    while True:
        try:
            chunk = await asyncio.wait_for(stream.read(65536), timeout=read_timeout)
        except asyncio.TimeoutError:
            return output_buffer
        if not chunk:
            return output_buffer
        output_buffer.extend(chunk)
两个读取函数:
_read_remaining_output(): 读取所有剩余数据,带超时_drain_available_output(): 非阻塞读取,快速获取已缓冲的数据
4.3.6 输出格式化
def _format_output(output_buffer: bytearray) -> str:
    """格式化输出缓冲区。"""
    # 解码为 UTF-8,替换无法解码的字节
    text = output_buffer.decode("utf-8", errors="replace").replace("\r\n", "\n").strip()

    if not text:
        return "(no output)"  # 无输出提示

    if len(text) > 12000:
        return f"{text[:12000]}\n...[truncated]..."  # 截断长输出

    return text
格式化逻辑:
- 解码 UTF-8,处理编码错误
- 统一换行符为
\n - 空输出显示
(no output) - 超过 12000 字符截断
4.3.7 交互式命令检测
def _preflight_interactive_command(command: str) -> str | None:
    """预检查可能的交互式命令。"""
    lowered_command = command.lower()
    if not _looks_like_interactive_scaffold(lowered_command):
        return None

    return (
        "This command appears to require interactive input... "
        "Prefer non-interactive flags (for example --yes, -y, ...)"
    )

def _looks_like_interactive_scaffold(lowered_command: str) -> bool:
    """检测是否像是需要交互的脚手架命令。"""
    scaffold_markers = (
        "create-next-app",
        "npm create ",
        "pnpm create ",
        "yarn create ",
        "bun create ",
        "pnpm dlx ",
        "npm init ",
        ...
    )
    non_interactive_markers = (
        "--yes", " -y", "--skip-install",
        "--defaults", "--non-interactive", "--ci",
    )

    # 包含脚手架标记且不包含非交互标记
    return any(marker in lowered_command for marker in scaffold_markers) \
           and not any(marker in lowered_command for marker in non_interactive_markers)
交互式命令检测:
- 检测
npm create、create-next-app等常见交互式命令 - 检查是否已包含
--yes、-y等非交互标志 - 如果可能需要交互,提前返回错误提示
这个设计非常贴心,避免了很多新手容易犯的错误。
第五章:查询执行流程深度剖析
5.1 QueryContext 数据类
src/openharness/engine/query.py 定义了查询执行的核心逻辑。首先是 QueryContext 数据类:
@dataclass
class QueryContext:
    """Context shared across a query run."""
    api_client: SupportsStreamingMessages
    tool_registry: ToolRegistry
    permission_checker: PermissionChecker
    cwd: Path
    model: str
    system_prompt: str
    max_tokens: int
    context_window_tokens: int | None = None
    auto_compact_threshold_tokens: int | None = None
    permission_prompt: PermissionPrompt | None = None
    ask_user_prompt: AskUserPrompt | None = None
    max_turns: int | None = 200
    hook_executor: HookExecutor | None = None
    tool_metadata: dict[str, object] | None = None
QueryContext 是查询执行的上下文容器,包含了执行一次查询所需的所有依赖。使用 dataclass 简化定义。
5.2 工具元数据管理
OpenHarness 使用工具元数据(tool_metadata)在工具调用之间传递状态。这部分代码展示了如何管理这种 “记忆”:
5.2.1 任务焦点状态
def _task_focus_state(tool_metadata: dict[str, object] | None) -> dict[str, object]:
    """获取或初始化任务焦点状态。"""
    if tool_metadata is None:
        return {}

    value = tool_metadata.setdefault(
        "task_focus_state",
        {
            "goal": "",              # 当前目标
            "recent_goals": [],      # 最近的目标历史
            "active_artifacts": [],  # 活跃的工件(文件、URL等)
            "verified_state": [],    # 已验证的状态
            "next_step": "",         # 下一步计划
        },
    )
    ...
任务焦点状态跟踪 Agent 的 “思维状态”:
goal: 当前正在处理的目标recent_goals: 最近处理过的目标(防止重复)active_artifacts: 正在处理的文件、URL 等verified_state: 已确认完成的工作next_step: 计划中的下一步
5.2.2 记忆用户目标
def remember_user_goal(
    tool_metadata: dict[str, object] | None,
    prompt: str,
) -> None:
    """记录用户目标到元数据。"""
    state = _task_focus_state(tool_metadata)
    summary = _summarize_focus_text(prompt)
    if not summary:
        return

    recent_goals = state.setdefault("recent_goals", [])
    if isinstance(recent_goals, list):
        _append_capped_unique(recent_goals, summary, limit=MAX_TRACKED_USER_GOALS)
    state["goal"] = summary
当用户提交新消息时,提取并记录目标。使用 _append_capped_unique() 维护一个有限长度的历史列表。
5.2.3 记忆已读文件
def _remember_read_file(
    tool_metadata: dict[str, object] | None,
    *,
    path: str,
    offset: int,
    limit: int,
    output: str,
) -> None:
    """记录文件读取操作。"""
    bucket = _tool_metadata_bucket(tool_metadata, "read_file_state")

    # 提取前 6 行非空内容作为预览
    preview_lines = [line.strip() for line in output.splitlines()[:6] if line.strip()]

    entry = {
        "path": path,
        "span": f"lines {offset + 1}-{offset + limit}",
        "preview": " | ".join(preview_lines)[:320],
        "timestamp": time.time(),
    }

    # 去重:删除同一文件的旧记录
    bucket[:] = [
        existing
        for existing in bucket
        if not isinstance(existing, dict) or str(existing.get("path") or "") != path
    ]
    bucket.append(entry)

    # 限制历史长度
    if len(bucket) > MAX_TRACKED_READ_FILES:
        del bucket[:-MAX_TRACKED_READ_FILES]
记录文件读取:
- 文件路径
- 读取的行范围
- 内容预览(前 6 行)
- 时间戳
保持最近 6 个文件的读取记录,用于后续决策。
5.2.4 记录工具执行
def _record_tool_carryover(
    context: QueryContext,
    *,
    tool_name: str,
    tool_input: dict[str, object],
    tool_output: str,
    tool_result_metadata: dict[str, object] | None,
    is_error: bool,
    resolved_file_path: str | None,
) -> None:
    """记录工具执行到元数据,供后续工具参考。"""
    if is_error:
        return  # 不记录错误

    # 记录文件操作为活跃工件
    if resolved_file_path is not None:
        _remember_active_artifact(context.tool_metadata, resolved_file_path)

    # 根据工具类型记录特定信息
    if tool_name == "read_file":
        _remember_read_file(...)
        _remember_verified_work(...)
    elif tool_name == "skill":
        _remember_skill_invocation(...)
    elif tool_name in {"agent", "send_message"}:
        _remember_async_agent_activity(...)
    elif tool_name == "bash":
        _remember_verified_work(...)
    ...
根据工具类型记录不同的信息:
read_file: 记录文件读取历史skill: 记录技能调用agent: 记录异步 Agent 活动bash: 记录命令执行
这种设计让 Agent 能够 “记住” 它做过什么,避免重复工作。
5.3 run_query 核心循环
run_query() 是 OpenHarness 最核心的函数,实现了完整的 Agent 循环。
5.3.1 函数签名与初始化
async def run_query(
    context: QueryContext,
    messages: list[ConversationMessage],
) -> AsyncIterator[tuple[StreamEvent, UsageSnapshot | None]]:
    """Run the conversation loop until the model stops requesting tools.

    Auto-compaction is checked at the start of each turn. When the
    estimated token count exceeds the model's auto-compact threshold,
    the engine first tries a cheap microcompact (clearing old tool result
    content) and, if that is not enough, performs a full LLM-based
    summarization of older messages.
    """
    from openharness.services.compact import (
        AutoCompactState,
        auto_compact_if_needed,
    )

    compact_state = AutoCompactState()
    reactive_compact_attempted = False
    last_compaction_result: tuple[list[ConversationMessage], bool] = (messages, False)

    # 计算安全的 max_tokens
    effective_max_tokens = _bounded_completion_tokens(
        context.max_tokens,
        context.context_window_tokens,
    )
    reported_token_clamp = False
初始化:
compact_state: 自动压缩状态effective_max_tokens: 考虑上下文窗口后的安全 token 限制
5.3.2 自动压缩内部函数
    async def _stream_compaction(
        *,
        trigger: str,
        force: bool = False,
    ) -> AsyncIterator[tuple[StreamEvent, UsageSnapshot | None]]:
        """执行自动压缩,流式返回进度事件。"""
        nonlocal last_compaction_result
        progress_queue: asyncio.Queue[CompactProgressEvent] = asyncio.Queue()

        async def _progress(event: CompactProgressEvent) -> None:
            await progress_queue.put(event)

        # 创建压缩任务
        task = asyncio.create_task(
            auto_compact_if_needed(
                messages,
                api_client=context.api_client,
                model=context.model,
                system_prompt=context.system_prompt,
                state=compact_state,
                progress_callback=_progress,
                force=force,
                trigger=trigger,
                ...
            )
        )

        # 流式返回进度事件
        while True:
            try:
                event = await asyncio.wait_for(progress_queue.get(), timeout=0.05)
                yield event, None
            except asyncio.TimeoutError:
                if task.done():
                    break
                continue

        # 获取最终结果
        last_compaction_result = await task
自动压缩机制:
- 当对话 token 数超过阈值时触发
- 先尝试 “微压缩”(清理旧工具结果)
- 如果不够,使用 LLM 进行完整摘要
- 流式返回进度,保持 UI 响应
5.3.3 主循环
    turn_count = 0
    while context.max_turns is None or turn_count < context.max_turns:
        turn_count += 1

        # 1. 检查并执行自动压缩
        async for event, usage in _stream_compaction(trigger="auto"):
            yield event, usage
        messages, was_compacted = last_compaction_result

        # 2. 图像预处理(非多模态模型)
        async for event in _preprocess_images_in_messages(messages, context):
            yield event, None

        final_message: ConversationMessage | None = None
        usage = UsageSnapshot()
每轮开始:
- 自动压缩(如果需要)
- 图像转文本(非多模态模型)
5.3.4 调用模型 API
        try:
            async for event in context.api_client.stream_message(
                ApiMessageRequest(
                    model=context.model,
                    messages=messages,
                    system_prompt=context.system_prompt,
                    max_tokens=effective_max_tokens,
                    tools=context.tool_registry.to_api_schema(),
                )
            ):
                if isinstance(event, ApiTextDeltaEvent):
                    # 文本增量事件
                    yield AssistantTextDelta(text=event.text), None
                    continue

                if isinstance(event, ApiRetryEvent):
                    # 重试事件
                    yield StatusEvent(
                        message=f"Request failed; retrying in {event.delay_seconds:.1f}s..."
                    ), None
                    continue

                if isinstance(event, ApiMessageCompleteEvent):
                    # 消息完成事件
                    final_message = event.message
                    usage = event.usage

        except Exception as exc:
            # 错误处理:token 限制、提示过长、网络错误等
            ...
流式调用模型 API:
- 发送当前对话历史
- 流式返回文本增量
- 处理重试事件
- 捕获完成事件
5.3.5 处理模型响应
        if final_message is None:
            raise RuntimeError("Model stream finished without a final message")

        # 处理协调器上下文(多 Agent 场景)
        coordinator_context_message: ConversationMessage | None = None
        if context.system_prompt.startswith("You are a **coordinator**."):
            ...

        # 过滤空消息
        if final_message.role == "assistant" and final_message.is_effectively_empty():
            yield ErrorEvent(message="Model returned an empty assistant message."), usage
            return

        # 追加到对话历史
        messages.append(final_message)
        yield AssistantTurnComplete(message=final_message, usage=usage), usage
处理响应:
- 检查消息是否为空
- 追加到历史
- 返回完成事件
5.3.6 检查工具调用
        if not final_message.tool_uses:
            # 没有工具调用,对话结束
            if context.hook_executor is not None:
                await context.hook_executor.execute(
                    HookEvent.STOP,
                    {"event": HookEvent.STOP.value, "stop_reason": "tool_uses_empty"},
                )
            return

        tool_calls = final_message.tool_uses
检查模型是否请求了工具调用。如果没有,结束对话。
5.3.7 执行工具
        if len(tool_calls) == 1:
            # 单个工具:顺序执行
            tc = tool_calls[0]
            yield ToolExecutionStarted(tool_name=tc.name, tool_input=tc.input), None
            result = await _execute_tool_call(context, tc.name, tc.id, tc.input)
            yield ToolExecutionCompleted(
                tool_name=tc.name,
                output=result.content,
                is_error=result.is_error,
            ), None
            tool_results = [result]
        else:
            # 多个工具:并发执行
            for tc in tool_calls:
                yield ToolExecutionStarted(tool_name=tc.name, tool_input=tc.input), None

            async def _run(tc):
                return await _execute_tool_call(context, tc.name, tc.id, tc.input)

            # 并发执行,一个失败不影响其他
            raw_results = await asyncio.gather(
                *[_run(tc) for tc in tool_calls], return_exceptions=True
            )
            ...
工具执行策略:
- 单个工具:顺序执行,立即返回结果
- 多个工具:并发执行,提高性能
- 使用
return_exceptions=True确保一个工具失败不会导致其他工具被取消
5.3.8 追加工具结果并继续循环
        # 追加工具结果到对话历史
        messages.append(ConversationMessage(role="user", content=tool_results))

    # 超过最大轮数
    if context.max_turns is not None:
        raise MaxTurnsExceeded(context.max_turns)
将工具结果作为用户消息追加到历史,然后循环继续,让模型对结果做出响应。
5.4 工具执行函数
async def _execute_tool_call(
    context: QueryContext,
    tool_name: str,
    tool_use_id: str,
    tool_input: dict[str, object],
) -> ToolResultBlock:
    """执行单个工具调用。"""

    # 1. 执行 pre_tool_use 钩子
    if context.hook_executor is not None:
        pre_hooks = await context.hook_executor.execute(...)
        if pre_hooks.blocked:
            return ToolResultBlock(..., is_error=True)

    # 2. 查找工具
    tool = context.tool_registry.get(tool_name)
    if tool is None:
        return ToolResultBlock(..., content=f"Unknown tool: {tool_name}", is_error=True)

    # 3. 校验输入
    try:
        parsed_input = tool.input_model.model_validate(tool_input)
    except Exception as exc:
        return ToolResultBlock(..., content=f"Invalid input: {exc}", is_error=True)

    # 4. 权限检查
    decision = context.permission_checker.evaluate(...)
    if not decision.allowed:
        if decision.requires_confirmation and context.permission_prompt is not None:
            confirmed = await context.permission_prompt(tool_name, decision.reason)
            if not confirmed:
                return ToolResultBlock(..., is_error=True)
        else:
            return ToolResultBlock(..., is_error=True)

    # 5. 执行工具
    result = await tool.execute(parsed_input, ToolExecutionContext(...))

    # 6. 记录到元数据
    _record_tool_carryover(context, ...)

    # 7. 执行 post_tool_use 钩子
    if context.hook_executor is not None:
        await context.hook_executor.execute(HookEvent.POST_TOOL_USE, ...)

    return ToolResultBlock(...)
工具执行流程:
- 执行前置钩子
- 查找工具实现
- Pydantic 校验输入
- 权限检查(可能需要用户确认)
- 实际执行工具
- 记录执行历史到元数据
- 执行后置钩子
- 返回结果
第六章:ohmo 个人 Agent 系统
6.1 ohmo 的定位
ohmo 是 OpenHarness 提供的个人 Agent 应用,构建在核心框架之上。与 oh 命令不同,ohmo 专注于个人助理场景:
- 长期记忆:记住用户偏好、工作习惯
- 人格定制:通过
soul.md定义 Agent 性格 - IM 集成:通过 Gateway 接入 Telegram、Slack、Discord、飞书
- 会话持久化:跨对话保持上下文
6.2 工作空间系统
ohmo/workspace.py 实现了完整的工作空间管理。
6.2.1 工作空间目录结构
WORKSPACE_DIRNAME = ".ohmo"

# 初始化时创建的文件:
# ~/.ohmo/
#   ├── soul.md           # Agent 人格定义
#   ├── identity.md       # Agent 身份
#   ├── user.md          # 用户画像
#   ├── BOOTSTRAP.md     # 首次引导
#   ├── state.json       # 状态文件
#   ├── gateway.json     # 网关配置
#   ├── memory/          # 记忆目录
#   │   ├── MEMORY.md    # 记忆索引
#   │   └── *.md         # 具体记忆文件
#   ├── skills/          # 技能目录
#   ├── plugins/         # 插件目录
#   ├── sessions/        # 会话存档
#   └── logs/            # 日志目录
6.2.2 核心模板
SOUL_TEMPLATE:定义 Agent 的核心价值观
SOUL_TEMPLATE = """# SOUL.md - Who You Are

You are ohmo, a personal agent built on top of OpenHarness.

## Core truths

- Be genuinely helpful, not performatively helpful.
  Skip filler like "great question" or "happy to help" unless it is actually
  natural in context.
- Have judgment.
  You can prefer one option over another, notice tradeoffs, and explain your
  reasons plainly.
- Be resourceful before asking.
  Read the file, check the context, inspect the state, and try to figure things
  out before bouncing work back to the user.
- Earn trust through competence.
  Be careful with anything public, destructive, costly, or user-facing.
  Be bolder with internal investigation, drafting, organizing, and synthesis.
- Remember that access is intimacy.
  Messages, files, notes, and history are personal. Treat them with respect.

## Boundaries

- Private things stay private.
- When in doubt, ask before acting externally.
- Do not send half-baked replies on messaging channels.
- In groups, do not casually speak as if you are the user.
- Do not optimize for flattery; optimize for usefulness, honesty, and good taste.

## Vibe

Be concise when the answer is simple. Be thorough when the stakes are high.
Sound like a capable companion with taste, not a corporate support bot.
"""
这个模板定义了 ohmo 的行为准则:
- 真诚帮助:不做作,不说空话
- 有判断力:能做出选择,解释原因
- 自主解决:先尝试自己解决,不轻易打扰用户
- 建立信任:谨慎处理公开、破坏性操作
- 尊重隐私:把用户数据当作私密信息
USER_TEMPLATE:用户画像
USER_TEMPLATE = """# user.md - About Your Human

Learn the person you are helping. Keep this useful, respectful, and current.

## Profile

- Name:
- What to call them:
- Pronouns: *(optional)*
- Timezone:
- Languages:

## Defaults

- Preferred tone:
- Preferred answer length:
- Decision style:
- Typical working hours:

## Ongoing context

- Main projects:
- Recurring responsibilities:
- Current pressures or priorities:
- Tools and platforms they use often:

## Preferences

- What they usually want more of:
- What tends to annoy them:
- What they want handled carefully:
- What kinds of reminders or follow-through help them:

## Relationship notes

How should ohmo show up for this user over time?
What kind of assistant relationship feels right: terse operator, thoughtful
partner, organized chief of staff, calm technical companion, or something else?
"""
用户画像模板收集:
- 基本信息:名字、称呼、时区、语言
- 偏好设置:语调、回答长度、决策风格
- 工作背景:主要项目、职责、使用的工具
- 互动偏好:喜欢什么、讨厌什么、需要什么样的提醒
这种设计让 Agent 能够真正了解用户,提供个性化服务。
6.2.3 工作空间初始化
def initialize_workspace(workspace: str | Path | None = None) -> Path:
    """Create the workspace and seed template files when missing."""
    root = ensure_workspace(workspace)

    # 模板文件映射
    templates = {
        get_soul_path(root): SOUL_TEMPLATE,
        get_user_path(root): USER_TEMPLATE,
        get_memory_index_path(root): MEMORY_INDEX_TEMPLATE,
        get_identity_path(root): IDENTITY_TEMPLATE,
    }

    # 创建缺失的模板文件
    for path, content in templates.items():
        if not path.exists():
            path.write_text(content.strip() + "\n", encoding="utf-8")

    # 初始化 state.json
    state_path = get_state_path(root)
    state_data = {"app": "ohmo", "workspace": str(root.resolve())}
    if not state_path.exists():
        state_path.write_text(json.dumps(state_data, indent=2) + "\n", encoding="utf-8")

    # 首次引导标记
    bootstrap_path = get_bootstrap_path(root)
    if not state_data.get("bootstrap_seeded"):
        state_data["bootstrap_seeded"] = True
        if not bootstrap_path.exists():
            bootstrap_path.write_text(BOOTSTRAP_TEMPLATE.strip() + "\n", encoding="utf-8")
        state_path.write_text(json.dumps(state_data, indent=2) + "\n", encoding="utf-8")

    # 初始化网关配置
    gateway_path = get_gateway_config_path(root)
    if not gateway_path.exists():
        gateway_path.write_text(
            json.dumps(
                {
                    "provider_profile": "codex",
                    "enabled_channels": [],
                    "session_routing": "chat-thread",
                    "send_progress": True,
                    "send_tool_hints": True,
                    "permission_mode": "default",
                    "sandbox_enabled": False,
                    "allow_remote_admin_commands": False,
                    ...
                },
                indent=2,
            ) + "\n",
            encoding="utf-8",
        )
    return root
初始化流程:
- 创建工作空间目录结构
- 生成缺失的模板文件(soul.md、user.md 等)
- 初始化 state.json
- 首次引导标记和 BOOTSTRAP.md
- 生成默认网关配置
6.3 记忆系统
ohmo/memory.py 实现了个人记忆管理。
6.3.1 记忆文件管理
def list_memory_files(workspace: str | Path | None = None) -> list[Path]:
    """List `.ohmo` memory markdown files."""
    memory_dir = get_memory_dir(workspace)
    return sorted(path for path in memory_dir.glob("*.md") if path.name != "MEMORY.md")
列出记忆目录下的所有 Markdown 文件(排除索引文件)。
def add_memory_entry(workspace: str | Path | None, title: str, content: str) -> Path:
    """Create a personal memory file and append it to MEMORY.md."""
    memory_dir = get_memory_dir(workspace)
    memory_dir.mkdir(parents=True, exist_ok=True)

    # 生成 slug 文件名
    slug = sub(r"[^a-zA-Z0-9]+", "_", title.strip().lower()).strip("_") or "memory"
    path = memory_dir / f"{slug}.md"
    path.write_text(content.strip() + "\n", encoding="utf-8")

    # 更新索引
    index_path = get_memory_index_path(workspace)
    existing = index_path.read_text(encoding="utf-8") if index_path.exists() else "# Memory Index\n"
    if path.name not in existing:
        existing = existing.rstrip() + f"\n- [{title}]({path.name})\n"
        index_path.write_text(existing, encoding="utf-8")
    return path
添加记忆的流程:
- 将标题转换为 slug(如 “My Preferences” → “my_preferences”)
- 创建 Markdown 文件
- 更新 MEMORY.md 索引
def remove_memory_entry(workspace: str | Path | None, name: str) -> bool:
    """Delete a memory file and remove its index entry."""
    memory_dir = get_memory_dir(workspace)
    matches = [path for path in memory_dir.glob("*.md") if path.stem == name or path.name == name]
    if not matches:
        return False
    path = matches[0]
    path.unlink(missing_ok=True)

    # 从索引中移除
    index_path = get_memory_index_path(workspace)
    if index_path.exists():
        lines = [line for line in index_path.read_text(encoding="utf-8").splitlines() if path.name not in line]
        index_path.write_text("\n".join(lines).rstrip() + "\n", encoding="utf-8")
    return True
删除记忆时同时删除文件和索引条目。
6.3.2 加载记忆到提示词
def load_memory_prompt(workspace: str | Path | None = None, *, max_files: int = 5) -> str | None:
    """Return a prompt section describing personal memory."""
    memory_dir = get_memory_dir(workspace)
    index_path = get_memory_index_path(workspace)

    lines = [
        "# ohmo Memory",
        f"- Personal memory directory: {memory_dir}",
        "- Use this memory for stable user preferences and durable personal context.",
    ]

    # 添加索引内容
    if index_path.exists():
        index_lines = index_path.read_text(encoding="utf-8").splitlines()[:200]
        lines.extend(["", "## MEMORY.md", "```md", *index_lines, "```"])

    # 添加具体记忆文件(最多 5 个)
    for path in list_memory_files(workspace)[:max_files]:
        content = path.read_text(encoding="utf-8", errors="replace").strip()
        if not content:
            continue
        lines.extend(["", f"## {path.name}", "```md", content[:4000], "```"])

    return "\n".join(lines)
将记忆加载到提示词中:
- 包含索引概览
- 包含最近 5 个记忆文件的完整内容(截断到 4000 字符)
- 格式化 Markdown,便于模型理解
这种设计让 Agent 在每次对话时都能 “记起” 用户的重要信息。
6.4 Gateway IM 网关
ohmo/gateway/ 目录实现了 IM(即时通讯)网关,让 Agent 能接入各种聊天平台。
6.4.1 网关服务
class OhmoGatewayService:
    """Foreground/background service wrapper for the personal gateway."""

    def __init__(self, cwd: str | Path | None = None, workspace: str | Path | None = None):
        self._cwd = str(Path(cwd or Path.cwd()).resolve())
        self._workspace = workspace
        os.chdir(self._cwd)

        # 初始化工作空间
        root = initialize_workspace(self._workspace)
        os.environ["OHMO_WORKSPACE"] = str(root)

        # 加载配置
        self._config = load_gateway_config(self._workspace)

        # 创建消息总线
        self._bus = MessageBus()

        # 创建运行时池(管理多个并发会话)
        self._runtime_pool = OhmoSessionRuntimePool(
            cwd=self._cwd,
            workspace=self._workspace,
            provider_profile=self._config.provider_profile,
        )

        # 创建桥接器
        self._bridge = OhmoGatewayBridge(
            bus=self._bus,
            runtime_pool=self._runtime_pool,
            restart_gateway=self.request_restart,
        )

        # 创建渠道管理器
        self._manager = ChannelManager(
            build_channel_manager_config(self._config), self._bus
        )
网关服务组件:
- MessageBus: 消息总线,解耦各个模块
- OhmoSessionRuntimePool: 会话运行时池,支持多用户并发
- OhmoGatewayBridge: 桥接消息总线和会话运行时
- ChannelManager: 管理各种 IM 渠道连接
6.4.2 支持的渠道
_SUPPORTED_CHANNELS = {
    "telegram": TelegramChannel,
    "slack": SlackChannel,
    "discord": DiscordChannel,
    "feishu": FeishuChannel,
}
目前支持 Telegram、Slack、Discord、飞书四个平台。
6.4.3 消息路由
# gateway/router.py
async def route_incoming_message(
    message: InboundMessage,
    session_pool: SessionPool,
) -> None:
    """Route an incoming message to the appropriate session."""

    # 根据 chat_id 查找或创建会话
    session_key = f"{message.channel}:{message.chat_id}"
    session = session_pool.get(session_key)

    if session is None:
        # 创建新会话
        session = await session_pool.create(
            key=session_key,
            channel=message.channel,
            chat_id=message.chat_id,
        )

    # 将消息添加到会话处理队列
    await session.handle_message(message)
路由逻辑:
- 根据渠道和聊天 ID 生成会话键
- 查找现有会话或创建新会话
- 将消息分发给会话处理
第七章:会话管理与记忆系统
7.1 会话存储
ohmo/session_storage.py 实现了会话持久化。
class OhmoSessionBackend:
    """File-based session storage for ohmo."""

    def __init__(self, workspace_root: Path) -> None:
        self._root = Path(workspace_root)
        self._sessions_dir = self._root / "sessions"
        self._sessions_dir.mkdir(parents=True, exist_ok=True)

    def _session_path(self, session_id: str) -> Path:
        """Return the file path for a session."""
        # 使用日期前缀组织文件,避免目录过大
        date_prefix = time.strftime("%Y%m")
        dir_path = self._sessions_dir / date_prefix
        dir_path.mkdir(parents=True, exist_ok=True)
        return dir_path / f"{session_id}.json"

    def save(self, session_id: str, data: dict[str, Any]) -> None:
        """Save session data to disk."""
        path = self._session_path(session_id)
        path.write_text(json.dumps(data, indent=2, default=str), encoding="utf-8")

    def load(self, session_id: str) -> dict[str, Any] | None:
        """Load session data from disk."""
        path = self._session_path(session_id)
        if not path.exists():
            return None
        return json.loads(path.read_text(encoding="utf-8"))

    def list_sessions(self) -> list[str]:
        """List all saved session IDs."""
        sessions = []
        for path in self._sessions_dir.rglob("*.json"):
            sessions.append(path.stem)
        return sessions

    def delete(self, session_id: str) -> bool:
        """Delete a saved session."""
        path = self._session_path(session_id)
        if not path.exists():
            return False
        path.unlink()
        return True
会话存储特点:
- 文件存储:JSON 格式,便于查看和调试
- 日期组织:按月份分子目录,避免单目录文件过多
- 简单接口:save/load/list/delete 四个基本操作
7.2 会话恢复
async def resume_session(
    session_id: str,
    backend: OhmoSessionBackend,
    query_engine: QueryEngine,
) -> bool:
    """Resume a saved session."""
    data = backend.load(session_id)
    if data is None:
        return False

    # 恢复对话历史
    messages = [
        ConversationMessage.model_validate(msg)
        for msg in data.get("messages", [])
    ]
    query_engine.load_messages(messages)

    # 恢复工具元数据
    query_engine.tool_metadata.update(data.get("tool_metadata", {}))

    return True
会话恢复流程:
- 从文件加载会话数据
- 反序列化对话历史
- 恢复工具元数据(包括已读文件、目标等)
- 加载到 QueryEngine
这种设计让用户可以随时中断对话,之后从断点继续。
第八章:权限控制与安全机制
8.1 权限检查器
src/openharness/permissions/checker.py 实现了细粒度的权限控制。
@dataclass
class PermissionDecision:
    """Result of a permission check."""
    allowed: bool
    requires_confirmation: bool
    reason: str | None = None

class PermissionChecker:
    """Evaluates whether tool invocations are allowed."""

    def __init__(
        self,
        mode: PermissionMode = PermissionMode.DEFAULT,
        path_rules: list[PathRule] | None = None,
        denied_commands: list[str] | None = None,
    ):
        self._mode = mode
        self._path_rules = path_rules or []
        self._denied_commands = denied_commands or []

    def evaluate(
        self,
        tool_name: str,
        is_read_only: bool,
        file_path: str | None = None,
        command: str | None = None,
    ) -> PermissionDecision:
        """Evaluate whether a tool invocation is permitted."""

        # 1. 检查模式
        if self._mode == PermissionMode.UNRESTRICTED:
            return PermissionDecision(allowed=True, requires_confirmation=False)

        if self._mode == PermissionMode.READ_ONLY and not is_read_only:
            return PermissionDecision(
                allowed=False,
                requires_confirmation=False,
                reason="Read-only mode: write operations are not allowed",
            )

        # 2. 检查拒绝命令列表
        if command and any(dc in command for dc in self._denied_commands):
            return PermissionDecision(
                allowed=False,
                requires_confirmation=False,
                reason=f"Command contains denied pattern",
            )

        # 3. 检查路径规则
        if file_path:
            for rule in self._path_rules:
                if rule.matches(file_path):
                    if rule.action == "deny":
                        return PermissionDecision(
                            allowed=False,
                            requires_confirmation=False,
                            reason=f"Path blocked by rule: {rule.pattern}",
                        )
                    elif rule.action == "confirm":
                        return PermissionDecision(
                            allowed=True,
                            requires_confirmation=True,
                            reason=f"Path requires confirmation: {rule.pattern}",
                        )

        # 4. 根据工具和操作类型决定
        if is_read_only:
            # 只读操作默认允许
            return PermissionDecision(allowed=True, requires_confirmation=False)

        # 写操作需要确认(在非 unrestricted 模式下)
        return PermissionDecision(
            allowed=True,
            requires_confirmation=self._mode != PermissionMode.UNRESTRICTED,
            reason="Write operation requires confirmation",
        )
权限决策流程:
- 模式检查:unrestricted(无限制)、read-only(只读)、default(默认)
- 命令黑名单:检查是否包含危险命令
- 路径规则:根据文件路径匹配允许/拒绝/确认规则
- 操作类型:只读操作通常允许,写操作可能需要确认
8.2 路径规则
@dataclass
class PathRule:
    """A rule for controlling access to file paths."""
    pattern: str  # glob 或正则模式
    action: Literal["allow", "deny", "confirm"]
    pattern_type: Literal["glob", "regex"] = "glob"

    def matches(self, path: str) -> bool:
        if self.pattern_type == "glob":
            return fnmatch.fnmatch(path, self.pattern)
        else:
            return re.search(self.pattern, path) is not None
路径规则示例:
path_rules:
  - pattern: "*.secret"
    action: deny
  - pattern: "/etc/*"
    action: confirm
  - pattern: "*.md"
    action: allow
8.3 交互式确认
当权限检查返回 requires_confirmation=True 时,系统会调用 permission_prompt 回调:
# 在 TUI 中
async def prompt_permission(tool_name: str, reason: str) -> bool:
    # 显示确认对话框
    confirmed = await show_confirmation_dialog(
        title=f"Allow {tool_name}?",
        message=reason,
    )
    return confirmed

# 在 CLI 中
async def prompt_permission(tool_name: str, reason: str) -> bool:
    # 命令行交互
    response = input(f"Allow {tool_name}? ({reason}) [y/N]: ")
    return response.lower() in ("y", "yes")
第九章:CLI 与命令系统
9.1 CLI 架构
src/openharness/cli.py 是 2423 行的巨型文件,包含所有 CLI 命令。使用 typer 库构建命令行界面。
import typer

app = typer.Typer(name="oh")

# 注册子命令
@app.command()
def setup():
    """统一配置入口"""
    ...

@app.command()
def provider_list():
    """列出可用的 provider"""
    ...

@app.command()
def auth_status():
    """查看认证状态"""
    ...

# 带参数的命令
@app.command()
def run(
    prompt: str = typer.Option(None, "--prompt", "-p", help="Single prompt to run"),
    model: str = typer.Option(None, "--model", "-m", help="Model to use"),
    max_turns: int = typer.Option(None, "--max-turns", help="Maximum agent turns"),
):
    """Run OpenHarness."""
    ...
9.2 Dry-run 模式
OpenHarness 提供了 --dry-run 模式,可以预览配置而不实际执行:
@app.command()
def dry_run(
    prompt: str = typer.Option(None, "--prompt", "-p"),
    output_format: str = typer.Option("text", "--output-format"),
):
    """Preview what would happen without executing."""

    # 加载配置
    settings = load_settings()

    # 检查认证状态
    auth_status = check_auth_status(settings)

    # 解析提示
    if prompt:
        # 检测是否为 slash command
        if prompt.startswith("/"):
            command_name = prompt[1:].split()[0]
            command_info = get_command_info(command_name)

            issues = []
            if command_info is None:
                issues.append(f"Unknown command: {command_name}")
            else:
                # 分析命令影响
                if command_name in MUTATING_COMMANDS:
                    issues.append(f"Command '{command_name}' modifies local state")
        else:
            # 普通提示词
            # 检测可能用到的 skills 和 tools
            likely_skills = detect_likely_skills(prompt)
            likely_tools = detect_likely_tools(prompt)

    # 检查 MCP 配置
    mcp_status = validate_mcp_servers(settings.mcp_servers)

    # 生成报告
    report = {
        "status": "ready" if not issues else "warning" if len(issues) < 3 else "blocked",
        "auth": auth_status,
        "skills": likely_skills,
        "tools": likely_tools,
        "mcp": mcp_status,
        "issues": issues,
        "next_actions": generate_next_actions(auth_status, issues),
    }

    print(format_report(report, output_format))
Dry-run 输出示例:
Status: ready

Authentication:
  ✓ Anthropic API key configured

Likely skills:
  - python-debugging
  - git-workflow

Likely tools:
  - read_file
  - bash
  - grep

MCP servers:
  ✓ filesystem (stdio)
  ✗ fetch: command not found: curl

Issues:
  ⚠ MCP server 'fetch' is not properly configured

Next actions:
  1. Fix or disable the broken MCP server: oh mcp disable fetch
  2. Run the prompt: oh -p "Explain this codebase"
9.3 Provider 管理
@app.command()
def provider_add(
    name: str = typer.Argument(..., help="Profile name"),
    label: str = typer.Option(..., help="Display label"),
    provider: str = typer.Option(..., help="Provider type (anthropic/openai)"),
    api_format: str = typer.Option(..., help="API format"),
    auth_source: str = typer.Option(..., help="Authentication source"),
    model: str = typer.Option(..., help="Default model"),
    base_url: str | None = typer.Option(None, help="Custom base URL"),
):
    """Add a custom provider profile."""
    ...

@app.command()
def provider_use(profile: str = typer.Argument(..., help="Profile name to activate")):
    """Switch to a provider profile."""
    ...
第十章:架构设计哲学总结
10.1 核心设计原则
原则 1:分离模型与装备(可以参考我以前的文章)
Agent = Model + Harness
OpenHarness 的核心洞见是:模型(LLM)和装备(Harness)应该分离。
- 模型负责:理解、推理、决策
- 装备负责:工具执行、状态管理、错误处理、安全边界
这种分离带来:
- 模型可替换:同一个装备可以搭配不同的模型
- 行为可预测:装备提供确定性保证
- 能力可扩展:通过插件扩展装备能力
原则 2:配置即代码
大量使用 Markdown 作为配置格式:
- 人类可读
- 版本友好
- 易于编辑
# SOUL.md

## Core truths
- Be genuinely helpful
- Have judgment
- Be resourceful before asking
原则 3:分层解耦
Brain → Hands → Session
每层可以独立失败、恢复、扩展。
原则 4:流式优先
所有操作都是异步流式的:
- UI 保持响应
- 支持实时反馈
- 易于取消
10.2 代码量分析
OpenHarness 如何实现 11,733 行代码复刻 Claude Code 98% 功能?
精简策略:
- 只做核心循环:Agent loop、工具执行、状态管理
- 插件化扩展:Skills、Plugins、MCP 协议支持外部扩展
- 复用生态:React TUI、Pydantic、typer 等成熟库
- 配置驱动:人格、记忆、技能都用配置而非代码
对比 Claude Code:
| 组件 | OpenHarness | Claude Code |
|---|---|---|
| 核心引擎 | ~2000 行 | ~50000 行 |
| 工具系统 | ~3000 行 | ~80000 行 |
| UI | React + Ink | 自建 |
| 集成 | 通过 MCP | 内置大量集成 |
OpenHarness 通过 MCP 协议 将集成外包,保持核心精简。
10.3 适用场景
OpenHarness 适合:
- 需要深度定制的场景
- 私有化部署需求
- 多模型切换需求
- 学习和研究目的
Claude Code 适合:
- 追求开箱即用
- 信任官方托管
- 不需要深度定制
10.4 未来展望
OpenHarness 的设计为未来的扩展预留了空间:
- 更多渠道:通过 Gateway 架构接入更多 IM 平台
- 更多模型:通过统一 API 客户端支持新模型
- 更多工具:通过 MCP 和插件系统扩展
- 更强记忆:通过记忆系统实现长期上下文
结语
通过对 OpenHarness 11733 行代码的逐行分析,我们看到了一个精心设计的 AI Agent 框架。它的成功不在于功能的堆砌,而在于:
- 清晰的架构:模型与装备分离,分层解耦
- 精简的核心:只做最必要的事,其他交给插件
- 配置驱动:用 Markdown 实现灵活定制
- 流式设计:异步优先,保持响应
这种设计哲学值得所有 AI Agent 开发者学习。
项目地址:https://github.com/HKUDS/OpenHarness
参考链接:

小龙虾开发者社区是 CSDN 旗下专注 OpenClaw 生态的官方阵地,聚焦技能开发、插件实践与部署教程,为开发者提供可直接落地的方案、工具与交流平台,助力高效构建与落地 AI 应用
更多推荐


 11
11 0
0- 0


 已为社区贡献4条内容

所有评论(0)