
AI:windows本地部署OpenClaw
本文介绍了在Windows系统上本地部署OpenClaw AI工具的详细步骤
·
前言
OpenClaw现象级火爆/泛滥AI圈,本人也尝试在windows上搭建了它并成功运行,这里给出我的本地部署方案。
总体来说,这个安装非常简单:安装npm、git -> 配置代理和安装 -> 访问和使用
安装npm、git
git就不用说了:https://blog.csdn.net/G541788_/article/details/133134055
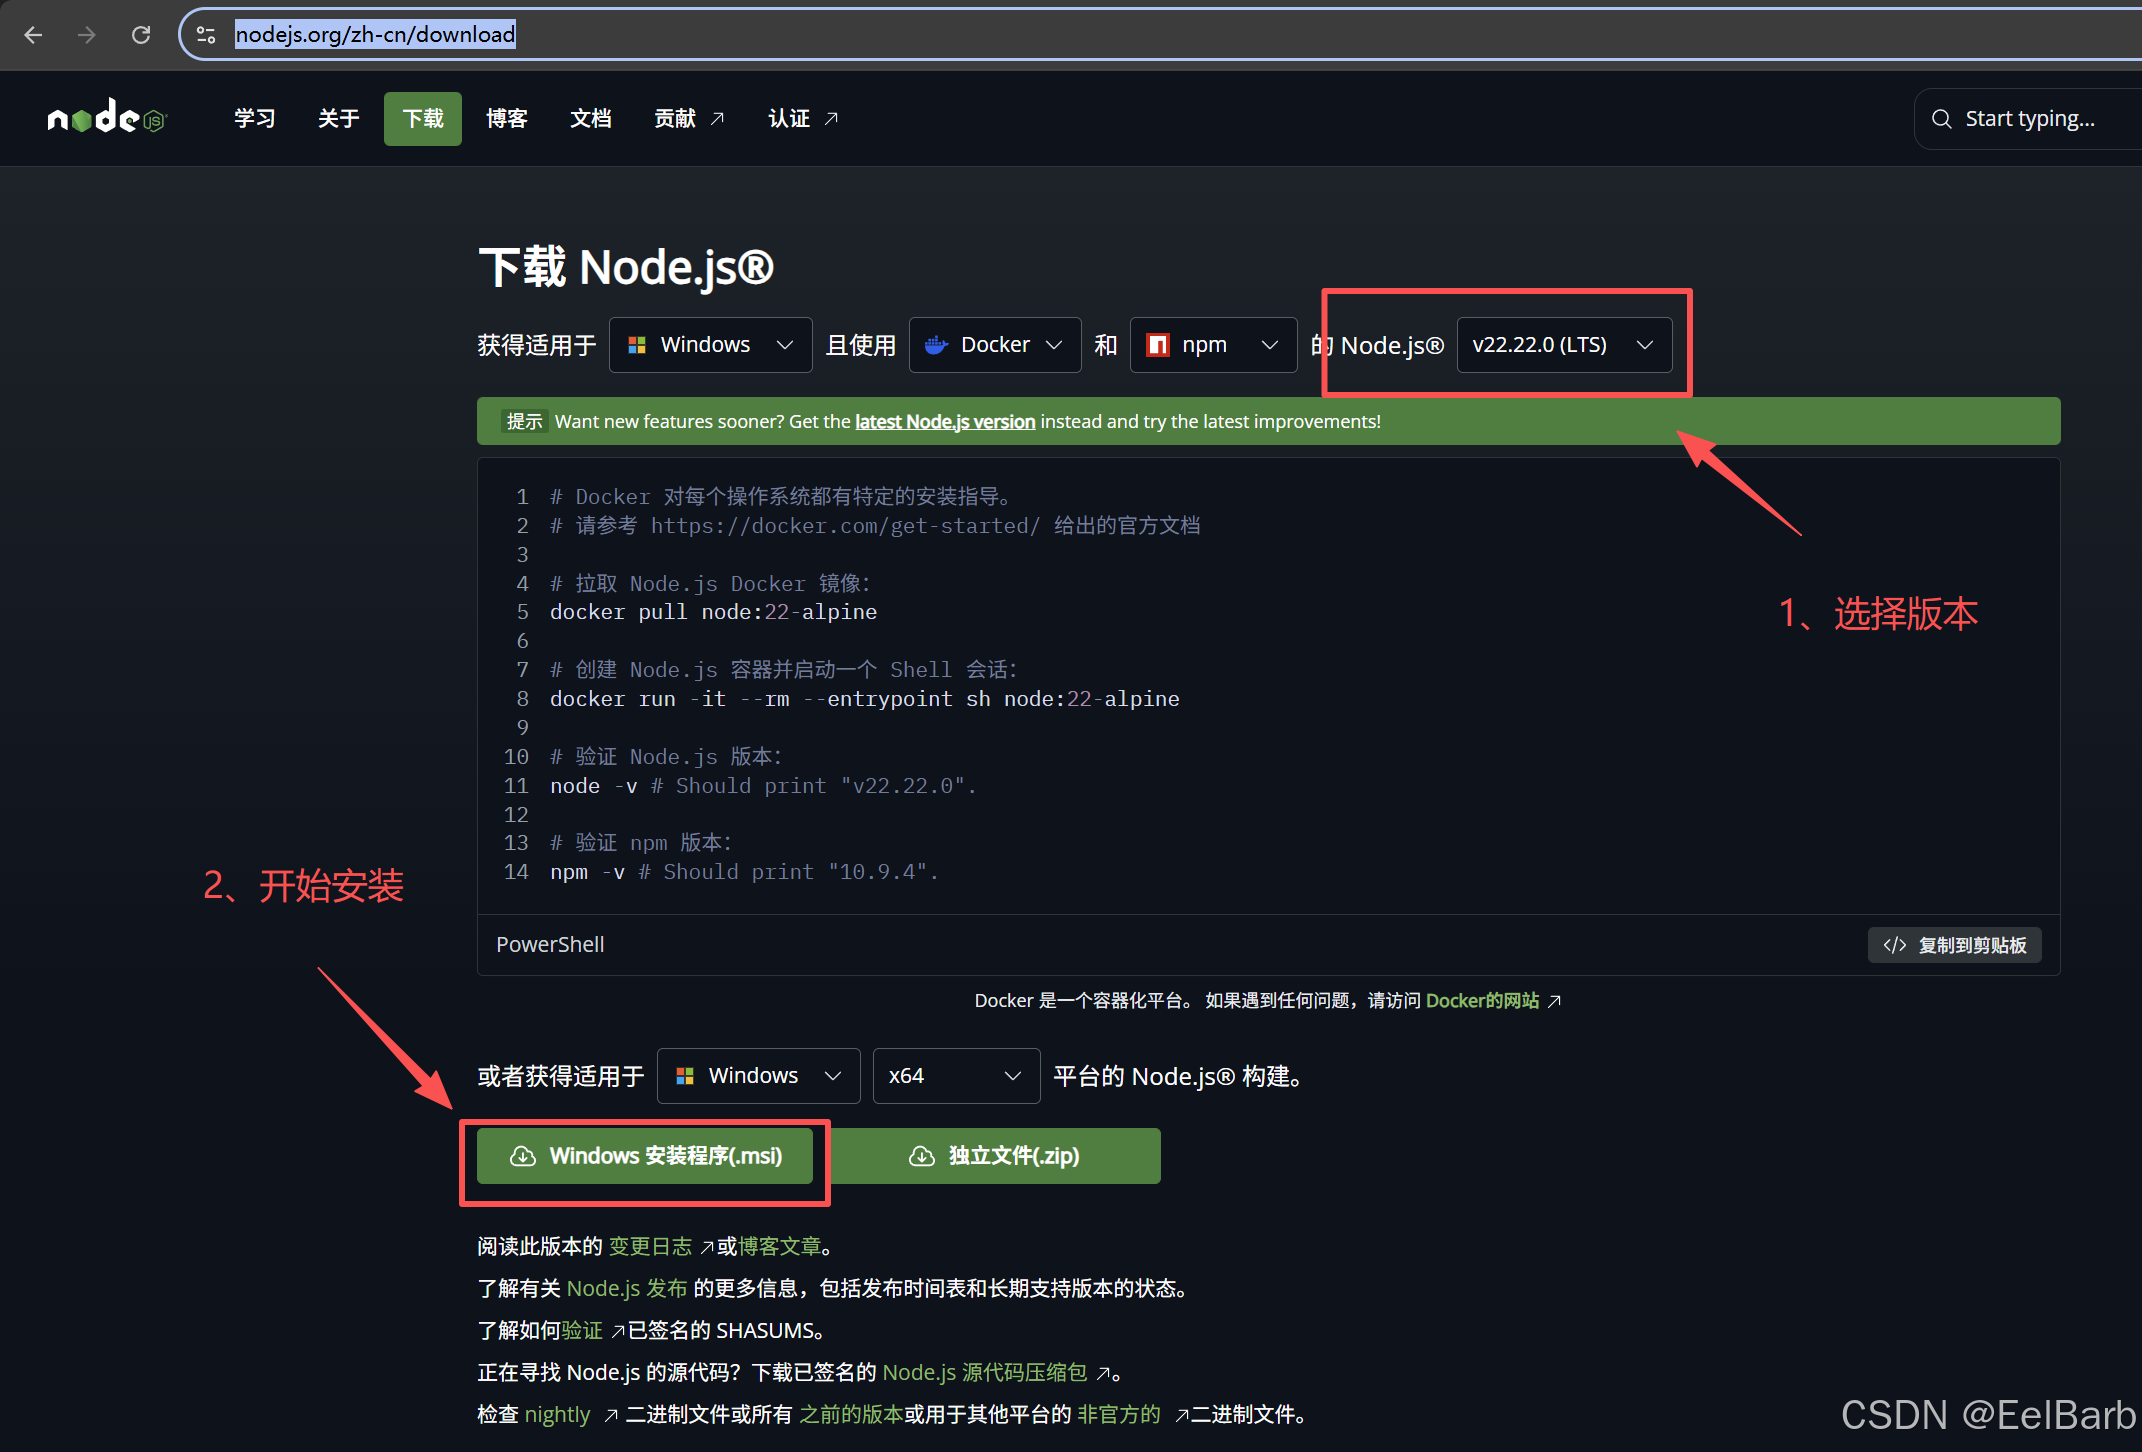
npm的话按照官方要求,需要v22版本及以上,可以在官网下载:
https://nodejs.org/zh-cn/download
配置代理和安装
安装openClaw可能会遇到一时半会儿无法逾越的屏障,你或许需要知道这个内容:
npm config set proxy http://127.0.0.1:7890
npm config set https-proxy http://127.0.0.1:7890

git config --global http.proxy http://127.0.0.1:7890
git config --global https.proxy http://127.0.0.1:7890

# 清除npm代理
npm config delete proxy
npm config delete https-proxy

# 清除git代理
git config --global --unset http.proxy
git config --global --unset https.proxy
安装openClaw
npm install -g openclaw@beta

# 检查环境,全部yes
openclaw doctor

# 开始配置openclaw
openclaw onboard

# 安全提示:选择YES
# 配置方式:QuickStart(快速开始)
# 配置处理:Use existing values(使用现有值)
# 选择自己想要接入的模型(免费):Qwen/kimi/Volcano Engine(豆包)
  选择自己想要接入的模型(本地):Custom Provider
# 输入ApiKey或者本地的方案
# 选择外部聊天接入方式:Skip for now(跳过)
# 技能安装:Skip for now(跳过)
# hooks:建议都选上

# 运行openclaw
openclaw gateway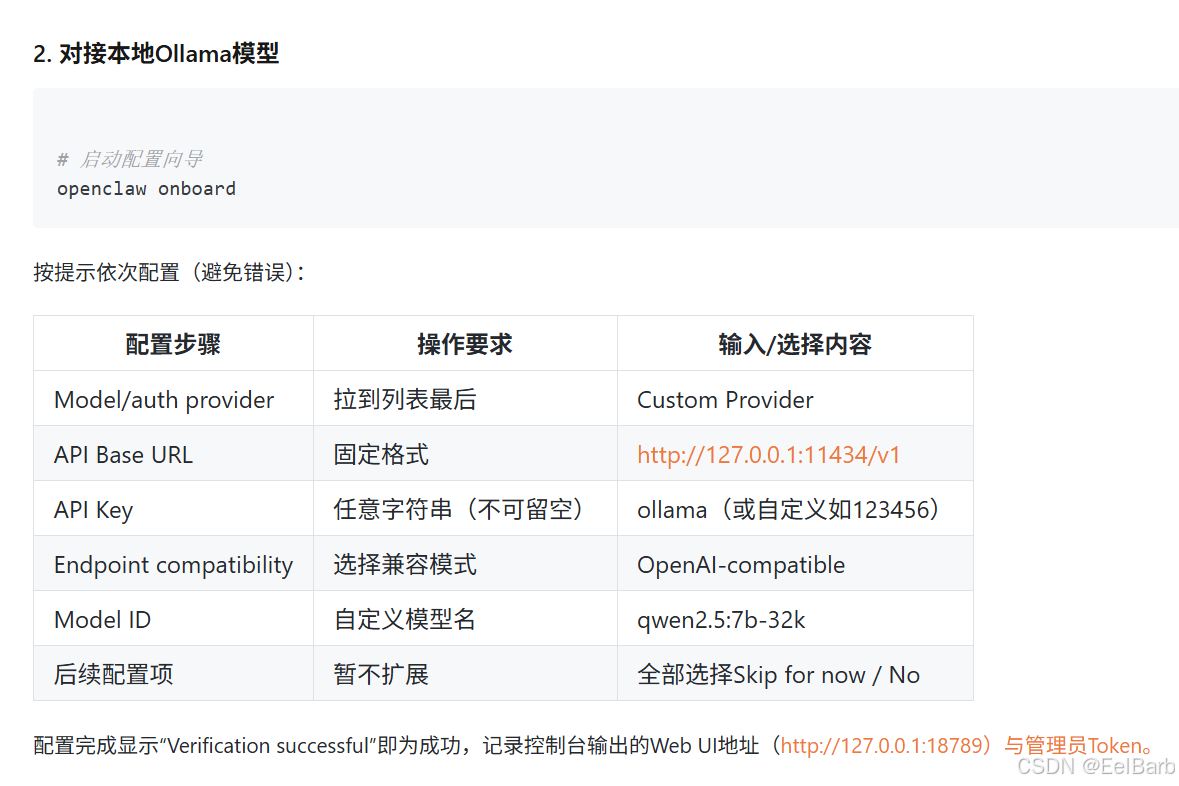
# 解决openclaw无法访问本地目录或者写文件的问题
### 注意:可能会有风险

# 设置全局工具 profile 为 coding(包含 group:fs 文件操作组)
openclaw config set tools.profile "coding"

# 设置为 full(无限制,适合本地开发)
openclaw config set tools.profile "full"
访问和使用

小龙虾开发者社区是 CSDN 旗下专注 OpenClaw 生态的官方阵地,聚焦技能开发、插件实践与部署教程,为开发者提供可直接落地的方案、工具与交流平台,助力高效构建与落地 AI 应用
更多推荐


 1
1 0
0- 0


 已为社区贡献1条内容

所有评论(0)