java项目如何使用webSocket
简单介绍下webSocket,webSoket是一种基于Tcp连接的协议,只需建立一次握手,就能实现持久性的连接,允许服务器主动向浏览器推送数据,也允许浏览器向服务器推送数据。优点就是节省服务器资源和带宽。话不多说,进入正题,首先我后台使用的是springboot,前端使用的是vue,但是原理都是类似的,以下内容亲测可用,如果不可用,请检查你的拦截器,查看你的安全框架是否对websocket连接进
·
	简单介绍下webSocket,webSoket是一种基于Tcp连接的协议,只需建立一次握手,就能实现持久性的连接,允许
服务器主动向浏览器推送数据,也允许浏览器向服务器推送数据。优点就是节省服务器资源和带宽。
	话不多说,进入正题,首先我后台使用的是springboot,前端使用的是vue,但是原理都是类似的,以下内容
亲测可用,如果不可用,请检查你的拦截器,查看你的安全框架是否对websocket连接进行拦截。
1.pom文件
        <dependency>
            <groupId>org.springframework.boot</groupId>
            <artifactId>spring-boot-starter-websocket</artifactId>
        </dependency>
2.java后台
	@Component
@ServerEndpoint("/webSocket")
public class WebSocket {

    private Session session;

    private static CopyOnWriteArraySet<WebSocket> webSocketSet = new CopyOnWriteArraySet<>();

    @OnOpen
    public void onOpen(Session session){
        this.session = session;
        webSocketSet.add(this);
        System.out.println("新的连接 总数:"+webSocketSet.size());
    }


    @OnClose
    public void onColse(){
        webSocketSet.remove(this);
        System.out.println("断开连接 总数:"+webSocketSet.size());

    }

    @OnMessage
    public void onMessage(String message){
        System.out.println("收到客户端发来的消息:"+message);
    }

    public void sendMessage(String message){
        for (WebSocket webSocket : webSocketSet){
            System.out.println("广播消息:"+message);
            try {
                webSocket.session.getBasicRemote().sendText(message);
            } catch (IOException e) {
                e.printStackTrace();
            }

        }
    }
}

3.配置文件
@Component
public class WebSocketConfig {

    @Bean
    public ServerEndpointExporter serverEndpointConfigurator(){
        return new ServerEndpointExporter();
    }
}

4.安全框架拦截器放行websocket,不然会一直连接失败


// An highlighted block
5.前端部分:
data()中定义:
path:"ws://127.0.0.1:8084/webSocket",
socket:"",
mounted () {
// 初始化
this.init()
},
init: function () {
if(typeof(WebSocket) === "undefined"){
alert("您的浏览器不支持socket")
}else{
// 实例化socket
this.socket = new WebSocket(this.path)
// 监听socket连接
this.socket.onopen = this.open
// 监听socket错误信息
this.socket.onerror = this.error
// 监听socket消息
this.socket.onmessage = this.getMessage
}
},
open: function () {
console.log("socket连接成功")
},
error: function () {
console.log("连接错误")
},
getMessage: function (msg) {
this.progress = msg.data;
},
send: function () {
this.socket.send(params)
},
close: function () {
console.log("socket已经关闭")
},
6.完成上述步骤后,一次简单的websocket连接就建立完成了。
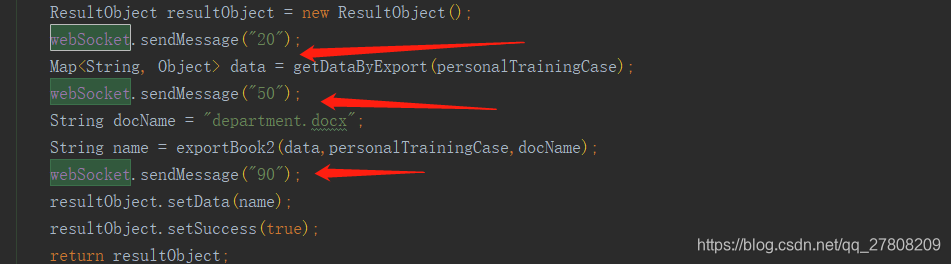
7.后台向前端发送消息:
@Autowired
private WebSocket webSocket;

前往低代码交流专区
更多推荐

 1
1 0
0- 0


 已为社区贡献2条内容

所有评论(0)