vue的render函数,你真的会用吗?单页面的render函数解坑
今天,回去又好好的看了一遍vue的render函数。感觉之前有一些误解和没有深刻的理解到位。一、基础(官网例子)官网的例子非常简单,但是又比较有代表性,如果是刚入门的vuer看起来也可能是有点懵懂的。但是不急,我们一步步来解析一下。官网说让我们深入一个简单的例子,这个例子里render函数很实用。假设我们要生成一些带锚点的标题:<h1><a name=...
今天,回去又好好的看了一遍vue的render函数。感觉之前有一些误解和没有深刻的理解到位。
一、基础(官网例子)
官网的例子非常简单,但是又比较有代表性,如果是刚入门的vuer看起来也可能是有点懵懂的。但是不急,我们一步步来解析一下。
官网说让我们深入一个简单的例子,这个例子里 render 函数很实用。假设我们要生成一些带锚点的标题:
<h1>
  <a name="hello-world" href="#hello-world">
    Hello world!
  </a>
</h1>
对于上面的 HTML,你决定这样定义组件接口:
<anchored-heading :level="1">Hello world!</anchored-heading>到这里,都没有问题。非常的easy,也就是写一个组件,然后用一个props为level的参数捣鼓一番。
我们继续官网的例子。
当开始写一个只能通过 level prop 动态生成标题 (heading) 的组件时,你可能很快想到这样实现:
<script type="text/x-template" id="anchored-heading-template">
  <h1 v-if="level === 1">
    <slot></slot>
  </h1>
  <h2 v-else-if="level === 2">
    <slot></slot>
  </h2>
  <h3 v-else-if="level === 3">
    <slot></slot>
  </h3>
  <h4 v-else-if="level === 4">
    <slot></slot>
  </h4>
  <h5 v-else-if="level === 5">
    <slot></slot>
  </h5>
  <h6 v-else-if="level === 6">
    <slot></slot>
  </h6>
</script>
Vue.component('anchored-heading', {
template: '#anchored-heading-template',
props: {
level: {
type: Number,
required: true
}
}
})无非也就是对例子的循环往复而已。有的人会说,我直接在vue外层进行循环不就好了啊?用v-for呀!你这个简直就是too young too simply 了。那样写,很容易失去可扩展性。标签的名字不好控制,而且,slot标签外层一般还得加上不必要的div。所以,官网开始解释啦:
这里用模板并不是最好的选择:不但代码冗长,而且在每一个级别的标题中重复书写了 <slot></slot>,在要插入锚点元素时还要再次重复。
虽然模板在大多数组件中都非常好用,但是显然在这里它就不合适了。那么,我们来尝试使用 render 函数重写上面的例子:
Vue.component('anchored-heading', {
  render: function (createElement) {
    return createElement(
      'h' + this.level,   // 标签名称
      this.$slots.default // 子节点数组
    )
  },
  props: {
    level: {
      type: Number,
      required: true
    }
  }
})
看起来简单多了!这样代码精简很多,但是需要非常熟悉 Vue 的实例属性。在这个例子中,你需要知道,向组件中传递不带 v-slot 指令的子节点时,比如 anchored-heading 中的 Hello world!,这些子节点被存储在组件实例中的 $slots.default 中。
是不是特别容易理解呢?
这个时候,你在render方法里边可以将this打印出来,这个时候你会看见一个大大的对象,如下:

这个鬼不就是proxy对象吗,代理对象还不就是对象,直接拉出this.$slots来用就可以了。是不是很容易?
而default就表示你在<slot></slot>上没有给一个名字而已,要淡定,如果你要一个自定义的名字(具名插槽)或者是作用域插槽都是信手拈来了啊。如下:

啥?不知道插槽怎么写?那你还真的要去好好复习了呢。
二、怎么插入我们要的节点呢?
说到了这里,可能很多朋友还是不知道render函数工作的方式。那么我们可以再解释一下。按照官网的例子:
在深入渲染函数之前,了解一些浏览器的工作原理是很重要的。以下面这段 HTML 为例:
<div>
  <h1>My title</h1>
  Some text content
  <!-- TODO: Add tagline -->
</div>当浏览器读到这些代码时,它会建立一个“DOM 节点”树来保持追踪所有内容,如同你会画一张家谱树来追踪家庭成员的发展一样。
上述 HTML 对应的 DOM 节点树如下图所示:

每个元素都是一个节点。每段文字也是一个节点。甚至注释也都是节点。一个节点就是页面的一个部分。就像家谱树一样,每个节点都可以有孩子节点 (也就是说每个部分可以包含其它的一些部分)。
高效地更新所有这些节点会是比较困难的,不过所幸你不必手动完成这个工作。你只需要告诉 Vue 你希望页面上的 HTML 是什么,这可以是在一个模板里:
<h1>{{ blogTitle }}</h1>或者一个渲染函数里:
render: function (createElement) {
  return createElement('h1', this.blogTitle)
}
在这两种情况下,Vue 都会自动保持页面的更新,即便 blogTitle 发生了改变。
具体vue是如何保持页面更新的,这就要去研究源码啦。这里不再赘述,如果有兴趣的朋友可以研究一下objectdefineproperty这个原生的js方法。其实Proxy也可以对数据进行劫持,而且接口更多更详细,听闻vue团队也要开始对vue进行重构,可能会用Proxy替代之前的数据劫持方法哦。
Vue 通过建立一个虚拟 DOM 来追踪自己要如何改变真实 DOM。请仔细看这行代码:
return createElement('h1', this.blogTitle)createElement 到底会返回什么呢?其实不是一个实际的 DOM 元素。它更准确的名字可能是 createNodeDescription,因为它所包含的信息会告诉 Vue 页面上需要渲染什么样的节点,包括及其子节点的描述信息。我们把这样的节点描述为“虚拟节点 (virtual node)”,也常简写它为“VNode”。“虚拟 DOM”是我们对由 Vue 组件树建立起来的整个 VNode 树的称呼。
好了说了这么多,无非就是想让大家知道,render到底是什么东西,怎么样工作的。跟我们印象中的vue是不是相一致的。
三、createElement 参数
接下来你需要熟悉的是如何在 createElement 函数中使用模板中的那些功能。这里是 createElement 接受的参数:
// @returns {VNode}
createElement(
  // {String | Object | Function}
  // 一个 HTML 标签名、组件选项对象,或者
  // resolve 了上述任何一种的一个 async 函数。必填项。
  'div',

  // {Object}
  // 一个与模板中属性对应的数据对象。可选。
  {
    // (详情见下一节)
  },

  // {String | Array}
  // 子级虚拟节点 (VNodes),由 `createElement()` 构建而成,
  // 也可以使用字符串来生成“文本虚拟节点”。可选。
  [
    '先写一些文字',
    createElement('h1', '一则头条'),
    createElement(MyComponent, {
      props: {
        someProp: 'foobar'
      }
    })
  ]
)
这个节点就是我们称之为VNode的创建的节点了。至于插入到哪里,就是我们在组件的位置啦!这个时候,很多朋友就会说了,信你个鬼,不见得在单页面有效果。这就对了嘛,如果单页面也如同官网一样傻瓜式容易懂,那么我写这文章就没有意义了。我们下边好好分析单页面的render函数渲染。莫慌!
说完了render函数的拿手方法createElement,我们有必要了解一下它的数据对象:
有一点要注意:正如 v-bind:class 和 v-bind:style 在模板语法中会被特别对待一样,它们在 VNode 数据对象中也有对应的顶层字段。该对象也允许你绑定普通的 HTML 特性,也允许绑定如 innerHTML 这样的 DOM 属性 (这会覆盖 v-html 指令)。
{
  // 与 `v-bind:class` 的 API 相同,
  // 接受一个字符串、对象或字符串和对象组成的数组
  'class': {
    foo: true,
    bar: false
  },
  // 与 `v-bind:style` 的 API 相同,
  // 接受一个字符串、对象,或对象组成的数组
  style: {
    color: 'red',
    fontSize: '14px'
  },
  // 普通的 HTML 特性
  attrs: {
    id: 'foo'
  },
  // 组件 prop
  props: {
    myProp: 'bar'
  },
  // DOM 属性
  domProps: {
    innerHTML: 'baz'
  },
  // 事件监听器在 `on` 属性内,
  // 但不再支持如 `v-on:keyup.enter` 这样的修饰器。
  // 需要在处理函数中手动检查 keyCode。
  on: {
    click: this.clickHandler
  },
  // 仅用于组件,用于监听原生事件,而不是组件内部使用
  // `vm.$emit` 触发的事件。
  nativeOn: {
    click: this.nativeClickHandler
  },
  // 自定义指令。注意,你无法对 `binding` 中的 `oldValue`
  // 赋值,因为 Vue 已经自动为你进行了同步。
  directives: [
    {
      name: 'my-custom-directive',
      value: '2',
      expression: '1 + 1',
      arg: 'foo',
      modifiers: {
        bar: true
      }
    }
  ],
  // 作用域插槽的格式为
  // { name: props => VNode | Array<VNode> }
  scopedSlots: {
    default: props => createElement('span', props.text)
  },
  // 如果组件是其它组件的子组件,需为插槽指定名称
  slot: 'name-of-slot',
  // 其它特殊顶层属性
  key: 'myKey',
  ref: 'myRef',
  // 如果你在渲染函数中给多个元素都应用了相同的 ref 名,
  // 那么 `$refs.myRef` 会变成一个数组。
  refInFor: true
}
至此,官网中render函数的实质内容已经暴露无二。接下来就是细节的问题了。有下边的完整代码可以借鉴一下:
var getChildrenTextContent = function (children) {
  return children.map(function (node) {
    return node.children
      ? getChildrenTextContent(node.children)
      : node.text
  }).join('')
}

Vue.component('anchored-heading', {
  render: function (createElement) {
    // 创建 kebab-case 风格的 ID
    var headingId = getChildrenTextContent(this.$slots.default)
      .toLowerCase()
      .replace(/\W+/g, '-')
      .replace(/(^-|-$)/g, '')

    return createElement(
      'h' + this.level,
      [
        createElement('a', {
          attrs: {
            name: headingId,
            href: '#' + headingId
          }
        }, this.$slots.default)
      ]
    )
  },
  props: {
    level: {
      type: Number,
      required: true
    }
  }
})
四、单页面的render函数
很多朋友看到这里,松了一口气了,终于要说重点了。没有错,我们项目,基本上都是单页面的。很多朋友虽然不懂webpack,但是利用了官网的vue-cli就能够创造一个全新的vue项目。那么我们如果遇见了特殊的需求,比如要循环插槽等需要用到render函数的时候,我们应该如何用上render?
很简单!
1、渲染render函数的vue文件去掉template标签

上述的方法是错误的写法,你会发现页面上晚上打印不出
console.log('this', this, this.level)也就是说,render函数都没有进来。因为render函数的优先级低于template。页面中如果有template,那么render函数就会失效。刺不刺激?
2、将render函数放在js文件中而不是vue文件
为何呢?
很简单,因为这个时候你都已经不要html啦,还要什么vue综合模板?!那不是多此一举嘛。

在父级怎么调用呢?跟官网的例子一个样子的。比如我这个例子的父级简单为:

也就是当做组件的方式引入,至于slot的写法可以参照slot的标准。
五、elementui的table组件的render方法
element-ui大家应该都不陌生。它的table中含有大量的render方法。它是如何进行render方法的渲染的呢?下边我截取一部分源码,
table的目录结构如图所示。table.vue是一个总组件集合体,而table-body.js等都是它的一个分支组件(这里不是简单的方法函数,是实在的组件)。table-body.js组件在父级table.vue的html中展示如图:

上图明显的就是table-body.js的一个组件引入模式,只是这边没有用插槽而已

上图是它引入的路径和它需要传递给组件的的props参数们。
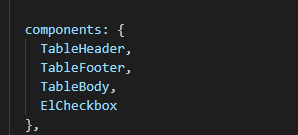
上图是注册组件。
这样一来,是不是对render函数的引入有了一个直观的了解。然后,最重要的就是在table-body.js中究竟如何写呢?
import { getCell, getColumnByCell, getRowIdentity } from './util';
import { getStyle, hasClass, addClass, removeClass } from 'element-ui/src/utils/dom';
import ElCheckbox from 'element-ui/packages/checkbox';
import ElTooltip from 'element-ui/packages/tooltip';
import debounce from 'throttle-debounce/debounce';
import LayoutObserver from './layout-observer';

export default {
  name: 'ElTableBody',

  mixins: [LayoutObserver],

  components: {
    ElCheckbox,
    ElTooltip
  },

  props: {
    store: {
      required: true
    },
    stripe: Boolean,
    context: {},
    rowClassName: [String, Function],
    rowStyle: [Object, Function],
    fixed: String,
    highlight: Boolean
  },

  render(h) {
    const columnsHidden = this.columns.map((column, index) => this.isColumnHidden(index));
    return (
      <table
        class="el-table__body"
        cellspacing="0"
        cellpadding="0"
        border="0">
        <colgroup>
          {
            this._l(this.columns, column => <col name={ column.id } />)
          }
        </colgroup>
        <tbody>
          {
            this._l(this.data, (row, $index) =>
              [<tr
                style={ this.rowStyle ? this.getRowStyle(row, $index) : null }
                key={ this.table.rowKey ? this.getKeyOfRow(row, $index) : $index }
                on-dblclick={ ($event) => this.handleDoubleClick($event, row) }
                on-click={ ($event) => this.handleClick($event, row) }
                on-contextmenu={ ($event) => this.handleContextMenu($event, row) }
                on-mouseenter={ _ => this.handleMouseEnter($index) }
                on-mouseleave={ _ => this.handleMouseLeave() }
                class={ [this.getRowClass(row, $index)] }>
                {
                  this._l(this.columns, (column, cellIndex) => {
                    const { rowspan, colspan } = this.getSpan(row, column, $index, cellIndex);
                    if (!rowspan || !colspan) {
                      return '';
                    } else {
                      return (
                        <td
                          style={ this.getCellStyle($index, cellIndex, row, column) }
                          class={ this.getCellClass($index, cellIndex, row, column) }
                          rowspan={ rowspan }
                          colspan={ colspan }
                          on-mouseenter={ ($event) => this.handleCellMouseEnter($event, row) }
                          on-mouseleave={ this.handleCellMouseLeave }>
                          {
                            column.renderCell.call(
                              this._renderProxy,
                              h,
                              {
                                row,
                                column,
                                $index,
                                store: this.store,
                                _self: this.context || this.table.$vnode.context
                              },
                              columnsHidden[cellIndex]
                            )
                          }
                        </td>
                      );
                    }
                  })
                }
              </tr>,
              this.store.isRowExpanded(row)
                ? (<tr>
                  <td colspan={ this.columns.length } class="el-table__expanded-cell">
                    { this.table.renderExpanded ? this.table.renderExpanded(h, { row, $index, store: this.store }) : ''}
                  </td>
                </tr>)
                : ''
              ]
            ).concat(
              <el-tooltip effect={ this.table.tooltipEffect } placement="top" ref="tooltip" content={ this.tooltipContent }></el-tooltip>
            )
          }
        </tbody>
      </table>
    );
  },

  watch: {
    'store.states.hoverRow'(newVal, oldVal) {
      if (!this.store.states.isComplex) return;
      const el = this.$el;
      if (!el) return;
      const tr = el.querySelector('tbody').children;
      const rows = [].filter.call(tr, row => hasClass(row, 'el-table__row'));
      const oldRow = rows[oldVal];
      const newRow = rows[newVal];
      if (oldRow) {
        removeClass(oldRow, 'hover-row');
      }
      if (newRow) {
        addClass(newRow, 'hover-row');
      }
    },
    'store.states.currentRow'(newVal, oldVal) {
      if (!this.highlight) return;
      const el = this.$el;
      if (!el) return;
      const data = this.store.states.data;
      const tr = el.querySelector('tbody').children;
      const rows = [].filter.call(tr, row => hasClass(row, 'el-table__row'));
      const oldRow = rows[data.indexOf(oldVal)];
      const newRow = rows[data.indexOf(newVal)];
      if (oldRow) {
        removeClass(oldRow, 'current-row');
      } else {
        [].forEach.call(rows, row => removeClass(row, 'current-row'));
      }
      if (newRow) {
        addClass(newRow, 'current-row');
      }
    }
  },

  computed: {
    table() {
      return this.$parent;
    },

    data() {
      return this.store.states.data;
    },

    columnsCount() {
      return this.store.states.columns.length;
    },

    leftFixedLeafCount() {
      return this.store.states.fixedLeafColumnsLength;
    },

    rightFixedLeafCount() {
      return this.store.states.rightFixedLeafColumnsLength;
    },

    leftFixedCount() {
      return this.store.states.fixedColumns.length;
    },

    rightFixedCount() {
      return this.store.states.rightFixedColumns.length;
    },

    columns() {
      return this.store.states.columns;
    }
  },

  data() {
    return {
      tooltipContent: ''
    };
  },

  created() {
    this.activateTooltip = debounce(50, tooltip => tooltip.handleShowPopper());
  },

  methods: {
    getKeyOfRow(row, index) {
      const rowKey = this.table.rowKey;
      if (rowKey) {
        return getRowIdentity(row, rowKey);
      }
      return index;
    },

    isColumnHidden(index) {
      if (this.fixed === true || this.fixed === 'left') {
        return index >= this.leftFixedLeafCount;
      } else if (this.fixed === 'right') {
        return index < this.columnsCount - this.rightFixedLeafCount;
      } else {
        return (index < this.leftFixedLeafCount) || (index >= this.columnsCount - this.rightFixedLeafCount);
      }
    },

    getSpan(row, column, rowIndex, columnIndex) {
      let rowspan = 1;
      let colspan = 1;

      const fn = this.table.spanMethod;
      if (typeof fn === 'function') {
        const result = fn({
          row,
          column,
          rowIndex,
          columnIndex
        });

        if (Array.isArray(result)) {
          rowspan = result[0];
          colspan = result[1];
        } else if (typeof result === 'object') {
          rowspan = result.rowspan;
          colspan = result.colspan;
        }
      }

      return {
        rowspan,
        colspan
      };
    },

    getRowStyle(row, rowIndex) {
      const rowStyle = this.table.rowStyle;
      if (typeof rowStyle === 'function') {
        return rowStyle.call(null, {
          row,
          rowIndex
        });
      }
      return rowStyle;
    },

    getRowClass(row, rowIndex) {
      const classes = ['el-table__row'];
      if (this.table.highlightCurrentRow && row === this.store.states.currentRow) {
        classes.push('current-row');
      }

      if (this.stripe && rowIndex % 2 === 1) {
        classes.push('el-table__row--striped');
      }
      const rowClassName = this.table.rowClassName;
      if (typeof rowClassName === 'string') {
        classes.push(rowClassName);
      } else if (typeof rowClassName === 'function') {
        classes.push(rowClassName.call(null, {
          row,
          rowIndex
        }));
      }

      if (this.store.states.expandRows.indexOf(row) > -1) {
        classes.push('expanded');
      }

      return classes.join(' ');
    },

    getCellStyle(rowIndex, columnIndex, row, column) {
      const cellStyle = this.table.cellStyle;
      if (typeof cellStyle === 'function') {
        return cellStyle.call(null, {
          rowIndex,
          columnIndex,
          row,
          column
        });
      }
      return cellStyle;
    },

    getCellClass(rowIndex, columnIndex, row, column) {
      const classes = [column.id, column.align, column.className];

      if (this.isColumnHidden(columnIndex)) {
        classes.push('is-hidden');
      }

      const cellClassName = this.table.cellClassName;
      if (typeof cellClassName === 'string') {
        classes.push(cellClassName);
      } else if (typeof cellClassName === 'function') {
        classes.push(cellClassName.call(null, {
          rowIndex,
          columnIndex,
          row,
          column
        }));
      }

      return classes.join(' ');
    },

    handleCellMouseEnter(event, row) {
      const table = this.table;
      const cell = getCell(event);

      if (cell) {
        const column = getColumnByCell(table, cell);
        const hoverState = table.hoverState = {cell, column, row};
        table.$emit('cell-mouse-enter', hoverState.row, hoverState.column, hoverState.cell, event);
      }

      // 判断是否text-overflow, 如果是就显示tooltip
      const cellChild = event.target.querySelector('.cell');
      if (!(hasClass(cellChild, 'el-tooltip') && cellChild.childNodes.length)) {
        return;
      }
      // use range width instead of scrollWidth to determine whether the text is overflowing
      // to address a potential FireFox bug: https://bugzilla.mozilla.org/show_bug.cgi?id=1074543#c3
      const range = document.createRange();
      range.setStart(cellChild, 0);
      range.setEnd(cellChild, cellChild.childNodes.length);
      const rangeWidth = range.getBoundingClientRect().width;
      const padding = (parseInt(getStyle(cellChild, 'paddingLeft'), 10) || 0) +
        (parseInt(getStyle(cellChild, 'paddingRight'), 10) || 0);
      if ((rangeWidth + padding > cellChild.offsetWidth || cellChild.scrollWidth > cellChild.offsetWidth) && this.$refs.tooltip) {
        const tooltip = this.$refs.tooltip;
        // TODO 会引起整个 Table 的重新渲染,需要优化
        this.tooltipContent = cell.innerText || cell.textContent;
        tooltip.referenceElm = cell;
        tooltip.$refs.popper && (tooltip.$refs.popper.style.display = 'none');
        tooltip.doDestroy();
        tooltip.setExpectedState(true);
        this.activateTooltip(tooltip);
      }
    },

    handleCellMouseLeave(event) {
      const tooltip = this.$refs.tooltip;
      if (tooltip) {
        tooltip.setExpectedState(false);
        tooltip.handleClosePopper();
      }
      const cell = getCell(event);
      if (!cell) return;

      const oldHoverState = this.table.hoverState || {};
      this.table.$emit('cell-mouse-leave', oldHoverState.row, oldHoverState.column, oldHoverState.cell, event);
    },

    handleMouseEnter(index) {
      this.store.commit('setHoverRow', index);
    },

    handleMouseLeave() {
      this.store.commit('setHoverRow', null);
    },

    handleContextMenu(event, row) {
      this.handleEvent(event, row, 'contextmenu');
    },

    handleDoubleClick(event, row) {
      this.handleEvent(event, row, 'dblclick');
    },

    handleClick(event, row) {
      this.store.commit('setCurrentRow', row);
      this.handleEvent(event, row, 'click');
    },

    handleEvent(event, row, name) {
      const table = this.table;
      const cell = getCell(event);
      let column;
      if (cell) {
        column = getColumnByCell(table, cell);
        if (column) {
          table.$emit(`cell-${name}`, row, column, cell, event);
        }
      }
      table.$emit(`row-${name}`, row, event, column);
    },

    handleExpandClick(row, e) {
      e.stopPropagation();
      this.store.toggleRowExpansion(row);
    }
  }
};
render函数中运用了jsx的模板形式去写,Bable方式让我们看js写的html代码更容易看懂:

简单而又清晰的展示了table-body的渲染。
好了,今天的分析就先到这里。如果说得不到位或者不对的地方,欢迎来信指正。谢谢!

前往低代码交流专区
更多推荐


 23
23 0
0- 0


 已为社区贡献4条内容

所有评论(0)