
大数据平台学习之路(4)编译hue并使用
1、背景上篇博客已经记录了安装hive,编译spark的过程,但是spark-sql shell或者hive shell编写sql来并不是很方便,所以这篇博客介绍hue,编译hue并使用。2、HUE简介github地址https://github.com/cloudera/hueHue是一个开放源码的SQLWorkbench,用于浏览、查询和可视化数据仓库中的数据:gethue....
1、背景
上篇博客已经记录了安装hive,编译spark的过程,但是spark-sql shell或者hive shell编写sql来并不是很方便,所以这篇博客介绍hue,编译hue并使用。
2、HUE简介
github地址 https://github.com/cloudera/hue
Hue是一个开放源码的SQLWorkbench,用于浏览、查询和可视化数据仓库中的数据:gethue.com
更多介绍请查看下面两篇其他作者的博客
https://blog.csdn.net/ywheel1989/article/details/51560312
https://blog.csdn.net/liangyihuai/article/details/54137163
3、准备文件
https://codeload.github.com/cloudera/hue/zip/master
4、安装所需依赖(官方介绍)
http://cloudera.github.io/hue/latest/administrator/installation/dependencies/
安装在你想安装的节点
sudo apt-get install git ant gcc g++ libffi-dev libkrb5-dev libmysqlclient-dev libsasl2-dev libsasl2-modules-gssapi-mit libsqlite3-dev libssl-dev libxml2-dev libxslt-dev make maven libldap2-dev python-dev python-setuptools libgmp3-dev安装Node.js
sudo apt install curl
curl -sL https://deb.nodesource.com/setup_8.x | sudo bash -
sudo apt-get install -y nodejs
5、编译安装hue
执行下面命令,网速会很慢,可以通过github官网下载,然后拷贝到虚拟机中
git clone https://github.com/cloudera/hue.git
cd hue
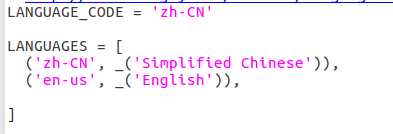
make apps修改参数文件设置中文界面(也可以通过默认文件在用户设置中修改为中文)
gedit /home/hadoop/hue-master/desktop/core/src/desktop/settings.py

修改为
$ make locales
$ make install
之后的安装路径是/usr/local/hue
在运行上面命令的时候安装mysql
$ sudo apt-get install mysql-server mysql-client
在mysql中创建数据库并赋权。
create database hue charset utf8;
create database huedb charset utf8;

GRANT ALL PRIVILEGES ON hue.* TO 'hue'@'localhost' IDENTIFIED BY 'hue';
GRANT ALL PRIVILEGES ON hue.* TO 'hue'@'192.168.0.12' IDENTIFIED BY 'hue';
GRANT ALL PRIVILEGES ON hue.* TO 'hue'@'%' IDENTIFIED BY 'hue';
GRANT ALL PRIVILEGES ON huedb.* TO 'hue'@'localhost' IDENTIFIED BY 'hue';
GRANT ALL PRIVILEGES ON huedb.* TO 'hue'@'192.168.0.12' IDENTIFIED BY 'hue';
GRANT ALL PRIVILEGES ON huedb.* TO 'hue'@'%' IDENTIFIED BY 'hue';
$ vim /usr/local/hue/desktop/conf/pseudo-distributed.ini[desktop]
secret_key='7c07c6b8fbb5048d06d1ff6150f67efcc1cb921f'
http_host=192.168.0.12
http_port=8888
time_zone=Asia/Shanghai
server_user=hue
server_group=hadoop
default_user=hue
default_hdfs_superuser=hadoop
[[database]]
engine=mysql
host=localhost
port=3306
user=hue
password=hue
name=hue
[notebook]
show_notebooks=true
enable_external_statements=true
enable_batch_execute=true
enable_sql_indexer=false
enable_presentation=true
enable_query_builder=true
enable_query_scheduling=false
[[interpreters]]
[[[mysql]]]
name = MySQL
interface=sqlalchemy
## https://docs.sqlalchemy.org/en/latest/dialects/mysql.html
## options='{"url": "mysql://root:root@localhost:3306/hue"}'
options='{"url": "mysql://hue:hue@localhost:3306/hue"}'
[[[sparksql]]]
name=SparkSql
interface=hiveserver2
#[[[sparksql]]]
## name=SparkSql
##interface=sqlalchemy
##options='{"url": "hive://hive@data1:10000/mdw"}'
[dashboard]
is_enabled=true
has_sql_enabled=true
[[engines]]
analytics=true
nesting=false
[hadoop]
[[hdfs_clusters]]
[[[default]]]
fs_defaultfs=hdfs://master:9000
logical_name=hadoop
webhdfs_url=http://master:50070/webhdfs/v1
hadoop_hdfs_home=/usr/local/hadoop-2.8.5
hadoop_conf_dir=/usr/local/hadoop-2.8.5/etc/hadoop
hadoop_bin=/usr/local/hadoop-2.8.5/bin
[[yarn_clusters]]
[[[default]]]
resourcemanager_host=master
resourcemanager_port=8032
submit_to=true
resourcemanager_api_url=http://master:8088
proxy_api_url=http://master:8088
history_server_api_url=http://master:19888
spark_history_server_url=http://master:18088
[beeswax]
hive_server_host=192.168.0.11
hive_server_port=10000
hive_metastore_host=192.168.0.11
hive_metastore_port=9083
hive_conf_dir=/usr/local/spark-2.3.3/conf
server_conn_timeout=120
[metastore]
enable_new_create_table=true
force_hs2_metadata=true
[spark]
livy_server_url=http://master:8998
livy_server_host=192.168.0.10
livy_server_session_kind=yarn
csrf_enabled=false
sql_server_host=192.168.0.11
sql_server_port=10000
[jobbrowser]
disable_killing_jobs=false
enable_v2=true
enable_query_browser=true
[librdbms]
[[databases]]
[[[mysql]]]
nice_name="My SQL DB"
name=huedb
engine=mysql
host=localhost
port=3306
user=hue
password=hue
添加hue的环境变量
$ vim ~/.bashrc

export HUE_ENV=/usr/local/hue/build/env
export PATH=$PATH:$HUE_ENV/bin
初始化数据库
$ hue syncdb
$ hue migrate
然后启动hue并配置密码
$ supervisor
如果要运行hive或者sparksql 需要启动hadoop hive元数据库以及spark-thriftserver.sh(不要使用hiveserver2,无法兼容)
但是需要运行scala 或者spark或者pyspark 时需要 livy服务
接下来配置livy-server
6.配置live-server
下载livy(只需要主节点安装)
http://archive.apache.org/dist/incubator/livy/0.5.0-incubating/livy-0.5.0-incubating-bin.zip
解压到usr/local目录
修改livy.conf
# What port to start the server on.
livy.server.session.factory=yarn
livy.server.port = 8998
livy.repl.enable-hive-context = true
livy.server.csrf_protection.enabled = false
# What spark master Livy sessions should use.
livy.spark.master = yarn-client

# What spark deploy mode Livy sessions should use.
livy.spark.deploy-mode = client
修改livy-env.sh,添加如下内容
export LIVY_HOME=/usr/local/livy-0.5.0
export JAVA_HOME=/usr/lib/jvm/java-8-openjdk-amd64
export HADOOP_CONF_DIR=/usr/local/hadoop-2.8.5/etc/hadoop
export SPARK_HOME=/usr/local/spark-2.3.3
export SPARK_CONF_DIR=/usr/local/spark-2.3.3/conf
export SCALA_HOME=/usr/local/scala-2.11.8
export LIVY_LOG_DIR=${LIVY_HOME}/logs
export LIVY_PID_DIR=${LIVY_HOME}/run
export SCALA_HOME=/usr/local/scala-2.11.8
export PYSPARK_ALLOW_INSECURE_GATEWAY=1
配置环境变量,添加如下内容
export PATH=$PATH:$NPM_HOME/bin
export LIVY_HOME=/usr/local/livy-0.5.0
export PATH=$PATH:$LIVY_HOME/bin
export PYSPARK_ALLOW_INSECURE_GATEWAY=1
更新环境变量
source ~/.bashrc同时需要在spark-env.sh添加如下内容
export PYSPARK_ALLOW_INSECURE_GATEWAY=1启动livy
livy-server start现在就可以在hue下使用scala和pyspark了
关闭livy
livy-server stop7.配置Hue完成
欢迎大家进行交流,一起学习进步,同时我的配置文件会放在微云上,在配置时可以参考,如果有问题可以随时留言或者发邮箱给我749818844@qq.com,我会尽快解决。
参数配置文件 链接:https://share.weiyun.com/5nfMu7B 密码:74bx47

瓜分20万奖金 获得内推名额 丰厚实物奖励 易参与易上手
更多推荐

 1
1 0
0- 0


 已为社区贡献1条内容

所有评论(0)