
Qt 实现 Logger 日志----轻量级开源库QsLog的使用
github的下载地址:https://github.com/victronenergy/QsLog下载后,解压到非中文目录,用qt creator打开(qt5.8.0,windows平台上,亲测可用),如图:编译:(1)编译QsLogSharedLibrary,在windows平台上,会生成QsLog2.lib和QsLog2.dll(2)编译官方给的demo,log_example_s...
github的下载地址:https://github.com/victronenergy/QsLog
下载后,解压到非中文目录,用qt creator打开(windows平台上,亲测可用),解压后的目录结构:

双击QsLogSharedLibrary.pro打开

一、动态库方式
看到QsLogSharedLibrary.pro中
win32 {
    DEFINES += QSLOG_IS_SHARED_LIBRARY
}
在windows系统中,默认生成动态库
以下均在Qt Creator中进行编译和使用,只是使用的编译器有所不同,这里都进行图文说明。
(1)在Mingw编译器中的编译和使用
编译:
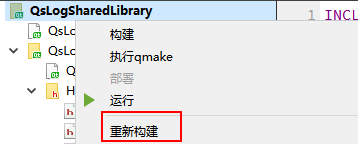
(说明:QsLogSharedLibrary使用Debug方式,还是Release方式没有区别,都是生成release版本的库,生成的库可以被Debug版本程序使用,也可以被Release版本程序使用)
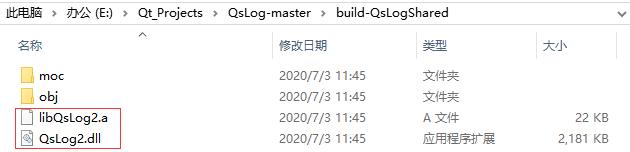
在工程源码目录中,会出现build-QsLogShared文件夹
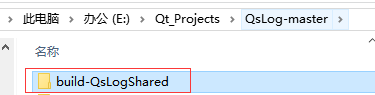
进入该文件夹:
使用:
在Qt Creator中新建一个console工程,使用mingw编译器
在工程文件夹中新建QsLog文件夹,
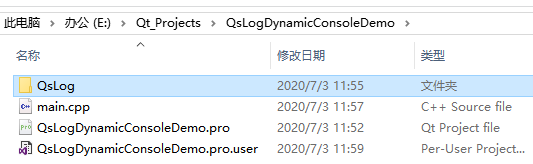
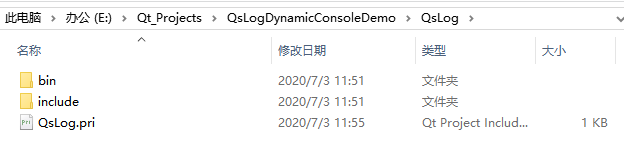
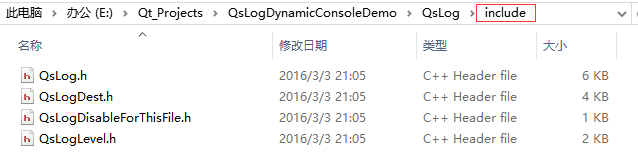
将4个头文件放到
将刚才生成的动态库放到这个文件夹中

QsLog.pri
CONFIG += c++11

#DEFINES += QS_LOG_LINE_NUMBERS    # automatically writes the file and line for each log message
#DEFINES += QS_LOG_DISABLE         # logging code is replaced with a no-op

HEADERS += \
    $$PWD/include/QsLog.h \
    $$PWD/include/QsLogDest.h \
    $$PWD/include/QsLogDisableForThisFile.h \
    $$PWD/include/QsLogLevel.h

LIBS += -L$$PWD/bin -lQsLog2
在QsLogDynamicConsoleDemo.pro中添加
include(./QsLog/QsLog.pri)
main.cpp
#include "QsLog/include/QsLog.h"
#include "QsLog/include/QsLogDest.h"
#include "QsLog/include/QsLogLevel.h"

#include <QCoreApplication>
#include <QDir>
#include <iostream>

void logFunction(const QString &message, QsLogging::Level level)
{
    std::cout << "From log function: " << qPrintable(message) << " " << static_cast<int>(level)
              << std::endl;
}

int main(int argc, char *argv[])
{
    QCoreApplication a(argc, argv);

    using namespace QsLogging;

    // 1. init the logging mechanism
    Logger& logger = Logger::instance();
    logger.setLoggingLevel(QsLogging::TraceLevel);
    const QString sLogPath(QDir(a.applicationDirPath()).filePath("log.txt"));

    // 2. add two destinations
    DestinationPtr fileDestination(DestinationFactory::MakeFileDestination(
     sLogPath, EnableLogRotation, MaxSizeBytes(512), MaxOldLogCount(2)));
    DestinationPtr debugDestination(DestinationFactory::MakeDebugOutputDestination());
    DestinationPtr functorDestination(DestinationFactory::MakeFunctorDestination(&logFunction));
    logger.addDestination(debugDestination);
    logger.addDestination(fileDestination);
    logger.addDestination(functorDestination);

    // 3. start logging
    QLOG_INFO() << "Program started";
    QLOG_INFO() << "Built with Qt" << QT_VERSION_STR << "running on" << qVersion();

    QLOG_TRACE() << "Here's a" << QString::fromUtf8("trace") << "message";
    QLOG_DEBUG() << "Here's a" << static_cast<int>(QsLogging::DebugLevel) << "message";
    QLOG_WARN()  << "Uh-oh!";
    qDebug() << "This message won't be picked up by the logger";
    QLOG_ERROR() << "An error has occurred";
    qWarning() << "Neither will this one";
    QLOG_FATAL() << "Fatal error!";

    logger.setLoggingLevel(QsLogging::OffLevel);
    for (int i = 0;i < 10000000;++i) {
       QLOG_ERROR() << QString::fromUtf8("this message should not be visible");
    }
    logger.setLoggingLevel(QsLogging::TraceLevel);

    QLOG_DEBUG() << "Program ending";
    QsLogging::Logger::destroyInstance();

    return a.exec();
}
运行结果:


记得打包的时候,将QsLog2.dll和.exe放到一起。
(2)在vs编译器中的使用
编译步骤相同,只是生成的QsLog2.dll和QsLog2.lib
(而mingw编译器生成的是Qslog2.dll和QsLog2.a)

运行和上面的步骤相同,只是
bin文件夹里放的是刚才生成的

说明:原来是是在Qt Creator中用vs编译器编译的,所以会生成QsLog2.lib,用mingw编译器的话,会生成QsLog2.a,二者都会生成QsLog2.dll
github的下载地址:https://github.com/victronenergy/QsLog
文中的demo工程,放到下面了:
链接:https://pan.baidu.com/s/1E7W2yEuUeuXgdWdk7g8P8Q
提取码:1tu5
后面发现这位大佬写得不错:Qt轻量级日志库QsLog的使用
接下来的教程会介绍QsLog的一些编译参数和函数的使用,以及一些通过实例进行介绍
参考:

旨在为数千万中国开发者提供一个无缝且高效的云端环境,以支持学习、使用和贡献开源项目。
更多推荐


 5
5 0
0- 0


 已为社区贡献9条内容

所有评论(0)