DevOps工具:k8s数据共享与持久化-nfs
文档:https://github.com/kubernetes-sigs/nfs-subdir-external-provisioner/blob/master/charts/nfs-subdir-external-provisioner/README.md。:通过将构建产物和相关数据持久化,可以确保每个构建版本的可追溯性,有利于快速排查和解决问题,同时可回滚到之前得版本。:共享和持久化数据,可
DevOps为什么要持久化数据?
- 可伸缩:可利用k8s集群的资源执行自动化任务。
- 可追溯:通过将构建产物和相关数据持久化,可以确保每个构建版本的可追溯性,有利于快速排查和解决问题,同时可回滚到之前得版本。而CI、CD和测试各阶段都可能产生文件(不适合存储数据库),因此需要持久化。
- 数据备份与恢复:通过定期备份关键数据,可以防止数据丢失、灾难恢复、以及保障业务连续性。
- 灵活性和可移植性:共享和持久化数据,可以确保应用程序在不同环境的一致性,有利于迁移。
准备服务端环境
服务器环境:10.10.13.46 Ubuntu
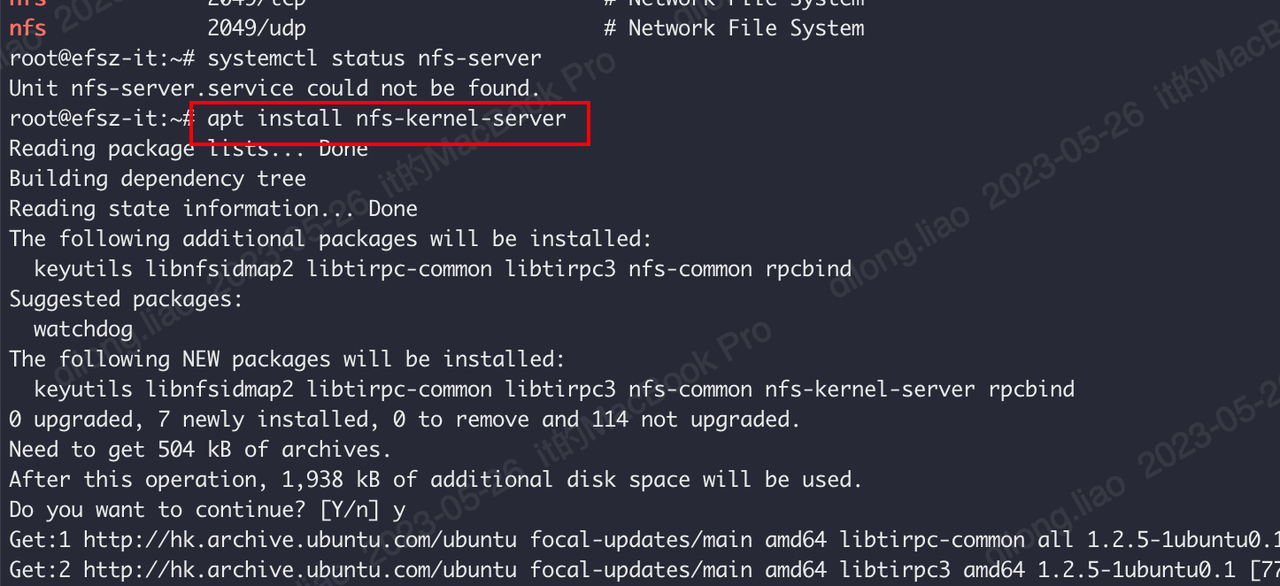
安装nfs server
执行命令
apt install nfs-kernel-server

检测服务状态:
systemctl status nfs-server

创建NFS数据目录
mkdir -p /data/nfs/test
chown nobody:nogroup /data/nfs/test
chmod -R 777 /data/nfs/test
编辑exports配置文件
# 允许网络段访问
# vim /etc/exports
echo "/data/nfs/test 10.10.*.*(rw,sync,no_subtree_check)" >> /etc/exports
配置文件中的权限说明:
- rw:允许读写
- sync:文件同时写入硬盘和内存
- no_subtree_check:即使输出目录是一个子目录,nfs服务器也不检查其父目录的权限,这样可以提高效率
共享目录
exportfs -arv
# 显示NFS服务器上所有的共享目录
showmount -e

exportfs参数说明
-a 打开或取消所有目录共享。
-o options,...指定一列共享选项,与 exports(5) 中讲到的类似。
-i 忽略 /etc/exports 文件,从而只使用默认的和命令行指定的选项。
-r 重新共享所有目录。它使 /var/lib/nfs/xtab 和 /etc/exports 同步。 它将 /etc/exports 中已删除的条目从 /var/lib/nfs/xtab 中删除,将内核共享表中任何不再有效的条目移除。
-u 取消一个或多个目录的共享。
-f 在“新”模式下,刷新内核共享表之外的任何东西。 任何活动的客户程序将在它们的下次请求中得到 mountd添加的新的共享条目。
-v 输出详细信息。当共享或者取消共享时,显示在做什么。 显示当前共享列表的时候,同时显示共享的选项。
showmount显示NFS服务器的共享信息

准备客户端环境
安装NFS客户端
apt-get install nfs-common -y

mkdir /data/nfs
mount -t nfs -o nolock,vers=3 10.10.13.46:/data/nfs /data/nfs

测试
在客户端添加文件
dd if=/dev/zero of=./test.dd bs=1M count=10

服务端查看是否有文件:文件已同步

为所有k8s节点安装NFS客户端
- 方案:ansible执行脚本安装
- 步骤:
- 为所有节点设置免密
- 安装NFS客户端
1. 为所有节点设置免密
采用DaemonSet实现,成功执行后删除DaemonSet
# k8s 宿主机免密登录
---
apiVersion: apps/v1
kind: DaemonSet
metadata:
  name: ssh-passwordless
  namespace: ops
  labels:
    app: ssh-passwordless
spec:
  selector:
    matchLabels:
      name: ssh-passwordless
  template:
    metadata:
      labels:
        name: ssh-passwordless
    spec:
      nodeSelector:
        kubernetes.io/os: linux
      tolerations:
        - effect: NoSchedule
          operator: Exists
        - key: CriticalAddonsOnly
          operator: Exists
        - effect: NoExecute
          operator: Exists
      containers:
        - name: shell
          image: busybox
          command:
            - "/bin/sh"
          args:
            - "-c"
            - |
              pubkey='xxxxxx'
              exist=$(cat /root/.ssh/authorized_keys | grep "${pubkey}" | wc -l)
              echo ${exist}
              if [ ${exist} -eq 0 ]; then
                echo 添加公钥
                echo "${pubkey}" >> /root/.ssh/authorized_keys
              fi
              echo 休息一天。。。
              sleep 86400
          volumeMounts:
            - name: ssh
              mountPath: /root/.ssh
              readOnly: true
      volumes:
        - name: ssh
          hostPath:
            path: /root/.ssh
2. 安装NFS客户端
echo "安装nfs client"
kubectl get no -o wide | awk '{if (NR>1){print $6}}' > hosts
echo "安装nfs client的机器"
ansible all --list-host
echo "开始安装nfs client"
ansible all -m shell -a 'apt-get install nfs-common -y'
执行结果
安装nfs client
安装nfs client的机器
  hosts (22):
    10.10.12.35
    10.10.12.83
开始安装nfs client
10.10.12.35 | CHANGED | rc=0 >>
Reading package lists...
Building dependency tree...
Reading state information...
nfs-common is already the newest version (1:1.3.4-2.5ubuntu3.6).
0 upgraded, 0 newly installed, 0 to remove and 129 not upgraded.
k8s应用NFS
手动管理PV
编写编排测试
---
apiVersion: v1
kind: PersistentVolume
metadata:
  name: nfs-pv
spec:
  capacity:
    storage: 1Mi
  accessModes:
    - ReadWriteMany
  nfs:
    server: 10.10.13.46
    path: /data/nfs/debug
  mountOptions:
    - nfsvers=4.2

---
apiVersion: v1
kind: PersistentVolumeClaim
metadata:
  name: nfs-pv-pvc
spec:
  accessModes:
    - ReadWriteMany
  resources:
    requests:
      storage: 1Mi
  volumeName: nfs-pv

---
kind: Pod
apiVersion: v1
metadata:
  name: test-pod-pv
spec:
  containers:
    - name: test-pod
      image: busybox:1.24
      command:
        - "/bin/sh"
      args:
        - "-c"
        - "touch /mnt/SUCCESS && exit 0 || exit 1"   #创建一个SUCCESS文件后退出
      volumeMounts:
        - name: nfs-pvc
          mountPath: "/mnt"
  restartPolicy: "Never"
  volumes:
    - name: nfs-pvc
      persistentVolumeClaim:
        claimName: nfs-pv-pvc  #与PVC名称保持一致
执行结果

自动管理PV
安装StorageClass
由StorageClass自动管理PV
方法一:helm安装
文档:https://github.com/kubernetes-sigs/nfs-subdir-external-provisioner/blob/master/charts/nfs-subdir-external-provisioner/README.md
helm repo add nfs-subdir-external-provisioner https://kubernetes-sigs.github.io/nfs-subdir-external-provisioner/
helm install nfs-subdir-external-provisioner nfs-subdir-external-provisioner/nfs-subdir-external-provisioner \
    --set nfs.server=10.10.13.46 \
    --set nfs.path=/data/nfs/debug
方法二:编排安装
---
apiVersion: v1
kind: ServiceAccount
metadata:
  name: nfs-client-provisioner
  # replace with namespace where provisioner is deployed
  namespace: default        #根据实际环境设定namespace,下面类同
---
kind: ClusterRole
apiVersion: rbac.authorization.k8s.io/v1
metadata:
  name: nfs-client-provisioner-runner
rules:
  - apiGroups: [""]
    resources: ["persistentvolumes"]
    verbs: ["get", "list", "watch", "create", "delete"]
  - apiGroups: [""]
    resources: ["persistentvolumeclaims"]
    verbs: ["get", "list", "watch", "update"]
  - apiGroups: ["storage.k8s.io"]
    resources: ["storageclasses"]
    verbs: ["get", "list", "watch"]
  - apiGroups: [""]
    resources: ["events"]
    verbs: ["create", "update", "patch"]
---
kind: ClusterRoleBinding
apiVersion: rbac.authorization.k8s.io/v1
metadata:
  name: run-nfs-client-provisioner
subjects:
  - kind: ServiceAccount
    name: nfs-client-provisioner
    # replace with namespace where provisioner is deployed
    namespace: default
roleRef:
  kind: ClusterRole
  name: nfs-client-provisioner-runner
  apiGroup: rbac.authorization.k8s.io
---
kind: Role
apiVersion: rbac.authorization.k8s.io/v1
metadata:
  name: leader-locking-nfs-client-provisioner
  # replace with namespace where provisioner is deployed
  namespace: default
rules:
  - apiGroups: [""]
    resources: ["endpoints"]
    verbs: ["get", "list", "watch", "create", "update", "patch"]
---
kind: RoleBinding
apiVersion: rbac.authorization.k8s.io/v1
metadata:
  name: leader-locking-nfs-client-provisioner
subjects:
  - kind: ServiceAccount
    name: nfs-client-provisioner
    # replace with namespace where provisioner is deployed
    namespace: default
roleRef:
  kind: Role
  name: leader-locking-nfs-client-provisioner
  apiGroup: rbac.authorization.k8s.io

---
apiVersion: storage.k8s.io/v1
kind: StorageClass
metadata:
  name: managed-nfs-storage
provisioner: nfs-storage #这里的名称要和provisioner配置文件中的环境变量PROVISIONER_NAME保持一致
allowVolumeExpansion: true
parameters:
  archiveOnDelete: "false"


---
apiVersion: apps/v1
kind: Deployment
metadata:
  name: nfs-client-provisioner
  labels:
    app: nfs-client-provisioner
  # replace with namespace where provisioner is deployed
  namespace: default  #与RBAC文件中的namespace保持一致
spec:
  replicas: 1
  strategy:
    type: Recreate
  selector:
    matchLabels:
      app: nfs-client-provisioner
  template:
    metadata:
      labels:
        app: nfs-client-provisioner
    spec:
      serviceAccountName: nfs-client-provisioner
      containers:
        - name: nfs-client-provisioner
          image: gcr.io/k8s-staging-sig-storage/nfs-subdir-external-provisioner:v4.0.2
          volumeMounts:
            - name: nfs-client-root
              mountPath: /persistentvolumes
          env:
            - name: PROVISIONER_NAME
              value: nfs-storage  #provisioner名称,请确保该名称与 nfs-StorageClass.yaml文件中的provisioner名称保持一致
            - name: NFS_SERVER
              value: 10.10.13.46   #NFS Server IP地址
            - name: NFS_PATH
              value: /data/nfs/debug    #NFS挂载卷
      volumes:
        - name: nfs-client-root
          nfs:
            server: 10.10.13.46  #NFS Server IP地址
            path: /data/nfs/debug   #NFS 挂载卷
测试自动管理PV方案
---
kind: PersistentVolumeClaim
apiVersion: v1
metadata:
  name: test-claim
spec:
  storageClassName: managed-nfs-storage
  accessModes:
    - ReadWriteMany
  resources:
    requests:
      storage: 1Mi

---
kind: Pod
apiVersion: v1
metadata:
  name: test-pod
spec:
  containers:
    - name: test-pod
      image: busybox:1.24
      command:
        - "/bin/sh"
      args:
        - "-c"
        - "touch /mnt/SUCCESS-sc && exit 0 || exit 1"   #创建一个SUCCESS文件后退出
      volumeMounts:
        - name: nfs-pvc
          mountPath: "/mnt"
  restartPolicy: "Never"
  volumes:
    - name: nfs-pvc
      persistentVolumeClaim:
        claimName: test-claim  #与PVC名称保持一致
集成到DevOps
init-kube:
  settings:
    ns: ops
  config:
    - |
      %{readText "ops/init/init.ssh-passwordless.k8s.yaml" | indent 32}%
  execTmpl: |
    - name: kube
      template: ops-shell
      arguments:
        parameters:
          - name: cmd
            value: |
                kubectl --kubeconfig=/.kube/@{- $.env.kube.env -}@.yaml apply -f /workdir/@{$.sys.stage}@/@{$.sys.mod}@/@{$.name}@
                sleep 30
                echo "查看免密Pod"
                kubectl --kubeconfig=/.kube/@{- $.env.kube.env -}@.yaml -n @{ $.settings.ns }@ get po -o wide | grep ssh
                echo "删除ssh免密任务"
                kubectl --kubeconfig=/.kube/@{- $.env.kube.env -}@.yaml -n @{ $.settings.ns }@ delete ds ssh-passwordless

                @{- if and (not (contains .sys.env "uat") ) (not (contains .sys.env "prod") )  }@

                echo "安装nfs client"
                cd / # 因为ansible.cfg 位于根目录,默认进入root目录
                kubectl --kubeconfig=/.kube/@{- $.env.kube.env -}@.yaml get no -o wide | awk '{if (NR>1){print $6}}' > hosts
                echo "安装nfs client的机器"
                ansible all --list-host
                echo "开始安装nfs client"
                ansible all -m shell -a 'apt-get install nfs-common -y'

                @{- end  }@
FAQ
Read-only file system
现象

解决方案:NFS路径必须是挂载路径

selfLink was empty, can’t make reference
现象

解决方案:换镜像gcr.io/k8s-staging-sig-storage/nfs-subdir-external-provisioner:v4.0.0,参考#25
旧镜像:
quay.io/external_storage/nfs-client-provisioner:latest

结语
本文包含了k8s应用NFS环境搭建的所有操作,以及集成到自研DevOps平台的配置。
若有更佳的实践方法和需求,请评论告知。

请用微信扫码关注下🙏 ,持续更新云原生DevOps最佳实践。
本文由mdnice多平台发布

K8S/Kubernetes社区为您提供最前沿的新闻资讯和知识内容
更多推荐
 13
13 0
0- 0


 已为社区贡献2条内容

所有评论(0)