
ubuntu中安装bcc环境
2、bcc 应该是一个git仓库,当我们直接下载代码的时候,需要使用git init 将其初始化为一个仓库,否则在cmake -DPYTHON_CMD=python3 .. 会出问题。virtual-machine:~/bcc/bcc-0.29.1/examples$ sudo python3 hello_world.py 运行hello world脚本。因此,我们可以在vim config-5.
0-参考文档
1-使用系统版本:ubuntu-20.04
2-内核使用版本:
使用uname -a 进行查看
Linux zhangxiang-virtual-machine 5.4.0-26-generic
3-查看内核是否符合条件:
需要满足的条件:
CONFIG_BPF=y
CONFIG_BPF_SYSCALL=y
# [optional, for tc filters]
CONFIG_NET_CLS_BPF=m
# [optional, for tc actions]
CONFIG_NET_ACT_BPF=m
CONFIG_BPF_JIT=y
# [for Linux kernel versions 4.1 through 4.6]
CONFIG_HAVE_BPF_JIT=y
# [for Linux kernel versions 4.7 and later]
CONFIG_HAVE_EBPF_JIT=y
# [optional, for kprobes]
CONFIG_BPF_EVENTS=y
# Need kernel headers through /sys/kernel/kheaders.tar.xz
CONFIG_IKHEADERS=y
如何判断:
Kernel compile flags can usually be checked by looking at /proc/config.gz or /boot/config-<kernel-version>
因此,我们可以在vim /boot/config-5.4.0-26-generic 中检索是否满足条件,通常情况下是满足条件的。
4-进行安装需要的环境:
sudo apt install -y zip bison build-essential cmake flex git libedit-dev \ libllvm12 llvm-12-dev libclang-12-dev python zlib1g-dev libelf-dev libfl-dev python3-setuptools \ liblzma-dev arping netperf iperf
5-进行编译bcc模块
git clone https://github.com/iovisor/bcc.git
mkdir bcc/build; cd bcc/build
cmake ..
make
sudo make install
cmake -DPYTHON_CMD=python3 .. # build python3 binding
pushd src/python/
make
sudo make install
popd
问题解析:
1、bcc/src/cc/libbpf该文件夹为空,我们可以直接git clone GitHub - libbpf/libbpf: Automated upstream mirror for libbpf stand-alone build.Automated upstream mirror for libbpf stand-alone build. - libbpf/libbpf![]() https://github.com/libbpf/libbpf , 将该文件下载文件,否则会报错。
https://github.com/libbpf/libbpf , 将该文件下载文件,否则会报错。
2、bcc 应该是一个git仓库,当我们直接下载代码的时候,需要使用git init 将其初始化为一个仓库,否则在cmake -DPYTHON_CMD=python3 .. 会出问题
6-验证
我们可以
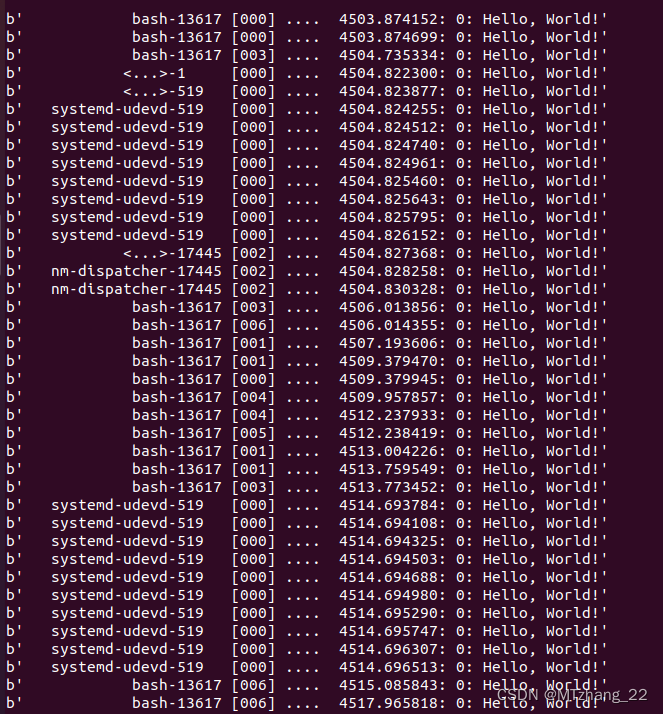
virtual-machine:~/bcc/bcc-0.29.1/examples$ sudo python3 hello_world.py 运行hello world脚本
当进行系统调用时,会输出hello world
此时,我们设备中就安装好了bcc模块,开始愉快的学习吧!!

瓜分20万奖金 获得内推名额 丰厚实物奖励 易参与易上手
更多推荐

 15
15 0
0- 0


 已为社区贡献3条内容

所有评论(0)