
移动开发作业一
通过本次作业,我对Android应用程序的开发流程和主要组件有了更深入的理解。实践中我学到了如何处理UI事件、实现不同Fragment之间的通信,并通过整个过程更好地理解了Android开发的一般思路。在这次的Android应用程序开发作业中,我们主要学习了如何使用Android Studio和相关的开发工具,以及如何创建和管理Android应用的不同组件。使用了recycleview组件,还实现
作业要求:
1、设计一个app的门户框架,需要实现3-4个tab切换效果;本功能要求需要的技术为:activity、xml、fragment
2、在任一tab页中实现列表效果;本功能的实现需要使用recycleview;
实验环境:
IDE:Android Studio
Android Studio Giraffe | 2022.3.1 Patch 1
Build #AI-223.8836.35.2231.10671973, built on August 17, 2023
Runtime version: 17.0.6+0-b2043.56-10027231 amd64
VM: OpenJDK 64-Bit Server VM by JetBrains s.r.o.
Windows 10 10.0
GC: G1 Young Generation, G1 Old Generation
Memory: 1280M
Cores: 12
Registry:
external.system.auto.import.disabled=true
ide.text.editor.with.preview.show.floating.toolbar=false
AVD:Android API 34 x86_64
SDK:Android API 34
gradle版本:8.1.1
设计步骤:
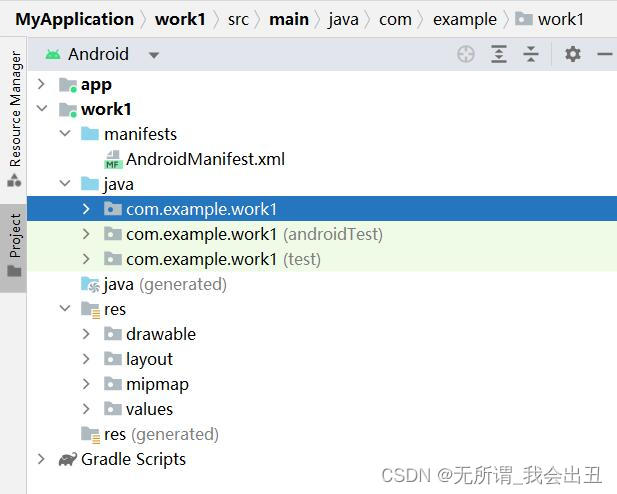
(1)总体框架:
这次主要在work1模块中实现:
.class文件存放在Java目录下的com.example.work1包下面
xml文件存放在res目录下layout包中
图片文件存放在res目录下drawable包中
项目结构


(2)XML文件设计
1、顶部top.xml

<?xml version="1.0" encoding="utf-8"?>
<LinearLayout xmlns:android="http://schemas.android.com/apk/res/android"
    xmlns:tools="http://schemas.android.com/tools"
    android:layout_width="match_parent"
    android:layout_height="wrap_content">

    <TextView
        android:id="@+id/top"
        android:layout_width="wrap_content"
        android:layout_height="wrap_content"
        android:layout_weight="1"
        android:background="#1B1919"
        android:gravity="center"
        android:text="微信"
        android:textColor="#EFE9E9"
        android:textSize="50dp" />
</LinearLayout>
2、底部导航栏button.xml

<?xml version="1.0" encoding="utf-8"?>
<LinearLayout xmlns:android="http://schemas.android.com/apk/res/android"
    android:layout_width="match_parent"
    android:layout_height="wrap_content"
    android:orientation="horizontal">

    <LinearLayout
        android:id="@+id/linearlayout1"
        android:layout_width="0dp"
        android:layout_height="wrap_content"
        android:layout_weight="1"
        android:orientation="vertical">


        <ImageView
            android:id="@+id/imageView1"
            android:layout_width="80dp"
            android:layout_height="80dp"
            android:layout_gravity="center"
            android:src="@drawable/chat" />

        <TextView
            android:id="@+id/textView1"
            android:layout_width="match_parent"
            android:layout_height="wrap_content"
            android:gravity="center"
            android:text="聊天" />
    </LinearLayout>

    <LinearLayout
        android:id="@+id/linearlayout2"
        android:layout_width="0dp"
        android:layout_height="wrap_content"
        android:layout_weight="1"
        android:orientation="vertical">


        <ImageView
            android:id="@+id/imageView2"
            android:layout_width="80dp"
            android:layout_height="80dp"
            android:layout_gravity="center"
            android:src="@drawable/people" />

        <TextView
            android:id="@+id/textView2"
            android:layout_width="match_parent"
            android:layout_height="wrap_content"
            android:gravity="center"
            android:text="联系人" />
    </LinearLayout>

    <LinearLayout
        android:id="@+id/linearlayout3"
        android:layout_width="0dp"
        android:layout_height="wrap_content"
        android:layout_weight="1"
        android:orientation="vertical">


        <ImageView
            android:id="@+id/imageView3"
            android:layout_width="80dp"
            android:layout_height="80dp"
            android:layout_gravity="center"
            android:src="@drawable/friend" />

        <TextView
            android:id="@+id/textView3"
            android:layout_width="match_parent"
            android:layout_height="wrap_content"
            android:gravity="center"
            android:text="朋友圈" />
    </LinearLayout>

    <LinearLayout
        android:id="@+id/linearlayout4"
        android:layout_width="0dp"
        android:layout_height="wrap_content"
        android:layout_weight="1"
        android:orientation="vertical">


        <ImageView
            android:id="@+id/imageView4"
            android:layout_width="80dp"
            android:layout_height="80dp"
            android:layout_gravity="center"
            android:src="@drawable/me" />

        <TextView
            android:id="@+id/textView4"
            android:layout_width="match_parent"
            android:layout_height="wrap_content"
            android:gravity="center"
            android:text="我的" />
    </LinearLayout>
</LinearLayout>
3、四个tab页面、主页面和item
①第一个使用recycleview的fragment页面
fragment_list2.xml
<?xml version="1.0" encoding="utf-8"?>
<FrameLayout xmlns:android="http://schemas.android.com/apk/res/android"
    xmlns:tools="http://schemas.android.com/tools"
    android:layout_width="match_parent"
    android:layout_height="match_parent"
    tools:context=".Fragment_list1">

    <!-- TODO: Update blank fragment layout -->
    <androidx.recyclerview.widget.RecyclerView
        android:id="@+id/recycleView_list1"
        android:layout_width="match_parent"
        android:layout_height="match_parent"
        tools:layout_editor_absoluteX="0dp"
        tools:layout_editor_absoluteY="0dp" />

</FrameLayout>
②第二个使用recycleview的fragment页面
fragment_list1.xml
<?xml version="1.0" encoding="utf-8"?>
<FrameLayout xmlns:android="http://schemas.android.com/apk/res/android"
    xmlns:tools="http://schemas.android.com/tools"
    android:layout_width="match_parent"
    android:layout_height="match_parent"
    tools:context=".Fragment_list1">

    <!-- TODO: Update blank fragment layout -->
    <androidx.recyclerview.widget.RecyclerView
        android:id="@+id/recycleView_list1"
        android:layout_width="match_parent"
        android:layout_height="match_parent"
        tools:layout_editor_absoluteX="0dp"
        tools:layout_editor_absoluteY="0dp" />

</FrameLayout>
③带Textview的fragment页面
fragment_3.xml
<?xml version="1.0" encoding="utf-8"?>
<LinearLayout xmlns:android="http://schemas.android.com/apk/res/android"
    xmlns:tools="http://schemas.android.com/tools"
    android:layout_width="match_parent"
    android:layout_height="match_parent"
    tools:context=".Fragment3">

    <!-- TODO: Update blank fragment layout -->
    <TextView
        android:id="@+id/textView3"
        android:layout_width="match_parent"
        android:layout_height="wrap_content"
        android:text="这里是朋友圈页面"
        android:textSize="50dp"
        android:gravity="center"
        android:layout_gravity="center" />

</LinearLayout>
④带Textview的fragment页面
fragment_4.xml
<?xml version="1.0" encoding="utf-8"?>
<LinearLayout xmlns:android="http://schemas.android.com/apk/res/android"
    xmlns:tools="http://schemas.android.com/tools"
    android:layout_width="match_parent"
    android:layout_height="match_parent"
    tools:context=".Fragment4">

    <!-- TODO: Update blank fragment layout -->
    <TextView
        android:id="@+id/textView4"
        android:layout_width="match_parent"
        android:layout_height="wrap_content"
        android:text="这里是我的页面"
        android:gravity="center"
        android:textSize="50dp"
        android:layout_gravity="center" />

</LinearLayout>
⑤activity_main.xml
<?xml version="1.0" encoding="utf-8"?>
<LinearLayout xmlns:android="http://schemas.android.com/apk/res/android"
    xmlns:tools="http://schemas.android.com/tools"
    android:layout_width="match_parent"
    android:layout_height="match_parent"
    android:orientation="vertical"
    tools:context=".MainActivity">


    <include layout="@layout/top" />


    <FrameLayout
        android:id="@+id/content"
        android:layout_width="match_parent"
        android:layout_height="match_parent"
        android:layout_weight="1">

    </FrameLayout>

    <include layout="@layout/bottom" />
</LinearLayout>
⑥item.xml
<?xml version="1.0" encoding="utf-8"?>
<LinearLayout xmlns:android="http://schemas.android.com/apk/res/android"
    xmlns:app="http://schemas.android.com/apk/res-auto"
    android:layout_width="match_parent"
    android:layout_height="wrap_content"
    android:orientation="vertical">


    <TextView
        android:id="@+id/textView21"
        android:layout_width="wrap_content"
        android:layout_height="wrap_content"
        android:layout_marginStart="14dp"
        android:text="TextView"
        android:textSize="30dp"
        app:layout_constraintBottom_toTopOf="@+id/textView22"

        app:layout_constraintTop_toTopOf="parent"
        app:layout_constraintVertical_bias="0.5" />

    <TextView
        android:id="@+id/textView22"
        android:layout_width="wrap_content"
        android:layout_height="wrap_content"
        android:layout_marginStart="14dp"
        android:text="TextView"
        android:textSize="20dp"
        app:layout_constraintBottom_toBottomOf="parent"
        app:layout_constraintStart_toEndOf="@+id/imageView"
        app:layout_constraintTop_toBottomOf="@+id/textView21"
        app:layout_constraintVertical_bias="0.5" />

</LinearLayout>
(3)JAVA文件设计
①Fragment_list2
使用了recycleview组件,还实现了点击弹出文字的功能。
核心代码:
fragment的JAVA代码,主要展现onCreateView方法:
private RecyclerView recyclerView;  // 声明RecyclerView变量
private Myadapter myAdapter;  // 声明自定义的适配器变量

@Override
public View onCreateView(LayoutInflater inflater, ViewGroup container,
                         Bundle savedInstanceState) {

    // 通过布局填充器创建视图
    View view = inflater.inflate(R.layout.fragment_list2, container, false);

    // 从视图中获取RecyclerView
    recyclerView = view.findViewById(R.id.recycleView_list2);

    // 创建字符串列表并填充数据
    List<String> list = new ArrayList<>();
    for (int i = 0; i < 9; i++) {
        list.add("这是第" + i + "行");
    }

    // 创建适配器并设置项目点击监听器
    myAdapter = new Myadapter(list, requireContext(), new Myadapter.OnItemClickListener() {
        @Override
        public void onItemClick(String content) {
            // 处理项目点击,你可以显示对话框、导航到另一个片段等。
            Toast.makeText(requireContext(), content, Toast.LENGTH_SHORT).show();
        }
    });

    // 将适配器设置到RecyclerView
    recyclerView.setAdapter(myAdapter);

    // 创建线性布局管理器并设置为垂直方向
    LinearLayoutManager manager = new LinearLayoutManager(requireContext());
    manager.setOrientation(RecyclerView.VERTICAL);
    recyclerView.setLayoutManager(manager);

    // 返回填充好数据和设置好监听器的视图
    return view;
}
对应的适配器Myadapter类:
package com.example.work1;

import android.content.Context;
import android.view.LayoutInflater;
import android.view.View;
import android.view.ViewGroup;
import android.widget.TextView;

import androidx.annotation.NonNull;
import androidx.recyclerview.widget.RecyclerView;

import java.util.List;

// 自定义适配器类,继承自RecyclerView.Adapter<Myadapter.MyHolder>
public class Myadapter extends RecyclerView.Adapter<Myadapter.MyHolder> {

    List<String> list1;  // 数据列表
    Context context1;
    OnItemClickListener listener;  // 项目点击监听器

    // 定义接口,用于处理项目点击事件
    public interface OnItemClickListener {
        void onItemClick(String content);
    }

    // 构造函数,接收数据列表、上下文和点击监听器
    public Myadapter(List list, Context context, OnItemClickListener listener1) {
        this.list1 = list;
        this.context1 = context;
        listener = listener1;
    }

    // 创建 ViewHolder,用于保存 item 的视图
    @Override
    public MyHolder onCreateViewHolder(@NonNull ViewGroup parent, int viewType) {
        // 通过布局填充器创建 item 的视图
        View view = LayoutInflater.from(context1).inflate(R.layout.item, parent, false);

        // 创建 MyHolder 对象,将 item 视图传递给构造函数
        MyHolder myHolder = new MyHolder(view);

        return myHolder;
    }

    // 绑定数据到 ViewHolder
    @Override
    public void onBindViewHolder(@NonNull MyHolder holder, int position) {
        String item = list1.get(position);
        // 设置 TextView 显示的文本内容
        holder.textView.setText(list1.get(position));

        // 为项目设置点击监听器
        holder.itemView.setOnClickListener(new View.OnClickListener() {
            @Override
            public void onClick(View v) {
                if (listener != null) {
                    // 当项目被点击时,调用接口中的方法
                    listener.onItemClick(item);
                }
            }
        });
    }

    // 返回数据集的大小
    @Override
    public int getItemCount() {
        return (list1.size());
    }

    // 内部类,用于保存 item 的视图
    class MyHolder extends RecyclerView.ViewHolder {
        TextView textView;  // TextView 控件

        // 构造函数,接收 item 的视图
        public MyHolder(@NonNull View itemView) {
            super(itemView);
            textView = itemView.findViewById(R.id.textView21);  // 找到 TextView 控件
        }
    }
}
②Fragment_list1
使用了recycleview组件,通过Student类传入数据。
核心代码:
Student类:
package com.example.work1;

public class Student {
    private String name;
    private String id;

    public void setName(String name) {
        this.name = name;
    }

    public void setId(String id) {
        this.id = id;
    }

    public String getName() {
        return name;
    }

    public String getId() {
        return id;
    }

    public Student(String name, String id) {
        this.name = name;
        this.id = id;
    }
}
fragment的JAVA代码,主要展现onCreateView方法:
private RecyclerView recyclerView;  // 声明RecyclerView变量
private Myadapter_stu myAdapter;  // 声明自定义的学生适配器变量

@Override
public View onCreateView(LayoutInflater inflater, ViewGroup container,
                         Bundle savedInstanceState) {
    // 通过布局填充器创建视图
    View view = inflater.inflate(R.layout.fragment_list1, container, false);

    // 从视图中获取RecyclerView
    recyclerView = view.findViewById(R.id.recycleView_list1);

    // 创建学生列表并添加学生数据
    List<Student> stuL = new ArrayList<>();
    Student s1 = new Student("戴维", "201");
    Student s2 = new Student("张三", "202");
    Student s3 = new Student("张四", "203");
    Student s4 = new Student("张五", "204");
    Student s5 = new Student("张六", "205");
    Student s6 = new Student("张七", "206");
    stuL.add(s1);
    stuL.add(s2);
    stuL.add(s3);
    stuL.add(s4);
    stuL.add(s5);
    stuL.add(s6);

    // 创建学生适配器并设置到RecyclerView
    Myadapter_stu myAdapter = new Myadapter_stu(stuL);
    recyclerView.setAdapter(myAdapter);

    // 创建线性布局管理器并设置为垂直方向
    LinearLayoutManager manager = new LinearLayoutManager(requireContext());
    manager.setOrientation(RecyclerView.VERTICAL);
    recyclerView.setLayoutManager(manager);

    // 返回填充好数据的视图
    return view;
}
对应的适配器Myadapter类:
package com.example.work1;

import android.content.Context;
import android.view.LayoutInflater;
import android.view.View;
import android.view.ViewGroup;
import android.widget.TextView;

import androidx.annotation.NonNull;
import androidx.recyclerview.widget.RecyclerView;

import java.util.List;

// 学生适配器类,继承自RecyclerView.Adapter<Myadapter_stu.MyHolder>
public class Myadapter_stu extends RecyclerView.Adapter<Myadapter_stu.MyHolder> {

    List<Student> stulist;  // 学生数据列表

    // 构造函数,接收学生数据列表
    public Myadapter_stu(List<Student> stu) {
        stulist = stu;
    }

    // 创建 ViewHolder,用于保存 item 的视图
    @Override
    public MyHolder onCreateViewHolder(@NonNull ViewGroup parent, int viewType) {
        // 通过布局填充器创建 item 的视图
        View view = LayoutInflater.from(parent.getContext()).inflate(R.layout.item, parent, false);

        // 创建 MyHolder 对象,将 item 视图传递给构造函数
        MyHolder myHolder = new MyHolder(view);

        return myHolder;
    }

    // 绑定数据到 ViewHolder
    @Override
    public void onBindViewHolder(@NonNull MyHolder holder, int position) {
        // 获取当前位置的学生对象
        Student student = stulist.get(position);

        // 设置 TextView 显示的学生姓名和学号
        holder.nametext.setText(student.getName());
        holder.idtext.setText(student.getId());
    }

    // 返回数据集的大小
    @Override
    public int getItemCount() {
        return (stulist.size());
    }

    // 内部类,用于保存 item 的视图
    class MyHolder extends RecyclerView.ViewHolder {
        TextView nametext;  // 姓名显示的TextView控件
        TextView idtext;    // 学号显示的TextView控件

        // 构造函数,接收 item 的视图
        public MyHolder(@NonNull View itemView) {
            super(itemView);
            // 找到姓名和学号显示的TextView控件
            nametext = itemView.findViewById(R.id.textView21);
            idtext = itemView.findViewById(R.id.textView22);
        }
    }
}
③Fragment3.class和Fragment4.class
只显示一段话
核心代码,主要展现onCreateView方法:
    public View onCreateView(LayoutInflater inflater, ViewGroup container,
                             Bundle savedInstanceState) {
        // Inflate the layout for this fragment
        return inflater.inflate(R.layout.fragment_3, container, false);
    }
}
④MainActivity.class
主程序:
package com.example.work1;

import androidx.appcompat.app.AppCompatActivity;
import androidx.fragment.app.FragmentManager;
import androidx.fragment.app.FragmentTransaction;

import androidx.fragment.app.Fragment;
import android.os.Bundle;
import android.view.View;
import android.widget.LinearLayout;

public class MainActivity extends AppCompatActivity implements View.OnClickListener {

    // 声明各个Fragment和FragmentManager
    Fragment fragment1;
    Fragment fragment2;
    Fragment fragment3;
    Fragment fragment4;
    Fragment fragmentlist1;
    Fragment fragmentlist2;
    FragmentManager fm;

    // 声明用于点击的LinearLayout
    LinearLayout linearLayout1, linearLayout2, linearLayout3, linearLayout4;

    @Override
    protected void onCreate(Bundle savedInstanceState) {
        super.onCreate(savedInstanceState);
        setContentView(R.layout.activity_main);

        // 获取LinearLayout的引用
        linearLayout1 = findViewById(R.id.linearlayout1);
        linearLayout2 = findViewById(R.id.linearlayout2);
        linearLayout3 = findViewById(R.id.linearlayout3);
        linearLayout4 = findViewById(R.id.linearlayout4);

        // 获取FragmentManager实例
        fm = getSupportFragmentManager();

        // 初始化各个Fragment实例
        fragment1 = new Fragment1();
        fragment2 = new Fragment2();
        fragment3 = new Fragment3();
        fragment4 = new Fragment4();
        fragmentlist1 = new Fragment_list1();
        fragmentlist2 = new Fragment_list2();

        // 进行初始化操作
        innitial();

        // 默认显示fragmentlist2
        fragmentshow(fragmentlist2);

        // 设置LinearLayout的点击监听器
        linearLayout1.setOnClickListener(this);
        linearLayout2.setOnClickListener(this);
        linearLayout3.setOnClickListener(this);
        linearLayout4.setOnClickListener(this);
    }

    // 隐藏所有Fragment
    private void fragmentHide() {
        FragmentTransaction ft = fm.beginTransaction()
                .hide(fragmentlist2)
                .hide(fragmentlist1)
                .hide(fragment3)
                .hide(fragment4);
        ft.commit();
    }

    // 显示指定的Fragment
    private void fragmentshow(Fragment fragment) {
        fragmentHide();
        FragmentTransaction ft = fm.beginTransaction()
                .show(fragment);
        ft.commit();
    }

    // 初始化Fragment,将它们添加到FragmentManager
    private void innitial() {
        FragmentTransaction ft = fm.beginTransaction()
                .add(R.id.content, fragmentlist2)
                .add(R.id.content, fragmentlist1)
                .add(R.id.content, fragment3)
                .add(R.id.content, fragment4);
        ft.commit();
    }

    // 处理LinearLayout的点击事件
    @Override
    public void onClick(View view) {
        if (view.getId() == R.id.linearlayout1)
            fragmentshow(fragmentlist2);
        else if (view.getId() == R.id.linearlayout2)
            fragmentshow(fragmentlist1);
        else if (view.getId() == R.id.linearlayout3)
            fragmentshow(fragment3);
        else if (view.getId() == R.id.linearlayout4)
            fragmentshow(fragment4);
    }
}
展示效果:


线上仓库地址:Android: 移动开发作业 - Gitee.com![]() https://gitee.com/david_csv/android/tree/master/
https://gitee.com/david_csv/android/tree/master/
作业心得:
在这次的Android应用程序开发作业中,我们主要学习了如何使用Android Studio和相关的开发工具,以及如何创建和管理Android应用的不同组件。以下是本次实验的一些主要收获和总结:
1. 总体框架设计:
项目结构的规划,包括Java类、XML布局文件、图片资源等。使用Fragment和Activity实现App的多页面结构。设计顶部top.xml和底部导航栏button.xml,用于呈现App的整体布局。
2. XML文件设计:
设计顶部top.xml,包含一个TextView用于显示标题。设计底部导航栏button.xml,包含四个LinearLayout,每个LinearLayout内包含一个ImageView和一个TextView,用于呈现底部Tab的图标和文字。设计各个fragment的XML布局文件,如fragment_list1.xml、fragment_list2.xml,包含RecyclerView来展示列表数据。
3. Java文件设计:
创建Student类用于表示学生信息,包括姓名和学号。创建Myadapter_stu适配器类,继承自RecyclerView.Adapter,用于处理学生列表的数据和视图绑定。
创建Fragment_list1和Fragment_list2,使用RecyclerView展示学生列表。在Fragment_list2中使用了OnItemClickListener接口处理列表项点击事件。创建MainActivity,使用FragmentManager管理Fragment的显示和隐藏,实现底部导航栏的点击切换页面。
4. RecyclerView的使用:
在Fragment_list1和Fragment_list2中使用RecyclerView来展示学生列表。
自定义适配器Myadapter_stu,实现onCreateViewHolder、onBindViewHolder和getItemCount等方法。
在Fragment_list2中通过接口OnItemClickListener处理RecyclerView中列表项的点击事件。
5. 布局和控件设计:
使用LinearLayout、FrameLayout等布局容器实现页面的整体布局。设计item.xml布局文件,用于展示学生信息的每一项。
在MainActivity中通过onClick方法处理底部导航栏点击事件,实现页面切换。
通过本次作业,我对Android应用程序的开发流程和主要组件有了更深入的理解。掌握了如何设计用户界面、管理生命周期、使用Fragment和RecyclerView等关键技能。实践中我学到了如何处理UI事件、实现不同Fragment之间的通信,并通过整个过程更好地理解了Android开发的一般思路。

鸿蒙生态一站式服务平台。
更多推荐
 3
3 0
0- 0


 已为社区贡献1条内容

所有评论(0)