
uniapp实现不同登录角色显示不同底部导航栏
/style>这里使用了uview中tabBar选中项和非选中项图片的切换和文字颜色的改变。
前言:
作者本人最近在弄一个移动端项目,项目是由uniapp构建的,其中需要实现不同登录角色显示不同底部导航栏。uniapp原生的tabBar无法满足,需要使用自定义底部tabBar来实现效果。于是作者开始在网上寻找成功代码,但是最后总感觉有些问题,最后解决完问题后,分享下这个过程。
本文主要参考uni-app 实现根据用户不同角色显示不同的tabBar【完整图文流程】_uniapp不同角色设置不同tabbar-CSDN博客
这篇文章,大体上都是没啥问题的,所以这里只是分享部分具体项目中出现的问题。话不多说,开始上代码。
实现过程中遇到的问题
1.自定义tabBar组件
<template>
	<view>
		<view class="tabBar_css">
			<u-tabbar
				:value="currentPagePath"
				:fixed="true"
				:placeholder="true"
				:safeAreaInsetBottom="true">
				<u-tabbar-item v-for="(item,index) in tabBerList"
					:key="index"
					:text="item.text"
					:name="item.pagePath"
					@click="click_page(item)"
				>
						<image
							class="u-page__item__slot-icon"
							slot="active-icon"
							:src="item.selectedIconPath"
						></image>
						<image
							class="u-page__item__slot-icon"
							slot="inactive-icon"
							:src="item.iconPath"
						></image>
					</u-tabbar-item>
			</u-tabbar>
		</view>
	</view>
</template>

<script>
	import {mapGetters} from 'vuex'
	export default {
		name:"tabBar",
		props:{
			currentPagePath:String
		},
		data() {
			return {

			}
		},
		onShow() {

		},
		computed:{
			...mapGetters([
				'tabBerList',
			])
		},
		methods:{
			click_page(item){
				// console.log(this.tabBerList,456);
				let page = '/' + item.pagePath
				uni.switchTab({
					url:page,
					success:function(res){

					},fail:function(res){

					}
				})
			}
		}
	}
</script>

<style lang="scss">
	.tabBar_css{
		position: fixed;
		bottom: 0;
		z-index: 9999;
		width: 100%;
		.u-page__item__slot-icon{
			width: 48rpx;
			height: 48rpx;
		}
	}
</style>
这里使用了uview中tabBar选中项和非选中项图片的切换和文字颜色的改变。
2.tabBarList
//患者端
const patientList = [{
	"pagePath": "pages/patient/home/index",
	//图标下的标题
	"text": "首页",
	//图标路径
	"iconPath": "/static/img/tab1.png",
	//当前页签对应的页面被打开时显示的图标路径
	"selectedIconPath": "/static/img/tab2.png"
}, {
	"pagePath": "pages/patient/carer/index",
	"text": "护工大厅",
	"iconPath": "/static/img/tab3.png",
	"selectedIconPath": "/static/img/tab4.png"
}, {
	"pagePath": "pages/patient/myhome/index",
	"text": "我的",
	"iconPath": "/static/img/tab5.png",
	"selectedIconPath": "/static/img/tab6.png"
}];

//护工端
const carerList = [{
	"pagePath": "pages/carer/home/index",
	"text": "首页",
	"iconPath": "/static/img/tab1.png",
	"selectedIconPath": "/static/img/tab2.png"
}, {
	"pagePath": "pages/carer/recievingOrder/index",
	"text": "接单大厅",
	"iconPath": "/static/img/tab7.png",
	"selectedIconPath": "/static/img/tab8.png"
}, {
	"pagePath": "pages/carer/myhome/index",
	"text": "我的",
	"iconPath": "/static/img/tab9.png",
	"selectedIconPath": "/static/img/tab10.png"
}];
//调度端
const dispatchList = [{
		"pagePath": "pages/dispatch/home/index",
		"text": "首页",
		"iconPath": "/static/img/tab1.png",
		"selectedIconPath": "/static/img/tab2.png"
	}, {
		"pagePath": "pages/dispatch/dispatchHall/index",
		"text": "订单调度",
		"iconPath": "/static/img/tab11.png",
		"selectedIconPath": "/static/img/tab12.png",
	},
	{
		"pagePath": "pages/dispatch/complaintHandling/complaintHandling",
		"text": "投诉管理",
		"iconPath": "/static/img/tab13.png",
		"selectedIconPath": "/static/img/tab14.png",
	}, {
		"pagePath": "pages/dispatch/myhome/index",
		"text": "我的",
		"iconPath": "/static/img/tab15.png",
		"selectedIconPath": "/static/img/tab16.png"
	}
];
export default {
  patientList,
  carerList,
  dispatchList
};
这是笔者项目三种登录角色,需要配置的路径。
3.page.json
"tabBar": {
		"custom": true,
		"color": "#999",				//图标下的文本的颜色
		"selectedColor": "#2883E5",		//被选中时的文本颜色
		"list": [
			{
				//页签对应的页面地址
				"pagePath": "pages/patient/home/index"
			},
			{
				"pagePath": "pages/patient/carer/index"
			},
			{
				"pagePath": "pages/patient/myhome/index"
			},
			{
				"pagePath": "pages/carer/home/index"
			},
			{
				"pagePath": "pages/carer/recievingOrder/index"
			},
			{
				"pagePath": "pages/carer/myhome/index"
			},
			{
				"pagePath": "pages/dispatch/home/index"
			},
			{
				"pagePath": "pages/dispatch/dispatchHall/index"
			},
			{
				"pagePath": "pages/dispatch/complaintHandling/complaintHandling"
			},
			{
				"pagePath": "pages/dispatch/myhome/index"
			}
		]
	},
原生的list只能有5个,像笔者这种不太能满足,所以只能自定义了。具体其他配置可以参考上面那篇文章,就不过多展开了。
4.目录结构
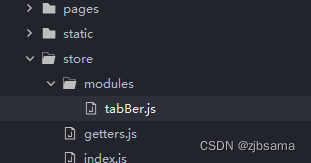
在modules中新建tabBer.js,这里是笔者参考后遇到的最大的问题,我在用户登录成功后调用获取用户信息的方法,获取用户角色,并且存入storage中,

然后按照上述文章的写法,最后登录成功后存入storage的值发生改变,但getters中的tabBarList却还是上一个登录角色的,没有改变,在浏览器f5重新刷新后才显示正确,所以在js中使用mutations来尝试改变getters。
5.tabBer.js
import tabBer from '../../utils/tabBer.js'

// 判断用户tabBer类别

const state = {
	 // tabbar列表数据
	tabBarList: []
}
const mutations = {
	SET_TYPE:(state, type)=>{
	    state.tabBarList = tabBer[type];
	}
}

export default {
	namespaced: true,
	state,
	mutations
}
6.getters:
const getters = {
	tabBerList: state => state.tabBer.tabBarList,
}
export default getters
7.登录页面
因为使用了modules,所以通过this.$store.commit('方法名',val)是找不到mutations方法的,需要带上模块名。
import { mapMutations } from 'vuex'methods: {
...mapMutations(['tabBer/SET_TYPE']),
login() {
const userinfo = {
userName: encrypt(this.userinfo.userName),
password: encrypt(this.userinfo.password)
};
this.$store.dispatch('Login', userinfo).then(() => {
if (this.$store.state.token) {
this.$store.dispatch('GetInfo').then(() => {
this.toPages()
let a = uni.getStorageSync('roleCode')
let type = a=='ph' ? 'carerList' : a =='dd'? 'dispatchList': 'patientList'
// this.$store.commit('tabBer/SET_TYPE',type)
this['tabBer/SET_TYPE'](type)
}).catch(err => {
console.log(err, '获取用户信息失败');
});
}
}).catch((err) => {})
},
}最后,按照文章中所写的在有底部导航栏页面中传当前页面路径,但是,运行到手机上时会报一个meta未定义的错误,好像是因为app端是没有$route的原因,(笔者之前查过,给出的解释大致是这样,有点忘了...),所以笔者换了中写法。具体代码如下:
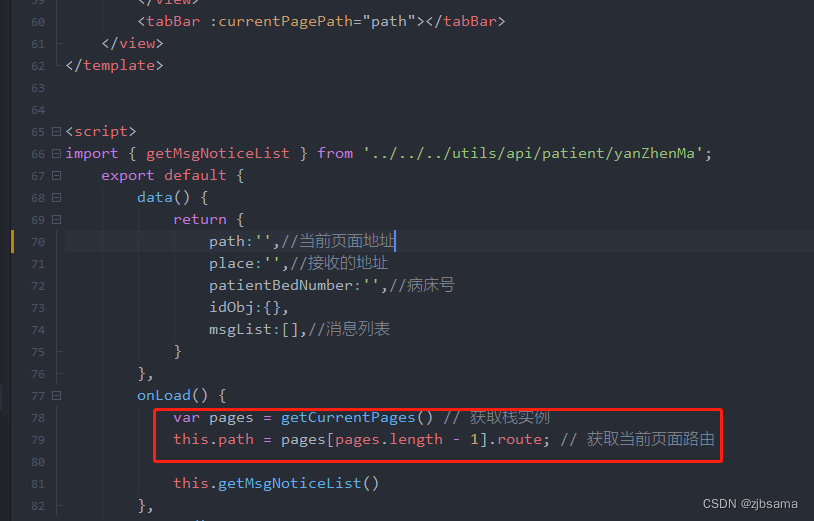
这样在运行到app端时是不会报错的。
总结
好的,这些就是作者在参考学习大佬的思路后,遇到的问题和解决方式,希望能够对大家之后的开发起到些许帮助。
如果对你有帮助的话,请给个赞,有问题欢迎大家在评论区讨论。笔者是个小菜鸡,但是相信还是会有大佬能够大家提出的疑问。ok,完结。

为开发者提供学习成长、分享交流、生态实践、资源工具等服务,帮助开发者快速成长。
更多推荐


 3
3 0
0- 0


 已为社区贡献1条内容

所有评论(0)